January 25, 2015 Poached Chicken Breasts with Warm Tomato Ginger Vinaigrette

DSC_0828a

Poach (poch) verb, to take by illegal methods, in this case, as in taking all the flavor out of a chicken breast, leaving it tough, stringy and tasteless.  Sound familiar? If you were offered a poached chicken breast you might be inclined to decline, and rightfully so.  Cooks Illustrated has taken this classic techinque and perfected it for the home cook. It’s not that difficult or time consuming and will produce consistently good results.

Poaching is a gentle cooking method, best for delicately flavored foods, whether it be an egg, fish, or in this case, chicken. The chicken is cooked in a simmering liquid, just under the boiling point between 160°F and 180°F. Problems occur when the poaching liquid is either too cool or too hot or the cook minding the pot has left the poaching process go on too long.  This method does require some watchfulness but is much easier than traditional approaches to poaching.

As with any recipe, start with the best product you can find. Just like you, your chicken shouldn’t be bloated so look for a brand that has not been injected with a saline solution.  Trim away any excess fat or sinew before proceeding with the recipe. I have found that four 6-8 ounce chicken breasts are optimal. Wrap each chicken breast in plastic wrap and pound firmly on a stable surface. Your goal is to even out the thickness of the breast so you should be pounding the thicker top part to be more in line with the thinner “tail”. Whatever you do, don’t pound with the jagged side of a meat tenderizer. It will tear the meat and leave you with something unusable. I have a flat mallet expressly for this purpose but a heavy skillet or the flat side of the tenderizer will work as well.

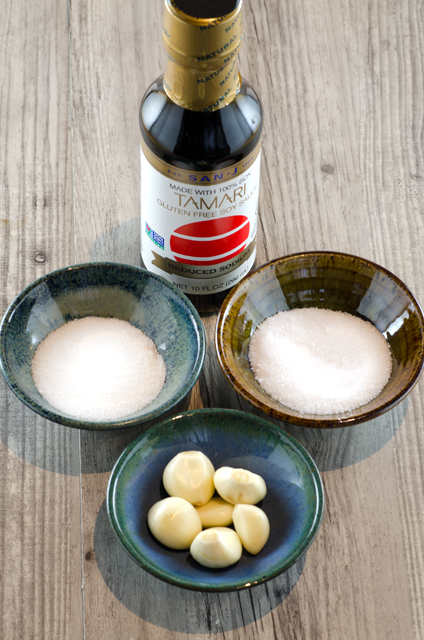
Next step is the poaching liquid, classic French recipes usually include flavorings such as wine, lemon, stock or a bouquet garni. The chefs at Cooks Illustrated have done years of testing for various recipes to determine what flavorings will actually permeate into the cell wall of the meat. With the knowledge they have acquired over the years, they determined that salt, sugar, garlic and soy sauce would flavor the meat and still leave the chicken with a neutral flavor suitable to a wide range of recipes. Soy brings that desired “umami” or meaty, savory flavor.  I chose to use a gluten-free low sodium soy sauce since salt was one of the ingredients in the poaching liquid.

You will need a very large pot to cook the breasts, enough to accomodate four quarts, a full gallon of water plus a little room at the top. A word to the wise, start with your pot on the burner and bring the water and the ingredients to it. In my case, a Le Creuset pot filled with a gallon of water is quite cumbersome and heavy to carry. Whisk the ingredients together in your pot until the salt and sugar are dissolved. Place a steamer basket, metal works best here, in the bottom of the pot. This is used to keep the breast from making contact with the bottom of the pot, allowing for the chicken to cook evenly on all sides.  My steamer has a ten inch diameter when opened and comforably held the breasts without overlapping or crowding. Cover and let the pot sit at room temperature for 30 minutes. This allows the internal temperature of the breast you just recently took from the refrigerator to slowly rise. After the short brine, turn the heat on your stove to medium.

Stir the water occasionally to even out any hot spots. It should take about 15-20 minutes for the water to reach a temperature of 175°F. I used my thermapen to check every five minutes or so but clipping a thermometer to the inside of the pot works as long as you are diligent to check the temperature’s progress. When the water is at the right temperature, turn off the heat and cover the pan.

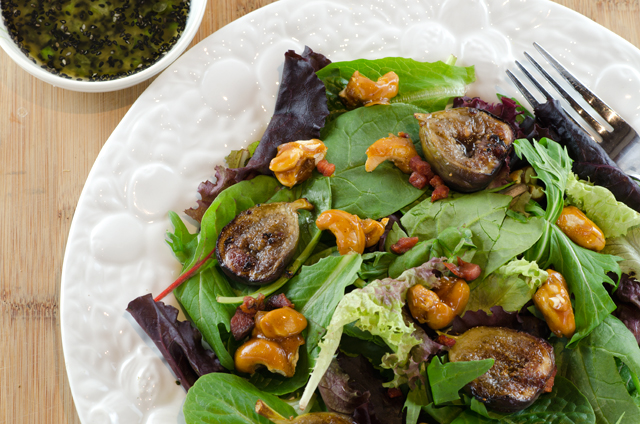
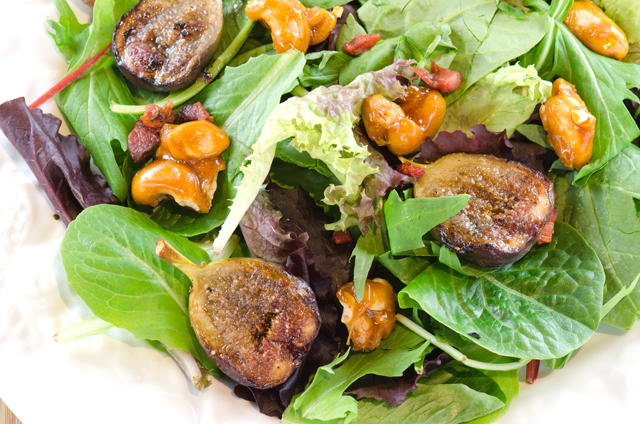
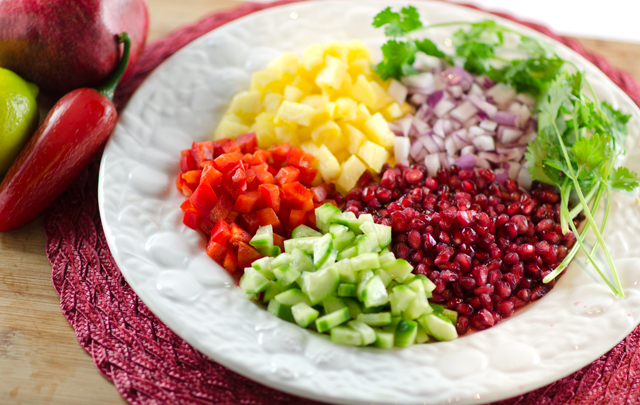
Now you have a little time to make a salad and a vinaigrette (the one that follows or your own) while the chicken cooks.  Cooks Illustrated suggests that you remove the chicken at 160°F, the suggested internal temperature for poultry. I remove mine at a slighly lower temperature (155°F) knowing that the chicken will continue to rise in temperature even after it is removed from the cooking liquid. Place the chicken breasts on a piece of foil and wrap loosely.

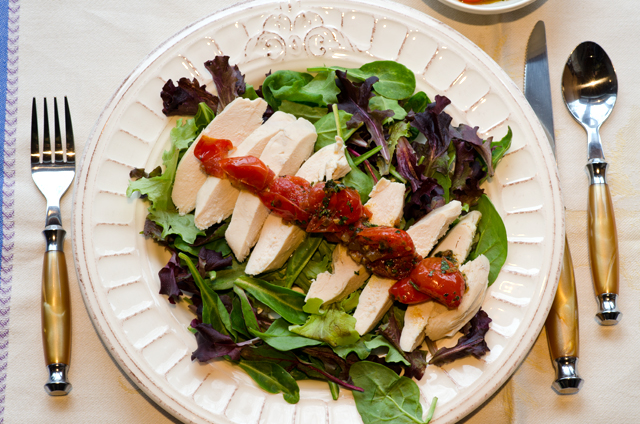
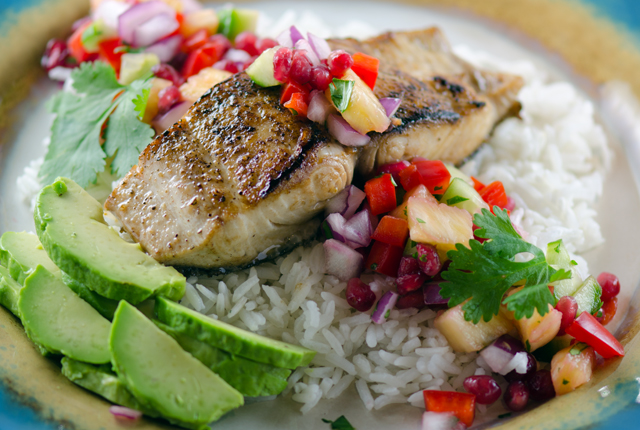
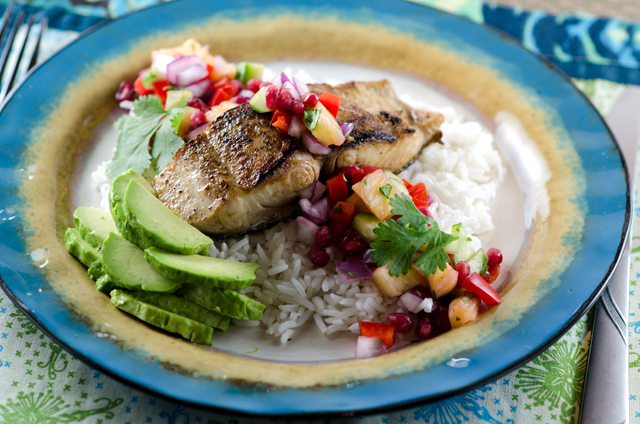
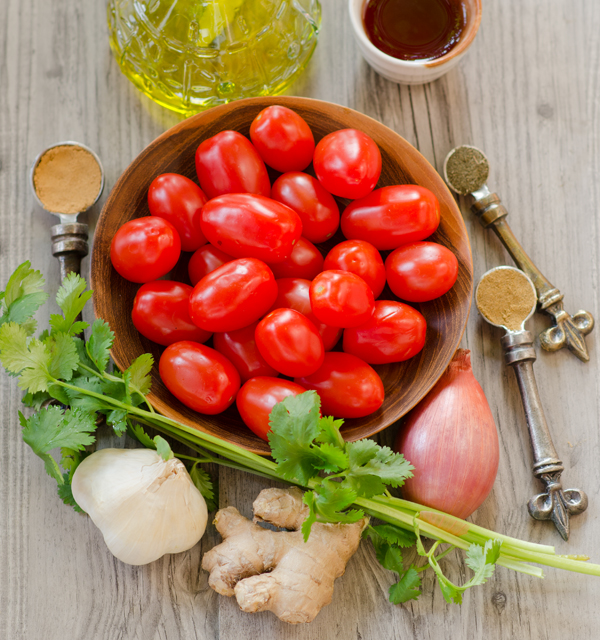
Let chicken rest for 5 minutes. Slice the breast on a slight bias, running with the grain of the meat. I served it with a warm tomato ginger vinaigrette, an excellent accompaniment, inspired by chutney ingredients. Just remember if you are using grape tomatoes, they are meatier with a thicker skin and will not break down as easily as a cherry tomato. Serve the chicken on a bed of greens, stuff in a pita pocket or shred as a last minute addition to a soup recipe.

Wrap each chicken breast in plastic wrap and pound with the flat edge of a mallet to an even thickness.


The ingredients that flavor the chicken breast, soy, salt, sugar and garlic.

Perfectly Poached Chicken Breasts

Cooks Illustrated March/ April 2014

Serves four

Ingredients

  • 4 (6 to 8 ounce) boneless, skinless chicken breasts, trimmed
  • ½c soy sauce (I used gluten-free, low sodium)
  • ¼c salt (I used kosher)
  • 2T granulated sugar
  • 6 garlic cloves, smashed and peeled

Directions

  1. Individually wrap each breast in plastic and pound thick ends to an even thickness with tail end, about 3/4 inch thick.
  2. Whisk 4 quarts water, soy sauce, salt, sugar and garlic in a Dutch oven until the sugar and salt are dissolved. Arrange breasts, skinned side up in a steamer basket, making sure the breast don’t overlap. Submerge the steamer basket in the brine. Let sit at room temperature to brine for 30 minutes.
  3. Heat the pot over medium heat, stirring occasionally to even out any hot spots. In 15-20 minutes the water should reach a temperature of 175°F.  Turn off the heat,  take it off the burner and cover. Let stand until meat reaches desired temperature, 155°F to 160°F, start checking temperature of the meat in the thickest part of the breast at the 15 minute mark.
  4. Transfer breasts to a cutting board, cover with aluminum foil and let rest for 5 minutes. Slice the breast on the diagonal into 1/4 to 1/2 inch thick slices and serve.

DSC_0823a

Warm Tomato-Ginger Vinaigrette

Ingredients

  • ¼c extra virgin olive oil
  • 1 minced shallot
  • 1 ½t freshly grated ginger
  • ¼t ground cumin
  • 1/8t ground fennel
  • 12 ounces of cherry or grape tomatoes (halved if cherry tomatoes, quartered if grape)
  • Salt and pepper
  • 1T red wine vinegar
  • 1t packed brown sugar
  • 2T chopped fresh cilantro or parsley

Directions

  1. Heat 2 tablespoons of the olive oil in a  10-inch skillet until shimmering. Add shallot, garlic, cumin and fennel and cook until fragrant, about 15 seconds.
  2. Stir in the tomatoes and a pinch of salt and cook, stirring frequently until the tomatoes have softened, 3 to 5 minutes.
  3. Off heat stir in the vinegar and sugar and season with salt and pepper to taste, cover or put under a heat lamp to keep warm. Stir in cilantro or parsley and remaining oil just before serving.

DSC_0846a

January 17, 2015 Hazelnut-Orange Biscotti

DSC_0769aWhen it comes to cookies, at the top of the list of my personal favorites is biscotti.  Almond biscotti were on the menu  for a light nibble after our seven fishes dinner and I am making hazelnut orange biscotti for a pasta making dinner this weekend. Biscotti originated in medieval Italy as a long shelf life food for Roman soldiers and travelers. It is thought that both Christopher Columbus and Marco Polo relied on biscotti for sustenance on their long journeys. The word derives from bis, Latin for twice and cotto for baked. The basic recipe is simple, dough is formed into logs, baked and cooled, sliced and baked again.

Hazelnuts, are also known as filberts.  Twenty five percent of the world’s hazelnut production goes to the manufacturing of Nutella, a very popular creamy chocolate hazelnut spread. Hazelnuts may a bit harder to find than, lets say walnuts or almonds, but many large supermarkets stock them. When I can I like to buy nuts from a bulk bin to ensure their freshness. I baked the hazelnuts in a 350°F oven for 10 minutes, shaking the pan every few minutes and rotating the pan each time. The nuts will start to exude their oil and your kitchen will smell heavenly.  Transfer lightly toasted nuts to a tea towel to cool, then fold over half the towel and rub gently, back and forth to remove as much skin as possible. Don’t worry if some of the nuts refuse to be skinned, the toasting has made the tannins in the skin less bitter and will add some color and depth of flavor. The nuts should only be lightly toasted since they will be going back into the oven to be baked again in the biscotti. Some of the toasted nuts are finely ground and added to the flour mixture, the rest are coarsely chopped and are folded in at the end of the recipe. Be sure not to take the finely ground nuts too far or you may be left with hazelnut butter.

A little bit of fresh rosemary is included with the dry ingredients. If you don’t have access to fresh, a smaller amount of dried will do or you could eliminate it all together. Flour, rosemary, baking powder and salt are combined in bowl of a food processor. Be sure to check the expiration date on your baking powder.  If the date has passed or is soon approaching, there is a simple test you can do to see if it will still do the job. Baking powder  is a chemical leavener that reacts to temperature so just drop a little into a glass of hot water. If it bubbles up, you are good to go! Process these ingredients then transfer to a bowl.

Two eggs are now added to the empty bowl  and  processed until light in color and doubled in volume. I improvised a paper cone for the feed tube to make it easier to add the sugar gradually. This was much neater than using a measuring cup. The melted butter, orange zest, orange liqueur and vanilla extract are added and processed until combined.  The wet ingredients are transferred to a bowl and the flour mixture and hazelnuts are gently folded in.  I find that a large bowl and the largest spatula you have will make this easier. Lift up from the bottom of the bowl and fold over. Whatever you do, resist the temptation to stir the ingredients!

Flour your hands before forming the dough into two logs the size of the 8×3 inch template. Brush the logs with egg white wash, this will give the cookies sheen. Bake the logs for about 25 minutes, cool and cut into 1/2′ slices. I find a serrated knife works best for this. Time for the cookies to go back into the oven. Bake cookies until crisp and golden brown on both sides. Cool completely before serving.  The cookies will be great at this point but you can also take them one step further by dipping the cookies in bittersweet chocolate and sprinkling with toasted hazelnuts.

Oh, by the way, biscotti is the plural form of the word, like a batch of cookies. If you only have one left it’s a biscotto and it’s time to fill the cookie jar again.DSC_0672a

Hazelnut-Orange Biscotti

from Cooks Illustrated November 2012

Makes 30 cookies

Ingredients

  • 1 1/4c hazelnuts, lightly toasted and skinned
  • 1 3/4c all purpose flour
  • 1/2t finely minced dried rosemary
  • 2t baking powder
  • 1/4t table salt
  • 2 large eggs, plus 1 egg white beaten with a pinch of salt
  • 1c granulated sugar
  • 4T unsalted butter, melted and cooled
  • 1T grated orange zest
  • 1 1/2t orange flavored liqueur (Grand Marnier, Triple Sec)
  • 1/2t vanilla extract
  • Vegetable oil spray

Directions

  1. Adjust oven rack to middle position and heat oven to 325°F. Using a ruler and marker, draw two 8 by 3-inch rectangles, spaced 4 inches apart on a piece of parchment paper. Grease baking sheet and place parchment on it, ink side down.
  2. Pulse 1 cup hazelnuts in food processor until coarsely chopped, 8 to 10 pulses; transfer to a bowl and set aside. Process remaining 1/4 cup hazelnuts in food processor until finely ground, about 45 seconds.
  3. Add flour, rosemary, baking powder, and salt; process to combine, about 15 seconds. Transfer the flour mixture to a bowl.
  4. Process 2 eggs in the now empty food processor until lightened in color and almost doubled in volume, about 3 minutes. With processor running, slowly add sugar until thoroughly combined, about 15 seconds. Add melted butter, orange zest, orange liqueur and vanilla; process until combined, about 10 seconds.
  5. Transfer egg mixture to a large bowl. Sprinkle half of the flour mixture over the egg mixture and, using a large spatula, gently fold until just combined. Add remaining flour mixture and chopped hazelnuts and gently fold until just combined.
  6. Divide batter in half. Using floured hands, form each half into an 8 by 3 inch rectangle, using the lines on the parchment as a guide. Using a medium rubber spatula lightly coated with spray, smooth the tops and sides of the rectangles. Gently brush the tops of the loaves with the egg white wash. Bake until the loaves are golden and just beginning to crack on top, 25-30 minutes, rotating pan halfway through baking.
  7. Let loaves cool on baking sheet for 30 minutes. Transfer loaves to cutting board. Using a serrated knife, slice each loaf on a slight diagonal into 1/2 inch thick slices.  Lay slices, cut side down, about 1/4 inch apart on wire rack set  in rimmed baking sheet. Bake until crisp and golden brown on both sides, about 30 minutes, flipping slices halfway through baking. Let cool completely before serving. Biscotti can be stored in an airtight container for up to 1 month.

  8. To further embellish the cookies, melt some bittersweet chocolate, about four ounces in a small pan over another pan of simmering water. This is known as a double boiler.  Line a small dish with a sheet of waxed paper to catch the drippings. Hold the cookie in your non dominant hand over the dish. Use a wooden spoon to evenly drizzle melted chocolate over half of the cookie. Then immediately sprinkle some finely chopped hazelnuts on top. Let the chocolate dry thoroughly on a rack over a sheet pan that has been lined with parchment to catch any additional drippings. Store cookies in an airtight container.

DSC_0761a

DSC_0573a
After three minutes the eggs are light in color and doubled in volume.
DSC_0577a
After the cookies cool cut into 1/2″ slices.
DSC_0578a
The cookies are placed cut side down on a wire rack set in a baking sheet. Bake until crisp and golden brown on both sides.

DSC_0669a

DSC_0673a


January 10, 2015 Turkey Zucchini Meatballs

DSC_0549a

It’s a new year and it’s time to put the emphasis back on healthy meals. But healthy doesn’t have to equal boring. Meatballs are lightened up with ground turkey and fresh herbs in this recipe from Yotam Ottolenghi’s cookbook, Jerusalem.  Originally from Jerusalem, Ottolenghi is a London based chef restaurant owner, food writer and cookbook author known for his vibrant, fresh, multi cultural cuisine. His recipe takes ground turkey and zucchini, two ingredients with not much flavor going for them on their own and combines them with fresh herbs, cilantro and mint, along with garlic, cumin and spicy cayenne pepper to make a delicious meatball.

In July, I would be making this recipe with herbs and zucchini fresh from the garden. But it’s a bitter cold day in January, so like everyone else I have to bite the bullet and plunk down several dollars for a small bunch of herbs I would have buckets of in the summer. Don’t get me started with the zucchini…  When I purchase herbs at the supermarket I try to treat them as a precious commodity. How many times have you (or I) brought home a bunch of herbs, used the tablespoon or teaspoon we needed and the rest was sentenced to the crisper drawer. The next time you notice it, you’re not even sure what it is. My favorite method of preserving fresh herbs as long as possible in the fridge, is to trim the stem ends and place the bunch in a glass with several inches of water. I place a loose plastic storage bag over the herbs and not only can I successfully store them for a week or more, I am more likely to use them since they are not tucked away in a drawer.

This is a wet meat mixture to work with so use a minimally processed product, the extra water added in some brands of ground turkey is not your friend.  Check the label, the turkey I purchased was 93/7, lean to fat with no water added. I used a hand grater for the zucchini and lightly wrung it out in  a cloth towel to eliminate extra liquid. I like to taste the leaf of the herbs I am using to see how pungent (or not) they are to see what adjustments I might need to make for the recipe.

Put all the ingredients in a large enough bowl so that you can combine your ingredients thoroughly. Take off your rings and roll up your sleeves to do some serious mixing.  Put some non stick spray on the sheet that you will place the meatballs when formed and also on your hands to minimize the herbs from sticking to your fingers (some will). Ottolenghi’s original recipe called for these to be made as small burgers, but I thought meatballs were better suited for this January night.

Cook the meatballs in a large (12inch) heavy skillet. I used a Le Creuset cast iron type skillet. Just a thin film of a neutral oil, canola, safflower, is all you need to coat the bottom of the pan. Be sure not to overcrowd the pan, I cooked 18 meatballs in two batches. I shake the pan halfway through to make sure they don’t stick.  Finish your browned meatballs in the oven for 5 to 7 minutes to finish cooking them.

The accompanying sauce is very simple, Greek yogurt, sour cream, lemon peel and juice and an interesting middle eastern ingredient, sumac.  I discuss sumac at greater lengths here. Sumac is extracted from the berries of the sumac bush and it adds an astringent, fruity taste to dishes. I purchased mine from Penzeys. I am over my Meyer Lemon envy of 2013 now that Joe is growing several trees that are producing fruit. They are inside now for the winter. This is the season for harvest and I was able to pick a fresh lemon from one of our trees.  More information about Meyer lemons is in this post.  Meyer lemons are not as acidic as regular lemons but the sumac added another layer of flavor complexity to the sauce.

Herb substitutions could be made, parsley for the cilantro, finely snipped chives for the green onions. A tzatziki sauce would also be a good accompaniment. Serve with a tomato sauce and zucchini “noodles” for a family-friendly spaghetti and meatballs substitution.  This one definitely goes in the “I would make this one again” column.

Turkey and Zucchini Meatballs

Makes about 18

Ingredients for Meatballs

  • 1lb ground turkey
  • 2c grated zucchini
  • 3 scallions, white and green, thinly sliced
  • 1 large egg
  • 2T chopped mint
  • 2T chopped cilantro
  • 2 cloves garlic, crushed or finely chopped
  • 1t ground cumin
  • 1t table salt
  • 1/2t freshly ground pepper
  • 1/2t cayenne pepper
  • about 1/8c of a neutral cooking oil, canola, safflower

Ingredients for the Sour Cream and Sumac Sauce

  • 1/2c sour cream (regular or low fat)
  • 2/3c plain Greek yogurt (regular or low fat)
  • 1t grated lemon zest
  • 1T freshly squeezed lemon juice
  • 1 small clove garlic, crushed
  • 1T sumac
  • 1/2t salt
  • 1/4t freshly ground pepper

Directions

  1. Make the sour cream sauce by placing all the ingredients in a small bowl. Stir well and set aside or chill until needed.
  2. Preheat the oven to 425°F. In a large bowl combine all the ingredients for the meatballs, except the cooking oil. Mix well with your hands. Shape into 2″ balls. Place meatballs on a well greased baking sheet to ready for cooking.
  3. Pour enough oil into a large heavy frying pan to form a layer about 1/16 inch thick on the bottom of the pan. Heat over medium heat until oil is shimmering, sear the meatballs in batches on all sides. Cook each batch for about 4 minutes adding oil as needed, until browned.
  4. Transfer the seared meatballs to a baking sheet and place in the oven for 5-7 minutes, or until just cooked through. Serve warm or at room temperature with the sauce on the side.
DSC_0526a
Mint, scallions and cilantro bring a lot of flavor to the meatballs.


I grated zucchini on a box grater and wrung out the extra moisture with a tea towel.
Why yes, I pick my lemons fresh from the tree.
DSC_0559a
Meyer lemons have thinner skin and are sweeter than the usual lemon.
Ready to go into the frying pan.
DSC_0565a
Cilantro in a half filled glass of water, ready to put the bag on top and store in the fridge.

DSC_0556a


January 3, 2015 Spicy Sausage, Escarole and White Bean Stew

DSC_0506aTwo cups of chopped leaves barely put a dent in the head of escarole staring back at me in the fridge.  I needed it for our Seven Fishes seafood stew, now the remainder of it’s girth was contained in a plastic bag. I knew it would burst out like a jack-in-the-box  the minute I opened it. The question now was, what should I do with the rest of this bitter green? I decided on a quick and easy escarole, sausage and white bean stew.

Chicory, escarole, frisee, what’s in a name? They are all forms of one plant, endive, that has two primary forms; one with curly feathery leaves, the other with broader more flattened leaves.

The curly feathery variety is marketed as curly chicory or curly endive.  Some specialty growers press and keep curly chicory from light during the later stages of the growth process and the green is brought to market as frisee.  Frisee is fragile in appearance, but in actuality, is quite sturdy. Because of the extra pains growers must take to produce frisee it is quite expensive.  One of the dishes I made for Seven Fishes, sauteed scallops with mushrooms, called for a bed of frisee. The almost ten dollar price tag for one head was even too pricey for me!

Escarole, also referred to as broad leafed endive, is the form that has a large, comparatively flat head. It is a nutritional powerhouse, high in fiber, minerals, vitamins A,K and C and beta carotene. It is like lettuce in form, the outer, darker leaves are more bitter and best suited for cooking. The innermost pale leaves are not as bitter and are an interesting addition to a salad. Escarole can be very sandy so wash it well in several changes of water.

This stew is a classic combination of bitter greens with white beans and sausage. Cooked sausage and canned beans help this dish to come together with minimal  fuss and shows that a soup doesn’t have to be complicated to be good. Like many soups it tastes even better after a few days in the fridge.

DSC_0481a
The darker outer leaves of escarole are best suited for cooking, the inner leaves are an interesting addition to a salad.


Spicy Sausage, Escarole and White Bean Stew

Serves four

Ingredients

  • 1T olive oil
  • 1 medium yellow onion, chopped
  • 2 medium cloves garlic, chopped
  • 2 15-oz cans cannellini beans, rinsed and drained
  • 1 head escarole, chopped into 1-2 inch pieces, washed and lightly dried
  • 1c low salt canned chicken broth or homemade stock
  • 12oz cooked Andouille sausage, chopped into 1-inch pieces
  • 1-1/2t red wine vinegar, more to taste
  • Kosher salt
  • Freshly grated Parmigiano-Reggiano

Directions

  1. Heat the oil in a heavy 5 to 6 quart Dutch oven over medium heat. Add the onion and cook, stirring occasionally, until tender 5-6 minutes. Add the garlic and cook for one minute, then stir in the beans.
  2. Add the escarole to the pot in batches using tongs, wilting it before adding each addition. Add the chicken broth and the cooked sausage to the pot.
  3. Cover the pot and cook until the beans are heated through and the escarole is tender, about 8-10 minutes. Season to taste with vinegar and salt.
  4. Transfer to bowls and sprinkle each portion with some of the Parmigiano-Reggiano.

DSC_0512a

December 23, 2014 Grilled Fig Salad with Spiced Cashews


DSC_0234a

A pile of several months worth of food magazines were accumulating so one afternoon I sat down with a stack and some sticky notes to mark the pages of the recipes that intrigued me.  October’s Salad of the Month in Food and Wine demanded a second look, grilled fig salad with spiced cashews. This recipe was contributed by  Ratha Chaupoly and Ben Daitz, chef-owners of the Cambodian sandwich shop, Num Pang with six locations in New York City.

The first step in making this recipe and one of the things that makes this salad quite different is cashew brittle. A good brittle should be hard, but not hard to make. They just require a bit of patience and your undivided attention. Combine sugar and a few tablespoons of water in a heavy bottomed pan over medium high heat and bring to a boil.  Continue to boil over low heat undisturbed until you see a light amber caramel start to form. Immediately take the pan off the heat and whisk in butter and the ingredient that makes this brittle unique, five spice powder.

Five spice powder actually gets it name from the five elements in Chinese culture and can contain as many as ten different spices. Traditionally it is a blend of star anise, cloves, cassia or Chinese cinnamon, Szechuan peppercorns and fennel. Since it was banned in this country for many years, some premade blends swap out ginger or black pepper for Szechuan peppercorns. It adds a spicy fragrance and flavor to both sweet and savory recipes.

Since it is the middle of December I was not going to fire up the grill for the figs. A grill pan did the job quite nicely. Fresh figs this time of year come from California  but nothing beats a fresh fig right off the tree. Joe is growing six varieties of fruit bearing fig trees. Our season for fresh figs is late summer through early fall. We keep a close eye on the ripening process. Too green and the figs are tasteless and watery. If left too long to ripen the figs burst open and all their sweet deliciousness becomes a treat for the bees. In our horticultural zone fig trees need to be protected in the winter. Last year’s harsh winter gave Joe concern that some of the trees might have died off.  They didn’t and in addition he made new cuttings this spring to add to our tree collection.
The dressing for the salad combines traditional Chinese ingredients, rice wine vinegar, ginger, scallions and sesame oil. Be sure your sesame oil is toasted, not cold pressed, it has an amazing fragrance and a warm toasted flavor. Black sesame seeds are worth searching out, they have a richer flavor than their white counterparts. All this being said I found the dressing on it’s own to be a litttle lackluster so I added a quarter teaspoon both of  oyster sauce and a spicy ginger syrup. To bring an element of salty crunch to the salad, I added some speck, a salted and cured ham that I browned in a pan.

The original recipe called for Bibb or oak leaf lettuce but I feel a mesclun mix that includes a more assertive green such as spinach or baby chard would make a better salad.  I should mention too that the brittle is delicious on its own for snacking and it would be easy enough to swap out another nut or spice to make it different.

Grilled Fig Salad with Spiced Cashews

Serves 4

Adapted from Food and Wine Magazine October 2014

Ingredients

  • 1/2c sugar
  • 1/2T unsalted butter
  • 1/4t Chinese five-spice powder
  • 1 cup roasted unsalted cashews
  • Kosher salt
  • 1/4c canola oil plus more for brushing
  • 2T toasted sesame oil
  • 2T unseasoned rice wine vinegar
  • 3T peeled and finely grated fresh ginger
  • 1/4t ginger juice with honey
  • 1/4t hoisin sauce
  • 1/3c  scallions, green parts only, finely chopped
  • 1T toasted black sesame seeds
  • 12 fresh figs, halved
  • Freshly ground pepper
  • 4c plus spring mix salad greens

Directions

  1. Line a baking sheet with parchment paper. In a medium saucepan, bring the sugar and 2 tablespoons of water to a boil. Boil over moderately low high, undisturbed, until a light amber caramel forms, about 5 minutes.
  2. Using a wet pastry brush, wash down any sugar crystals on the sides of the pan. Remove the pan from the heat and whisk in the butter and the five spice powder. Stir in the cashews until evenly coated. Scrape the cashews onto the prepared baking sheet and spread in an even layer; season with salt to taste and cool. Break the glazed cashews into individual pieces.
  3. In a small bowl, whisk 1/4c canola oil with the sesame oil, rice wine vinegar, ginger, ginger juice, oyster sauce, scallions and sesame seeds.
  4. Sauté several slices of prosciutto or speck until brown. Drain on paper towels and when cool, crumble for salad.
  5. Heat a grill pan over high heat and brush lightly with oil. Brush the cut sides of the figs with oil and season with salt and pepper. Grill over moderate heat just until lightly charred and barely juicy, about 2 minutes per side, transfer to a plate.
  6. In a large bowl, toss the lettuce with 2/3 dressing and season with salt and pepper.  Arrange the lettuce on plates and top with the ham and figs. Drizzle more dressing over the figs, sprinkle with the candied cashews and serve.
DSC_0228a
This easy brittle is worth making on its own.
One of our fig trees in late August.  Figs were not ripe yet.
One of our fig trees in late August. Figs were not ripe yet.

DSC_0232a


December 22, 2014 Two Dips for Holiday Entertaining


DSC_0253aHere are two new recipes to add to your holiday entertaining repetoire.  Kabocha squash and olive pomegranate walnut dips are unique, flavorful and will take you out of the everyday French onion and spinach dip rut.

Olive, pomegranate and walnut dip is also known as Zeytoon Parvardeh and originates from the northern Iranian province of Gilan, where fruit, olive and nut trees abound. Pomegranates, in peak season now, are used in two ways, for the crunchy seeds and deliciously tart pomegranate molasses. Pomegranate molasses can be purchased at Middle Eastern markets or if you are feeling a little adventurous, you can make your own by cooking down pomegranate juice with a little lemon juice, much in the same way a balsamic vinegar reduction is made. Olives, another major component in this dish, are pitted and  chopped to about the size of the pomegranate seeds. My choice was a mild buttery Castelvetrano, but any variety that is briny, not bitter will work. Walnuts are traditionally used in this dish but another Middle Eastern favorite, pistachios, would be a good  substitute.

This “dip” has the chunky consistency of a tapenade or a relish and in one instance I saw it referred to as a salad. We used it as a topping for fish and I could see it topping sliced lamb in a pita.  If you chopped the ingredients in a food processor as it was called for in some of the versions of the recipe, it would have more of the consistency of a dip.  Though tarragon compliments the flavors of the ingredients in this dish, some of the more authentic recipes called for mint and a seasoning called golpar or Persian hogweed. Used with vegetarian and bean dishes, it is often incorrectly sold labeled as angelica. Golpar translates to “rose feather” and has been described as fragrant and reminiscent of pepper or cardamom. Sounds like something I will have to seek out in the future.

We use winter squash in soups, casseroles and side dishes, why not in a dip? I improvised this recipe with ingredients I had in my kitchen. The honeyed sweetness and custardy texture of kabocha squash is a natural for a dip. The goat cheese brings a little creamy saltiness and contrasts with the heat of the curry powder. Sweet or hot curry powder would work according to your taste.The juice of a lemon brightens all the flavors. Kabocha squash dip is a natural for pita triangles or vegetable crudite.  Serve the olive, pomegranate and walnut dip with crostini that has been topped with a thin layer of chevre.

Green Olive, Walnut and Pomegranate Dip

Makes 2 1/4cups

Ingredients

  • 1/2c walnuts
  • 2c pitted briny green olives, finely chopped
  • 1/2c pomegranate seeds
  • 3T pomegranate molasses
  • 3T finely chopped tarragon
  • 3T extra virgin olive oil
  • 1T red wine vinegar
  • Kosher salt and freshly ground pepper


DSC_0168aDSC_0250aDirections

  1. Preheat oven to 375°F. Spread the walnuts in a pie plate and bake until toasted, 10 minutes. Let cool, then finely chop.
  2. In a bowl, mix the walnuts with the other ingredients and season with salt and pepper to taste. Serve with pita chips, crudité or as a topping for fish.

DSC_0244a


DSC_0266aKabocha Squash Dip

Makes 2 1/2 cups

Ingredients

  • 1 small Kabocha squash
  • 4oz soft goat cheese at room temperature
  • 1/3c tahini
  • 2t or more curry powder (mild, hot, your choice)
  • Juice of one small lemon
  • Half and half or cream to thin out texture
  • Kosher salt and freshly ground pepper

DSC_0149aDSC_0157a

Directions

  1. Preheat oven to 425°F. Cut Kabocha squash into 2″ wedges, place on a baking sheet cut side up and brush lightly with olive oil. Bake squash until tender and browned in spots, about 45 minutes. Check half way through baking to flip the tray around. Let squash cool.
  2. Scrape two packed cups squash from the skin, save any additional squash for another use. Put squash, goat cheese, tahini, curry powder, juice of a lemon in a food processor and pulse until nearly smooth. Add a little cream to thin out, pulse until smooth. Season with salt and pepper and additional curry powder if desired.
  3. Scrape into a bowl and serve with crackers or crudité.

DSC_0261a


DSC_0262a

December 12, 2014 Creamy Kale Gratin

DSC_0072aWhen it comes to Thanksgiving I’m “all about the sides”. Now don’t get me wrong, we had three turkeys for Thanksgiving, roasted, grilled and smoked, all cooked to perfection by my hubby. No fried turkey this year, we tried it one Thanksgiving and the combination of a deep fryer and a windy day on a wooden deck made for an interesting and potentially dangerous afternoon.

I love fall vegetables, a variety of interesting winter squashes, beautiful brassicas and hearty root vegetables all appear at our table. In previous years I would make myself crazy with last minute preparations for a half dozen complicated side dishes before we sat down to Thanksgiving dinner. Now I like to roast a combination of root vegetables tossed with olive oil, salt and freshly ground pepper and supplement them with some other interesting sides.

If I am at home in the early afternoon I will occasionally turn on “The Chew”, a television program that has been described as “The View” for foodies. The panel includes among others, star chef, restauranteur and cookbook author, Mario Batali, and it was Mario’s recipe this day that caught my attention, Creamy Kale Gratin.
We are not newcomers on the ever expanding kale bandwagon. Joe has been growing it in the fall for quite a few years, before it achieved it’s current celebrity status. This year’s crop was abundant. He grew both the Red Russian variety with it’s reddish purple stems and curly leaves and the Lacinato or dinosaur kale with crinkly long dark green leaves. What most people don’t know is that after the first frost, kale becomes sweeter and could easily convert the most die hard kale hater.

Today’s episode was titled potluck party, focusing on dishes you could bring to a Thanksgiving dinner and I’m sure this dish would be a hit at any potluck meal, Thanksgiving or otherwise. Mario compared this dish to steakhouse creamed spinach, only made with kale. Mario had the assistance of actress Katherine Heigl, best known for her Emmy winning role on Grey’s Anatomy.  Her job, along with promoting her new television series, was to chop some of the kale while Mario made the Bechamel  sauce. I saw that chef Michael Symon was at the ready, most likely in case the task was too much for her to handle. I noticed she did a fine job, Michael said with a bit of surprise that she did a good job and Mario commented on her “mad skills”. She explained that she played a cook in one of her movies (Life As We Know It; I checked)  and they taught her to properly chop. She refered to it as a hidden talent, one of those things you learn as an actor.

The kale leaves are roughly chopped to the stem. Twenty cups may seem like a large quantity but like all greens, they cook down quickly. Rather than putting the stems in the trash, Mario puts the stems in half full pickle jars and snacks on them the next day. The kale is cooked in a large sautepan until wilted, it will cook fully when it is combined with the cheese sauce and croutons. A layer of croutons is placed on the bottom of a large buttered gratin dish. The next layer is the kale combined with the very cheesy sauce seasoned with freshly ground nutmeg. The remaining croutons are layered on top.

Either variety of  kale is suitable for this recipe. From my observation of the video it looks like they used a curly variety, I used the darker Lacinato with long crinkly leaves. I prepped my dish the day before, stopping before sprinkling the croutons with olive oil, salt and pepper. I brought the dish to room temperature the next day, finished the final steps and baked the gratin. The last dilemma the Chew tackled was how do you eat the bread bit? Fork and knife is fine but if you want to pick it up like a crostini, that’s just fine too.   We all enjoyed the gratin, a delicious way to enjoy one of the final offerings of the fall garden.

DSC_0029_edited-1
Lacinato kale in the fall garden.

Creamy Kale Gratin

Serves 10

Ingredients

  • 20 cups Russian or Lacinato kale, stems removed and roughly chopped
  • 1 loaf sourdough bread, cut into 1/2 inch slices
  • 6 T butter, and additional butter for the baking dish
  • 1/2c shallots, sliced
  • 1t red pepper flakes
  • 1/4c all purpose flour
  • 1 1/2c milk
  • 1 1/2c heavy cream
  • 8oz grated gruyere cheese
  • 8oz grated sharp white cheddar cheese
  • 1/2c crème fraiche
  • 1/2c Parmigiano Reggiano, freshly grated
  • 1/2t freshly grated nutmeg

Directions

  1. Preheat oven to 400°F
  2. Preheat a large sauté pan over medium high heat. Add 2 tablespoons butter and a drizzle of olive oil. When the butter has melted, add the shallots, salt, pepper and red pepper flakes. Sauté until translucent, about 4 minutes. Add the kale and season with salt and pepper. Sauté until wilted about 4 minutes. Set aside.
  3. Meanwhile, in a separate heavy bottomed pot (think Le Creuset) , melt 4 tablespoons butter. Add flour and stir to combine. Cook the flour mixture for 2 minutes, stirring continuously. Slowly pour in the milk and cream and whisk to combine. Continue to cook,, stirring continuously with a wooden spoon, until the béchamel sauce coats the back of a wooden spoon (about 5 minutes). Remove from the heat. Add in the cheeses and whisk until smooth. Season with freshly grated nutmeg, salt and pepper. Stir in the reserved kale mixture.
  4. Butter a large gratin baking dish. Lay an even layer of the read slices in the bottom of the gratin dish. Pour the creamy kale over the bread. Top the casserole with the remaining bread slices, placing them tightly together. Season the bread with salt and pepper and drizzle with olive oil. Place in the oven to bake for 30 minutes, until the topping is golden brown. Remove from the oven and allow to cool for 5 to 10 minutes before serving.
DSC_0035a
A rough chop is all you need for this dish.
DSC_0037a
A layer of bread slices are placed at the bottom of the dish.
DSC_0039_edited-1
Next, a layer of creamy, cheesy kale.
DSC_0062a
Then another layer of sourdough bread rounds.
DSC_0070a
Brush sourdough lightly with olive oil, sprinkle with salt and freshly ground pepper and bake. Delicious!


December 7, 2014 Roasted Butternut Squash Soup with Asian Pear and Ginger

DSC_0042a

Squash soup is a constant on our Thanksgiving table. As a novice cook it was the tried and true Silver Palate version of butternut squash soup with apples and curry that I turned to. This delicious soup with a little bit of sweet and a little bit of spice was always met with rave reviews from friends and family. In recent years I have tried to change it up a little. My basic formula is to combine a winter squash whether it’s Hubbard, butternut, kabocha, with a fall fruit like apples or pears and spiced with flavors that remind me of fall, cinnamon, nutmeg, allspice or ginger.

This year’s recipe was developed with inspiration from a visit to the farmers market, butternut squash soup with fresh ginger and Asian pears. When choosing a butternut squash look for one that is evenly beige in color and heavy for it’s size. There should be about an inch of intact stem and the skin should be matte, not shiny in appearance. If the stem is removed, it is easier for bacteria to enter the squash. A shiny butternut squash was picked too young, or worse, waxed. I look for a butternut with a thicker “neck” and a smaller ball. I cut the squash in two pieces, where the neck meets the ball. I find that it’s easier to peel in two separate units. I prefer a vegetable peeler for this task but a thin bladed sharp knife will work as well. I don’t always have the time, but when I do I also toast the seeds for a snack or a garnish.

Butternut squash is a common find at the farmers market in the fall  but freshly harvested ginger, that was a new discovery for me. The most visible difference in the freshly harvested ginger was that the skin was soft, not woody and the flesh was much juicier. A little investigation and I discovered it’s not that difficult to grow your own ginger, in our case indoors, since we lack the year round tropical climate. We can try this in the spring when the ginger at the supermarket is at it’s freshest and easiest to root. I’m sure I can convince Joe to try this, maybe growing our own will be the alternative to the shriveled up piece I always seem to have in the fridge.

Asian pears are native to China, Taiwan, Korea and Japan and we even have a few trees in our orchard. The fruit is pome shaped like an apple and unlike it’s European counterparts must fully ripen on the tree. Also, Asian pears are consumed when the flesh is firm and crisp with a somewhat gritty texture, not buttery soft like an Anjou or Bosc.

This is an easy soup to put together, toss the cubed vegetables with olive oil, salt and pepper and roast until they are soft and browned in places.  The vegetables are pureed in the food processor with just enough chicken stock to make a thick soup. Cook the puree mixture over medium heat to blend the flavors together. If this soup is made in advance, it will thicken as it sits, just add enough chicken broth to thin it out.

DSC_0046a

Roasted Butternut Squash Soup

Serves eight

Ingredients

  • 1 large butternut squash 4-5 lbs., peeled and cut into 1-inch dice
  • 1 Asian pear, peeled, cored and sliced
  • 1 medium onion in 1-inch dice
  • 2 carrots, peeled in 1-inch dice
  • 1 large stalk celery in 1-inch dice
  • 1 inch piece of fresh ginger, peeled if necessary, cut into 6-8 pieces
  • 3T olive oil
  • 3-4 cups low sodium chicken broth
  • Kosher salt and pepper

Directions

  1. Preheat oven to 400°F. In a large bowl combine the butternut squash cubes and olive oil. Mix together, coating the cubes well. Sprinkle with kosher salt and freshly ground pepper.  Spread  the squash pieces evenly on a rimmed baking sheet. Be sure not to crowd.
  2. In the same bowl, toss the pear, carrots and celery to coat with the olive oil that remained in the bowl. Sprinkle with kosher salt and freshly ground pepper.  Place on a second baking sheet and place both sheets in the oven. Roast for 35-40 minutes, rotating trays top and bottom halfway through the cooking time. Vegetables should be soft and browned.
  3. In batches, add the roasted cubes to the food processor with enough chicken stock to blend the mixture. Add blended vegetables to a large soup pot and cook over medium heat. Bring to a boil, then reduce heat to low and simmer, covered for twenty minutes.
  4. Serve soup warm garnished with pear slices.
DSC_0020a
Fresh ginger, the skin is much softer and the ginger is juicier.

DSC_0024aDSC_0021aDSC_0028aDSC_0044a


November 20, 2014 Mahi Mahi with Pomegranate Salsa

DSC_0009aFish is always my go-to selection for a quick and healthy dinner.  This weekend my fish market had quite a few excellent varieties and some beautiful mahi mahi fillets caught my eye.

Also known as dolphin fish, the Hawaiian name, mahi mahi, was used first by restaurants to distinguish it from the mammal. Despite the Hawaiian name, mahi mahi is mostly fished on the Atlantic coast. Wild caught in the United States from Massachusetts to Texas, it is considered a “best choice” by the Monterey Bay Aquarium Seafood Watch. Mahi mahi are fished by longline methods or troll and pole. These methods limit the accidental catch of sea turtles and other threatened species.

Mahi mahi is a lean fish with a delicate, mildly pronounced flavor and medium texture. The flesh usually has strips of brown running down the center of the fillet. This is a harmless discoloration, some (not us) think this makes the fish less attractive so they trim it off. Be sure to remove the skin before cooking, it is tough and tasteless. Halibut would be a good substitution if mahi mahi is not available.

We cook our fish very simply and compliment it with a bright sauce. I wanted to take advantage of seasonal fall ingredients and I noticed a display of pomegranates at the front of the supermarket. Whether it was inspiration or the power of suggestion, I’m not certain, I planned to make a pomegranate salsa. I combined jewel toned pomegranate arils with juicy pineapple, crispy cucumber and red onion. A little jalapeno from the garden provided enough heat to contrast with the sweet and I finished the salsa with a little cilantro. Served with rice and avocado slices and a salad, this made a quick and delicious dinner. This salsa would be good with tortilla or pita chips or even as a bruschetta with a creamy goat cheese.

DSC_0002a

Mahi Mahi with Pomegranate Salsa

Serves four

Ingredients

  • 4 mahi mahi fillets, 6 oz each
  • Cooked jasmine or other long grain rice
  • Sliced avocado
  1. Preheat  oven to 450°F.
  2. Measure the fillets at their thickest point. Season fish with salt and pepper and place on a baking sheet.
  3. Bake fish for 10 minutes for every inch of thickness. If you check internal temperatures, it should be about 130°F. Remember fish will continue to cook even off the heat.
  4. Mound the rice on plates and top with fish and salsa. Arrange avocado slices on the side. Sprinkle with cilantro and serve with lime wedges.

Pomegranate Salsa

Makes about 4 cups

Ingredients

  • 1c pomegranate arils
  • 3/4c peeled and diced cucumber
  • 3/4c diced pineapple
  • 1/4c diced red onion
  • 1-3 jalapeno peppers, seeded and minced
  • 1/3c diced sweet red pepper
  • 2T fresh lime juice
  • 1/3c finely chopped cilantro

Directions

  1. Combine all the ingredients in a bowl and stir to combine. Taste for heat preference and additional jalapeno if desired.

DSC_0012a

November 16, 2014 NuMex Suave Orange Peppers

DSC_9452aA warm early fall, plant cages and a drip irrigation system all contributed to a bumper crop of sweet and hot peppers this season. One of the most interesting varieties we grew was the Nu Mex Suave Orange.  In appearance, this pepper closely resembles a habenaro. If you are not familiar with habenaros, they are one of the hottest varieties grown. Pepper heat is rated on the Scoville scale. For example, jalapenos are around 25,000 units, hot enough to satisfy most palates. The red Savina habenaro is 577,000 Scoville units, a bit too hot for all but the most dedicated pepperheads to enjoy.

So why was there a need to breed a mild habenaro? In addition to their heat, habenaros have a unique flavor that most people couldn’t taste because they couldn’t get past the scorching heat.

This is where the developers of new pepper breeds came in. With seed donated from a chile aficionado from Texas, and many seeding trials, the varieties, Nu Mex Suave Red and Orange pepper were originated.  Nu Mex is the name for products created at the agricultural experimentation station at New Mexico State University at Las Cruces and suave, meaning mellow or smooth, emphasizes the mild nature of the chile. Nu Mex Suaves look like a cross between a habenaro and a Scotch bonnet, another hot chili, used in Jamaican jerk sauces and salsa.

DSC_9455a

The fruits are about 2 inches in size, plump, wrinkled and bright orange yellow in color.  Suaves have a citrusy flavor with an orange lemony overtone. The heat is felt in the back of the mouth and throat as opposed to a jalapeno where you will experience the heat on your tongue and lips.

Their wrinkled appearance and thin waxy skin make them a poor candidate for roasting. I used them in salads and had my own experiment with some mini stuffed peppers. I also froze several bags  and look forward to the mild heat and citrusy flavor they will add to soups, stews and other dishes.

DSC_9483a