December 3, 2017 Creamy Kale and Goat Cheese Gratin


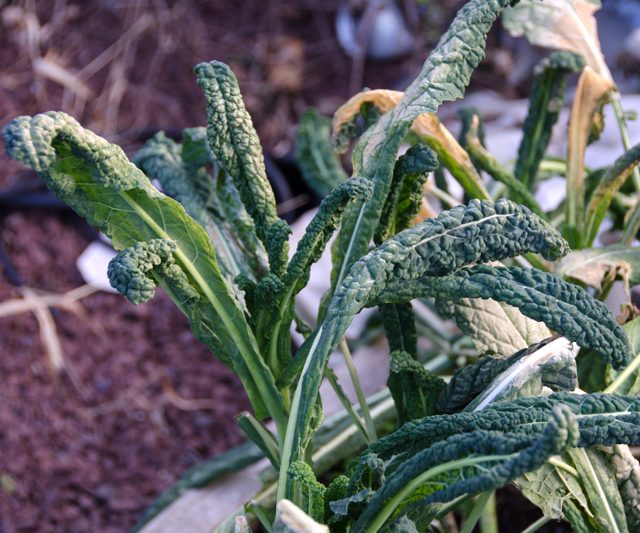
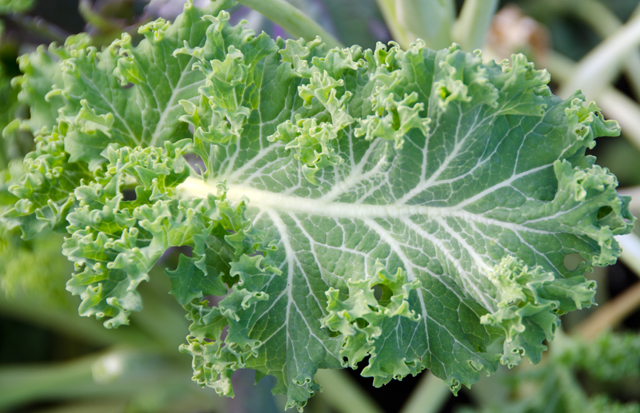
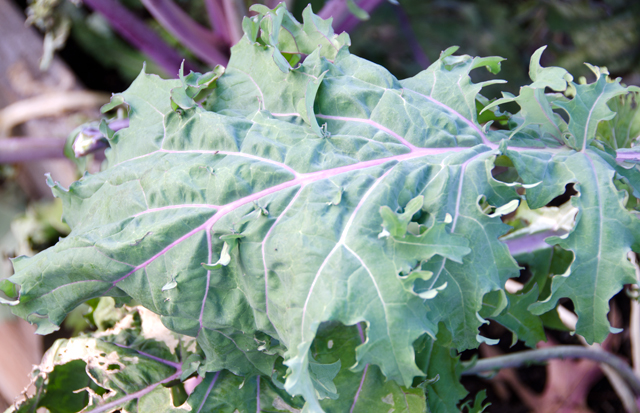
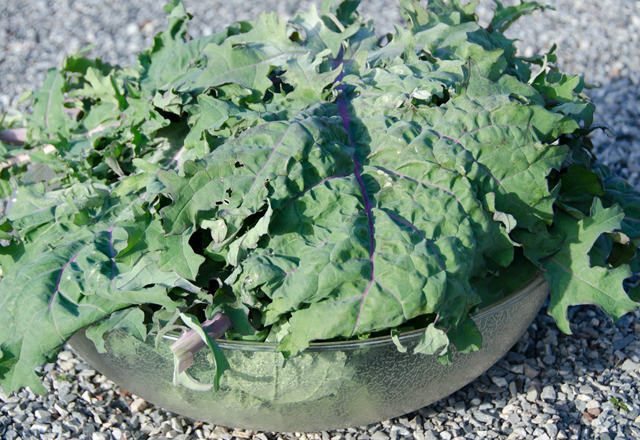
Kale and goat cheese gratin is the ultimate winter comfort food and a great addition to any potluck or holiday feast. The original recipe from Fine Cooking called for dandelion greens but I have made it with baby chard greens and spinach as well, depending on the season. This time I used the bounty of fall kale from our garden. Joe planted several varieties, for this recipe I used a combination of Lacinato or Tuscan, Red Russian with its purple veins and stems and curly Dwarf Blue Curled. If we’re lucky, some of the plants that don’t die off this winter will provide us an early spring kale crop.

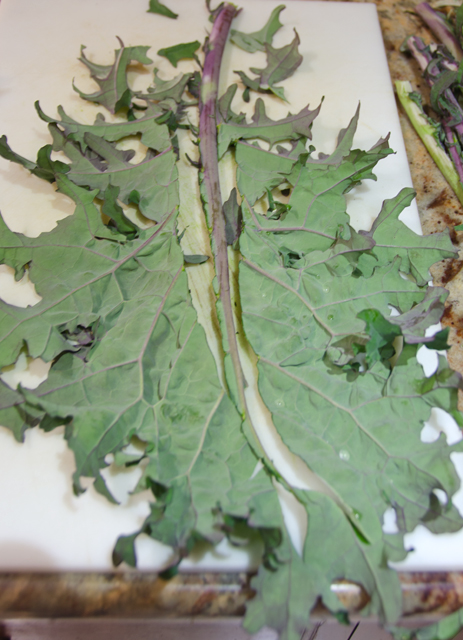
When shopping for kale look for moist, crisp, unwilted bunches, unblemished by tiny holes, which indicate insect damage. The leaves should not be yellowed or brown. Wrap unwashed kale in paper towels, then store in plastic bags in the refrigerator crisper for a few days. When you are ready to cook, submerge the leaves in a sinkful of cold water, swishing them around to remove any dirt. To trim for cooking, lay a leaf bottom side up on a cutting board and run a paring knife along each side of the center stem. I like using a Cutco steak knife in this step for the traction it gives. Repeat until all the stem are removed. Then cut the leaves in the size your recipe calls for, in this case, 2 inch strips. If you are so inclined, chop the stems into smaller pieces, store them in freezer bags and add them the next time you make a vegetarian stock.

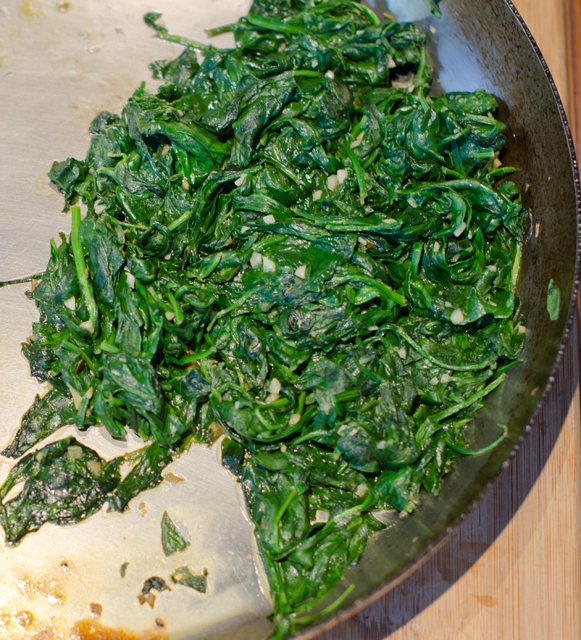
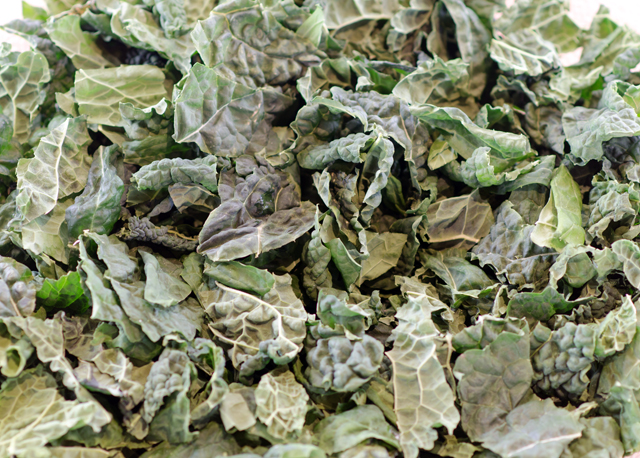
Bring a large pot of well salted water to a boil and cook the kale for 3-4 minutes or until tender. You can do this step in batches if necessary. If you are doing this in batches, remove the kale with a Chinese strainer and allow the water to come back to a boil before adding the next bunch of leaves. Transfer the blanched leaves to a colander to drain well and cool. Put the cooled leaves in a clean cotton dish towel and gently wring the greens and get rid of any excess moisture. There’s nothing worse than a watery gratin!

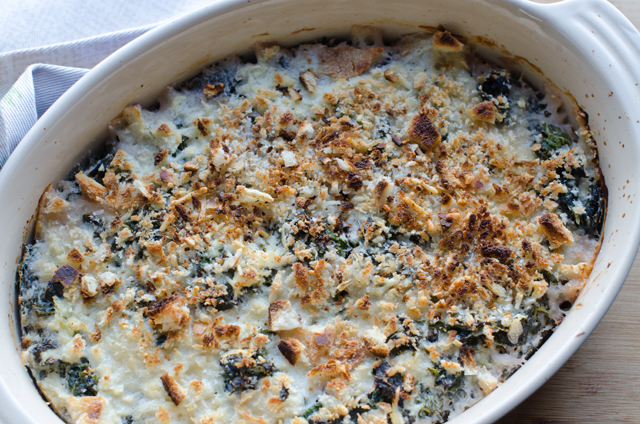
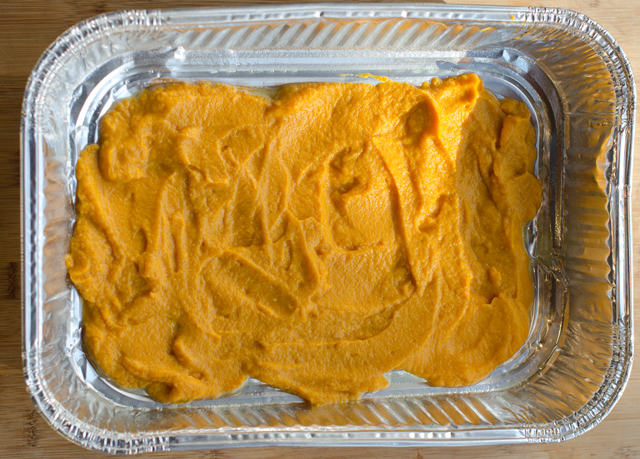
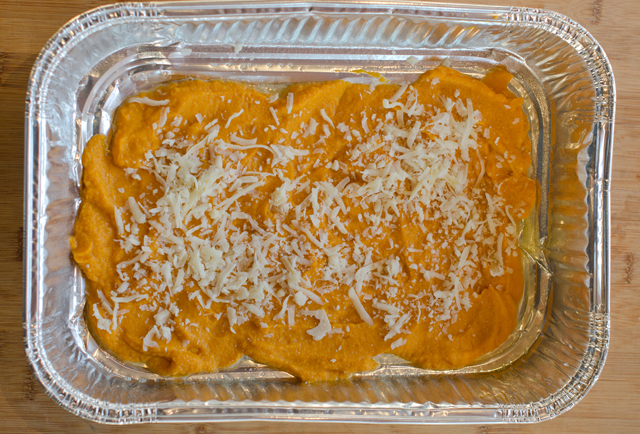
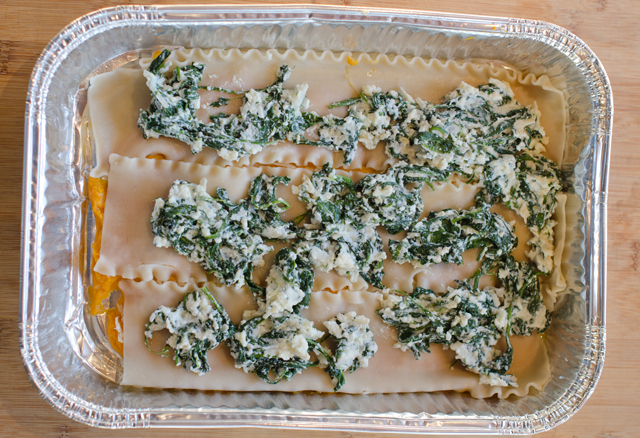
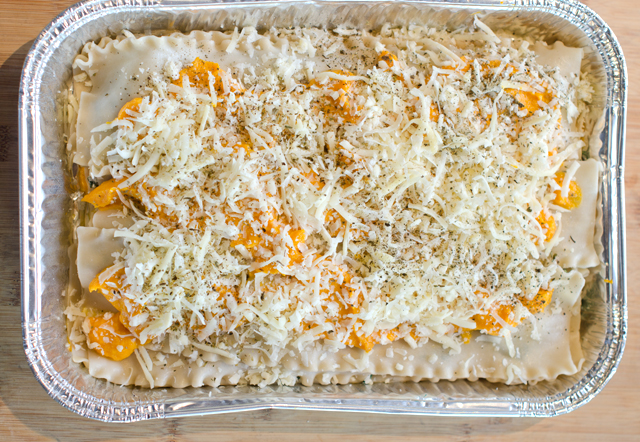
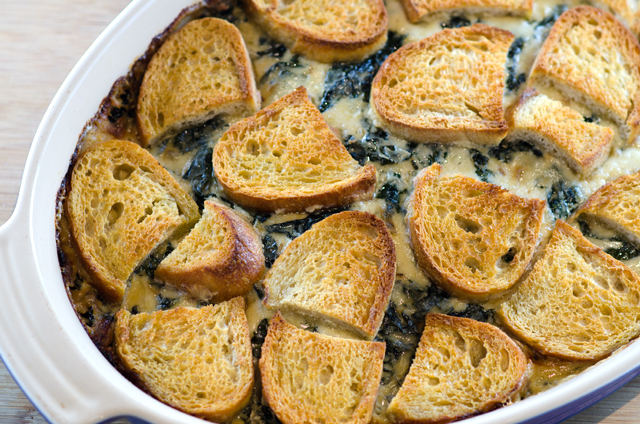
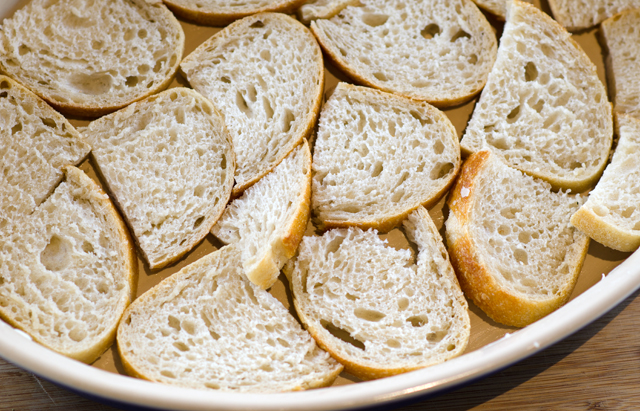
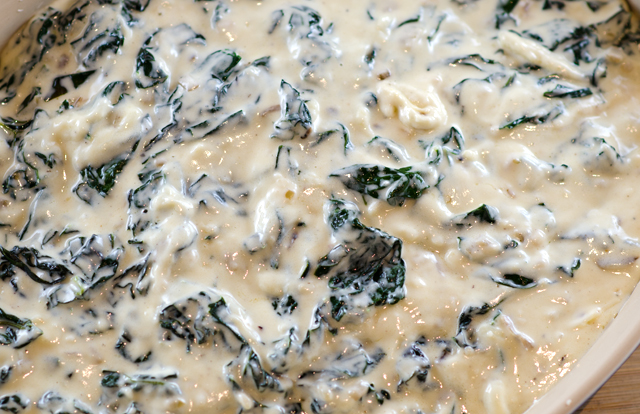
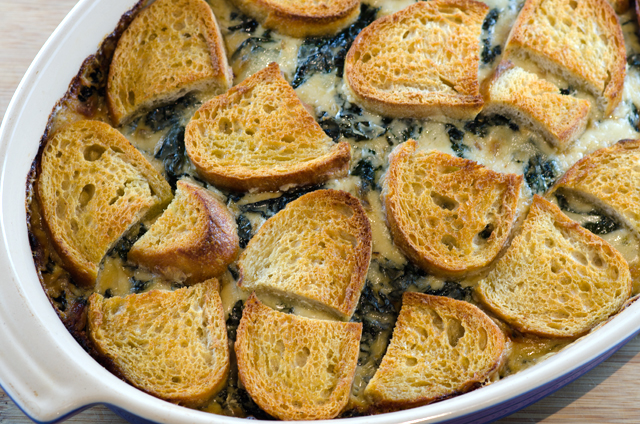
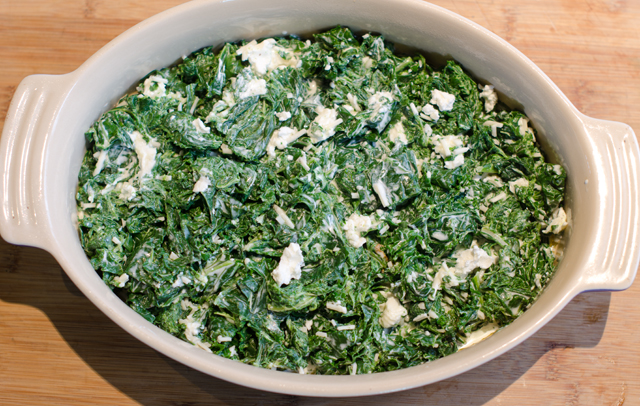
Chop the greens coarsely and put in a large mixing bowl and combine with Parmesan and a creamy goat cheese. Combine well, don’t be afraid to use your hands for this. Spread the greens in a buttered baking dish and add cream that has been infused with garlic and lemon. Be sure to use a shallow gratin dish rather than a deeper, smaller one. The larger surface area helps reduce the cream. Top with the breadcrumb mixture and bake until the crumbs are brown and the liquid is bubbly and has reduced below the crumb level.

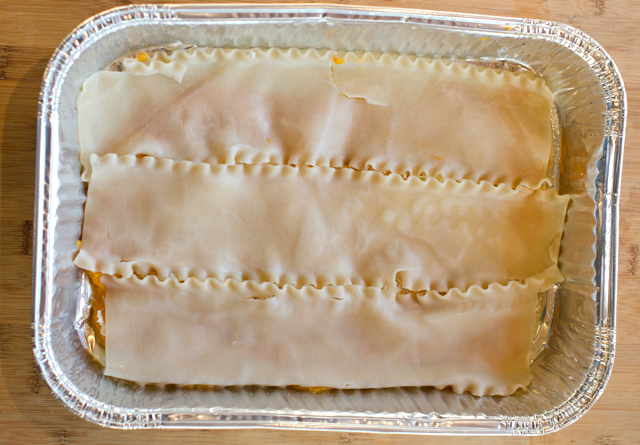
The kale and goat cheese gratin can be prepped in advance. Prepare the kale filling and add the cream to the dish but hold off on adding the crumb topping until right before you bake it. Cover with plastic wrap and refrigerate. If you have refrigerated the dish, bring it back to room temperature, or if baking right from the fridge, add a little extra time to your cooking.

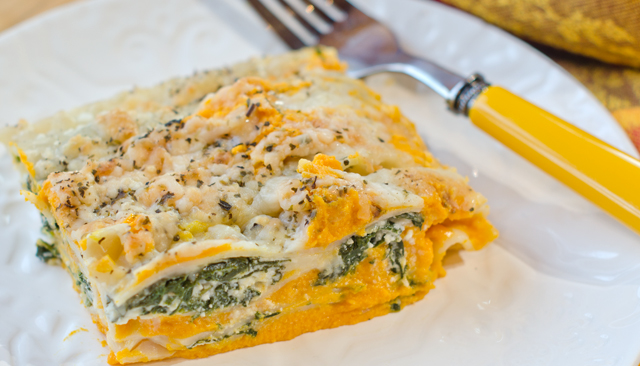
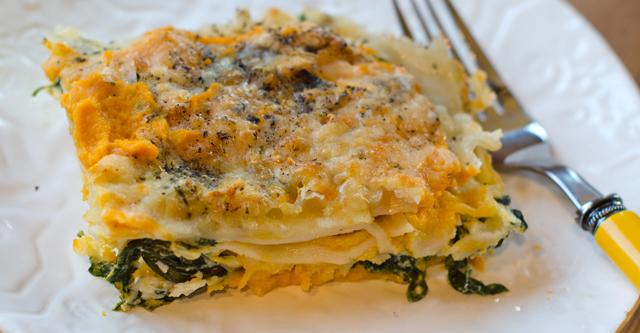
Creamy, cheesy greens topped with a crunchy Parmesan crumb crust, what’s not to love? This flavorful dish is great served with lamb or turkey (of course!) and makes excellent leftovers.

Lacinato, Tuscan or Dinosaur kale.
Dwarf blue curled kale
Red Russian kale
It takes a lot of kale to make a pound.
Trimming the leaves.
It just needs a breadcrumb crust now.

Creamy Kale and Goat Cheese Gratin

Serves six or more

Ingredients

  • ½ t unsalted butter
  • Kosher salt
  • 1 lb. kale, stemmed, leaves cut into 2-inch strips
  • 1 c coarse fresh breadcrumbs
  • 3 T plus ¼ c finely grated Parmesan
  • 1-1/3 c heavy cream
  • 2 garlic cloves, peeled and smashed
  • ¼ t finely grated lemon zest
  • Freshly ground black pepper
  • 2 oz fresh soft goat cheese

Directions

  1. Position a rack in the center of the oven and heat the oven to 375°F. Coat a shallow medium-sized gratin dish with the butter.
  2. Bring an 8-quart pot of well-salted water to a boil over high heat. Working in batches, boil the kale just until tender, about 3 minutes. Drain well.
  3. Use a dish towel to gently wring the greens and get rid of any excess moisture.
  4. In a small bowl, combine the breadcrumbs, 3 T Parmesan and a pinch of salt.
  5. In a medium saucepan over medium high heat, bring the cream and garlic to a boil, about 5 minutes. As soon as the cream has come to a vigorous boil (but before it boils over), remove the pan from the heat and let sit for 5 to 10 minutes. Add the lemon zest and season with a little salt and pepper. Stir well and remove the garlic cloves.
  6. Transfer the greens to a cutting board and chop them coarsely. Put them in a large mixing bowl and add the remaining ¼ c Parmesan and the goat cheese. Using your fingers, mix well. Spread the mixture in the prepared gratin dish. Pour the cream over and stir gently with a spoon to distribute evenly.
  7. Season to taste with salt and pepper. Top the gratin evenly with the breadcrumbs.
  8. Bake the gratin until the crumbs are browned and the liquid has reduced below the crumb level, about 30 minutes. Serve warm.

November 18, 2017 Curried Butternut Squash Soup


A reluctant fall has finally settled in and made itself at home in Bucks County. We have experienced our first killing frost, officially ending the growing season. One of the last survivors of the garden is the kale. Cold weather just seems to make it sweeter. I have a sinkful soaking right now, reviving it for tonight’s dinner. We also have a wheelbarrow full of butternut squash in the garage that was harvested before the frost.

Fortunately butternut squash stores well in a cool basement, so I will be able to use it through to next spring. I cube and roast it to add to our green salads, butternut squash lasagna is a new favorite, and of course, soup. Smooth and silky butternut squash soup is a cold weather favorite. I have shared several recipes for butternut squash on this blog but this is the original, the recipe I have been making for over thirty years.

When I first discovered my love for cooking one of the first cookbooks in my library was The Silver Palate cookbook. Silver Palate’s recipe for curried butternut squash soup was a constant on our Thanksgiving table for many years. This velvety rich soup has just the right combination of sweet, tart and spicy and was met with rave reviews from friends and family alike.

Begin the recipe by sautéing chopped onions and curry powder in sweet (unsalted) butter. If your curry powder has been sitting in the back of your spice cabinet for longer than you can remember, it’s time to invest in a new jar. There is no one formulation for curry powder and each variety can have different component spices in differing amounts. For this soup the best choice is sweet curry powder. It will give you a wide range of flavors without too much heat. One large onion yielded the two cups I needed. The covered pan will allow the onions to cook slowly,  give them a stir every five minutes or so to keep them from sticking to the pan.

While the onion is cooking, peel and cube the butternut squash. The medium-large squash I used weighed in at 3.3 lbs and yielded about 6 cups of peeled, cubed squash. Add squash cubes, apple and chicken stock, bring to a boil and cook until squash and apples are tender. Purée the soup in a food processor or blender. Return the soup to the pot, add apple juice or cider and season with salt and pepper. Serve piping hot with a garnish of a tangy freshly grated green apple.

Over the years this recipe this soup has become less of a project for the home cook. Don’t feel like chopping a large unwieldy squash? You can buy peeled and chopped squash at most grocery stores. Does the thought of straining and pouring hot soup into a blender make you just a little nervous? An immersion blender eliminates this step. If you make this soup ahead of time, cool it and store in the fridge.  When you reheat the soup you may thin to thin it out a bit with a little more stock.

The most amazing thing about this recipe is you have made a rich, creamy soup without a drop of cream or milk. Perfect for the holidays or great alongside a sandwich of leftover turkey.

The primary players.
A three pound squash yielded about 6 cups of cubes.
Simmering on the stove top.
I pureed my soup in the food processor but a blender or immersion blender works too.

Curried Butternut Squash Soup

Serves six

Ingredients

  • 4 T unsalted butter
  • 2 c finely chopped onions
  • 4-5 t sweet curry powder
  • 3 lb butternut squash
  • 2 tart apples, peeled, cored and chopped
  • 3 c chicken stock
  • 1 c apple juice or cider.
  • kosher salt and freshly ground pepper to taste
  • 1 shredded unpeeled tart apple (garnish)

Directions

  1.  Melt the butter in a 5 quart Dutch oven. Add chopped onions and curry powder and cook, covered, over low heat until onions are tender, about 25 minutes.
  2. While the onions are cooking peel the squash, scrape out the seeds and chop the flesh into 1″ cubes.
  3. When the onions are tender, pour in the stock, add squash and apples, and bring to a boil. Reduce heat and simmer, partially covered, until squash and apples are very tender, about 25 minutes.
  4. Pour the soup through a strainer, reserving the liquid, and transfer the solids to a bowl of a food processor. Add 1 cup of the cooking stock and process until smooth.
  5. Return the puréed soup to the pot and apple juice and the remaining cooking liquid, about 2 cups, until the soup is of the desired consistency.
  6. Season to taste with salt and pepper, simmer briefly to heat through, and serve immediately, garnished with shredded apple.

April 22, 2017 Butternut Squash Bread and Rolls

You might expect a recipe like this to be posted around Thanksgiving, but delicious homemade butternut squash rolls were the accompaniment to asparagus soup for Easter dinner. Usually the squash of choice in both sweet and savory breads is pumpkin, since I am still chipping away at my stash of butternut squash, it was an easy substitution.

I cut the squash in half lengthwise and baked it on a parchment lined baking sheet, cut side down at 375°F until it was very soft, about 45 minutes. I scooped out the squash then cooked it down a bit to get rid of any additional moisture to make a nice thick puree.

I slightly adapted a recipe from the King Arthur Flour site, with encouragement from a rating of 4.8 out of 5 stars and 106 positive reviews. The only problem was that the ingredients were a bit too much for my Kitchen Aid mixer. Once the initial ingredients were mixed together I separated them into two smaller pieces so they could be kneaded in the mixer without taxing it too much. I cut back on the sugar called for in the original recipe, since I was not attempting to make a sweet bread recipe and unlike pumpkin, butternut squash puree has some natural sweetness.
The bread and rolls turned out great, I served the rolls with the soup, the bread is well wrapped, well labeled and frozen for future use. I’m thinking bread pudding sometime soon.

Butternut Squash Bread and Rolls

Makes two loaves or 1 loaf and a dozen rolls

Ingredients

  • 2 T active dry yeast
  • ½ c lukewarm milk
  • 2 large eggs
  • 1 ½ c butternut squash puree
  • 2 T vegetable oil
  • 6 ½ c unbleached all-purpose flour (I prefer King Arthur)
  • ¼ c brown sugar
  • 2 ½ t salt
  • ½ t ground ginger
  • ½ t ground cardamom

Directions

  1. Place all the ingredients into a large bowl of a stand mixer and combine ingredients using the flat beater. Alternately, this could be done by hand or in a bread machine.
  2. Once the ingredients are thoroughly combined, replace the flat beater with the dough hook and knead the dough until it is smooth and soft. I needed to do this in two batches.
  3. Put the dough into a lightly greased bowl. Cover and let dough rise until doubled, 60 to 75 minutes.
  4. Gently deflate the dough and turn it out onto a lightly oiled work surface. Divide it in half.
  5. Shape the dough into loaves or rolls. The loaves can be placed into lightly greased 9″ x 5″ loaf pans or rolls placed on parchment lined baking sheets.
  6. Cover the pans/baking sheets and let loaves/rolls rise until doubled, about 45 minutes. Toward the end of the rising time, preheat the oven to 350°F.
  7. Bake the bread for 30 to 35 minutes. The crust will be a deep golden brown and a digital thermometer inserted into the center will register 190°F. Bake rolls for about 20 minutes until golden brown.
  8. Remove bread and rolls from oven and turn out onto a wire rack to cool.  Cool completely and store, well wrapped at room temperature for several days. Freeze for longer storage.

January 31, 2017 Baked Shrimp Toasts

Shrimp toasts, bite-sized triangles of bread topped with shrimp paste are a popular dim sum item and a new addition to our Chinese New Year celebration. It is said the dish originated in Guangzhou (Canton) in China nearly a hundred years ago. There are others who claim it is a hybrid of a traditional Chinese shrimp recipe and bread, not native to China but introduced by foreign travelers to Hong Kong. I chose to use a recipe from Susannah Foo, a popular and highly acclaimed Philadelphia chef who eponymous restaurant closed in 2009. Shrimp toasts are often fried, this version is baked and can be made ahead and frozen, a big plus when you are serving an extensive menu. This year we celebrate the year of the rooster, which comes after a monkey year and before a dog year. Roosters are said to honest, bright, communicative and ambitious.

Baked Shrimp Toasts

Makes 3 dozen or more

Ingredients

  • 10 to 12 slices thinly sliced white bread, crusts removed
  • 1 large egg white
  • 1 lb medium or large shrimp, peeled and deveined
  • 2 T heavy cream
  • 1 T vodka
  • 1 t kosher salt
  • ½ c chopped water chestnuts
  • 2 scallions, minced

Directions

  1. Preheat oven to 250° Cut each piece of bread into 4 triangular pieces. Place on a baking sheet and bake for about twenty minutes, until the bread is dry but not browned; leave oven on.
  2. While the toast is drying, beat the egg white lightly. Dry the shrimp well with a paper towel and place in a food processor; puree.
  3. Add the egg white, cream, vodka and salt. Process until just pureed. Transfer to a bowl.
  4. Add the water chestnuts and scallions to the shrimp mixture and mix just until all the ingredients are combined.
  5. If you are baking the shrimp toasts immediately, increase the oven temperature to 375°F and coat a baking sheet lightly with non stick spray.
  6. Spread 2 heaping teaspoons of the shrimp mixture on each piece of bread. Repeat with the remaining triangles.
  7. At this point, the shrimp toast can be frozen for later use. Place the triangles on baking sheets and freeze. Once frozen, remove from the baking sheets, place in freezer bags and return to the freezer.
  8.  Bake frozen shrimp toasts directly from the freezer, about 10 minutes, the shrimp will be cooked through, all the ingredients hot and the toast is golden brown on the bottom. Triangles that were not frozen will take a little less time.

December 27, 2016 Butternut Squash and Spinach Lasagna


In this unique lasagna, perfect for the fall and winter months, a ricotta enriched butternut squash purée takes the place of a marinara sauce. A cheesy spinach filling complements the creamy squash for this satisfying and healthy vegetarian main dish.

You will need a medium size butternut squash, weighing two and a half to three pounds. Cut the stem end off the butternut squash then cut the squash in half where the bulb end meets the neck. Cut both pieces in half lengthwise. scoop the seeds and fiber out of the bulb end, save seeds for later use. I  rinse the seeds off and dry them between layers of paper towels. Toss with a little bit of olive oil and sprinkle with salt. Bake in a 375°F oven until they pop and become toasty brown. They are great for topping salads and for snacking.

Cover a large baking tray with parchment paper. Brush the squash pieces lightly with olive oil and place the four sections of squash cut side down on the baking sheet. Bake in a 375° oven for about 50 to 55 minutes, until the squash pierces easily with the tip of the knife. Let cool for 10 minutes, the skin should come off easily. Place the squash pieces in the bowl of a food processor fitted with the metal blade. If necessary, add a little additional liquid, purée until smooth, you will have about 2½ cups. Add 1 cup of ricotta cheese and purée again, season to taste with salt and pepper and a little freshly grated nutmeg.

Place the spinach in a large bowl. Lightly rinse the spinach and toss in the bowl. The moisture will help wilt the spinach quickly. I used a 1 pound container of organic triple washed spinach.  Finely chop two garlic cloves.  Heat a large sauté pan over high heat and add the olive oil and swirl it around. Saute the garlic for a few minutes then add the spinach by the handfuls, adding more each time as it wilts down.  After squeezing out any additional liquid, the end result will be one generous cup of spinach.

You can make this version with regular lasagna noodles or if you are following a gluten-free diet, I would recommend  brown rice pasta noodles from Tinkyada, easily found in large grocery stores. They are actually good and have a nutty brown rice flavor. Follow package instructions with regular noodles, I would suggest cooking brown rice noodles for about 10 minutes, no longer. Drain them in a colander, rinse with cold water and dry on parchment lined baking sheets. I haven’t tried this recipe with no bake noodles, my suggestion would be just be certain that the ingredients in your lasagna are moist enough to cook the noodles properly. There are 14 noodles in the package of brown rice noodles, I cook them all in case of breakage. You can always make a lasagna roll up with any leftover purée and cheese.

In a medium bowl mix the well-drained garlic spinach with one and a quarter cups of ricotta cheese and a cup of mozzarella cheese or a cheese blend that you prefer. Season to taste with salt and freshly ground pepper.

To assemble the lasagna, spray the bottom of your baking tray with nonstick spray.I used a disposable pan with dimensions of 11 x 8 x 2 . Spread one-third of the butternut squash mixture over the bottom of the tray. Top with three lasagna noodles. Dollop one half of the spinach cheese mixture over the noodles. Continue to layer and finish with the remaining butternut squash, sprinkle with a generous amount of cheese, and a sprinkle of dried basil and oregano. Cover with aluminum foil and bake for a half hour. After the half hour take off the foil reattach any cheese that has attached to the foil and bake uncovered for another 10 to 15 minutes.

Since lasagna is a time-consuming dish you could do this in stages, make the butternut squash puree one day, the spinach filling the next and assemble and cook on the third day. You could substitute frozen spinach rather than cooking down your own. Possible additions to the dish include sautéed onions, sage leaves, even toasted walnuts. Serve with a crisp salad of arugula, fennel and apples. As it is with all lasagna, it’s even better the next day.

One of our very own butternut squash.
After baking, the skin pops off easily.
Skin off, ready to puree.
A large container of spinach cooks down to about a cup.
First layer of butternut squash ricotta puree .
Just a sprinkling of mozzarella cheese on top.
Lasagna noodles next, these are the brown rice noodles.
Next is the spinach and ricotta filling.
Repeat layers and finish with squash puree, a generous sprinkling of cheese, dried basil and oregano.
Out of the oven..


Delicious!!

Butternut Squash and Spinach Lasagna

Serves 6-8

Ingredients for butternut squash filling

  • 1-3 lb butternut squash
  • Olive oil
  • 1¼ c regular or low-fat ricotta cheese
  • ½ t salt
  • ¼ t freshly ground nutmeg

Ingredients for spinach layer

  • 1 lb fresh spinach
  • 1 t olive oil
  • 2 t minced garlic
  • 1 c regular or low-fat ricotta cheese
  • 1¼ c mozzarella cheese
  • Kosher salt and freshly ground pepper to taste

To assemble the lasagna

  • 1 lb lasagna noodles (regular or gluten-free)
  • Shredded mozzarella cheese
  • Shredded Parmesan cheese
  • Dried basil and oregano

Directions for making the squash puree

  1. Preheat oven to 375°F.
  2. Line a large baking sheet with parchment paper and spray lightly with nonstick spray.
  3. With a sharp knife cut the squash in half where the neck meets the bulbous end. Cut both of these pieces in half lengthwise. Scoop out the seeds and reserve for toasting if desired.
  4. Brush the cut sides lightly with olive oil and place the four squash pieces on a baking sheet cut side down. Bake in preheated oven 25 minutes, rotate and bake another 25 minutes. The squash should be easily pierced with the tip of a knife.
  5. Cool the squash for about ten minutes, until it can be handled. Scoop out the flesh and place in the bowl of a food processor fitted with the metal blade. Puree squash until smooth.  Add the ricotta cheese, nutmeg and salt and puree again. Taste and adjust seasonings. Add a little more ricotta if necessary, the puree should have the consistency of a thick marinara sauce. Set puree aside for the assembly. Leave oven on at 375° if you will be finishing the lasagna.

Directions for the spinach filling

  1. Place the fresh spinach in a large colander that is set inside a large bowl. Sprinkle the spinach lightly with water and toss spinach lightly.
  2. Heat olive oil in a 12″ saute pan. Add garlic and saute until light golden brown. Add the spinach by the handful, adding more as it wilts down. After draining the spinach of excess liquid, you will have a generous cup.
  3. In a medium bowl combine spinach and garlic along with ricotta, mozzarella, salt and freshly ground pepper. Taste and adjust seasonings.

Directions for assembling the lasagna

  1. Bring a large pot of lightly salted water to a boil over high heat. Add  lasagna noodles and cook according to package directions. Stir noodles occasionally to prevent them from sticking. Drain well and rinse with cool water.
  2. To assemble the lasagna, spray the bottom of the baking dish with nonstick spray. I used a disposable tray with dimensions of 8″ x 11″ x 2″.
  3. Spread one-third of the butternut squash puree over the bottom of the pan. Sprinkle lightly with mozzarella cheese. Top with three lasagna noodles. Dollop one half of the spinach cheese mixture over the noodles, sprinkle lightly with mozzarella cheese. Top this layer with the second layer of noodles.
  4. Spread your second layer of butternut squash over the noodles. Sprinkle with mozzarella cheese, then top with the third layer of lasagna noodles.
  5. Top this with the remaining spinach cheese mixture and sprinkle with mozzarella cheese.
  6. Top with the remaining butternut squash puree and spread evenly over the noodles. Sprinkle this layer generously with shredded mozzarella and Parmesan cheese. Sprinkle lightly with dried basil and oregano.
  7. Cover the baking dish tightly with foil and bake for 30 minutes. After 30 minutes remove the foil, reattach any cheese clinging to the foil and continue to bake uncover for another 10 to 15 minutes. You can turn the broiler on for a few minutes if you want to brown the cheese.

February 21, 2015 Chinese New Year Retrospective

_SueCNY

I shouldn’t be home, I should be landing in sunny Florida about now but a snowstorm changed our plans. Since Chinese New Year was this past week, I thought I would share some pictures from our celebrations of previous years.

I make spicy gingerbread cookies with the appropriate cutter for each year.  The dragon (2012) is said to be vital, confident and gifted.
I make spicy gingerbread cookies with the appropriate cutter for each year. The dragon (2012) is said to be vital, confident and gifted.
DSC_0006b
A Chinese soup dumpling. Making and sharing dumplings is a New Year’s tradition that fosters family togetherness and cooperation of spirit. Since dumplings are shaped like gold ingots, eating these “golden nuggets” confers prosperity for the New Year.
DSC_8397a
Potstickers and dipping sauce.

DSC_0976b

Yu Sheng, the New Year’s salad that probably originated in Singapore. It is served on the seventh day of the celebration and brings diners prosperity and good fortune.
DSC_0930b
Combining the East with the West, adzuki bean ice cream.


Noodles symbolize longevity. Spicy Sichuan Noodles feature the unique flavor of Sichuan peppercorns, banned in the United States until a few years ago.
DSC_0965b
Ingredients ready for the Chinese Hot Pot, everyone gets in on the cooking with this one.


Lion's Head meatballs in a clay pot cooker.
Lion’s Head meatballs in a clay pot cooker.
DSC_0346a
Wontons and pork buns.


Menu for the Year of the Pig (Boar)
Menu for the Year of the Pig (Boar).

_dinnertablecny

December 12, 2014 Creamy Kale Gratin

DSC_0072aWhen it comes to Thanksgiving I’m “all about the sides”. Now don’t get me wrong, we had three turkeys for Thanksgiving, roasted, grilled and smoked, all cooked to perfection by my hubby. No fried turkey this year, we tried it one Thanksgiving and the combination of a deep fryer and a windy day on a wooden deck made for an interesting and potentially dangerous afternoon.

I love fall vegetables, a variety of interesting winter squashes, beautiful brassicas and hearty root vegetables all appear at our table. In previous years I would make myself crazy with last minute preparations for a half dozen complicated side dishes before we sat down to Thanksgiving dinner. Now I like to roast a combination of root vegetables tossed with olive oil, salt and freshly ground pepper and supplement them with some other interesting sides.

If I am at home in the early afternoon I will occasionally turn on “The Chew”, a television program that has been described as “The View” for foodies. The panel includes among others, star chef, restauranteur and cookbook author, Mario Batali, and it was Mario’s recipe this day that caught my attention, Creamy Kale Gratin.
We are not newcomers on the ever expanding kale bandwagon. Joe has been growing it in the fall for quite a few years, before it achieved it’s current celebrity status. This year’s crop was abundant. He grew both the Red Russian variety with it’s reddish purple stems and curly leaves and the Lacinato or dinosaur kale with crinkly long dark green leaves. What most people don’t know is that after the first frost, kale becomes sweeter and could easily convert the most die hard kale hater.

Today’s episode was titled potluck party, focusing on dishes you could bring to a Thanksgiving dinner and I’m sure this dish would be a hit at any potluck meal, Thanksgiving or otherwise. Mario compared this dish to steakhouse creamed spinach, only made with kale. Mario had the assistance of actress Katherine Heigl, best known for her Emmy winning role on Grey’s Anatomy.  Her job, along with promoting her new television series, was to chop some of the kale while Mario made the Bechamel  sauce. I saw that chef Michael Symon was at the ready, most likely in case the task was too much for her to handle. I noticed she did a fine job, Michael said with a bit of surprise that she did a good job and Mario commented on her “mad skills”. She explained that she played a cook in one of her movies (Life As We Know It; I checked)  and they taught her to properly chop. She refered to it as a hidden talent, one of those things you learn as an actor.

The kale leaves are roughly chopped to the stem. Twenty cups may seem like a large quantity but like all greens, they cook down quickly. Rather than putting the stems in the trash, Mario puts the stems in half full pickle jars and snacks on them the next day. The kale is cooked in a large sautepan until wilted, it will cook fully when it is combined with the cheese sauce and croutons. A layer of croutons is placed on the bottom of a large buttered gratin dish. The next layer is the kale combined with the very cheesy sauce seasoned with freshly ground nutmeg. The remaining croutons are layered on top.

Either variety of  kale is suitable for this recipe. From my observation of the video it looks like they used a curly variety, I used the darker Lacinato with long crinkly leaves. I prepped my dish the day before, stopping before sprinkling the croutons with olive oil, salt and pepper. I brought the dish to room temperature the next day, finished the final steps and baked the gratin. The last dilemma the Chew tackled was how do you eat the bread bit? Fork and knife is fine but if you want to pick it up like a crostini, that’s just fine too.   We all enjoyed the gratin, a delicious way to enjoy one of the final offerings of the fall garden.

DSC_0029_edited-1
Lacinato kale in the fall garden.

Creamy Kale Gratin

Serves 10

Ingredients

  • 20 cups Russian or Lacinato kale, stems removed and roughly chopped
  • 1 loaf sourdough bread, cut into 1/2 inch slices
  • 6 T butter, and additional butter for the baking dish
  • 1/2c shallots, sliced
  • 1t red pepper flakes
  • 1/4c all purpose flour
  • 1 1/2c milk
  • 1 1/2c heavy cream
  • 8oz grated gruyere cheese
  • 8oz grated sharp white cheddar cheese
  • 1/2c crème fraiche
  • 1/2c Parmigiano Reggiano, freshly grated
  • 1/2t freshly grated nutmeg

Directions

  1. Preheat oven to 400°F
  2. Preheat a large sauté pan over medium high heat. Add 2 tablespoons butter and a drizzle of olive oil. When the butter has melted, add the shallots, salt, pepper and red pepper flakes. Sauté until translucent, about 4 minutes. Add the kale and season with salt and pepper. Sauté until wilted about 4 minutes. Set aside.
  3. Meanwhile, in a separate heavy bottomed pot (think Le Creuset) , melt 4 tablespoons butter. Add flour and stir to combine. Cook the flour mixture for 2 minutes, stirring continuously. Slowly pour in the milk and cream and whisk to combine. Continue to cook,, stirring continuously with a wooden spoon, until the béchamel sauce coats the back of a wooden spoon (about 5 minutes). Remove from the heat. Add in the cheeses and whisk until smooth. Season with freshly grated nutmeg, salt and pepper. Stir in the reserved kale mixture.
  4. Butter a large gratin baking dish. Lay an even layer of the read slices in the bottom of the gratin dish. Pour the creamy kale over the bread. Top the casserole with the remaining bread slices, placing them tightly together. Season the bread with salt and pepper and drizzle with olive oil. Place in the oven to bake for 30 minutes, until the topping is golden brown. Remove from the oven and allow to cool for 5 to 10 minutes before serving.
DSC_0035a
A rough chop is all you need for this dish.
DSC_0037a
A layer of bread slices are placed at the bottom of the dish.
DSC_0039_edited-1
Next, a layer of creamy, cheesy kale.
DSC_0062a
Then another layer of sourdough bread rounds.
DSC_0070a
Brush sourdough lightly with olive oil, sprinkle with salt and freshly ground pepper and bake. Delicious!


December 7, 2014 Roasted Butternut Squash Soup with Asian Pear and Ginger

DSC_0042a

Squash soup is a constant on our Thanksgiving table. As a novice cook it was the tried and true Silver Palate version of butternut squash soup with apples and curry that I turned to. This delicious soup with a little bit of sweet and a little bit of spice was always met with rave reviews from friends and family. In recent years I have tried to change it up a little. My basic formula is to combine a winter squash whether it’s Hubbard, butternut, kabocha, with a fall fruit like apples or pears and spiced with flavors that remind me of fall, cinnamon, nutmeg, allspice or ginger.

This year’s recipe was developed with inspiration from a visit to the farmers market, butternut squash soup with fresh ginger and Asian pears. When choosing a butternut squash look for one that is evenly beige in color and heavy for it’s size. There should be about an inch of intact stem and the skin should be matte, not shiny in appearance. If the stem is removed, it is easier for bacteria to enter the squash. A shiny butternut squash was picked too young, or worse, waxed. I look for a butternut with a thicker “neck” and a smaller ball. I cut the squash in two pieces, where the neck meets the ball. I find that it’s easier to peel in two separate units. I prefer a vegetable peeler for this task but a thin bladed sharp knife will work as well. I don’t always have the time, but when I do I also toast the seeds for a snack or a garnish.

Butternut squash is a common find at the farmers market in the fall  but freshly harvested ginger, that was a new discovery for me. The most visible difference in the freshly harvested ginger was that the skin was soft, not woody and the flesh was much juicier. A little investigation and I discovered it’s not that difficult to grow your own ginger, in our case indoors, since we lack the year round tropical climate. We can try this in the spring when the ginger at the supermarket is at it’s freshest and easiest to root. I’m sure I can convince Joe to try this, maybe growing our own will be the alternative to the shriveled up piece I always seem to have in the fridge.

Asian pears are native to China, Taiwan, Korea and Japan and we even have a few trees in our orchard. The fruit is pome shaped like an apple and unlike it’s European counterparts must fully ripen on the tree. Also, Asian pears are consumed when the flesh is firm and crisp with a somewhat gritty texture, not buttery soft like an Anjou or Bosc.

This is an easy soup to put together, toss the cubed vegetables with olive oil, salt and pepper and roast until they are soft and browned in places.  The vegetables are pureed in the food processor with just enough chicken stock to make a thick soup. Cook the puree mixture over medium heat to blend the flavors together. If this soup is made in advance, it will thicken as it sits, just add enough chicken broth to thin it out.

DSC_0046a

Roasted Butternut Squash Soup

Serves eight

Ingredients

  • 1 large butternut squash 4-5 lbs., peeled and cut into 1-inch dice
  • 1 Asian pear, peeled, cored and sliced
  • 1 medium onion in 1-inch dice
  • 2 carrots, peeled in 1-inch dice
  • 1 large stalk celery in 1-inch dice
  • 1 inch piece of fresh ginger, peeled if necessary, cut into 6-8 pieces
  • 3T olive oil
  • 3-4 cups low sodium chicken broth
  • Kosher salt and pepper

Directions

  1. Preheat oven to 400°F. In a large bowl combine the butternut squash cubes and olive oil. Mix together, coating the cubes well. Sprinkle with kosher salt and freshly ground pepper.  Spread  the squash pieces evenly on a rimmed baking sheet. Be sure not to crowd.
  2. In the same bowl, toss the pear, carrots and celery to coat with the olive oil that remained in the bowl. Sprinkle with kosher salt and freshly ground pepper.  Place on a second baking sheet and place both sheets in the oven. Roast for 35-40 minutes, rotating trays top and bottom halfway through the cooking time. Vegetables should be soft and browned.
  3. In batches, add the roasted cubes to the food processor with enough chicken stock to blend the mixture. Add blended vegetables to a large soup pot and cook over medium heat. Bring to a boil, then reduce heat to low and simmer, covered for twenty minutes.
  4. Serve soup warm garnished with pear slices.
DSC_0020a
Fresh ginger, the skin is much softer and the ginger is juicier.

DSC_0024aDSC_0021aDSC_0028aDSC_0044a


February 9, 2014 Green Tea Creme Brulee

DSC_4464a

We ushered in the year of the horse with our usual Chinese New Year dinner. This year’s celebration was considerably smaller than previous years in the number of guests but not in the number of courses. For the conclusion of our meal, I like to take a non traditional approach with dessert, incorporating Chinese flavors into dishes familiar to Western palates.

In my readings I have learned that the Chinese do not usually have desserts at the end of a typical meal, opting for fresh fruit if anything at all. Sweets are often enough enjoyed at tea time, often sweetened and candied fruits made into sweet soups and cakes. Exotic Chinese desserts for special occasions like birds nest soup double boiled in coconut milk or glutinous rice and wheat soup would be a bit esoteric and even too sweet for Western palates. So I like to keep it simple, spicy ginger cookies in the shape of the celebrated animal of the year, ice cream and sorbets featuring everything from red beans to tangerines.

This year I decided on a rich and satisfying green tea crème brûlée.  Crème brûlée, translated “burnt cream” is a rich custard topped with a layer of caramelized sugar. A custard is a combination of eggs or egg yolks and milk or cream baked gently until it sets. Sweet custards, crème brûlée or crème caramel, custard based ice creams and pots de creme contain sugar. Custards can be savory as well, like quiches, that combine cream or milk and eggs with cheese.

Crème brûlée can be baked in small individual dishes or in one low sided round or oval dish. A large surface area is desirable to maximize the caramelized sugar crunch that contrasts so well with the creamy custard underneath. The basic custard can be a blank canvas to showcase other flavors. Typically the custard is flavored with a vanilla bean but to give it an Eastern flair I infused it with green tea as well. I chose a gunpowder green that imparts a slightly smoky flavor. Infusing tea bags in warmed cream for about a half hour gave me the flavor I was looking for.

Crème brûlée is baked in a bain marie or water bath. The custards are placed in a larger pan that is filled halfway up the sides of the dish or dishes with very hot tap water. This protects the crème brûlée  from the direct heat of the oven. A tea towel in the bottom of the pan gives more stability and individual ramekins are less likely to dance around. Since oven heat can be notoriously inconsistent from one area to the next, the bain marie helps distribute the heat more evenly so that each custard cooks at the same rate.

Clear a generous spot on your countertop right next to the oven with potholders at the ready. It can be quite a feat removing the baking pan half filled with water and the custards. When the crème brûlée is done it should be removed immediately from the bain marie, a good pair of tongs make this easy, place on a wire rack and cooled for about a half hour at room temperature and refrigerated, preferably overnight.  Covered with plastic wrap they can sit in your refrigerator for several days, a bonus to the busy cook.

When you are ready to serve the dessert, prepare the sugar glaze.  I prefer turbinado or Demerara sugar to sprinkle on the crème brûlée. They are both minimally refined sugars and their large crystals are easier to spread and give it an extra crunch. Sprinkle a light layer of sugar evenly over the top. We started originally with the smaller propane torch sold in kitchen stores but have found the larger propane torch does the job in a lot less time. Place the finished desserts back in the refrigerator to chill for about a half hour.

The Chinese believe that dietary balance is achieved through moderation. One should leave the table satisfied, not satiated. Green tea creme brulee is a dessert that does this quite nicely.

DSC_4450a
I find it easiest to pour the hot tap water from a very narrow sprout, like a watering can, done slowly the water won’t slosh onto the crème brûlée.

Green Tea Crème Brûlée

Serves eight

Ingredients

  • 4 c heavy cream, chilled
  • 2/3 c granulated sugar
  • pinch table salt
  • 10 tea bags- I used Numi Gunpowder Green
  • 12 large egg yolks
  • 1t  vanilla bean paste or vanilla extract
  • 8 – 12 teaspoons turbinado sugar or Demerara sugar
Directions
  1. Adjust oven rack to lower-middle position and heat oven to 300° F.
  2. Combine 2 cups cream, sugar, and salt in medium saucepan; add tea bags and bring mixture to boil over medium heat, stirring occasionally to ensure that sugar dissolves. Take pan off heat and let steep 30 minutes to infuse flavors.
  3. While the tea bags are steeping, place kitchen towel in bottom of large baking dish or roasting pan and arrange eight 4- to 5-ounce ramekins (or shallow fluted dishes) on towel.
  4. After cream has steeped, remove tea bags and squeeze bags with tongs or press into mesh strainer to extract all liquid. Stir tea liquid and remaining 2 cups cream into steeped cream to cool down mixture. Whisk yolks and vanilla extract in large bowl until broken up and combined. Whisk about 1 cup cream mixture into yolks until loosened and combined; repeat with another 1 cup cream. Add remaining cream and whisk until evenly colored and thoroughly combined. Strain through fine-mesh strainer into 2-quart measuring cup,  discard solids in strainer. Pour or ladle mixture into ramekins, dividing it evenly among them.
  5. Carefully place baking dish with ramekins on oven rack; pour very hot tap water into dish, taking care not to splash water into ramekins, until water reaches halfway up the height of ramekins. Bake until centers of custards are just barely set and are no longer sloshy and digital instant-read thermometer inserted in centers registers 170°F to 175°F degrees, 30 to 35 minutes (25 to 30 minutes for shallow fluted dishes). Begin checking temperature about 5 minutes before recommended time.
  6. Transfer ramekins to wire rack; cool to room temperature, about 2 hours. Set ramekins on rimmed baking sheet, cover tightly with plastic wrap, and refrigerate until cold, at least 4 hours or up to 4 days.
  7. Uncover ramekins; if condensation has collected on custards, place paper towel on surface to soak up moisture. Sprinkle each with about 1 teaspoon turbinado sugar (1 1/2 teaspoons for shallow fluted dishes); tilt and tap ramekin for even coverage. Ignite torch and caramelize sugar. Refrigerate ramekins, uncovered, to re-chill, 30 to 45 minutes (but no longer); serve.
DSC_1033a
Sometimes I do “minis”. Just a taste when I am serving more than one dessert at this large meal.

November 30, 2013 Cauliflower with Brown Butter, Pears, Sage and Hazelnuts

DSC_4022a

Move over kale there’s a new vegetable star in town, cauliflower. Well, at least according to Bon Appetit’s trend alert in the November issue. Top chefs are now embracing the once lowly vegetable, in everything from a “ragu” atop pizza to roasted and topped with tahini dressing.

We’ve been enjoying cauliflower in new ways in the last couple of years. I like to separate it into florets, put it in a big bowl and toss it with olive oil, kosher salt and Aleppo pepper. Then I roast it on a baking sheet in a hot oven, tossing it occasionally, so that all the pieces get sweet and toasty brown. If the cauliflower gets done before the main course, I keep it warm under a heat lamp and inevitably most of it gets eaten before we sit down to dinner. I refer to it as veggie popcorn. The other method of cooking is to cook the florets in boiling water until soft. Then I put the cauliflower in the food processor with a little half and half, salt, pepper and my seasoning of choice and puree it. This time cauliflower morphs into “mashed potatoes” for a low carb treat.

Last Saturday was the last local outdoor farmers market, some of the vendors will return once a month now for an indoor market. While loading up on vegetables for Thanksgiving, I noticed one farm was offering along side the usual white variety, purple and a yellow-orange cauliflower. The young woman behind the counter referred to the orange one as “cheddar”. The shopper next to me turned up her nose and made a “yuk” face. She said the color reminded her of packaged macaroni and cheese.

If she knew the story behind this variety I think she would have changed her mind. Cauliflower belongs to the genus Brassica which includes broccoli, cabbage and yes, kale. The “cheddar” or orange variety of cauliflower was first discovered in Canada in the 1970’s. Scientists at Cornell University crossed it with the standard white cauliflower to create a vitamin rich variety, popular with farmers markets and specialty grocers. What my fellow shopper didn’t know was that the hue is from extra beta carotene. It is naturally stored in edible portion of the plant, the head of the flower buds, also known as the curd. That means it has 25% more vitamin A than it’s white cousin and second only to carrots.

Purple cauliflower had it’s origins in either Italy or South Africa. Anthocyanin pigments, also found in red cabbage and red wine gives purple cauliflower it’s color and the added benefits of promoting eye and heart health. Milder in flavor than the white variety, most varieties will retain most of their purple color when cooked.

This recipe is courtesy of Andrew Carmellini, a Food and Wine best new chef 2000. He is best known for his modern Italian dishes and his recipe combines some of fall’s favorite ingredients. The nutty flavor of roasted cauliflower is enhanced with brown butter and hazelnuts and combined with sweet pears and fragrant sage. It is a great addition to any holiday table and easy enough for a weeknight. It gains points with busy holiday cooks in two ways; one, it is a stovetop dish, freeing up valuable oven space and two, it’s delicious both warm and at room temperature, perfect for a buffet and leaving time for last minute prep for other dishes. Purple and yellow cauliflower will certainly brighten up any holiday table, but it would be just as delicious with the standard white variety.

Cauliflower with Brown Butter, Pears, Sage and Hazelnuts

From Fine Cooking magazine

Serves 8-10

Ingredients

  • 6T unsalted butter
  • 1 medium head white cauliflower  or 2 small heads yellow and purple cauliflower cut into small florets about 3/4 inch wide
  • 1/2 cup toasted, skinned, chopped hazelnuts (see tip right)
  • 8 fresh sage leaves, thinly sliced crosswise
  • Kosher salt and freshly ground black pepper
  • 2 large ripe pears, cored and thinly sliced
  • 2 Tbs. chopped fresh flat-leaf parsley
Tip:

To toast hazelnuts, spread them in a single layer on a baking sheet. Bake in a 350°F oven for 14 to 18 minutes, stirring every 5 minutes, until lightly browned. While still warm, rub them against each other in a clean dishtowel to remove the papery skins.

Directions
  1. In a 12-inch skillet over medium-high heat, melt the butter until light brown and bubbly. Add the cauliflower, hazelnuts, and sage.
  2. Cook for 2 minutes, stirring occasionally. Season with 1 tsp. salt and 1/2 tsp. pepper and continue cooking, stirring occasionally, until the cauliflower is browned and crisp-tender, 7-8 minutes more.
  3. Remove the pan from the heat. Add the pear slices and parsley. Gently toss to combine and warm the pears. Season to taste with more salt. Serve hot or at room temperature.
Make Ahead Tips

You can prep all the ingredients several hours ahead except for the pears, which will brown if cut too far in advance.

DSC_4007a
Beautiful purple and “cheddar” cauliflower.
DSC_3412a
The sage is still doing well in our fall garden.
DSC_4019a
A side that would be a delicious and colorful addition to any holiday table.