October 17, 2016 Slow Cooker Chicken Thighs with Leeks and Mushrooms

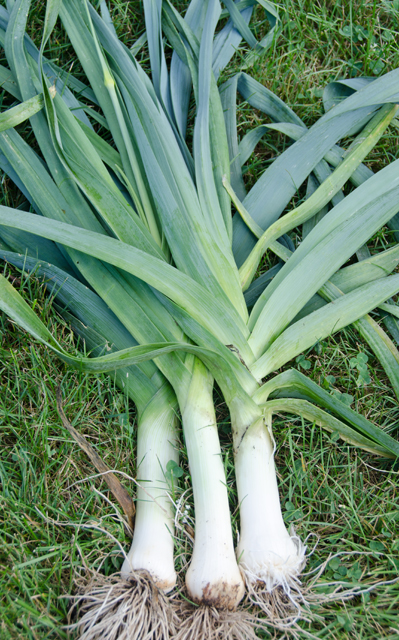
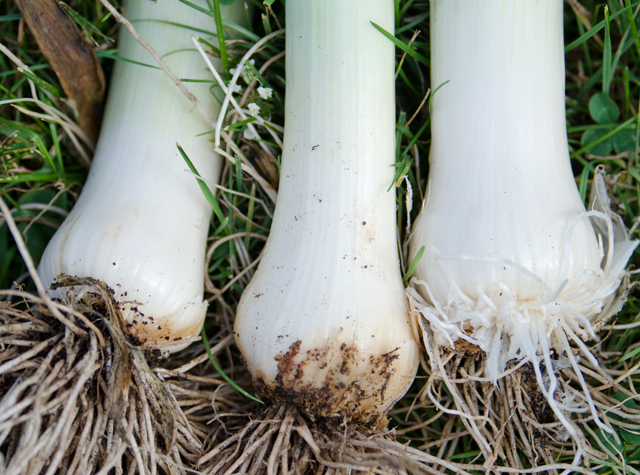
Several rows in our garden are always reserved for leeks. It all started years ago with the classic book, Crockett’s Victory Garden, a month by month guide to all things (well most) gardening. It was in those pages Joe set his eyes on them for the first time, leeks that looked like they could almost double as baseball bats, actually they were Crockett’s exact words. It inspired him to give leeks a try. In addition, as cooking enthusiasts in the eighties, finding leeks in the supermarket was often futile, or if they had them, very expensive and not that good.. So growing leeks was a logical conclusion.

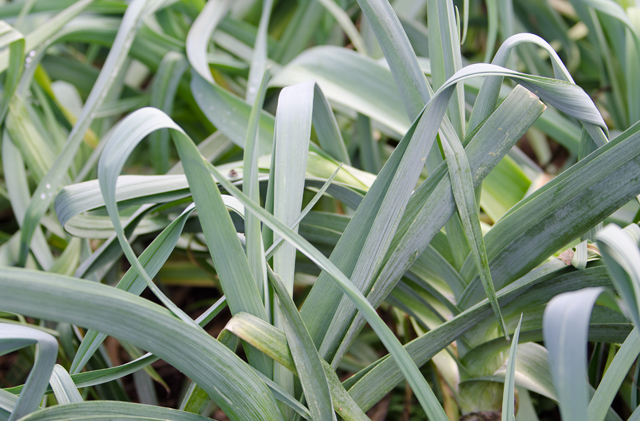
Leeks are a cool season vegetable that require 120 to 170 days to harvest. Joe starts them indoors and transplants them in the garden anytime after the last frost. At that point the leeks look like skinny blades of grass. He plants them closer together than they should be, so that we have thinnings that can be used like scallions before the mature leeks are ready. We will harvest most of them in the fall but some will winter over until early spring.

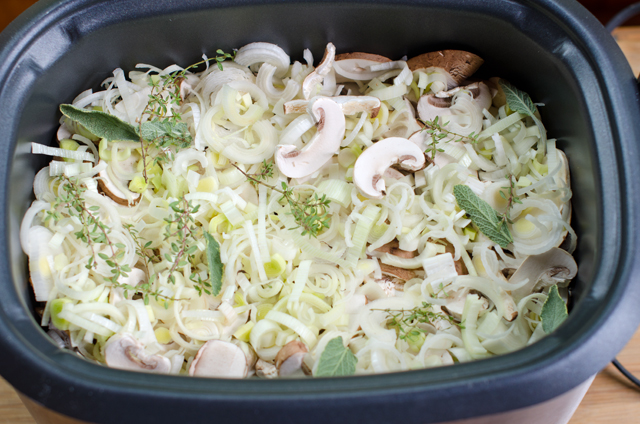
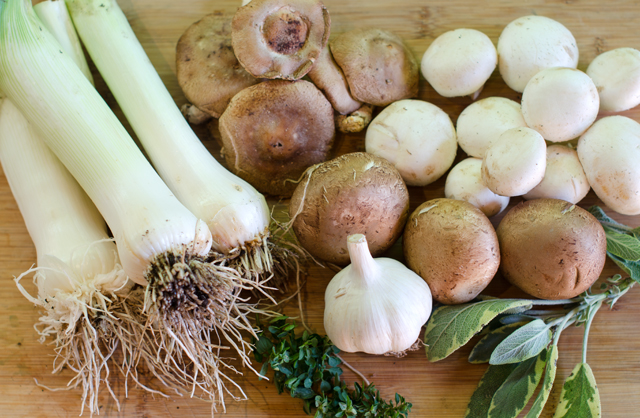
Even though we haven’t had much of a stretch of fall weather and it may get up to 80°F today, I am craving the stews and braises that are a natural in the cooler weather. In this dish versatile chicken thighs are slow cooked on top of a bed of leeks and mushrooms. The mild onion flavor of leeks pairs nicely with the savory earthy flavor of the mushrooms.

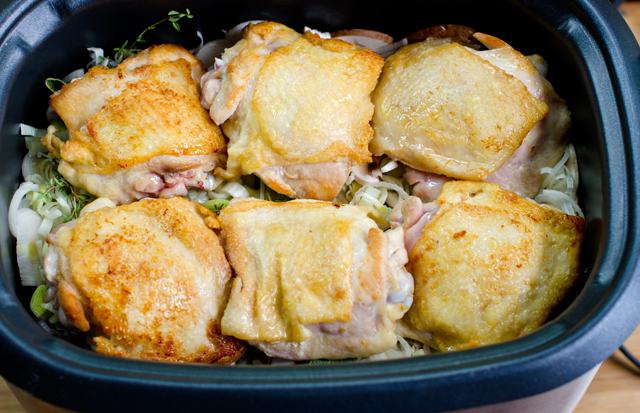
If you choose to brown the chicken first as I did, pat the chicken pieces dry with paper towels. This helps keep the chicken from steaming instead of searing. You can also substitute chicken leg quarters for the thighs, that’s the thigh and the leg in one portion. Boneless skinless thighs are another option, add those directly to the slow cooker without browning. I chose bone in and skin on for better flavor. I like the skin on and browned, it protects the chicken during the cooking process and makes for a more attractive presentation. You don’t even have to eat the skin if you don’t want to.

It has been stated countless times but is worth repeating. Do not rinse chicken, it just splashes bacteria all over you, your countertops and any other food that is nearby. The heat from cooking is enough to kill any bacteria that are present on the chicken.

The recipe is very simple, you can serve the chicken with the leeks and mushrooms as-is or after removing the chicken, thicken up the sauce a bit. I ladled out some of the broth and stirred in a little flour to thicken it up and added a little sour cream and half and half to make a more substantial sauce. Serve with white basmati rice to absorb all the juices.

A row of leeks.
Not quite baseball bat size but still fine.

Slow Cooker Chicken Thighs with Leeks and Mushrooms

Serves 4-6

Ingredients

  • 3 lbs skin on and bone in chicken thighs
  • 1 T olive oil
  • 4 c assorted sliced mushrooms, white, shiitake, cremini
  • 3 c leeks white and pale green parts only, halved lengthwise, washed well to remove any dirt and sliced thinly
  • 1½ T fresh thyme leaves
  • 1½  T minced fresh sage leaves
  • Kosher salt and fresh ground pepper to taste
  • 2/3 c dry white wine (Chardonnay or Burgundy)
  • 2/3 c chicken broth (homemade or low sodium canned)
  • 1 T all-purpose flour
  • 1/3 c sour cream
  • 1-2 T half and half or heavy cream

Directions

  1. Heat a large non stick skillet over medium high heat.
  2. Pat dry the chicken thighs well with paper towels. Season with kosher salt.
  3. Add olive oil to skillet and add chicken thighs skin side down. Do not crowd, this  should be done in batches. Cook skin side down for three minutes then flip to other side and cook for an additional two minutes. Remove to a plate.
  4. Place the mushrooms, leeks, thyme and sage to the slow cooker. Season with a  little salt and some fresh ground pepper.
  5. Nestle the chicken pieces on top of the vegetables and pour the wine and broth  around them.
  6. Cover and cook on low for six hours. If desired, at the end of cooking remove the chicken pieces to a platter and keep warm. Ladle out about a cup of the broth into a glass measuring cup. Whisk in a tablespoon of flour to thicken and stir in sour cream and half and half or heavy cream. Stir this back into the slow cooker taste and add more salt and pepper as desired. Serve chicken and sauce over rice.
Leeks, mushrooms and herbs into the slow cooker first.
Place chicken on top.
Serve with rice to sop up the juices.

October 9, 2017 Arugula Salad with Pears, Beets, Blue Cheese and Walnuts

The vegetable garden doesn’t end at our house just because summer is over. Joe’s new crop of salad greens, planted in the greenhouse are ready to be harvested. I typically use a variety of greens in our salad but this time I let arugula take the starring role. Nutty and just slightly peppery arugula is combined with a finely sliced Chiogga beet also courtesy of the fall garden, creamy blue cheese, walnuts and some of the Asian pear slices that I made in the last post.

Fall is a good time to get in another crop of some root crops like radishes, turnips and beets. Along with the salad greens, the root vegetables prefer cooler temperatures. This year has been tough, summer like heat and humidity has stayed around well into October (I’m not complaining) and it has affected the plantings, especially the radishes. I’ve started to harvest some beets while they are still small and sweet for salads.

I especially like the Chiogga (kee-OH-gee-uh) beet for its deep pink and white spirals, it adds a pretty pop of color to an otherwise dull salad. I like them raw, shaved as thinly as possible on a mandolin. The sweet earthy flavor contrasts nicely with the arugula. Blue cheese and toasted walnuts are always a natural with arugula. I chose a buttermilk blue that is described as tangy yet mellow. It has a creamy taste and texture and doesn’t overwhelm the other elements of the salad.

The dehydrated Asian pear slices I made in the last post are great for snacking, and for a bite of fruity sweetness in salads like this one. Dehydrating intensified the already sweet pears.The pears resemble mushroom slices so they would be quite a surprise for an unaware diner biting into one. If you didn’t make the dehydrated pear slices, substitute a thinly slice fresh Asian pear.

I dressed this salad with a simple vinaigrette using a Tubby Olive Gravenstein apple white balsamic vinegar with a good extra virgin olive oil with just a touch of walnut oil. You could substitute a white balsamic vinegar with just a touch of honey.

Arugula Salad with Pears, Beets, Blue Cheese and Walnuts

Serves two

Ingredients

  • 2 T white balsamic vinegar or Gravenstine apple balsamic
  • 1 t Dijon mustard
  • ½ t honey (not needed if using apple balsamic)
  • 4 T extra virgin olive oil
  • 1 T walnut oil
  • kosher salt and freshly ground pepper
  • 4 large handfuls arugula (about 12 ounces)
  • ¼ c dried Asian pear pieces or 1  ripe pear, cored and sliced thin
  • 1 small beet, scrubbed and trimmed, sliced very thinly on a mandolin
  • 3 ounces soft blue cheese, crumbled

Directions

  1. In a small bowl, whisk together the balsamic vinegar, mustard, and honey. Gradually pour in the olive and walnut oils, and continue whisking  until the dressing has emulsified. Season with salt and pepper.
  2. Divide the arugula between plates. Top with the beet slices, walnuts, sliced pear and blue cheese, then drizzle with vinaigrette.


October 6, 2017 Dehydrated Asian Pears

In addition to the gardens, we have a small orchard that includes a pear, apple, persimmon, Asian pear and most recently, fig trees. We are usually so busy harvesting from the garden that the orchard is all but forgotten and most of the fruit that falls from the trees goes to the deer. The persimmons are Cody’s special treat, I can honestly say I don’t understand that at all. The Asian pear is the most productive of the trees and this year I wanted to find a different way to use the fruit. Several years ago I canned about a half dozen jars of Asian pear chutney, this time I was looking for something new. My inspiration came at the local farmers market. A local orchard was selling dehydrated apples. Why not Asian pears?

The task at hand now was to pick the pears. Some were accessible by hand, for the pears that were higher up the tree I needed a different approach. I turned to the aptly named fruit picker, a wire basket attached to a long pole. There are bent prongs at the top of the basket that allow you to pull the fruit off the branch. The bottom of the basket is cushioned with foam to prevent the fruit from bruising.

The Ball canning book states that drying food is easy but may require some trial and error. Various factors, the quality of the produce, drying methods, pretreatment techniques and climate can all affect the finished product. So it is necessary to follow the general guidelines and then make the necessary adjustments.

Successful home dehydration depends on three factors: heat, enough to force out moisture but not enough to cook the food, dry air, to absorb the released moisture and air circulation, to move the moisture away.

I started by washing and drying just a few pears, since this was just a test batch. I don’t own a dehydrator, but the lowest heat on our convection oven is 140°F, only 5 degrees higher than the recommended temperature of 135°F. I lined two large half-sheet pans (18″ x 13″) with parchment and began slicing the pears. Since the Asian pears from our tree were relatively small, I wanted to maintain the largest piece possible. I cut the pears in half lengthwise through the core and removed any blemishes. I discovered a melon baller was the right tool to scoop out the core.

To peel or not to peel? That was the next question and for the first batch I decided not to. Another step that is optional is dipping. Dipping the fruit in diluted lemon juice prevents oxidation, which turns the fruit brown. I sliced the fruit with a sharp knife, about an quarter of an inch slice and spaced them evenly on the baking trays. I baked them in the convection oven for 5 hours, rotating the trays half way through the drying process. Then I turned the oven off and left the trays in the oven overnight. I was very pleased with the results. Most of  the pieces look like slices of a mushroom cap and I will continue not peeling them. Asian pears are super sweet and drying them intensifies the sweetness. The consistency should be pliable, not crisp with no moisture pockets. Your time may vary, so check frequently. Great for snacking, store the pear chips in quart bags in the fridge and freezer.

Using the fruit picker.
Success!


Dehydrated Asian Pears

 Makes 70-80 pieces

Ingredients

  • 4-5 Asian pears
  • Dipping solution of 1 c lemon juice to 1 qt water to prevent oxidation  (if desired)

Directions

  1. Place oven racks in upper and lower positions. Preheat convection oven to the lowest setting possible, 140°F in my case.
  2. Line two half sheet pans with parchment paper.
  3. Wash and dry pears, peel if desired. Remove any blemishes. Cut the pears in half lengthwise. Remove the stem and core. I found a melon baller worked well. Slice pears with a mandolin or sharp knife into ¼ inch pieces.
  4. Soak fruit in dipping solution if desired, no longer than 10 minutes. Drain before drying well with paper towels.
  5. Evenly space out the slices on the baking trays and dehydrate for about 5-6 hours. Leave in turned off oven overnight. The slices should be pliable and chewy with no moisture pockets.
  6. Store in plastic quart bags in the refrigerator or freezer.