May 27, 2016 Sauteed Chicken Breasts with Tomato Basil Sauce with Capers

DSC_6957aBoneless skinless chicken breasts, the little black dress of dinnertime. A sautéed chicken breast with a simple sauce can make a delicious quick dinner or has the potential to turn into a dried out disaster. So it is very important to learn how to cook them properly. I’d like to share the method I’ve learned via Cooks Illustrated magazine that will provide excellent results every time.

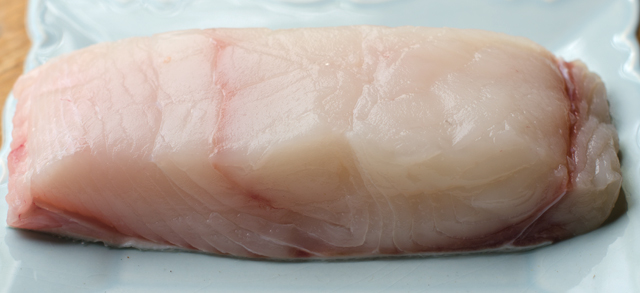
The most important ingredient and foundation of the dish is the chicken. I use a chicken that is antibiotic and hormone free and not injected with water or other additives. My favorite brand is Bell and Evans, a little more expensive but definitely makes for a much better finished product.

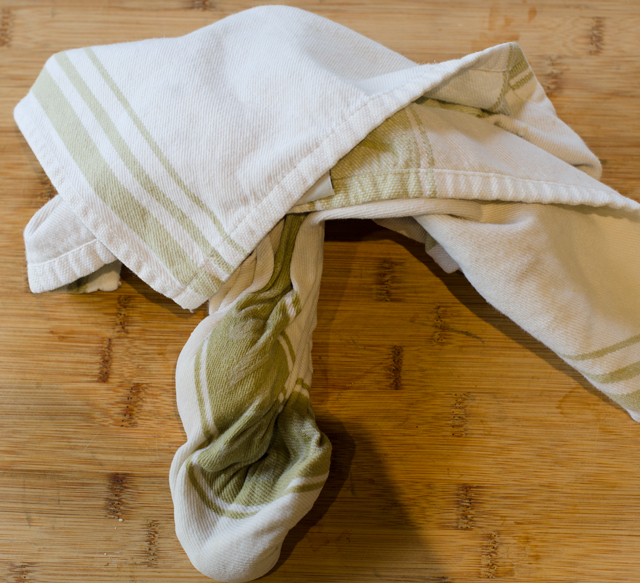
The original recipe, written in 1993 called for the chicken to be rinsed under cool water. Research now shows that washing poultry can increase the risk of cross contaminating something else in your kitchen, the sink, countertops, utensils etc. So it’s best just to pat the chicken dry. The flour will adhere better and any bacteria on the surface of the chicken will be killed when you cook it.

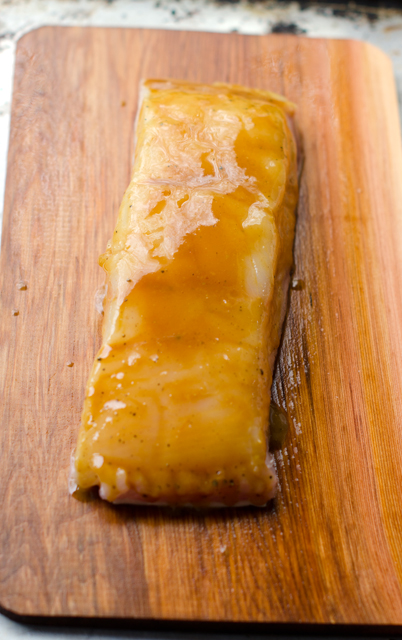
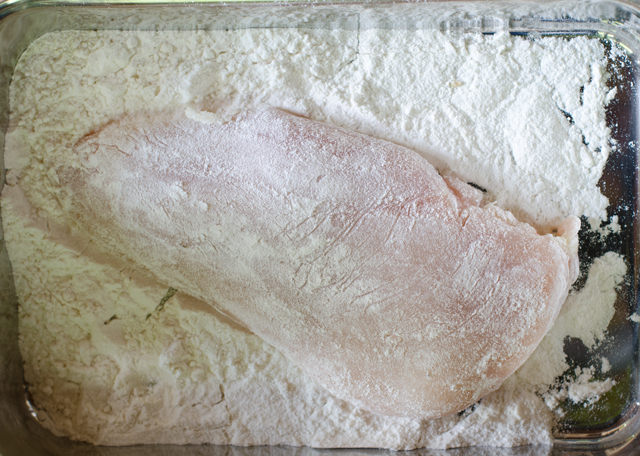
Remove any fat, gristle or small pieces of bone from the chicken breasts. If the tenderloin is still attached, remove for another use. The chicken breast needs to be dried thoroughly on all surfaces with paper towels. Salt and pepper then lightly flour both sides of the breast before cooking. The flour produces a moisture barrier so the fat spits less and the chicken develops a browned crispy crust.

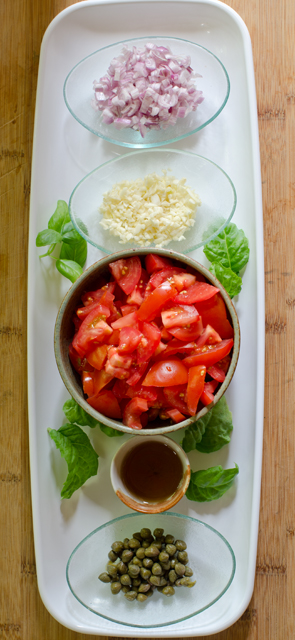
When you are ready to make the recipe, the whole procedure takes less than 10 minutes. It’s important to have all the ingredients, including the components for the sauce ready to go. The French have a phrase for it, mise en place. I have all the ingredients measured out in small bowls in the fridge until it’s time to cook. The only thing I would wait to do until the last minute would be to dry the chicken breasts. There is only a quarter cup of flour to coat four pieces of chicken and have found I use less than half of it. If you are gluten-free you could substitute a combination of rice flour and cornstarch or a nut flour. Working with one cutlet at a time dip it into the flour and evenly coat.

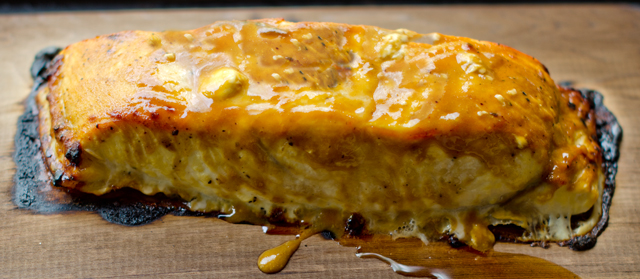
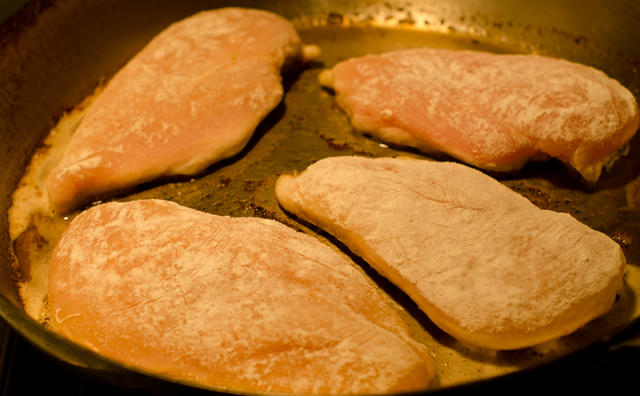
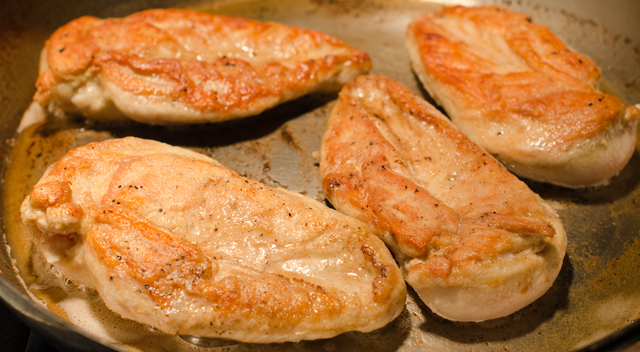
Turn your oven to the lowest setting or turn on the heat lamp above your stove. I have a commercial style cook top and have found I need to use a little more oil and butter to cook the chicken breasts than the original recipe. Place the chicken breasts tenderloin side down in the sizzling oil and butter combination. Set your timer for four minutes. Flip them over and cook on the second side for about three minutes, move to a plate and keep warm.

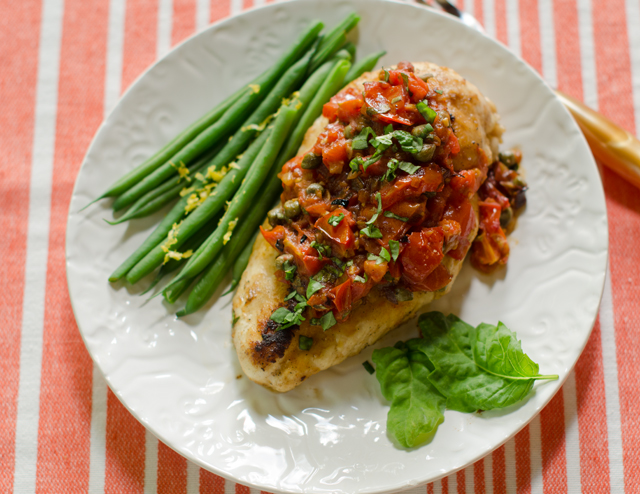
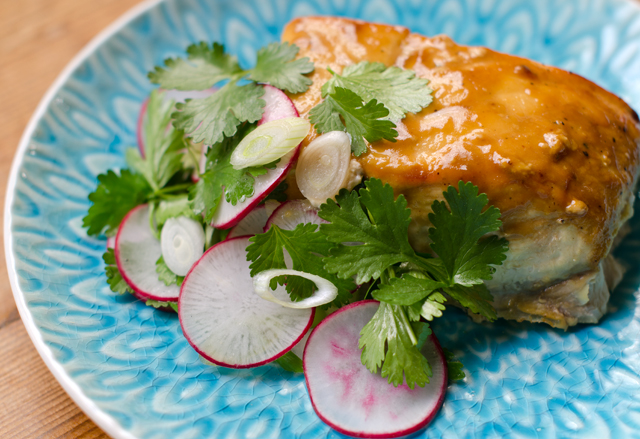
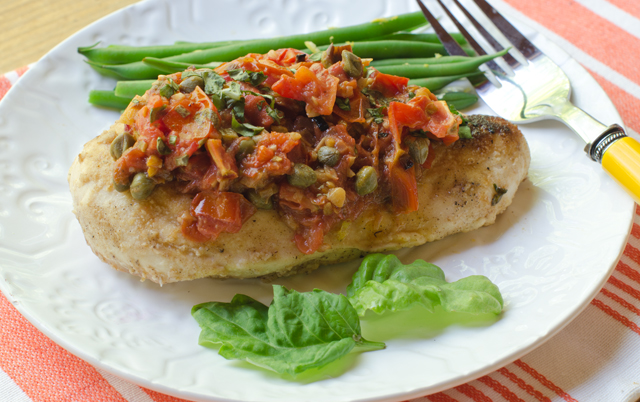
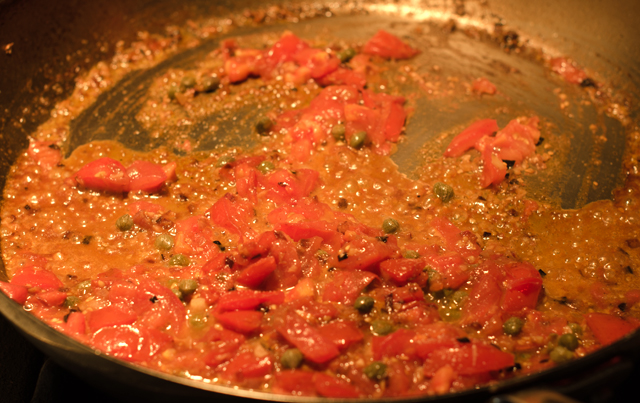
Add shallots to the pan, and sauté until soft, next add the garlic and tomatoes and cook until the tomatoes are juicy. When I am not using tomatoes from our garden I like Campari tomatoes. They have an excellent texture (read not mealy) with the right balance of acid and sweetness. They are considered a cocktail tomato, a little bigger than a cherry tomato but smaller and rounder than a plum.  The original recipe called for seeding the tomatoes, I chose to skip that time consuming step. Add the wine or vermouth and the capers and boil until the sauce is thickened. Stir in chopped basil and salt and pepper to taste. The result? A chicken breast that is nicely browned on the outside with a tender and juicy interior with a delicious and easy sauce to accompany it.

DSC_6936a
Sauce ingredients ready.
Lightly flour each cutlet.
Add chicken to pan.
Add chicken to pan.
DSC_6943a
Flip chicken after four minutes.
Sauce ingredients come together quickly


Sauteed Chicken Breasts with Tomato Basil Sauce with Capers

Serves Four

Ingredients

  • 4 boneless skinless chicken breasts (about 1½ to 1¾ lbs)
  • Kosher salt and freshly ground pepper
  • ¼ c all purpose flour
  • 2 T unsalted butter
  • 2 T vegetable oil

Directions for cooking the chicken

  1. Dry the chicken thoroughly with paper towels and sprinkle 1 teaspoon salt and ½ teaspoon pepper on both sides of the cutlet.
  2. Measure flour into a pie plate or similar container. Working with one cutlet at a time, press both sides into flour.
  3. Heat butter and oil in a 9 inch or larger heavy skillet until the butter has foamed and has just started to take on color.  Place the cutlets in the skillet, tenderloin side down.
  4. Keep the skillet on medium high heat, reducing heat if it starts to smoke. Saute the cutlets for 4 minutes on the first side,  using tongs, turn to the other side.  Cook for 3 minutes then remove cutlets to a plate and keep warm in an oven on the lowest setting or under a heat lamp.

Ingredients for the tomato basil sauce

  • 1/3 c shallots
  • 2 T chopped garlic
  • 2 c chopped tomatoes
  • ¼ c dry white wine or vermouth
  • 2 T capers, drained
  • 2 T shredded basil leaves

Directions for the tomato basil sauce

  1. Without discarding the fat, place skillet over medium heat. Add shallots and saute until softened, about 1 minute. Stir in garlic and then the tomatoes. Increase heat and cook, stirring frequently until the tomatoes have broken down and become juicy, about 2 minutes.
  2. Add wine, capers and any chicken juices from the plate. Boil sauce until it thickens, stir in herbs and season to taste with salt and pepper. Serve immediately.

DSC_6950a

DSC_6957a


May 14, 2016 Wood Planked Halibut with Herb Salad

DSC_6927aThe creamy pinkish-white halibut I purchased at my favorite seafood store, Heller’s was the perfect match for a recipe on Friday’s episode of The Chew. The episode, tied in for Mother’s Day was titled, “Kitchen wisdom, things you learn from your mother about cooking”. This recipe shared by Michael Symon was not so much about things you learn from your mother, but treating your mom with a dinner she would be more likely to order out at a restaurant but probably wouldn’t want to cook at home

The recipe for wood planked halibut with herb salad sounded interesting and a bit different than how I usually prepare halibut. Michael chose halibut because it is in season and reasonably priced. Cod would be a good substitute.  We have been using the cedar plank method of cooking for several years now but have only used it with salmon. I thought the delicate flavor of the halibut would be complemented nicely by the cedar.

The first step in the recipe is to soak the wood planks, he was using three for three pounds of fish. Wood planks are becoming more readily available in grocery stores, many times they are set up with the barbecue displays. Most of the ones I have seen are cedar. Chef Symon said he was using an oak plank. Be sure to soak your plank for several hours, even overnight. You will need something to weight it down so it doesn’t float to the top, I use a heavy marble mortar. While you are soaking one plank for dinner that night, soak a second along with it, wrap it in foil and store it in the freezer for the next time. Michael said to soak it in salt water to season the underside of the fish,

The first discrepancy in the recipe came with the proportions for the glaze. The online recipe called for quarter cup of soy sauce a tablespoon of hot Chinese mustard and 2 tablespoons of honey. On the television program, chef Symon said to use equal parts of each. That’s straight from the chef’s mouth so that’s how I followed the recipe.

The online recipe called for 3 pounds of fish, by my estimates, that could serve 6 to 8 people depending on portion size. The online recipe stated it served four, those are pretty healthy portion sizes. I had a little less than a pound to serve two people, so I cut back on the glaze accordingly. Chinese mustard is the condiment in little packets you might have stuffed in the butter keeper in your refrigerator. Unfortunately I didn’t have any and couldn’t find any in my local supermarket. So I added about a quarter teaspoon of wasabi to some Dijon mustard. You can adjust the heat to your own liking, or skip the wasabi completely. Whisk the ingredients together, put half in a bowl to glaze the fish before cooking and the other half in a bowl as a finishing glaze.

Season the halibut with salt-and-pepper on both sides, if you don’t like to see black specks on your white fish, use white pepper instead. Place the fish, skin side down on the plank. Michael puts his fish on a foil lined baking tray for easy clean up. Joe, who is the resident fish cooker, put our well soaked board directly on the oven rack. . Brush the first half of the glaze on the fish. This is where discrepancy number three comes in. The online written recipe states to cook the fish for 30 minutes. On the TV program, Chef Symon says it cooks in about 8 minutes or 5 under the broiler! Where is the truth here? We rely on the Canadian fisheries method of cooking fish which estimates the total cooking time of any fish to be 10 minutes (maybe even a little less ) for every inch of thickness, measuring at the thickest part at 450°F.

While the fish is cooking, you will have time to make the herb salad. It’s a combination of thinly sliced radishes, cilantro, and scallions tossed with lime juice and extra-virgin olive oil. We just finished our first crop of radishes and there’s lots of cilantro coming up “wild” in the circle garden. Don’t despair cilantro haters, Michael said any soft herb (as opposed to one that is woody,  like rosemary) could be used. That would include parsley, dill and chervil. The amount of herb salad for the online recipe feeding four people/three pounds of fish was a reasonable portion for two so scale up the recipe if you are cooking a larger quantity of fish.

I would definitely make this recipe again, the wood smoke lightly permeates the fish and the kitchen, an added bonus. The glaze is easy, using mostly pantry ingredients. Michael Symon also pointed out that this method for cooking fish could be easily done on the grill, an added bonus for the summer months to come.

DSC_6900a
Soak the wood plank for several hours or overnight. Just be sure it doesn’t float to the top!
DSC_6911a
Fresh halibut from Alaska.
DSC_6902a
Ingredients for the marinade.


DSC_6914a
Half of the marinade is brushed on before it goes in the oven.
DSC_6908a
While the fish is cooking, make the herb salad. I sliced the radishes as thinly as possible on a mandolin.
DSC_6898a
Cilantro comes up in our garden on it’s own. If you don’t like cilantro, use parsley.
DSC_6915a
Brush the remaining glaze over the fish after cooking.

Wood Planked Halibut with Herb Salad

Serves 2

Ingredients

  • 2 T tamari or soy sauce
  • 2 T dijon style mustard
  • ¼t wasabi from a tube, more or less to taste
  • 2 T honey
  • 12-16 oz halibut
  • 1 c  thinly shaved radish
  • ½ c cilantro leaves
  • ½ c scallions, sliced thinly on the diagonal
  • 3 T olive oil
  • ½ lime juiced
  • 1 cedar plank submerged in cold water for 2 hours and up to overnight
  • Kosher salt and freshly ground black pepper

Directions

  1.  Preheat oven to 450°F Line a baking sheet with foil and place the plank on it.
  2.  In a medium sized bowl add the soy, mustard, wasabi and honey. Mix until smooth.  Divide the glaze evenly into two bowls.
  3. Season the halibut on both sides with salt and freshly ground pepper. Place on the plank. Brush the contents of the first bowl evenly over the fish. Measure the fish at it’s thickest point to calculate the amount of time it needs to cook. The Canadian fisheries method of cooking fish is ten minutes per inch, measuring at the thickest part of the fillet, start checking at eight minutes, halibut is a fish that “puffs up” when cooked so a little additional time may be needed. Don’t overcook,  fish still continues to cook after you take it off the heat. Remove fish from oven and brush with additional glaze.
  4. While the fish is cooking add radishes, scallions and cilantro to a medium bowl. Season with salt and pepper. Add olive oil and lime juice, toss to combine.
  5. Serve halibut with herb salad.

DSC_6925a

May 6, 2016 Cauliflower Pizza Crust

DSC_6789aConsider the amazing versatility of cauliflower. Tossed with olive oil, salt and freshly ground black pepper and roasted until it is golden brown, it’s addictive as popcorn. It’s a delicious gluten-free substitute for mashed potatoes and couscous and the secret ingredient in a healthier version of Alfredo sauce.

In this recipe, the vegetable master of disguise is the basis for a pizza crust. I began my research by reading through about 20 recipes for cauliflower pizza I found online. They were written by cookbook authors, celebrity chefs and food bloggers. No two recipes were exactly the same and some were quite vague in their instructions. I used these recipes to construct my own version of a crust that works every time.

Line a pizza pan or a baking sheet with parchment paper. I used a nonstick spray on the corners to make sure it stayed in place. Preheat your oven to 425°F.

Start with a head of cauliflower, chop it into four cups of smaller florets, you want uniform pieces that won’t overwhelm your food processor.
If you are using a hand grater leave the pieces larger and the stem attached so you don’t scrape your fingers. Save the stems for cauliflower mashed potatoes. Pulse the florets with the metal blade in the food processor until the cauliflower is the consistency of small grains of rice or couscous. Some writers referred to this as cauliflower “snow”. 4 cups of cauliflower florets yielded two and three-quarter cups of finely chopped cauliflower.

Cauliflower needs to be cooked to get rid of excess moisture. Some of the recipes I read called for sautéing the cauliflower on the stove top, others chose steaming and a few didn’t cook it at all. I am not a big fan of the microwave, but I feel it’s the easiest way to cook the cauliflower for this recipe and there is no need for additional water to be added. Place the cauliflower in a microwave safe container and cover with plastic. I cooked mine on the “fresh vegetable” setting for about six minutes. Let the cauliflower cool thoroughly before proceeding with the next step, if you don’t you could easily burn your fingers.

The next step is crucial to the success of this recipe. Dump the cauliflower into the center of a clean, cloth dish towel. Gather up the four corners and twist. Squeeze the bottom to extract as much liquid from the cauliflower as possible. When you think you’ve squeezed enough, squeeze one more time. Transfer the cauliflower pulp to a bowl, you should have about a scant cup. Add to this one lightly beaten large egg, a pinch of salt, three quarters of a cup of shredded mozzarella, half cup of shredded Parmesan cheese. Although not necessary you can add a half teaspoon each of dried oregano and basil. Mix first with a spatula to incorporate the ingredients, then mix with your hands for best results.

Form into a disk and place on the prepared baking sheet. Press out from the center evenly to make a 10 inch circle. Be sure that the crust is evenly pressed out, with no thin or thick spots. Some sources said to spray the surface of the parchment paper with nonstick spray but I didn’t and my results were fine. Place the baking sheet on the middle rack of your preheated oven. Bake until spotty brown, it took about 12 minutes in the convection oven, it may take you a little longer for a conventional oven.

Remove baking sheet from the oven and add your favorite toppings. I made a basic tomato sauce and mozzarella cheese pizza. I baked it in the oven for another 10 minutes, until the cheese was melted and bubbly. I was able to cut the pizza with a wheel and the slices held together nicely.  The possibilities for toppings are endless. In about a month or so I will be topping this crust with basil pesto and thinly sliced zucchini.

DSC_6762a
Start with a large head of cauliflower, you won’t need it all.
DSC_6792a
Separate into smaller florets.
DSC_6766a
Add to the food processor with metal blade attached.
DSC_6767a
Process finely until you get rice or couscous like granules.
DSC_6771a
Now it is ready for the microwave.
DSC_6799a
Place the cooked cauliflower in the middle of a cotton dishtowel.
DSC_6801a
Squeeze to extract all the excess liquid.
DSC_6773a
You will be left with cauliflower “pulp”.
DSC_6774a
Mix in beaten egg, cheeses, salt and dried herbs.
DSC_6776a
Form it into a ball.
DSC_6778a
Flatten into a 10 inch round.
DSC_6779a
Bake at 425 F for ten to fifteen minutes, until starting to brown in spots.
DSC_6782a
Top with sauce.
DSC_6783a
And mozzarella cheese.
DSC_6785a
Bake for 10 minutes, until the cheese is bubbly.
DSC_6787a
Delicious!

Makes one 10″ round

Ingredients

  • 4 cups of cauliflower florets
  • 1 large egg, lightly beaten
  • ¾ c shredded low fat mozzarella cheese
  • ½ freshly grated Parmesan cheese
  • ½ t dried oregano
  • ½ t dried basil

Directions

  1. Line a rimmed baking sheet or pizza pan with parchment paper and preheat oven to 425°F.
  2. Chop cauliflower into 4 cups of smaller florets. Transfer to a food processor and pulse until the cauliflower is the consistency of rice or couscous, my finished product measured 2 ¾ cups. Alternately grate larger pieces on a box grater until you have 2 ¾ cups of finely grated cauliflower.
  3. Place in a large bowl and microwave on high for 6 minutes. Remove from oven and let cool.
  4. Dump the cauliflower into the center of a cotton dish towel, flour sack types are best. Draw up the corners and twist tightly. Squeeze the cauliflower in the dish towel to extract as much liquid as possible.
  5. Transfer the cauliflower “pulp” to a bowl. Next, add the beaten egg, cheeses and herbs. Combine with a rubber spatula and for best results, finish the mixing with your hands.
  6. Form into a disk and place on the prepared baking sheet or pan. Press out from the center to make an even 10″ round.
  7. Place baking sheet on the lower middle rack of the preheated oven. Bake until spotty brown, mine took about 12 minutes, the crust may be ready anywhere from 10 to 15 minutes.
  8. Remove crust from the oven and top with your favorite pizza combinations. Bake until cheese is melted and bubbly, another 10 minutes.


May 1, 2016 Smoked Salmon and Spinach Frittata

DSC_6759aSpinach again, this time combined with eggs, cheese and smoked salmon to make a frittata. Quick to make, they are as good at breakfast as they are as an impromptu supper. Once again, I used the basic recipe of a frittata from Cooks Illustrated, for broccoli rabe and sun dried tomatoes. substituting the spinach and smoked salmon.

A large oven proof non stick skillet is a must for making this recipe, check first that it fits in your oven. Be sure to have a pot holder draped over the oven door so you are not tempted to touch the handle with your bare hands. I learned that lesson the hard way many years ago. Sauté the spinach just enough to wilt it down, then add garlic and Aleppo pepper, a favorite ingredient of mine. Small cubes of cheese are added to the eggs, for this recipe I like a Jarlsberg or a Havarti with dill.

The eggs are cooked for a short time on the stove top. Add the smoked salmon when the eggs are setting up on the bottom before they go in the oven. Once the frittata is spotty brown and puffed, remove it from the oven. Allow it to sit for 5 minutes, the residual heat will finish the cooking. Loosen the frittata from the pan with a spatula and move it to a platter or cutting board for serving.

DSC_6760a

Smoked Salmon and Spinach Frittata

Ingredients

  • 12 large eggs
  • 3 T half and half or heavy cream
  • Kosher salt and freshly ground black pepper
  • 2 t olive oil
  • 3-4 c spinach, large stems removed
  • 1 medium clove garlic minced
  • ¼ t Aleppo pepper or paprika
  • ¾ c cheese cut into small cubes, Jarlsberg or Havarti with dill
  • ½ c smoked salmon chopped into pieces

DSC_6742a

Directions

  1. With oven rack in the upper middle position, heat broiler. Whisk eggs, half and half, a dash of salt and pepper in a medium bowl until well combined. Set aside.
  2. In a non stick 12″ oven safe skillet heat oil until shimmering. Add the spinach and cook until wilted, 2-3 minutes. Add garlic and pepper flakes and cook until fragrant, 30 seconds or so.
  3. Stir cheese into the eggs; add egg mixture into the skillet and cook, using spatula to stir and scrape the bottom of the skillet. Large curds will form but the mixture will still seem somewhat wet, about 2 minutes. Shake skillet to distribute eggs evenly; cook without stirring for 30 seconds to set the bottom. Sprinkle smoked salmon pieces evenly over the surface of the frittata.
  4. Slide skillet under broiler and broil until the frittata has risen and the surface puffs and turns spotty brown, three to four minutes. Remove skillet from the oven and let stand 5 minutes to finish cooking.
  5. Using a spatula, loosen frittata from the skillet and slide onto a platter or cutting board. Cut into wedges and serve.

DSC_6744a

DSC_6748a

DSC_6756a