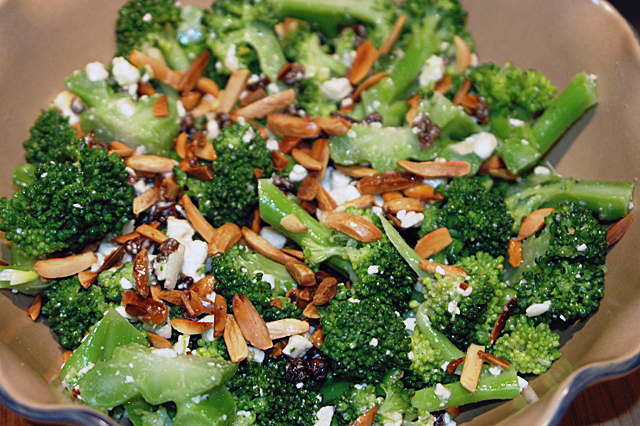
June 29, 2012 Broccoli Salad with Feta, Olive-Oil Fried Almonds and Currants


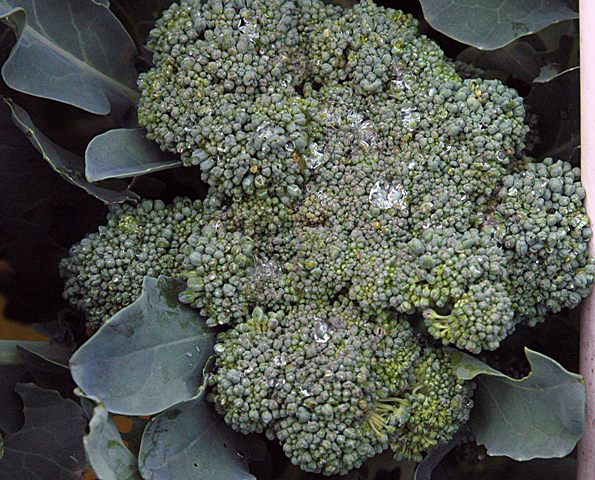
Broccoli is a much maligned vegetable. Former president George H.W. Bush is quoted as saying,”I do not like broccoli. And I haven’t liked it since I was a little kid and my mother made me eat it. And I’m President of the United States and I’m not going to eat any more broccoli.” Well Mr President. my theory is most people don’t really hate the vegetables they think they do, they just haven’t had them fresh or prepared properly, well except for lima beans. Rich in fiber, broccoli nutrients include calcium and vitamins C, K and A. Botanically it belongs to the cruciferous family which includes cabbage, kohlrabi and turnips. I love broccoli, especially when it is picked fresh from the garden and cooked within hours. After the main head is picked, side florets will continue to produce for weeks to come. It has a definite sweetness, that no supermarket fresh or frozen variety can compare to. In the off season I like to separate it into florets, toss with olive oil, kosher salt, Aleppo pepper and pinch of sugar and roast it at 450 until brown and crispy in spots. We are lucky if the roasted broccoli makes it to the table. The garden’s first broccoli heads are ready for harvest and I turned to Fine Cooking for a broccoli salad recipe. Lightly cooked broccoli is combined with sweet currants, salty feta and almonds dressed with a slightly spicy vinaigrette.. The verdict? Two of us consumed the salad that feeds four to six in one day and I made it again the next evening. A definite winner.

Broccoli Salad with Feta, Olive-Oil-Fried Almonds and Currants

from Fine Cooking Magazine #76

Serves four to six

Ingredients

  • 1 lb broccoli
  • 1-1/2 tablespoons dried currants
  • 1 medium clove garlic
  • Kosher salt
  • 2 Tbs red wine vinegar
  • Pinch cayenne pepper
  • 5 Tbs extra-virgin olive oil
  • 1/2 cup blanched, slivered almonds
  • 3 oz feta (preferably French), crumbled (about 3/4 cup)
  • 1/3 cup roughly chopped fresh cilantro (optional)

Directions

  1. Bring a large pot of generously salted water to a boil over high heat.
  2. Meanwhile, tear off any broccoli leaves and trim the bottoms of the stems. Cut the florets just above where they join the large stem, and then cut each floret lengthwise in half or in quarters through its stem (but not the buds). The top of each floret should be about the size of a quarter. Using a vegetable peeler or paring knife, peel the tough outer skin from the large stem, removing as little flesh as possible. Cut the stem into baton-shaped pieces about 1/4 inch wide and 2 inches long.
  3. Boil the florets and stem pieces until they’re tender (pierce with a paring knife or taste a piece) but still offer a bit of resistance, about 3 minutes. Drain the broccoli, spread it on a baking sheet in an even layer, and set aside to cool, it will continue to cook as it cools.
  4. Put the currants in a small bowl, add enough hot water to cover, and let sit until softened, about 10 min. Meanwhile, using a mortar and pestle or the flat side of a chef’s knife, mash the garlic to a paste with a pinch of salt. Transfer the garlic to a small bowl and add the vinegar and cayenne. Let sit for about 10 minutes.
  5. Warm 1 Tbs. of the oil in a small saute pan over medium heat. Add the slivered almonds and fry, stirring frequently, until golden brown, 2 to 3 min. Transfer to a plate lined with paper towels and season with salt.
  6. Drain the currants. Whisk the remaining 4 Tbs oil into the vinegar mixture. Just before serving combine the broccoli, currants, feta, and half of the almonds in a large bowl. Drizzle with the vinaigrette and toss gently to combine. Taste and season with a pinch more salt if necessary. Transfer to a serving platter and sprinkle with the remaining almonds and the cilantro, if using.

The changes I made to the recipe:

I didn’t need to peel the stem of my just-picked broccoli, it was tender enough. Also my broccoli was sufficiently cooked in two minutes. I did fry the almonds but I don’t see why they couldn’t be toasted if you wanted to avoid the extra oil. Marcona almonds would be a great substitute. I love French feta but didn’t have any on hand so I used a supermarket brand. I didn’t have cilantro so I substituted parsley. Basil might be nice as well.
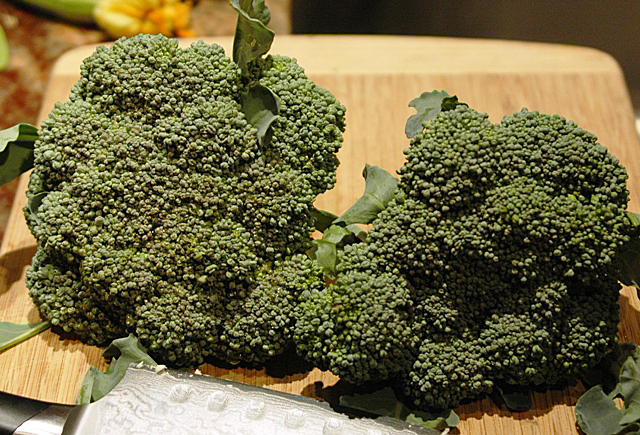
From the garden to the cutting board.
Ready to cook.
A delicious salad!

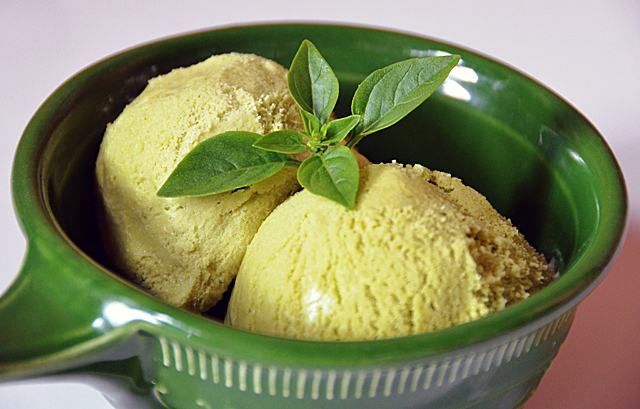
June 26, 2012 Basil Gelato


I knew the minute I saw the picture of bright green Basil gelato on Saveur’s magazine’s blog this week that I would be pulling out my behemoth Il Gelateria and making it for Sunday’s dessert. Every summer I make an assortment of ice creams and sorbet with the herbs we grow in the garden. Lavender and anise hyssop have become standards as well as fruit and herb combinations like peach and cinnamon basil. The basil in our garden is flourishing and it’s good to cut it back periodically to slow it down from going to seed.

Gelato means frozen in Italian, and yes it is different from ice cream. Gelato is made with a larger proportion of milk to cream. By definition, ice cream can have a minimum of 10% fat while gelato is 5-7% fat.  Real gelato is churned at a slower speed than ice cream so less air is incorporated in gelato. Ice cream can contain as much as 50% air, gelato only 25-30% air.

I have a gelato, not an ice cream maker, a Gaggia Il Gelatiera that has served me well over the last twenty years. I originally purchased the machine for a catering job. The couple whose wedding I was catering requested white chocolate and espresso ice cream to accompany their wedding cake and I was happy to oblige. I knew I wouldn’t get very far with the frozen canister type or even the old-fashioned hand crank that is chilled with rock salt and large quantities of ice.  I was going to be making ice cream for one hundred people at an outdoor reception on a warm June day. My research sent me to the nearest Williams-Sonoma store which at that time was in Princeton, New Jersey to purchase an Il Gelateria. The Il Gelatiera is a self-refrigerating ice cream maker, meaning the refrigeration mechanism is built-in. You just plug it in, switch on the refrigeration unit, wait a few minutes until it cools down, add your chilled base and switch on the paddle. A batch, about one quart was ready in a half hour. But I could continue to make batch after batch, without having to refreeze a canister or crank for hours on end. Expensive, yes, twenty years ago it was a little less than five hundred dollars, so definitely an investment. The Il Gelatiera is not available for sale in the U.S. at this time. Amazon’s U.K. site offers an updated model with free shipping, in the U.K. that is, at about the same price I paid for mine. Today’s gold standard is most likely the Cuisinart ICE-50BC. At about half the price and one-third the weight, (my machine weighs 28.4 lbs!) it’s what I would most likely choose if I were buying an ice cream maker today.

Now to jump on my soap box. If you are going to take the time to make homemade ice cream or gelato, or any dairy based item (cheese, yogurt, even whipped cream)  avoid ultra pasteurized dairy products. Ultra pasteurization is a process that gives dairy an extended shelf life but can adversely affect the taste and texture of the product.

Basil Gelato

Recipe from Saveur Magazine

Makes 1 quart

Ingredients

  • 2 c basil leaves
  • 2 c whole milk
  • 1 c heavy cream
  • ¾ c sugar
  • 1 T     lemon zest
  • ¼t  salt
  • 6 egg yolks

Directions

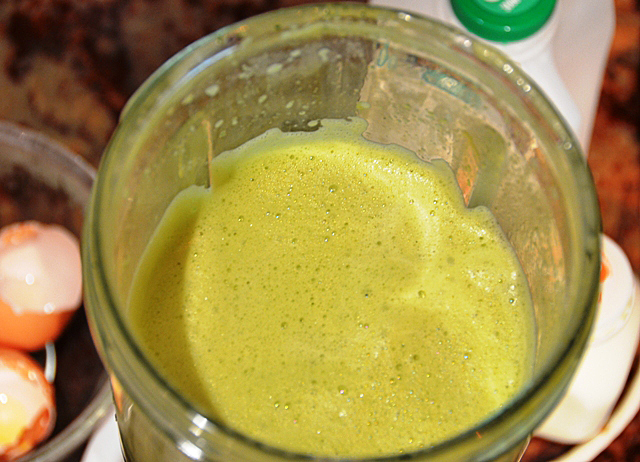
  1. Combine basil, milk, cream, sugar, lemon zest, salt, and yolks in a blender and puree until smooth. Because of the size of my blender bowl, I averted possible disaster and did not put all the milk in, I whisked it in afterward.
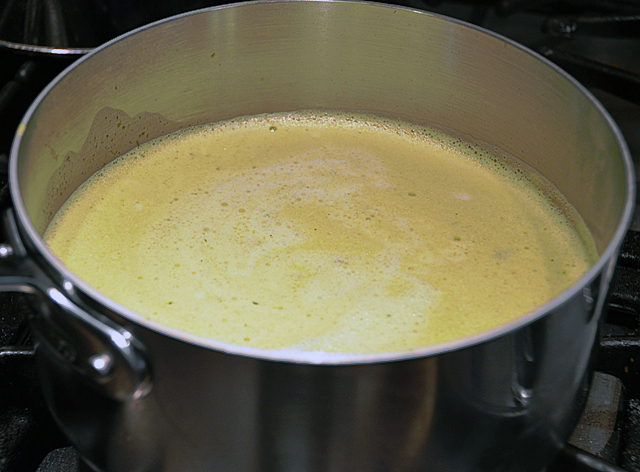
  2. Pour into a 2 quart saucepan and heat gently until sugar dissolves. Remove from heat and pour through a fine strainer, chill in the refrigerator.
  3. Pour chilled mixture into an ice cream maker and freeze according to manufacturer’s instructions.
  4. Serve garnished with fresh basil leaves.

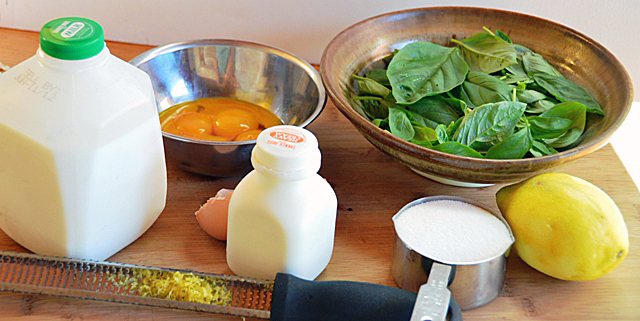
All the ingredients are ready to go.

All the ingredients are combined in a blender.

Bring the ingredients to a simmer. Strain and chill before freezing.

June 20, 2012 Roasted Broccoli and Farro Salad

Unique ingredients intrigue me. Give me a vegetable or grain I haven’t seen before and it’s bound to show up in my shopping basket. This was the case a few weeks ago at the Pennsylvania Dutch Farmers Market. Bags of grains lined the wall of one stand and a bag of farro caught my eye. All I knew at that point was that the name might be Italian, and sounded a lot more appealing than kamut or spelt. My research revealed that farro (pronounced FARH-oh) was a staple of ancient Egypt, a type of wheat brought to Europe by Julius Caesar. It was said to have fed the Roman Legion but soon fell out of favor because it is a low yielding crop. In recent years farro has experienced a resurgence.Grown mostly in Tuscany and Umbria, the small plump grains have a nutty flavor that is perfect in soups, stews and salads. Farro comes either whole grain, pearled or semi-pearled. Pearled means that the hull is removed from the grain and results in a shorter cooking time. The Aleppo pepper in the recipe is a new favorite ingredient of mine and definitely worth trying. Aleppo pepper is  from northern Syria and it is a crushed, slightly oily dried pepper. It has a complex flavor that doesn’t overpower  with a moderate heat level, some fruitiness and cumin undertones. I used a French feta cheese in this recipe. It is a sheep’s milk cheese and is much creamier and milder than the supermarket garden-variety. I have found it both at Wegmans and at the Middle Eastern stand at the local Pennsylvania Dutch farmer’s market.

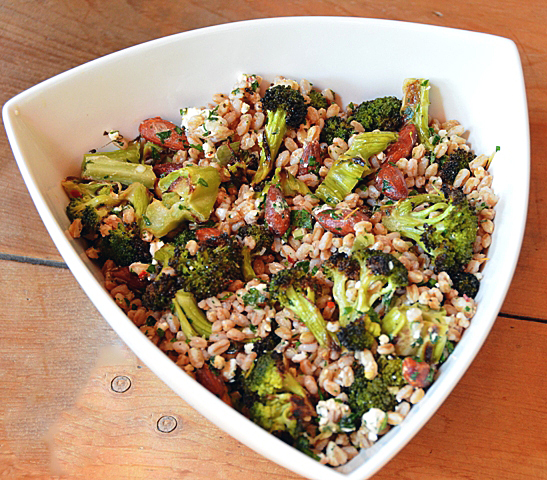
We have a bumper crop of broccoli this year, the plants look great and they are yielding beautiful heads and after they are picked, a good amount of side growth. . In this recipe the broccoli is roasted, and combined with farro, feta cheese and a simple vinaigrette. I added some chopped tamari almonds for some crunch. The contrasts of creamy, chewy and the caramelized broccoli made for a delicious salad.

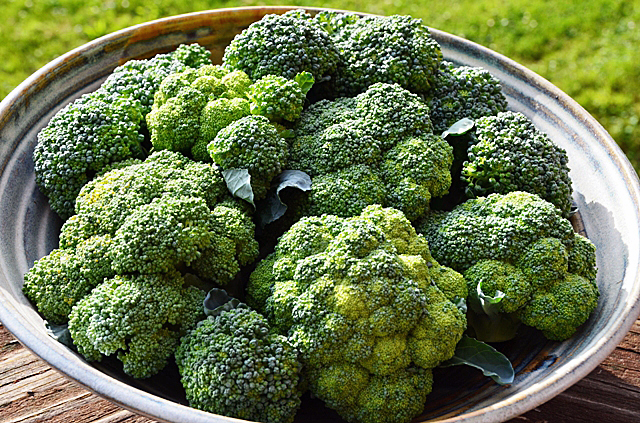
Today's broccoli harvest.

Roasted Broccoli and Farro Salad

adapted slightly from Fine Cooking Magazine #107

Ingredients

  • 3/4 c farro (either pearled or whole grain)
  • 1 lb broccoli, cut into bite-sized pieces including the stems
  • Kosher salt and freshly ground pepper
  • 1T Aleppo pepper
  • 3T extra virgin olive oil
  • 1/2 crumbled feta
  • 2 scallions, thinly sliced, white and light green part only
  • 2T coarsely chopped fresh flat-leaved parsley
  • 1-2T red wine vinegar
  • 1/3 c coarsely chopped tamari almonds

Directions

  1. Preheat oven to 425F.
  2. In a 4-quart saucepan, bring 2 quarts of  well salted water to a boil over high heat. Add the farro and cook until tender, 20 to 30 minutes for pearled and 45 to 60 minutes for whole grain. Drain well and transfer to a large bowl.
  3. Toss the broccoli in a large bowl with 2T olive oil, kosher salt,  a grind of pepper and the Aleppo pepper. Transfer to a baking sheet and roast under tender, checking pan several times to ensure even browning. I use a spatula to toss things around to be certain all sides are getting brown.
  4. Add the broccoli, feta, scallions, parsley to the farro, Sprinkle with a tablespoon or so of red wine vinegar and toss. Drizzle with remaining olive oil, sprinkle almonds on top and toss. Season to taste, adjusting seasonings as needed. Serve warm or at room temperature.


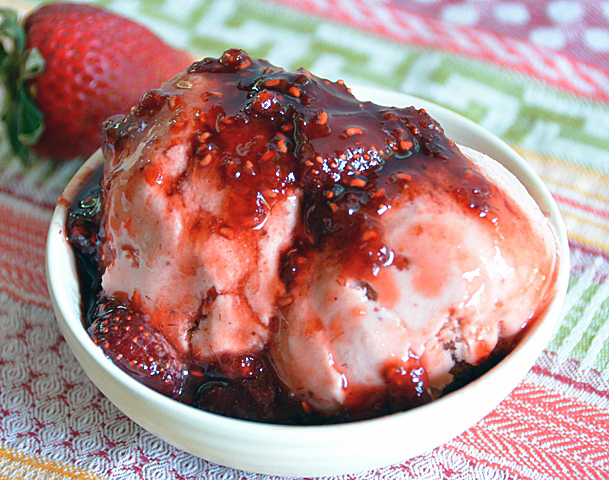
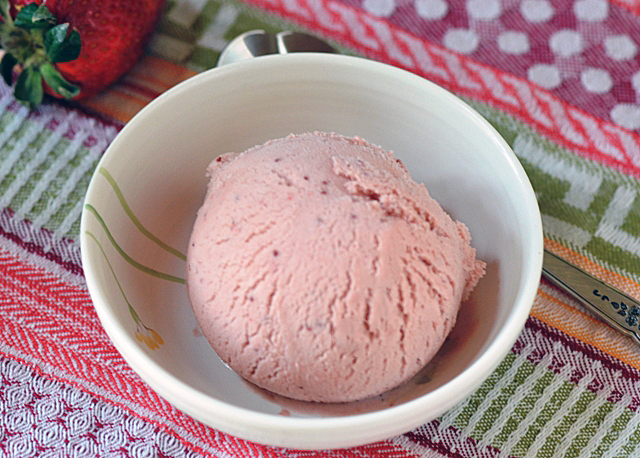
June 18, 2012 Roasted Balsamic Strawberry Ice Cream with Strawberry-Raspberry Sauce

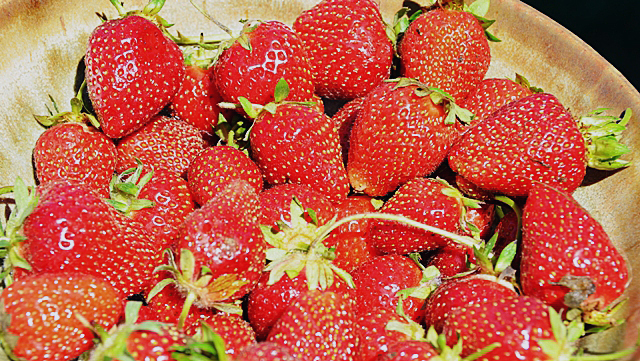
Strawberries and balsamic vinegar, a classic combination from Italy”s Emilia-Romagna region inspired this recipe. Rain delayed our local berry season by about two weeks so we are still able to purchase beautiful ripe strawberries at the farmer’s market .Roasting vegetables intensifies their flavor, so why not fruit/?  The further addition of balsamic vinegar enhances the color and flavor of the strawberries. The roasted berries could be used on their own as a topping for store-bought ice cream, yogurt or cheesecake. To insure success in custard making, It is very important to have your mis en place ready  for the ice cream recipe. Otherwise you could end up with sweetened scrambled eggs.  The accompanying sauce is very easy, no need to even strain out the seeds, unless you want to.

Roasted Strawberry Balsamic Ice Cream

Yields a generous quart

For the roasted strawberries:

Ingredients:

  • 3c strawberries
  • 1T balsamic vinegar
  • 1T turbinado sugar

Directions:

  1. Preheat oven to 375F
  2. Wash, stem, hull and halve strawberries.
  3. Place in a bowl and sprinkle a tablespoon or so of turbinado sugar and a tablespoon of balsamic vinegar over the berries. Toss lightly.
  4. Arrange on a parchment lined rimmed  baking sheet, cut side down.
  5. Bake until the fruit softens and the juices start to bubble, start looking at 20 minutes and judge accordingly. Remove from oven and let cool.
  6. Transfer berries to a blender or food processor. Puree until smooth and refrigerate until ready to use.

Ice Cream Base:

  • 2c heavy cream
  • 1c whole milk
  • 3/4c granulated sugar
  • Kosher salt
  • 5 egg yolks
  • 1t vanilla extract

Directions:

  1. Prepare an ice bath by filling a large bowl with several inches of ice water.  Place a smaller metal bowl (large enough to hold your ingredients) inside the large bowl. Pour one cup of heavy cream in the small bowl. Have a fine strainer nearby.
  2. Whisk the egg yolks to break them up.
  3. In a medium non-reactive saucepan, mix 1 cup of heavy cream with the milk, sugar and a pinch of salt. Warm over medium high heat until tiny bubbles begin to form around the edge of the pan.
  4. In a steady stream, pour one cup of the warm cream mixture into the egg yolks, whisk constantly to prevent the eggs from curdling.
  5. Pour the egg and cream mixture back into the saucepan and cook over low heat , stirring constantly with a rubber spatula, scraping the bottom. Cook until the custard is thickened, 4 to 8 minutes.  The custard will be thick enough to coat the back of a spoon and hold a line drawn through it with a finger. An instant read thermometer, which I prefer,  should read 175 to 180F at this point. Immediately remove from the stove and put the custard through a strainer into the bowl that has the cream in the ice bath.
  6. Cool the custard to room temperature and whisk in the berry mixture.
  7. Refrigerate custard until completely chilled, overnight or at least four hours. Then freeze custard in your ice cream maker according to manufacturer’s directions.
  8. Store ice cream in an air-tight container, freeze for at least four hours before serving.

Balsamic Strawberry-Raspberry Sauce:

Ingredients:

  • 1c strawberries
  • 1c raspberries
  • 1c sugar
  • 2T balsamic vinegar (or more to taste)

Directions:

  1. Cook berries, sugar and balsamic vinegar in a medium sauce pan until sugar dissolves. Bring to a boil, reduce heat and simmer until thickened, this will depend on the water content of your berries,anywhere from 5 to 8 minutes. Berries should be able to coat the back of a spoon.
  2. Transfer sauce to a bowl. Chill until cold, two hours or so.

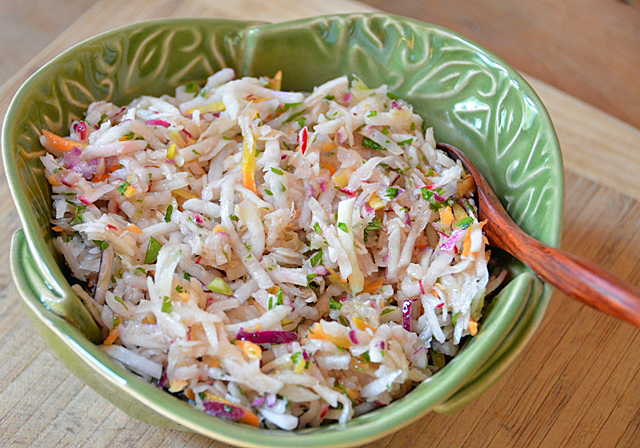
June 15, 2012 Southwestern Kohlrabi Slaw

 Spicy margarita baby back ribs were on the menu for our Sunday evening cookout so I thought a sweet and crunchy slaw would be the perfect accompaniment. Purple kohlrabi from the farmers market were waiting in the produce bin of the refrigerator and I just picked baby carrot thinnings and bright red and magenta radishes from the garden. The last time I made a different kohlrabi slaw I cut the kohlrabi and the apples by hand into matchstick julienne. This time I decided not to fuss as much and let the food processor do the work. Lacking a food processor, a box grater would be a reasonable substitute. If your kohlrabi is on the large side be sure to squeeze out the excess liquid before you dress the salad.
The beautiful bowl in the picture is courtesy of my dear friend, Debbie. It was given as a thank you several months ago, and I placed for display in a glass-doored cabinet. This day when I was looking for something to serve the slaw in I noticed the card that came with the bowl. “Bowling them over- Hilborn Pottery produces both hand-built and custom thrown bowls. Oven microwave, and dishwasher proof, they can be used for preparing and serving both hot and cold dishes.” Well I guess I needed some convincing that I could really use it, and that was the proof. Oh, we did hand wash the bowl and spoon.

Kohlrabi Slaw

Serves 6 to 8 as a side

Ingredients

  • 4 small to medium kohlrabi, trimmed, peeled if necessary
  • 1 small carrot (i used about 6 mini carrot thinnings=1 small)
  • 3-4 radishes, trimmed
  • 2-3t lime juice
  • 1t cumin
  • 1/2t mild chili powder
  • 2-3T extra virgin olive oil
  • Kosher salt and pepper to taste

Directions

  1. Shred kohlrabi, carrot and radishes with the medium shredding disc of the food processor.  Place in a bowl
  2. Combine lime juice, cumin, chili powder in a small bowl. Whisk in olive oil. Add kosher salt and freshly ground pepper to taste.
  3. Immediately before serving, pour enough dressing over shredded vegetables to coat. Toss slaw, taste and adjust seasonings. Serve immediately.

June 13, 2012 Red Quinoa Salad


As a long time fan of grain salads, I was pleased to see my favorite food magazine Fine Cooking’s article in the June/July issue, The New Summer Side-summer grain salads. Their nifty recipe maker feature allows you to drag and drop ingredients into a bowl and gives the cook countless combinations of grains, vegetables, fruits and nuts to make their own unique grain salad with a final recipe to print out at the end.  I chose quinoa as the base for my salad. KEEN-wah (as it is pronounced) is not a really a grain, but a pseudograin, a relative of chard and beets, grown for its seeds.  It has been cultivated in the Andes Mountains for over 5000 years. The “mother grain” as quinoa is translated in a Native American language, is rich in fiber, complete protein and B vitamins. It is gluten-free and easy to digest. Red quinoa has been described as both sweeter and earthier than the yellow. I chose it for the contrast in color to the green vegetables. Asparagus was in season at the farmers market and I picked Easter egg radishes and snow peas from our garden. Don’t skip rinsing the quinoa, the saponin coating is bitter and not always fully removed in processing. I look forward to using the create your own grain salad recipe maker throughout the summer as more vegetables come into season to come up with many new combinations.

Red Quinoa Salad

Serves 8 to 10

Ingredients

  • 2 c red quinoa (you can substitute yellow or black)
  • 1/4c white balsamic vinegar
  • 2T fresh lemon juice
  • 2T roasted walnut oil
  • 2t  honey
  • 1t finely grated lemon zest
  • Kosher salt and freshly ground pepper
  • 1 1/2 c asparagus
  • 1T olive oil
  • 1/2c thinly sliced radishes
  • 1c sugar snap peas
  • 1/2 c coarsely chopped walnuts
  • 3/4c crumbled feta cheese
  • 1T finely snipped chives
  • 1T finely chopped flat leaved parsley

Directions

  1. Rinse quinoa in a fine mesh colander under cold running water and drain well before cooking.
  2. Bring 4 cups of water to a boil. Add quinoa, reduce heat to a simmer and cook until the grains turn from white to transparent and the spiral-like germ has separated, this could take anywhere between 15-20 minutes. Rinse with cold water and drain very well.  Transfer quinoa to a parchment or foil lined baking sheet. Drizzle with a little bit of the olive oil and allow to cool completely.
  3. Put the vinegar, lemon juice, honey and grated lemon peel in a small bowl and gradually whisk in the olive and walnut oils. Season to taste with salt and freshly ground pepper.
  4. Trim asparagus into 1 inch diagonal pieces and transfer to a microwave safe container with 1/2c water, 1T olive oil and 1/2t kosher salt. Cover tightly with plastic wrap. Microwave on high for about 4 minutes, check for doneness, thicker stalks may take a little longer. Drain in a colander.
  5. Bring a small pot of water to a boil. Add sugar snap peas and cook until the peas turn bright green, about 3 minutes. Drain and rinse. Slice on the diagonal.
  6. Place cooled quinoa in a bowl large enough to toss all ingredients. Toss quinoa to break up any clumps. Add asparagus, radishes, snow peas, walnuts, feta, chives and parsley and toss with about 1/2 cup of the vinaigrette. Taste and season as needed with more vinaigrette, salt and pepper.
  7. You can either serve the salad immediately or refrigerate to serve the next day. Bring to room temperature before serving and season again as needed.

June 12, 2012 Swordfish Steaks with Strawberry Salsa


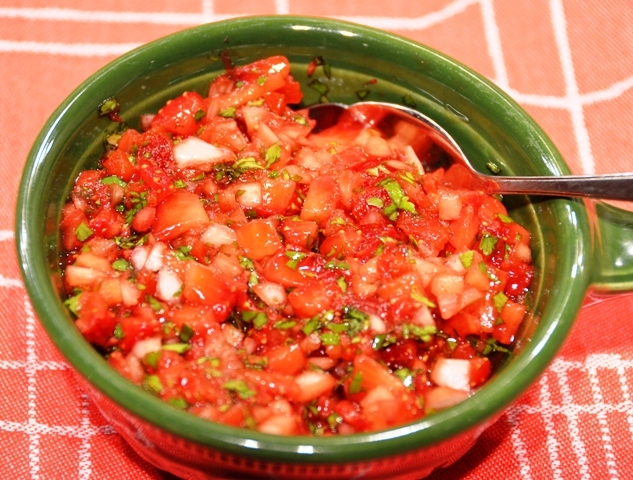
Sweet, succulent strawberries, who doesn’t enjoy them in seasonal fare like shortcake, ice cream, jam and salsa. Strawberry salsa, you say? Well if mangoes, papayas and pineapples have all been popular fruits for this spicy treat, why not strawberries? After all, salsa means sauce in Spanish, though in North America we usually think of it as any variation of the spicy tomato based sauces of Mexico.
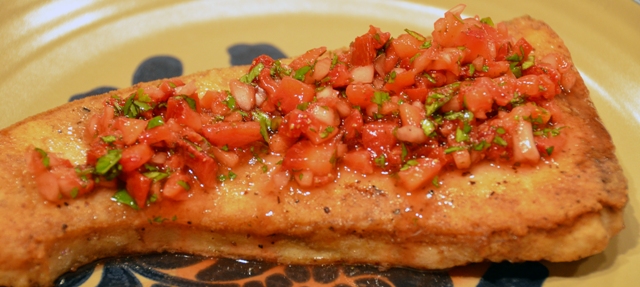
This very simple salsa appeared 15 years ago in Gourmet magazine. The original presentation in the article “Spotlight on the Strawberry” served the salsa in an avocado half with crispy tortilla strips. I thought I would serve it  with the swordfish steak we were having for dinner. The sweet and spicy flavors in the salsa paired nicely with the richness of the swordfish.
You can vary the type and amount of the pepper according to your tastes. I would consider making it a bit hotter if I were just serving it with chips. A little heat goes a long way as a topping for fish. The strawberries would be good in combination with any of the aforementioned salsa fruits. It would also be a good topping for grilled chicken or fish tacos. Enhance the sweetness of the salsa and serve with baked tortilla chips dusted with cinnamon sugar as a snack or dessert.

 Swordfish Steaks with Strawberry Salsa 

Serves two with extra salsa

Strawberry Salsa

Ingredients

  • 1 fresh Serrano or jalapeno chili
  • 1 cup of finely chopped strawberries
  • 1/4 finely chopped white onion
  • 2T finely chopped cilantro
  • 1/2t fresh lime juice
  • 1/4t salt
  • 1/2t sugar (if desired, will depend on your berries)

Directions

  1. Wearing rubber gloves, remove stems, seeds and ribs from chili and chop fine.
  2. In a bowl stir together chili and remaining salsa ingredients. Salsa may be made several hours ahead and chilled, covered.

 Swordfish Steak

Ingredients

  • 2- 6 oz swordfish steaks
  • Kosher salt and freshly ground pepper
  • Wondra flour
  • 1T each olive oil and unsalted butter

Directions

  1. Preheat oven to 450F.
  2. Measure steaks using the Canadian method to calculate total cooking time.
  3. Season swordfish steaks with salt and pepper. Dust with Wondra flour.
  4. Heat an oven-proof saute pan over medium high heat.
  5. Melt butter and oil in a saute pan large enough to hold the fish without crowding and small enough to fit in your oven.
  6. Brown swordfish for two minutes on each side.
  7. Move saute pan to oven. Finish in oven, subtracting four minutes from your total cooking time. For example 1″ fish=10 minutes cooking time minus four minutes equals six minutes in the oven.
  8. Using oven mitts, remove from pan from oven, transfer fish to serving plate with spatula. Top with salsa and serve immediately.


June 5, 2012 Salmon and Arugula Pesto


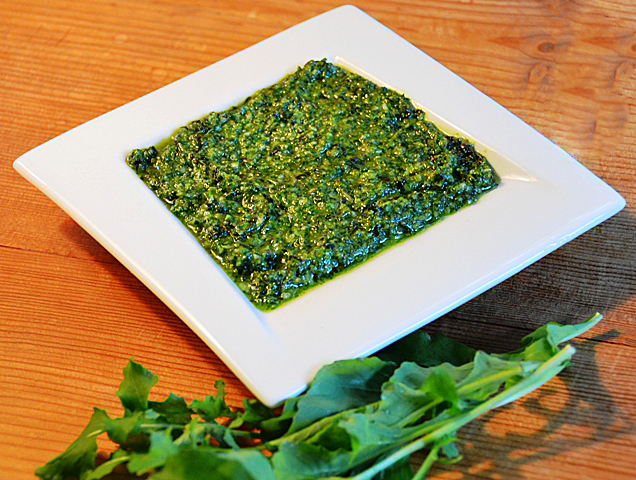
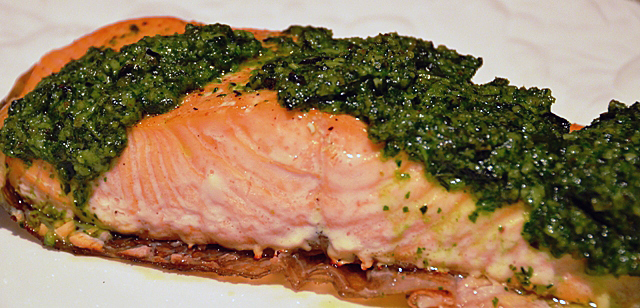
Considered trendy in the 80’s, arugula is still popular with chefs and home cooks alike thirty years later. The peppery green is known by many names, arugula, roquette, rocket, rugula or rucola. It may be the herb known as oroth in the Bible (2Kings 4:39-40). Even though it looks like dandelion greens or oak leaf lettuce, it is a member of the brassica family like broccoli and cauliflower, and is low in calories and rich in vitamins A and C, calcium and iron. We have been making succession plantings this spring so there is always more than enough arugula to add to our salads. In this recipe from Fine Cooking magazine the sharp peppery flavor of the arugula is a pleasant contrast to rich fattiness of the salmon. This recipe calls for arugula and basil, if your arugula is on the mild side and not “hot”, all arugula could be used. Different nuts such as pistachios, pecans or pine nuts could be interesting. Arugula pesto would also be good tossed with pasta or potatoes, added to soft goat cheese as a spread or even as a pizza topping. We use the Canadian fisheries method of cooking fish which equates 1 inch of the thickest part of the fish to 10 minutes of cooking time. We use a tool, a little fish-shaped ruler with a slide called “perfect fish”. After some research, the only source I could find was Fante’s, a gourmet cookware store in Philadelphia, but they are currently out of stock. Lacking the “perfect fish” use a ruler to measure the thickness of your fish. 

Bring back the "Perfect Fish"!


Roasted Salmon with Arugula Pesto

adapted from Fine Cooking magazine

Serves four

Ingredients

  • 1/3c walnut pieces
  • 2c loosely packed fresh arugula
  • 1c loosely packed fresh basil
  • 1/4c freshly grated Parmesan cheese
  • 1/4c extra virgin olive oil
  • 4 6-8 oz skinless salmon filets

Directions

  1. Preheat oven to 450F.
  2. Toast walnut pieces in a small dry skillet over medium heat until fragrant and a bit darker, about 4-5 minutes. Let cool slightly and transfer to a food processor.
  3. Add arugula, basil, Parmesan, and garlic and process until the mixture is finely chopped, this should take less than a minute.
  4. With the motor running, slowly add the olive oil in a steady stream until well combined.
  5. Transfer pesto to a bowl and season to taste with salt.
  6. Cut salmon into individual servings and salt lightly (kosher or sea salt)
  7. Measure thickest part of steak with the Perfect Fish tool. (every 10th of an inch  equals 1 minute of cooking time at 450 degrees F)
  8. At 1 minute prior to calculated time of completion, remove from oven and coat with thin layer of pesto and return to oven for 1 minute.
  9. Serve immediately or be sure to remove from baking pan immediately (so that the fish does not continue to cook.)
  10. For a more translucent preparation decrease cooking time by 1-2 minutes
  11. Serve on warmed plates