Our spring vegetable garden includes several varieties of lettuce, spinach, radishes, Japanese turnips, beets, kohlrabi, sugar snap peas and cooking greens. However there is one spring vegetable that we don’t grow that makes my trip to the farmers market worthwhile, fresh local asparagus. Asparagus is a real sign that spring is here. and the season is fleeting. I will serve it roasted, grilled, raw in salads, in stir fries and a new way (at least for me) I heard about from a new “friend”, Alexa.
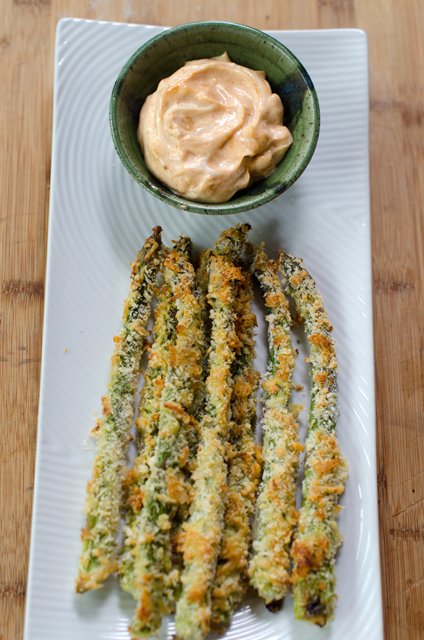
Alexa is a digital assistant that performs tasks, like turning on Sirius radio when I’m in the kitchen. “Alexa, play Seventies on Seven”. You can ask her the score of the game, will it be sunny today and even turn the lights on if you have the right smart home device. Our Amazon Echo has a screen that always shows the time, weather and rotating news headlines, fun facts and even recipes. One afternoon I noticed that a recipe for oven baked asparagus fries popped up. I was too busy at the time but thought that this was one I needed to try. On line I found many recipes, this is my interpretation of this popular dish.
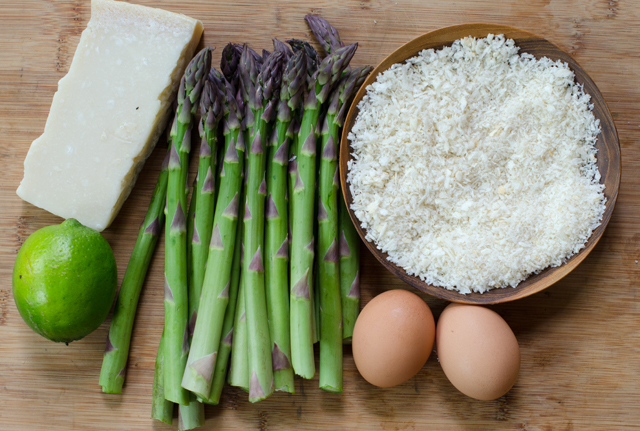
Look for medium-sized asparagus for this recipe, twenty spears weighed about a pound. If you are storing the asparagus for any length of time, leave the rubber band on, trim about an inch off the bottom. Stand the spears up in a jar with about two inches of cool water and cover loosely with a plastic bag.
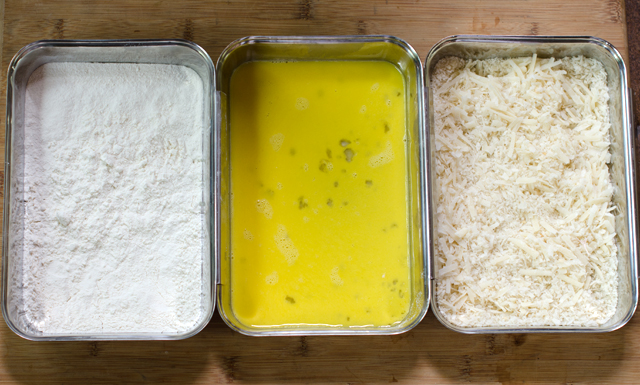
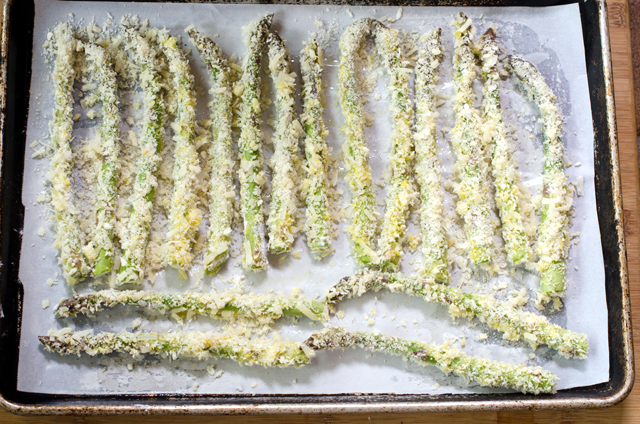
When you are ready to proceed with the recipe, preheat the oven to 425° F. Line a large baking sheet with parchment paper or foil for easy clean up and brush with a tablespoon of oil or coat lightly with cooking spray. Set up your breading station by lining up three containers that are long enough to accommodate the asparagus spears. Place the flour in the first container. Add the beaten eggs to the second container. Combine panko and Parmesan and season with salt and pepper for the third container. Trim off the tough ends and lightly rinse the asparagus. Coat the spears with flour, dip in the egg then turn to coat in the Parmesan panko mixture. Place on baking sheet, lining up in a row but not touching. Lightly coat the spears with olive oil cooking spray. Bake in preheated oven, turning spears over halfway during the cooking process to ensure even baking.
In the category of “in case you didn’t know” panko is a Japanese style white breadcrumb that is light and airy with a texture like crushed corn flakes. You can easily find them in the Asian section of your supermarket. I prefer to only put a third of the breadcrumb mixture in the dredging pan at a time. After you have rolled several eggy spears in the crumbs, they tend to make the crumbs wet, so adding more dry crumbs as needed makes the process easier and neater. Remember the rule of wet hand dry hand. Designate one hand to do the dry steps, flour and breadcrumbs and the other to do the wet step-the egg mixture.These are best served right from the oven. Serve plain or with smoked paprika aioli.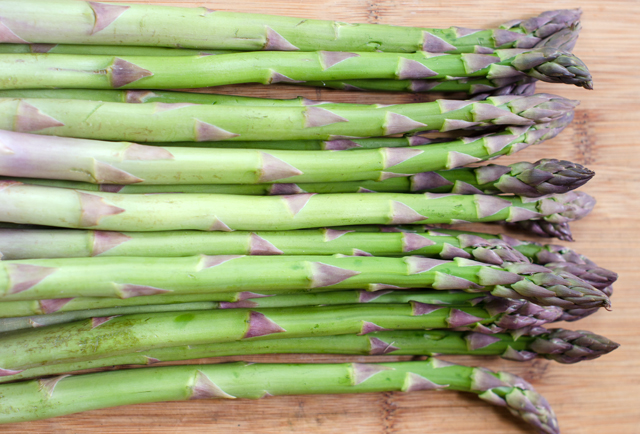
Baked Parmesan Panko Asparagus Fries
Serves four
Ingredients
- 1 lb asparagus-medium thickness
- ½ c or more unbleached all-purpose flour
- 2 eggs, beaten
- 1 T fresh lime juice
- 1 c panko breadcrumbs
- 1 c freshly grated Parmesan cheese
- Kosher salt and fresh ground pepper
- Non stick spray or olive oil
Directions
- Preheat oven to 425°F. Line a large baking sheet with parchment and lightly coat with a tablespoon of olive oil or olive oil cooking spray.
- Rinse the asparagus and snap or cut tough ends off.
- In a large bowl stir with a fork to combine the Parmesan and panko
- Set up your breading station: line up three shallow bowls or dishes that are long enough to accommodate the spears. Put the flour in the first dish. Place the beaten eggs in the second and lightly beat in the lime juice. Place the Parmesan panko crumbs in the third, season crumbs with salt and pepper to taste.
- Dredge the spears first in the flour, dip in the egg mixture and roll in the crumbs to coat on all sides, pressing crumbs in.
- Place asparagus on the prepared baking sheet, spears close together but not touching. Coat lightly with olive oil cooking spray.
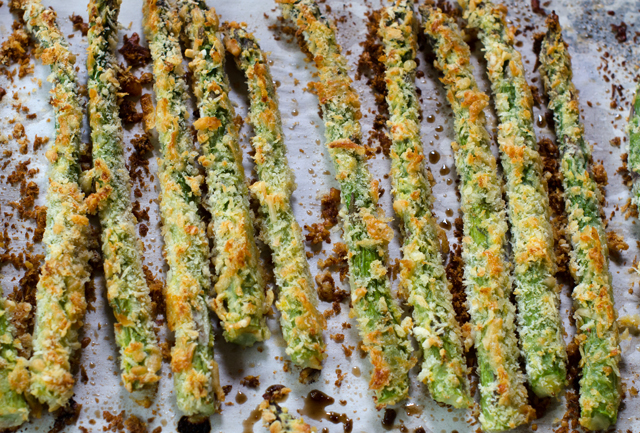
- Bake the asparagus until browned, crisp and crunchy, about 10-12 minutes. Flip spears over halfway through the cooking time for even baking.
- Serve immediately with smoked paprika aioli or your favorite dipping sauce.
Smoked Paprika Aioli
Makes about a cup
Ingredients
- 4-5 cloves roasted garlic
- ¾ c mayonnaise (homemade or prepared)
- 1 t smoked paprika
- 1 t fresh lemon juice
- Kosher salt and freshly ground pepper
Directions
- To make roasted garlic, cut off top third of a head of garlic, drizzle with olive oil, wrap in foil and bake in a 375°F oven for about 40 minutes or until garlic is soft and brown.
- With a fork, mash 4-5 roasted cloves in a medium bowl. Add mayonnaise, smoked paprika, lemon juice and whisk to combine. Adjust seasonings and salt and pepper to taste.
- Refrigerate for at least an hour to meld the flavors.