March 26, 2017 Butternut Squash Soup with Sage Pesto

Is there really a need for another recipe for butternut squash soup when there are already three other butternut squash soup recipes on the blog? Well, when you have a metal locker in the basement still half full of last year’s harvest, (in excellent condition I will add) there’s always room for one more soup. This time the squash isn’t blended into a silky purée resulting in a soup that’s perfect as a starter for an elegant meal, here the squash pulls double duty. The fat bulbous end becomes part of a squash “stock” and the neck is cut into chunks that are simmered in the stock to make this hearty main dish soup.

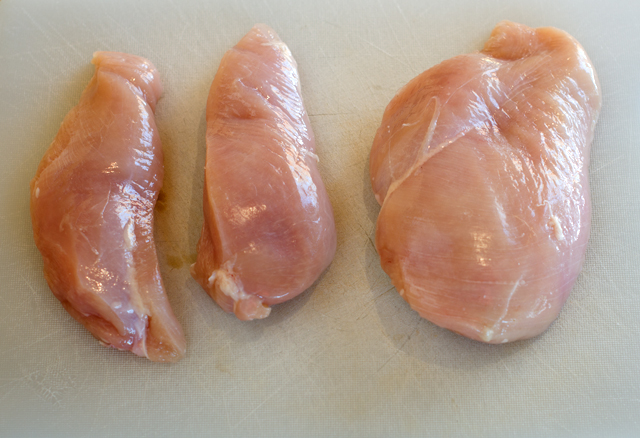
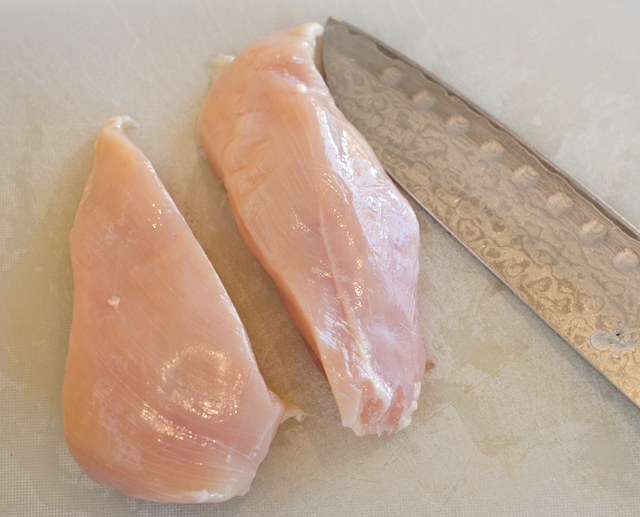
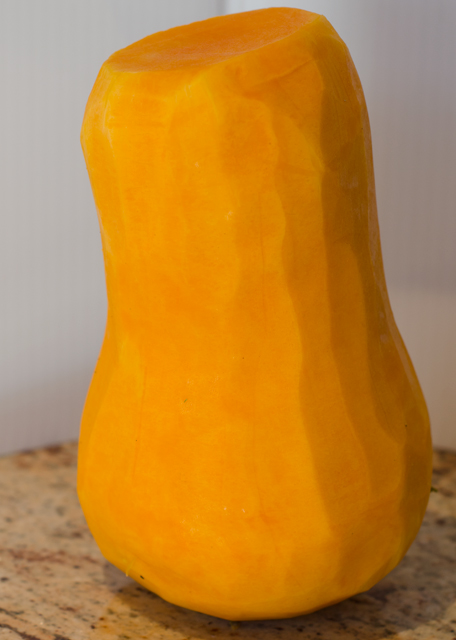
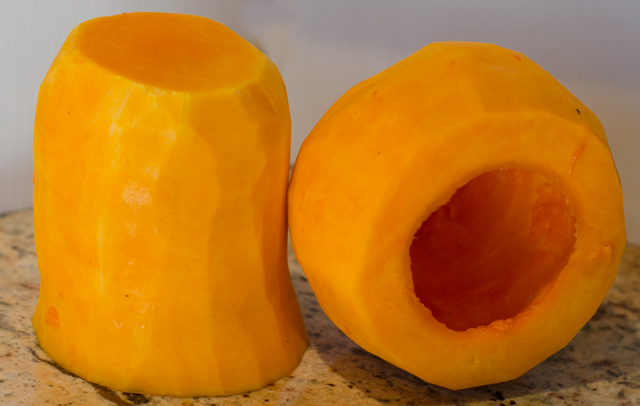
Start with a medium-sized squash, 2 to 2 1/2 lb, use a sharp knife to cut off a half inch piece at both ends.  You can either cut the squash in half (approximately) where the neck meets the bulb or leave it whole for peeling. The next part I find easiest to do using a vegetable peeler, the inexpensive Kuhn Rikon ones are my favorite. A well sharpened chef’s knife works well too. Place the squash on its side and run the peeler down the length. This part goes quicker with the neck, the curved bottom takes a little more time, but with practice the whole process shouldn’t take more than ten minutes. Be sure to remove the white flesh and green fibers that are right below the skin’s surface. The squash should be completely orange after peeling. Scoop out the seeds and the fibrous pulp from the bulb end. I save the seeds for roasting as a garnish for soups and salads.

The bulb halves are cut into four chunks and combined in a saucepan with stock, water, butter and soy sauce or tamari. The soy brings a savory umami note to the natural sweetness of the squash and the butter adds richness. Cook until the squash is very soft and mash in the pan until broken down.

While the stock is cooking, cut the neck end into 1/3 inch cubes. Sauté leeks and tomato paste in a Dutch oven. The mild sweet onion flavor of the leeks complements the squash and the tomato paste adds a little umami to the mix. Add the garlic and squash pieces and cook, stirring occasionally. Pour in the squash stock, bring to a simmer, partially cover and cook for ten minutes. Canned cannellini beans are the last addition and add a hearty creaminess and some substance to the soup. Simmer until the squash is tender. You can serve it now or if you have the time, make the soup, cool, refrigerate and reheat and serve the next day. As with many soups and stews, the flavors have time to meld together and it even tastes better.

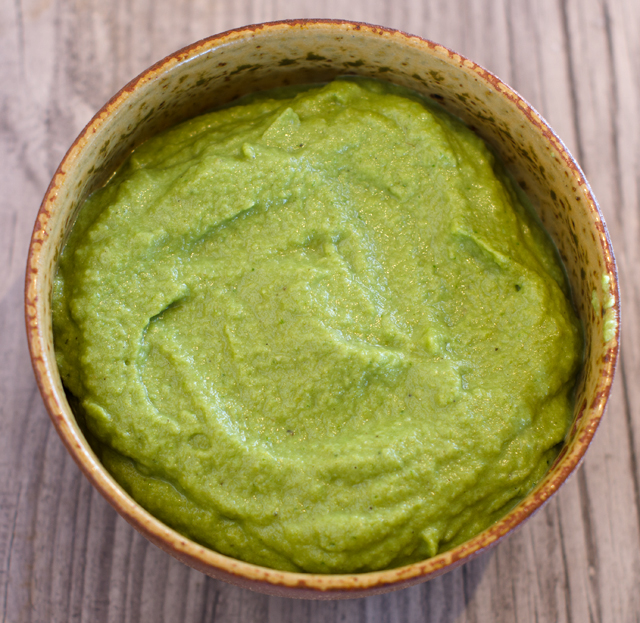
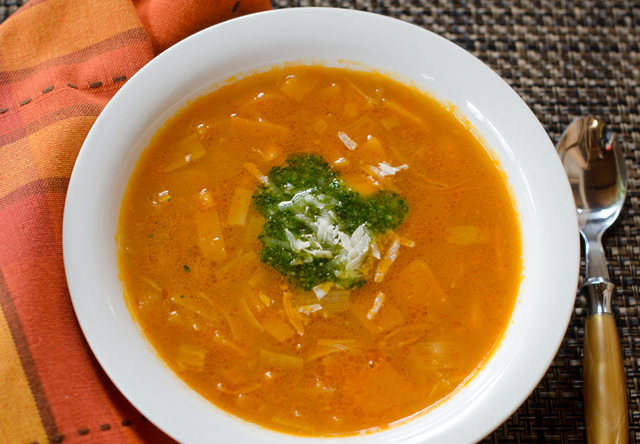
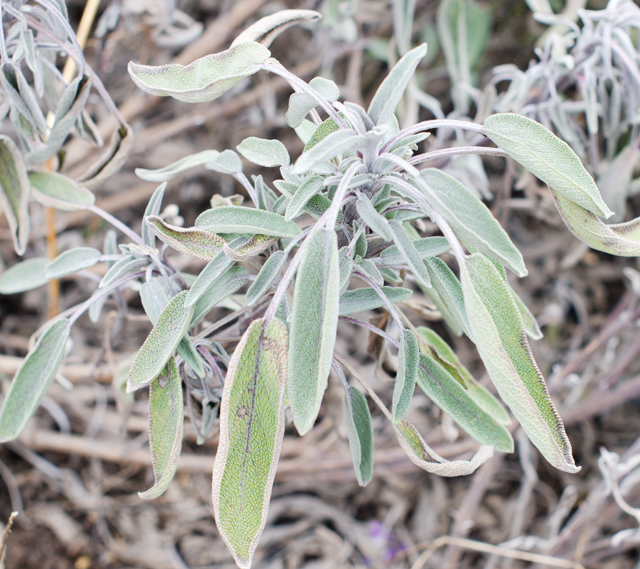
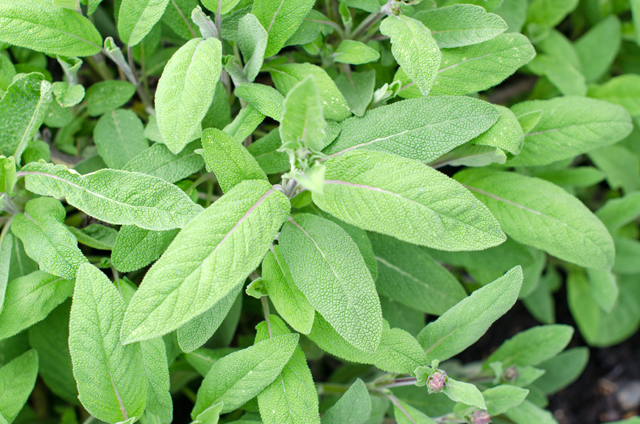
Don’t skip making the pesto, it is a wonderful addition to the soup. Sage and parsley replace the typical basil in this recipe. I’m glad that sage is one of the first herbs to perk up in the garden, in spite of the cold temperatures of late. I truly despise paying several dollars for a handful of less than perfect leaves when I can pick them fresh.

Butternut Squash Soup with Sage Pesto

Serves 6-8

Ingredients for soup

  • 1- 2½ lb butternut squash
  • 4 c broth, chicken or vegetable
  • 3 c water
  • 4  T unsalted butter
  • 1 T soy sauce or tamari
  • 1 T vegetable oil
  • 1 lb leeks, white and light green parts only, washed thoroughly, sliced thin
  • 1 T tomato paste
  • 2 garlic cloves, minced finely
  • Kosher salt and freshly ground pepper
  • 3-15 oz can cannellini beans
  • White wine vinegar to taste

Peeled whole butternut squash.

Cut the bottom into large chunks, they will become part of the squash stock.

Directions for soup

  1. Using a vegetable peeler, remove the skin and the fibrous threads just below the skin, the squash should look completely orange, no white spots remaining.
  2. Cut the squash in half where the neck and bulb meet. Cut the bulb section in half and remove the seeds and any strings. Save seeds for toasting if desired.
  3. Cut each half into four sections. Place the squash sections, broth, water, butter and soy or tamari in a medium saucepan and bring to a boil over medium high heat. Reduce heat to a simmer, partially cover and cook for about 25 minutes or until squash is very soft.
  4. Using a potato masher, mash the squash, still in the broth until it is broken down. Cover pan to keep warm and set aside.
  5.  While the broth is cooking, cut the neck of the squash into 1/3 inch pieces. Heat oil in a large Dutch oven over medium heat until shimmering. Add the chopped leeks and tomato paste and cook until the leeks are softened and the tomato paste darkens, about 5 minutes. Add garlic and cook until fragrant, 30 seconds. Add squash pieces, some salt and pepper and cook, stirring occasionally for 5 minutes.
  6. Add squash broth and bring to a simmer. Partially cover and cook for 10 minutes. Add beans and their liquid, partially cover and cook, stirring occasionally, until the squash is tender 15 to 20 minutes.
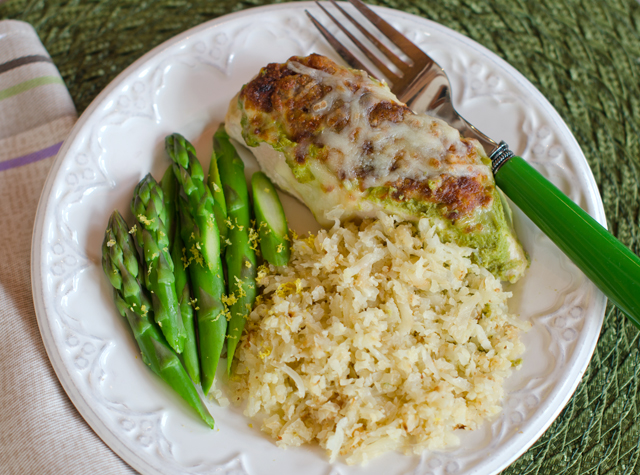
  7. Ladle soup into individual bowl, add a splash of white wine vinegar and dollop of pesto and an additional sprinkle of Parmesan cheese.
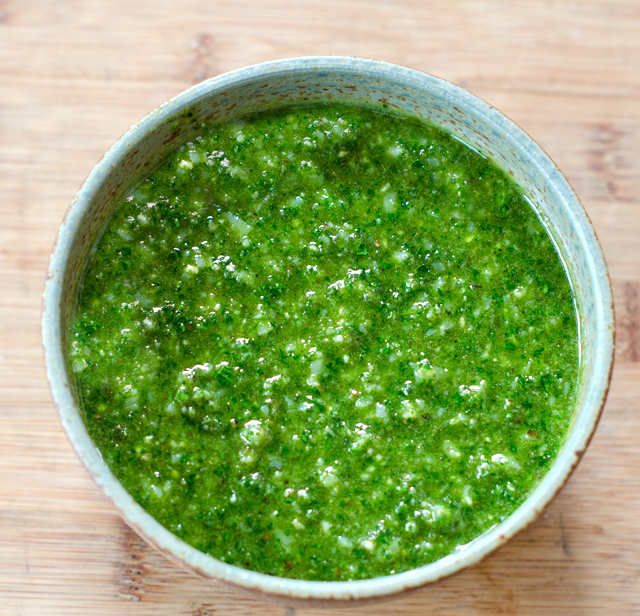
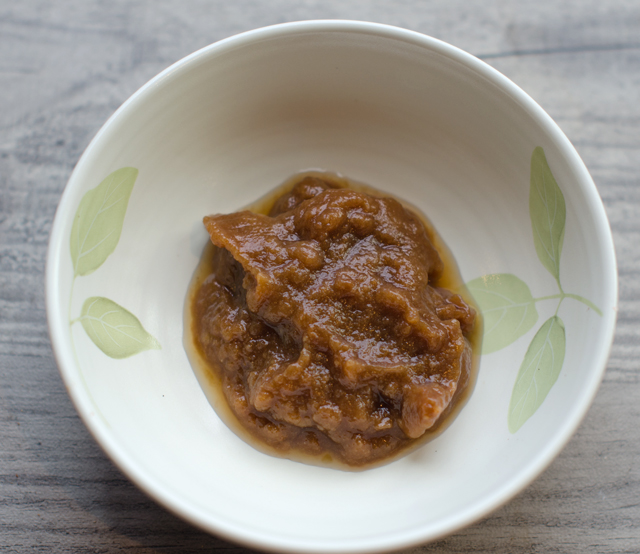
 

Sage Parsley Pesto

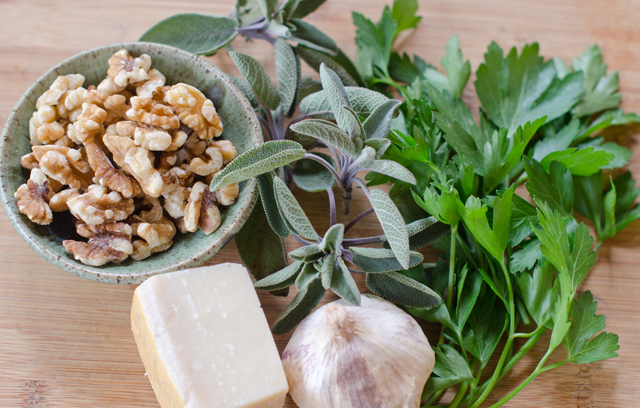
Ingredients for the Sage Parsley Pesto

  • ½ c toasted walnuts
  • 2 cloves of garlic, minced
  • 1 c fresh parsley leaves
  • ½ c fresh sage leaves
  • ¾ c extra virgin olive oil
  • ½ c grated Parmesan cheese
  • Salt and pepper to taste
Sage is one of the first perennial herbs to emerge in the herb garden.
By the end of April, the sage will look more like this.

Directions for the Sage Parsley Pesto

  1. Pulse walnuts and garlic in food processor until coarsely chopped, about 5-6 pulses.
  2. Add parsley and sage to the bowl, with the processor running, slowly add oil and process until smooth, about 1 minute.
  3. Transfer to a bowl, stir in Parmesan and add salt and pepper to taste.
Parsley mellows out the sage in this pesto, a combination I will definitely try again.


March 21, 2017 Creamy Poblano Chicken

I didn’t think the day would come, but I finally exhausted my supply of freezer pesto. I’ve been using it this winter to top boneless chicken breasts before baking as an easy weeknight supper. A little looking around the freezer and I found the ingredients for this new impromptu sauce. Chicken with poblano cheese sauce is loosely based on a Mexican classic. Poblano peppers have a dark green skin and if left to ripen further on the vine will turn red. They are somewhat heart-shaped, 3-6 inches long and 2-3 inches wide. Poblano peppers are rich and flavorful with a mild to medium heat.

This recipe can be made as mild or as spicy as you like, depending on the number of poblanos added to the sauce. Since most recipes begin with roasted and peeled poblanos, there are several methods for roasting. If you have a gas stove as I do, they can be roasted on an open grated grill known as an asador. If you don’t have a gas stove they can be broiled on a foil lined baking sheet. With either method, turn them often so they char evenly. Put the chilis in a bowl while they are still hot and cover tightly with plastic wrap. Let them rest until they are cool enough to handle, 15-20 minutes. Pull on the stem to remove the seed core and cut the chile open to remove any additional seeds and ribs. Remove the skin by running your hands down the chile, use a damp paper towel to remove any skin that won’t easily come off. Resist rinsing the chiles, you will dilute the flavor.

The base is cauliflower Alfredo sauce, a recipe from the blog two summers ago. I wasn’t certain if this would be good to freeze, but I’m pleased to say it reheated well. Since my first step was to see if the sauce held up to freezing, I started with a cup of the cooled down sauce in the food processor. To this I added several roasted poblanos, from the end of last years garden, also from the freezer.

I puréed the sauce, along with a cup of raw spinach leaves, a teaspoon of ground cumin, salt and pepper. Start with one stemmed and seeded poblano, cut into strips and add more as desired just to give a little kick of heat. I topped chicken breasts with this sauce, covered with foil and baked for 23 minutes. After 23 minutes, I took out the chicken, removed the foil and topped with grated cheese and placed under the broiler. Delicious and the chicken is cooked perfectly! Next time I might add some roasted garlic too. This sauce would also be good to top chicken enchiladas or even as a dip for veggies.

Creamy Poblano Chicken

Serves 4

Ingredients

  • 1-1 ½ c cauliflower Alfredo sauce
  • 2-3 roasted poblano peppers
  • 1 c raw spinach leaves
  • 1 t ground cumin
  • kosher salt and freshly ground pepper
  • 2 lbs boneless skinless chicken breasts, remove tenderloin if attached, breasts cut in equal halves
  • ½c or more shredded cheese, a Mexican blend is good here, mozzarella is fine as well
  • Non stick spray or oil to coat baking dish.
Cut large breast pieces in half.
It’s best to cut on an angle to get even pieces.
Poblano peppers add just the right amount of heat.
I like to cook them on the stovetop on an asador.


The sauce can be made easily in a food processor or blender.

Coat the breast pieces evenly with the sauce.
Cover the chicken tightly with foil before cooking. Be careful of the steam that will escape after cooking.
After cooking they will shrink a bit.
Turn the broiler on and sprinkle chicken with cheese.
The finished product!

Directions

Preheat oven to 375°F

  1. Put the first four ingredients in the bowl of a food processor or blender and pulse until all ingredients are incorporated. Taste for seasoning and add another poblano if desired. Season with salt and pepper to taste. Scrape sauce from processor into a bowl and set aside.
  2. Spray a 9″ X 11″  baking dish with non stick spray or coat lightly with olive oil.
  3. Remove tenderloins from chicken breasts if still attached. Cut each breast in half to make even (as possible) pieces. Place the chicken breast pieces in the baking dish.
  4. Cover each piece generously with the sauce. Cover the baking dish with foil and bake for 23 minutes. Remove baking dish from oven, take off the foil and set oven to broil. Sprinkle cheese over chicken breasts and return baking dish without the foil to the oven. Broil until the cheese is melted and starts to brown in spots, 3-4 minutes. Watch closely. Serve with cauliflower rice to sop up the juices.

March 7, 2017 Pad Thai, a light version

Since Joe has already lost ten pounds on a South Beach phase 1 diet, I am looking for ways to adapt recipes we already like to fit the plan. My latest “rework” is Pad Thai. Pad Thai is a stir fried noodle dish, typical food cart fare in Thailand that over the last thirty years has gained popularity worldwide.

Most of the Thai cookbooks I own are over thirty years old and I was surprised to see that I rarely found a listing for Pad Thai in the index. What I did find were recipes for “Noodles, stir fried Thai style”. I learned that Pad Thai was made popular in the 1930’s and ’40s as part of an attempt to modernize and revitalize the economy of the country. The full name of the dish is  Kway teow phat Thai. Kway teow means rice noodles in a Chinese dialect and phat Thai means Thai-style, hinting at the possible Chinese origins of the dish.

The dish is a harmonic combination of flavors, umami (fish sauce), sour (lime or tamarind paste), salty (soy sauce or tamari) and sweet (palm sugar). Fish sauce used to require a special trip to the Asian grocer, now it can be found in most large supermarkets. I prefer tamari in recipes over soy. A by product of miso production, it is thicker and less salty than soy sauce. Palm sugar is a sweetener made from the sap of the flowers of the coconut palm tree. The taste is similar to brown sugar with caramel and butterscotch notes. Tamarind comes from the pods of a large tropical tree and adds a pleasant sweet tart note to dishes. . If you look at the list of ingredients on a Worcestershire sauce bottle, tamarind extract is one of the ingredients. Lime juice is usually substituted when tamarind isn’t available. Another recipe I found in my research called for apricot or prune puree if a substitute for tamarind was needed. One well known cookbook author recommended ketchup as a substitute for tamarind, texture yes, taste, not like any ketchup I’ve tried.

Several months ago I bought a container of tamarind pods with no specific reason other than to possibly use them some day. This recipe presented my opportunity, but I really had no idea how to extract the pulp from the pods. My first step was to remove the dried outer pods. Don’t expect them to come off neatly, they will break off in pieces. When the dried brown pods are removed, the sticky pulp is exposed along with strings that run the length of the pods, remove as many of the strings as possible. In the middle of the pulp are the smooth shiny seeds that almost look like they have been polished. After reading several articles I came up with the approach that worked for me. I put the pulp that still contained the seeds in a bowl. I covered the pulp with warm water for about twenty minutes. Then I put the softened pulp in a sieve and pressed on the solids with a pestle to extract as much pulp as possible. I got a decent amount of pulp and some tamarind water too. Next time I think I will take the easy route and order tamarind paste on line.

My version substitutes shredded cabbage for the traditional rice noodles since they aren’t part of phase one of the diet. Cabbage provides a good base for the dish and adds sweetness too. Noodles made from zucchini or daikon radish would work here too. I used shrimp as the protein in this dish, but chicken and either of those combined with tofu works as well. The secret to making any stir fry dish is to have all your components ready before you start cooking. It comes together in less than a half hour and I must say we enjoyed it very much.

Tamarind pods
Tamarind puree

Pad Thai

Serves 3-4

Ingredients

  • 6-8 cups finely shredded green cabbage
  • 5 T peanut or neutral oil like grapeseed (divided)
  • 2 eggs, lightly beaten
  • 4 garlic cloves, finely minced
  • 12 oz to 1 lb shrimp, peeled and deveined
  • 1 green pepper, stemmed, seeded and finely sliced
  • 1 large shallot, finely sliced
  • 1 cup of mung bean sprouts, rinsed and trimmed
  • 2 t or more of nam pla (Thai fish sauce)
  • 2 t tamarind paste or lime juice
  • 1 T tamari or  soy sauce
  • ¼ c chopped peanuts
  • ¼ c cilantro leaves
  • 1-2 Thai chiles (optional)
  • 1 lime cut into wedges

Directions

  1.  Heat 2 teaspoons cooking oil in a large wok over medium high heat. Swirl the oil around to coat the entire pan, then add the cabbage. Season with some fresh ground pepper and stir fry until barely crisp tender, 3-4 minutes. Remove to a  bowl.
  2. Add a little more oil to the wok and add the eggs, and scramble quickly with a fork. Cook until set and remove to a cutting board and cut into thin strips.
  3. Add oil as necessary and add the garlic and the shrimp and cook, stirring occasionally, until the shrimp lose their grey color, 2-3 minutes. Remove from the pan with a slotted spoon to a plate.
  4. Add the shallot and green pepper to the wok. Season with salt and pepper and stir fry and stir fry until crisp tender, 4-5 minutes.
  5. Raise the heat to high and add a tablespoon or more of oil as needed Add the cabbage, eggs, shrimp and sprouts to the wok. Season to taste with the nam pla, tamari and tamarind or lime juice. Cook until all the ingredients are heated through.
  6. Add the chopped peanuts, cilantro leaves and optional pepper. Toss once or twice and transfer the contents of the pan to a serving platter. Serve with lime wedges.