We have adopted the Italian/Italian American tradition of seven fishes and it has been our Christmas eve feast we share with friends for the past six years. I explained the tradition of the seven fishes in a post from 2012.
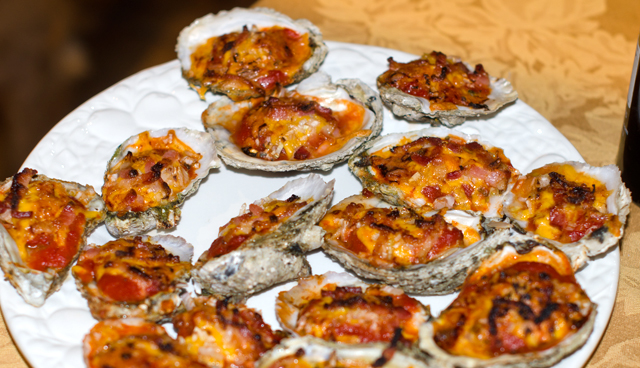
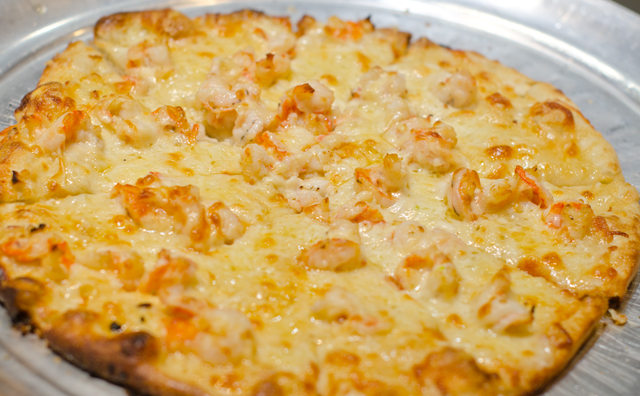
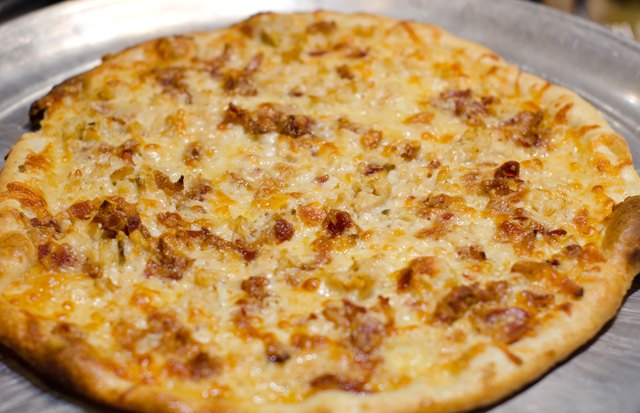
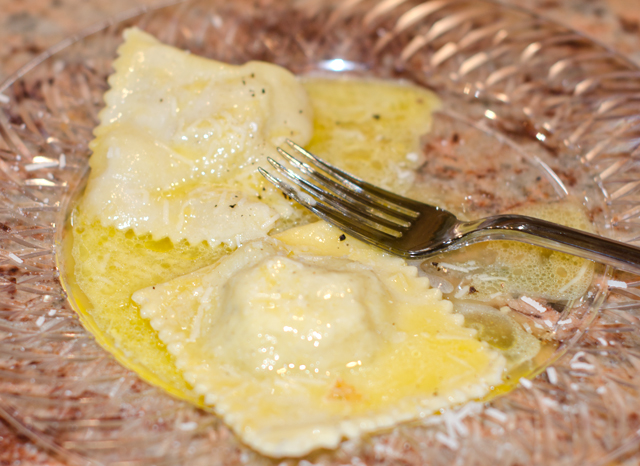
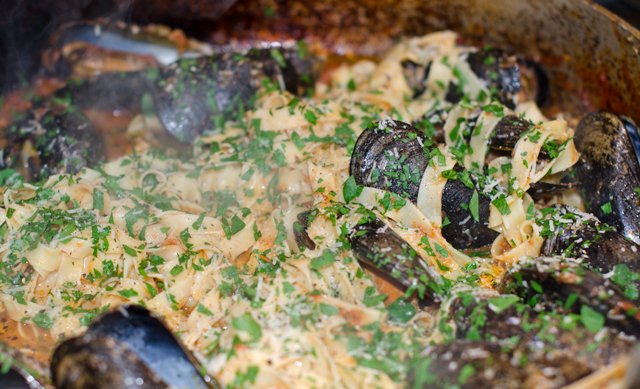
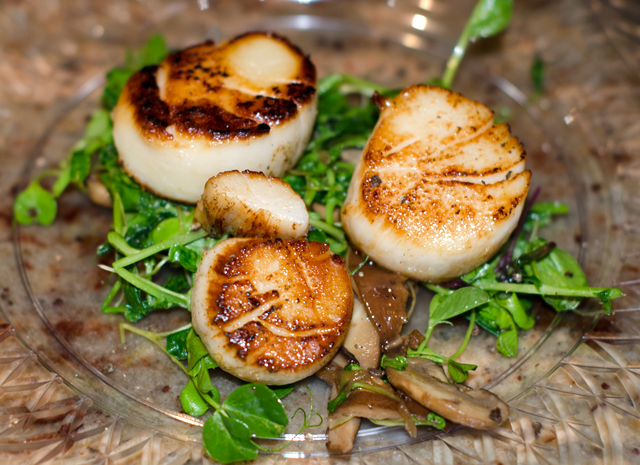
This year our seafood included oysters straight from the Chesapeake Bay courtesy of Nik. The extra large succulent oysters are enjoyed both raw with lemon and a splash of cranberry pear vinegar and baked a la Oysters Kenwood. We had a traditional (for us) shrimp scampi pizza as well as a newly inspired creation of a clam and bacon pizza. Both were delicious. We had a refreshing calamari salad, seafood stew, the best stuffed clams ever, just hope Joe remembers the recipe. Homemade pasta was served in two forms, mussels diavola with fettuccine and delicious crab ravioli served with a delicate lemon butter sauce. Golden brown seared scallops were served on a bed of microgreens with mixed sautéed mushrooms. The last course was swordfish skewers and pearl onions with a balsamic sweet and sour sauce. Some years Joe has cooked these in the fireplace grill but due to exceptionally warm weather this year they were cooked outdoors on the grill.
We start the party a little earlier each year, so that we aren’t finishing the last course at midnight. That actually happened the first few years. To finish things off, we left just enough room to finish off the meal with delicious Italian cookies and pastries from Chambersburg, an Italian neighborhood in Trenton, courtesy of Rich.
Nik power washes the oysters before they come inside for shucking..Joe and his wonderful stuffed clams.Stuffed clams had bacon in them too.Oysters Kenwood, oysters baked with tomato sauce, bacon and cheddar cheese. Delicious!!Shrimp scampi pizza.Clam and bacon pizza, this year’s new creation.Delicate crab ravioli with lemon butter sauce.Homemade fettuccine with mussels diavola.Seared scallops on a bed of microgreens and sautéed mushrooms.
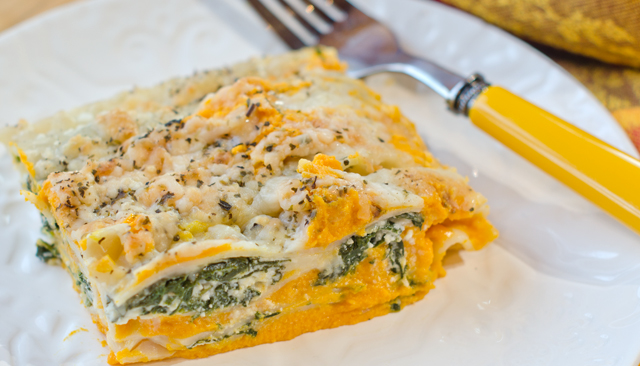
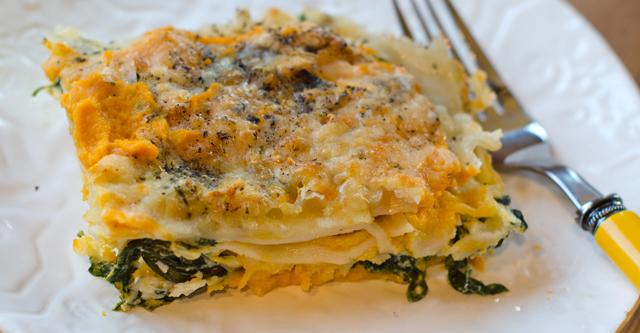
In this unique lasagna, perfect for the fall and winter months, a ricotta enriched butternut squash purée takes the place of a marinara sauce. A cheesy spinach filling complements the creamy squash for this satisfying and healthy vegetarian main dish.
You will need a medium size butternut squash, weighing two and a half to three pounds. Cut the stem end off the butternut squash then cut the squash in half where the bulb end meets the neck. Cut both pieces in half lengthwise. scoop the seeds and fiber out of the bulb end, save seeds for later use. I rinse the seeds off and dry them between layers of paper towels. Toss with a little bit of olive oil and sprinkle with salt. Bake in a 375°F oven until they pop and become toasty brown. They are great for topping salads and for snacking.
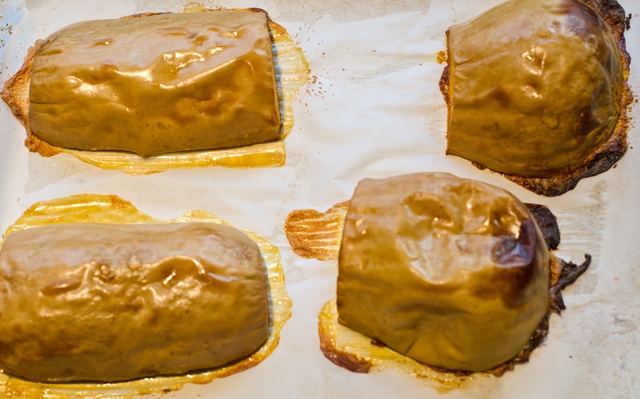
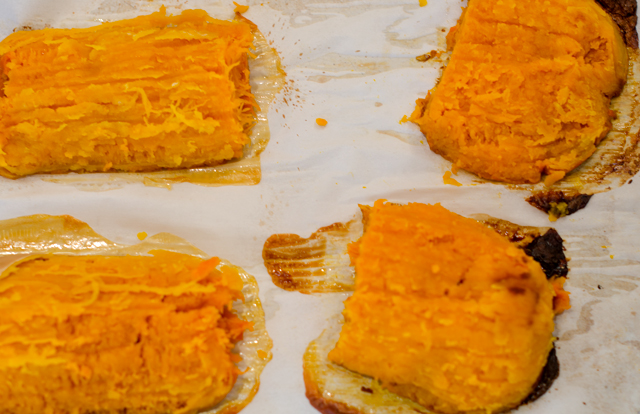
Cover a large baking tray with parchment paper. Brush the squash pieces lightly with olive oil and place the four sections of squash cut side down on the baking sheet. Bake in a 375° oven for about 50 to 55 minutes, until the squash pierces easily with the tip of the knife. Let cool for 10 minutes, the skin should come off easily. Place the squash pieces in the bowl of a food processor fitted with the metal blade. If necessary, add a little additional liquid, purée until smooth, you will have about 2½ cups. Add 1 cup of ricotta cheese and purée again, season to taste with salt and pepper and a little freshly grated nutmeg.
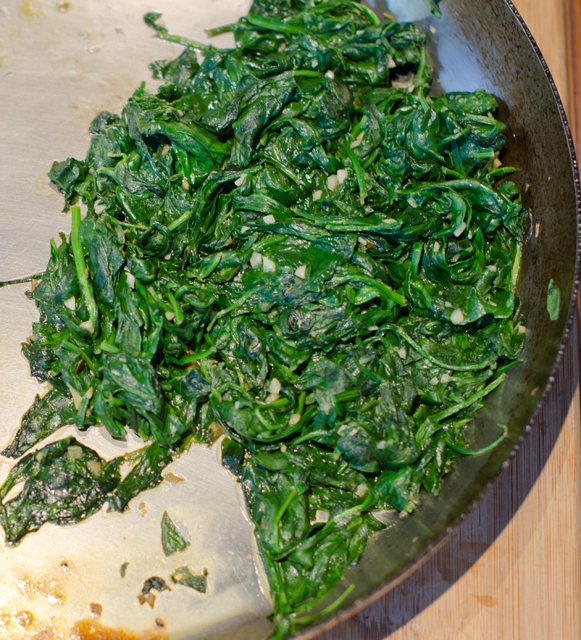
Place the spinach in a large bowl. Lightly rinse the spinach and toss in the bowl. The moisture will help wilt the spinach quickly. I used a 1 pound container of organic triple washed spinach. Finely chop two garlic cloves. Heat a large sauté pan over high heat and add the olive oil and swirl it around. Saute the garlic for a few minutes then add the spinach by the handfuls, adding more each time as it wilts down. After squeezing out any additional liquid, the end result will be one generous cup of spinach.
You can make this version with regular lasagna noodles or if you are following a gluten-free diet, I would recommend brown rice pasta noodles from Tinkyada, easily found in large grocery stores. They are actually good and have a nutty brown rice flavor. Follow package instructions with regular noodles, I would suggest cooking brown rice noodles for about 10 minutes, no longer. Drain them in a colander, rinse with cold water and dry on parchment lined baking sheets. I haven’t tried this recipe with no bake noodles, my suggestion would be just be certain that the ingredients in your lasagna are moist enough to cook the noodles properly. There are 14 noodles in the package of brown rice noodles, I cook them all in case of breakage. You can always make a lasagna roll up with any leftover purée and cheese.
In a medium bowl mix the well-drained garlic spinach with one and a quarter cups of ricotta cheese and a cup of mozzarella cheese or a cheese blend that you prefer. Season to taste with salt and freshly ground pepper.
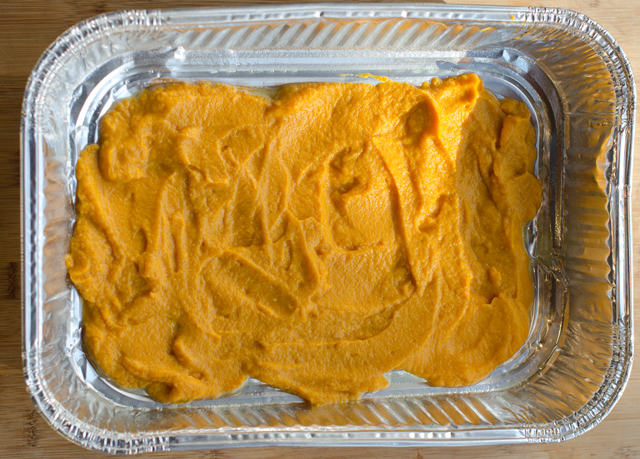
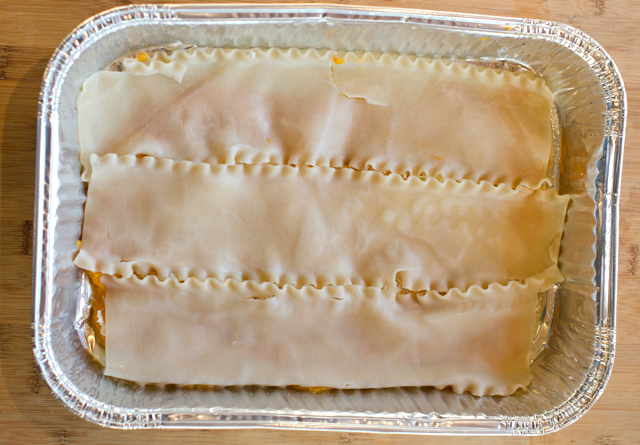
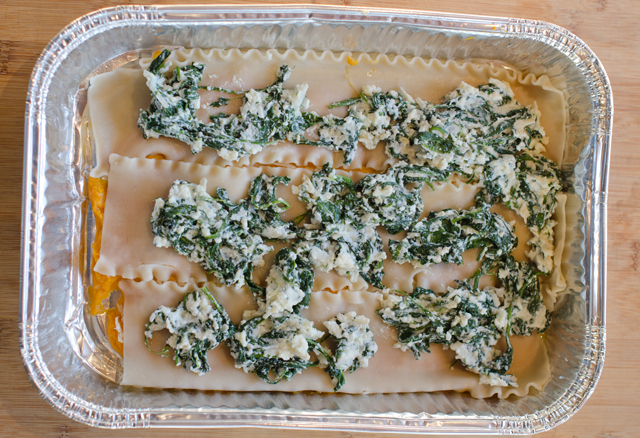
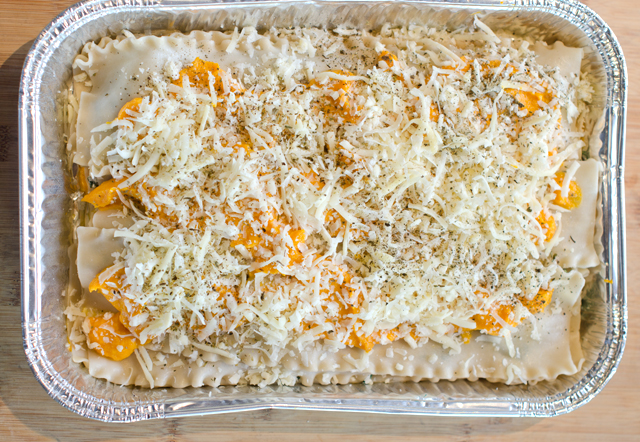
To assemble the lasagna, spray the bottom of your baking tray with nonstick spray.I used a disposable pan with dimensions of 11 x 8 x 2 . Spread one-third of the butternut squash mixture over the bottom of the tray. Top with three lasagna noodles. Dollop one half of the spinach cheese mixture over the noodles. Continue to layer and finish with the remaining butternut squash, sprinkle with a generous amount of cheese, and a sprinkle of dried basil and oregano. Cover with aluminum foil and bake for a half hour. After the half hour take off the foil reattach any cheese that has attached to the foil and bake uncovered for another 10 to 15 minutes.
Since lasagna is a time-consuming dish you could do this in stages, make the butternut squash puree one day, the spinach filling the next and assemble and cook on the third day. You could substitute frozen spinach rather than cooking down your own. Possible additions to the dish include sautéed onions, sage leaves, even toasted walnuts. Serve with a crisp salad of arugula, fennel and apples. As it is with all lasagna, it’s even better the next day.
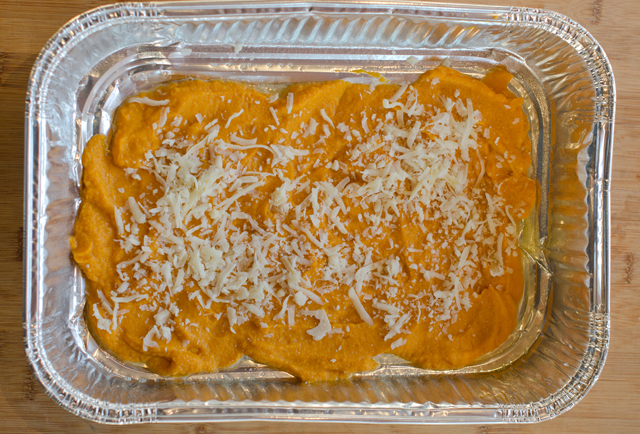
One of our very own butternut squash.After baking, the skin pops off easily.Skin off, ready to puree.A large container of spinach cooks down to about a cup.First layer of butternut squash ricotta puree .Just a sprinkling of mozzarella cheese on top.Lasagna noodles next, these are the brown rice noodles.Next is the spinach and ricotta filling.Repeat layers and finish with squash puree, a generous sprinkling of cheese, dried basil and oregano.Out of the oven..
Delicious!!
Butternut Squash and Spinach Lasagna
Serves 6-8
Ingredients for butternut squash filling
1-3 lb butternut squash
Olive oil
1¼ c regular or low-fat ricotta cheese
½ t salt
¼ t freshly ground nutmeg
Ingredients for spinach layer
1 lb fresh spinach
1 t olive oil
2 t minced garlic
1 c regular or low-fat ricotta cheese
1¼ c mozzarella cheese
Kosher salt and freshly ground pepper to taste
To assemble the lasagna
1 lb lasagna noodles (regular or gluten-free)
Shredded mozzarella cheese
Shredded Parmesan cheese
Dried basil and oregano
Directions for making the squash puree
Preheat oven to 375°F.
Line a large baking sheet with parchment paper and spray lightly with nonstick spray.
With a sharp knife cut the squash in half where the neck meets the bulbous end. Cut both of these pieces in half lengthwise. Scoop out the seeds and reserve for toasting if desired.
Brush the cut sides lightly with olive oil and place the four squash pieces on a baking sheet cut side down. Bake in preheated oven 25 minutes, rotate and bake another 25 minutes. The squash should be easily pierced with the tip of a knife.
Cool the squash for about ten minutes, until it can be handled. Scoop out the flesh and place in the bowl of a food processor fitted with the metal blade. Puree squash until smooth. Add the ricotta cheese, nutmeg and salt and puree again. Taste and adjust seasonings. Add a little more ricotta if necessary, the puree should have the consistency of a thick marinara sauce. Set puree aside for the assembly. Leave oven on at 375° if you will be finishing the lasagna.
Directions for the spinach filling
Place the fresh spinach in a large colander that is set inside a large bowl. Sprinkle the spinach lightly with water and toss spinach lightly.
Heat olive oil in a 12″ saute pan. Add garlic and saute until light golden brown. Add the spinach by the handful, adding more as it wilts down. After draining the spinach of excess liquid, you will have a generous cup.
In a medium bowl combine spinach and garlic along with ricotta, mozzarella, salt and freshly ground pepper. Taste and adjust seasonings.
Directions for assembling the lasagna
Bring a large pot of lightly salted water to a boil over high heat. Add lasagna noodles and cook according to package directions. Stir noodles occasionally to prevent them from sticking. Drain well and rinse with cool water.
To assemble the lasagna, spray the bottom of the baking dish with nonstick spray. I used a disposable tray with dimensions of 8″ x 11″ x 2″.
Spread one-third of the butternut squash puree over the bottom of the pan. Sprinkle lightly with mozzarella cheese. Top with three lasagna noodles. Dollop one half of the spinach cheese mixture over the noodles, sprinkle lightly with mozzarella cheese. Top this layer with the second layer of noodles.
Spread your second layer of butternut squash over the noodles. Sprinkle with mozzarella cheese, then top with the third layer of lasagna noodles.
Top this with the remaining spinach cheese mixture and sprinkle with mozzarella cheese.
Top with the remaining butternut squash puree and spread evenly over the noodles. Sprinkle this layer generously with shredded mozzarella and Parmesan cheese. Sprinkle lightly with dried basil and oregano.
Cover the baking dish tightly with foil and bake for 30 minutes. After 30 minutes remove the foil, reattach any cheese clinging to the foil and continue to bake uncover for another 10 to 15 minutes. You can turn the broiler on for a few minutes if you want to brown the cheese.
When Christopher Kimball left Cooks Illustrated to start a new multimedia venture, Milk Street, that includes a website, cooking school, TV and radio show and print magazine I was curious how the new magazine would differ from Cooks Illustrated, the publication he founded over twenty years ago. I have always been a big fan of Cooks Illustrated and have saved every issue since the first one came out in 1993. Could I justify subscribing to one more cooking publication?
The magazines are about the same size, Cooks Illustrated is a tad longer and both are 32 pages long. Both accept no advertising, unless you count the subscription inserts. Cooks Illustrated uses mostly black and white photography and illustration with color photographs of all the finished dishes on the inside back cover. Color photographs abound in Milk Street, though they aren’t the life-sized glamour shots we see on many popular blogs, they are accurate representations of the finished dishes. One thing Milk Street does not have are the wonderful back cover illustrations of John Burgoyne that are a welcome part of each issue. Whether it is a page of eggplant varieties, classic American cookies, crustaceans or heirloom tomatoes I always look forward to seeing his detailed and realistic work. On the other hand, Milk Street has Christopher Kimball’s folksy and entertaining letters from Vermont.
Commenting on the new publication, Mr Kimball said that Milk Street would bring techniques from the world’s kitchens, focusing on simple dishes with easy to find ingredients. The term, “easy to find” has certainly changed since I started cooking over thirty years ago. The coconut milk and fish sauce I can find on any supermarket shelf now would have taken a special trip to an ethnic market back then. Although that was enjoyable and educational at the time, I appreciate the convenience now.
Looking at a recent issue of Cooks Illustrated I found recipes for shredded tacos, walkaway ratatouille, grilled pizza and paella on the grill, the typical representation of the Americas and western Europe. There is usually one recipe with an Asian influence, in this issue one for Korean fried chicken wings. Milk Street’s inaugural issue reflected the global emphasis they promised with recipes for harissa from north Africa, pie crust that uses a Japanese baking technique, Chinese white cooked chicken, Thai coleslaw, French carrot salad and the one I chose to make first, Pinchos Morunos.
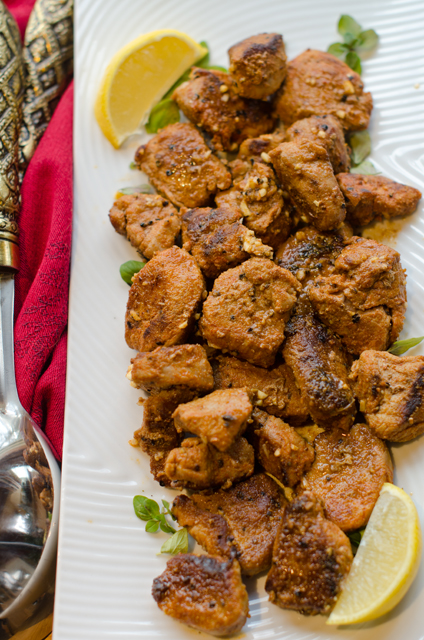
Pinchos morunos are grilled skewered meat kabobs. A pincho, or pintxo as it is called in Basque country, is a thorn or a spike. This can either refer to the skewer the meat is cooked on or the cocktail pick that is attached to a piece of bread when pinchos are served as part of a tapas menu. Morunos refers to the Moors who influenced Spanish food and culture for centuries. The meat in the original recipe was most likely lamb, the Moors were Muslim and did not eat pork. When the Spanish adopted this recipe, the meat of choice became pork. The meat was tossed with a Moroccan spice blend, ras el hanout. The term ras el hanout translates to “head of the shop” and refers to the best spices the shop has to offer. Ras el hanout can have as many as ten spices, this recipe streamlines that number to three, salt and pepper not included.
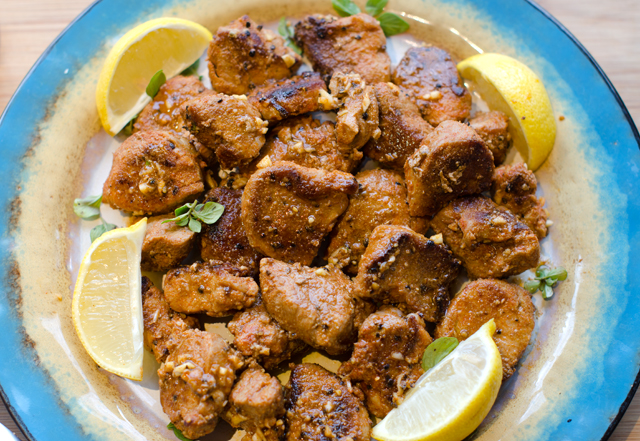
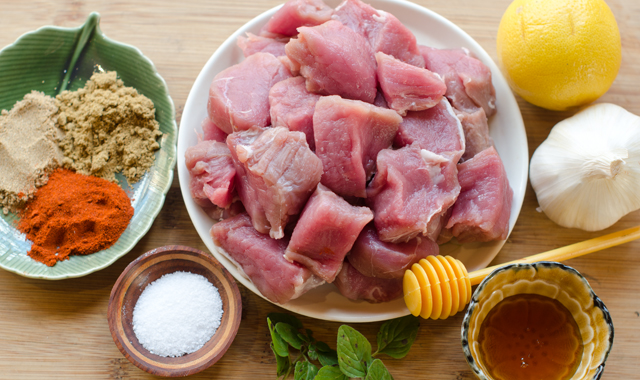
This version of pinchos morunos eliminates the skewers and brings the meat right to the saute pan. The pork is cut into 1 to 1 ½ inch cubes and tossed with a flavorful spice rub of cumin, coriander and smoked paprika. The cubes of pork are just the right size to absorb the rub and flavor the meat. The meat only needs to sit for about an hour before proceeding with the recipe. While the pork is absorbing the flavor of the spices, mix the garlic, lemon juice and honey in a small bowl.
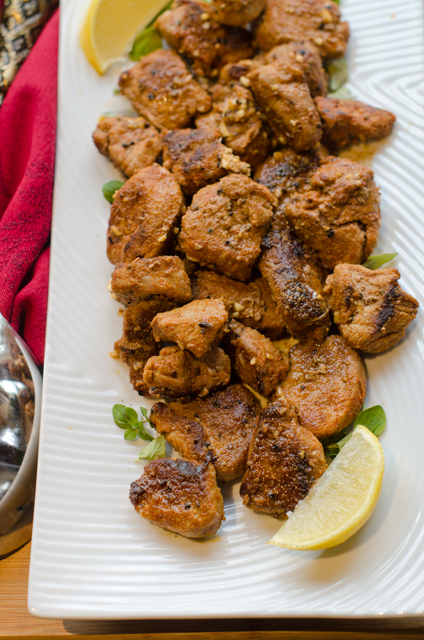
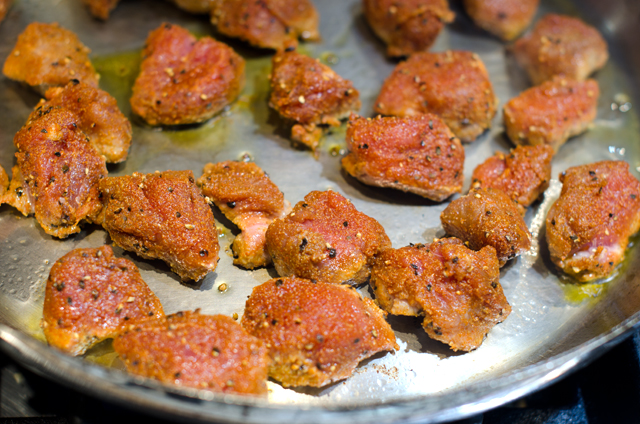
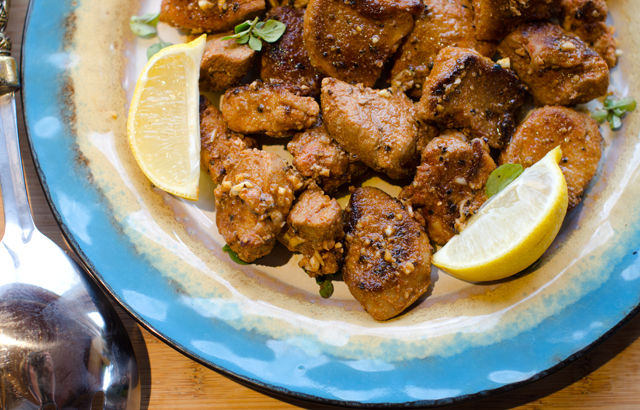
Place a large skillet over high heat, coat lightly with olive oil and heat until smoking. Add the seasoned pork cubes in one layer and cook without moving for about 3 minutes. You want all of the meat to develop a deep brown crust. Flip the pork with tongs and cook, turning the pieces occasionally as they continue to brown. The additional cooking time is 2-3 minutes, the pork will continue to cook even after you take it off the heat and you don’t want the pork to dry out. While the pork is still hot, pour the garlic, lemon, honey mixture over the meat and garnish with oregano. Serve immediately to optimally appreciate the flavors. You can prep the components of the dish earlier in the day. Cut the meat into cubes, cover with plastic wrap and make the spice blend and lemon honey mixture . An hour before serving, bring the meat out of the fridge and proceed with the recipe.
We have enjoyed this recipe several times for dinner. Serve with rice or couscous and a salad. It would also make a great hors d’oeuvre accompanied with a saffron aioli for dipping.
Pinchos Morunos
Serves 2-3
Ingredients
1½ t ground coriander
1½ t ground cumin
1½ t smoked paprika
¾t each kosher salt and fresh ground pepper
1 lb pork tenderloin, trimmed and cut into 1 to 1½ inch pieces
1 T lemon juice plus lemon wedges for serving
1 T honey
1 large clove of garlic, finely grated
2 T extra virgin olive oil
1 T chopped fresh oregano
Directions
Combine coriander, cumin, smoked paprika, salt and pepper in a medium bowl.
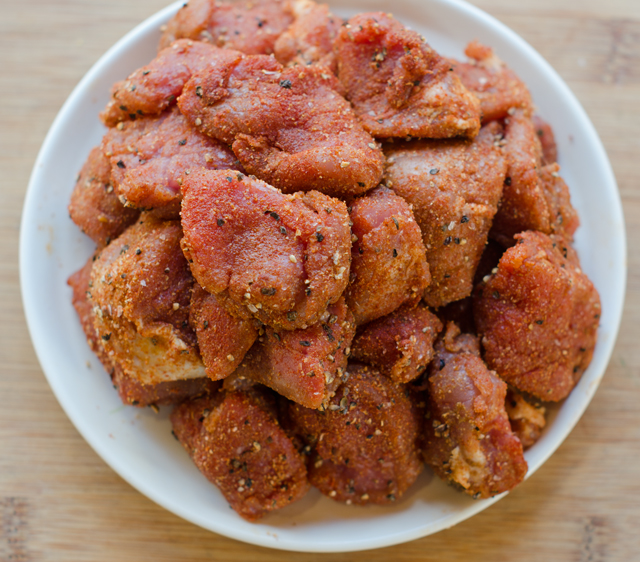
Add the cubed pork to the bowl and toss to coat thoroughly until no dry rub remains.
Let the pork sit at room temperature for 30 minutes and up to 1 hour.
While the pork is sitting at room temperature, combine the lemon juice, honey and garlic in another bowl.
In a large skillet over high heat, heat 1 tablespoon of the oil until smoking. Add the meat in a single layer and cook without moving until deeply browned on one side, about 3 minutes. Using tongs flip the meat over and continue to cook until browned on all sides, another 2-3 minutes.
Take meat off the heat and pour the lemon juice and garlic mixture over the meat and toss until evenly coated. Transfer the meat to a serving platter.
Drizzle the meat with the remaining olive oil, sprinkle with oregano and serve with lemon wedges.
Toss the pork cubes with the spice blend.Be sure the pork develops a nice crust on the first side.
One of the highlights of last summer was our trip to the Food and Wine Classic in Aspen Colorado. It is touted as America’s premier culinary event, and certainly lived up to those expectations. We enjoyed three days of cooking demonstrations, wine tastings and best of all, the grand tasting pavilion. It was there that we, and 5000 other fanatical foodies sipped, savored and sampled our way around the massive white tents. One area we were certain to stop at during each grand tasting was to sample the offerings of Food and Wine magazines best new chefs. Everything we tried was imaginative and delicious as well. Not coincidentally, the July issue of Food and Wine magazine offered recipes from each of these up and coming chefs.
With memories of the wonderful small plates we enjoyed at the classic, it was time to try some of their dishes for ourselves. This summer I tried the rather ambitious, summer squash with lemon curd and citrus vinaigrette from chef Brad Kilgore. Joe was more interested in the Tuna Poke on Nori Crackers. This very simple version is from Ravi Kapur, chef at Liholiho Yacht Club, a San Francisco restaurant with Hawaiian, Indian and Chinese influences.
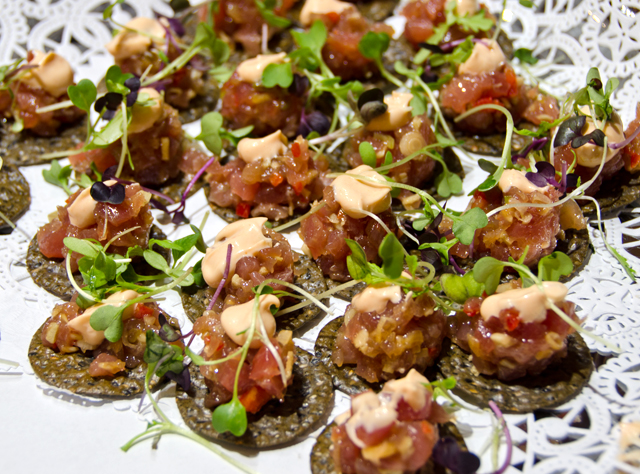
If you are not familiar with it, poke, pronounced POH-keh is a raw fish salad. Poke, means chop or chunk, which refers to the bite sized pieces the fish is cut into. It is commonplace in Hawaii, found everywhere from the deli departments of grocery stores to fine dining establishments.
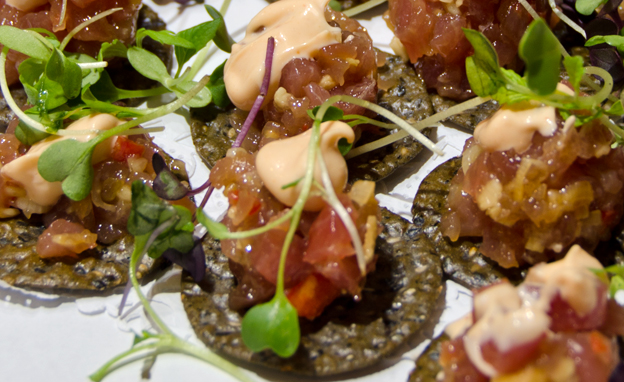
The first time we tried it just for ourselves and the poke passed our taste test with flying colors. The nori crackers are a nice “cheffy” touch but speaking on behalf of the cleanup crew, messy and not necessary for the home cook. For this recipe, make the poke with sushi grade ahi tuna from the most reputable vendor you can find. The spicy mayo has only three ingredients, tamari, sriracha and mayo. So it’s very simple, finely chopped tuna, scallion, ginger, jalapeno, tamari and dark sesame oil combined in a bowl and seasoned with salt. Spoon the poke on black sesame crackers, I like the ones from Edward and Sons, easily found in large supermarkets. Dollop or pipe some of the spicy mayo on top. Garnish with some Asian microgreens and a few toasted sesame seeds. We have served it at two parties so far this year, both to rave reviews.
Tuna Poke
Serves 6-8
Ingredients for the Spicy Mayo
¼ c good quality mayonnaise
¼ t tamari
1 t sriracha (or to taste)
Ingredients for the Poke
12-oz sushi grade tuna cut into ¼-inch dice
4 t minced scallions
2 t minced peeled fresh ginger
2 t seeded and minced jalapeno
1 t tamari
½ t toasted sesame oil
Kosher salt
Black sesame crackers
Asian microgreens and toasted sesame seeds for garnish
Directions for the Spicy Mayo
In a small bowl whisk all the ingredients together until smooth.
Directions for the Poke
In a large bowl, fold all the ingredients except the garnishes together; season with salt.
Spoon the poke on the black sesame crackers and dollop with some of the spicy mayo. Garnish with sprouts and sesame seeds.
 We have adopted the Italian/Italian American tradition of seven fishes and it has been our Christmas eve feast we share with friends for the past six years. I explained the tradition of the seven fishes in a post from 2012.