April 30, 2018 Whole Roasted Cauliflower


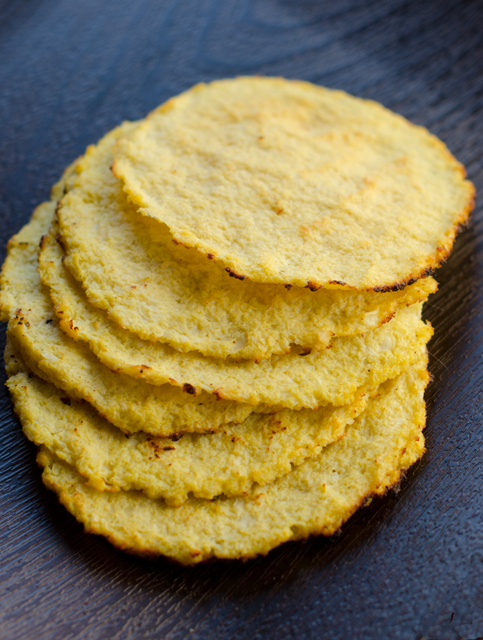
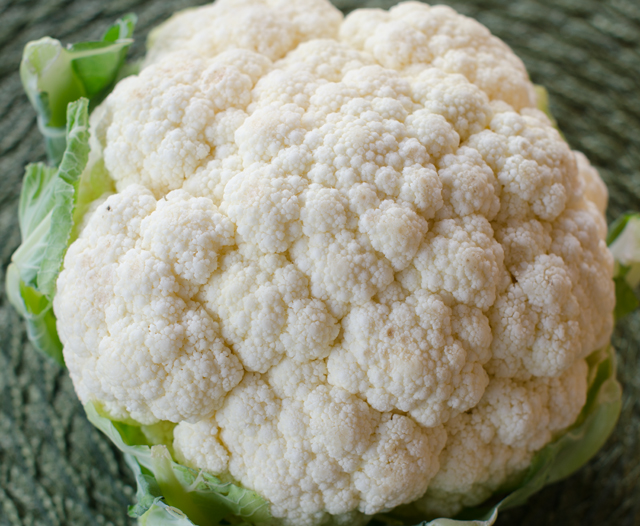
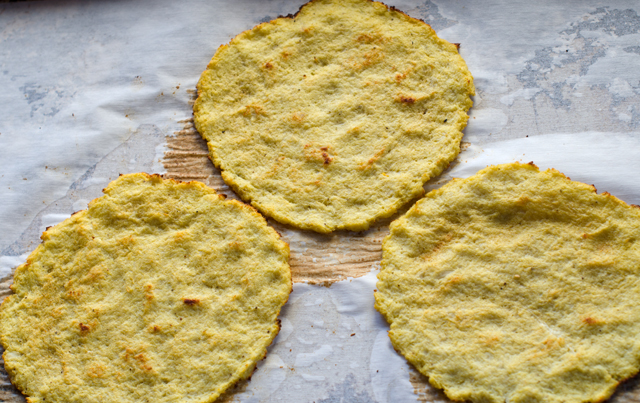
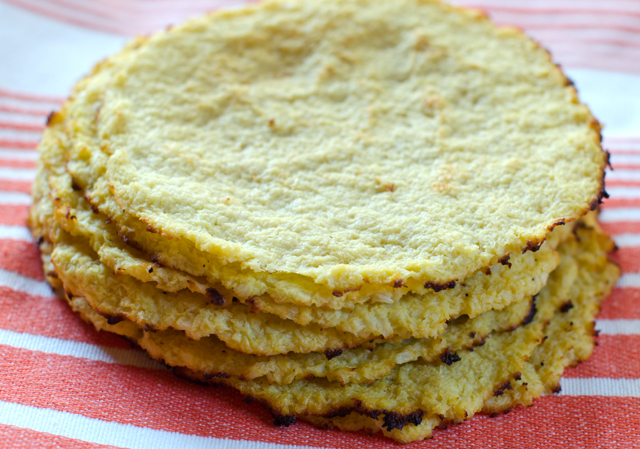
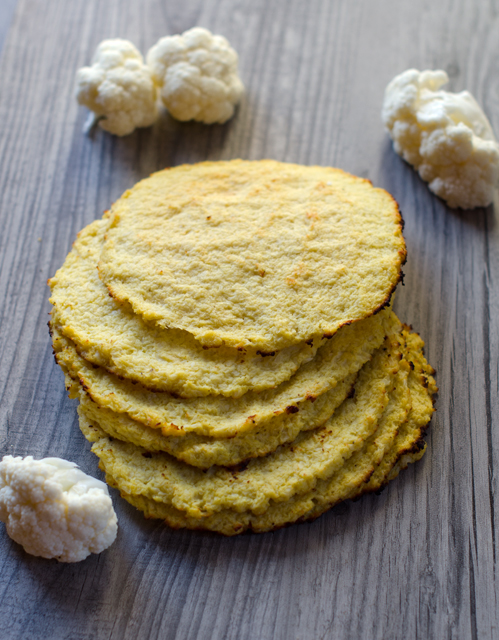
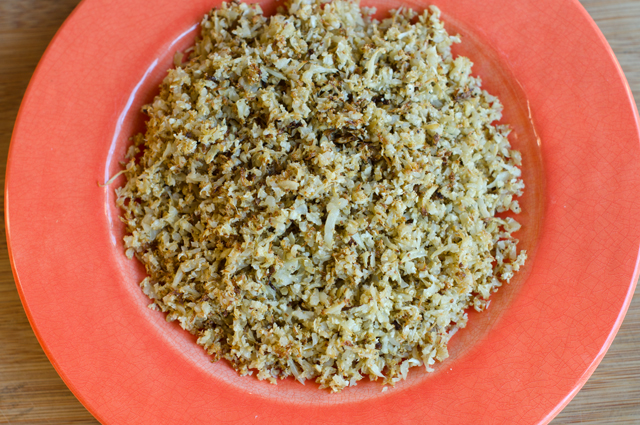
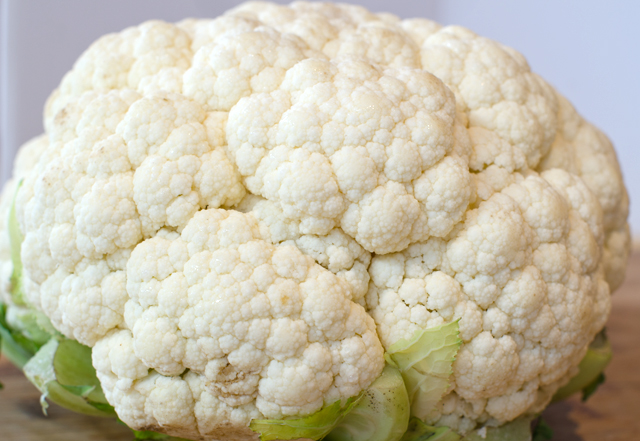
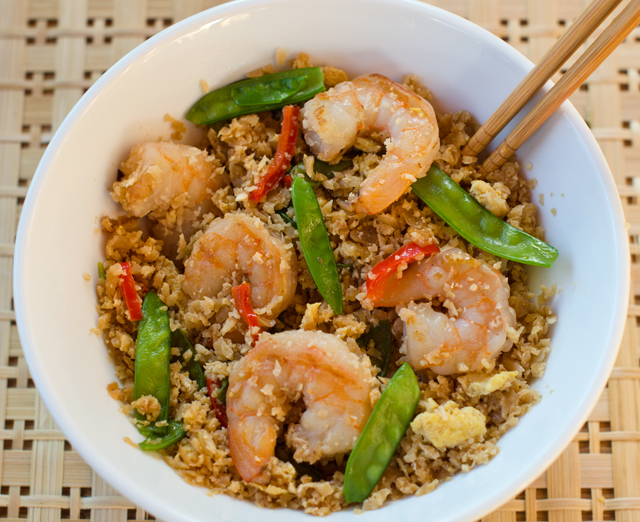
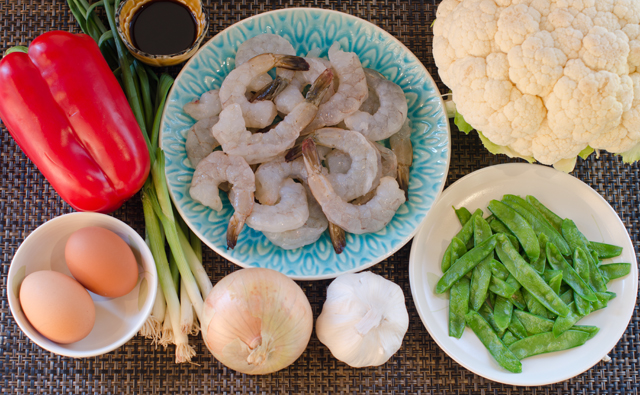
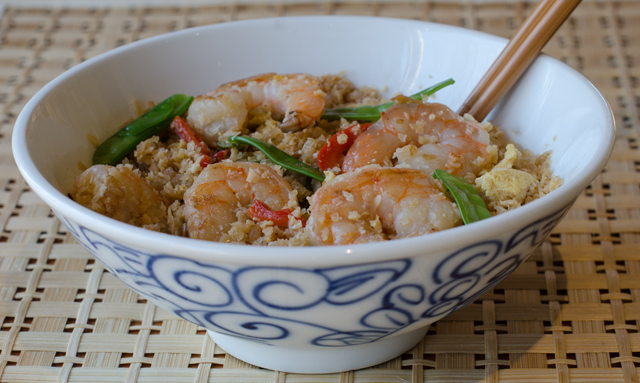
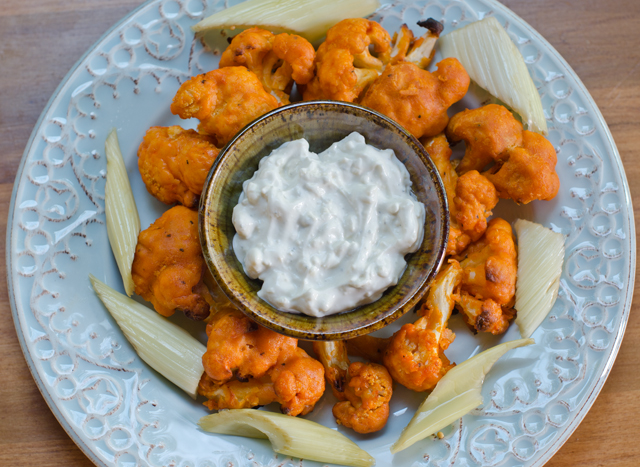
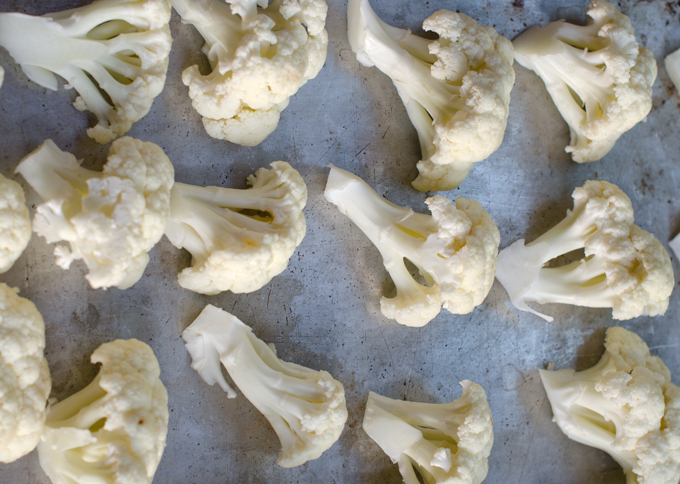
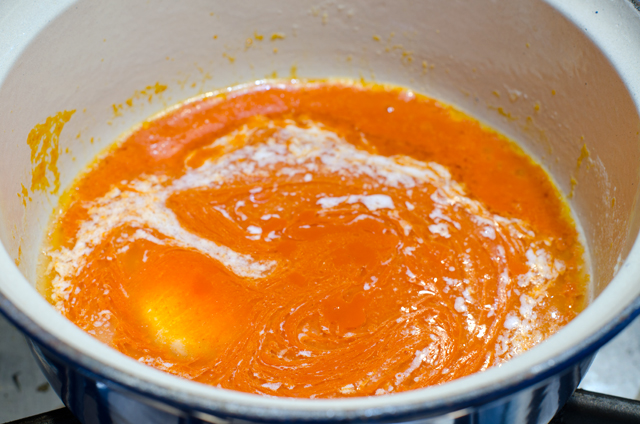
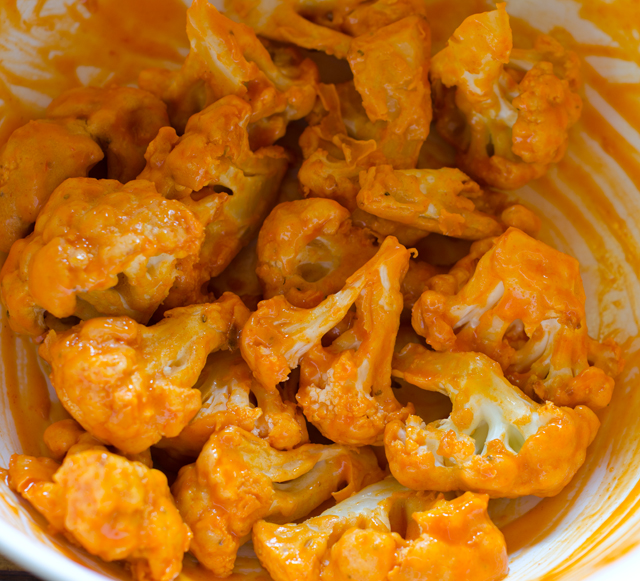
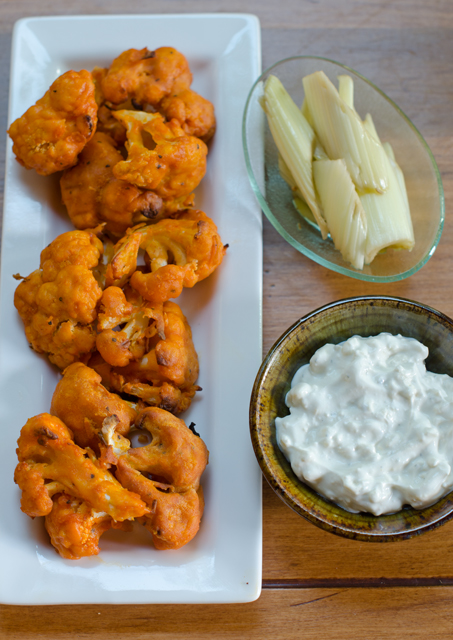
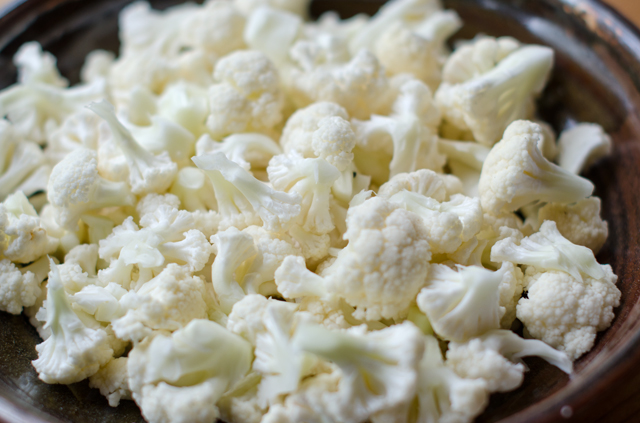
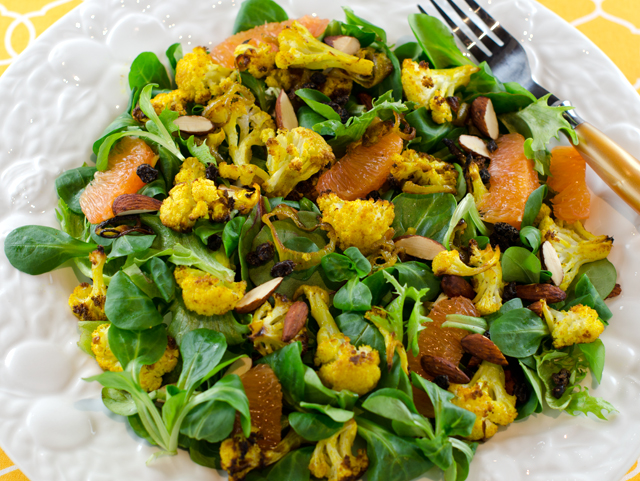
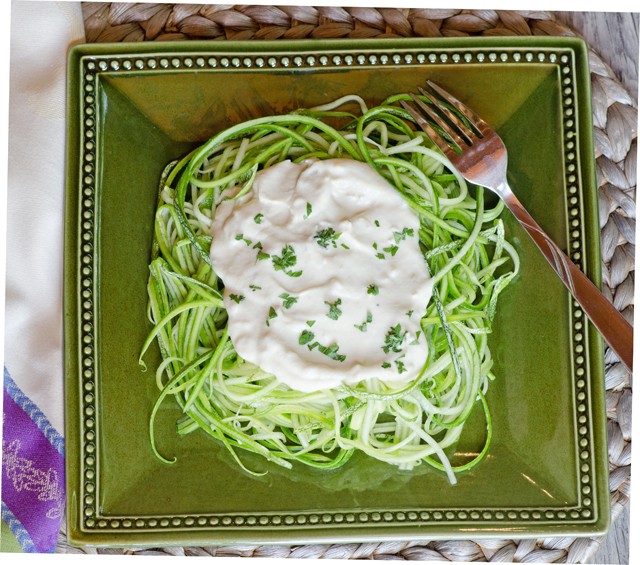
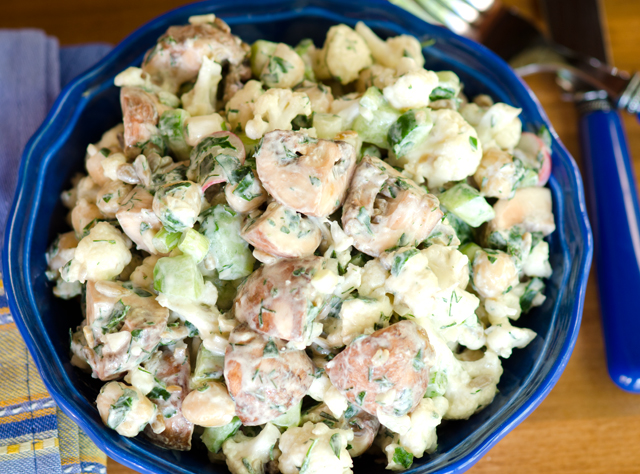
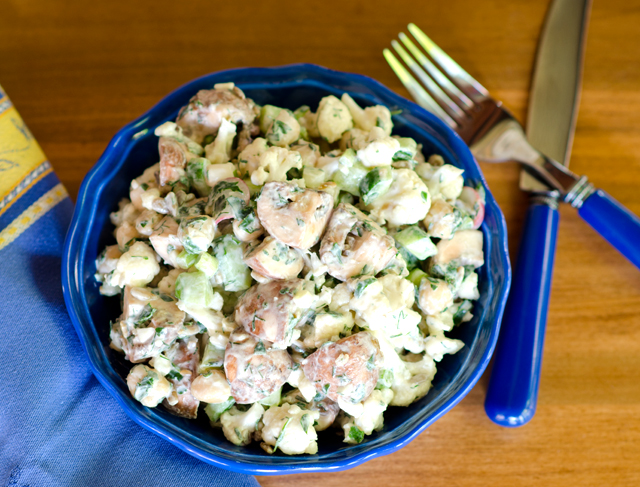
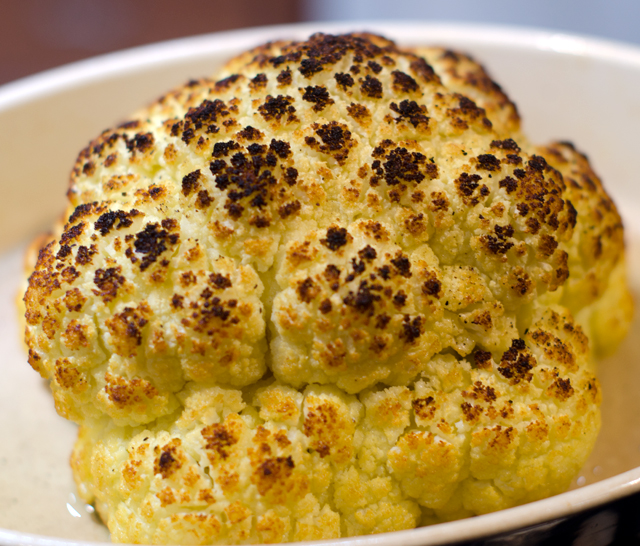
Is there any other vegetable as versatile as cauliflower? Puréed as a substitute for mashed potatoes, broken down into fine grains like rice, couscous and polenta, filling in as both pizza crust and tortilla, sometimes I think we forget how good it is without the disguises. I love to toss cauliflower florets with olive oil, salt and pepper and roast them until crispy brown on the outside and tender and creamy to the bite. A tray of roasted cauliflower sometimes doesn’t make it to the dinner table, we finish it off like popcorn. I shouldn’t leave out cauliflower “steaks”, thick slabs roasted in the same fashion as the florets and just as good. But the version that is visually impressive and surprisingly not that hard to do is whole roasted cauliflower. The internet has countless recipes for whole roasted cauliflower, most of the ones I read just baked the cauliflower.  This one, from Israeli celebrity chef Eyal Shani in the latest issue of Milk Street Kitchen uses two techniques, poaching in well salted boiling water and then roasting at a high heat.

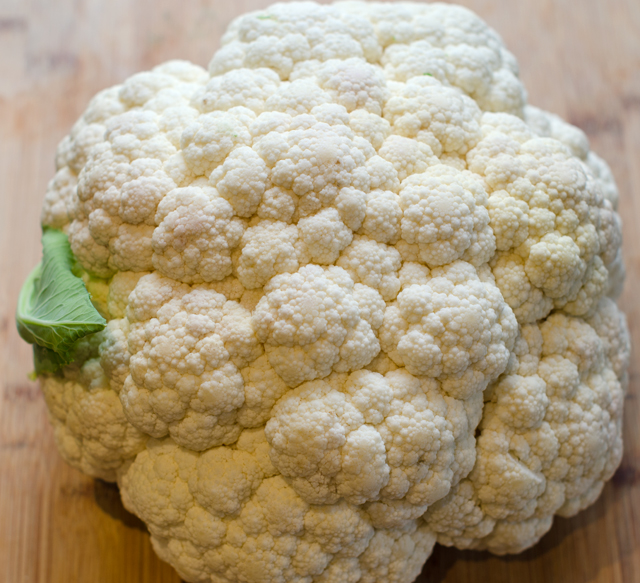
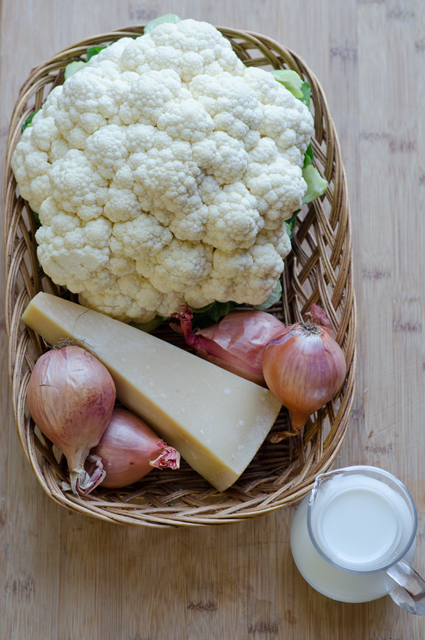
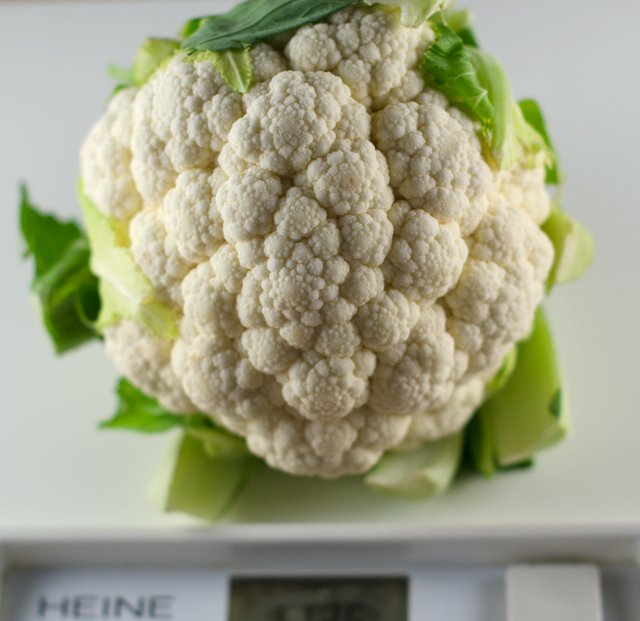
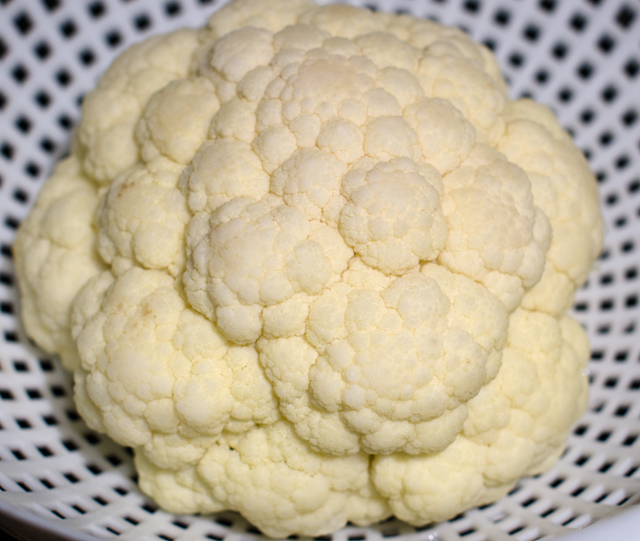
Prime season for cauliflower is in the fall and the ones available at farmers markets can be as large as 4-5 pounds. Out of season we depend on the wrapped varieties in our local supermarkets. Look for a cauliflower that weighs about two to two and half pounds.  A larger head will be overcooked on the outside before it is tender on the inside. To begin the two step cooking process, get a large pot of water on to boil and preheat your oven to 475°F with the rack in the middle position.

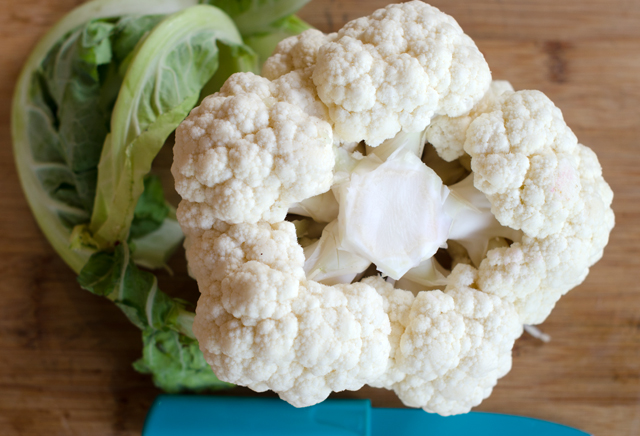
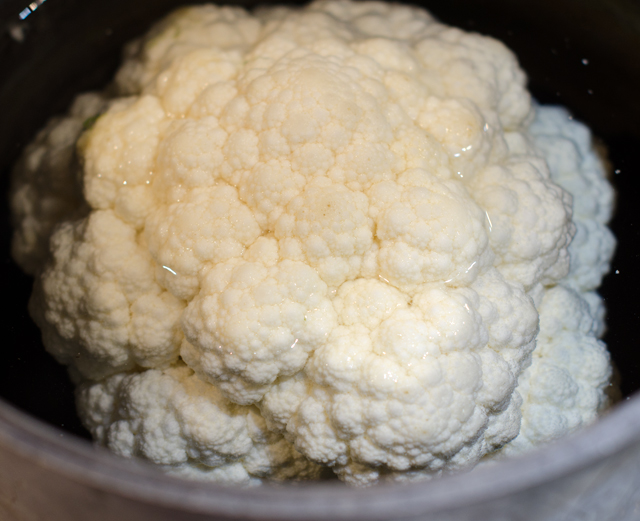
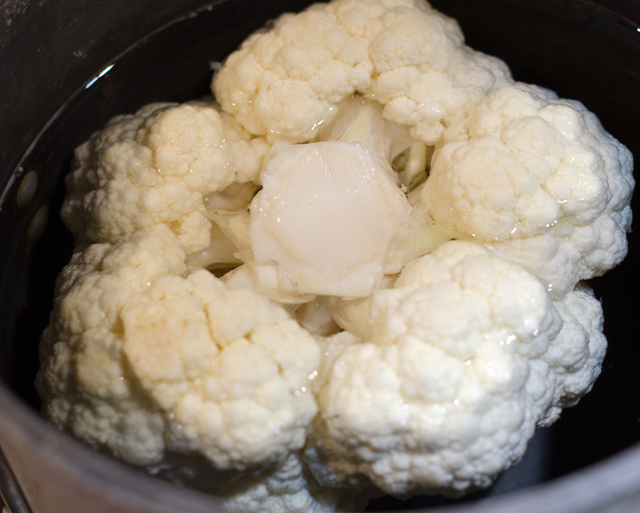
While you are waiting for things to heat up, carefully trim off the leaves and the hard core near the bottom of the cauliflower. Leave the main stem intact and make sure not to cut through any of the florets. When the water has come to a rolling boil, add a half cup of kosher salt to the water.  Carefully lower the cauliflower into the boiling water and immediately set a timer for five minutes. Since the cauliflower floats to the top, you will need to flip it halfway through the cooking process so it will cook evenly. When the timer goes off, transfer the cauliflower, stem side down to a colander. I found that a large Chinese strainer made this process easy. Allow the cauliflower to drain for at least ten minutes, you want the cauliflower to roast, not steam.

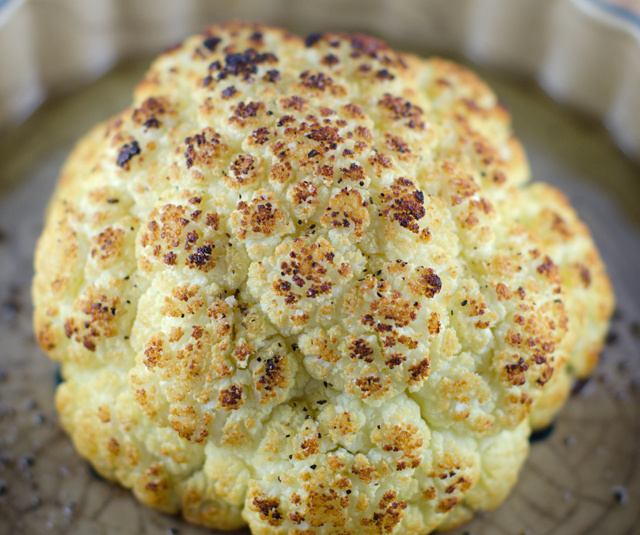
Transfer the cauliflower to a shallow sided baking dish, stem side down of course. Sprinkle with pepper or a pepper seasoning blend and rub with olive oil. Don’t neglect the bottom florets. Place the dish in the oven and bake, rotating the dish several times during the cooking process. This will allow for even browning. Tilting the pan with a potholder, use a small spoon to redistribute any olive oil that accumulates in the pan. The cauliflower is done when it is golden brown on the outside and the center is easily pierced with a skewer. Let cool for five minutes and serve right in the baking dish. Use a knife to cut into wedges. Delicious as is, or serve with your favorite dipping sauce.

Start with a cauliflower that weighs about 2 lbs.
Trim away the leaves and the hard stem.
Blanch cauliflower in a large pot of well salted water. Salting the water ensures the cauliflower is seasoned to the core.
At the halfway point flip the cauliflower to the other side.
Immediately transfer cauliflower to a colander to drain, stem side down.
The finished product.

Whole Roasted Cauliflower

Serves two to four

Ingredients

  • 2-pound cauliflower
  • Kosher salt and fresh ground pepper
  • 3-4 T extra virgin olive oil

Directions

  1. Preheat oven to 475°F with the rack in the middle position. In a 6 to 8 quart pot, bring 4 quarts of water to a rolling boil. While you are waiting for the water to boil, trim the green leaves and hard stem from the cauliflower. leaving the core and florets intact. Add a ½ cup of salt to the water and when it comes to a boil carefully lower the cauliflower into the water. Immediately set a timer for five minutes. Flip the cauliflower half way through the cooking process. Remove from heat.
  2.  Transfer the cauliflower to a colander stem side down and drain for at least 10 minutes.
  3. Transfer the cauliflower to a shallow sided baking dish, stem side down.
  4. Drizzle with olive oil and use your hands to rub it in. Season with fresh ground pepper.
  5. Roast in the preheated oven, rotating the baking dish  several times during the cooking process. Spoon oil that accumulates in the pan back over the cauliflower.
  6. Cauliflower is done when golden brown on the outside and a skewer can easily pierce the center, 20-25 minutes.
  7. Let rest for five minutes and serve in the baking dish.

January 21, 2018 Cauliflower Tortillas

Does any vegetable come close to having the versatility of cauliflower? It has a nutty sweetness when roasted and a creamy sumptuous quality when steamed and puréed. It’s a low carb, paleo, gluten-free option that substitutes for rice, couscous and even pizza crust. Let’s not neglect to mention the nutritional benefits as well. Cauliflower is an excellent source of vitamin C. vitamin K, folate, pantothenic acid (vitamin B5) and dietary fiber and an entire head of cauliflower is only 156 calories!

Here’s a recipe to help keep you on track for a new year of healthy eating and a creative addition to your cooking repertoire, cauliflower tortillas. They have a texture similar to the real thing and a mildly nutty flavor.

Preheat your oven to 375°F and line two baking sheets with parchment paper, a Silpat liner works too. I use a little nonstick spray on the edges to keep the parchment from curling up. Start with a medium cauliflower, the one I used was 2 lbs, including the greens. Cut the cauliflower in quarters, remove the greens and most of the core. In a food processor, pulse the cauliflower into granules finer than rice, but don’t get to the point of liquefying it. I do this in batches so no chunks are left behind. If you don’t have a food processor you can go low tech and do this step with a hand-held box grater. The cauliflower needs to be cooked to remove as much liquid as possible. You can do this in either a microwave or a steamer. The next step is crucial to get the right consistency for the cauliflower “dough”. Gather the steamed cauliflower granules in a clean cloth dish towel (a thin one works best) and wring out all the excess liquid. Use rubber gloves or an extra towel to protect your hands, the cauliflower will be very hot. If you have the time, you can wait until it cools down a bit. When you think you have squeezed out all the liquid you possibly can, squeeze some more. The end result reminds me of masa dough, the ingredient corn tortillas are made from.

Place the well-drained cauliflower in a medium bowl and mix in two well beaten eggs and salt and pepper to taste. Many of the recipes I read add additional herbs and spices at this point and you are welcome to do so if you choose. I prefer to keep mine plain like a regular corn tortilla to showcase the flavors of what I fill it with.

Divide the cauliflower mixture into six portions and use your hands to press them evenly into six small circles, about five to six inches in diameter. Bake in the preheated oven for ten minutes, take them out of the oven and flip them to the other side and bake for an additional 5-7 minutes. I used convection heat and that helped them brown in the oven. You can also brown the tortillas in a pan to give them a crispy edge and a more nutty flavor.

The resulting tortillas are soft and pliable like the real thing and they hold up well to a variety of fillings. On my first attempt I filled them with taco seasoned ground turkey, guacamole and salsa. They would be great for quesadillas or enchiladas too. You don’t have to limit your choices to just Mexican, they would make a great breakfast wrap or with some smoked turkey, avocado slices, lettuce and tomato for a low carb lunch. Joe gave them two very enthusiastic thumbs up. Today we made breakfast tacos with scrambled eggs, cheese and chicken sausage topped with guacamole and salsa, delicious! Next to try, chicken enchiladas.


The cauliflower head, also known as the curd.
Pulse the cauliflower into fine granules.
Gather the cooked cauliflower into a dish towel, cheesecloth works here too.
After several minutes of squeezing the liquid out of the cauliflower, the finished product looks like this.
The resulting cup and a half of liquid that was squeezed out.
Mix the dried cauliflower with eggs and salt and pepper to taste.
Divide the mixture into six portions and form into circles on parchment lined baking sheets.
Cauliflower tortillas hot out of the oven.

Cauliflower Tortillas

Makes 6

Ingredients

  • 1 medium cauliflower (about 2 lbs total including the greens)
  • 2 large eggs
  • Kosher salt and freshly ground pepper to taste

Directions

  1. Preheat oven to 375°F (I used convection heat) with racks in the upper and lower shelves of the oven. Line two large baking sheets with parchment. I use a little non stick spray on the corners to keep them from rolling up.
  2. Cut the cauliflower in quarters, remove the leaves and cut out most of the core. In a food processor pulse the cauliflower into granules, smaller than rice. I ended up with 6 cups lightly packed cauliflower.
  3. Place the riced cauliflower in a bowl and microwave on high for two minutes, stir well, microwave two minutes, stir and microwave again for two minutes.Alternately you can cook the cauliflower in a steamer.
  4. Dump the cooked cauliflower in the center of a cloth dish towel or a doubled layer of cheesecloth. Gather up the ends, careful, it will be extremely hot and squeeze out any excess liquid.  You may want to protect your hands with an additional towel or rubber gloves. When you think you have removed all the water, give it one more squeeze.
  5. Return the cauliflower to a bowl, add two beaten eggs, salt and pepper to taste and mix well until combined.
  6. Scoop out the cauliflower into 6 fairly equal portions on the baking sheets and form into circles.
  7. Bake with trays in the upper and lower half of the oven for five minutes then reverse the upper and lower positions and bake for another five minutes. Remove both trays from the oven and peel the tortillas off the baking sheets, flip them over and return to the oven for another 5-6 minutes.
  8. Transfer cooked tortillas to a wire rack to cool.
  9. Heat a medium-sized non stick pan over medium heat and brown the tortillas on both sides to crisp the edges.
  10. Store in well sealed freezer bags. To use, reheat tortillas over medium heat in a small non stick pan.

February 23, 2017 Toasted Cauliflower Rice

 Toasted cauliflower rice takes plain cauliflower rice to the next dimension. If you are already making cauliflower rice, there’s not much more to do to give this “stand-in” a more rice like texture along with the nutty quality we love in regular rice. Make cauliflower rice either by pulsing it or using the shredding disc of the food processor. You can also go low-tech and grate the cauliflower on a box grater with the medium sized holes. I think it’s even more important to press out the additional liquid when you are making toasted cauliflower rice, so your rice will toast, not steam.

Put the cauliflower granules in a large enough bowl to mix it around, toss with a tablespoon or so of olive oil, a sprinkle of kosher salt and a grind of pepper (white pepper if you are fussy). Spread the riced cauliflower evenly over a lined baking sheet, foil works best here for easy clean up. A full head of cauliflower will probably take two baking sheets. Bake at 375°F convection heat for about twenty to twenty five minutes. I flipped the baking sheet from front to back and top to bottom at the halfway point and gave it several good stirs during the cooking time. The end product is toasty with an amazing rice like texture. Bake more than what you think you might need, it will shrink (after all cauliflower is 92% water) during the cooking process and yes, it is that good. Feel free to add any spices or add-ins to this dish. I served it with pesto chicken breasts to absorb the sauce but the possibilities are endless.

 Oven Toasted Cauliflower Rice

Serves 2-4

Ingredients

  • 1 head cauliflower
  • 1 T olive oil
  • Kosher salt and pepper to taste
Plain cauliflower rice before toasting.
Drizzle with olive oil, sprinkle generously with salt and pepper.
Spread out evenly on a foil lined baking sheet. A whole head may take two sheets.

Directions

  1. Preheat convection oven to 375°F. Cover two large, rimmed baking sheet with aluminum foil.
  2. Break the cauliflower into florets, removing the stems. Place the florets in the food processor bowl and pulse until the cauliflower looks like rice. This takes about 10 to 15 one-second pulses. You may need to do this in two batches to avoid overcrowding.
  3. Place the cauliflower rice in a large bowl, add olive oil, salt and pepper. Toss until the rice is coated with the oil. Spread in a single layer on the baking sheet and roast until tender, rotating the baking sheets halfway during the baking time. The rice is done when it starts to look golden in spots.

February 20, 2017 Shrimp Fried Cauliflower Rice

Cauliflower florets are a low carb substitute for white rice in this savory one pot, or should I say one wok, dish. It’s low glycemic, gluten-free and South Beach Diet friendly. Packed with juicy shrimp and colorful vegetables, this recipe is perfect for an easy go-to weeknight meal.

Cauliflower is sold by the head, not by weight. Depending on the time of year a standard head can vary greatly in size. Cauliflower is a cool weather crop in our area and harvested in the fall. When they appear at the farmers markets they can be huge, five pounds or more. In the winter months, imports from the West Coast are fairly small.  The head I used weighed in at 2.13 pounds and half of the head made 5 cups, just what I needed for this recipe.

Stores like Trader Joe’s are now selling prepackaged cauliflower rice, but it’s easy enough to make your own. Cut the cauliflower into florets by quartering the head through the stem end and cut away the piece of core from each quarter. Then cut the cored cauliflower into florets. You can use a box grater with medium-sized holes or the food processor fitted with the grater blade. With both techniques you are aiming for little pieces the size of rice granules. I like to press out any additional moisture from the rice by placing it in a clean cotton tea towel and squeezing to remove remaining water. No excess moisture equals a dish that won’t turn out soggy.

As with all stir fry preparations, all of your ingredients should be ready to go when it’s time to cook. Trying to stay with a South Beach friendly preparation I used red pepper strips and snow peas. The peas were frozen from last year’s garden and perfect for a meal like this. Other possibilities are peas, carrots, and water chestnuts. Heat your wok, the pan is hot enough when a bead of water instantly sizzles and evaporates on contact. Once this happens, add one tablespoon of a neutral oil; peanut or canola are fine here.  Swirl it around to thoroughly coat the pan. Add the shrimp all at once and spread them out over the pan so they are not overlapping. Cook shrimp on first side for one minute then flip and cook for thirty seconds. The shrimp should be almost cooked but not quite, they will finish cooking when you add them back to finish the recipe. Remove shrimp to a plate.

Add the eggs in next, stir and break them apart to get scrambled egg pieces. When the eggs are not quite cooked through, add them to the plate with the shrimp. Keep warm.
Wipe out your pan with a paper towel and return it to high heat. Add the second tablespoon of oil and swirl to coat the pan. The aromatics are in next, onion, garlic and ginger. Cook, stirring often until the onion is translucent, 3-4 minutes. Stir in your choice of vegetables and cook for another 3 minutes. Add the scallions and cook for 15 seconds. Add the cauliflower rice to the pan and sprinkle the tamari and sesame oil over the rice. Warm the cauliflower rice through and finally add in the shrimp and eggs. Let the shrimp and eggs heat back up and finish cooking. Toss to mix the rice evenly with all the ingredients. Taste for seasoning, adding more tamari and sesame oil if desired. Serve hot.

Shrimp Fried Cauliflower Rice

Ingredients

  • 1 medium head of cauliflower
  • ¾ to 1 lb medium uncooked shrimp, shelled and deveined
  • ½ t kosher salt
  • Black pepper
  • 2 tablespoons peanut oil, divided
  • 2 eggs, beaten in a small bowl
  • 1 small onion, finely chopped
  • 2 cloves garlic, minced
  • 4 scallions, minced
  • 1-2 c vegetables, I used a combination of snow peas and red pepper slivers. Peas, carrots, water chestnuts can be used.
  • 1 T tamari and more to taste
  • 1 teaspoon and more toasted sesame oil


Directions

    1. For the cauliflower rice, cut the cauliflower in half, cut out the core and discard. Cut the cauliflower into chunks.  Place the cauliflower into a food processor and pulse until it’s the consistency of grains of rice. Alternately you can a small handheld cheese grater or a chef’s knife. Set aside 4-5 cups for this recipe.
    2. Season shrimp with salt and pepper, set aside.
    3. Heat a wok or large sauté pan on high heat. When the pan is hot enough for a bead of water to instantly sizzle and evaporate, add 1 tablespoon of the oil and swirl to coat pan.  Add the shrimp, quickly spreading out around the pan so that they are not overlapping. Cook the shrimp untouched for a minute then flip over and let the other side cook for 30 seconds, or until about almost cooked through. Remove the shrimp from the pan onto a plate, leaving as much oil in the pan as possible.
    4. Turn the heat to medium high and let the pan heat up again. Pour in the eggs, stirring in a quick motion to break up and scramble the eggs. When the eggs are almost cooked through, scoop out of the wok onto the same plate as the cooked shrimp.
    5. Use a paper towel to wipe the pan clean and return to high heat with the remaining 1 tablespoon of cooking oil, swirling to coat. When the oil is very hot, add the garlic, ginger and onion to the skillet, and cook, stirring often, until onions have become translucent, about 3-4 minutes. Stir in red pepper strips and snow peas, and cook, stirring constantly, until vegetables are tender, about 3-4 minutes.
    6. Add green onions and stir fry until fragrant, about 15 seconds. Add in the cauliflower rice and stir well to mix in the green onions throughout.
    7. Drizzle the sauce all around the rice and toss. Add the cooked eggs, shrimp and sesame oil, tossing to mix the rice evenly with all of the ingredients. Finish cooking the shrimp and eggs and let everything heat back up again. Taste for seasoning and add additional tamari and sesame oil if desired. Serve hot.


October 26, 2016 Buffalo Cauliflower Bites

dsc_8213aInspiration for the recipes at Sue’s Seasonal Palate comes from many sources. Sometimes it’s a magazine article I’ve read, an intriguing recipe from the internet or a dish I’ve recently tried in a restaurant. The latter was the case for this recipe.

Last weekend we got together with some long time friends at a popular brewpub called The Vault. It’s located in a former bank built in 1889 in the historic borough of Yardley Pennsylvania. The owners of the Vault bring their own brand of sophistication to the brewpub concept and have turned it into an experience that is unique. No deafening pop or rock music or a bank of televisions tuned to the latest sports programs, they have chosen to feature live and recorded jazz that enhances the relaxed atmosphere and is more conducive to conversation. The beer is brewed on premises and the offerings from the kitchen are made in-house or sourced locally. Both the kitchen and the brewery are open to view. Though I am more of a wine drinker I really enjoyed the Sweet Potato Ale. The menu includes a nice selection of starters along with sandwiches, interesting salads and pizzas from their wood fired oven. The menu is definitely a cut above the average pub fare and one of their appetizers made me want to recreate it at home.

Our server suggested we start off with an appetizer of buffalo cauliflower to share for the table while we were pondering our other food choices. For a brief history of the buffalo wing we only need to go back to 1964 where they originated in, no surprise here, Buffalo, New York. The story has several versions but the most popular and my favorite, is that one evening, Teressa Bellissimo, co-owner of the Anchor Bar was challenged to whip up a late night snack for her son and his friends. “Mother Teressa” found some large chicken wings that had been deemed too meaty for the stockpot. Bellissimo chopped the wings into two sections, deep-fried them and tossed them with some hot sauce. She served them with celery that was part of the Anchor Bar’s antipasto and some of the house blue cheese dressing. The wings were reported to be an immediate local success and the first official Chicken Wing Day was celebrated on July 29, 1977. Over fifty years later they are a national favorite consumed everywhere from bars, to sporting venues to “competitive eating events” like the Philadelphia Wing Bowl and Buffalo’s annual National Buffalo Wing Festival.

It wasn’t enough for cauliflower to be a substitute for mashed potatoes, couscous and even pizza crust, the versatile vegetable takes the place of chicken wings in this recipe. The Vault’s buffalo cauliflower is described on the menu as buttermilk cauliflower, house buffalo sauce, chive sour cream and the real surprise, sweet pickled celery. The calorie count for six pieces of deep-fried chicken wings at one website I looked at was 616. Though I have nothing against traditional buffalo wings I also thought this recipe was worth the somewhat healthier do-over.

Start with a large head of cauliflower and break into chicken wing size florets. I was aiming for 1½ in by 2½ inches in length, you should have 5 to 6 cups of “wings” and probably more. Some recipes I found called for the cauliflower to be roasted with olive oil, salt and pepper. I wanted the florets to have a bit more substance so I coated the cauliflower with a simple batter of flour, milk and spices. Substitutions can be made here, almond milk for vegans, rice flour for a gluten-free diet. If you use rice flour as I did, you may need to thin the batter out a bit more.

I tried at first to dip the pieces by using the handle at the bottom of my cauliflower “wing”. This turned out to be a very messy approach., It is easier to use tongs to dip the individual pieces in the batter. Dip each piece thoroughly, lift out and allow the excess batter to drip back into the bowl. To minimize clean up, line the baking sheet with foil or parchment. Since several of the blogs I read mentioned excess batter clumping up and sticking to the baking sheet, I chose to place the florets on a wire rack thoroughly sprayed with Pam over the baking sheet. Preheat oven to 425°F, (convection heat) and bake for about twenty minutes or until golden. I flipped the pieces halfway through the baking process.

While the cauliflower is baking, melt the butter in a small saucepan over medium heat. Add the hot sauce and stir to combine. In a medium bowl, combine the cooked cauliflower and sauce, toss gently to combine. Place the cauliflower back on the baking sheet and bake for another 10 minutes, until the cauliflower begins to crisp. Serve immediately with plain or sweet pickled celery and blue cheese dressing or sauce.

Cauliflower pieces shouldn't be too small.
Cauliflower pieces shouldn’t be too small.
A simple batter of flour, spices and milk.
Ingredients for the batter.
A simple batter of flour, spices and milk.
Dip cauliflower pieces in the batter. Place on a wire rack above the parchment lined baking tray for easy clean up.
While the cauliflower is baking, stir together melted butter and hot sauce.
After the cauliflower has baked to a golden brown, mix with hot sauce and butter.
After the cauliflower has baked to a golden brown, mix with hot sauce and butter. Bake until crisp.
The final product served with blue cheese sauce and pickled celery.

Buffalo Cauliflower Bites

Serves four or two very hungry  people

Ingredients

  • 1 c flour, can be all-purpose, whole wheat, brown rice etc.
  • 1 c milk, almond milk or water
  • 1 t  garlic powder
  • 1 t cumin
  • 1 t smoked paprika
  • 1 tsp. salt
  • ½ t ground paprika
  • 1 head cauliflower,cut into florets
  • ½ c hot sauce (I used Franks Original)
  • 3 T butter

Directions

  1. Preheat oven to 425°F. Line a large baking sheet with parchment paper or foil. Spray a large wire rack with cooking spray to place over the baking sheet.
  2. Combine flour, water, spices, salt and pepper in a large bowl and stir until smooth. Using tongs, dip cauliflower pieces in the batter. Coat well, lift out and allow the excess to drip back into the bowl.
  3. Arrange cauliflower in a single layer on the wire rack that is on top of the baking sheet.  Bake 20 minutes or until golden.
  4. In a small saucepan, melt the butter, add the hot sauce and stir to combine. Pour evenly over cauliflower. Toss gently until cauliflower is evenly coated.
  5. Bake 10 minutes or until cauliflower begins to crisp, rearranging florets occasionally if needed. Serve with celery and blue cheese dressing.

dsc_8213a

May 6, 2016 Cauliflower Pizza Crust

DSC_6789aConsider the amazing versatility of cauliflower. Tossed with olive oil, salt and freshly ground black pepper and roasted until it is golden brown, it’s addictive as popcorn. It’s a delicious gluten-free substitute for mashed potatoes and couscous and the secret ingredient in a healthier version of Alfredo sauce.

In this recipe, the vegetable master of disguise is the basis for a pizza crust. I began my research by reading through about 20 recipes for cauliflower pizza I found online. They were written by cookbook authors, celebrity chefs and food bloggers. No two recipes were exactly the same and some were quite vague in their instructions. I used these recipes to construct my own version of a crust that works every time.

Line a pizza pan or a baking sheet with parchment paper. I used a nonstick spray on the corners to make sure it stayed in place. Preheat your oven to 425°F.

Start with a head of cauliflower, chop it into four cups of smaller florets, you want uniform pieces that won’t overwhelm your food processor.
If you are using a hand grater leave the pieces larger and the stem attached so you don’t scrape your fingers. Save the stems for cauliflower mashed potatoes. Pulse the florets with the metal blade in the food processor until the cauliflower is the consistency of small grains of rice or couscous. Some writers referred to this as cauliflower “snow”. 4 cups of cauliflower florets yielded two and three-quarter cups of finely chopped cauliflower.

Cauliflower needs to be cooked to get rid of excess moisture. Some of the recipes I read called for sautéing the cauliflower on the stove top, others chose steaming and a few didn’t cook it at all. I am not a big fan of the microwave, but I feel it’s the easiest way to cook the cauliflower for this recipe and there is no need for additional water to be added. Place the cauliflower in a microwave safe container and cover with plastic. I cooked mine on the “fresh vegetable” setting for about six minutes. Let the cauliflower cool thoroughly before proceeding with the next step, if you don’t you could easily burn your fingers.

The next step is crucial to the success of this recipe. Dump the cauliflower into the center of a clean, cloth dish towel. Gather up the four corners and twist. Squeeze the bottom to extract as much liquid from the cauliflower as possible. When you think you’ve squeezed enough, squeeze one more time. Transfer the cauliflower pulp to a bowl, you should have about a scant cup. Add to this one lightly beaten large egg, a pinch of salt, three quarters of a cup of shredded mozzarella, half cup of shredded Parmesan cheese. Although not necessary you can add a half teaspoon each of dried oregano and basil. Mix first with a spatula to incorporate the ingredients, then mix with your hands for best results.

Form into a disk and place on the prepared baking sheet. Press out from the center evenly to make a 10 inch circle. Be sure that the crust is evenly pressed out, with no thin or thick spots. Some sources said to spray the surface of the parchment paper with nonstick spray but I didn’t and my results were fine. Place the baking sheet on the middle rack of your preheated oven. Bake until spotty brown, it took about 12 minutes in the convection oven, it may take you a little longer for a conventional oven.

Remove baking sheet from the oven and add your favorite toppings. I made a basic tomato sauce and mozzarella cheese pizza. I baked it in the oven for another 10 minutes, until the cheese was melted and bubbly. I was able to cut the pizza with a wheel and the slices held together nicely.  The possibilities for toppings are endless. In about a month or so I will be topping this crust with basil pesto and thinly sliced zucchini.

DSC_6762a
Start with a large head of cauliflower, you won’t need it all.
DSC_6792a
Separate into smaller florets.
DSC_6766a
Add to the food processor with metal blade attached.
DSC_6767a
Process finely until you get rice or couscous like granules.
DSC_6771a
Now it is ready for the microwave.
DSC_6799a
Place the cooked cauliflower in the middle of a cotton dishtowel.
DSC_6801a
Squeeze to extract all the excess liquid.
DSC_6773a
You will be left with cauliflower “pulp”.
DSC_6774a
Mix in beaten egg, cheeses, salt and dried herbs.
DSC_6776a
Form it into a ball.
DSC_6778a
Flatten into a 10 inch round.
DSC_6779a
Bake at 425 F for ten to fifteen minutes, until starting to brown in spots.
DSC_6782a
Top with sauce.
DSC_6783a
And mozzarella cheese.
DSC_6785a
Bake for 10 minutes, until the cheese is bubbly.
DSC_6787a
Delicious!

Makes one 10″ round

Ingredients

  • 4 cups of cauliflower florets
  • 1 large egg, lightly beaten
  • ¾ c shredded low fat mozzarella cheese
  • ½ freshly grated Parmesan cheese
  • ½ t dried oregano
  • ½ t dried basil

Directions

  1. Line a rimmed baking sheet or pizza pan with parchment paper and preheat oven to 425°F.
  2. Chop cauliflower into 4 cups of smaller florets. Transfer to a food processor and pulse until the cauliflower is the consistency of rice or couscous, my finished product measured 2 ¾ cups. Alternately grate larger pieces on a box grater until you have 2 ¾ cups of finely grated cauliflower.
  3. Place in a large bowl and microwave on high for 6 minutes. Remove from oven and let cool.
  4. Dump the cauliflower into the center of a cotton dish towel, flour sack types are best. Draw up the corners and twist tightly. Squeeze the cauliflower in the dish towel to extract as much liquid as possible.
  5. Transfer the cauliflower “pulp” to a bowl. Next, add the beaten egg, cheeses and herbs. Combine with a rubber spatula and for best results, finish the mixing with your hands.
  6. Form into a disk and place on the prepared baking sheet or pan. Press out from the center to make an even 10″ round.
  7. Place baking sheet on the lower middle rack of the preheated oven. Bake until spotty brown, mine took about 12 minutes, the crust may be ready anywhere from 10 to 15 minutes.
  8. Remove crust from the oven and top with your favorite pizza combinations. Bake until cheese is melted and bubbly, another 10 minutes.


February 6, 2016 Roasted Cauliflower Salad with Orange and Tarragon


DSC_5828aThe produce department of a well stocked supermarket is a happy place for me. I love looking at neat rows of perfect produce with automatic misters that always seem to turn on the minute I reach in to pick out my choice. I look for new vegetables I have read about in food magazines. Kale sprouts? Not in local stores yet. I am inspired to try that new recipe, create a new salad. I bemoan the high cost of tiny bunches of fresh herbs and swear that I will ask Joe to pot up more to use in the winter season. In our gardening “off season” I can even find local lettuces and greens grown in indoor greenhouses not far from where I live.

About a month ago I discovered one of my favorite vegetables was missing from it’s place of prominence on the shelves. Cauliflower, usually placed near it’s cousin broccoli was all but missing in action. When I did find it, it was banished to a corner at the very end of the produce aisle. There was only a very sparse offering and the heads were probably half the size of those from local farms available just a few months ago. And the price? These tiny heads were selling at $5.99 a piece, I could easily pass that up.

After a little research, I learned that the problem was due to the changing weather and rainfall patterns from a strong El Nino in the primary areas where it is grown, California’s Imperial Valley and near Yuma Arizona. The combination of cauliflower’s current status as most favored vegetable (sorry kale!) and the recent shortage led to it’s conspicuous absence.

Several weeks have passed and the price is coming down a bit so I have currently suspended my moratorium on cauliflower. This salad, roasted curried cauliflower with orange and tarragon in the latest issue of Fine Cooking was the inspiration for my return.

Florets of cauliflower and thinly sliced shallots are tossed with curry powder, olive oil, salt and pepper. Since they can vary in heat quite a bit, I chose a sweet curry powder from Penzey’s. Curry powders are are a blend of spices, thirteen in this case, including turmeric, coriander, cumin and ginger, just to name a few. You can also make your own curry blend according to your tastes. The cauliflower and shallots are spread out on a large baking sheet and roasted until the vegetables are tender and browned, 20 to 25 minutes. Watch carefully, since I was using convection heat I reduced the temperature from 450°F to 425°F. I also stir the cauliflower around at about the halfway point to insure even browning.

While the vegetables are roasting, prepare the orange segments, I discuss how to do it here. Unlike cauliflower, oranges and all citrus are plentiful and priced well this time of year. If you don’t want to try your hand at supreming, substitute Mandarin orange segments, not the ones packed in syrup, of course!

The vinaigrette is composed of rice vinegar, Dijon mustard, orange juice and extra virgin olive oil. Fresh tarragon brings a “licoricey” flavor to the dressing but if the expense of a small container of fresh tarragon bothers you as much as it does me, skip it or add a little dried. Toss the cooled vegetables along with the orange segments, almonds, currants and mache. I used a mache “blend” from Organic Girl that includes mache rosettes, baby red and green chard and tango lettuce. It’s a good quality product for non garden months. You could also choose baby arugula or any salad blend.

We loved the salad and finished it in one sitting. The flavors and textures all contrast very nicely. I added a little crumbled soft goat cheese to our salads, some chickpeas or finely chopped fennel would also be an interesting addition. This could also double as a vegetarian main dish and would be great for a buffet.

Roasted  Cauliflower Salad with Orange and Tarragon

Serves four (or two very hungry people)

  • 1 large head cauliflower cut into 1″ florets (about 8 cups)
  • 1 c thinly sliced shallots
  • 1½t curry powder
  • 7 T extra virgin olive oil
  • Kosher salt and freshly ground pepper
  • 2 large oranges (I used Cara Cara)
  • 1 T rice vinegar
  • 2 t Dijon mustard
  • 2-3 T chopped fresh tarragon
  • 1/3 c coarsely chopped tamari almonds or toasted slivered almonds
  • ¼c dried currants
  • 5-6 c mâche or baby arugula

Directions

  1. Position a rack in the center of the oven to 450°F. Line a large rimmed baking sheet with foil.
  2. Toss the cauliflower and shallots with the curry powder, 2 T oil, salt and pepper. Spread on a baking sheet and roast until the vegetables are tender and browned, 20 to 25 minutes. Let cool.
  3. Slice the ends of the oranges so they rest flat on a cutting board, cut off the peel and the pith. Working over a bowl, cut the orange segments free from the membranes, letting them fall into the bowl. Squeeze the juice out of the membranes into a small bowl.
  4. In another small bowl, whisk the vinegar and the mustard. Slowly whisk in the remaining 5 T oil. Whisk in 3 T of the orange juice and the tarragon. Season to taste.
  5. Add the cauliflower, almonds and currants to the orange segments and toss with enough vinaigrette to coat well. Add the mache and toss again. Drizzle with remaining vinaigrette and serve.

DSC_5820a

Cauliflower tossed with curry powder. The orange color comes from the turmeric.
DSC_5833a
Delicious!

November 8, 2015 Curried Chicken with Cauliflower, Apricots and Olives

DSC_5012aStep aside slow cookers, move over microwaves, there’s  a new method for getting dinner on the table in a hurry, sheet pan suppers. It provides the busy weeknight cook with easy preparation, the convenience of cooking everything on one pan and makes clean up a snap.

The sheet pans I have stood the test of time, they have served me well for over 25 years.  They may have a little more “character” than a new one but they still do the job. As a caterer I used them constantly, for roasting vegetables and meats, baking cookies, rolls and countless hors d’oeurves. Actually the correct name is a half sheet pan, usually 13″x18″ in dimension,  just the right size to fit in most standard ovens. A full sheet pan is18″x26″, the size fits the rack in a commercial oven. Don’t confuse a jelly roll pan with a sheet pan, jelly roll pans are flimsy and you would need to double them up and you still wouldn’t achieve the same sturdiness. A sheet pan is an inexpensive addition to your cooking equipment. You will find them in both restaurant equipment stores or in the catering aisle of any big box store. Choose one that is aluminum or stainless steel, they hold up well under high heat cooking. I would not recommend a non stick sheet pan, the surface will eventually erode and could possibly contaminate the food you are cooking.

Curried Chicken Thighs with Cauliflower, Apricot and Olives is from Molly Gilbert, author of Sheet Pan Suppers. She calls this a riff on the classic eighties Silver Palate recipe for Chicken Marabella. In Ms. Gilbert’s version the flavor profile moves from Meditteranean to Moroccan, the capers in the original recipe are gone, the olives remain and the prunes have been replaced with dried apricots.

Start the recipe by combining the chicken thighs with half of the curry powder and smoked paprika, oil, vinegar, cinnamon, cayenne and salt. I think it’s beneficial for a  recipe that uses an ingredient in two different steps to read, 4 teaspoons curry powder, divided. That would be helpful for the cook, (and we all do it) who maybe isn’t reading the recipe that carefully.

Next is the issue of curry powder, a blend of many spices that can range in flavor from very mild (sweet) to the Madras blend which is quite hot. I think the sweet curry powder is the right choice for most palates making this recipe. The paprika called for in the recipe is smoked, giving another interesting flavor dimension to the dish.

Toss the chicken with the spices, cover and refrigerate for at least eight hours but preferably overnight. The recipe calls for boneless skinless chicken thighs, I used bone-in thighs because I felt they would hold up better to the high heat cooking. When you are ready to cook, place the rack in the center of the oven. The recipe calls for a 450°F oven but I reduced mine to 425°F since I was roasting with convection heat.

A large head of cauliflower translated into about eight cups for me.  I like to cut the head in half and then into quarters through the core. Then I separate the florets from the central stem and break the florets into smaller, relatively equal sized pieces. Toss the cauliflower with the remaining oil, curry powder, paprika and salt to evenly coat. Spread the cauliflower evenly on the sheet pan in a single layer and add the chopped apricots and olives. Soak the apricots for five minutes to soften, anything longer will turn them mushy. I used Castelvetrano olives, my personal favorites and easy to find on the Mediterranean bar of any good supermarket.

Remove the chicken from the marinade and space the pieces evenly over the cauliflower. Add the apricots and olives to the baking sheet. You might want to tuck some of them under the chicken since they get quite brown. Roast, rotating the pan halfway through the cooking time. I used an instant read thermometer and my chicken pieces were done in a little less than a half hour. If you are not using a convection oven it may take a little longer but no matter what, the instant read thermometer is always key to getting the best results.

This is a great weeknight supper because everything can be ready in advance, chicken marinated, cauliflower, apricots and olives prepped. At dinnertime get everything ready to cook while your oven preheats. A simple salad will complete the meal.

Curried Chicken with Cauliflower, Apricots and Olives

Serves 4

Ingredients

  • 8 bone-in chicken thighs (about 2lbs)
  • ¼c extra virgin olive oil, divided,  2T chicken, 2T cauliflower
  • 1T apple cider vinegar
  • 4t sweet curry powder, divided, 2t chicken, 2t cauliflower
  • 1t smoked paprika, divided, ½t chicken, ½t cauliflower
  • ½t ground cinnamon
  • ¼t cayenne pepper
  • Kosher Salt
  • 1 large head cauliflower, cut into bite-sized florets
  • ¾c chopped dried apricots, soaked in hot water for 5 minutes and drained
  • 1c pitted green olives, halved
  • ½c chopped fresh cilantro or parsley
  • 1 large lemon cut into wedges
DSC_5006a
Toss the cauliflower with curry powder, cinnamon, smoked paprika, cayenne pepper and salt.
Everything ready to go on the sheet pan.

Directions

  1. Combine the chicken thighs with 2T oil, the vinegar, 2t curry powder, cinnamon, cayenne and ¾t salt in a medium bowl, tossing to coat. Cover and refrigerate for at least 8 hours and up to overnight.
  2. Position the oven rack in the center and preheat oven to 450°F (425°F if using convection heat). Line a large sheet pan with parchment paper. Combine on the pan, the cauliflower with the remaining 2T oil, 2t sweet curry powder, ½t paprika and ¾t salt, tossing to coat. Be sure the cauliflower is spread out evenly.
  3. Add the apricots and olives and spread them evenly on the pan.
  4. Remove the chicken thighs from the marinade and place them evenly spread over the cauliflower. Roast, rotating the pan halfway through the cooking time, between 30-35 minutes. Remove the chicken from the pan and toss the cauliflower with the pan drippings. Serve chicken and cauliflower with a sprinkle of cilantro or parsley  and lemon wedges on the side.

DSC_5019a


July 26, 2015 Cauliflower “Alfredo” Sauce

DSC_3786aCauliflower is the vegetable master of disguise. We love it cut into florets or “steaks”  roasted with olive oil, salt and pepper and chow down on it like popcorn. It makes a satisfying substitute for mashed potatoes, and chopped finely it can replace couscous or other grains in some recipes. So my ears perked up the other day when I heard yet another way to use cauliflower.

If I am at home in the early afternoon I will turn on “The Chew”, a television program that has been described as “The View” for foodies. A recipe that caught my attention recently was a side by side comparison of traditional  Alfredo sauce, prepared by Iron Chef and restauranteur Michael Symon, with a “lightened up” version of the sauce, made by natural foods chef and author, Daphne Oz.

Michael and Daphne’s sauces start out with same five ingredients, shallots, parmesan cheese, extra virgin olive oil, parsley and butter. As Michael pointed out, he learned from fellow chef Mario Batali, traditional Alfredo sauce in Italy is butter, a little bit of the pasta water and Parmesan cheese.  It does not include heavy cream, an American addition to the dish. Michael and Daphne both added shallots to their sauce, also not traditional but adding an additional smoky sweet note to the sauce.

Here is where the recipes diverge. Michael’s traditional version of the sauce used one whole stick of butter and a cup of Parmesan cheese. Although Daphne’s recipe did include a quarter of the amount of the butter and cheese in Michael’s recipe, most of the velvety texture came from, you guessed it, cauliflower. She boiled cauliflower in milk and pureed it to make the base for the sauce. Cauliflower acted as a binder and gave the sauce it’s smoothness.

This was a recipe I had to try for myself. The recipe starts with four cups of cauliflower florets and a cup of milk added to a saucepan. Bring to a boil, reduce to a simmer and cook until fork tender, about 10-12 minutes. Strain out the cauliflower pieces and add to a blender, then add milk and butter. To make this a non-dairy preparation use almond milk and a butter substitute like Earth Balance.  Puree the ingredients until smooth and season with salt and pepper.

Shallots are sauteed in olive oil until softened and the pan is deglazed with a little white wine. Add the cauliflower puree to the pan and loosen the sauce with a little water or milk. Freshly grated Parmesan, nutmeg and a little chopped parsley are the finishing touches to the sauce. Both Daphne and Michael used fettucine noodles for their finished dish. Since we have eating our share of zucchini “noodles” this summer, I thought this would be another way to use them. I took zucchini noodles, added them to a saute pan to reduce as much liquid as possible and warm them up a bit.  I only cook them for a few minutes  since I still want them to retain a litttle crunch.

The sauce holds well and if you are going to make it, double up, use the whole head of cauliflower and freeze some for later use. I’m also thinking of using this as a substitute for bechamel sauce in my moussaka once the eggplants start rolling in.  As Daphne said, this is a sauce that will let you indulge without the guilt.

DSC_3845a

DSC_3779a

Cauliflower Alfredo Sauce

Serves six

Ingredients

  • 4c cauliflower, cut into chunks
  • 1 c milk
  • Kosher salt and freshly ground pepper
  • 2T butter
  • 1-2T olive oil
  • 1 large shallot, finely minced (about ¼c)
  • ½c white wine
  • ¼c finely grated Parmigiano-Reggiano cheese
  • ¼t freshly grated nutmeg

Directions

  1. Put the cauliflower and the milk in a large saucepan and season with salt and pepper. Note:milk will not cover the cauliflower.
  2. Bring to a boil, reduce heat to a simmer , cover and cook until fork tender, about 10-12 minutes.
  3. Using a slotted utensil, transfer the cauliflower to a blender. Add the milk and butter and puree until smooth. Season with salt and pepper.
  4. Place a large sauté pan over medium heat and add 1-2 tablespoons of olive oil. Add the shallot and cook for 2-3 minutes, or until slightly tender.
  5. Deglaze with the white wine and reduce liquid by half, 1-2 minutes.
  6. Add the cauliflower puree to the pan, if sauce is too thick, add a little water or milk.
  7. Add freshly ground nutmeg and stir in the Parmesan.

DSC_3802a

October 25, 2014 Cauliflower Salad

DSC_9433a“Gifted” with another box of Brassicas this week, I was looking for a way to use cauliflower in a fall salad. A new cookbook, Bar Tartine : Techniques and Recipes, gave me the salad I was looking for.

Opened in 2005, Bar Tartine, located in the Mission District of San Francisco is an offshoot of the highly praised San Francisco bakery, Tartine. In addition to doing their own curing, preserving and in-house fermenting, the food draws influences from countries as diverse as Norway, Japan and Hungary.

The cauliflower is broken down into tiny florets, save the rest to make cauliflower “mashed potatoes”. In a bowl with the yogurt dressing, combine the florets with cucumbers, chickpeas and mushrooms. Our garden provided me with the radishes and serrano peppers needed for this salad. I was hesitant to use the two serranos as suggested, ours get quite hot so I went with just one. The yogurt dressing tamed the chiles heat quite a bit.
Resist the urge to roast or blanch the cauliflower before adding it to the salad, if you normally dislike it raw.  Marinating small florets in the dressing softens them up considerably without making them mushy. The yogurt dressing is especially good and would work well with other salad combinations.

DSC_9387a
Assembled ingredients for the yogurt dressing.


Bar Tartine Cauliflower Salad

Serves 6

Ingredients

For the dressing

  • 1 c Greek style yogurt, regular or low fat
  • 5T sunflower oil
  • 2 cloves of garlic, minced
  • 2T freshly squeezed lemon juice
  • 1T red wine vinegar
  • 1T honey
  • 1 1/2t fine grain sea salt
  • Freshly ground black pepper

Directions for the dressing

  1. In a bowl large enough to hold all the salad components, whisk together the yogurt, sunflower oil, garlic, lemon juice, vinegar, honey, salt and pepper to taste. If not using immediately, store dressing in an airtight container. Dressing can be made several days ahead.

Ingredients for the salad

  • 6-8 c cauliflower, trimmed into tiny florets
  • 2 medium cucumbers, peeled, seeded if necessary, cut into small dice
  • 4-5 scallions, cut into 1/4″ rounds
  • 1c cooked chickpeas, fresh is best but rinsed well and drained thoroughy if canned.
  • 8oz mushrooms, button or shiitake, quartered
  • 6-8 radishes, ends trimmed and thinly sliced
  • 1 or 2 green serrano chiles, stemmed, seeded and thinly sliced
  • 1/4c sunflower seeds, lightly toasted
  • 1/4c each chopped fresh flat leafed parsley, dill and tarragon

Directions for the salad

  1. Add the cauliflower, cucumbers, scallions, chickpeas, mushrooms, radishes, chilies, sunflower seeds and herbs to the bowl toss lightly and let stand for 15 minutes.
  2. During this time the vegetables will begin to exude some liquid the cauliflower will soften. Toss again and transfer salad to a bowl. Leftovers should keep for several days, if you can keep them around that long!

DSC_9428a