February 28, 2017 Roasted Broccoli Salad with Tahini Lemon Dressing


Broccoli is an all season favorite that usually has a place of prominence at the front of the produce aisle. I love to roast broccoli toss it with olive oil and sprinkle with salt and pepper. It’s so good we’re lucky it makes it to the dinner table. This time I used a little restraint and combined it with some roasted chickpeas, cilantro leaves and sun-dried tomatoes. A tahini dressing brings it all together and makes a wonderful winter side dish. If you don’t like cilantro, substitute flat leafed parsley.

Roasted Broccoli Salad with Tahini Lemon Dressing

Serves 4

Ingredients

  • 1¼ to 1½ lbs broccoli crowns
  • 2-3 T extra virgin olive oil
  • Kosher salt and freshly ground black pepper to taste
  • 2 T tahini
  • 1 ½ T lemon juice
  • 2 t balsamic vinegar (white preferably)
  • 1 t tamari
  • 1 t honey
  • 1 clove garlic, finely chopped
  • 1 c chickpeas
  • 1 c cilantro leaves
  • 2 T finely chopped sun-dried tomatoes

Directions

  1. Preheat oven to 425°F. Line a large baking sheet with parchment paper. Cut the broccoli into florets, including some of the stem. Place broccoli in a large bowl and toss with olive oil, salt and pepper. Move the broccoli to a baking sheet and place in an even layer.
  2. Roast until the broccoli is nicely browned, stirring and flipping the pieces occasionally, check after 5 minutes. Roasting will take about 15 minutes total. Leave oven on.
  3. While the broccoli is roasting, combine the dressing ingredients, tahini, lemon juice, balsamic vinegar, tamari, honey, chopped garlic in a small bowl. Stir to combine and add a little water if needed to thin the dressing.
  4. Drain and rinse a can of chickpeas. Place them on clean cloth kitchen towel or paper towels to dry and roll gently to remove skin. Place chickpeas on the same baking sheet that the broccoli was on and roast until they turn golden brown in spots. Roll the chickpeas around on the sheet during the baking time to ensure even browning.
  5. In a large bowl place the roasted broccoli, chickpeas, cilantro leaves and sun-dried tomatoes. Toss gently. Drizzle dressing on individual portions and serve immediately.

February 26, 2017 Brussels Sprouts Salad with Lemon Caper Dressing and Asiago Cheese

The last two days have brought us very pleasant but unseasonable temperatures in the seventies. While opening a window to let some fresh air in I spotted two pansy “volunteers” that had sprung up close to the house but not in an area where we normally plant anything. On a walk down to the garden I spotted the first dandelion. An early spring? Looks like even though the temperatures are going back into the forties by this evening. A few days of warmth is not enough to show evidence of new life in the garden. There are some beet greens and radicchio under a cold frame and I will take it on Joe’s word that there is miners lettuce and some kale in the greenhouse. I did see a bit of green in the circle garden, the beginning of the rebirth of the Chinese chives. In a month or two we will be pulling them out by the bucketfuls but for now it’s nice to see that first poke of green, letting us know that spring isn’t that far off. Until then my produce is from the local supermarkets and club stores.

This Brussels sprouts salad is simple and delicious with a satisfying crunchy texture. The sprouts can be sliced in no time in the food processor, I used a 2 mm (thin) slicing disk or with a mandoline; trust me use the guard. If you want to work on your knife skills, slice them by hand. The dressing couldn’t be simpler, extra virgin olive oil, lemon juice, salt, pepper and capers. If you always wondered what those little green things are, capers are the unopened flower buds of Capparis spinosa, a prickly perennial shrub like bush, native to the Mediterranean and some parts of Asia. The buds are harvested, dried in the sun and then pickled in vinegar, brine or salt. The size of a caper can be as small as a green peppercorn, and as large as a small olive. The largest ones are usually served as part of an antipasto platter, the small ones are referred to as non pareils (French for without equal), the size best suited for this recipe. Many recipes call for rinsing them first but I would say taste them and decide for yourself. Rough chop the capers and add them to the dressing. Shredded Asiago cheese compliments the salad with it’s creamy nutty flavor. Finish the salad off with toasted slivered almonds and garnish with thinly sliced scallions. Leftovers are even better the next day.

Brussels Sprouts Salad with Lemon Caper Dressing and Asiago Cheese

Makes 4-6 servings

Ingredients

  • 1 lb Brussels sprouts, core ends trimmed. damaged outer leaves removed
  • ½ c extra-virgin olive oil
  • ¼ c lemon juice
  • 1 t lemon zest
  • ¼ c capers, roughly chopped
  • 1 clove garlic, chopped
  • ¼ t kosher salt or more to taste
  • freshly ground black pepper
  • 2/3 c Asiago cheese
  • ½ c toasted slivered almonds
  • 2-3 scallions, sliced thinly on the diagonal

Directions

  1. Shred the Brussels sprouts using the slicing disc of a food processor.  You can also slice them by hand with a well sharpened knife or a mandoline slicer. Place shredded sprouts in a bowl large enough to toss them in.
  2. In a small bowl whisk together the olive oil, lemon juice and zest, capers, garlic, salt and pepper. Pour about two thirds of the dressing over the sprouts and toss. Add the toasted almonds and Asiago cheese and toss again. Taste and add more salt if needed and additional dressing if needed. Garnish with chopped scallions and serve immediately.
Add shredded Brussels sprouts to a large bowl and toss with dressing and other ingredients.

Pansies that came up in February.
The first new growth of garlic chives. My garnish for the next Brussels sprout salad.

February 23, 2017 Toasted Cauliflower Rice

 Toasted cauliflower rice takes plain cauliflower rice to the next dimension. If you are already making cauliflower rice, there’s not much more to do to give this “stand-in” a more rice like texture along with the nutty quality we love in regular rice. Make cauliflower rice either by pulsing it or using the shredding disc of the food processor. You can also go low-tech and grate the cauliflower on a box grater with the medium sized holes. I think it’s even more important to press out the additional liquid when you are making toasted cauliflower rice, so your rice will toast, not steam.

Put the cauliflower granules in a large enough bowl to mix it around, toss with a tablespoon or so of olive oil, a sprinkle of kosher salt and a grind of pepper (white pepper if you are fussy). Spread the riced cauliflower evenly over a lined baking sheet, foil works best here for easy clean up. A full head of cauliflower will probably take two baking sheets. Bake at 375°F convection heat for about twenty to twenty five minutes. I flipped the baking sheet from front to back and top to bottom at the halfway point and gave it several good stirs during the cooking time. The end product is toasty with an amazing rice like texture. Bake more than what you think you might need, it will shrink (after all cauliflower is 92% water) during the cooking process and yes, it is that good. Feel free to add any spices or add-ins to this dish. I served it with pesto chicken breasts to absorb the sauce but the possibilities are endless.

 Oven Toasted Cauliflower Rice

Serves 2-4

Ingredients

  • 1 head cauliflower
  • 1 T olive oil
  • Kosher salt and pepper to taste
Plain cauliflower rice before toasting.
Drizzle with olive oil, sprinkle generously with salt and pepper.
Spread out evenly on a foil lined baking sheet. A whole head may take two sheets.

Directions

  1. Preheat convection oven to 375°F. Cover two large, rimmed baking sheet with aluminum foil.
  2. Break the cauliflower into florets, removing the stems. Place the florets in the food processor bowl and pulse until the cauliflower looks like rice. This takes about 10 to 15 one-second pulses. You may need to do this in two batches to avoid overcrowding.
  3. Place the cauliflower rice in a large bowl, add olive oil, salt and pepper. Toss until the rice is coated with the oil. Spread in a single layer on the baking sheet and roast until tender, rotating the baking sheets halfway during the baking time. The rice is done when it starts to look golden in spots.

February 20, 2017 Shrimp Fried Cauliflower Rice

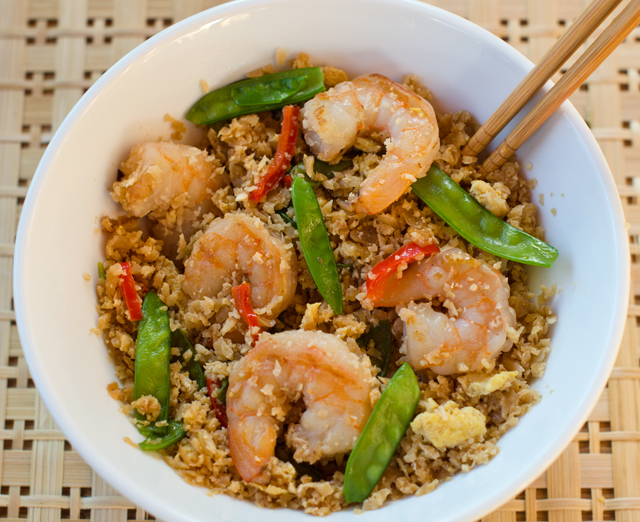
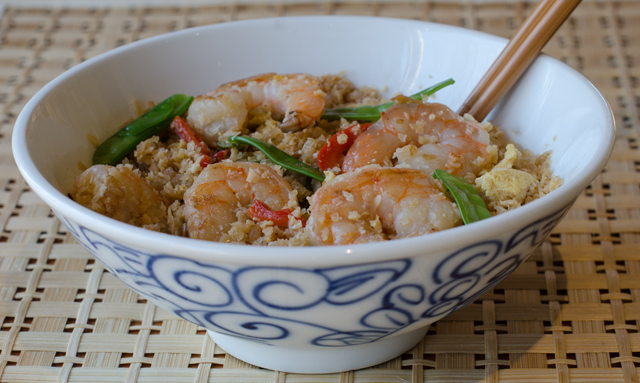
Cauliflower florets are a low carb substitute for white rice in this savory one pot, or should I say one wok, dish. It’s low glycemic, gluten-free and South Beach Diet friendly. Packed with juicy shrimp and colorful vegetables, this recipe is perfect for an easy go-to weeknight meal.

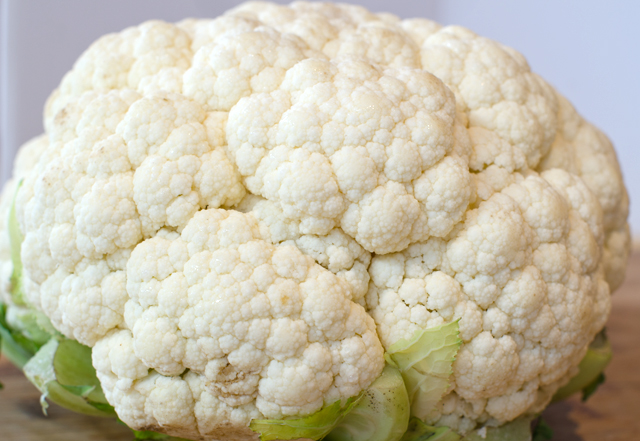
Cauliflower is sold by the head, not by weight. Depending on the time of year a standard head can vary greatly in size. Cauliflower is a cool weather crop in our area and harvested in the fall. When they appear at the farmers markets they can be huge, five pounds or more. In the winter months, imports from the West Coast are fairly small.  The head I used weighed in at 2.13 pounds and half of the head made 5 cups, just what I needed for this recipe.

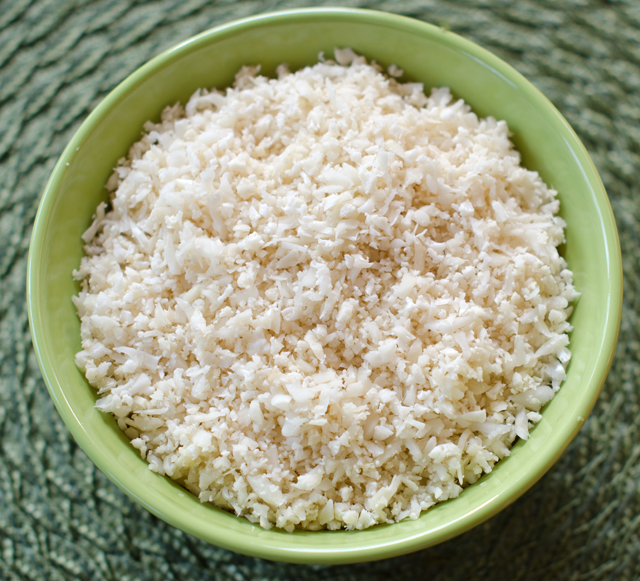
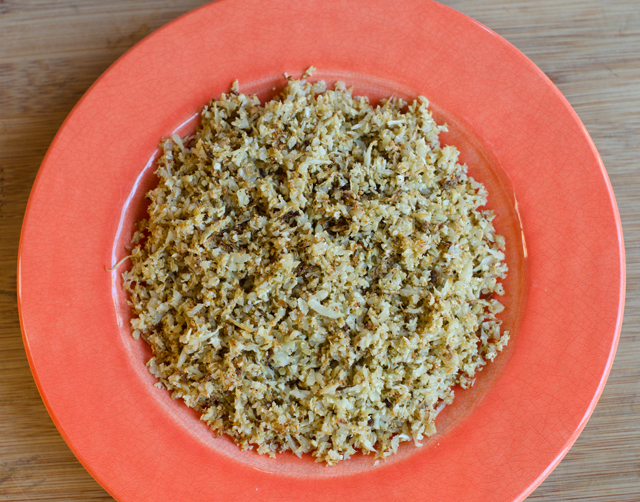
Stores like Trader Joe’s are now selling prepackaged cauliflower rice, but it’s easy enough to make your own. Cut the cauliflower into florets by quartering the head through the stem end and cut away the piece of core from each quarter. Then cut the cored cauliflower into florets. You can use a box grater with medium-sized holes or the food processor fitted with the grater blade. With both techniques you are aiming for little pieces the size of rice granules. I like to press out any additional moisture from the rice by placing it in a clean cotton tea towel and squeezing to remove remaining water. No excess moisture equals a dish that won’t turn out soggy.

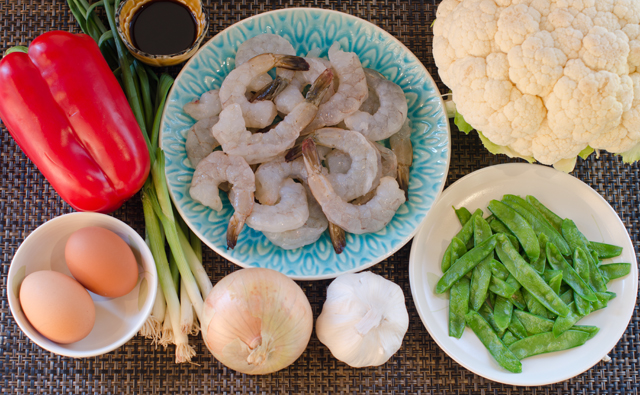
As with all stir fry preparations, all of your ingredients should be ready to go when it’s time to cook. Trying to stay with a South Beach friendly preparation I used red pepper strips and snow peas. The peas were frozen from last year’s garden and perfect for a meal like this. Other possibilities are peas, carrots, and water chestnuts. Heat your wok, the pan is hot enough when a bead of water instantly sizzles and evaporates on contact. Once this happens, add one tablespoon of a neutral oil; peanut or canola are fine here.  Swirl it around to thoroughly coat the pan. Add the shrimp all at once and spread them out over the pan so they are not overlapping. Cook shrimp on first side for one minute then flip and cook for thirty seconds. The shrimp should be almost cooked but not quite, they will finish cooking when you add them back to finish the recipe. Remove shrimp to a plate.

Add the eggs in next, stir and break them apart to get scrambled egg pieces. When the eggs are not quite cooked through, add them to the plate with the shrimp. Keep warm.
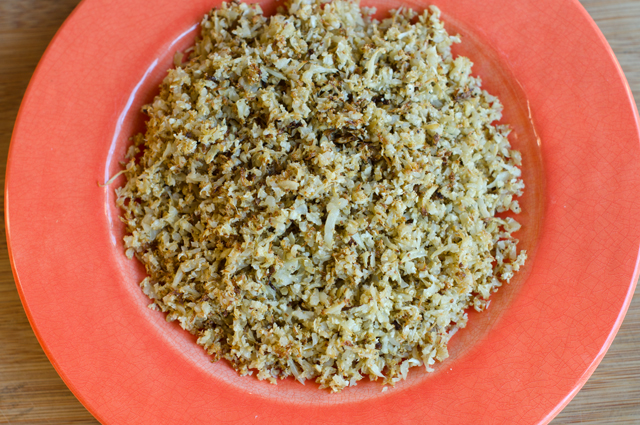
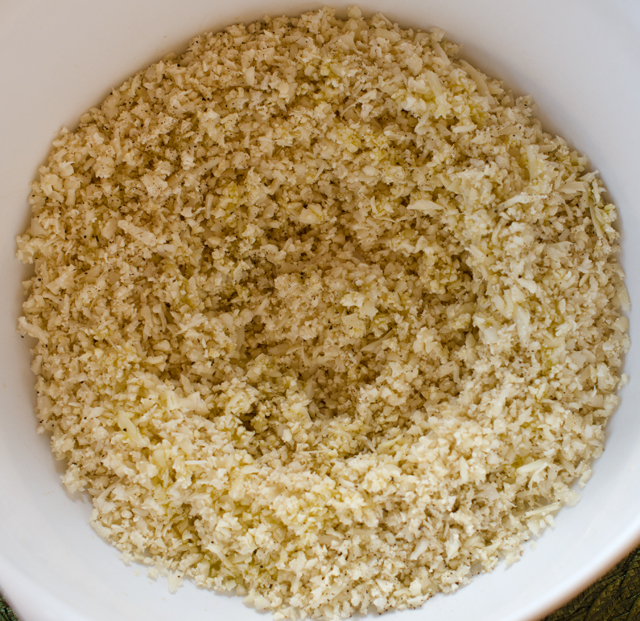
Wipe out your pan with a paper towel and return it to high heat. Add the second tablespoon of oil and swirl to coat the pan. The aromatics are in next, onion, garlic and ginger. Cook, stirring often until the onion is translucent, 3-4 minutes. Stir in your choice of vegetables and cook for another 3 minutes. Add the scallions and cook for 15 seconds. Add the cauliflower rice to the pan and sprinkle the tamari and sesame oil over the rice. Warm the cauliflower rice through and finally add in the shrimp and eggs. Let the shrimp and eggs heat back up and finish cooking. Toss to mix the rice evenly with all the ingredients. Taste for seasoning, adding more tamari and sesame oil if desired. Serve hot.

Shrimp Fried Cauliflower Rice

Ingredients

  • 1 medium head of cauliflower
  • ¾ to 1 lb medium uncooked shrimp, shelled and deveined
  • ½ t kosher salt
  • Black pepper
  • 2 tablespoons peanut oil, divided
  • 2 eggs, beaten in a small bowl
  • 1 small onion, finely chopped
  • 2 cloves garlic, minced
  • 4 scallions, minced
  • 1-2 c vegetables, I used a combination of snow peas and red pepper slivers. Peas, carrots, water chestnuts can be used.
  • 1 T tamari and more to taste
  • 1 teaspoon and more toasted sesame oil


Directions

    1. For the cauliflower rice, cut the cauliflower in half, cut out the core and discard. Cut the cauliflower into chunks.  Place the cauliflower into a food processor and pulse until it’s the consistency of grains of rice. Alternately you can a small handheld cheese grater or a chef’s knife. Set aside 4-5 cups for this recipe.
    2. Season shrimp with salt and pepper, set aside.
    3. Heat a wok or large sauté pan on high heat. When the pan is hot enough for a bead of water to instantly sizzle and evaporate, add 1 tablespoon of the oil and swirl to coat pan.  Add the shrimp, quickly spreading out around the pan so that they are not overlapping. Cook the shrimp untouched for a minute then flip over and let the other side cook for 30 seconds, or until about almost cooked through. Remove the shrimp from the pan onto a plate, leaving as much oil in the pan as possible.
    4. Turn the heat to medium high and let the pan heat up again. Pour in the eggs, stirring in a quick motion to break up and scramble the eggs. When the eggs are almost cooked through, scoop out of the wok onto the same plate as the cooked shrimp.
    5. Use a paper towel to wipe the pan clean and return to high heat with the remaining 1 tablespoon of cooking oil, swirling to coat. When the oil is very hot, add the garlic, ginger and onion to the skillet, and cook, stirring often, until onions have become translucent, about 3-4 minutes. Stir in red pepper strips and snow peas, and cook, stirring constantly, until vegetables are tender, about 3-4 minutes.
    6. Add green onions and stir fry until fragrant, about 15 seconds. Add in the cauliflower rice and stir well to mix in the green onions throughout.
    7. Drizzle the sauce all around the rice and toss. Add the cooked eggs, shrimp and sesame oil, tossing to mix the rice evenly with all of the ingredients. Finish cooking the shrimp and eggs and let everything heat back up again. Taste for seasoning and add additional tamari and sesame oil if desired. Serve hot.
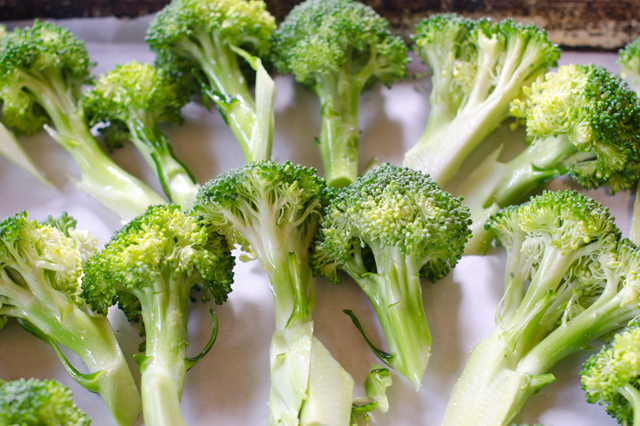
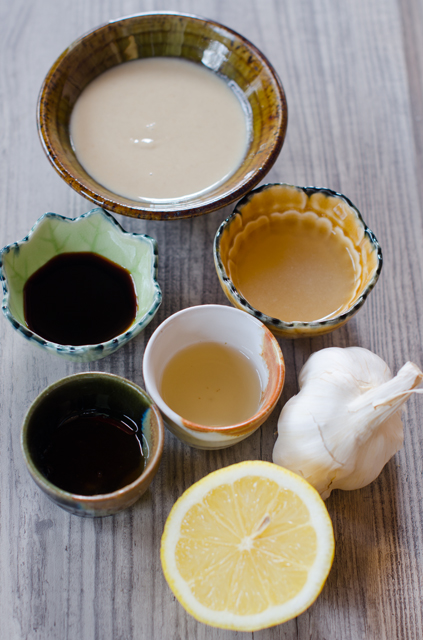
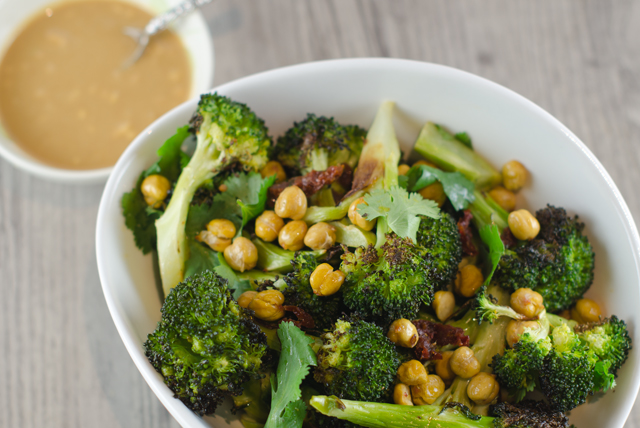
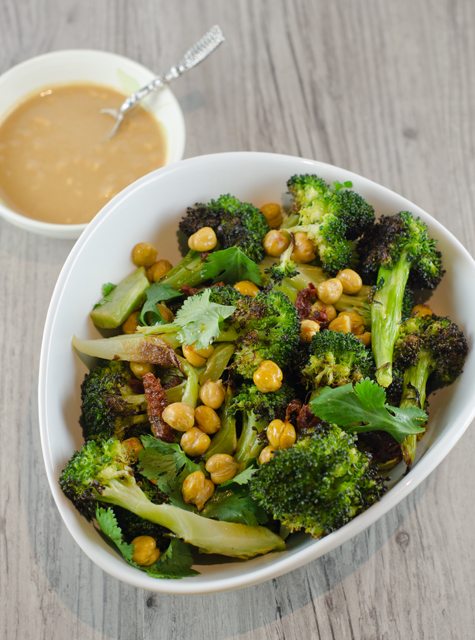