September 25, 2012 Chard Chips and Pickled Chard Stems


When the new issue of Fine Cooking came last week I was ready to put it aside for a few weeks. The holiday desserts and side dishes looked very tempting, but the beginning of fall was just last Saturday and I am still enjoying cooking as much as I can with the harvest from our garden. As I quickly thumbed through the issue I happened to notice an article that interested me, “What We Are Cooking Now.” Specifically, what really caught my eye were Swiss chard chips. I had heard of kale chips, both the pricey little bags sold in health food stores and the homemade varieties that a friend introduced me to. So why not chard chips? We have three sections of chard of the Bright Lights and Rhubarb variety still producing, so I thought it would be fun to try my hand at this. Since I am a proponent of using both the chard leaves and the stems, I wanted to use the colorful stems in another healthy nibble so a refrigerator pickle seemed to be the best choice here.
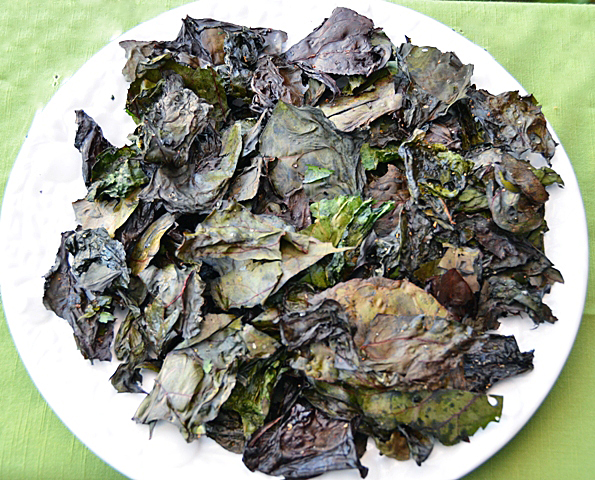
My on-line research revealed many different approaches to making chard chips and after reading them all, came up with my own method. There are certain important things to remember if you are going to make chard chips. Wash the leaves thoroughly, chard leaves are usually very crinkly, and those crevices can be dirty. After washing the leaves, remove the stems, reserve if using. Spin the leaves dry in a salad spinner and use paper towels to remove any excess moisture. Any moisture left on the leaves will cause them to steam, not bake and crisp up. A  “bunch” is a non-specific term, to be exact as possible, I used 25 chard leaves that were about 12-14 inches long after stemming. When in doubt, keep the leaf pieces larger, 2 inch squares approximately. The leaves will break easily when they are dry and too many small pieces will give you chard crumbles or dust.  Place the dry leaf pieces in a large bowl and toss lightly with olive oil and your seasonings of choice. Start with a modest amount, about a tablespoon of oil, you can always add more, it’s not as easy to take it away. I used a little Espelette pepper olive oil, kosher salt, fresh ground pepper, a little garlic powder and a little plain olive oil to taste. I did not grease my baking sheet or use cooling racks to elevate the leaves. I did not crowd or overlap the leaves. I used four large baking sheets in two ovens, racks in the top and the bottom set to 275F on the convection bake setting. The caveat here is, know your own oven, my chips seemed to be ready quicker than most of the recipes I looked at, keep a watchful eye to ensure a crispy, not a burnt chip!
Chard Chips

  • 1 large bunch of chard, 25 leaves, 12-14 inches long
  • Olive oil
  • Seasoning of your choice, I used kosher salt, garlic powder and freshly ground pepper

Directions

  1. Preheat oven to 275F (convection bake). Put racks in the top and bottom of oven.
  2. Wash chard leaves thoroughly in several changes of water. Remove the stems from the leaves, reserve for chard stem pickles.
  3. Dry chard leaves, first in a salad spinner, then remove excess moisture with paper towels. Cut leaves into 2″x2″ pieces, or a size as close as possible, when in doubt, larger is better.
  4. Spread leaves on a large ungreased baking sheet, do not overlap or crowd. My leaves took up four sheets that I baked in two ovens.
  5. Bake chard for six to seven minutes, check to see how the leaves are drying, at this point I loosened the leaves with a spatula and my fingers and rotated the baking sheets, top to bottom and front to back.
  6. Bake for another six to seven minutes, chard should be crisp, not burnt.
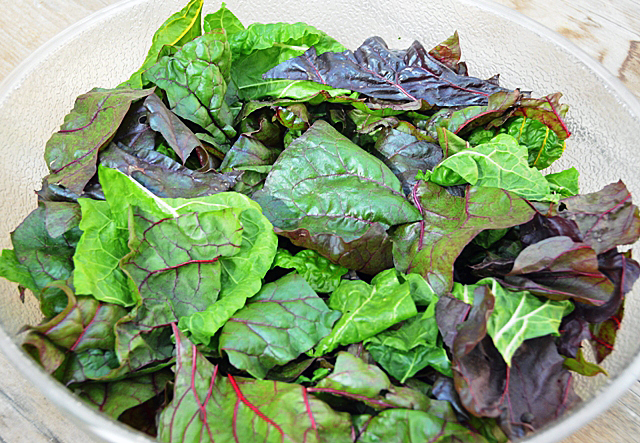
Trimmed chard leaves ready to be tossed with olive oil and seasonings


Give the chard leaves enough room to ensure even baking.
Not the prettiest snack, but certainly tastes good!


Pickled Chard Stems

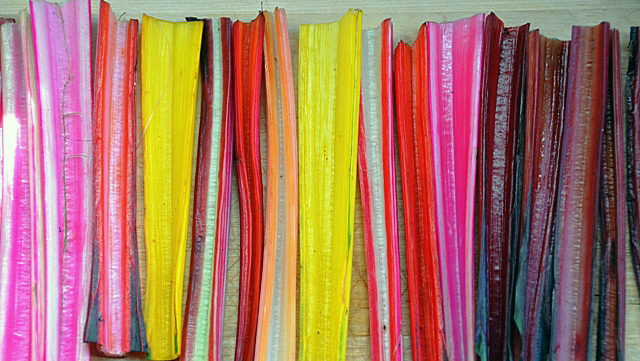
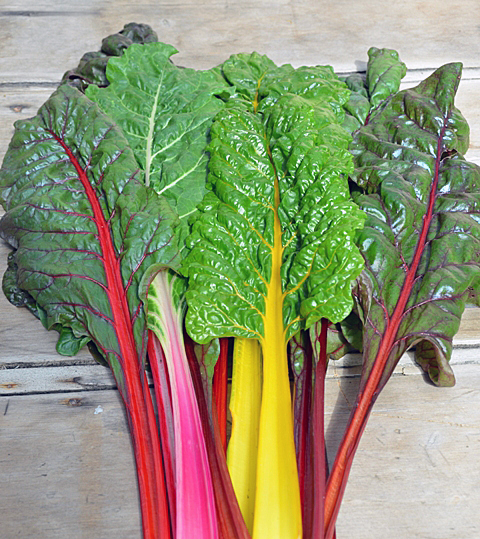
Colorful Bright Lights and Rhubarb chard stems are too pretty to waste.

Pickling shows off the brightly colored stems in another healthy nibble. Refresh the stems in some ice water to crisp them up and cut to even lengths to fit your canning jar. I chose pint jars but one cup sized jars would work as well. I used a basic refrigerator pickle recipe and added my own spice blend combination. Allow them to cure in the refrigerator for a few days, after three days they were ready. If your stems are wide, cut them in half lengthwise, there will be less chance for the stems to be stringy.

Quick Chard Pickle

Makes  2 pints

  • 2 pint canning jars and lids
  • Enough chard stems to pack tightly into the jars
  • 2c water
  • 1c rice wine vinegar
  • 1/4c granulated sugar
  • 1/2t cumin seed
  • 1/2t coriander seed
  • 1/2t fennel seed
  • 1 small piece of cinnamon stick about 2″
  • 1/2t pink peppercorns
  • 1/2t white peppercorns

Directions

  1. Sterlize two pint canning jars by washing them in hot soapy water, rinsing and drying them thoroughly. Crush spices in a mortar and pestle or small food processor. Distribute spices evenly between the two jars.
  2. In a medium saucepan bring two cups of water to a boil. Add vinegar, sugar and salt and bring the mixture back to a boil.
  3. Pack the chard stems in the jars as tightly as possible. Using a wide mouth canning funnel, pour the brine over the stems to cover completely. Place lids and bands on the jars and let cool. Refrigerate, chard pickles will be ready in a few hours but at their best in about two days.
    My spice blend ready to crush in the mortar and pestle.
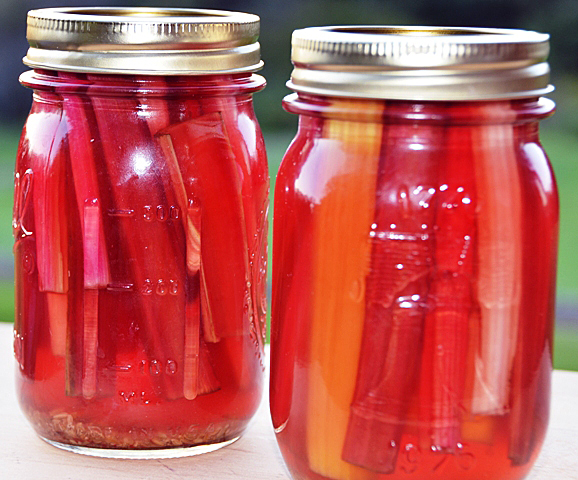
Pickled chard stems ready for the refrigerator. Notice the classic Bicentennial Liberty Bell jar on the right.


September 19, 2012 Roasted Eggplant Caponata

The days are getting shorter, there is a chill in the morning air, only three days until the official beginning of autumn. Our summer vegetables are on the wane and this morning I harvested some of the last eggplants, peppers, fennel and tomatoes of the season. The sweet and sour flavors of eggplant caponata would be the right contrast to the richness of the king salmon we were having for dinner.
Caponata is a dish native to Sicily by way of the Arabs (then called the Saracens)  who ruled the island from the ninth to the eleventh century. Along with citrus fruits, pasta and eggplants, just to name a few, the Saracens brought the sweet and sour flavor combination to Sicily, the sour coming from vinegar and sweet from sugar or honey.  Among several theories, the word caponata came from the Sicilian dialect, capunata, the name for a sailor’s dish of a biscuit steeped in oil and vinegar, served with chopped vegetables.
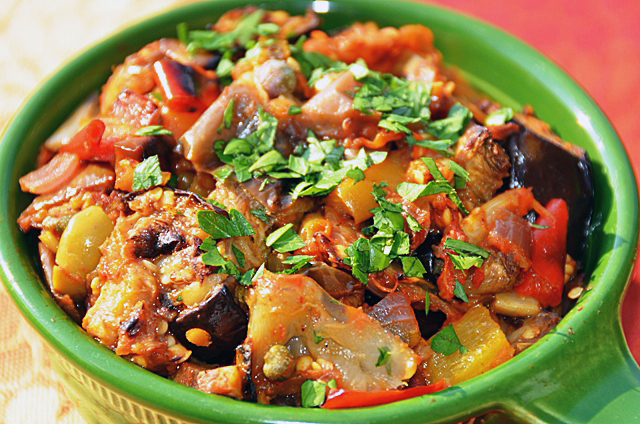
The vegetables in my caponata were the “last gasp” of certain varieties we were growing. I used lavender-white Asian Bride  and magenta colored Beatrice eggplant, both ideal because of their thin skin (no peeling required), some small yellow Admiral peppers, and  a red Anaheim pepper that had just a little heat. Fennel isn’t typically an ingredient in caponata, but I thought the slight licorice flavor would add to the sweetness. The most time consuming part of the recipe is the hand chopping of the vegetables, a food processor is definitely not the right choice here. Unlike most of the recipes I make with eggplant, I salted the eggplant to eliminate any bitter flavors from these plants that had been on the vine for a while. Salting also prevents the eggplant from absorbing too much oil and becoming greasy. I decided to roast the vegetables in this recipe is to keep the olive oil to a minimum. I cut the vegetables a bit smaller than I would usually since I was using it as a topping for fish. Caponata is also wonderful scooped up with a pita, in a sandwich and as a topping for pasta. It is best made a day ahead so the flavors have time to blend. Caponata keeps about a week in the refrigerator, if it lasts that long.

Eggplant Caponata

Makes about 4 cups

  • 1 medium eggplant or a combination of smaller eggplants to equal about 1 1/2lbs, unpeeled, and trimmed
  • 3 ribs of celery cut into 1/2 inch dice
  • 1 small red onion cut into 1/2 inch dice
  • 1 small yellow pepper cut into 1/2 inch dice
  • 1 small red pepper cut into 1/2 inch dice
  • 1 small fennel bulb cut into 1/2 inch dice (optional)
  • Olive oil
  • 1 1/2 cups peeled plum tomatoes with juices or 1 14 oz can of diced tomatoes
  • 1T tomato paste
  • 2-3T Pomegranate red wine vinegar
  • 1-2t granulated sugar or honey
  • 2 anchovy filets, minced
  • 1/3 c green olives, pitted and slivered
  • 3T drained and rinsed balsamic capers
  • 2T chopped Italian parsley
  • Kosher salt and freshly ground pepper

Directions

  1. Preheat oven to 450F. Place racks in the top and bottom shelves of the oven.
  2. Cut the eggplant into 1-inch cubes. Place the cubes in a bowl, sprinkle with a tablespoon of  kosher salt. Spread the cubes on a baking sheet that has been lined with a paper towel. Allow cubes to sit for one hour. Pat cubes dry with paper towel and remove any excess salt. Do not rinse.
  3. Place the cubes in a bowl and toss with 1-2T of olive oil. Place cubes on a baking sheet, spread them out evenly, crowded vegetables will steam, not roast. Set aside. In another bowl, toss the celery, onion, fennel and peppers with another tablespoon or more of olive oil. Spread on another baking sheet, making sure that the vegetables are spread out evenly and not crowded.
  4. Place vegetables in preheated oven and cook for about 5 minutes. With a spatula, loosen them from the baking sheet to promote even browning and rotate the baking sheets, top and bottom as well as front and back. Continue to roast in the oven until vegetables are softened and browned around the edges. Start checking the pan after 5 minutes.
  5. Allow vegetables to cool on baking sheet. In a medium saute pan cook tomatoes and their liquid. Add tomato paste, red wine vinegar, sugar or honey and anchovies (if using) and stir to combine. Taste and adjust the sweet and sour flavor as desired.  Add the cooled vegetables, toss gently but thoroughly to combine. Add chopped olives, capers and chopped parsley. Taste and adjust seasoning as desired. Set aside to allow flavors to blend. Serve at room temperature as accompaniment to fish or chicken or with crusty bread or crostini.


September 16, 2012 Stuffed Yellow Peppers

Stuffed peppers take me back to my early gardening and cooking days. Photographs in the seed catalogs of the early eighties would often feature a photo of a large casserole dish filled with bright green peppers stuffed to the brim with a mixture of ground beef, white rice and tomato sauce or tomato soup topped with copious amounts of cheddar cheese. An easy inexpensive way to use up the end of the season bounty.
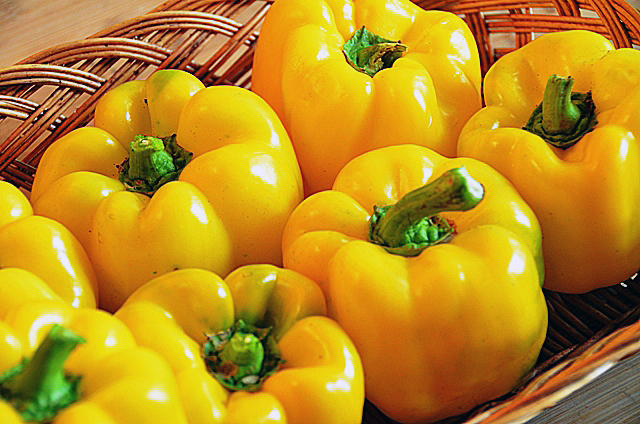
But wait, those green peppers although fully developed, were stopped on their way to full maturity. Allowed to continue ripening on the vine, peppers will turn red, yellow, orange, purple and occasionally white. Bell peppers, named so for their bell-like shape are a member of the nightshade family along with potatoes, eggplants and tomatoes. Red,yellow and orange peppers have three times as much vitamin C as citrus fruit.  It’s that next step after peppers turn green that becomes risky. Peppers that continue to ripen on the vine don’t just change color but they become sweeter, not just for us, but also for the pests that attack them. One of the reasons red, yellow and orange peppers cost so much more than green ones.
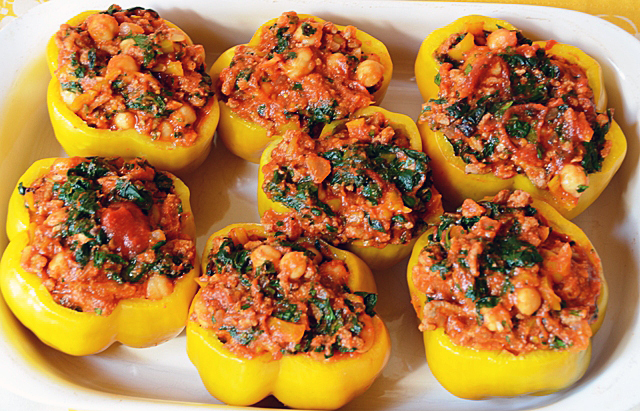
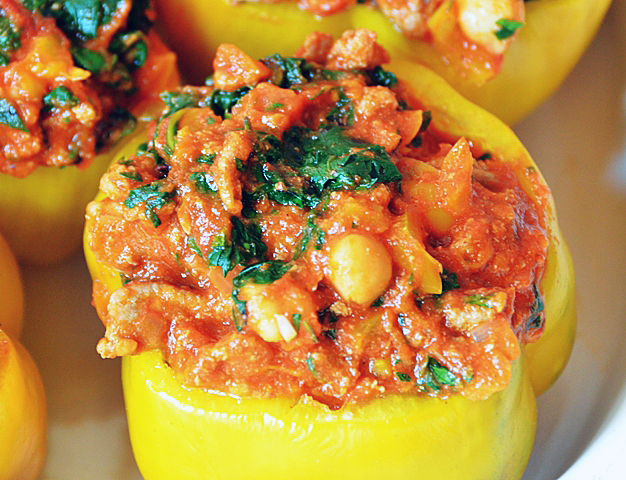
Full disclosure, I never did care much for those stuffed green peppers. My recipe for stuffed peppers has evolved over the years. An abundance of beautiful yellow peppers, the Admiral variety to be exact, inspired this recipe. We are half way through a South Beach phase one eating plan so the recipe was adapted to reflect this. I would normally add a healthy grain like whole wheat couscous or barley, but since grains aren’t part of South Beach diet phase one, I adjusted the recipe accordingly. Chopped chard and chickpeas were added to low fat ground turkey with my homemade tomato sauce to make a substantial and delicious filling. I like to keep my peppers whole but they could be split down the middle and stuffed if your peppers are an irregular shape. Black beans could take the place of the garbanzos, and frozen chopped spinach, cooked and drained, could take the place of the chard. Leftovers? Joe said the peppers were even better the next day.

Stuffed Yellow Peppers

Ingredients

  • 6 medium yellow peppers (any color is fine) tops cut off and reserved, seeds and ribs removed
  • 2-3T olive oil
  • 1/2 c chopped onion
  • 1-2t chopped garlic
  • 1lb lean ground turkey
  • 2c tomato sauce (I use my homemade sauce
  • 1 15.5 oz can of garbanzo beans, rinsed and drained
  • 3/4lb chard leaves, stems removed, reserved for another use
  • 1/4c chopped parsley
  • Kosher salt and freshly ground pepper to taste
  • 1/2c low fat mozzarella or Italian blend cheese

Directions

  1. Preheat oven to 375F.
  2. Finely chop the flesh from the reserved tops of the peppers to measure about 1/2 cup.
  3. In a skillet, heat the olive oil. Add the onion and peppers and cook over medium heat until softened, about 4 minutes. Add garlic and cook one minute more.
  4. Add ground turkey and cook, breaking up with the back of a spoon, until lightly browned.  Add tomato sauce and cook until slightly thickened, about 4 minutes. Remove pan from heat.
  5. Cook chard leaves in light salted boiling water for three minutes. Drain chard in a colander and let cool, then squeeze dry and chop coarsely. Chopped chard should measure about one cup.
  6. Stir chopped chard and garbanzos into the meat mixture. Taste mixture to adjust flavors. Add chopped parsley, and salt and pepper to taste.
  7. Stand peppers up in a baking dish just large enough to hold them. If your peppers won’t stand up on their own cut a thin slice from the bottom to help them stand.
  8. Add 1/2c water to the baking dish. Cover with foil, and bake until peppers are tender, 35-40 minutes.
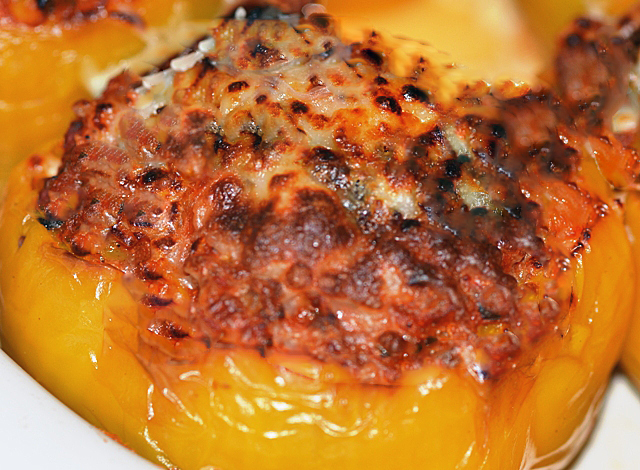
  9. Remove foil and sprinkle cheese over peppers. Return peppers to the oven and bake uncovered until cheese has melted and peppers are tender, 10-15 minutes more.


 Peppers are stuffed and ready to go!


September 8, 2012 Salsa Verde

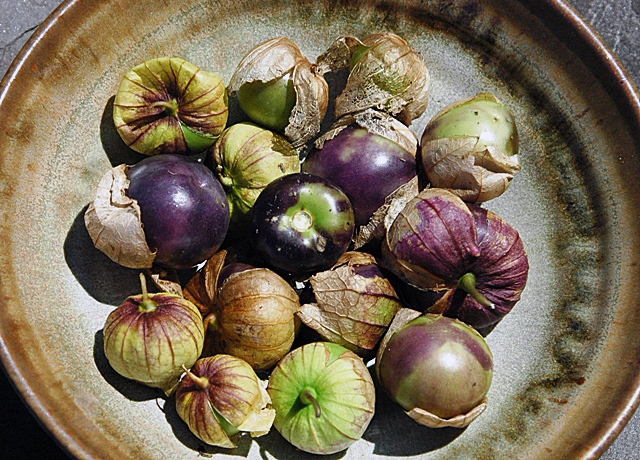
Many cold winters ago as we were perusing the seed catalogs, Joe was going over the litany of our seed purchase list. Discovering something different, he asked, “Toe-mah-till-ohs?”  “Uh sure, mm, okay.” I had never seen or heard of tomatillos before but was interested in the small green fruit. Were they like tomatoes? How do you know when they are ripe? Not having a large Mexican community in the area at that time my initial knowledge of real Mexican food (think not Chi Chis) came through the cookbooks of Rick Bayless and Diana Kennedy.  I learned that it is pronounced, toh MAH tee yo, and tomatillos like tomatoes and eggplants are  members of the nightshade family. Tomatillos are a prominent ingredient and bring the citrusy tang to salsa verde. I learned salsa verde was not just an alternate dip for tortilla chips, but a sauce to cook chicken or pork in. This knowledge didn’t bring me initial success as a gardener/harvester. I would examine the papery husks that resembled Chinese lanterns on the vine and not find much inside. So I would give up, some years we even skipped over growing them at all. Last year Joe  found a seed source that had both green and purple tomatillos. With renewed determination I was going to harvest tomatillos. I learned that the tomatillo is ripe when the fruit fills out the outer layer and the papery skin starts to dry out.

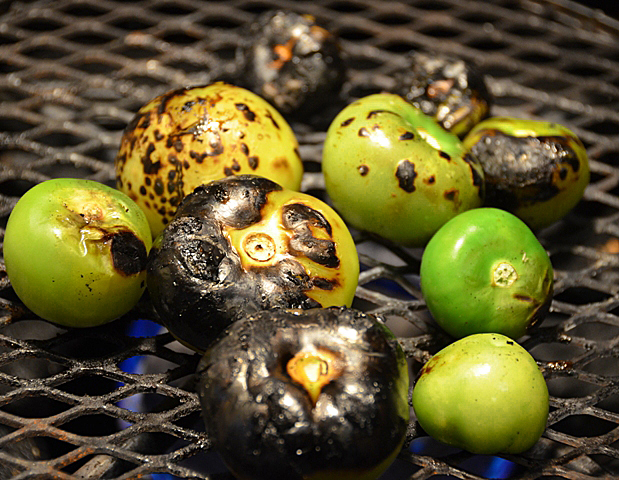
Preparation is relatively easy, remove the outer husk and rinse off the sticky residue that coats the fruit. The fruit should be bright green, firm and tart. They can be eaten raw or boiled, but I feel they are best when charred or broiled. I like cooking my tomatillos on an asador, a round grate that sits on top of your gas burner or outdoor grill. Most often I use the asador on the gas cook top, moving the tomatillos around to blacken on all sides with tongs. They don’t look very pretty when you are done with them but the flavor is wonderful, smoky, sweet and a little citrusy all at the same time. I used the asador to cook all the elements of my salsa verde, the tomatillos, garlic, red onion and the peppers; Anaheim, Pasilla Bajio and a green Jalapeno for good measure. I put all the ingredients in a blender, pulsed on high for a few minutes and came out with a green chili sauce that I am liking more every day. I have topped pork,chicken and fish with it so far and I’m sure it would be just as good with a steak. This year I plan on freezing some tomatillos as well, a little chicken tomatillo soup in about a month will hit the spot.

Postscript : Once again, as with “Perfect Fish”, I have learned that the asador is no longer available for sale. One version (not mine) was part of a line that Rick Bayless was designing and bringing to market. Copco dropped that line when they sold the company. Bayless is in discussions with several manufacturers to bring back the stove-top roaster.

 Salsa Verde

My own interpretation

Yield: about 2 1/2 cups

Ingredients

  • 10-12 small to medium tomatillos, husked and washed
  • 1 1″ thick slice of red onion
  • 3 cloves garlic with the peel on
  • 2-3 Anaheim chilis (mine were red)
  • 1 Pasilla Bajio chili
  • 1 Green Jalapeno chili
  • 1t ground cumin
  • 1t fresh lime juice
  • 1T chopped cilantro (optional)
  • Kosher salt and freshly ground pepper to taste

Directions

  1. Place stovetop asador over a gas flame, when the grill heats up (3-5 minutes) add  as many tomatillos will fit comfortably stem side down. The stem side is flatter and the tomatillos will not roll around. Move tomatillos around the cooking surface to ensure even cooking. Using tongs, turn the tomatillos to the other side and cook until charred and completely softened, 4-5 minutes per side, depending on how intense your flame is. Move the cooked tomatillos to a sheet pan or bowl. Add more tomatillos, onion, garlic and peppers as you have room. The garlic will take only seconds, don’t allow it to burn.
  2. Let everything cool for about 10-15 minutes. Now for the “fun” part, peel, stem and seed the tomatillos, garlic and peppers. I find the best way to do this is in the kitchen sink with a large bowl and cold running water near by to keep the skins and seeds from sticking to your hands. It’s okay if some of the char remains, it adds a little character and flavor to the sauce.
  3. Place tomatillos, onion, garlic and peppers in the blender. I like to add a teaspoon or so of ground cumin and some fresh lime juice. Blend on high, occasionally scraping down the sides of the bowl to incorporate all the ingredients.
  4. Pour sauce into a bowl, season with kosher salt and freshly ground pepper to taste. I add a tablespoon of chopped cilantro at this point, but that is optional.
  5. Alternately the tomatillos, garlic, onion and peppers could be charred under a broiler or over an outdoor grill.
    Tomatillos in various stages of charring
    Close up of tomatillo on asador.
    Chilis on asador
    Ready to peel
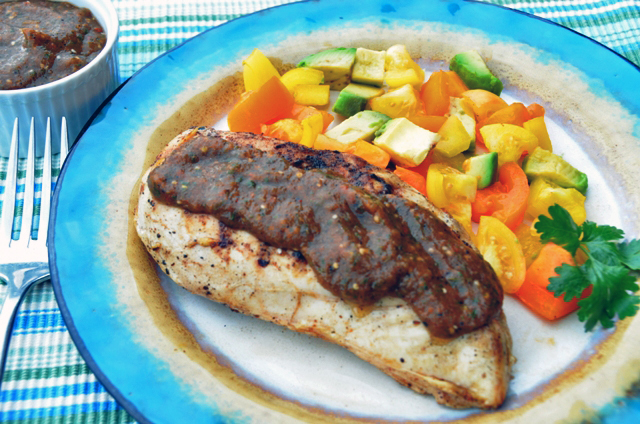
    Green chili sauce (salsa verde) over grilled chicken breast served with a salad of heirloom tomatoes, peppers and avocado.


September 4, 2012 Basil Pesto

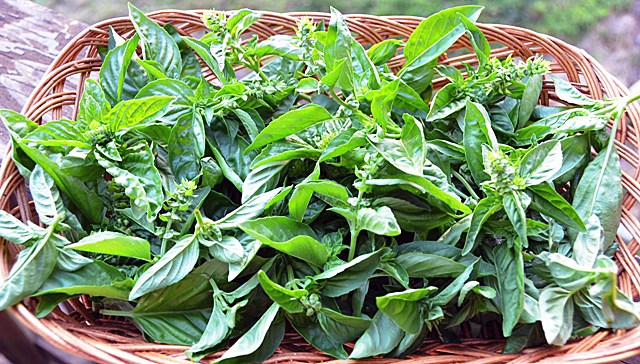
  Nothing is more evocative of summer than the scent of fresh basil in the garden. We grow many varieties, from the classic large-leaved Genovese, beautiful purple Dark Opal, scented varieties such as cinnamon, lemon, and lime, and miniature varieties that grow into perfect little ball shapes. One of my all time favorite ways to enjoy basil is in a delicious pesto sauce.
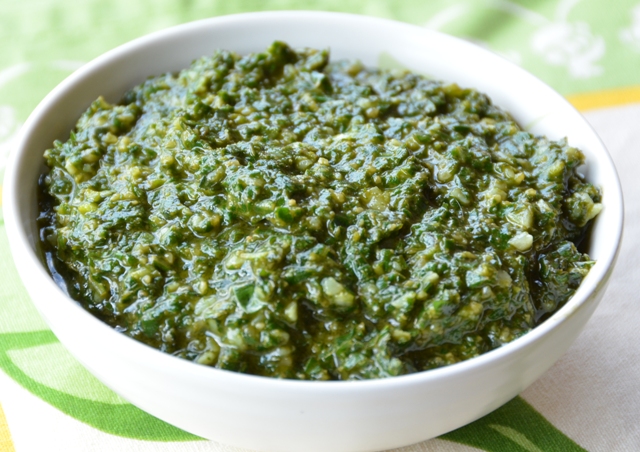
Originating in the northern Italian Riviera city of Genoa, pesto is a fresh uncooked sauce of basil leaves, pine nuts, grated cheese, olive oil and garlic. The word pesto derives from the Italian “pestare” to pound or to bruise.Traditionally, pesto was made in a mortar and pestle but now most people make short work of pesto by using a food processor. Several years ago we had the opportunity to teach a course on cooking with herbs at a local cookware store. One of the ways we engaged the participants in the class was to have them take turns using their muscle power to make pesto in a large mortar and pestle while I whizzed up a batch in my Cuisinart. The difference is remarkable. Pesto in the food processor is homogenized, very sauce-like while the mortar and pestle version was very creamy and had a great amount of definition and texture. I’m not saying every time you make pesto it needs to be made in the mortar and pestle but it is certainly worthwhile to try to see the difference and, you will get a mini-workout as well! 

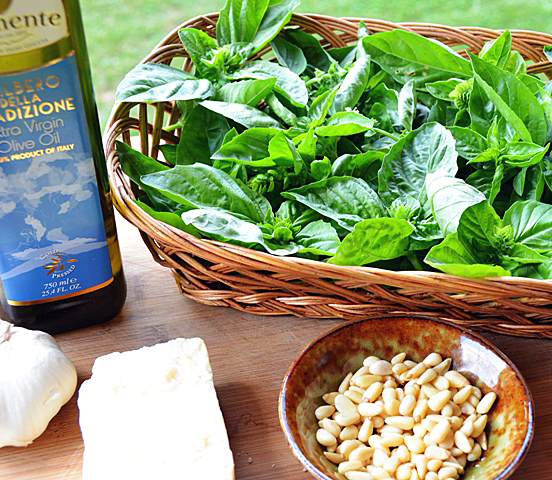
Pesto demands your freshest ingredients, basil, picked fresh from the garden or farmers market, fresh garlic, good quality pine nuts or walnuts, sea salt, freshly grated Parmigiano-Reggiano and your best extra virgin olive oil. Pesto will keep for about a week in the refrigerator. A thin layer of olive oil on top will help it retain it’s color. I freeze pesto without the addition of cheese in ice cube trays for seasons without basil. Just thaw out enough individual cubes for your recipe and add cheese to taste.

Basil Pesto

Makes 1 cup

Ingredients

  • 2-3 cloves of peeled garlic
  • 1/4c raw pine nuts or walnuts
  • 1/4t sea salt
  • 3c gently packed basil leaves
  • 1/2c extra-virgin olive oil
  • 1/2c freshly grated Parmigiano-Reggiano


Directions

Food processor method

  1. Process the garlic, nuts and salt until finely ground, about 20 seconds. Add the basil leaves and process in spurts just until no whole leaves remain. With the machine running, pour the oil through the feed tube in a steady stream. Stop and scrape down the sides, then process again for several seconds. Some of the texture of the leaves should remain. Add the cheese and pulse until incorporated.

Mortar and Pestle method

  1. Remove stems and center veins from basil leaves. Put one cup of basil leaves and the salt in the mortar, and using the pestle, press and pound the leaves against the sides of the bowl in a rotating motion, the salt provides some “traction”. Continue to add leaves as they break up and grind them until they are all used. Add the pine nuts and grind them into the sides of the bowl. Stir in the grated cheese and slowly stir in the extra virgin olive oil.

August 31, 2012 Grilled Beet and Fig Flatbread


Grilling pizzas and flatbreads certainly isn’t something new. But what topped this one in an article called “Going Meatless on the Grill” in Fine Cooking was, grilled beet slices and  figs. I admit I have gone a little beet crazy this summer, using them in cold soups, in salads, both roasted and raw in a fine julienne. I am still harvesting a few fresh beets from our garden before the fall planting becomes ready. We have a few fig trees, but they are young and not producing fruit yet. Figs are in season now and available in most supermarkets.  So I thought I would give this recipe a try. The base of this flatbread is a naan, an Indian flat bread that I have made before  but because of time constraints today I used a pre-packaged one (horrors!) that is readily available in many supermarkets. I thinly sliced beets on the very sharp Kyocera mandolin. The beet slices were tossed with olive oil, kosher salt and freshly ground pepper before they were placed on the hot grill. The original recipe called for the beet greens to be used in the topping but my beet greens were way past their prime. I substituted arugula that gave the flatbread a peppery kick. A combination of salty goat cheese and a creamy sharp provolone finished this delicious dish.

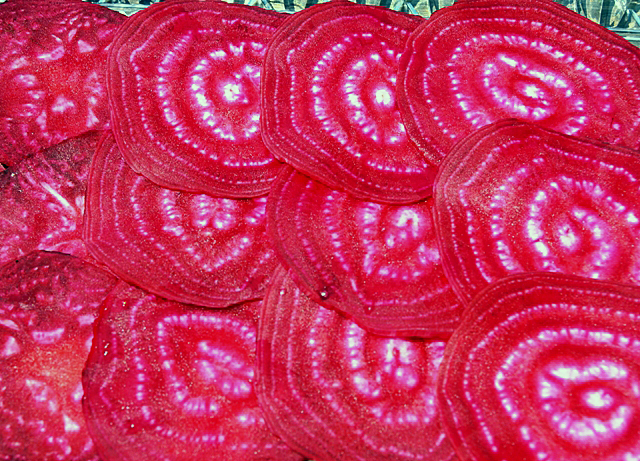
 Beautiful thinly sliced beets remind me of a tie-dyed shirt!

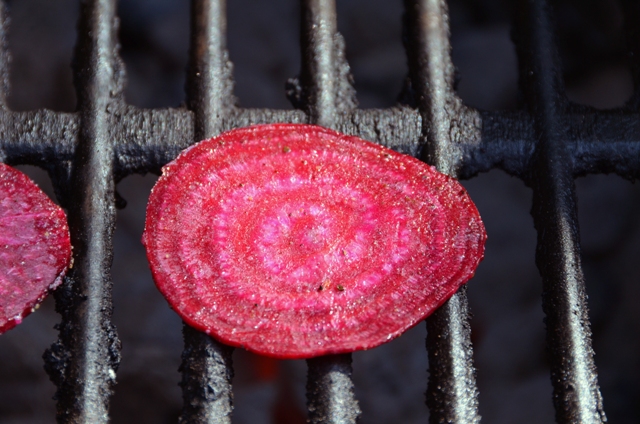
Beet slices on the grill.

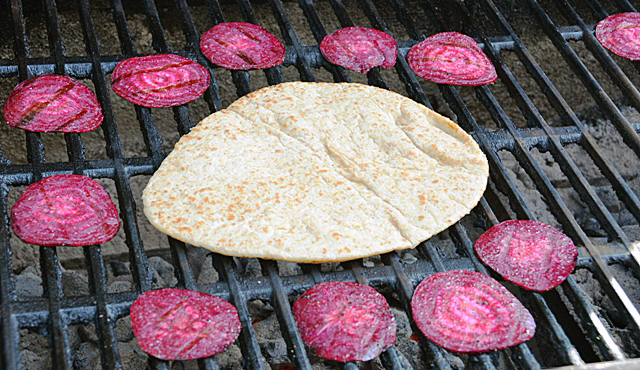
Add the naan to the grill once the beet slices have started to brown.


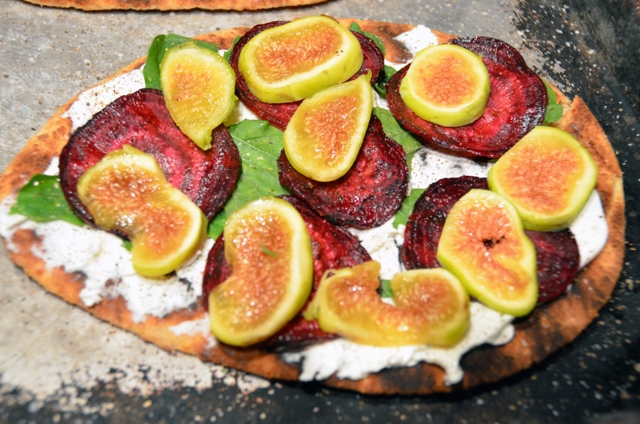
   Naan is topped with softened goat cheese, grilled beets and sliced fresh figs. The provolone is scattered over the top and returned to a closed grill to wilt the greens and melt the cheese.