October 6, 2017 Dehydrated Asian Pears

In addition to the gardens, we have a small orchard that includes a pear, apple, persimmon, Asian pear and most recently, fig trees. We are usually so busy harvesting from the garden that the orchard is all but forgotten and most of the fruit that falls from the trees goes to the deer. The persimmons are Cody’s special treat, I can honestly say I don’t understand that at all. The Asian pear is the most productive of the trees and this year I wanted to find a different way to use the fruit. Several years ago I canned about a half dozen jars of Asian pear chutney, this time I was looking for something new. My inspiration came at the local farmers market. A local orchard was selling dehydrated apples. Why not Asian pears?

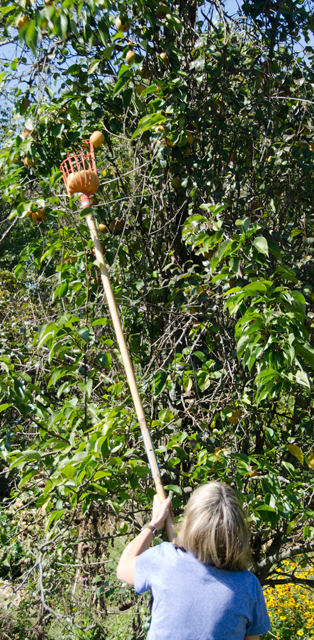
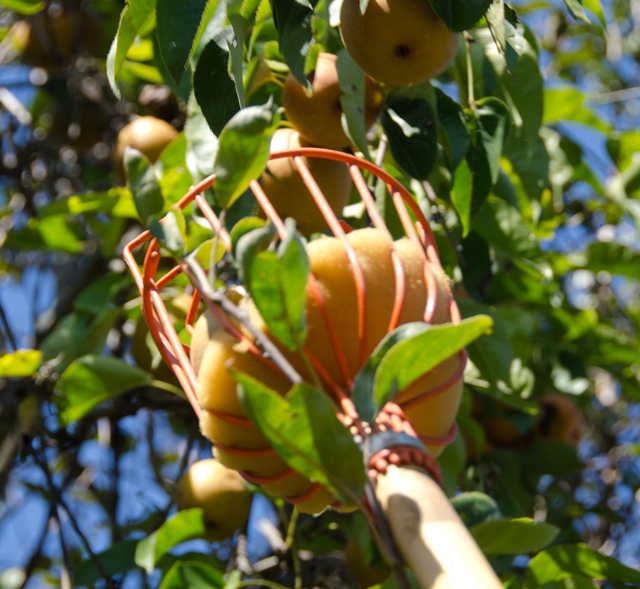
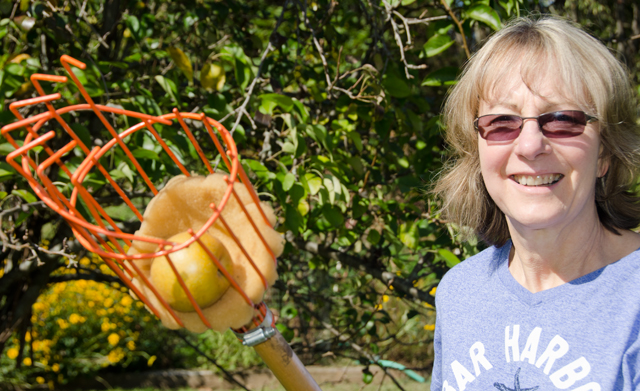
The task at hand now was to pick the pears. Some were accessible by hand, for the pears that were higher up the tree I needed a different approach. I turned to the aptly named fruit picker, a wire basket attached to a long pole. There are bent prongs at the top of the basket that allow you to pull the fruit off the branch. The bottom of the basket is cushioned with foam to prevent the fruit from bruising.

The Ball canning book states that drying food is easy but may require some trial and error. Various factors, the quality of the produce, drying methods, pretreatment techniques and climate can all affect the finished product. So it is necessary to follow the general guidelines and then make the necessary adjustments.

Successful home dehydration depends on three factors: heat, enough to force out moisture but not enough to cook the food, dry air, to absorb the released moisture and air circulation, to move the moisture away.

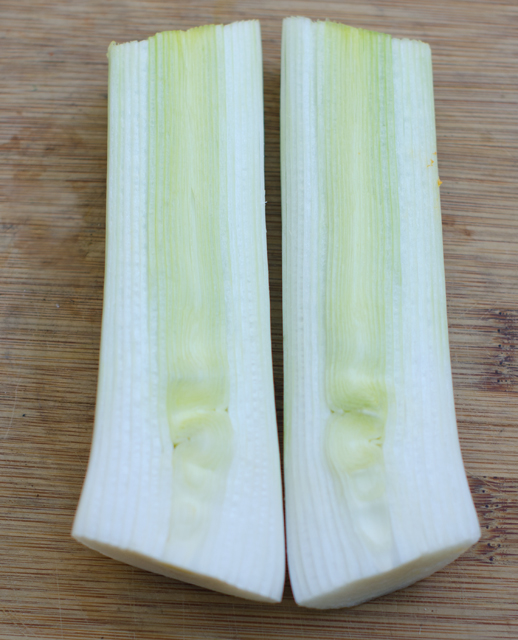
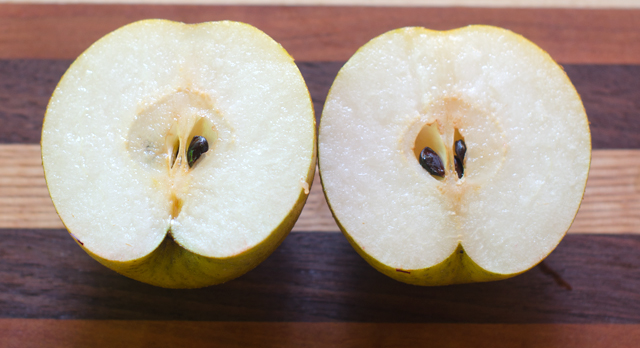
I started by washing and drying just a few pears, since this was just a test batch. I don’t own a dehydrator, but the lowest heat on our convection oven is 140°F, only 5 degrees higher than the recommended temperature of 135°F. I lined two large half-sheet pans (18″ x 13″) with parchment and began slicing the pears. Since the Asian pears from our tree were relatively small, I wanted to maintain the largest piece possible. I cut the pears in half lengthwise through the core and removed any blemishes. I discovered a melon baller was the right tool to scoop out the core.

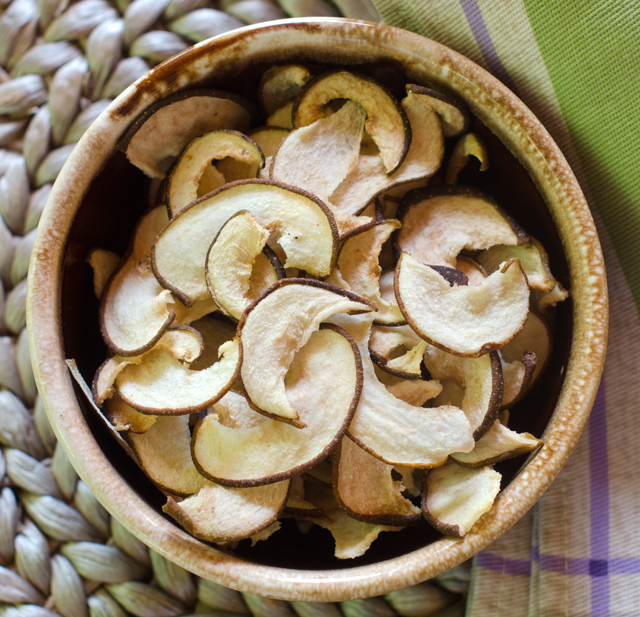
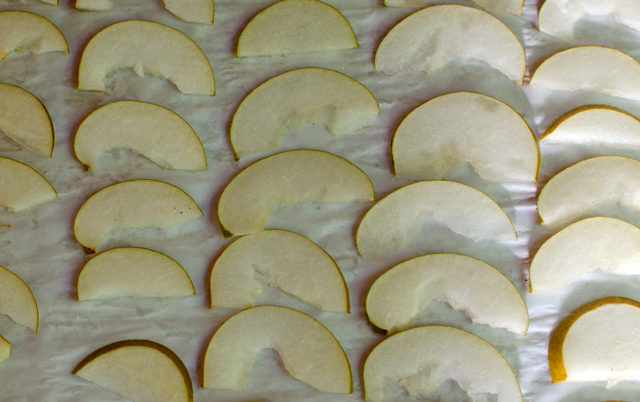
To peel or not to peel? That was the next question and for the first batch I decided not to. Another step that is optional is dipping. Dipping the fruit in diluted lemon juice prevents oxidation, which turns the fruit brown. I sliced the fruit with a sharp knife, about an quarter of an inch slice and spaced them evenly on the baking trays. I baked them in the convection oven for 5 hours, rotating the trays half way through the drying process. Then I turned the oven off and left the trays in the oven overnight. I was very pleased with the results. Most of  the pieces look like slices of a mushroom cap and I will continue not peeling them. Asian pears are super sweet and drying them intensifies the sweetness. The consistency should be pliable, not crisp with no moisture pockets. Your time may vary, so check frequently. Great for snacking, store the pear chips in quart bags in the fridge and freezer.

Using the fruit picker.
Success!


Dehydrated Asian Pears

 Makes 70-80 pieces

Ingredients

  • 4-5 Asian pears
  • Dipping solution of 1 c lemon juice to 1 qt water to prevent oxidation  (if desired)

Directions

  1. Place oven racks in upper and lower positions. Preheat convection oven to the lowest setting possible, 140°F in my case.
  2. Line two half sheet pans with parchment paper.
  3. Wash and dry pears, peel if desired. Remove any blemishes. Cut the pears in half lengthwise. Remove the stem and core. I found a melon baller worked well. Slice pears with a mandolin or sharp knife into ¼ inch pieces.
  4. Soak fruit in dipping solution if desired, no longer than 10 minutes. Drain before drying well with paper towels.
  5. Evenly space out the slices on the baking trays and dehydrate for about 5-6 hours. Leave in turned off oven overnight. The slices should be pliable and chewy with no moisture pockets.
  6. Store in plastic quart bags in the refrigerator or freezer.

July 4, 2017 Quick Pickled Baby Beets

The hot days of July are upon us so it’s time to harvest the root crops planted in early spring. that are still in the ground. We said good-bye to the radishes several weeks ago after the first heat wave of the summer. Warm temperatures cause radishes to bolt and become woody in texture. They will be planted at the end of summer for a fall harvest. The first planting of Japanese turnips have been harvested and now it’s time to harvest the rest of the beets.The”life cycle” of our beet consumption began with very small thinnings we add raw to our salads. The second thinning produces slightly larger leaves the size of spinach that are sautéed in olive oil with a little garlic and red pepper flakes for a wonderful side dish. Baby beets are sliced as thinly as possible or julienned and added to green salads.The Chiogga beets look pretty in salads, a slice looks like a candy cane bulls-eye and the Golden beets bring a pop of bright yellow.

I love beets, especially pickled ones. I have canned pickled beets in past summers for long storage, this year I thought I would make refrigerator pickles. Quick pickled baby beets couldn’t be simpler to make. These refrigerator pickles require very little prep and they are ready to eat after a few hours in the brine. Divide your beets by colors or they will bleed into each other. The brine is a touch sweet with a little spice. These pickles will last for several months in the refrigerator.

Just picked beets from the garden.
After a good clean up.


Quick Pickled Baby Beets

Makes 2 pint jars

Ingredients

  • 1 lb baby beets,  separated into colors
  • 1 c white wine vinegar
  • 2 t kosher salt
  • ½ c sugar
  • 2 T honey
  • Fresh ginger slices
  • 1 t coriander seed
  • 1 t black peppercorns
Trimmed and ready for pickling.

Directions

  1. Wash beets well, trim off the leaves and leave about an inch of stem on the beets. Separate beets into colors if you don’t want them to bleed into each other.
  2. Bring a medium pan of water to a boil. You can put all the beets of one variety in the pan, start checking the smaller beets at the two minute mark. Beets should be easily pricked with the tip of a knife, larger beets will take a few more minutes.
  3. Drain beets well in a colander. Place in a heat proof container like a canning jar, separating out the varieties.
  4. Combine vinegar, salt, sugar, honey and spices and bring to a boil. Pour the hot canning liquid over the beets and set aside to cool. Once cool, store in the refrigerator.


March 21, 2017 Creamy Poblano Chicken

I didn’t think the day would come, but I finally exhausted my supply of freezer pesto. I’ve been using it this winter to top boneless chicken breasts before baking as an easy weeknight supper. A little looking around the freezer and I found the ingredients for this new impromptu sauce. Chicken with poblano cheese sauce is loosely based on a Mexican classic. Poblano peppers have a dark green skin and if left to ripen further on the vine will turn red. They are somewhat heart-shaped, 3-6 inches long and 2-3 inches wide. Poblano peppers are rich and flavorful with a mild to medium heat.

This recipe can be made as mild or as spicy as you like, depending on the number of poblanos added to the sauce. Since most recipes begin with roasted and peeled poblanos, there are several methods for roasting. If you have a gas stove as I do, they can be roasted on an open grated grill known as an asador. If you don’t have a gas stove they can be broiled on a foil lined baking sheet. With either method, turn them often so they char evenly. Put the chilis in a bowl while they are still hot and cover tightly with plastic wrap. Let them rest until they are cool enough to handle, 15-20 minutes. Pull on the stem to remove the seed core and cut the chile open to remove any additional seeds and ribs. Remove the skin by running your hands down the chile, use a damp paper towel to remove any skin that won’t easily come off. Resist rinsing the chiles, you will dilute the flavor.

The base is cauliflower Alfredo sauce, a recipe from the blog two summers ago. I wasn’t certain if this would be good to freeze, but I’m pleased to say it reheated well. Since my first step was to see if the sauce held up to freezing, I started with a cup of the cooled down sauce in the food processor. To this I added several roasted poblanos, from the end of last years garden, also from the freezer.

I puréed the sauce, along with a cup of raw spinach leaves, a teaspoon of ground cumin, salt and pepper. Start with one stemmed and seeded poblano, cut into strips and add more as desired just to give a little kick of heat. I topped chicken breasts with this sauce, covered with foil and baked for 23 minutes. After 23 minutes, I took out the chicken, removed the foil and topped with grated cheese and placed under the broiler. Delicious and the chicken is cooked perfectly! Next time I might add some roasted garlic too. This sauce would also be good to top chicken enchiladas or even as a dip for veggies.

Creamy Poblano Chicken

Serves 4

Ingredients

  • 1-1 ½ c cauliflower Alfredo sauce
  • 2-3 roasted poblano peppers
  • 1 c raw spinach leaves
  • 1 t ground cumin
  • kosher salt and freshly ground pepper
  • 2 lbs boneless skinless chicken breasts, remove tenderloin if attached, breasts cut in equal halves
  • ½c or more shredded cheese, a Mexican blend is good here, mozzarella is fine as well
  • Non stick spray or oil to coat baking dish.
Cut large breast pieces in half.
It’s best to cut on an angle to get even pieces.
Poblano peppers add just the right amount of heat.
I like to cook them on the stovetop on an asador.


The sauce can be made easily in a food processor or blender.

Coat the breast pieces evenly with the sauce.
Cover the chicken tightly with foil before cooking. Be careful of the steam that will escape after cooking.
After cooking they will shrink a bit.
Turn the broiler on and sprinkle chicken with cheese.
The finished product!

Directions

Preheat oven to 375°F

  1. Put the first four ingredients in the bowl of a food processor or blender and pulse until all ingredients are incorporated. Taste for seasoning and add another poblano if desired. Season with salt and pepper to taste. Scrape sauce from processor into a bowl and set aside.
  2. Spray a 9″ X 11″  baking dish with non stick spray or coat lightly with olive oil.
  3. Remove tenderloins from chicken breasts if still attached. Cut each breast in half to make even (as possible) pieces. Place the chicken breast pieces in the baking dish.
  4. Cover each piece generously with the sauce. Cover the baking dish with foil and bake for 23 minutes. Remove baking dish from oven, take off the foil and set oven to broil. Sprinkle cheese over chicken breasts and return baking dish without the foil to the oven. Broil until the cheese is melted and starts to brown in spots, 3-4 minutes. Watch closely. Serve with cauliflower rice to sop up the juices.

October 30, 2016 Sweet Pickled Celery

dsc_8190aAs mentioned in my previous post, from day one, the traditional accompaniments for buffalo wings have been celery sticks and blue cheese dressing. Last week, we were pleasantly surprised with the sweet pickled celery served with the buffalo cauliflower at The Vault. It requires no special canning equipment and you can make it in small batches. No delayed gratification here, you can enjoy it as soon as the canning liquid cools.

This quick and easy recipe is courtesy of celebrity Chef Gordon Ramsay. I have been enjoying the most recent season of Ramsay’s reality cooking competition, MasterChef, while I exercise on the elliptical machine. For some reason our new Xfinity cable box saved several seasons of MasterChef as something we might enjoy. Well I am happy to say “cable box, you get me.” With all of his swearing and in your face style with the contestants, I forgotten what an amazing chef he is.

This recipe is from Ramsay’s Ultimate Home Cooking cookbook and was an accompaniment for buttermilk fried chicken. Interesting, since the episode I watched today featured a fried chicken challenge for the losing team on MasterChef. No chicken here, just pickled celery.

Start with a head of celery, separate into individual ribs or stalks, remove any strings and wash and rinse well. Cut celery on the diagonal into one inch lengths and place in pint jars with lids that have been sterilized with hot soapy water. Over medium high heat make a simple syrup of equal parts 1 cup water to 1 cup sugar. Stir to dissolve the sugar. Add peppercorns, herbs and vinegar and bring mixture to a boil. Carefully pour the hot liquid over the celery filled jars. The celery will cook a bit, shrink and resettle from the hot liquid. You will be able to add more celery when this happens. When the liquid cools, the celery is ready to eat. It will be even better if you have time to refrigerate it overnight.

Great as an accompaniment to buffalo cauliflower, an antipasto platter or chopped finely and added to chicken or egg salad.

dsc_8176a

Sweet Pickled Celery

Ingredients

  • 1 medium bunch celery
  • 1 c water
  • 1 c sugar
  • 1 t black peppercorns
  • 1 t mustard seeds
  • 1 t fennel seeds
  • ½ t cloves
  • ½ t salt
  • 6 T white wine vinegar

dsc_8185a

Directions

  1.  Cut celery into individual stalks, wash and cut into one inch long diagonal pieces and place into sterilized pint canning jars. Fill the jars to the top. Keep extra celery aside to add later.
  2. Create a simple syrup of one cup water and one cup sugar. Add to a medium size pot along with the peppercorn, mustard and fennel seeds, cloves, salt and white wine vinegar. Over medium high heat, stir to dissolve sugar and bring to a rolling boil.
  3. Carefully pour the hot liquid into the canning jars. Wait a minute or two, the hot liquid will cook the celery a bit and shrink it, leaving more room for additional celery left over from the first step. Pack the celery in tightly, covered with the pickling liquid.
  4. As soon as the liquid cools, the celery can be eaten.  Even better if you refrigerate it overnight.
The final product served with blue cheese sauce and pickled celery.

October 13, 2016 Chicken and Butternut Squash Soup

dsc_8161a

Joe begins planning the vegetable garden right after the Christmas holidays. As always, he asked me if there was anything I wanted to add this year. I knew right away I wanted him to grow butternut squash. They were never planted before because the vines need considerable room to grow. Since the ever-expanding garden now includes an area near the orchard and the berry bushes, there would be some more room available. Last year he grew some loofah and bird house gourds in that area but since they were not going to be repeated, butternut squash got the okay.

Butternut is a variety of winter squash. The name is a bit of a misnomer however,  since all winter squashes are frost tender (the plants will die with the first frost) warm season (seeds must be planted when the soil temperature is above 65°) annuals (plants that complete their life cycle in one growing season). With a growing season of 110-120 days for full maturation, they are harvested in the fall and can be kept well through the cold winter months, hence the name. Summer squash like zucchini and yellow crookneck are harvested all summer long while the fruit is still immature and the skin is still tender. Not counting the ones that “get away” and could fill in for baseball bats. And yes, botanically speaking, both winter and summer squash are fruit since they develop from a flower and are the part of the plant that contains the seeds. Winter squash should only be harvested when fully mature. When winter squash is mature, the stem end will turn from green to brown and will appear that the stem is beginning to dry out. The skin should look dull, not shiny and it should be difficult to dent the squash skin with your fingernail. Winter squash do not require refrigeration but should be stored in a cool dark area.

Last weekend the harvest was finally ready and Joe brought them in by the wheelbarrows full, 60 in all. Some of the squash were slightly damaged and they will be the ones I use first. Some I will give away to friends and the rest we are storing on shelves in our basement.

Low in fat and rich in vitamins A, C, fiber and antioxidants, butternut squash is a great addition to many recipes. I like to roast cubes of butternut squash to add to my fall salads.The butternut squash seeds can be tossed with olive oil and salt and roasted for a crunchy snack or a salad topper.

The creamy texture of butternut squash makes a wonderful soup and I have recipes for two on the blog from years past, butternut squash soup with cider cream and butternut squash soup with Asian pear and ginger, both unique and delicious.

Because of fall’s chilly temperatures, I wanted to make a more substantial main course soup. I liked the idea of roasting the vegetables on the baking sheet to bring out their natural sweetness. For easy clean up, I lined the baking sheet with parchment paper. The leek, pepper and squash should be cut into pieces all relatively the same size so they cook evenly. A medium dice works best here, about 1 to 1 ½ inches. Toss the vegetables with olive oil and spread out evenly on a baking sheet, don’t overcrowd. Arrange the chicken thighs on top of the vegetables and season everything with salt and pepper. I think chicken thighs are the best choice for this recipe, the skin keeps the meat moist during the roasting process. Rotate the pan halfway during the cooking process to ensure even cooking.

Transfer the chicken thighs to a plate to cool and add the roasted vegetables to a pot along with the chicken broth and spices. Simmer over medium heat and use a potato masher or the back of a wooden spoon to mash-up some of the vegetables to give the soup a thick, chunky texture. Shred the chicken into bite sized pieces, discarding the skin and bones. Add to the soup and stir in fresh lemon juice, salt and pepper to taste. When the soup is almost done stir in the kale ribbons and cook until they are wilted, an additional five minutes. Additional add ins for this soup could include cannellini beans and fire roasted diced tomatoes. The soup can be frozen or stored in the fridge for several days.

Roasted Chicken and Butternut Squash Soup

Serves four to six

Ingredients

  • 6 bone-in skin-on chicken thighs
  • 1 medium butternut squash, (2½ to 3 lbs) peeled, seeded and diced medium
  • 1 medium leek, sliced medium
  • 1 small red pepper, diced medium  (I added a red poblano too for a little kick)
  • 2 T extra virgin olive oil
  • Kosher salt and freshly ground pepper
  • 4 c low sodium chicken broth
  • ¼ t ground cumin
  • ¼ t ground coriander
  • ¼ t smoked paprika
  • 2-3 cups of thinly chopped kale (avoid thick stems)
  • 2 T fresh lemon juice
  • Fresh parsley or coriander (optional)

dsc_8147a

Directions

  1. Preheat oven to 425°F. In a large bowl toss the squash, red pepper and onion with the olive oil. Spread evenly on a large baking sheet. Arrange the chicken thighs on top, spacing out evenly. Season everything with salt and pepper.
  2. Roast until the squash and chicken are cooked through, rotating pan halfway through the cooking process.
  3.  Transfer the chicken to a plate, loosely cover and let cool. Transfer squash and onions to a medium pot and broth, cumin, coriander and smoked paprika. Simmer over medium high heat.
  4. With a potato masher or the back of a  wooden spoon, mash some of the vegetables until soup is thick and chunky.
  5. Discard the skin and bones from the chicken, cut meat into small pieces and add to the soup. Stir in lemon juice and season with salt and pepper.
  6. Stir in the thinly chopped kale and cook for five minutes more, until the kale is wilted. Taste and adjust seasonings, To serve, top with fresh parsley or cilantro.
Preparing the butternut squash.

dsc_8150a

I used a leek from the garden but an onion will work as well.
Lining the baking sheet with parchment makes for easy clean up.
The "after" picture.
The “after” picture.
Kale ribbons only need about five minutes to wilt into the soup.

dsc_8166a

September 15, 2016 Harissa

dsc_7983aThe challenge facing us in late summer/early fall is preserving the harvest.  A prime example is hot peppers. In tropical climates they thrive as perennials and can grow for many years. It would be great if I could just walk down to the garden in January to pick a few fresh jalapenos. But given the fact that January temperatures where we live are below freezing and pepper plants prefer a daytime temperature of 65-80°F, it won’t be happening anytime soon . So it is necessary to find methods of preservation now to enjoy them later while the peppers are at their peak. Every year I freeze whole peppers, dry them, make chili flakes, pickle jalapenos, I’m even making sriracha now, but a new method is always welcome.
A very simple recipe I found for eggplant, another garden stalwart, suggested topping grilled slices with prepared harissa and yogurt. In the past I purchased harissa in a jar or a tube at the middle eastern stand at the local farmers market. This time I decided to see if this was something I could make myself. Harissa, is a garlicky spicy condiment found in the Northwest African countries of Algeria, Morocco and Tunisia. It can be used as a condiment for meat or fish, roasted vegetables, stirred into soups and stews and served alongside couscous. Think sriracha with more complexity. It’s ingredients can include roasted peppers, garlic, chile peppers of all varieties, fragrant spices such as coriander, cumin and caraway, dried mint, lemon and olive oil. There is no one master recipe for harissa. The ingredients in harissa vary by country, ethnicity, even neighborhood. You can adjust the heat by the number and type of chilies you use, just remember, harissa is supposed to be hot.

My recipe is a little different from most since I used fresh hot peppers, not dried ones that need to be reconstituted. This meant using double the amount of peppers. I used one red bell pepper, four mild poblano peppers and a mix of jalapeno, cayenne and ancho. I added a little tomato paste for sweetness, preserved lemon peel with just a little juice, chopped garlic, smoked paprika and an aromatic spice blend. I think the spice blend is what really gives this dish its unique flavor. Whole spices, coriander, cumin and caraway are toasted in a small skillet until the fragrance fills your kitchen. I find it easiest to grind them in a mortar and pestle, a mini food processor doesn’t quite give the consistency you are looking for.

All the peppers need to be charred to remove the skin. I did this in a hot oven, turning occasionally to blacken all the sides. I put the charred peppers in a bowl and covered it tightly with plastic wrap to steam the peppers. It is important for to wear rubber gloves when removing the skin, seeds and stem from the hot peppers. Conventional wisdom for years has said that the hottest part of the pepper is the seeds. A recent study however has shown that even though the seeds pack some heat, it’s actually the placenta, the white tissue that holds the seeds that is the source of the most heat. As you peel the peppers put them into piles, no heat, some heat and hottest. That way you can hold back on some of the hottest peppers until you are certain the sauce will be palatable for you.

Combine the chilies, toasted spices, garlic, salt and other optional ingredients in a food processor. With the food processor running, slowly drizzle in the olive oil until you have a smooth, thick paste. Scrape down the sides occasionally. Taste, now is the time to add that extra pepper if desired. As I said before, harissa is supposed to be hot. Season to taste with salt and pepper. Transfer harissa to clean jars, top with a thin layer of olive oil and store in the refrigerator for several weeks. Since I freeze pesto I may try to see if harissa can be frozen too.

As a postscript, the harissa received immediate approval from Joe who topped cucumber slices with harissa as an after work snack.

dsc_7947a
A harvest of both bell and hot peppers.

Harissa

Makes 2 cups

Ingredients

  • 1 medium bell pepper
  • 8 to 10 ounces fresh chili peppers of varying heat, poblano, ancho, jalapeno, cayenne
  • 2 t cumin seed
  • 2 t coriander seed
  • 2 t caraway seed
  • 3 to 4 cloves of peeled garlic
  • 1 T tomato paste
  • 1 t preserved lemon peel
  • 1 t juice from preserved lemon
  • 1 t smoked paprika
  • Kosher salt and fresh ground black pepper to taste
  • 3-4 T extra virgin olive oil

Directions

  1. Preheat oven to 425°F.Line a baking sheet with foil. Place all the peppers on the baking sheet and roast for 10 minutes.
  2. Turn the smaller peppers over and roast for another 10 minutes, until the skins are blackened. Remove them to a bowl. Turn the bell and poblano peppers over and roast for another 10-15 minutes, until the skins are blackened.
  3. Remove all the peppers to the bowl and tightly cover with plastic wrap to steam the skin.
  4. Place the cumin, coriander and caraway seed into a dry skillet over medium heat. Toast until seeds have darkened a bit and have become fragrant.
  5. Pour toasted seeds into the bowl of a mortar and pestle. Crush seeds to a powder.
  6. Using rubber gloves to protect your hands, stem, skin and seed the peppers.
  7. Place the peppers (hold back a few hot ones if you are concerned), toasted seeds, garlic, tomato paste, preserved lemon peel and juice, smoked paprika into the bowl of a food processor. Pulse to combine the ingredients, scraping down the sides.
  8. With the food processor running, add the olive oil in a steady stream until you have a smooth, thick paste. Taste, add salt and pepper to your liking and pulse in the extra peppers if desired.
  9. Transfer harissa to clean jars and top with a thin layer of olive oil. Store in the refrigerator for several months.
Place the peppers on a foil lined baking sheet for easy clean up.

dsc_7952a

Cumin, coriander and caraway seeds are toasted in a dry pan.

dsc_7956a

Pulverize the seeds in a mortar and pestle or spice grinder. Smells great.
dsc_7962a
Stem, seed and skin the peppers. Be sure to wear gloves to protect your hands from the hot peppers.


dsc_7965a
I added some preserved lemon peel and tomato paste.
Everything is combined in the food processor.
Everything is combined in the food processor. Add olive oil to make a thick paste.

dsc_7974a

October 31, 2015 Homemade Hot Pepper Sauces

DSC_4979aLast weeks plunge into the deep freeze meant it was time for one final harvest of hot peppers. With a formula that worked and an abundant source of peppers the challenge was to make a few hot sauces using the same method as the sriracha sauce from a few weeks ago. I first tried the NuMex Suave Orange peppers and several days later using green and red pasilla peppers and green poblano peppers. The jars fermented on the back kitchen countertop for about a week. I wasn’t sure what the results would be so my expectations weren’t very high.

To finish, I followed the same procedure for each variety, transferring the chopped chilis to the food processor, adding enough (1/3 to 1/2cup) white vinegar to puree until smooth. I carefully washed out the processor between peppers to keep each type as pure as possible. I strained the mixture through the medium disc of the food mill to eliminate any seeds. I think it’s easier than the mesh strainer and gives the finished product a little texture.

Now for some taste testing. The Numex Suave Orange has the flavor nuances of the habanero that are usually missed because the heat dominates. The sauce has a citrusy flavor with hints of orange and lemon and finishes with a little heat. The green pasilla flavor reminds me of green bell pepper and has a touch of moderate heat. The green poblano has an initial hint of sweetness and finishes with more heat than the green pasilla. I especially like the red pasilla sauce. The color is a deep dark red and the flavor is rich and full but not too hot. I think it would be the perfect addition to a chili recipe.

Numex Suave Orange Peppers
DSC_4858a
The habanero peppers on the left measure a tongue burning 100,000 to 300,000 on the Scoville scale while the Numex Suave Orange on the right are a very mild 800!
Adding peppers and garlic to the food processor.
Chop the peppers as finely as possible.
The peppers ferment for about a week.
DSC_4985a
The finished product

July 17, 2015 Pesto for Seasons Without Basil

DSC_3686aWhether you’ve grown it from seed or purchased your plants at the local home improvement store, those basil plants in your garden are loving the warm temperatures and rain we have been receiving recently. It’s about now that your basil plants have probably sent out spikes of tiny white flowers. Since basil is a true annual, when allowed to flower the plant will go to seed, the leaves will become bitter and your plant will eventually die off.  Now is the time to begin harvesting basil leaves.

As soon as you see that your basil is flowering, pinch them off so the energy in the plant stays diverted to foliage growth. Cutting back your basil plants regularly  encourages full, bushy plants. To harvest, cut leaves from the top of the plant, pinch out the top of the stem. This should include small new leaves or a flower stalk and a pair of full sized leaves growing below the tip.

My favorite thing to do with the basil harvest is to make pesto. We have pesto with pasta, as a sauce for vegetables or chicken, as a dip, on pizza, the possibilities are limitless. But, at least in our climate, as soon as the first frost comes, basil  is the first victim, the leaves of the plant will turn black and wither. It’s now that you should start preserving that classic taste of summer with freezer pesto.

I have been making this recipe for years now from a classic cookbook of the eighties, Fancy Pantry. Written by former food editor and a three time winner of the Tastemaker award, Helen Witty, Fancy Pantry is a collection of recipes subtitled, “Well preserved, prettily pickled, candied, brandied, potted, bottled, sun dried and otherwise put-by elegant edibles”. My well worn copy attests to it’s usefulness and I recommend it highly.

Mrs Witty attributes this recipe to the late Marcella Hazan. Long before there was Lidia and Mario, there was Marcella.  Marcella Hazan was a cookbook author and authority on Italian cooking. My introduction to Italian cooking came through her classic volume, The Classic Italian Cook Book: The Art of Italian Cooking and the Italian Art of Eating and it’s subsequent follow up, More Classic Italian Cooking. My cookbooks written by Mrs. Hazan fall open naturally now to recipes I used countless times. I appreciated her clear and concise recipes written in a voice that was both warm and encouraging.

Her pesto recipe is quite straightforward; mix all the ingredients, basil, pinenuts, garlic, olive oil and a pinch of salt in a blender. Seal tightly and freeze pesto in one cup jars. The cheese or butter as she suggests, should be added right before using it. Most modern recipes call for just Parmesan cheese in pesto. Marcella points out that in Genoa, where pesto originated, they use equal quantities of Parmesan and a special, mildly tangy sheep’s milk Pecorino cheese from Sardinia .  That cheese was not available to American cooks when the book was written, back in the seventies. I found several online sources that sell it now.  Her solution to the problem then was to use 3 parts Parmesan to 1 part Romano and suggests to adjust this to taste. She states, “a well rounded pesto is never made with all Parmesan or all pecorino”. Point taken.

I make my pesto in 2 cup batches and freeze in one cup glass canning jars with the amount of cheese needed to finish the recipe written on the lid. Plastic freezer containers are fine as well. When I purchase any nuts, I buy from bulk containers and store them in the freezer until I am ready to use them. They thaw quickly and freezing nuts prevents them from going rancid quickly. I often substitute walnuts for the pine nuts, since the more delicately flavored Mediterrannean variety are sold at one local market for 12.99 for four ounces! When Marcella was writing her book, the food processor was still years away from being a commonplace kitchen item.  The question for her was whether to make pesto in a blender or with the classic mortar and pestle. She recommends and I concur that everyone should try to make pesto at least once with the mortar and pestle “because of the greater character of the texture and its indubitably richer flavor.”

But Marcella was a practical cook and felt blender pesto was so good that it could be enjoyed “with a clear conscience” whenever there wasn’t time or patience to make pesto in a mortar and pestle. Of course, fresh pesto is always the best but as Marcella said, “since fresh basil has a brief season and pesto keeps quite well in the freezer”, I am going to make enough pesto now to satisfy all those out of season cravings.

DSC_3689a

DSC_3678a

Basil Pesto for the Freezer

Makes about 2 cups

Ingredients

  • Freshly picked basil, rinsed, leaves stripped off and blotted dry, gently packed down to measure 3 cups
  • ¾ to 1 cup of a good quality olive oil
  • 3 large cloves of garlic, or more to taste, peeled and chopped
  • 3T pine nuts or coarsely chopped toasted walnuts
  • ½ to 1 t salt, or to taste
  • At the time of use: Parmesan and Romano cheese

Directions

  1. Combine everything except the cheese in the bowl of a food processor or blender. Turn the motor on and off rapidly, scraping down the sides of the container once or twice, to process the pesto to the texture you like, some prefer smooth, others, a fine chopped mixture.
  2. Pack the pesto into small freezer containers such as straight sided half pint canning jars, leaving ½ inch of headroom to permit expansion. Seal the containers and store in the freezer.
  3. To use the pesto: Thaw the amount you’ll need in the refrigerator, if time permits. A cupful is enough for 4-5 servings of pasta. Blend your cheese into the thawed pesto, adding 3-4 tablespoons freshly grated cheese to each cup of sauce. Check the seasoning of the mixture, you may want more salt, depending on the saltiness of the cheese. Use in the recipe of your choice.

DSC_3690a

DSC_8399a

DSC_8366a

DSC_8406a


April 14, 2015 Beet Chutney

DSC_2334a

The good thing about cooking a ton of food for a holiday is that chances are, you will have lots of leftovers.  The challenging part is finding ways to repurpose those leftovers into something different and delicious. Smoked turkey was good on a salad, leftover roasted vegetables topped our homemade thin crust pizzas. In previous years I made moussaka with leftover lamb, this year we decided on lamb wraps. In addition to the usual tzatziki sauce that I would serve with lamb, Joe suggested  “something spicy.” I had some ideas but after googling it, found an interesting recipe for beet chutney.

As a beet lover, I enjoy their earthy quality and thought the sweet and sour quality of a chutney would be a nice contrast to the creamy coolness of tzatziki. The chutney comes together quickly and benefits from being made ahead, allowing the flavors to blend together. The recipes calls for a two inch diameter beet, which turned out to be just a little bit less than a cup. Tweak the sweet and sour elements to your own liking. I used golden raisins because that’s what I had on hand, dried cranberries might be nice as well. Dried cranberries would fit the color scheme and would fit right in with a Thanksgiving menu. The chutney would also be good  as a appetizer on top of a cracker spread with goat cheese or Brie.

DSC_2321a

Beet Chutney

Makes about a cup

Ingredients

  • 1/4c olive oil
  • 1 ½c red onion
  • 1 2-inch diameter red beet, peeled, cut into ¼ inch cubes
  • ½c water
  • ½c red wine vinegar
  • 3T raisins (I used golden raisins)
  • 3T sugar
  • 2t chopped peeled fresh ginger
  • 1t yellow mustard seeds
  • Pinch of cumin seeds

DSC_2323a

Directions

  1. Heat olive oil in a heavy medium saucepan  over medium heat. Add chopped red onion and beet cubes. Cook until onion is tender but not brown, stirring frequently, about 8 minutes
  2. Add ½c water. Increase heat to high and boil until mixture is thick, about 5 minutes. Add vinegar, raisins, sugar, ginger, mustard seeds, and a pinch of cumin seeds. Reduce heat to medium-low and simmer until beet cubes are tender and the chutney is thick, stirring often, about 10 minutes. Adjust seasonings as needed and season to taste with salt and pepper. Cool.
  3. Can be made 1 week ahead. Cover and chill.

DSC_2327aDSC_2336a


November 16, 2014 NuMex Suave Orange Peppers

DSC_9452aA warm early fall, plant cages and a drip irrigation system all contributed to a bumper crop of sweet and hot peppers this season. One of the most interesting varieties we grew was the Nu Mex Suave Orange.  In appearance, this pepper closely resembles a habenaro. If you are not familiar with habenaros, they are one of the hottest varieties grown. Pepper heat is rated on the Scoville scale. For example, jalapenos are around 25,000 units, hot enough to satisfy most palates. The red Savina habenaro is 577,000 Scoville units, a bit too hot for all but the most dedicated pepperheads to enjoy.

So why was there a need to breed a mild habenaro? In addition to their heat, habenaros have a unique flavor that most people couldn’t taste because they couldn’t get past the scorching heat.

This is where the developers of new pepper breeds came in. With seed donated from a chile aficionado from Texas, and many seeding trials, the varieties, Nu Mex Suave Red and Orange pepper were originated.  Nu Mex is the name for products created at the agricultural experimentation station at New Mexico State University at Las Cruces and suave, meaning mellow or smooth, emphasizes the mild nature of the chile. Nu Mex Suaves look like a cross between a habenaro and a Scotch bonnet, another hot chili, used in Jamaican jerk sauces and salsa.

DSC_9455a

The fruits are about 2 inches in size, plump, wrinkled and bright orange yellow in color.  Suaves have a citrusy flavor with an orange lemony overtone. The heat is felt in the back of the mouth and throat as opposed to a jalapeno where you will experience the heat on your tongue and lips.

Their wrinkled appearance and thin waxy skin make them a poor candidate for roasting. I used them in salads and had my own experiment with some mini stuffed peppers. I also froze several bags  and look forward to the mild heat and citrusy flavor they will add to soups, stews and other dishes.

DSC_9483a