November 9, 2017 Buckeye Candy

We had the pleasure of a visit recently from our dear friends Bill and Wilma. The main reason for their trip from sunny south Florida was to attend the wedding of a friend’s son. Along with wedding festivities, they spent time enjoying some Bucks County sightseeing, dining and spending time with friends, including us. Wilma was also fortunate enough to get excellent tickets to see her beloved Ohio State Buckeyes football team play Penn State on their home field in Columbus Ohio.

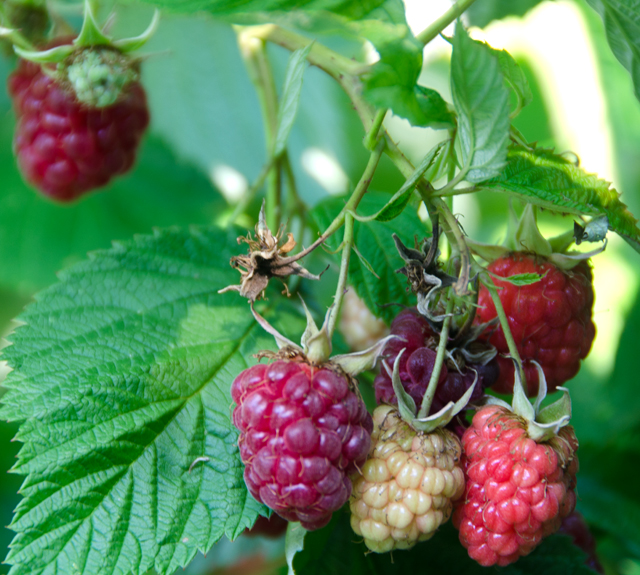
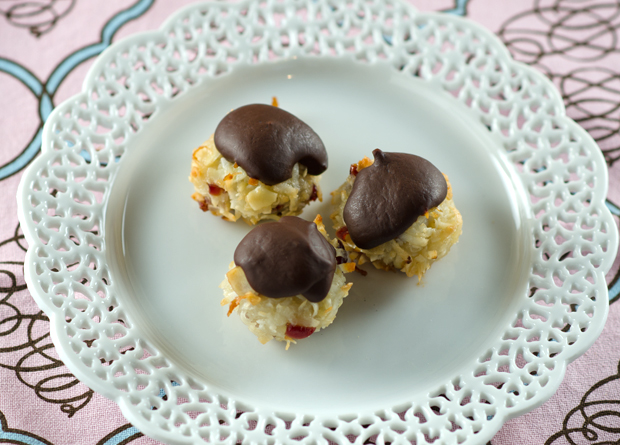
The Ohio Buckeye is one of 13 tree species of the genus Aesculus, also known as buckeye or horse chestnut and the state tree of Ohio. Ohio State adopted the buckeye as its official nickname in 1950 though it had been in common use for many years before. The name came about because the nuts of the tree are shiny dark brown with light tan patches resembling the eyes of a deer, a buck eye. The nuts are inedible but folklore says carrying one in your pocket wards off bad luck.

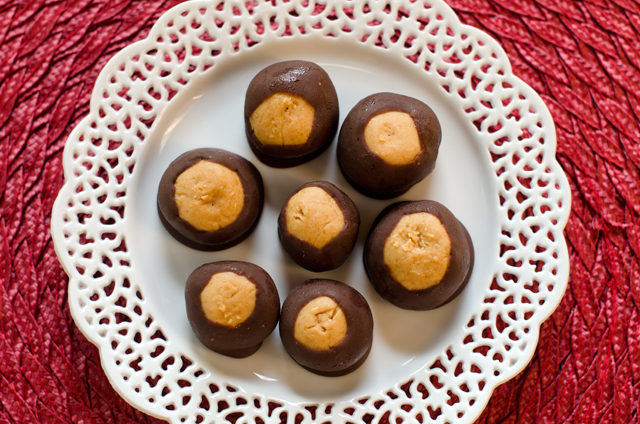
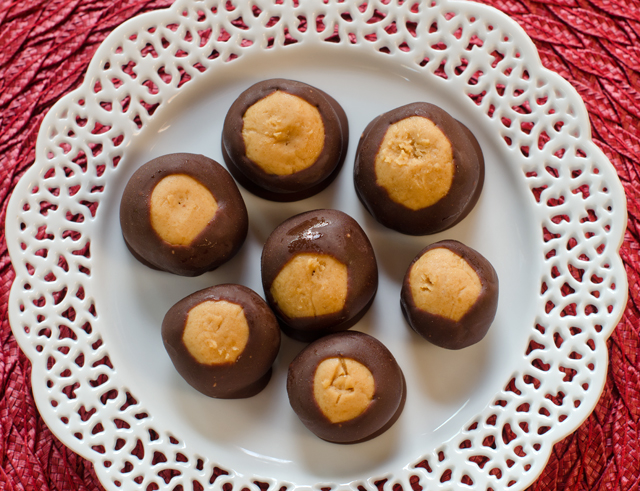
Though the buckeye nut is “mildly” poisonous, its namesake confection is quite delicious. Buckeye candy has a peanut butter fudge like filling that is partially dipped in melted chocolate, leaving a circle or “eye” of peanut butter visible. They are very easy to make and you may already have the ingredients in your pantry. The first step is to combine peanut butter, butter, confectioners’ sugar, vanilla and salt with the paddle attachment of a stand mixer.

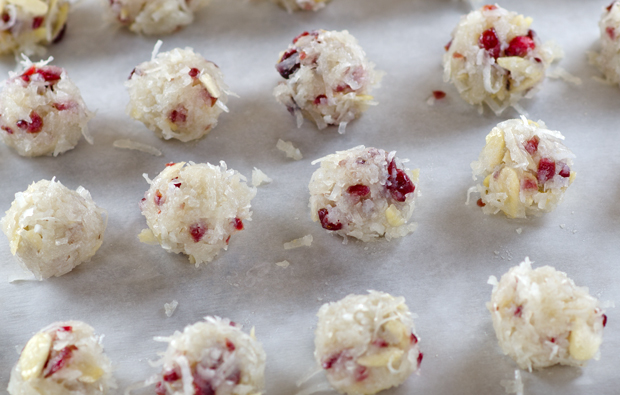
The most time-consuming, but not hard, part of the process is rolling the peanut butter mixture into balls. Give the balls a short chill in the freezer to firm them up before the next step. Melt chocolate, morsels are fine, with a tablespoon of coconut or vegetable oil. Adding a little oil makes the chocolate glossier and makes the buckeyes firmer when they’re outside the fridge.

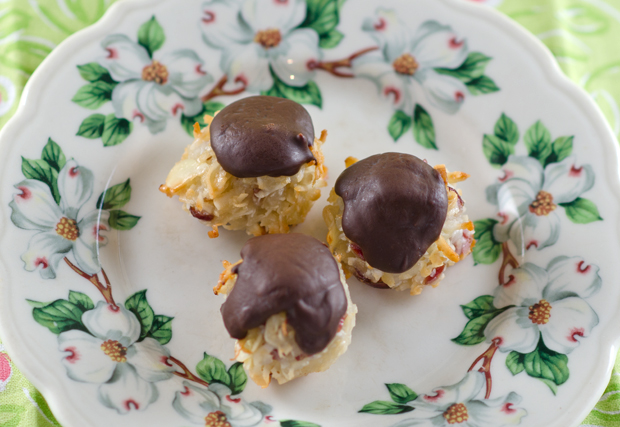
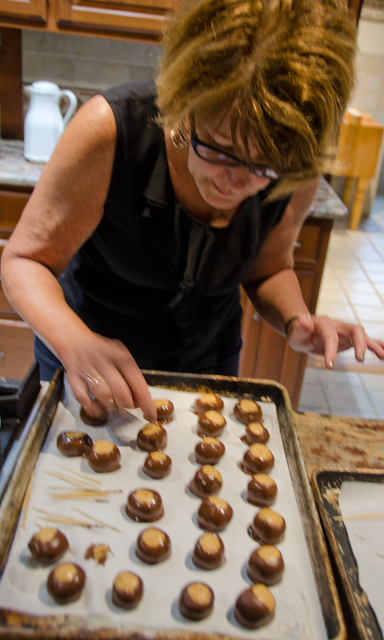
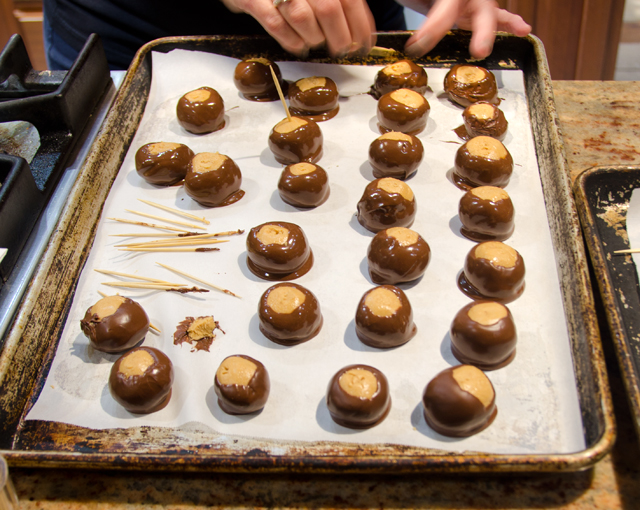
Stick a toothpick into a peanut butter ball and give it a generous dunk in the chocolate. Don’t submerge it, leave the top quarter undipped. This spot is what makes a buckeye a Buckeye! Transfer the buckeyes to the prepared baking sheet. Pull out the toothpick and carefully smooth over the hole. Chill the buckeyes overnight in the fridge for the best results. Store in an airtight container in the refrigerator.

The game? Ohio State pulled off an exciting fourth quarter come from behind win beating Penn State, final score 39-38.

Dipping the buckeyes.
Ready for a chill.

Buckeyes

Makes about 30 pieces

Ingredients

  • 2 c confectioners’ sugar
  • 1 c smooth sweetened peanut butter
  • 4 T melted unsalted butter
  • 1 t vanilla extract
  • ¾ t kosher salt
  • 6 ounces semi sweet chocolate
  • 1 T coconut oil

Directions

  1. Line a rimmed baking sheet with parchment paper. In a large bowl, with an electric mixer on medium, beat the confectioners’ sugar, peanut butter, butter, vanilla and salt until smooth and uniform, about 1 minute.
  2. Portion the mixture into 1 tablespoon balls. Roll the balls into neat circles between your palms. Transfer to the prepared baking sheet, cover with plastic wrap and chill in the freezer until firm, about 30 minutes.
  3. At the end of the chilling time, prepare the chocolate. In a small microwave safe bowl, melt the chocolate and coconut oil in short bursts, stirring often. If the chocolate becomes too thick during the dipping process, it can be liquefied again in the microwave.
  4. Use a toothpick to skewer one ball at a time, and dip it into the melted chocolate, leaving a small circle of the peanut butter mixture exposed at the top and allowing any excess chocolate to drip into the bowl. Transfer buckeyes to the prepared baking sheet and remove the toothpicks. Repeat with the remaining balls, returning them to the freezer for a few minutes if they become too soft to work with. Smooth over the holes left by the toothpick with a small offset spatula or your finger. Chill in the refrigerator until the chocolate is firm, about 30 minutes but if you can, overnight is best.

A little extra chocolate and some chocolate dipped potato chips.

June 28, 2017 Sour Cream Ice Cream

When we first moved to our Windy Bush road property thirty years ago, we were always on the lookout for new plantings to add to our new homestead. Joe bought various fruit trees and started a vegetable and herb garden.

Back then we found interesting herbs at a yearly plant sale at the Churchville Nature Center. Gardeners are very generous people and a fellow plant and herb enthusiast offered us some raspberry bushes in exchange for some scented geraniums from Joe’s collection. We took her up on the offer and Joe planted the bushes in the vegetable garden. As the variety of the vegetables and herbs increased in the garden, we needed to find a new location for the raspberry bushes. Joe cleared a new area, not just for raspberries, now also including golden and black varieties, but for strawberries, blueberries, currants and blackberries as well.

Back in the original location where the raspberries were planted, a small piece of one of the bushes was left behind. Surprisingly, or maybe not, this small bush not only grew but thrived over the years. The transplanted bushes were fruitful for a time but eventually died off. Over the years we have put in more bushes but none has been as productive as that original planting that was never moved. For years Joe would cut it back, but it kept coming back stronger each year. We finally gave in and the bush is getting larger and is putting out beautiful plump red berries. I used to look for berries around the fourth of July, this crop started in mid June and will produce another harvest in August.

We enjoy them right off the vine, of course but I was looking for another way to enjoy this special treat. While picking one day my thoughts first went to crème fraîche but decided that a sour cream ice cream would be the perfect foil for these berries. The recipe I found for sour cream ice cream on Epicurious was originally from Gourmet magazine, July 2009 and was contributed by Ian Knauer. I met Ian several years ago at our local farmers market where he was signing copies of his cookbook, The Farm, subtitled, “rustic recipes for a year of incredible food.” The Farm is a cooking school in Stockton New Jersey, about twenty minutes from our home. Making a mental note to check it out sooner rather than later.

This is a very easy recipe, especially if, like me, you have made custard based ice creams in the past. Custard ice cream, although very delicious, requires a watchful eye to carefully temper the eggs with the cream and milk. One false move and you will have sweetened scrambled eggs.

This recipe is a Philadelphia style ice cream, which means it contains cream and/or other dairy products, a flavor base, but no eggs. All of the ingredients are whirled together in a blender, chilled well and churned in the ice cream maker. The sour cream makes it tangy and pairs well with any summer berry. I served it with toasted pound cake.

Raspberries in various stages of ripeness on the vine.
Beautiful raspberries from the garden.

Sour Cream Ice Cream

Makes about 5 cups

Ingredients

  • 1-16 ounce container sour cream
  • 1 c chilled half and half
  • ¾ c sugar
  • ½ c chilled heavy cream
  • 2 t fresh lemon juice
  • ½ t vanilla extract

Directions

  1. Puree all ingredients with 1/8 teaspoon salt in a blender until mixture is very smooth and sugar is dissolved. Chill until very cold.
  2. Freeze mixture in an ice cream maker. Transfer to an airtight container and put in freezer to firm up, about 6 hours.
Everything is whirred together in a blender.
After the mix is well chilled in the refrigerator, it is churned in an ice cream maker.
The Tovolo “Glide-A-Scoop ” ice cream storage container makes it easy to make a perfect scoop every time.

February 21, 2016 Carrot Cake Sandwich Cookies

DSC_5967aCarrot cake is hands down my favorite dessert. Not just any carrot cake, the legendary creation made popular by a Philadelphia restaurant of the late seventies and early eighties, Frog/Commissary. Frog was the more formal dining restaurant (we ate their once) and the Commissary was a cafeteria style establishment.  The Frog Commissary cookbook was one of the first I owned and I am on my second copy, the first fell apart from constant use. I used many of the recipes over the years for parties and in my catering business. Though I don’t use it very much now (I should..), the recipes still feel as contemporary as they did over thirty years ago.

What can you say about a cake that uses a pound (4 cups) of carrots? Does that count as your vegetable for the day? The cake is cut into three layers and filled with a rich pecan cream concoction made with lots of butter, heavy cream and sugar. There’s always enough filling leftover for later to warm up a little to  pour over ice cream.  The tangy cream cheese and confectioner’s sugar frosting covers the cake and it is gilded with toasted coconut on the sides. I have never claimed to be a pastry chef, but I learned how to make icing “carrots” to embellish the carrot cakes I made. It was the first thing Joe ever made for me on my birthday, long before we were married. I must say I was more than a little impressed. Years later as a caterer I was asked to make this cake countless times, appearing as everything from the wedding cake itself to miniature carrot cake cupcakes on dessert buffets.

Coincidentally it is also the favorite cake of my brother. My brother and sister in law joined us for dinner to celebrate his birthday. My sister in law makes the cake for his birthday every year (a true gift of love!) Not wanting to duplicate her efforts, after all it can easily serve 12 people, I was looking for an alternative. Not just a reworking of the original recipe but something just a little different. Carrot cake bars? Too similar. Carrot cake ice cream? Interesting but that would need more time for experimentation.

I decided on a recipe for carrot cake sandwich cookies I found on the Epicurious website, originally published in the April 2004 issue of Gourmet magazine. It was a much reviewed (241 to be exact) recipe with most of the comments on the positive side. After reading some of the comments I did make a few simple changes to the recipe. First was to line the baking sheets with parchment rather than butter them, I thought it would solve the spreading problem many reviewers encountered and make it easier to transfer the cookies. I also refrigerated the cookies on the baking sheets for a half hour before baking, also because so many reviewers felt the cookies spread too much.  The not overly sweet cream cheese and honey filling was perfect for the cookie. I just increased the honey to my taste, one-third cup. Unless all of your cookies are the same in size, one last suggestion would be to match up the base of the cookies size wise before filling them.

DSC_5964a

Carrot Cake Sandwich Cookies

Adapted from  Epicurious

Makes about 2 dozen sandwich cookies

Ingredients for the cookies

  • 1 1/8 c all purpose flour
  • 1 t cinnamon
  • ½ t baking soda
  • ½ t salt
  •  ½ c unsalted butter (1 stick)
  • 1/3 c plus 2 T packed light brown sugar
  • 1/3 c plus 2 T granulated sugar
  • 1 large egg
  • ½ t vanilla
  • 1 c coarsely grated carrots (about 2 medium)
  • 1 c walnuts, chopped
  • 1/2 c golden raisins

DSC_5941a

Ingredients for the filling

  • 1 8 ounce package cream cheese
  • 1/3 c honey

Directions

  1. Put oven racks in upper and lower thirds of oven and preheat oven to 375°F Line two large baking sheets with parchment paper.
  2. Whisk flour, cinnamon, baking soda and salt together in a bowl.
  3. Beat butter, sugars, egg and vanilla together in a bowl with an electric mixer at medium speed until pale and fluffy, about 2 minutes. Mix in carrots, nuts and raisin in with a wooden spoon or a mixer at low speed. Then add flour mixture and beat with mixer until just combined.
  4. Drop 1 ½T batter per cookie 2 inches apart on baking sheets and place sheets in the refrigerator to firm up for about ½ hour.
  5. Bake cookies, switching position of sheets halfway through baking, until cookies are lightly browned and springy to the touch, 12-14 minutes total. Cool cookies on baking sheet for a few minutes, then with a spatula move the cookies to racks to cool completely.
  6. For the filling: while the cookies are baking, blend cream cheese and honey with a mixer or food processor until smooth.
  7. Sandwich flat sides of cookies together with a generous tablespoon of cream cheese filling in between.

DSC_5942a

DSC_5948a


DSC_5954a

DSC_5966a

January 17, 2015 Hazelnut-Orange Biscotti

DSC_0769aWhen it comes to cookies, at the top of the list of my personal favorites is biscotti.  Almond biscotti were on the menu  for a light nibble after our seven fishes dinner and I am making hazelnut orange biscotti for a pasta making dinner this weekend. Biscotti originated in medieval Italy as a long shelf life food for Roman soldiers and travelers. It is thought that both Christopher Columbus and Marco Polo relied on biscotti for sustenance on their long journeys. The word derives from bis, Latin for twice and cotto for baked. The basic recipe is simple, dough is formed into logs, baked and cooled, sliced and baked again.

Hazelnuts, are also known as filberts.  Twenty five percent of the world’s hazelnut production goes to the manufacturing of Nutella, a very popular creamy chocolate hazelnut spread. Hazelnuts may a bit harder to find than, lets say walnuts or almonds, but many large supermarkets stock them. When I can I like to buy nuts from a bulk bin to ensure their freshness. I baked the hazelnuts in a 350°F oven for 10 minutes, shaking the pan every few minutes and rotating the pan each time. The nuts will start to exude their oil and your kitchen will smell heavenly.  Transfer lightly toasted nuts to a tea towel to cool, then fold over half the towel and rub gently, back and forth to remove as much skin as possible. Don’t worry if some of the nuts refuse to be skinned, the toasting has made the tannins in the skin less bitter and will add some color and depth of flavor. The nuts should only be lightly toasted since they will be going back into the oven to be baked again in the biscotti. Some of the toasted nuts are finely ground and added to the flour mixture, the rest are coarsely chopped and are folded in at the end of the recipe. Be sure not to take the finely ground nuts too far or you may be left with hazelnut butter.

A little bit of fresh rosemary is included with the dry ingredients. If you don’t have access to fresh, a smaller amount of dried will do or you could eliminate it all together. Flour, rosemary, baking powder and salt are combined in bowl of a food processor. Be sure to check the expiration date on your baking powder.  If the date has passed or is soon approaching, there is a simple test you can do to see if it will still do the job. Baking powder  is a chemical leavener that reacts to temperature so just drop a little into a glass of hot water. If it bubbles up, you are good to go! Process these ingredients then transfer to a bowl.

Two eggs are now added to the empty bowl  and  processed until light in color and doubled in volume. I improvised a paper cone for the feed tube to make it easier to add the sugar gradually. This was much neater than using a measuring cup. The melted butter, orange zest, orange liqueur and vanilla extract are added and processed until combined.  The wet ingredients are transferred to a bowl and the flour mixture and hazelnuts are gently folded in.  I find that a large bowl and the largest spatula you have will make this easier. Lift up from the bottom of the bowl and fold over. Whatever you do, resist the temptation to stir the ingredients!

Flour your hands before forming the dough into two logs the size of the 8×3 inch template. Brush the logs with egg white wash, this will give the cookies sheen. Bake the logs for about 25 minutes, cool and cut into 1/2′ slices. I find a serrated knife works best for this. Time for the cookies to go back into the oven. Bake cookies until crisp and golden brown on both sides. Cool completely before serving.  The cookies will be great at this point but you can also take them one step further by dipping the cookies in bittersweet chocolate and sprinkling with toasted hazelnuts.

Oh, by the way, biscotti is the plural form of the word, like a batch of cookies. If you only have one left it’s a biscotto and it’s time to fill the cookie jar again.DSC_0672a

Hazelnut-Orange Biscotti

from Cooks Illustrated November 2012

Makes 30 cookies

Ingredients

  • 1 1/4c hazelnuts, lightly toasted and skinned
  • 1 3/4c all purpose flour
  • 1/2t finely minced dried rosemary
  • 2t baking powder
  • 1/4t table salt
  • 2 large eggs, plus 1 egg white beaten with a pinch of salt
  • 1c granulated sugar
  • 4T unsalted butter, melted and cooled
  • 1T grated orange zest
  • 1 1/2t orange flavored liqueur (Grand Marnier, Triple Sec)
  • 1/2t vanilla extract
  • Vegetable oil spray

Directions

  1. Adjust oven rack to middle position and heat oven to 325°F. Using a ruler and marker, draw two 8 by 3-inch rectangles, spaced 4 inches apart on a piece of parchment paper. Grease baking sheet and place parchment on it, ink side down.
  2. Pulse 1 cup hazelnuts in food processor until coarsely chopped, 8 to 10 pulses; transfer to a bowl and set aside. Process remaining 1/4 cup hazelnuts in food processor until finely ground, about 45 seconds.
  3. Add flour, rosemary, baking powder, and salt; process to combine, about 15 seconds. Transfer the flour mixture to a bowl.
  4. Process 2 eggs in the now empty food processor until lightened in color and almost doubled in volume, about 3 minutes. With processor running, slowly add sugar until thoroughly combined, about 15 seconds. Add melted butter, orange zest, orange liqueur and vanilla; process until combined, about 10 seconds.
  5. Transfer egg mixture to a large bowl. Sprinkle half of the flour mixture over the egg mixture and, using a large spatula, gently fold until just combined. Add remaining flour mixture and chopped hazelnuts and gently fold until just combined.
  6. Divide batter in half. Using floured hands, form each half into an 8 by 3 inch rectangle, using the lines on the parchment as a guide. Using a medium rubber spatula lightly coated with spray, smooth the tops and sides of the rectangles. Gently brush the tops of the loaves with the egg white wash. Bake until the loaves are golden and just beginning to crack on top, 25-30 minutes, rotating pan halfway through baking.
  7. Let loaves cool on baking sheet for 30 minutes. Transfer loaves to cutting board. Using a serrated knife, slice each loaf on a slight diagonal into 1/2 inch thick slices.  Lay slices, cut side down, about 1/4 inch apart on wire rack set  in rimmed baking sheet. Bake until crisp and golden brown on both sides, about 30 minutes, flipping slices halfway through baking. Let cool completely before serving. Biscotti can be stored in an airtight container for up to 1 month.

  8. To further embellish the cookies, melt some bittersweet chocolate, about four ounces in a small pan over another pan of simmering water. This is known as a double boiler.  Line a small dish with a sheet of waxed paper to catch the drippings. Hold the cookie in your non dominant hand over the dish. Use a wooden spoon to evenly drizzle melted chocolate over half of the cookie. Then immediately sprinkle some finely chopped hazelnuts on top. Let the chocolate dry thoroughly on a rack over a sheet pan that has been lined with parchment to catch any additional drippings. Store cookies in an airtight container.

DSC_0761a

DSC_0573a
After three minutes the eggs are light in color and doubled in volume.
DSC_0577a
After the cookies cool cut into 1/2″ slices.
DSC_0578a
The cookies are placed cut side down on a wire rack set in a baking sheet. Bake until crisp and golden brown on both sides.

DSC_0669a

DSC_0673a


August 5, 2014 Blueberry Cinnamon Basil Sorbet

ADSC_8346Summertime is the prime season for fresh berries. Our local season begins with beautiful “red to the core” strawberries in early to mid June. When our raspberry bushes were thriving, I would see the first luscious berries on the thorny bushes around the fourth of July.  I could always count on a call from my mother about mid July, letting me know the blueberries were ready to pick on the bush on what once was my grandfather’s property.

This year the call letting me know it was time to pick blueberries was from my brother. He is maintaining the grounds as we get ready to sell my parents house and adjoining property. This would be my last opportunity to pick from this healthy and prolific bush. I was rewarded with almost a gallon of berries after an hour’s picking. Along with the usual fare like muffins and bar cookies, I was anxious to try my hand at a recipe for sorbet.
The article in the June/July issue of Fine Cooking was contributed by Zoe Francois. Probably best known for her Five Minutes a Day bread books and her blog, Zoe Bakes, she offers a basic formula for sorbet that allows you to choose from endless combinations of fruits, spirits and add ins. She also tackles the common problem that you might encounter making this frozen treat, ending up with a sorbet that is too icy or too slushy.

In a professional kitchen you would use equipment like refractometers and saccharometers to achieve the correct balance. Ms. Francois shares a simple trick for the home cook to see if you have the correct ratio of sugar syrup to fruit puree. Gently place a clean fresh raw egg in a tall container filled with the sorbet base. If the egg sinks, add more of the sugar syrup, if it floats with only a quarter size piece of eggshell in view, your ratio is correct. I must emphasize fresh when it comes to the egg you are using. As eggs get older they contain more air, and might float regardless of the sugar content of your mixture.

Borrowing from the typical combination of blueberries and cinnamon that you would find in a muffin recipe, I added some spicy cinnamon basil and a pinch of ground cinnamon to infuse some extra flavor into the blueberry base. Be sure the flavors in your base are assertive, freezing the mixture will make it less intense. A little citrus juice, lemon or lime, and a pinch of salt will help intensify your flavors.
The hardest part of the recipe for me was finding that tall narrow container. Putting a raw egg into a clean blender jar, filled with the sorbet base seemed too risky because of the metal blade. A vase? Maybe, but the ones I had were too big. I finally found a clean tall take-out container that didn’t have any residual odors. I only needed an extra tablespoon of simple syrup to make the egg float properly. Another trick for getting a creamy sorbet is to blend the smallest amount, only one-eighth of a teaspoon full of guar gum into the strained fruit base. Guar gum is a natural emulsifier from the seed of the guar plant. Use it sparingly, too much and it will turn your frozen treat stringy or gummy.

Another great find came from this article for me. After many years of looking for container that I had visualized in my mind but could never find in stores, there it was, an insulated long narrow container with a non slip base that would make scooping ice cream easier. I purchased mine from Williams-Sonoma but Sur La Table is carrying them as well. On line reviews are mixed at this point, hopefully they will improve.

The berries made a delcious sorbet, my next assignment is to get my hubby to make cuttings from this bush before the house is sold so that we can continue the tradition and one day have a blueberry bush of our own.

DSC_8346a
Beautiful ripe berries.

Blueberry Cinnamon Basil Sorbet

From Fine Cooking Magazine

Makes 1 quart

Ingredients

  • 1c. granulated sugar
  • 1 1/2 c. light corn syrup
  • 1 c. water
  • 1 lb. fresh blueberries
  • 1-2T fresh lemon or lime juice
  • Pinch of salt (or more)
  • 2T finely chopped cinnamon basil
  • 1/8t ground cinnamon
  • 1/8 tsp. guar gum (optional, but makes for a creamier texture)
  •  1 fresh raw egg, in its shell, washed and dried

Directions

  1. To make the sugar syrup, combine sugar, corn syrup, and water in a small pot over medium heat. Heat, stirring occasionally, until all ingredients are combined and sugar granules are thoroughly dissolved. Set aside to cool to room temperature, then place in the refrigerator until cold, about 30 minutes.
  2. In a blender, puree the blueberries, lemon or lime juice and a pinch of salt. Taste mixture to correct flavors. Strain through a fine mesh sieve to remove the seeds. Place in a covered container and refrigerate until cold, about 30 minutes.
  3. Put the blueberry puree, 1 c. sugar syrup, 2 tablespoons packed basil leaves, ground cinnamon and guar gum, if using, in a blender. Strain mixture, once again, to remove any remaining seeds.
  4. Check the density of the sorbet base by gently lowering the egg into the container with a slotted spoon. If it sinks, remove it and stir in and additional 2 T of the sugar syrup, repeating as necessary until the egg floats just below the surface with a quarter-sized exposed area of shell. When density is right, pour sorbet base into a covered container and refrigerate until very cold, at least 30 minutes and up to overnight.
  5. To freeze, pour base into an ice cream maker and run according to manufacturer’s directions. Sorbet too hard to scoop? Let it sit 20 minutes in the refrigerator before serving. Sorbet will keep up to two weeks.

DSC_8350a
The blueberry puree.
DSC_8435a
It floats! Only a quarter sized piece of egg should be showing.
DSC_8445a
My new favorite container and Cutco ice cream scoop.

DSC_8456aDSC_8462a

April 29, 2014 Lemon Cheesecake with Lemon Curd

DSC_6770a

A light lemony cheesecake was the finishing touch for our Easter dinner. This easy to make cheesecake has been a favorite of mine for several years. It is a very simple recipe and always turns out great. It can even be made ahead and frozen, just wrap it very well in several layers of plastic and foil.

Lemon curd has long been a tea time favorite for topping for scones and shortbread. Here it adds another intense lemony layer to the cheesecake. The ingredients are very basic, eggs, butter, sugar and the zest and juice of lemon.

This lemon curd recipe was a real revelation for me. As a caterer I made countless, probably thousands of miniature lemon and lime curd tarts for dessert tables. The recipe I used for years combined the lemon juice and rind, beaten eggs and sugar in the top of a double boiler. The mixture was cooked slowly over simmering water until thick and shiny, making sure the curd never came to the boiling point. It was a long and tedious process. As careful as you might try to be, there was always the possibility of getting unattractive little white specks of egg in the curd. That meant the additional step of straining the curd and losing some of the product.

This recipe for lemon curd combines ingredients much in the way when you bake a cake. Room temperature butter and sugar are beaten together until smooth. Next the eggs and the egg yolks are beaten in one at a time. Now the lemon juice is added. Don’t panic, the mixture will appear to be curdled. The butter will start to melt when it’s cooked over low heat and the texture will become silky smooth.  The heat is now raised to medium and the curd is cooked until thickened, about 15 minutes.

Never let the mixture come to a boil. Be sure to get your whisk into every corner of the pan. This is when the curd can overcook if it is not stirred and scraped often.
Why does this method work? The egg proteins are coated in fat from the butter. This prevents them from coagulating into hard bits when the lemon juice is introduced.

All I know is that it works. The finished product may not seem to be as thick as you want it but it will continue to thicken after it is refrigerated. This easy recipe makes a lemon curd that is silky smooth, rich and creamy with just the right amount of tartness. Another bonus is that it can be frozen, so make a double batch and enjoy it now and later.

DSC_6767a

Lemon Cheesecake

Ingredients

For the crust:
  • 8 oz. vanilla wafers, finely crushed (2 cups of crumbs)
  • 3 T. granulated sugar
  • 7 T unsalted butter, melted
For the filling:
  • 3 8-oz. packages cream cheese, at room temperature
  • 1 c ricotta (regular or low fat)
  • 2 T. all-purpose flour
  • Table salt
  • 1-1/4 c granulated sugar
  • 2 Tbs. finely grated lemon zest
  • 1 Tbs. pure vanilla extract
  • 4 large eggs, at room temperature
For the garnish:
  • 3/4 cup lemon curd

Directions for the crust

  1. Position a rack in the center of the oven and heat the oven to 375°F.
  2. In a medium bowl, stir together the vanilla wafer crumbs and 3 Tbs. granulated sugar. Mix in the melted butter until the crumbs are evenly moist and clump together slightly. Transfer the mixture to a 9-inch spring form pan and press evenly onto the bottom and about 2 inches up the sides of the pan (to press, use plastic wrap or a flat-bottom measuring cup). Bake until the crust is fragrant and slightly darkened, 9 to 12 minutes. Let the pan cool on a rack. Lower the oven temperature to 300°F.

Directions for filling and baking the cheesecake

  1. In a stand mixer fitted with the paddle attachment, beat the cream cheese, ricotta, flour, and a pinch of table salt on medium speed, scraping down the sides of the bowl and the paddle frequently, until very smooth and fluffy, about 5 minutes. Make sure the cheese has no lumps. Add the 1-1/4 cups granulated sugar and continue beating until well blended and smooth.
  2.  Add the lemon zest and vanilla, and beat until blended, about 30 seconds. Add the eggs one at a time, beating just until blended. (Don’t overbeat once the eggs have been added or the cheesecake will puff too much and crack as it cools.) Pour the filling into the cooled crust and smooth the top.
  3. Bake at 300°F until the center jiggles like Jell-O when nudged, 55 to 65 minutes. The cake will be slightly puffed around the edges, and the center will still look moist. Set on a rack and cool completely. Cover and refrigerate until well chilled, at least 8 hours and up to 3 days. The cake can also be frozen at this point for up to 1 month.
  4. To freeze, put the unmolded, cooled cake on a rimmed baking sheet in the freezer, uncovered, until the top is cold and firm; then wrap it in two layers of plastic and one layer of foil. Thaw overnight in the refrigerator.

DSC_6772a

Classic Lemon Curd

From Fine Cooking magazine

Makes about 2 cups

Ingredients

  • 3 oz. (6 Tbs.) unsalted butter, softened at room temperature
  • 1 c sugar
  • 2 large eggs
  • 2 large egg yolks
  • 2/3 c fresh lemon juice
  • 1 t. grated lemon zest

Directions

  1. In a large bowl, beat the butter and sugar with an electric mixer, about 2 min. Slowly add the eggs and yolks. Beat for 1 min. Mix in the lemon juice. The mixture will look curdled, but it will smooth out as it cooks.
  2. In a medium, heavy-based saucepan, cook the mixture over low heat until it looks smooth. (The curdled appearance disappears as the butter in the mixture melts.) Increase the heat to medium and cook, stirring constantly, until the mixture thickens, about 15 minutes. It should leave a path on the back of a spoon and will read 170°F on a thermometer. Don’t let the mixture boil.
  3. Remove the curd from the heat; stir in the lemon zest. Transfer the curd to a bowl. Press plastic wrap on the surface of the lemon curd to keep a skin from forming and chill the curd in the refrigerator. The curd will thicken further as it cools. Covered tightly, it will keep in the refrigerator for a week and in the freezer for 2 months.
DSC_6602a
Sugar, butter, eggs and lemon, the basic ingredients of lemon curd.
DSC_6603a
It looks curdled after mixing but when it’s heated will smooth out to a silky lemon curd.


DSC_6760a
Delicious lemon curd.

April 24, 2014 Strawberry Rhubarb Crumb Bars

DSC_6692a

Some of Kathy’s friends were asked to bring a dessert for the lunch reception after her memorial service. Wanting to do something special in remembrance of her, I recalled she mentioned liking rhubarb so I knew it had to be part of my dessert contribution. The list of ingredients I have cooked with could rival a Chopped competition  but I had never used rhubarb before. I thought I would be best paired with another springtime favorite, strawberries. Since this lunch was informal, the dessert would need to be eaten out of hand so a bar cookie seemed to be the best choice.
For inspiration I turned to the doyenne of desserts, Martha Stewart. The rhubarb crumb bar on her website looked good and in the end notes she said that strawberries could be substituted for half of the rhubarb. Knowing her dessert recipes were dependable, that was good enough for me.
The first hurdle I encountered was finding a market that carried rhubarb. You would think that one of the harbingers of spring in the north would be in abundance but finding rhubarb was quite a challenge.  I will chalk that up to an exceptionally cold and snowy winter. After several phone calls I located the one farm market that carried it.  Manuevering through the crowds of Good Friday food shoppers, there it was, next to the corn on the cob (still haven’t figured out the logic of that).
I have passed by rhubarb before in markets with casual disinterest, so this was the first time I gave notice to it. To me it just looked like an overgrown stalk of celery or a ruby chard without the leaves. Not that impressive looking I’d say.  I learned that rhubarb leaves contain oxalic acid which is poisonous in large amounts. That’s why you will never see the leaves attached in the store.  Whoever figured out that the stalk wasn’t poisonous must have been very brave or very hungry!

Rhubarb, is also known as “pie plant”  and is a perennial vegetable. Rhubarb shows up most often in sweet dishes like cake, cobblers and crisps but also can show a more savory side in chutneys, salads and even curry. Look for firm, bright red or red-green stalks that can be as long as two feet. It can be wrapped in plastic and stored in the refrigerator for 3-5 days.

The flavor of rhubarb is quite tart and needs to be balanced with a great deal of sweetness.These easy to make bars combine a cake base with a tangy sweet filling of berries and rhubarb and are topped with streusel. Cool the bars completely, an overnight stay in the refrigerator is best, before cutting. Serve as is or dusted with confectioners sugar or “fancied up” with a dollop of sweetened whipped cream.

DSC_6609aDSC_6611aDSC_6612aDSC_6616aDSC_6619aDSC_6625aDSC_6628a

Strawberry Rhubarb Crumb Bars

Adapted from Martha Stewart Website

Makes 16 or more if you cut them smaller

Ingredients for the Streusel

  • 1/2c melted unsalted butter, you will need additional room temperature butter for the pan
  • 3/4c packed light brown sugar
  • 1/4t kosher salt
  • 1 1/4c all purpose flour plus more for the pan

Ingredients for the Bars

  • 1/2lb rhubarb, cut into 1/2″ dice
  • 1/2lb strawberries, hulled and sliced 1/4″ thick
  • 1 1/2T light brown sugar
  • 1 1/3c all purpose flour
  • 1t baking powder
  • 1/2t kosher salt
  • 3/4c unsalted butter at room temperature
  • 1 1/4c confectioners sugar
  • 2 large eggs, beaten lightly
  • 1t vanilla extract

Directions for the bars

  1. Preheat oven to 350ºF. Line a 9″ square baking pan with parchment paper, leaving a 2″ overhang on two sides. A little butter on the edge of the pan will help keep the parchment flush with the pan. Butter and flour the parchment and pan, tapping out excess flour.
  2. Make the streusel. Whisk together butter, brown sugar and salt. Add flour and mix together with a fork or your fingers. Refrigerate until ready to use.
  3. Make the cake. In a medium bowl, combine rhubarb, strawberries, brown sugar and 1/3c flour. Sift or whisk together remaining flour, baking powder and salt, set aside.
  4. Beat the butter and confectioners sugar with a mixer until light and fluffy. Slowly add eggs and vanilla extract.  Stir in flour mix until just incorporated.
  5. Spread batter in prepared pan, top with the strawberry rhubarb mix, then top with streusel.
  6. Bake 50-55 minutes or until golden and a toothpick comes out clean. Let the bars cool in the pan, then remove from the pan using the parchment tabs.
  7. Slice bars to preferred size and serve.

DSC_6693a


April 5, 2014 Lemon Buttermilk Pie with Saffron

DSC_6433a

I am not known for my pie baking skills, I make the ice cream and left that part of the meal to my friend, Kathy. Known for her blue ribbon prize winning pie skills, naming only one of her many talents, she could whip up a pie to compliment any occasion or cuisine. Sadly, Kathy lost her battle of many years to cancer just two weeks ago. She fought a long and ardous ordeal with amazing courage and dignity. So naturally the first dinner we were going to have with our closest friends and family after her passing, I decided to make a pie. What’s the big deal? It’s just a pie, don’t overthink it, just make it. I found a recipe in Bon Appetit, a lemon buttermilk pie with saffron. A bit different, Kathy’s pies were fruit filled, not custard types, so technically I was doing my own thing.

Buttermilk was the star of the dessert recipes in this article and it was in both the crust and the filling. I made my pie dough Friday evening and everything seemed okay, I didn’t overwork it and formed it into a disc to roll out the next day. The directions called for the crust to be rolled out on a well floured surface. I decided to roll mine between layers of waxed paper, I read somewhere that made it easier to transfer it to the pie pan. It got a bit “wrinkly” and fearing it would  stick, I transferred the rolled out dough back to the freezer before peeling it off the waxed paper. The transfer was successful and I trimmed it and made my not so pretty crimped edges. Then I pricked it with a fork and placed it back in the freezer to relax before the blind baking. Blind baking is pre baking the pie crust so that it doesn’t get soggy, important when you are going to add a custard filling. Blind baking accomplished, my only concern was that the bottom of the crust was just a tad too brown.

The custard filling was easy to whip up in the blender  but it looked like there would be more filling than the pie shell would handle. But I trudged ahead, believing something magical would happen when I poured it into the pie shell. It did, custard all over the counter, a ruined soggy crust and I moved my hand the wrong way, sending a new plate I just bought into the air and into several pieces on the ground. Score that one, pie one, me zero.

Determined, I was not going to give up on this, no pie would defeat me, so I made the crust recipe again and found a deeper pie plate to accomodate the filling. Rolling out, baking and filling would wait until Sunday, the day I would serve the pie. In the mean time I watched videos on the proper way to roll out pie crust and how to properly crimp the edge to make a beautiful pie.

I had all the ingredients I needed to make pie number two, I just needed the heavy cream to make whipped cream to accompany it. Joe asked if I should get a “back-up” dessert, just in case. I said no, no safety net here, well I guess if things turned out real bad I would just get some ice cream at the CVS. The rolling went extremely well, this time directly on the counter as the recipe suggested, out from the center, then continual 90 degree turns. I kept rolling until the dough was 4 inches larger in diameter than my pan. No problem transferring the dough to the pan, I trimmed and made reasonably pretty edges for the crust.

Now the blind baking. I pricked the crust all over, chilled it, placed a layer of foil and filled it with pie weights. What happened next I’m not exactly sure. I removed the weights and foil from the crust to finish baking. Much to my horror and dismay the edges of the crust started to shrink back in the pan. I put the foil and weights back in, hoping to salvage the crust and save a trip to the CVS.

It didn’t turn out that bad but wouldn’t be featured in Pie Weekly, if there was such a publication. I added the custard, carefully transferring the pie plate on the baking sheet back into the oven. The perfect pie in Bon Appetit was pale, nicely crimped with flecks of saffron showing up here and there. My pie filling was considerably darker, Joe pointed out that I baked in convection mode, that was why. The pie was not perfect, but still tasted good. And my pursuit of pie making will not end with this attempt, Kathy would have approved.

DSC_6393a
Ingredients for the pie filling.


Lemon Buttermilk Pie with  Saffron

From Bon Appetit

Serves eight

Ingredients for Buttermilk Pie Dough

  • 1 1/4c all purpose flour
  • 1T sugar
  • 1/2t kosher salt
  • 1/2c (1 stick) chilled unsalted butter cut into pieces
  • 1/4c buttermilk

Ingredients for Filling and Assembly

  • 2T all purpose flour, plus more
  • 6 large egg yolks
  • 3 large eggs
  • 1 1/4c buttermilk
  • 1 1/4c sugar
  • 1T finely grated lemon zest
  • 1/3c fresh lemon juice
  • 1/4t kosher salt
  • Pinch of saffron threads
  • 2T unsalted butter, melted and cooled slightly
  • Whipped cream, for serving

DSC_6426a


Directions for Buttermilk Pie Dough

  1. Pulse flour, sugar and salt in a food processor to combine. Add butter and pulse until mixture resembles coarse meal with a few pea-sized pieces of butter remaining.
  2. Transfer to a large bowl and add buttermilk. Mix with a fork, adding more buttermilk by the tablespoon if needed, just until a shaggy dough comes together. Knead lightly until no dry spots remain. Pat into a disc and wrap in plastic. Chill at least 4 hours. Dough can be made 2 days ahead, keep chilled.

Directions for filling and assembly

  1. Preheat oven to 325F. Roll out pie dough on lightly floured surface to a 14″ round. Transfer to a 9″ pie dish, allowing dough to slump down into dish. Trim dough, leaving about 1″ overhang. Fold overhang under and crimp edge. Prick bottom all over with a fork. Freeze 15 minutes.
  2. Line crust with parchment paper or foil, leaving an overhang, and fill with pie weights or dried beans. Place pie dish on a rimmed baking sheet and bake until crust is dry around the edge, 20-25 minutes. Remove foil and weights; bake until surface looks dry, 10-12 minutes longer.
  3. For the filling, blend egg yolks, eggs, buttermilk, sugar, lemon zest, lemon juice, and saffron in a blender until smooth. With motor running, add 2T flour, then the melted butter. Tap blender jar against countertop to burst any air bubbles in filling and pour into warm crust.
  4. Bake pie, rotating halfway through and covering edges with foil if they brown too much before filling is done, filling should be set around the edges but the center will jiggle slightly, 55-65 minutes.
  5. Transfer pie dish to a wire rack and let pie cool. Serve pie with whipped cream.
  6. Pie can be baked 2 days ahead. Keep at room temperature up to 6 hours, cover and chill to hold longer.

DSC_6404a

February 9, 2014 Green Tea Creme Brulee

DSC_4464a

We ushered in the year of the horse with our usual Chinese New Year dinner. This year’s celebration was considerably smaller than previous years in the number of guests but not in the number of courses. For the conclusion of our meal, I like to take a non traditional approach with dessert, incorporating Chinese flavors into dishes familiar to Western palates.

In my readings I have learned that the Chinese do not usually have desserts at the end of a typical meal, opting for fresh fruit if anything at all. Sweets are often enough enjoyed at tea time, often sweetened and candied fruits made into sweet soups and cakes. Exotic Chinese desserts for special occasions like birds nest soup double boiled in coconut milk or glutinous rice and wheat soup would be a bit esoteric and even too sweet for Western palates. So I like to keep it simple, spicy ginger cookies in the shape of the celebrated animal of the year, ice cream and sorbets featuring everything from red beans to tangerines.

This year I decided on a rich and satisfying green tea crème brûlée.  Crème brûlée, translated “burnt cream” is a rich custard topped with a layer of caramelized sugar. A custard is a combination of eggs or egg yolks and milk or cream baked gently until it sets. Sweet custards, crème brûlée or crème caramel, custard based ice creams and pots de creme contain sugar. Custards can be savory as well, like quiches, that combine cream or milk and eggs with cheese.

Crème brûlée can be baked in small individual dishes or in one low sided round or oval dish. A large surface area is desirable to maximize the caramelized sugar crunch that contrasts so well with the creamy custard underneath. The basic custard can be a blank canvas to showcase other flavors. Typically the custard is flavored with a vanilla bean but to give it an Eastern flair I infused it with green tea as well. I chose a gunpowder green that imparts a slightly smoky flavor. Infusing tea bags in warmed cream for about a half hour gave me the flavor I was looking for.

Crème brûlée is baked in a bain marie or water bath. The custards are placed in a larger pan that is filled halfway up the sides of the dish or dishes with very hot tap water. This protects the crème brûlée  from the direct heat of the oven. A tea towel in the bottom of the pan gives more stability and individual ramekins are less likely to dance around. Since oven heat can be notoriously inconsistent from one area to the next, the bain marie helps distribute the heat more evenly so that each custard cooks at the same rate.

Clear a generous spot on your countertop right next to the oven with potholders at the ready. It can be quite a feat removing the baking pan half filled with water and the custards. When the crème brûlée is done it should be removed immediately from the bain marie, a good pair of tongs make this easy, place on a wire rack and cooled for about a half hour at room temperature and refrigerated, preferably overnight.  Covered with plastic wrap they can sit in your refrigerator for several days, a bonus to the busy cook.

When you are ready to serve the dessert, prepare the sugar glaze.  I prefer turbinado or Demerara sugar to sprinkle on the crème brûlée. They are both minimally refined sugars and their large crystals are easier to spread and give it an extra crunch. Sprinkle a light layer of sugar evenly over the top. We started originally with the smaller propane torch sold in kitchen stores but have found the larger propane torch does the job in a lot less time. Place the finished desserts back in the refrigerator to chill for about a half hour.

The Chinese believe that dietary balance is achieved through moderation. One should leave the table satisfied, not satiated. Green tea creme brulee is a dessert that does this quite nicely.

DSC_4450a
I find it easiest to pour the hot tap water from a very narrow sprout, like a watering can, done slowly the water won’t slosh onto the crème brûlée.

Green Tea Crème Brûlée

Serves eight

Ingredients

  • 4 c heavy cream, chilled
  • 2/3 c granulated sugar
  • pinch table salt
  • 10 tea bags- I used Numi Gunpowder Green
  • 12 large egg yolks
  • 1t  vanilla bean paste or vanilla extract
  • 8 – 12 teaspoons turbinado sugar or Demerara sugar
Directions
  1. Adjust oven rack to lower-middle position and heat oven to 300° F.
  2. Combine 2 cups cream, sugar, and salt in medium saucepan; add tea bags and bring mixture to boil over medium heat, stirring occasionally to ensure that sugar dissolves. Take pan off heat and let steep 30 minutes to infuse flavors.
  3. While the tea bags are steeping, place kitchen towel in bottom of large baking dish or roasting pan and arrange eight 4- to 5-ounce ramekins (or shallow fluted dishes) on towel.
  4. After cream has steeped, remove tea bags and squeeze bags with tongs or press into mesh strainer to extract all liquid. Stir tea liquid and remaining 2 cups cream into steeped cream to cool down mixture. Whisk yolks and vanilla extract in large bowl until broken up and combined. Whisk about 1 cup cream mixture into yolks until loosened and combined; repeat with another 1 cup cream. Add remaining cream and whisk until evenly colored and thoroughly combined. Strain through fine-mesh strainer into 2-quart measuring cup,  discard solids in strainer. Pour or ladle mixture into ramekins, dividing it evenly among them.
  5. Carefully place baking dish with ramekins on oven rack; pour very hot tap water into dish, taking care not to splash water into ramekins, until water reaches halfway up the height of ramekins. Bake until centers of custards are just barely set and are no longer sloshy and digital instant-read thermometer inserted in centers registers 170°F to 175°F degrees, 30 to 35 minutes (25 to 30 minutes for shallow fluted dishes). Begin checking temperature about 5 minutes before recommended time.
  6. Transfer ramekins to wire rack; cool to room temperature, about 2 hours. Set ramekins on rimmed baking sheet, cover tightly with plastic wrap, and refrigerate until cold, at least 4 hours or up to 4 days.
  7. Uncover ramekins; if condensation has collected on custards, place paper towel on surface to soak up moisture. Sprinkle each with about 1 teaspoon turbinado sugar (1 1/2 teaspoons for shallow fluted dishes); tilt and tap ramekin for even coverage. Ignite torch and caramelize sugar. Refrigerate ramekins, uncovered, to re-chill, 30 to 45 minutes (but no longer); serve.
DSC_1033a
Sometimes I do “minis”. Just a taste when I am serving more than one dessert at this large meal.

January 19, 2014 Chocolate Dipped Coconut Macaroons

DSC_4413a

The assignment was for a “pick-up” dessert for the wedding shower I was co-hosting with three other friends. Looking for something easy to handle, My mind went first to bar cookies; brownies, blondies, maybe something using a little dulce de leche. Then in the cookbooks and magazines I was looking at I saw it, macaroons, nothing fancy for certain, but a cookie I had been meaning to try.

Macaroons had their ancient roots in amaretti, traditional almond meringue cookies  made from almonds, egg whites and sugar. Possibly originating in an Italian monastery, the name is derived from the Italian “ammacare” meaning to crush or beat, referring to the main ingredient of amaretti, ground almonds.

Tradition says that macaroons arrived in France by way of two Benedictine nuns seeking asylum during the French Revolution. The nuns, referred to as the “Macaroon Sisters” paid for their housing, baking and selling the confection.

Since the leavening in these cookies comes from egg whites, not flour, they were adopted by Italian Jewish bakers as a Passover sweet. The move in later years to shredded coconut was either the product of adventurous bakers or possibly because the almond cookies were often too delicate to transport and coconut made for a sturdier cookie.

The French translation of macaroon is macaron. The macaron is an entirely different cookie with essentially the same basic ingredients. The macarons we have come to be familiar with in the last few years are the multicolored darlings of the Parisian pastry shop. They are an elegant cookie, with a crisp smooth meringue exterior and a filling sandwiched between the layers. Macarons can be filled with jam, fruit curd, ganache or any variation of buttercream.

This recipe is a very easy to make coconut macaroon. The sweetness of the shredded coconut is balanced with the slightly tart dried cranberries and almonds. Like most macaroons, they are gluten free. Though the recipe called for the cookies to be shaped into pyramids, I scooped them out into balls and flattened the bottom. I drizzled bittersweet chocolate over the top, I think they look like little berets. You could also dip the bottoms in chocolate for a neater presentation. The one problem I had with the recipe is a continuation of the ever shrinking package size. The recipe calls for 3 cups or 8 ounces of sweetened shredded coconut. The standard package of that size now is 7 ounce or 2 2/3rds cups. You can decide if you need to buy another bag, I didn’t.  Variations are endless. A tropical version using chopped dried papaya and macadamia nuts drizzled with white chocolate sounds like a delicious possibility to me.

DSC_4403a
Cookies ready to bake on a parchment lined baking sheet.

Chocolate Dipped Coconut Macaroons

Makes about two dozen medium sized macaroons

Ingredients

  • 3 c (lightly packed) sweetened shredded coconut
  • 3/4 c sugar
  • 3/4 c egg whites (about 6 large)
  • 1/3c sweetened, dried cranberries, roughly chopped
  • 1/4c sliced almonds
  • 1 3/4 t vanilla extract
  • 1/4 t almond extract
  • 9 ounces bittersweet (not unsweetened) or semisweet chocolate, chopped
  • 6 T heavy whipping cream


Directions

  1. Mix first 5 ingredients in heavy large saucepan. Cook over medium heat until mixture appears somewhat pasty, stirring constantly, about 12 minutes. Remove from heat.
  2. Mix in 1 1/2 teaspoons vanilla extract and 1/4 teaspoon almond extract. Spread out coconut mixture on large baking sheet. Refrigerate until cold, about 45 minutes.
  3. Preheat oven to 300°F. Line another baking sheet with parchment. Press 1/4 cup coconut mixture into pyramid shape (about 1 1/2 inches high). Place on prepared sheet. Repeat with remaining coconut mixture. Bake cookies until golden, about 30 minutes. Transfer cookies to rack and cool.
  4. Set cookies on rack over rimmed baking sheet. Stir chocolate and cream in heavy medium saucepan over medium heat until melted and smooth. Remove from heat. Mix in remaining 1/4 teaspoon vanilla extract. Spoon glaze over cookies, covering almost completely and allowing chocolate to drip down sides. Refrigerate until glaze sets, at least 2 hours. (Can be made 1 day ahead. Transfer cookies to airtight container and keep refrigerated.)

DSC_4420a