August 6, 2019 Zucchini Pesto “Tots”

Tater tots are a mid twentieth century (1953) invention born out of the frugality of brothers F. Nephi and Golden Grigg. Co founders of Ore-Ida, they were looking for a way to use the potato pieces left over when making their french fries. The pieces were used as feed for the livestock on the family farm or just tossed in the trash. The brothers Grigg knew that there had to be a way to consume the discards.They chopped the potato pieces, added seasonings and salt, put them through an extruder where they got their tot shape then into the deep fryer.

Fast forward to the twentieth first century and Americans consume 70 million tots a year. They are loved by young and old alike, everyone from high end chefs like Daniel Boulud to mommy bloggers. Mommy bloggers have taken tots beyond the potato. To their delight they discovered that their little ones would eat veggies they wouldn’t touch before when they were presented in tot form. Broccoli, cauliflower, sweet potatoes, carrots, beets and zucchini have all been used to make tots.

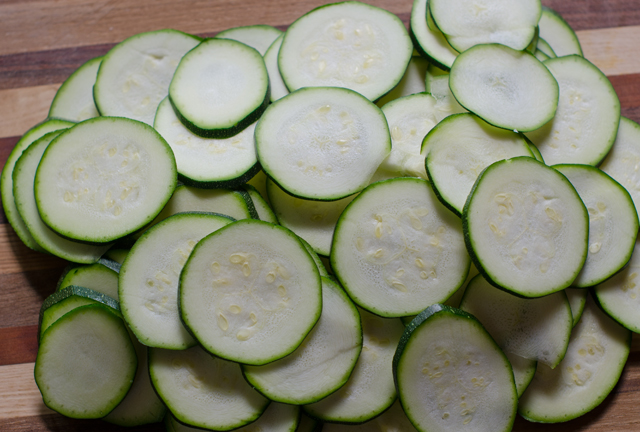
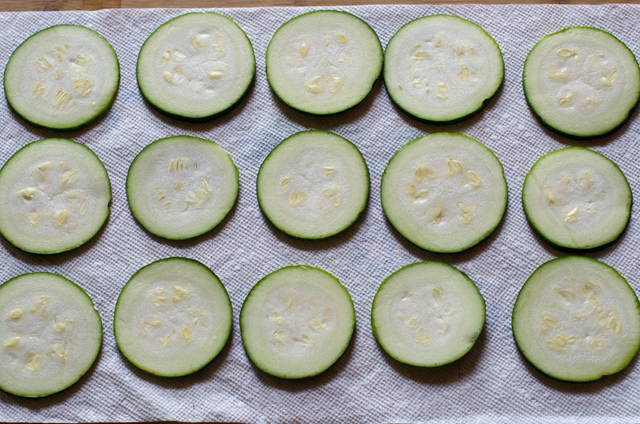
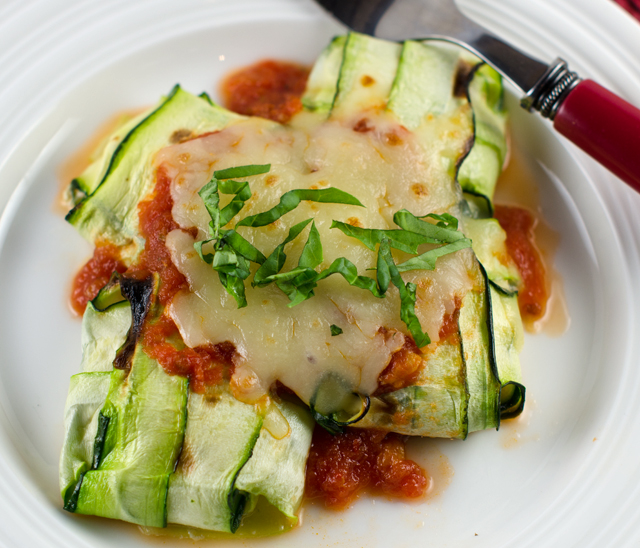
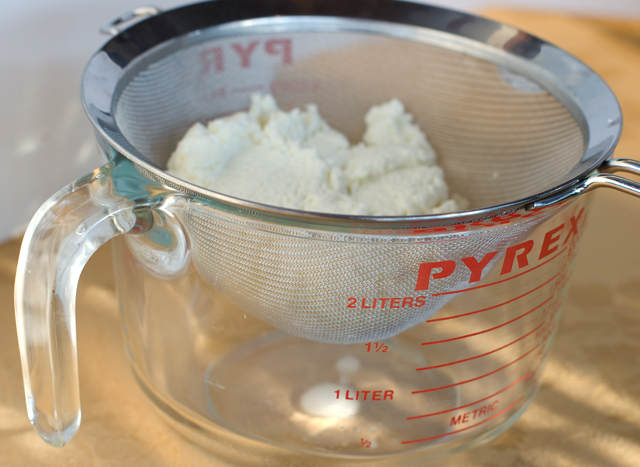
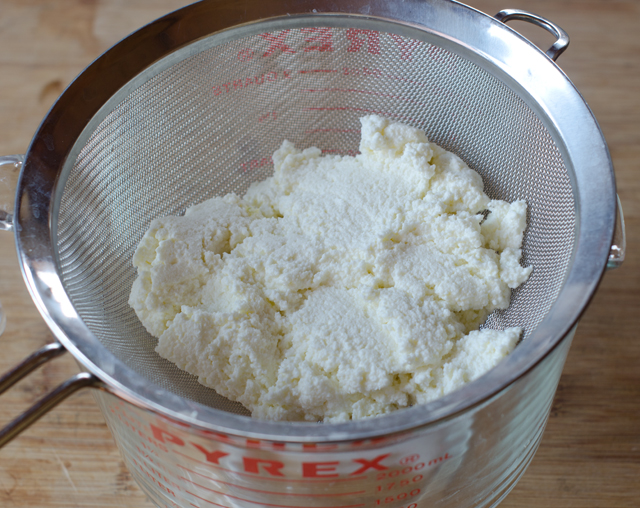
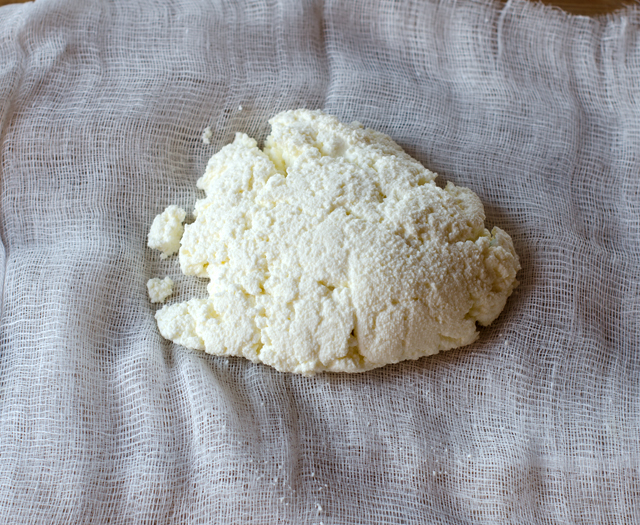
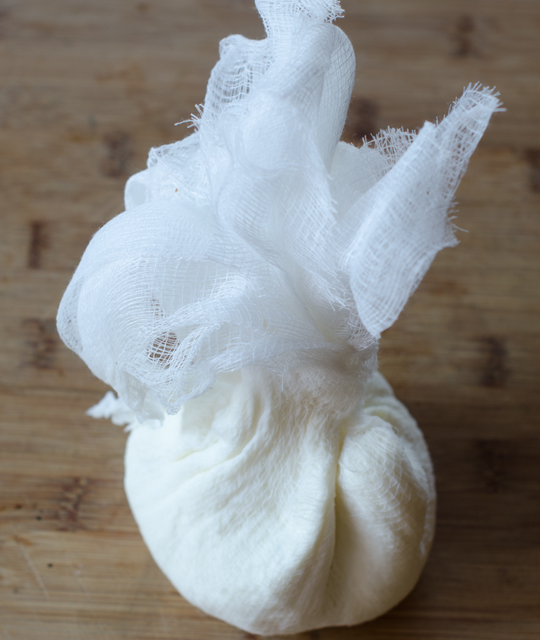
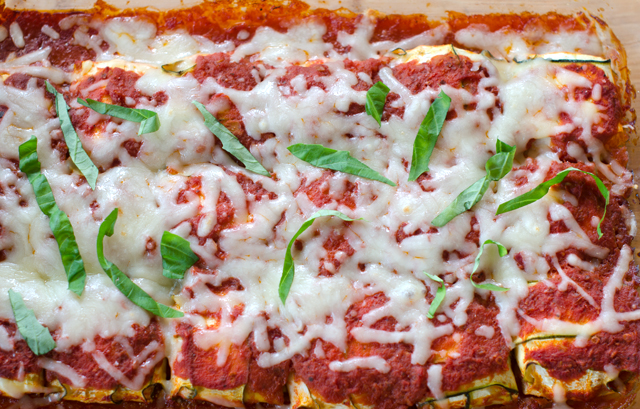
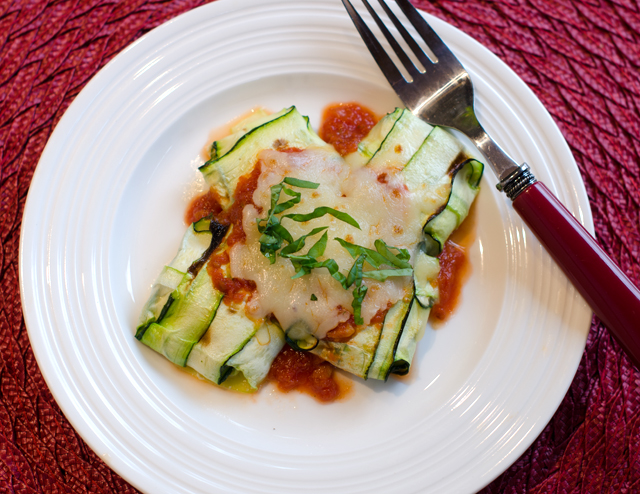
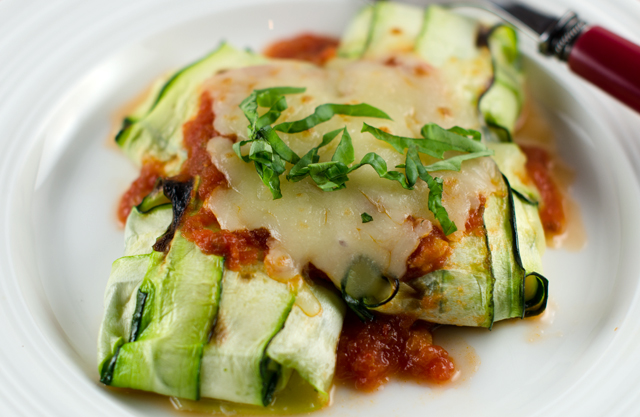
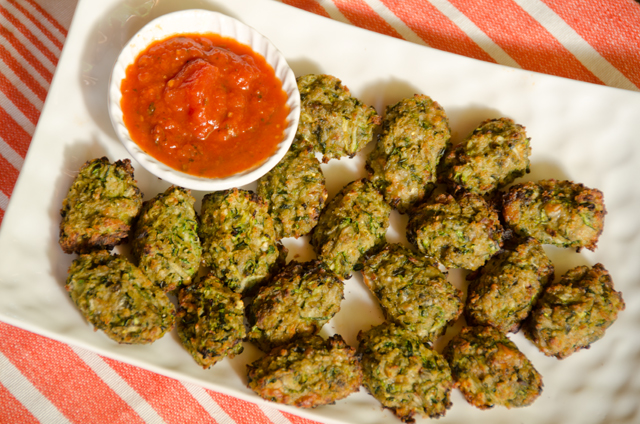
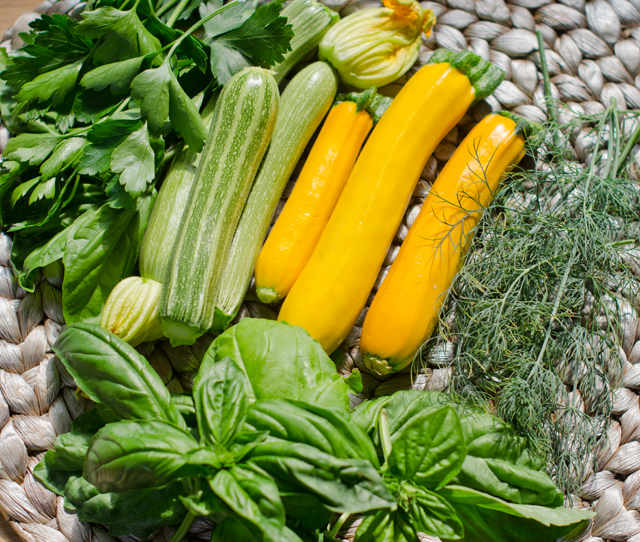
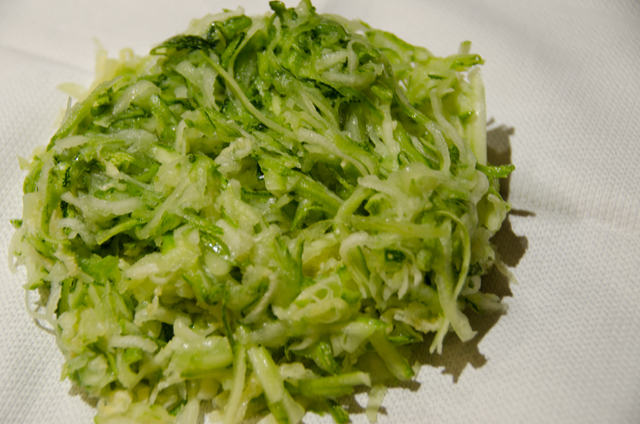
So it was time for me to take on the tot. I chose two things we have in abundance, zucchini and basil. Basil is in season so why not make some pesto?  Whatever vegetable you choose for your tots it is important to squeeze as much water out of the shredded vegetable as possible. A clean linen dishcloth is what I recommend. If time is short and you don’t have time to make the tot shape, divide the mixture evenly into well greased mini muffin pans. Make a double batch and freeze half for later. To eat, place frozen tots on a baking sheet and bake at 400°F 10-15 minutes, until heated through.Crispy on the outside and soft on the inside, zucchini pesto tots make a great snack or side dish.

Shredded zucchini
Shredded zucchini after squeezing

Zucchini Pesto Tots

Ingredients

  • 1¼ lb zucchini
  • 2-3 T basil pesto
  • 1 large egg, lightly beaten
  • ½ c panko bread crumbs
  • ½ c grated Parmesan cheese
  • Kosher salt and freshly ground black pepper

Directions

  1. Preheat oven to 400° F. Line a large baking sheet with parchment paper.
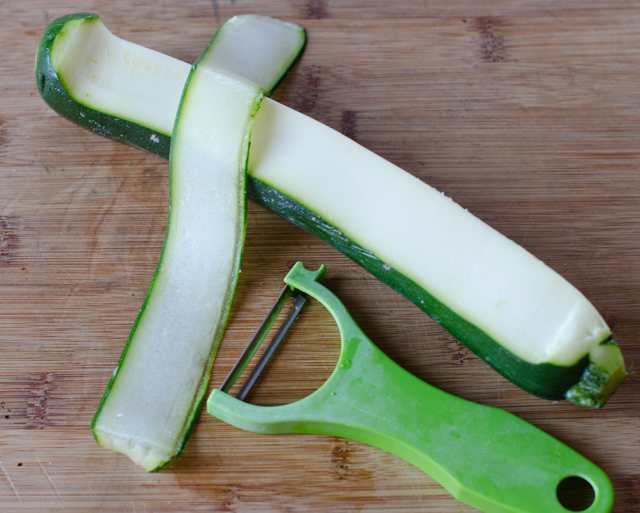
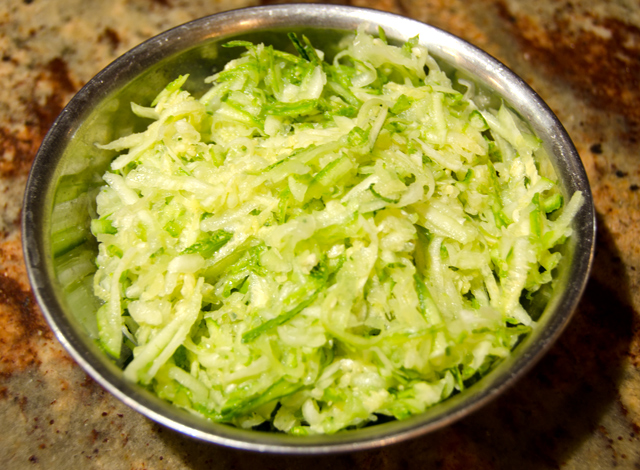
  2. Grate the zucchini with the large holes of a box grater.
  3. Transfer the grated zucchini to a large dish towel and strain out as much liquid as possible.
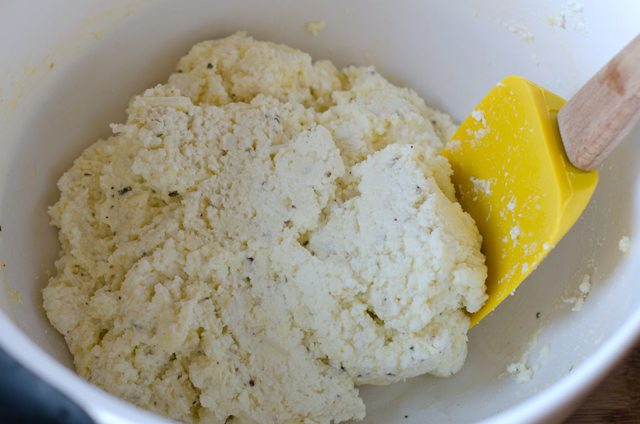
  4. Transfer the grated zucchini to a large bowl then add the pesto, egg, Parmesan and kosher salt and freshly ground pepper to taste. Mix together until well blended.
  5. Spoon a generous tablespoon into your hand and roll it into a cylinder. Place on the prepared baking sheet. Repeat with remaining zucchini mixture.
  6.  Bake 18-20 minutes, rotating the baking sheet half way through, until golden brown. Serve with your favorite dipping sauce.

October 23, 2018 Roasted Eggplant Salad


When the invitation says the party is a potluck, it’s time to pull out your favorite crowd pleasing dishes. Joe is most likely to bring his delicious baby back ribs or his mouth-watering prime rib roast. Sometimes both! As for me, I’m the designated salad queen. My end of summer salads usually include juicy ripe tomatoes and salad greens. Not this year, an exceptionally rainy and hot summer brought an early end to the tomatoes. Joe usually plants a nice variety of lettuces and greens at the end of August, for the same reason that didn’t happen either.

Not giving up on making a salad, I chose a vegetable that we did have in abundance, eggplant. Joe grows a wide variety; every color, from pure white to dark purple, globe shaped, plump Italian, long slender Asian varieties. The salad can be made with any variety of eggplant. Peel the eggplant, leaving strips of skin and cut into 1″ cubes and place into a large bowl. Sprinkle eggplant lightly with kosher salt, this helps bring out excess moisture.

Set the eggplant aside while you make the vinaigrette. Whisk together oil and vinegar, honey, smoked paprika and cumin. Blot the water off the eggplant and toss with the vinaigrette.

If you don’t already have it, smoked paprika is a great addition to your spice rack Smoked paprika can be made with either sweet or hot peppers that are dried  and smoked over an oak fire. When purchasing smoked paprika, if the label doesn’t specifically say it’s hot, it is sweet, with a deep rich smoky flavor. Cumin is one my favorite spices, it adds a warm, nutty flavor and aroma to this dish.

Preheat oven to 375°F with the rack in the middle position Spread the eggplant cubes evenly over a large parchment lined baking sheet. Roast until eggplant is softened and browned. Every fifteen minutes stir the cubes during the baking process to ensure even browning. The entire cooking process takes about 35-40 minutes.

While you are waiting for the eggplant to cook, whisk together the lemon juice and soy sauce. Return the cooked eggplant to the large bowl and toss with the soy-lemon mixture. Stir in chopped parsley, nuts and most of the crumbled goat cheese. Top salad with remaining cheese and chopped scallions.

Late summer harvest of eggplants.

Late summer harvest of eggplants.

Ready to toss with vinaigrette.


Roasted Eggplant Salad

Serves  4

Ingredients

  • 2 lbs eggplant
  • Kosher salt
  • 1/3c olive oil
  • 2T apple cider vinegar
  • 1T honey
  • 1T smoked paprika
  • ½t cumin
  • 4 garlic cloves, chopped
  • 2 T fresh lemon juice
  • 1 T soy sauce
  • 1 c roughly chopped parsley
  • ½ c roughly chopped smoked almonds
  • 2 oz goat cheese crumbled
  • ¼ c finely chopped scallions

Directions .

  1. Preheat oven to 375°  Cut the eggplant into 1″cubes and place in a large bowl. Sprinkle lightly with kosher salt and set aside.
  2. Whisk together olive oil, vinegar, honey, smoked paprika and cumin. Blot excess liquid from the eggplant, toss with the vinaigrette. Stir in the chopped garlic.
  3. Spread the eggplant out on a large parchment lined baking sheet and place on the middle rack of the oven. Roast until softened and lightly browned, stirring every 15 minutes, eggplant should be done in 35-40 minutes.
  4. Whisk together the lemon juice and soy sauce. Return the eggplant to the bowl and toss with the lemon juice mixture.  Stir in the parsley, almonds and most of the goat cheese, reserving a little.
  5. Place the finished salad in a serving bowl and sprinkle scallions and reserved goat cheese on top

September 6, 2018 Zucchini Crisps

Fellow vegetable gardeners, we’ve all done it. You diligently pick small to medium-sized zucchini, sometimes even with the blossom still in tact. Then it happens, you get busy doing other things, it rains for several days or you just forget. The once compact little fruits now resemble a major league baseball bat. If you are running out of ideas, zucchini chips are a quick and easy way to use up “the ones that got away”.

This recipe works best with medium to large zucchini because the chips shrink as they bake. Slice into 1/8 inch rounds, a mandolin works best here for uniform slices. Place the slices on paper towels and top with another layer of paper towels. Press down lightly to remove excess liquid. Move the slices to parchment lined baking sheets that have been lightly coated with olive oil or olive oil spray. I used half sheet pan (18×13) sized trays. Brush rounds lightly with extra virgin olive oil and season lightly with salt or your favorite seasoning blend. Bake in a 235°F oven for about 1 ½ hours, rotating trays at the half way point. If some of the chips are not ready, remove the crisp chips and put the damp chips back in the oven to finish baking. Let the chips cool a bit before devouring. Enjoy warm or at room temperature. Chips can be stored in zip-lock bags, that is, if any are left over.

A mandolin is perfect for achieving even slices.

Line zucchini slices on paper towels to blot excess moisture.


Zucchini Crisps

Makes about 80 crisps

Ingredients

  • 2 or 3 medium to large zucchini
  • Extra virgin olive oil
  • Kosher Salt and any spice mix

Directions

  1. Preheat an oven to 235°F (convection is best). Cover two large baking sheets with parchment and lightly coat with olive oil or olive oil spray.
  2. Wash and dry off the zucchini and cut off the stem end. Thinly slice (1/8 inch) the zucchini, a mandolin makes this easy.
  3. Lay the slices out on paper towels and cover the slices with a second layer of paper towels.
  4. Press down lightly on the paper towels to blot up excess moisture.
  5. Place the sliced zucchini on the baking sheets, being careful not to overlap.
  6. Brush the slices lightly with extra virgin oil and sprinkle with salt.
  7. Bake until crisp and golden, 1½ to 2 hours,  At the halfway point, switch the pans around to ensure even baking.

August 28, 2018 Roasted Green Beans with Parmesan

Rain happens. And when it does day after day I am less likely to make my way out to the garden. Unfortunately that doesn’t stop the veggies from growing. A prime example of this is the bush and pole beans Back in the early spring it’s easy to dream of vines loaded down with beautiful slim beans. Haricot Verts, as the French call them, only need a quick steaming, finished with butter, garlic, thyme and squeeze of lemon.

The beans I picked that first day without rain were well beyond their haricot verts stage but still usable. Since we love just about every other vegetable roasted, why not green beans? Using the method I use for other vegetables, I was certain they would turn out great.

Start with about a pound of beans, we have green, yellow and purple beans this year. Purple beans are pretty on the vine but when you cook them they do not stay purple, they become a very dark green color.

After you have rinsed the beans lay them out on paper towels and pat them dry as possible. This will allow for the beans to be thoroughly coated with the olive oil. Place the beans in a bowl large enough to toss them in. Add a few tablespoons of olive oil and toss the beans well.Then add kosher salt and fresh ground pepper and toss again. Place the beans on a lined baking sheet spread out as evenly as possible.

Roasting time is a function of how old your beans are. Slimmer beans may only ten to fifteen minutes, larger ones fifteen or more. When I made the first batch I timed them for ten minutes and rotated the pan, then every five minutes so they wouldn’t burn. As soon as the beans are close to being done, take them out the oven and sprinkle with cheese. Return the pan to the oven to melt the cheese. Serve warm.

Joe is growing both bush and pole beans.
One days pick.

Roasted Green Beans with Parmesan

Ingredients

  • 1 lb green beans, medium to large in size
  • Extra virgin olive oil
  • Kosher salt and fresh ground pepper to taste
  • ½ c freshly grated Parmesan cheese

Directions

  1. Preheat oven to 425°F
  2. Rinse beans in a colander with cool water. Removing all stems and blemishes, then blot with paper towels to remove off excess moisture.
  3. Transfer beans to a bowl large enough to toss them in. Use enough oil to lightly coat all the beans.  Sprinkle with kosher salt and freshly ground pepper and toss them again to coat.
  4. Put beans on a parchment lined baking sheet. Spread the beans evenly on the sheet.
  5. Roast for ten minutes, then pull out the oven and toss the beans in the pan again.
  6. Return the beans to the baking sheet and continue to roast until the beans are browned in spots.
  7. Remove pan from the oven and immediately sprinkle with Parmesan as evenly as possible. Return pan to the oven for a few minutes to melt the cheese.  Serve warm.


August 8, 2018 Spicy Cucumber Avocado Soup

Nothing is more refreshing to start a meal on a hot and humid summer day than a chilled soup. It’s even better when those ingredients can go right into the blender, no need to spend time cooking over a hot stove. This recipe combines crisp juicy cucumbers and creamy avocado with tangy lime and garlic chives.

All the “green” in the recipe is courtesy of the garden, except the avocado and possibly in the future we will have those as well. Our wonderful and very thoughtful sister-in-law Jody, gave Joe an Avoseedo, an ingenious seed starting device that helps you sprout an avocado pit. With minimal attention, changing the water every 1-2 weeks, in a few months you will have an avocado plant. He’s planted two in pots so far. Certainly beats the old toothpick over a glass of water method. Be sure to use a ripe avocado for a smooth puree.

This is primetime for cucumbers in our garden, just wish they didn’t come in all at once. Since our cukes were more mature they were a bit seedy and the skins thicker, I peeled and seeded them for this recipe. First trim the ends, peel, then cut in half. I found a melon baller (small side) to be the best way to scoop out the seeds. Cut the sections into half-inch chunks. I used three cups of peeled and seeded chunks.

The jalapeno and other hot peppers are making an earlier than usual appearance in the garden. That’s good but there is a rabbit that is taking a bite out of quite a few of our peppers before we can harvest them. Time to put up the chicken wire. Half of a jalapeno added to the soup was the right amount for our taste. Peppers can vary in heat so taste a small piece of the pepper first and add accordingly. Our Persian lime tree is producing the most fragrant and juicy fruit, about two dozen on the tree at last count.  Fresh lime juice adds the right acidity and brightness to the soup.

Garlic chives, also known as Chinese chives are the perfect herbal accent for this soup. If you are not familiar with them, common chives are tube-shaped and bright green while Chinese chives are a darker green and flat. Common chives have pinkish-purple globe like flowers that appear in the spring while Chinese chives have white star-shaped blossoms that are only starting to appear now. The flavor as the name indicates, is garlicky, but milder than a garlic clove.

The soup couldn’t be simpler to make, put all the ingredients in the blender and puree until the soup is smooth. Add yogurt to your liking, anywhere from a half to a full cup. Season with salt and pepper to taste. Place in a bowl and refrigerate for 4-6 hours to allow the flavors to blend. Before serving you may need to thin the soup out with a little water or milk. Garnish with chopped garlic chives and flowers. Makes a delicious first course or light lunch.

Garlic chives in the garden.

Garlic chives are flat with white flowers.
The heat in the jalapeno comes from the white ribs.
I used the smaller end of the melon baller to scoop out the cucumber seeds.
Chop into 1/2 inch pieces.
Into the blender
Puree until smooth

Spicy Cucumber Avocado Soup

Serves 3-4

Ingredients

  • 3 cups cucumbers, peeled and seeded, cut into ½-inch chunks
  • 1 medium ripe avocado
  • ½-1 c Greek style low-fat plain yogurt
  • 2 t fresh lime juice
  • ½ chopped jalapeno (or to taste)
  • 2 T chopped garlic chives
  • kosher salt and pepper to taste

Directions

  1. Peel and pit the avocado. Cut into chunks.
  2. Place all the ingredients in a blender and blend until smooth, about 1 minute. Taste for seasoning and add more salt if desired. Thin the soup out with a little cold water if necessary.
  3. Refrigerate the soup for several hours to blend the flavors. Serve garnished with chopped garlic chives and flowers.

July 18, 2018 Purslane Salad

The next time you are weeding, take a second look, you may be unintentionally pulling out the most nutritious green in your garden. Purslane, also known as duckweed, fat weed, little hogweed and pursley, is the only weed that can claim “superfood” status. Purslane is a rare plant source of omega 3 fatty acids, found in fish and flax seeds. It is also a good source of vitamins A, C and B, magnesium, potassium, calcium and iron. Did I mention it’s low in calories and a good source of fiber? Not bad for a plant that is an uninvited guest everywhere from fertile garden soil to the cracks in your driveway.

Purslane looks a bit like a miniature jade plant with small oval-shaped fleshy leaves that grow on thick succulent stems. Early season purslane leaves and stems are tender and edible, snip branchlets from heavier stems. The plant produces yellow flowers that will eventually produce tiny black seeds. Later in the summer separate larger leaves from mature stems. Most important, be sure you are harvesting purslane from areas that are not treated with herbicides. When in doubt, don’t pick!

Purslane is native to India and Persia and is widely used in both cuisines. In Mexico purslane is known as verdolagas where it is combined with pork to make a classic stew. Purslane’s succulent-like leaves have a refreshingly crisp texture with a slightly tart finish. You can use it raw in salads or cooked as a side dish.

Purslane is abundant in our garden this year. I am using it as a “transitional green” between the greens we harvested for salads in the spring and the new crop that will be ready to pick soon. I harvest it daily but it can be kept in the refrigerator for several days. Since purslane grows so close to the ground it should be rinsed very well in several changes of water. I fill a sink with cold water and submerge the purslane and swish it around to loosen the dirt that may be attached to it. The purslane floats and the dirt (most of it) sinks to the bottom. At this point you can remove any bruised or damaged leaves. Then I lift it out and give it a second quick soak it in the salad spinner.  now it is ready to spin.

In this salad, purslane is combined with a little flat leaf parsley, baby arugula (ours will be ready soon) and cucumbers and sweet Sungold tomatoes from our garden. Walnuts add a little crunch, garnish with edible nasturtium blossoms for additional color.

Purslane has popped up next to the cucumbers.
My daily purslane harvest.
Up close and personal for better identification.

Purslane Salad

Serves two

Ingredients

  • 2 c purslane leaves and tender stems
  • ½ c Italian parsley leaves
  • 2 c baby arugula
  • 1 medium cucumber, peeled, quartered lengthwise, seeds removed, cut into 1″ pieces
  • 1 dozen small tomatoes like Sungold, cut in half
  • 1/3 c chopped walnuts
  • lemon juice or a light vinegar
  • Extra virgin olive oil
  • Kosher salt and freshly ground pepper to taste
  • Nasturtium blossoms for garnish.

Directions

  1. Combine greens, cucumber, tomatoes and walnuts in a large bowl. Sprinkle with some kosher salt and toss.
  2. Add a splash of lemon juice or vinegar and a tablespoon or so of olive oil and toss. Taste a leaf and correct seasoning as needed.
  3. Divide on two plates and season with fresh ground pepper. Garnish with nasturtium blossoms and serve.

July 7, 2018 Swiss Chard, Gruyere and Ham Frittata

After a cold, very rainy spring, summer has arrived with a vengeance. We are experiencing temperatures in the upper 90’s with humidity that makes it feel like 100 degrees plus. With no real rain in the foreseeable future, drip irrigation and sprinklers are keeping the veggies and berries happy. We’ve had a few Sungold tomatoes, bright yellow blossoms are now producing the first zucchini of the season, tart juicy raspberries are beginning to ripen and we have the earliest eggplants ever.

As you enter the garden, there is a large planting of Swiss chard. Not only delicious and nutritious, the stems and veins bring a pop of brilliant color to the garden. Earlier in the spring, Joe planted the faster growing spinach in between each row of chard. The spinach was harvested first before it had a chance to bolt. Now we are enjoying a daily harvest of chard. The leaves are always a dark green but the stems can be white, red, yellow and even an orangey color. Very small leaves can be used in salads, larger leaves need to be separated from the stems but both parts are edible. You can read about more of the basics of chard in this post.

In season, I love making frittatas with ingredients straight from the garden. They are versatile as an on-the-go breakfast, lunch or a no-fuss light supper. In this recipe I take a basic frittata recipe I use as a guideline and use Swiss chard, both stems and leaves, a little Canadian bacon and, why not, a Swiss cheese. When I say Swiss most people are thinking of Emmenthaler, the mild holey cheese that is paired with ham in a sandwich. But there are other Swiss cheeses and Gruyère is one worth trying. Firm and dense, as in, no holes, Gruyere has a rich, creamy, slightly nutty taste.

Some important tips to remember when you are making this or any frittata. Cook any raw vegetable you will be adding to the frittata first. Even quick cooking vegetables like spinach and mushrooms exude water when you cook them. So cook them completely, no one wants a watery frittata! You also should adjust the amount of salt you use based on the saltiness of the ingredients you use like cheese and cured meats.

A  heavy bottomed oven safe non stick skillet or a well-seasoned cast iron pan is absolutely necessary to make the frittata. Before you proceed with the recipe be sure the skillet fits comfortably under the broiler without a great deal of maneuvering. The handle on my skillet was a bit high and made getting it in and out of the oven quite challenging. Have thick potholders at the ready so you don’t burn your fingers pulling the pan out of the oven. Once out, leave the potholder over the handle to remind yourself the pan is still hot. Use a spatula to loosen the frittata from the pan and transfer to a platter or cutting board. Of course, there are countless variations of the frittata and as the season moves on my add-ins will change.  Whatever you put in yours, it’s a great quick weeknight supper to serve alongside a simple green salad.

Our section of chard.

The colorful stems are good to eat as well.

Everything but the bacon.

Swiss Chard, Gruyère and Ham Frittata

Makes one 12″ frittata

Ingredients

  • 12 large eggs
  • 3 T half and half
  • Kosher salt and freshly ground pepper
  • 2 t olive oil
  • 8 c chard leaves roughly torn into 1″ pieces
  • ½ to 1 cup thinly sliced chard stems (optional)
  • 1 clove garlic, finely minced
  • ¾ c shredded Gruyère cheese
  • ¼ to ½ c finely diced Canadian bacon or ham

Directions

  1.  Adjust oven rack to upper middle position, about 5 inches away from the heating element. Heat broiler.
  2. Whisk eggs, half and half, ½ t salt and a grind of pepper in a medium bowl until well combined, about 30 seconds. Set eggs aside.
  3. Heat oil in a 12-inch non stick skillet over medium heat until shimmering; add stems first if using and saute until softened a bit, 3-4 minutes. Add chard and continue to cook until leaves are wilted and soft, another 4-5 minutes. Add chopped garlic and cook until fragrant.
  4. Stir shredded Gruyère into the egg mixture. Add egg mixture to the skillet and cook, using spatula to stir and scrape bottom of skillet, until large curds form and spatula begins to leave wake but eggs are still very wet, about 2 minutes. Shake skillet to  distribute eggs evenly, cook without stirring for 30 seconds. Sprinkle Canadian bacon over the frittata surface.
  5. Slide skillet under broiler and broil until the frittata has risen and the surface puffs and turn spotty brown, three to four minutes. Remove skillet from the oven and let stand 5 minutes to finish cooking.
  6. Using a spatula, loosen frittata from the skillet and slide onto a platter or a cutting board. Cut into wedges and serve.


June 12, 2018 Kohlrabi Slaw with Honey Lemon Mustard Dressing

With temperatures consistently in the eighties and more than our share of rain, it was time to do a final harvest of the spring vegetables. The heat, rain and deer damage sadly ruined our edible pod pea crop. On the positive side we have enjoyed a variety of lettuces, spinach, radishes and small white Japanese turnips. Also in the harvest, those funny looking space alien looking vegetables, kohlrabi.

Translated from the German, cabbage turnip, it is the bulbous above ground stem that gives the “turnip” name to the crispy green and sometimes purple vegetable. Oddly enough, it doesn’t taste like cabbage or turnips. When young, about the size of a tennis ball, it is thin-skinned, sweet and juicy with a mild flavor reminiscent of broccoli stems. Older, larger kohlrabi should be peeled, and the flavor is still sweet but a bit peppery.

Kohlrabi is a natural shredded or julienned in a slaw. This time I combined it with another ugly ducking vegetable, jicama. “HEE-kah-mah” is the edible tuberous root of a vine native to Mexico. Resembling a round potato, the papery brown skin needs to be peeled away before eating. The texture of the flesh is similar to an apple or a pear with a flavor that is mild and slightly sweet.

You can either shred or julienne the vegetables. Since the kohlrabi I used was on the small side, I shredded it in the food processor. The kohlrabi were still young and tender, so there was no need to peel, preserving the purple color. Larger kohlrabi with thicker skin should be peeled.

I was looking for a new twist on dressing the slaw so I turned to The Flavor Bible for some inspiration. I saw that both mustard and lemon were compatible flavors so I thought a honey whole grain mustard dressing would add the right texture and tang to the recipe. A little juice from one of our Ponderosa lemons gave the dressing brightness.

This simple slaw is a great addition to any buffet or picnic because it stays crisp long after it is dressed.

Kohlrabi ready to pick from the garden.
Just picked kohlrabi, love that purple color!
Jicama surrounded with purple kohlrabi
The kohlrabi need to be trimmed before they are shredded.
A recent harvest of Ponderosa lemons.
Nicknamed the “five pound lemon” they usually weigh two to four pounds. Ponderosa lemon is a citrus hybrid of a pomelo and a citron.


Kohlrabi Slaw

Serves 4-6

Ingredients for slaw

  • 3-4 small or 1 large kohlrabi
  • 1 small jicama
  • Kosher salt and freshly ground pepper

Honey Lemon Mustard Dressing

Ingredients for dressing

  • 2 T honey
  • 2 T whole grain mustard (can add another T if desired)
  • 3 T olive oil
  • ¼ c freshly squeezed lemon juice
  • pinch of salt

Directions for dressing

  1. Place all the ingredients in a small bowl and whisk to combine. Taste and adjust seasonings to your liking.

Directions for slaw

  1. To prepare the kohlrabi, trim the root stem to the base. Cut the leaf stems from the globes. Wash leaves if using in another preparation. If the kohlrabi is mature, peel, if smaller leave skin on.
  2. To prepare the jicama, peel.
  3. Grate kohlrabi and jicama in a food processor or on a box grater. Squeeze out any excess water with your hands. You should have about 6 cups total.
  4. Place shredded vegetables in a large bowl. Pour the dressing over the slaw and toss to combine. Season to taste with kosher salt and fresh ground pepper.
  5. Refrigerate until serving.

February 3, 2018 Chicken, Butternut Squash and Chickpea Soup

Chicken, butternut squash and garbanzo bean soup is the perfect comfort food loaded with lean protein, delicately sweet butternut squash, nutty garbanzos and spinach for a healthy meal. This hearty main dish soup of my own creation is a complete meal with almost all pantry items with exception of the spinach. Blue potatoes and butternut squash are still a part of the larder from last year’s  garden and I am finally making a dent into the supply of butternut squash from the fall harvest.

To save time you can buy cubed butternut squash in the produce section of most supermarkets. But if you choose to start with a whole squash, this is a method that works for me. I start by washing off the squash, any dirt left behind when you start cutting the squash will be transferred to your knife and subsequently, the squash flesh. Cut off a ½-inch piece at both ends so that they are flat, then I cut it where the neck and the bulb meet. I cut the bottom in half and scoop out the seeds and stringy fibers, a grapefruit spoon works well here. You can discard the seeds but I like roasting them for a snack or a salad topping. Use a vegetable peeler or chef’s knife to remove all of the skin and the green veins that are directly under the skin, your finished product should just be orange flesh. Now you can use a knife to cut the squash into pieces. I was aiming for 1½ inch pieces. The squash I used for this recipe weighed in 3.25 pounds and made about 8 cups of raw squash. In a large bowl, toss the squash with a little olive oil and salt and roast on a baking sheet until the cubes are caramelized but not at the point of disintegrating into the soup. The squash measured 4 ½ cups after roasting.

The soup would be good without it, but I added some chicken to up the protein quotient and really make it feel like a meal. Normally I would use chicken thighs, but I had boneless breasts in the fridge. I wanted to keep the chicken as moist as possible, (there is nothing worse than dried out chicken in your soup) so I turned to a method that I have used in the past, poaching. Poaching is a method that cooks chicken gently and slowly. Boneless breasts are arranged in a single layer and covered with the appropriate aromatics and liquid, water in this case, but a splash of wine is good too. The pot is brought to the boil, then reduced to a simmer. After about eight minutes, check the temperature of the chicken in the thickest part of the breast. Chicken is supposed to be cooked to 165°F but since I knew I would be adding it to my soup pot, I was aiming at 155-158°F so it wouldn’t overcook in that step. Remove from the poaching liquid and let cool, then shred into bite sized pieces. An easier approach? Use the meat from a rotisserie chicken.

Once you are finished these steps, the soup comes together very quickly. In a large Dutch oven, saute the onion, then add the garlic and herbs. The broth, tomatoes and garbanzos are next. Bring to a boil, reduce the heat. Add the squash, chicken and spinach and cook for about ten minutes, until the spinach is wilted.

Freshly cooked garbanzos are a favorite of mine and would be great in this recipe but would require some advanced planning. Puree a few cups of the soup before the last ingredients are added if you want to give the soup a more stew like consistency.

Peeled whole butternut squash.
Preparing the butternut squash.

Chicken, Butternut Squash and Chick Pea Soup

Serves four

Ingredients

  • 1 butternut squash, about 3 lb
  • Extra virgin olive oil-for baking the squash and making the soup
  • Kosher salt
  • ¾ to 1 lb chicken breasts 2-3 relatively the same size or already cooked and shredded chicken, breast or thigh meat
  • 1 medium onion, diced small
  • 2-3 cloves of garlic, finely minced
  • 1 t ground cumin
  • ½ t ground coriander
  • 3-4 c low sodium chicken broth
  • 1-10 oz can diced tomatoes and green chilies (mild or hot)
  • 1-15.5 oz can chick peas, drained and rinsed
  • 4-5 cups spinach leaves

Directions

Preparing the butternut squash

  1. Preheat oven to 375°F. Peel, seed and cut squash into 1½-in cubes. Alternately use 8 cups  of pre-cut squash.
  2. Put the squash cubes in a large bowl, drizzle with olive oil and kosher salt. Toss to coat and place on a baking sheet, distributing the cubes evenly as possible.
  3. On the lower rack of the oven, bake squash for ten minutes. Gently flip the squash pieces so that the sides that aren’t caramelized are on the bottom, bake for another 5 minutes. Redistribute the squash pieces again and cook for another 5-7 minutes. Remove squash from baking sheet and transfer to a plate to cool.

Poaching the chicken

  1. Place the chicken breasts in a heavy bottomed pot, large enough to hold them without overlapping but relatively snug.
  2. Cover the breasts by an inch and a half with cool (not hot) water with a pinch of salt, or broth, garlic, a sprig of thyme or a bay leaf.
  3. Over medium high heat, bring to a boil, then reduce the heat to a simmer. Partially cover and at the eight minute mark insert an instant read thermometer at the thickest point of the breast to check the temperature. I like pulling mine off the heat around 158°F since they will continue to cook a little after they are removed from the cooking liquid and when added to the hot soup will cook a  little more.
  4. Let the chicken cool then shred along the grain into bite sized pieces.

Assembling the soup

  1. In a large 5-quart Dutch oven cook the onion over medium high heat until translucent. Add the garlic and spices are cook for another minute.
  2. Add chicken broth, tomatoes and chick peas and bring to boil.
  3. Reduce heat to a simmer and add squash, chicken and spinach, heat through for about ten minutes or until spinach is wilted.
  4. Serve in warmed bowls.

January 13, 2018 Herbed Ricotta Zucchini Ravioli


Normally I wouldn’t share a recipe for zucchini in the middle of January, but this time I had to make an exception. I am always looking for new ways to prepare for the buckets of zucchini that our garden produces every summer, so I had to try out this recipe I saw on The Chew, “Herby” Ricotta Zucchini Ravioli. In this recipe, very thinly shaved zucchini slices take the place of pasta and are filled with a herbed ricotta filling.

The zucchini could be sliced on a mandoline, but to simplify things, a Y peeler works just as well. Remove the first strip of skin, then a few more slices until you have a flat surface. Make slices down the length of the zucchini until you reach the seedy core. Look for medium length zucchini. I found that strips 5-6 inches long and 1½ inches wide were the right size to accommodate a generous tablespoon of the filling. Place the slices on baking trays lined with paper towels and lightly salt to draw out any excess liquid.

The filling is very simple, ricotta cheese with an egg, grated Parmesan and seasonal herbs. Fresh ricotta is always best but one without preservatives is a good second choice. Drain the ricotta in a fine strainer to draw out excess liquid then squeeze it out in cheesecloth to make it as dry as possible. There aren’t any fresh herbs in the garden on this very cold January day, but Joe has brought some into the conservatory. For this recipe I used parsley, thyme and a little dried oregano. Let the ricotta herb mixture sit for 10 to 15 minutes to allow the flavors to blend.

Now it’s time to make the bundles. Put enough tomato sauce on the bottom of your prepared pan to lightly coat it. Blot any excess liquid from the zucchini. On a clean work surface, lay two strips of zucchini so that they slightly overlap lengthwise. Lay two more noodles on top perpendicular to the first two strips, it should look like a plus sign. Place a generous tablespoon at the intersection where the strips meet. Starting with the bottom strips, fold them over the center, repeat with the second set of strips. Place the ravioli seam side down in the prepared baking dish and repeat with remaining zucchini strips until you fill the baking dish. Top with sauce and sprinkle with shredded mozzarella cheese. Bake for about 25 minutes, take out of the oven and sprinkle on the remaining Parmesan.

The verdict? Joe and I both thought they were delicious and didn’t feel cheated with the zucchini wrapper. As Chew co host Clinton Kelly said,” this is an amazing alternative to pasta.” The calorie savings are pretty amazing too with regular ravioli coming in at 785 calories while the zucchini ravioli is 260 calories! The portion size wasn’t mentioned though. This is not the best dish for the freezer. Zucchini is 95% water so I think this dish would best be served fresh. This is a great meatless dish whether for lunch, dinner or as a side. Pesto would be a good addition to the ricotta filling and a cheesy Alfredo sauce could take the place of the tomato sauce. Can’t wait until summer to try these with zucchini from the garden and my own variations.

Drain the ricotta in a fine mesh sieve for a half hour.


Wrap the ricotta in cheesecloth and squeeze out any excess moisture.

Using a Y peeler, slice the zucchini into long thin strips.
Combine the ricotta, beaten egg, herbs, spices and cheese.
Slightly overlap 2 strips of zucchini and overlap two more strips, forming a plus sign.
Place a generous tablespoon of filling where the strips intersect.
Fold the bottom strips over the filling.
Fold in the other 2 strips to the center to completely enclose the filling.

Add the ravioli, seam side down to a baking dish lightly coated with tomato sauce.
Top with additional sauce.
Top with mozzarella cheese and bake .


Herby Ricotta Zucchini Ravioli

Serves 4

Ingredients

  • Olive oil for greasing the baking dish
  • 2 c ricotta – whole milk or part skim
  • 4-5 medium zucchini
  • 1/3 c plus 2 T grated Parmesan (divided)
  • 1 large egg
  • ¼ c fresh herbs, finely chopped (parsley, thyme, chives etc.)
  • ¼ t freshly grated nutmeg
  • 2 cloves garlic, peeled and finely minced
  • 2 ½ c tomato sauce-homemade or your favorite store brand
  • 1 c shredded mozzarella
  • Basil chiffonade for garnish
  • Kosher salt and freshly ground pepper to taste
  • Cheesecloth – that will be used with the ricotta

Directions

  1. Preheat the oven to 375°F.  Lightly grease a 8×12 baking dish with olive oil.
  2. Place a fine mesh sieve over a medium bowl and add the ricotta. Set aside and allow to sit for 30 minutes.
  3. Using a Y vegetable peeler, slice the zucchini lengthwise into thin strips, avoiding the seedy core. Place strips on a paper towel lined baking sheet, lightly sprinkle with salt and set aside.
  4.  In a medium bowl, add ricotta, 1/3 c Parmesan, egg, chopped herbs, nutmeg and garlic. Season with salt and pepper and stir until fully combined. Set aside for 10 minutes to let the flavors combine.
  5. Blot excess moisture off zucchini slices. On a work space, overlap 2 strips of zucchini and then overlap 2 additional strips on top and across the first 2 strips, forming a cross shape.
  6. Using a spoon or cookie scoop, place a generous tablespoon of the ricotta mixture into the center of the zucchini formation.
  7. Fold the bottom layer of the zucchini strips over the filling and into the center so that they are overlapping. Fold in the other two strips to the center so that the filling is completely enclosed. Repeat process with remaining filling and zucchini.
  8. In prepared baking dish, spread ½ cup sauce evenly over the bottom. Place zucchini seam-side down. Pour remaining sauce over zucchini. Top with remaining Parmesan and mozzarella. Transfer to oven and bake for 20 to 25 minutes, until zucchini is al dente.
  9. Garnish  with basil and serve.