January 29, 2013 Char Siu Bao- Steamed Pork Buns

DSC_8303a

For lovers of culturally authentic and delicious food, the dim sum experience in New York City’s Chinatown is not to be missed. After arriving in the heart of Chinatown at what looks like the lobby of a typical office building, we were whisked away by elevator to one of two floors where food is served. We were seated in a spacious, brightly lit banquet room at tables with starched white tablecloths, gold brocade chair covers and red walls.The room, full of hungry diners, were mostly Chinese, but also of every other ethnic persuasion, from toddlers to grandmas. Red velvet walls display dragons and large screen television sets broadcasted news and variety programs from China. 

But that’s not what we were there for.  We were waiting for the waiters and waitresses who maneuvered their metal carts stacked high with bamboo steamers through the crowd of anxious diners.  A photograph and price of each item was on the outside of the cart to avoid any language barrier issues. Not that there was one at our table, our good friend is from China and fills our table with a diverse offering of dim sum, from the unusual, chicken feet and jellyfish (yes I have tried them both) to the very popular char siu buns. I enjoyed the buns so much that I decided to add them to our Chinese New Year menu several years ago.

 
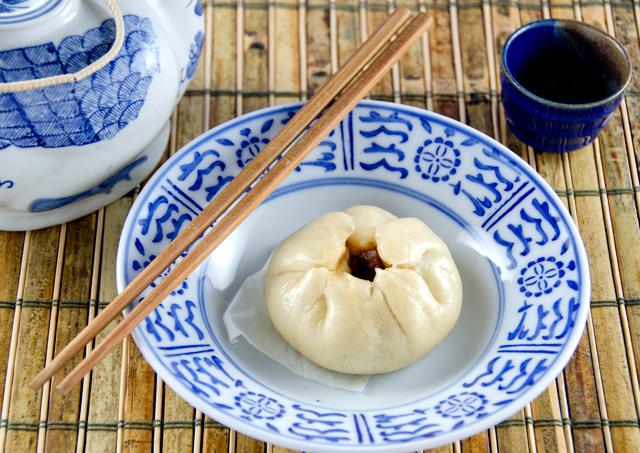
Char siu bao (buns) are a Cantonese dim sum favorite. They can be either baked or steamed and can have a variety of fillings ranging from savory, like vegetables, tofu, chicken or pork to sweet like sweetened red or mung bean paste. The buns in this recipe are filled with barbecued pork (char siu) and encased in a pillowy soft, slightly sweetened dough. Only a cup and half of the char siu I wrote about in a previous post is needed for this recipe. If you make that recipe, the additional pork can be used in stir fries, dumplings and noodle dishes. The finely chopped pork is added to what I would call a Chinese barbecue sauce. It is best to refrigerate the filling overnight to enhance the flavors and make the filling easier to work with.

Some recipes for the buns just use baking powder as a leavening agent but I prefer a recipe that uses two leavening agents, baking powder and yeast. The dough is easier to stretch and manipulate which results in a more attractive finished product. The dough is shaped into a 12 inch roll and in this case, cut into sixteen pieces. For mini buns, cut into 32 pieces, or 12 pieces for large buns. The pieces are rolled into a ball and then flattened into a disk. A small wooden dowel is used to roll out the dough circles. When I first attempted rolling out the dough in years past I used a conventional rolling pin with not always the best results. Last year Joe made me my own small dowel rolling pin and it makes the dough much easier to work with. Your dough round should have a plump “belly button” in the center. That means you roll toward but not fully into the center of the dough, turning the dough after each roll of the pin, totally avoiding the center of the round. The thinner outer edges are easier to pleat and the belly stretches over and protects the filling.

After the dough rises, the buns can either be baked or steamed. When I first made buns I gravitated to the baked variety. I thought the browned exterior the oven gave them a real “finished” look. I have learned to love the steamed buns over the years, no color change, but puffy and just as tasty. The steps of the recipe can be executed over the course of several days.  Finished buns can be frozen for about a month. Take as many as needed out of the freezer and revive in a bamboo steamer.

Char Siu Bao

Fine Cooking  #109
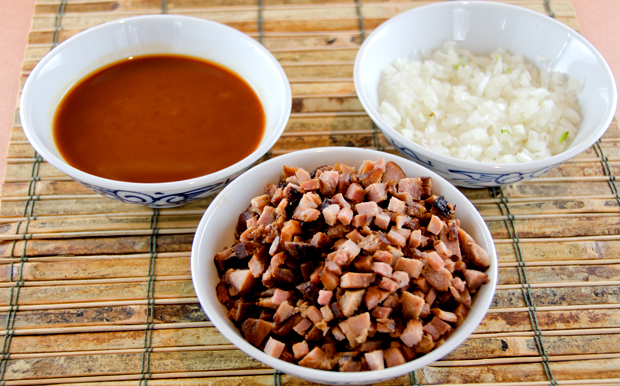
The chopped pork, onion and sauce ready to make the char siu filling.

 For the filling

  • 1/2 c lower-salt chicken broth
  • 2 T oyster sauce
  • 2 T. ketchup
  • 5 t granulated sugar
  • 4 t cornstarch
  • 1 T dark soy sauce
  • Kosher salt and freshly ground white pepper
  • 1 1/2 c Chinese barbecued pork, cut into small pieces
  • 2 Tbs. peanut oil
  • 1 small yellow onion, cut into 1/4-inch dice (1/2 cup)
  • 1 Tbs. Shaoxing (Chinese rice wine)
  • 1-1/2 tsp. Asian sesame oil

Directions for the filling

  1. In a medium bowl, stir or whisk the broth, oyster sauce, ketchup, sugar, cornstarch, soy sauce, 1/2 tsp. salt, and a pinch of pepper. Finely dice enough of the barbecued roast pork to yield 1-1/2 cups (about 6 oz.). Heat a wok over high heat for 30 seconds. Add the peanut oil and swirl to coat. When a wisp of white smoke appears, in about 30 seconds, add the onion. Reduce the heat to medium low and cook, stirring often, until golden-brown, about 6 minutes.
  2. Add the pork, increase the heat to high, and stir-fry to combine, 2 to 3 minutes. Drizzle the wine from the edge of the wok into the pork mixture and stir well. Reduce the heat to medium. 
  3. Make a well in the center of the mixture and pour in the sauce. Stir until the mixture thickens, about 3 minutes. Add the sesame oil and mix well. Refrigerate until cool, preferably overnight.
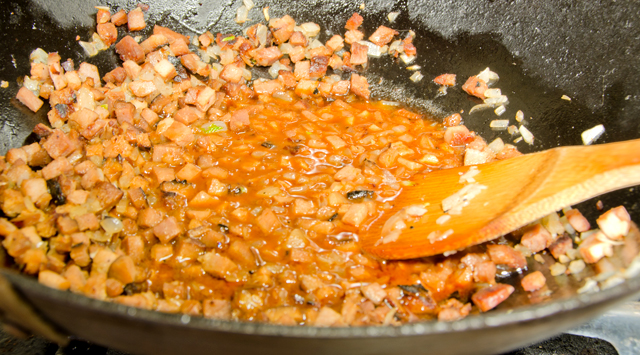
Stirring the sauce into the pork and onion.
The mixture thickens in about 3 minutes. Let it cool overnight in the refrigerator.


It's easier to pre-portion the filling before time.
It’s easier to pre-portion the filling before time.


For the dumplings

Adapted from Asian Dumplings

Makes enough for 12 large, 16 medium or 32 small buns

Ingredients

  • 1 1/2 t  instant dry yeast
  • 3/4 c lukewarm water
  • 2T canola oil
  • 2T sugar
  • 2 t baking powder
  • Scant 3 cups (12 1/2 ounces) flour
  1. To make the dough in a food processor: Combine the sugar,instant yeast, baking powder and flour in the bowl of the food processor. Pulse two or three times to combine. With the motor on, pour in the lukewarm water and canola oil through the feed tube in a steady stream and allow the machine to continue running until the dough starts coming together into a ball, about 20 seconds. Add more lukewarm water as needed by the teaspoon if that doesn’t occur. Let the machine continue for only 45 to 60 seconds to knead most of the dough into a large ball that cleans the sides of the bowl; a little may be left behind. The finished dough should  feel somewhat soft but not sticky.
  2. Place the dough in a clean oiled bowl.  Cover with plastic wrap and place in a warm draft-free place to rise for about 45 minutes or until almost doubled.  Alternately, let the dough rise overnight in the refrigerator. Return the dough to room temperature before using.

Form and fill the buns

  • Yeast dough from the previous step
  • 1 1/2c char siu bun filling from first step
  1. Pat the dough into a disc on a lightly floured surface. Cut the disk in half and wrap half with plastic to prevent the dough from drying out while you work with the other half.
  2. Roll the dough into a 12″ log. Cut the log in half, then cut into 8 pieces for medium, 16 for small.  Roll each piece into a ball, then flatten into a 1/4 inch thick disk. A small wooden dowel is best for this step. The rim should be thinner than the center; keeping a one inch wide belly in the center to ensure consistent thickness. Lay the finished circle on a tray, lightly dusting the bottom with flour to prevent the rounds from sticking.
  3. Cut parchment paper into 2 1/2 or 3-inch squares (for small or medium buns, respectively) before you begin to assemble the buns.
  4. Hold a dough circle in your hand, spoon filling in the center of the circle, leaving enough dough clear on the sides to pull up on . I like to pre-portion the filling to ensure a uniform amount in each bun.
  5. Bring the sides of the dough up while depressing the filling, pinching the dough as it reaches the top. Finally, twist the top to fully seal the bun.
  6. Place the buns on the parchment squares and place in a warm draft-free again to rise until doubled in size, about 45 minutes.
  7. The buns are ready now to steam, 12 minutes for small, 15 for medium. A finished bun will look puffy and dry. Serve warm.
  8. Leftover buns can be refrigerated for up to a week or frozen for up to a month. Revive cooked buns by steaming them for 5 to 8 minutes
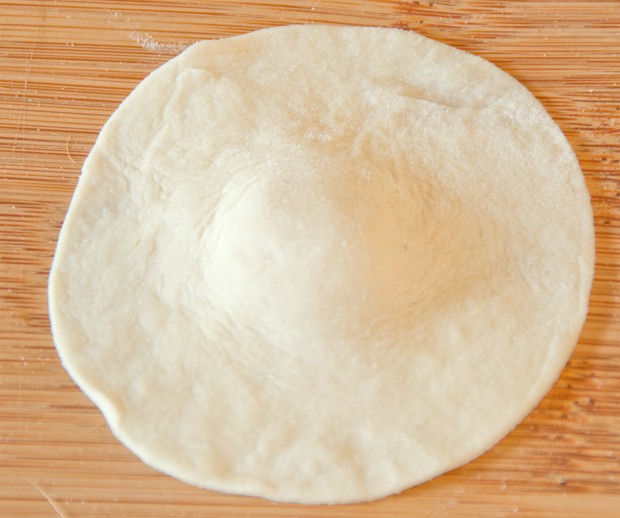


Round of dough with the "belly button".
Round of dough with the “belly button”.
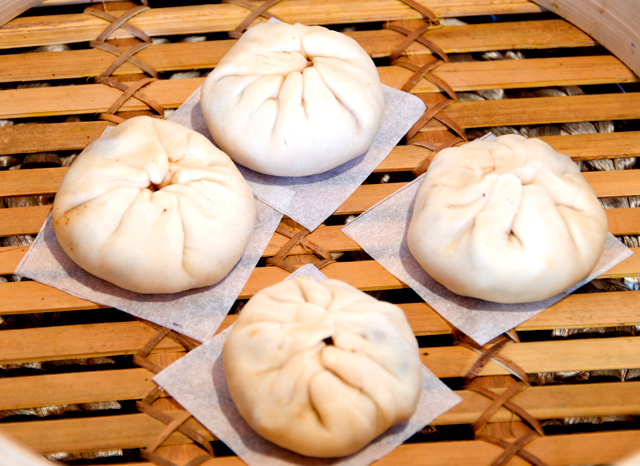
Finished buns, ready to steam.
Finished buns, ready to steam


January 23, 2013 Golden Crisp Daikon Radish Cake with Spicy Herb Soy Sauce

DSC_8283a

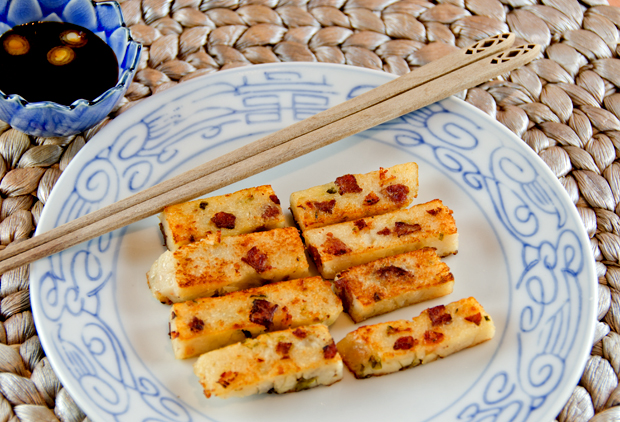
When is a turnip cake not a turnip cake at all? When it is made with daikon radish. The vegetable the Chinese refer to as a turnip or law bok closely resembles the Western daikon radish. Law Bok Gow or daikon radish cake, is a dim sum and Chinese New Year favorite. Radish is a homophone for the Cantonese word that means increasing good fortune. It is a steamed cake flecked with Chinese sausage, dried shrimp and scallions. Some versions also include shiitake mushrooms as well.

Two ingredients, Chinese sausage and dried shrimp may not be common to the Western kitchen, but they are readily available in most Asian markets. Chinese sausage, or lap cheong in Cantonese, is a dried, hard cured sausage (think salami or pepperoni) with a high fat content and a sweet flavor. Dried shrimp or xia mi are said to have the fifth flavor also refered to as umami. They are sold shell and all, in the refrigerated section of Asian markets. The flavor is very concentrated, so a little goes a long way.

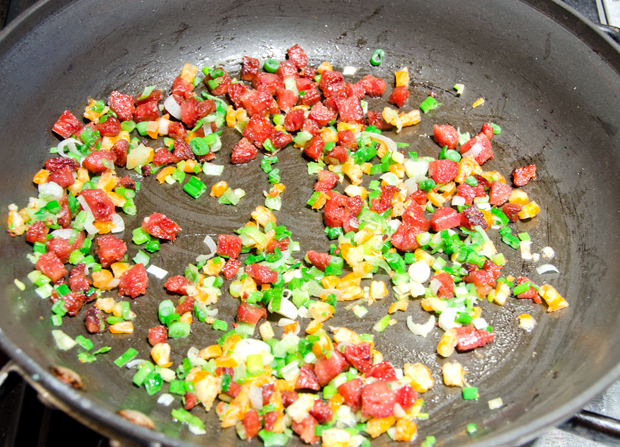
Finely chopped sausage is added to a hot skillet and browned, then the dried shrimp and scallions are added.The daikon radish is grated, then chopped and cooked to mellow out the flavor and release excess moisture. The daikon, sausage, shrimp and scallions are added to the batter of rice flour and water.

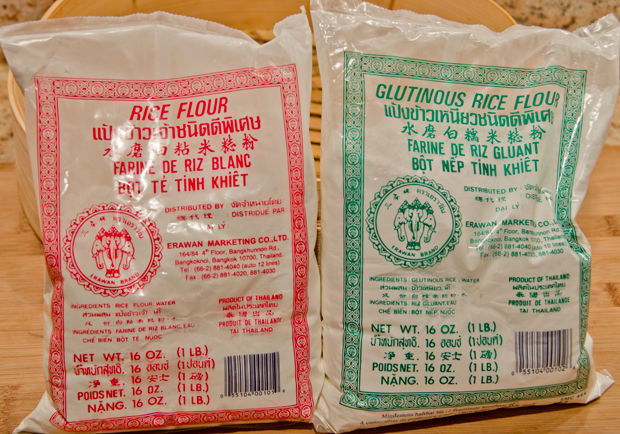
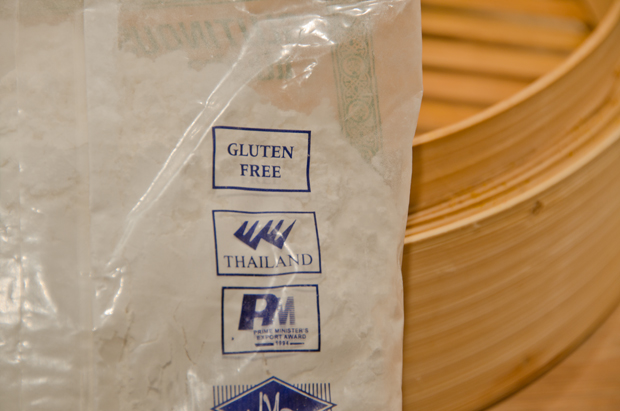
Be sure to use rice flour, not glutinous rice flour. Rice flour and glutinous rice flour are both made from rice and therefore gluten-free. Rice flour is made from medium or long grain rice and is mainly used in baked goods. Glutinous rice flour is made from short grain rice, the kind used in sushi. It has a high starch content and adds moisture and density to baked goods and is used to make the Japanese dessert, mochi. For the turnip cake, rice flour is used, read your bag carefully.
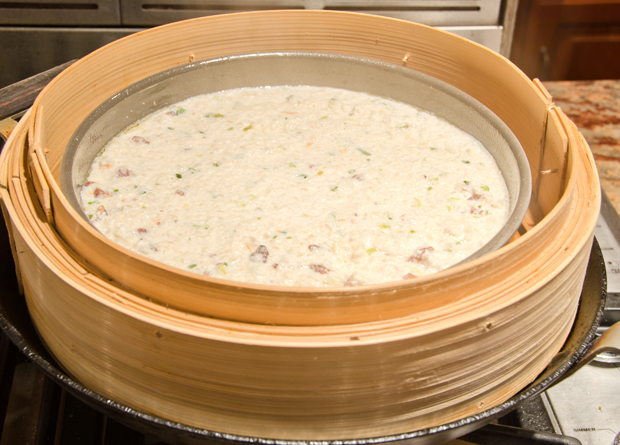
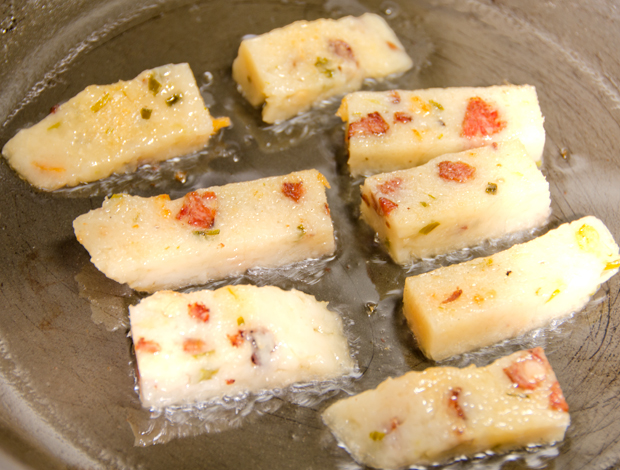
Pour the mixture into a well greased 9 1/2″ x 1 1/2″ cake pan. The cake is steamed until firm to the touch, about 45 minutes. When steaming for a long period of time, you will have to occasionally add water to the base of your steamer. Keep a small pot of simmering water on the stove for this purpose. I set a timer to check my water supply every ten minutes or so. Once the cake has cooled it removes easily from the pan. It can be eaten, as is, but I prefer to pan fry the slices, giving the exterior a nice crunch to contrast with the soft interior. Serve with spicy herb soy sauce or prepared hoisin or soy sauce.
Golden Crisp Daikon Cake

Ingredients

  • 1 1/2 lb daikon (Asian white radish), peeled, cut into 1-inch pieces
  • 2 Chinese sweet pork sausages (lop chong), cut into 1/4-inch cubes (about 3 ounces)
  • 1/2 c finely chopped green onions (about 3 large)
  • 2 T small dried shrimp, finely chopped
  • 1 c water
  • Nonstick vegetable oil spray
  • 1 1/2 c rice flour (not glutinous)

Directions

  1. Fit processor with large-hole grating disk. Working with a few pieces of daikon at a time, place daikon pieces in feed tube and process until coarsely grated. Transfer daikon to bowl. Replace grating disk in processor with metal blade. Return daikon to processor and finely chop, using on/off turns.
  2. Heat heavy large skillet over medium-high heat. Add sausage cubes to skillet and sauté until fat renders and sausage browns, about 5 minutes. Add green onions and dried shrimp; stir 1 minute. Add daikon with juices and 1/2 cup water; bring to boil. Reduce heat to medium; cook until daikon is soft and liquid is almost evaporated, stirring frequently, about 25 minutes.
  3. Meanwhile, spray 9-inch-diameter cake pan with 1 1/2-inch-high sides with nonstick spray. Whisk rice flour and remaining 1 cup water in large bowl until well blended. Stir in daikon mixture. Season to taste with salt and pepper. Spread daikon mixture evenly in prepared pan. Place cake pan on bamboo steamer rack set over wok filled halfway with simmering water or on metal rack set over simmering water in pot. Cover with lid; steam over medium heat until cake is set and firm to touch, occasionally adding more water to wok or pot as needed, about 45 minutes. Remove pan from steamer; cool cake in pan 1 hour. Cover and refrigerate daikon cake in pan overnight.
  4. DO AHEAD Daikon cake and sauce can be made 2 days ahead. Cover separately and refrigerate.
  5. Run small knife around daikon cake to loosen. Invert onto cutting board. Cut cake into 1/2-inch-thick slices (not wedges), then cut each slice crosswise into 2-inch-long pieces.
  6. Heat 1 tablespoon vegetable oil in large nonstick skillet over medium-high heat. Working in batches, add daikon cake slices to skillet and cook until golden brown, adding more oil to skillet for each batch as needed, about 5 minutes per side. Transfer slices to platter. Serve herb soy sauce alongside for dipping.
Spicy Herb Soy Sauce

Ingredients

  • 1 c soy sauce
  • 1 T Asian toasted sesame oil
  • 2 T (or more) vegetable oil, divided
  • 1 c fresh cilantro leaves
  • 1 T grated peeled fresh ginger, juices included
  • 2 small Thai red chiles, halved lengthwise, seeds removed, thinly sliced crosswise or 1 T hot chili sauce (such as sriracha)

Directions

  1. Whisk soy sauce and sesame oil in small bowl. Heat 1 tablespoon vegetable oil in small skillet over medium heat. Add cilantro, ginger with juices, and chiles or hot chili sauce; stir 30 seconds. Mix ginger mixture into soy sauce.
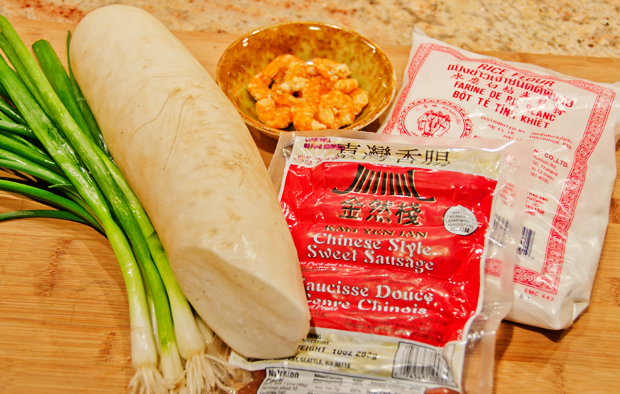
Daikon radish, dried shrimp, Chinese sausage, scallions and flour are the ingredients for this cake.


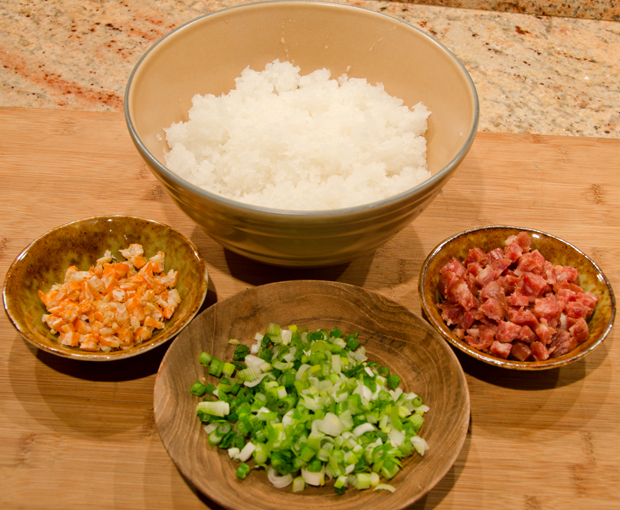
Ingredients ready to saute.


Saute the sausage until browned.


There are two types of rice flour, this recipe calls for regular (red label), not glutinous rice flour


Yes, glutinous rice is gluten-free!


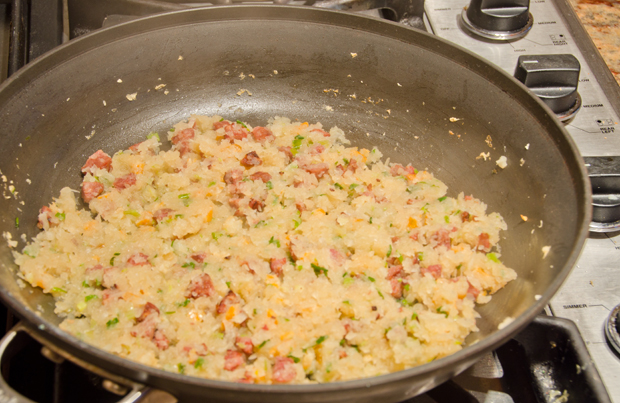
Add the daikon radish and saute until the liquid evaporates.


Be sure your steamer is large enough to allow steam to rise and cook the cake.


Saute pieces of the cake in a little oil for a crunchy exterior.

January 21, 2013 Char Siu Pork

DSC_8250a


Our Chinese New Year celebration is about a month away so it’s time to start planning this year’s menu and what can be made ahead. My sources all agree, Chinese steamed buns can be made a month ahead so that seemed like a good place to start. Making steamed filled buns involves several steps, the first is making the char siu pork filling.

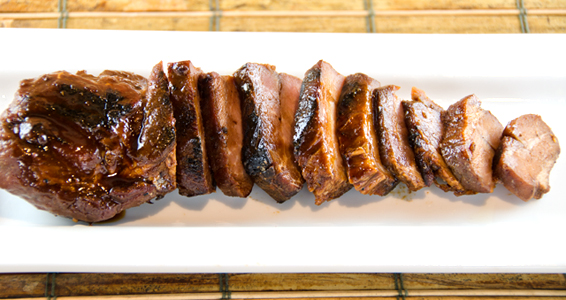
In Cantonese, char means fork in both the noun or verb form and siu (soo) means to roast or burn. “Fork roasted” refers to the way this traditional Cantonese street food is prepared, slow cooked on skewers over an open fire. Char siu should be moist and flavorful on the inside and caramelized and slightly chewy on the outside. Traditional Cantonese char siu is dyed with food coloring resulting in an unnatural ring of magenta when you cut into the meat.I forgo that step. I prefer the reddish brown color that dark soy imparts to the meat. After making char siu and pork buns for seven years now, pork shoulder is my cut of preference. On the fatty scale it is somewhere between the pork tenderloin or loin which I have found to be too lean and the currently popular pork belly, which is too fatty for my tastes. The shoulder has enough fat to prevent the meat from drying out.

I have been using the recipe for char siu from “The Chinese Kitchen” written by Eileen Yin-Fei Lo since we began celebrating Chinese New Year. I discovered this book when some of the recipes were used in a cooking class I attended in San Francisco.  When I cook Chinese recipes I try to keep the ingredients as authentic as possible from the original recipe. Two of the marinade ingredients for her char siu have alluded me all these years, Mei Kuei Lu Chiew and wet or preserved red bean curd. In the front of her book Ms. Lo has a section devoted to Chinese ingredients, “The Chinese Larder”. In this section she further describes uniquely Chinese ingredients that may not be familiar in the Western kitchen. Wet bean curd are cubes of fermented bean curd with salt, wine and red rice; not to be confused with preserved bean curd. Wet bean curd is red in color, not spicy and is used in braising and barbecuing recipes. I found what I thought might be reasonable substiutes but was pretty certain not the exact ingredient she was calling for.  Mei Kuei Lu Chiew is a Chinese spirit, based on sorghum and flavored with rose petals, needless to say, I gave up on that one the first year. Ms Lo admits that some of the English labeling of Chinese products may be confusing. She provides Chinese calligraphy next to each entry to show your grocer to ensure you have the right product. That would be fine but I have found increasingly that the markets I encounter are not Chinese but a mix of all Southeast Asian cultures. I have access to two supermarkets that carry Asian ingredients but both are Korean-owned. Thus the ingredients in the store may be Asian, but with a definite Korean slant with some Thai, Vietnamese, Chinese, a smattering of Japanese and Central American to boot.

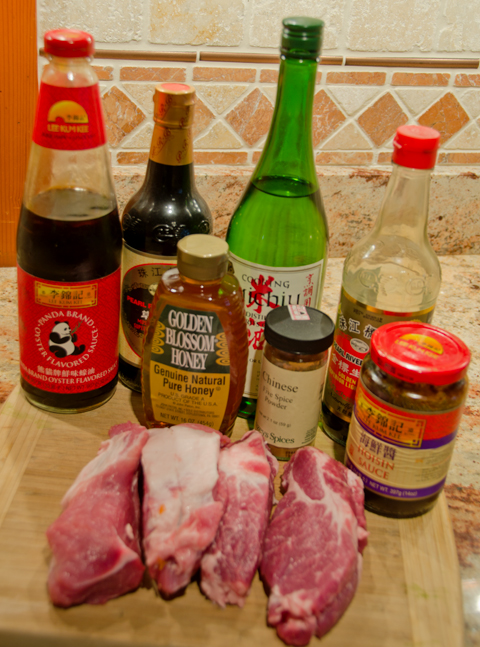
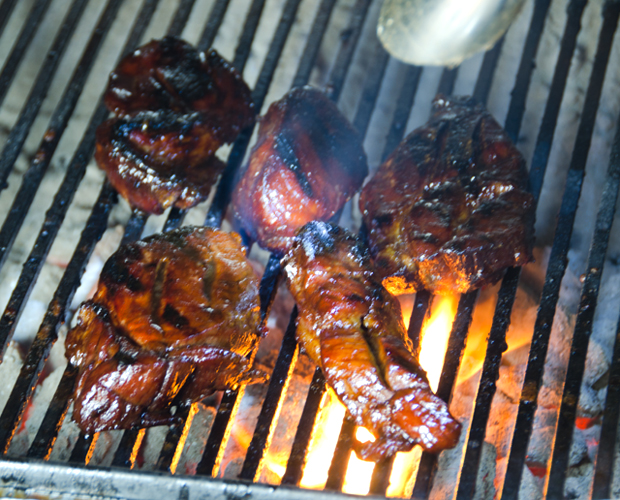
Twelve years after the publication of “The Chinese Kitchen”  Ms. Lo’s recipe for char siu pork and steamed buns were featured in the February/March 2011 issue of Fine Cooking magazine. I was pleased to see that in the updated version of the recipe in Fine Cooking both of my “problem ingredients” were no longer part of the marinade. Shaoxing or Chinese rice wine is now in place of Mei Kuei Chiew and the preserved bean curd is eliminated all together.  Some recipes call for maltose to give char siu its classic glazed look but honey works just as well, has a thinner consistency and is easier to handle.The meat is cut into four pieces and pierced several times to allow the marinade to penetrate, preferably overnight. Most recipes call for roasting the meat and broiling it at the end to give it that desirable char. This year I roasted it in the oven for fifteen minutes and Joe finished it in the fireplace grill. The sliced pork is now ready to top a bowl of noodles, chop into a filling for fried rice, or combine with other ingredients for a dumpling filling. My next step is to combine some of the pork with a sauce to fill steamed buns.
Char Siu – Barbecued Roast Pork

Ingredients

  • 1 2lb piece of pork shoulder
  • 1/2 c honey
  • 1/4c oyster sauce
  • 1/4c hoisin sauce
  • 3 1/2T dark soy sauce
  • 3 1/2T light soy sauce
  • 3T Shaoxing (Chinese rice wine)
  • 1 1/2t five-spice powder
  • Kosher salt and freshly ground white pepper

Directions

  1. Cut the pork shoulder lengthwise into 4 equal strips. Using a small knife, pierce each strip 4 times to help the marinade penetrate the meat. Transfer the meat to a gallon zip-lock bag.
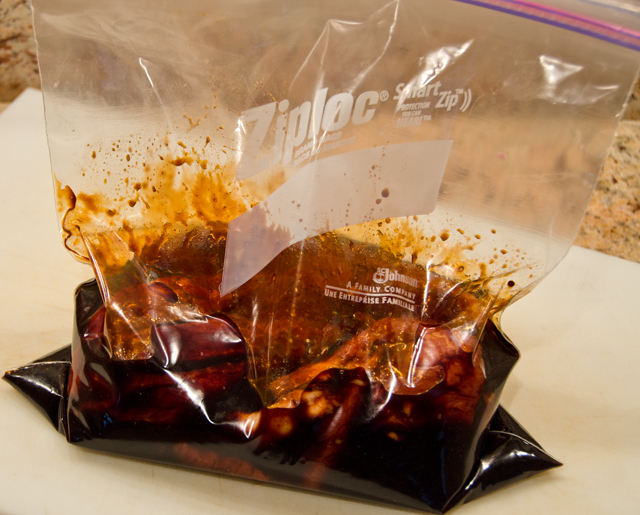
  2. Combine the honey, oyster sauce, hoisin sauce, dark and light soy sauce, rice wine, five spice powder, 1/2t salt and a pinch of ground white pepper in a small bowl. Pour over the meat in the bag. Massage the pork all around in the marinade so that it is covered. Push out all the air and seal the bag. Refrigerate for at least eight hours and preferably overnight.
  3. Position a rack in the top third of the oven and heat oven to 425F. Line a large heavy duty baking sheet with heavy-duty foil. Put the meat on the baking sheet and spoon some of the marinade over it. Roast until an instant read thermometer  inserted in the middle of the pork registers 165F, 30 to 40 minutes. During the cooking process, baste the meat occasionally with the juice from the pan and flip it several times.
  4. Position an oven rack about 4 inches from the broiler and heat the broiler on high. Broil the pork until it is slightly charred in places, about 2 minutes.
  5. *Alternate cooking method. Preheat oven to 375F. Place pork on foil lined baking sheet. Roast in oven for fifteen minutes, turning once.
  6. Skewer the pork and grill at about 400F, basting the pork with the remaining sauce, turning and basting until the pieces are nicely charred.
  7. Let the pork cool and then refrigerate until you are ready to make the bun filling. The pork may be refrigerated for up to 5 days or frozen for up to a month.


Ingredients ready to go for the pork marinade.


Pork pieces and marinade are added to a zip-loc bag.
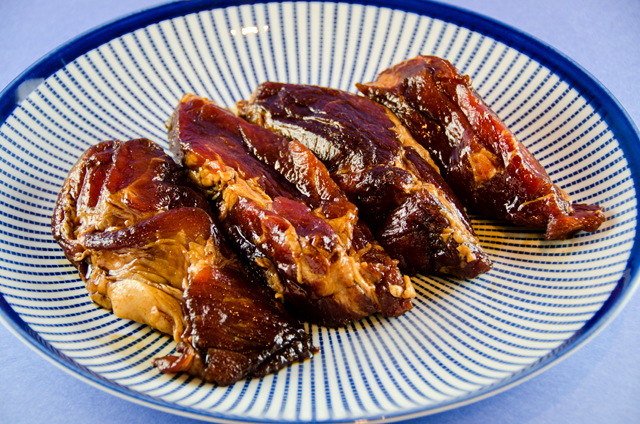
Out of the marinade after 24 hours, meat looks good already!
The fireplace grill give the meat that nice char that is desirable in char siu.
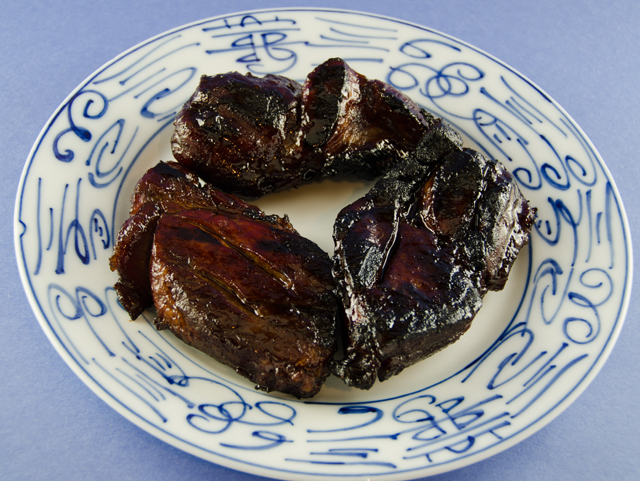
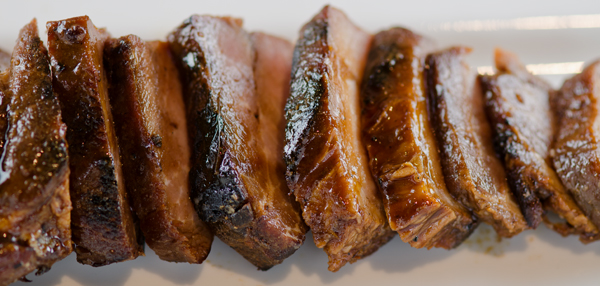
Char siu pork right off the grill.


Char siu ready to be chopped up for bun filling.


January 12, 2013 Israeli Couscous with Roasted Butternut Squash and Preserved Lemon

 DSC_8091a

 Now that the preserved lemons were ready, it was time to use them. In my research, I saw reference to a recipe that caught my attention, Israeli couscous with roasted butternut squash and preserved lemon. It was on the Epicurious website and I noted the original source was the September 1999 issue of Gourmet magazine. The issue is a part of my large food magazine library so I was able to see the recipe in it’s original context. The recipe was part of a larger menu, “Wedding in the City. When a caterer is out of the question.” The recipes had a definite Moroccan-middle eastern flair: caviar and hummus on pita toasts, grilled charmoula lamb chops, recipes for stuffed grape leaves and eggplant with cilantro vinaigrette. The fantasy wedding reception was scaled to serve fifty guests. Another article, “Without Ceremony” noted that the wedding banquet menu was too good to save for a special event and scaled some of the recipes, including the one for Israeli couscous, down to serve six.

The September 1999 issue of Gourmet was Ruth Reichl’s debut as  editor-in-chief, a position she held until the magazine’s print version demise in November 2009. In this issue Pat Conroy took readers along in the “Romance of Umbria”, the late actor-writer Spalding Gray gave account of his adventures in Disney World with his wife and children.  Described as a “great young American novelist” Ann Patchett wrote an essay called “Let Them Eat Kale.” Add to this Julia Child’s and Jacques Pepin’s roast chicken recipes and restaurant reporting by Pulitzer prize winner Jonathan Gold, it was quite an impressive issue, countless ads and all.

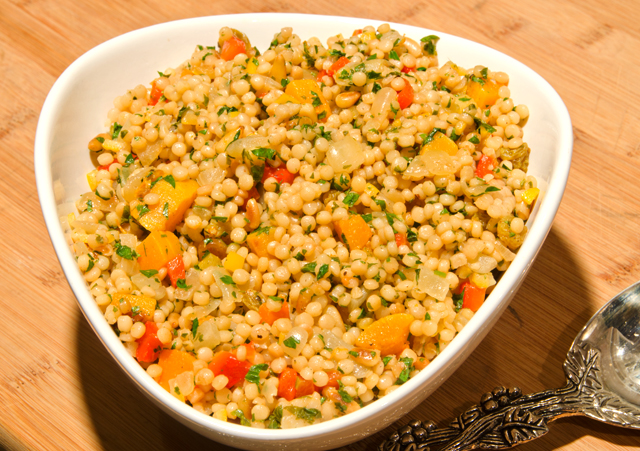
I made some changes to the original recipe. I used less squash and added a roasted pepper to the mix. You can either buy roasted peppers, or roast your own.  I roasted a red bell pepper on my trusty asador. To add another flavor dimension, I toasted my Israeli couscous in the saute pan before cooking. If you have issue with pine nuts, chopped toasted walnuts would substitute nicely. Farro or even orzo could take the place of Israeli couscous. Served warm or at room temperature, the tangy-salty combination of the preserved lemon peel and juice are what makes this recipe truly stand out.

 Israeli Couscous with Roasted Butternut Squash and Preserved Lemon

Serves 4-6

  • 1 preserved lemon (see this post)
  • 1 medium roasted sweet pepper, cut into 1/4″ dice
  • 3c butternut squash, peeled, seeded and cut into 1/2″ dice
  • 3T olive oil
  • 1 medium sweet onion, chopped
  • 1 1/4c low sodium chicken broth
  • 1 1/4 cups Israeli couscous
  • 1 (3 inch)  cinnamon stick
  • 1 bay leaf (Turkish)
  • 1/2 c chopped fresh flat leaf parsley
  • 1/2c chopped fresh cilantro
  • 1/3c toasted pine nuts
  • 1/2 c golden raisins
  1. Preheat oven to 450F.
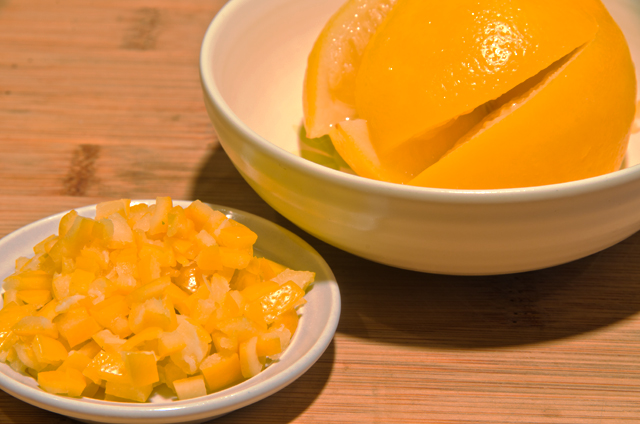
  2. Cut enough preserved lemon peel into 1/4 inch dice to measure 1/4c, set aside.
  3. In a large bowl, toss squash cubes with 1T oil and salt to taste. Spread cubes in a large shallow baking pan. Check occasionally, tossing cubes with a spatula so they are evenly roasted on all sides and tender, about 15 minutes. Transfer cubes to a large bowl.
  4. Cook onion in 1T oil in a 10″ straight sided saute pan over medium high heat until golden. Add to the squash.
  5. Add diced roasted pepper to the squash and onions.
  6. Add 1T butter and 1T olive oil to  same pan over medium heat.  Add couscous, cinnamon stick, and bay leaf and stir until couscous browns slightly, stirring often, about 5 minutes. Add broth and salt and bring to boil. Reduce heat to low; cover and simmer until couscous is tender and liquid is absorbed, about 10 minutes.
  7. Add the vegetables into the couscous, stir to combine all ingredients. Transfer back to the large bowl,  toss with 1T olive oil and 1T juice from the preserved lemons to coat.
  8. Add lemon peel, pine nuts, parsley, cilantro and pepper to taste. Adjust seasonings adding more of the preserved lemon juice if needed. Toss to coat well.
  9. Serve warm or at room temperature.
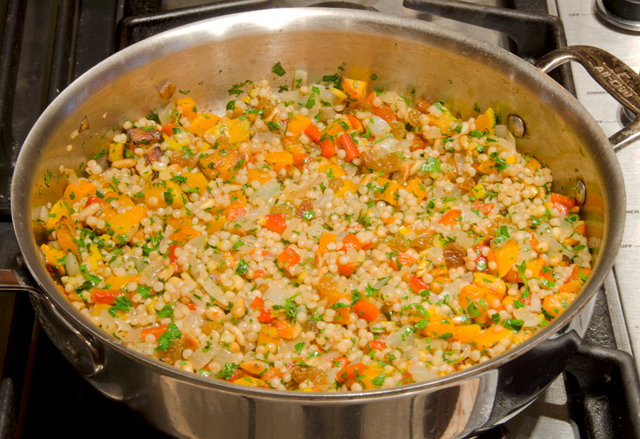
The vegetables are added back into the couscous.

January 11, 2013 Preserved Lemons

DSC_8073a

One more condiment, really? My husband astutely pointed out that if we emptied all the condiments from our refrigerator we would be left with some eggs, celery and a container of half and half. In our refrigerator you can find four types of mustard, capers, several containers of olives and everything you might need to put together a Thai curry. Some of the condiments were my own home grown homemade treats, a half used jar of pickled jalapenos, some yellow tomato jam and a small jar of homemade nutella. So why one more? A Facebook post from America’s Test Kitchen for preserved lemons caught my eye. I knew that a jar of preserved lemons would be expensive in a gourmet store, but not expensive or time-consuming at all if I made them myself. I decided the little amount of work in the recipe  might result in something very interesting. 

Preserved or pickled lemons are common in Indian, North African and Moroccan cuisine. Cookbook author Paula Wolfert in her book, Food of Morocco, states that preserved lemons are made with the creme de la creme of Moroccan lemons, the thin-skinned Doqq. The Doqq is not grown in the US but the Meyer lemon is a reasonable substitute. Since the Meyer is actually a cross between a lemon and an orange, they are less acidic and have a thinner rind than the standard supermarket variety lemon, the Eureka.
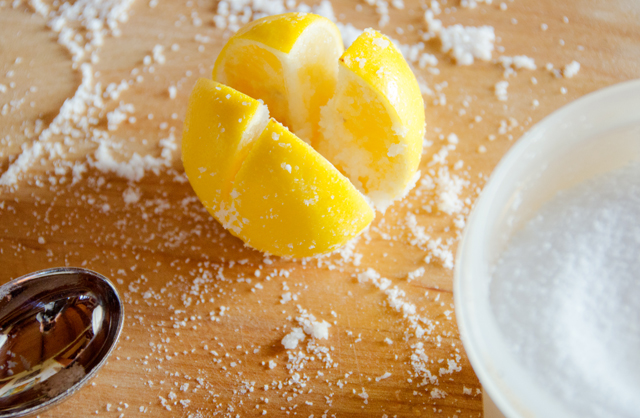
The lemons are pickled in a brine of lemon juice and salt. The lemons are sliced as if you are cutting them in quarters lengthwise, but not all the way through.  Kosher salt is packed in the incisions and the lemons are submerged in a bath of lemon juice. Additional seasonings can be added to the brine such as bay leaves, coriander seeds or cinnamon sticks. It takes very little time to put together, but it takes four to six weeks before the lemons are ready to use. As time goes on, more and more juice will exude from the lemons and the juice will take on a cloudy appearance. Shake the jar every now and then to keep the salt blended well in the liquid. Since they try to bob to the top, no matter how much juice you put in the jar, I cut a double round of parchment paper the size of the top of the jar to keep the lemons submerged in the juice-salt solution.
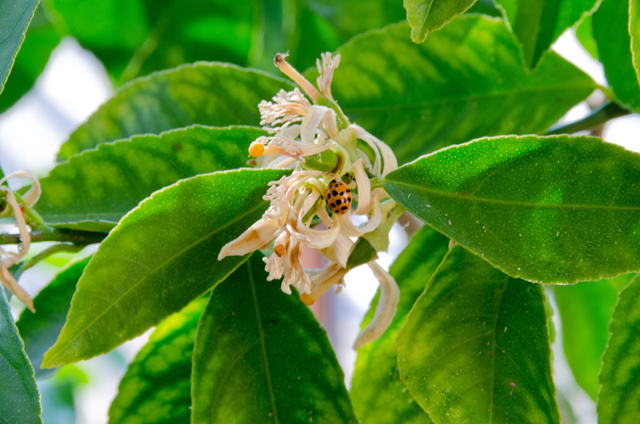
 If I lived on the west coast I would be telling you that I picked these lemons from organically grown trees in our backyard, but I live in Bucks County, Pennsylvania. We have a small Meyer lemon tree that we bought  in hopes that it will eventually produce fruit. We enjoy it on the deck in the spring and summer and it winters indoors to escape snow and freezing temperatures. The only thing it has offered us so far are the heavenly aromatic white blossoms that made their appearance several weeks ago. We bought the tree because only a few years ago I found it next to impossible to buy Meyer lemons in local supermarkets. That has changed recently. I bought my Meyer lemons at the local Sams Club. If that is your only option, wash them extremely well, since it is the skin you will ultimately be using.

The sourness of the lemons mellow over time and they develop a unique and exotic flavor profile of tangy citrus and salty. The peel of  the lemons can be used in marinades for chicken, lamb or fish. Chopped finely, the peel is an interesting addition to grain based salads like quinoa and couscous.  Use it in a gremolata, the classic Italian condiment of garlic, parsley and lemon rind. I use the juice in salad dressings and marinades as well. Feel free to experiment, just remember, a little goes a long way.

Preserved Lemons

from America’s Test Kitchen

Makes One Quart Jar

Ingredients

  • 4 Meyer lemons preferably, if not regular lemons will do,  scrubbed and dried well
  • 1½ cups juice (8 lemons)
  • ½ cup kosher salt
  • 1 sterilized quart jar with lid

Directions

  1. Cut each lemon lengthwise into quarters, stopping 1-inch from bottom so lemons stay intact at base.
  2. Working with 1 lemon at a time, hold lemon over medium bowl and pour 2 tablespoons of salt into cavity of lemon. Gently rub cut surfaces of lemon together, then place in clean 1-quart jar. Repeat with remaining lemons and salt. Add any accumulated salt and juice in bowl to jar.
  3. Pour lemon juice into jar and press gently to submerge lemons. At this point I cut a double parchment round the size of the mouth of the jar to keep the lemons submerged. Cover jar tightly with lid and shake. Refrigerate lemons, shaking jar once per day for first 4 days to redistribute salt and juice. Let lemons cure in refrigerator until glossy and softened, 4 to 6 weeks. If you used regular lemons, it may take longer to achieve the desired softness. Preserved lemons can be refrigerated for up to 6 months.
  4.  To use, cut off desired amount of preserved lemon. Using knife, remove pulp and white pith from rind. Slice, chop, or mince rind as desired.
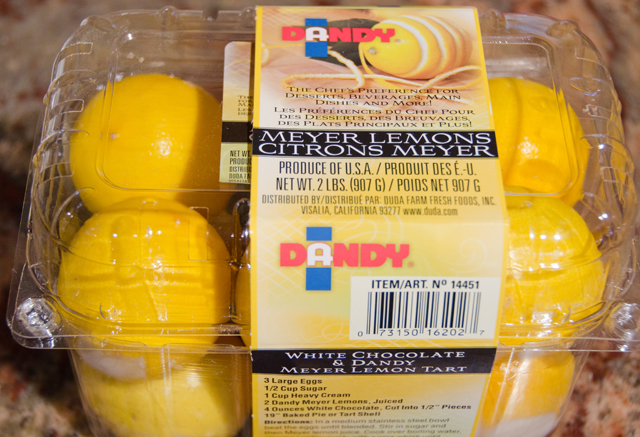
My lemons came in a nice protective tray.


Sprinkle kosher salt in the cuts you have made in the lemons.


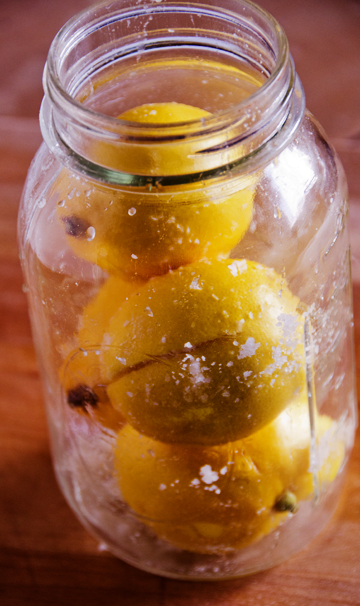
Pack the lemons in a sterilized quart jar. Add any additional seasonings at this time.


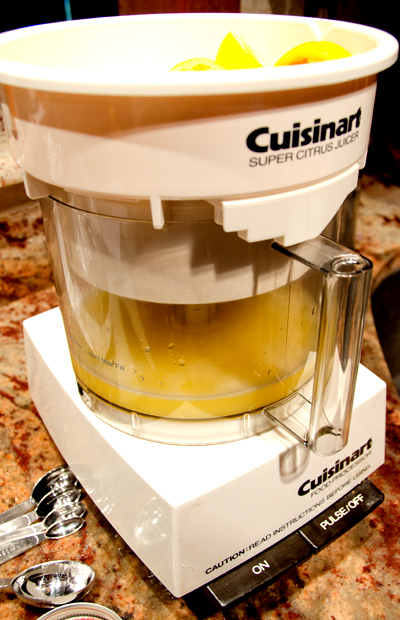
My Cuisinart juicer came in handy for this.


One and half cups of lemon juice are needed to cover the lemons.


Over time the juice will take on a cloudy appearance.


Some day this tree will produce Meyer lemons.


January 6, 2013 Lobster Bisque

DSC_7834aOur New Year’s Eve tradition for almost thirty years is the anti New Years Eve celebration of most people. Our evening is very low key. We get together with one couple, cook a nice, but somewhat indulgent meal of surf and turf, curl up on the couch and watch movies until the ball drops. 

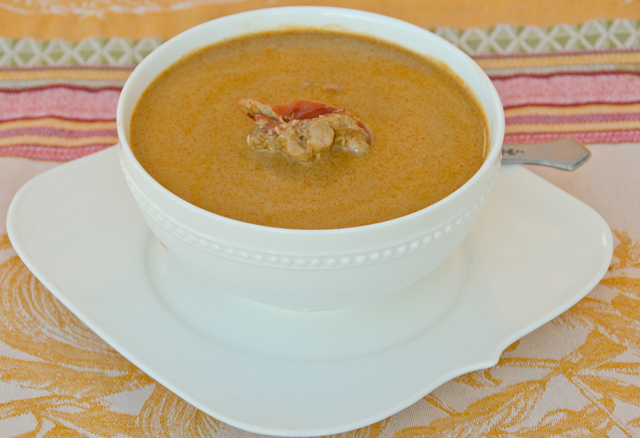
The highlight of this feast is a rich and flavorful lobster bisque that we have been making for 23 years now. Not a dish you would have every day or every week for that matter, but a nice splurge for a special occasion. This recipe is from a January 1990 Bon Appetit article with recipes from Jasper White, chef, restaurateur and New England seafood expert . Mr White offers his bisque recipe which he describes as “the perfect starter for a winter night.”

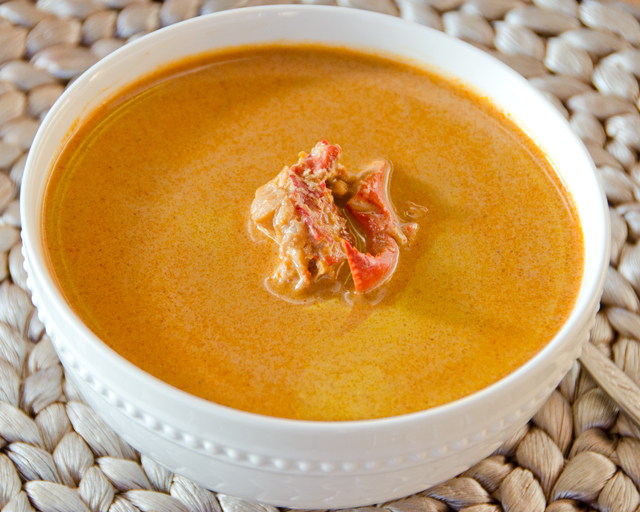
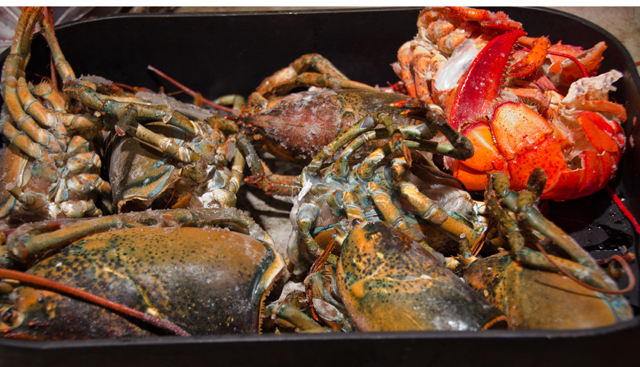
To say this recipe is a bit indulgent would be an understatement. It is not every day sweet briny lobsters, fragrant golden saffron and silky cream are combined in a luxurious soup. A warm winter resulted in a lobster glut in 2012 and we took advantage of the occasional weekend sale at our local markets. After enjoying lobster for dinner, we froze the body shells, planning ahead for the New Year’s Eve bisque. My fishmonger sells lobster bodies at a much cheaper price than whole lobsters and we also buy these to add to our stock. The shells are roasted, then combined in a stockpot with herbs, vegetables, wine, stock and saffron. This wonderful soup simmers for hours on the stovetop and your house will smell so warm and rich you will want to bottle the fragrance!

A bisque by definition is a rich, creamy soup made with shellfish, specifically crustaceans, in this case lobster. The addition of lobster meat to the final bisque is just an option, so that is one way of keeping the cost down.Though rice is the classic thickener for a bisque, tapioca starch, not cornstarch or arrowroot is the choice for this recipe. I’ve learned that tapioca starch thickens quickly and at a lower temperature than the other options. Tapioca grains don’t always dissolve completely, so straining the bisque twice eliminates that problem. In past years I made the veal stock that is called for in this recipe but I no longer have a source for veal bones. I use the reduced chicken and beef stock mentioned in the recipe, enhanced with a little veal demi glace. Many supermarkets carry the D’Artagnan brand. A little Cognac or another brandy is flamed at the end, burning off the alcohol, bringing even more complexity to the final dish.  The steps can be completed over the course of several days and the soup base minus the cream could be frozen for a future special occasion. Valentine’s Day, perhaps?

Lobster Bisque

 Serves 8 to 10

Ingredients

  • 3lbs cooked lobster body shells, halved lengthwise, head sacs removed
  • 5T olive oil
  • 2 large onions, coarsely chopped
  • 2 large carrots, coarsely chopped
  • 2 large celery stalks, coarsely chopped
  • 10 garlic cloves, coarsely chopped
  • 3 quarts plus 1 cup water
  • 2 c rich veal stock, or three cups canned low-salt chicken broth  and 1 cup canned unsalted beef broth, reduced to 2 cups
  • 1/2 of a 7.5 ounce container of veal demi glace (optional)
  • 2 c dry white wine
  • 6T tomato paste
  • 1T whole black peppercorns
  • 10 fresh tarragon sprigs
  • 4 fresh thyme sprigs
  • 3 bay leaves
  • 1/2t dried red pepper flakes
  • 1/2t saffron flakes
  • 1/4 c quick cooking tapioca
  • 2c heavy cream
  • 1/4c Cognac or other brandy
  • 1c cooked chopped lobster meat in 1/2 inch cubes
  • Kosher salt and freshly ground pepper

Directions

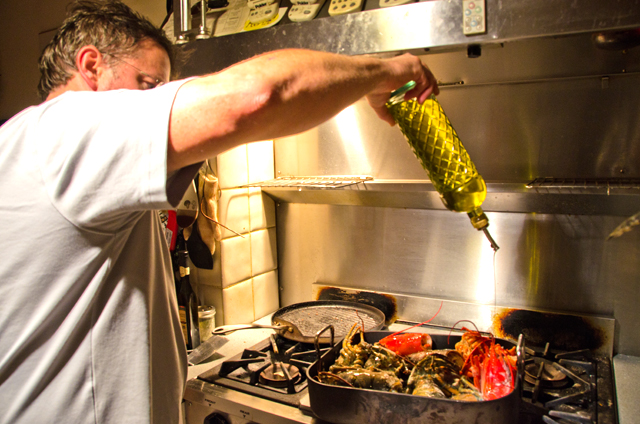
  1. Preheat oven to 375F. Transfer lobster shells to roasting pan. Drizzle with 2T olive oil. Roast until aromatic and slightly charred, stirring occasionally, about 45 minutes.
  2. While the shells are roasting, heat remaining 3T olive oil in a heavy large skillet over medium high heat. Add onions, carrots, celery and garlic and cook until light brown, stirring frequently, about 8 minutes.
  3. Transfer lobster shells to a large stockpot.  Set roasting pan over high heat. Add one cup water and bring to a boil, skimming foam from the surface. Stir in the sauteed vegetables, tomato paste, peppercorns, herbs, pepper flakes and saffron. Simmer until liquid is reduced to 6 cups, stirring frequently, about 1 1/2 hours.
  4. Stir tapioca into bisque and let simmer until thickened, stirring frequently, about 30 minutes. Strain bisque through a coarse sieve, pressing on solids to extract as much liquid as possible. Strain bisque again through a fine sieve into a heavy large saucepan. Can be prepared ahead, cover and refrigerate for two days or freeze for future use.
  5. Bring bisque to a gentle simmer, skimming surface if necessary. Add cream and heat through. Gently heat Cognac in a heavy small saucepan. Remove from heat and ignite with match. Allow flames to subside completely, then add to bisque. Add lobster meat if using and heat through. Season to taste with salt and pepper. Serve immediately in warmed bowls.


Lobster bodies are added to the roasting pan.


Drizzling olive oil over the lobster shells.


Scraping up the browned bits.


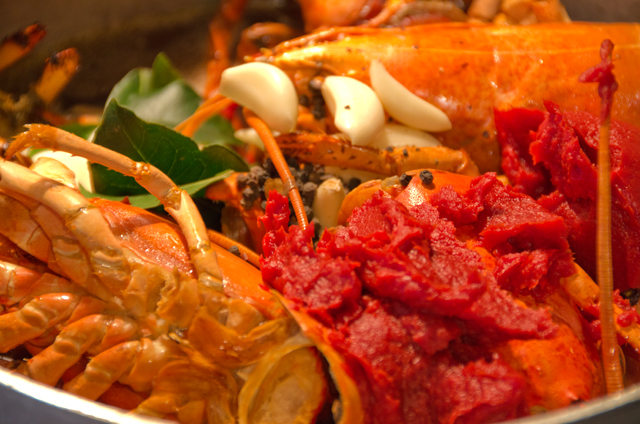
Roasted lobster shells and other ingredients go into the stockpot.


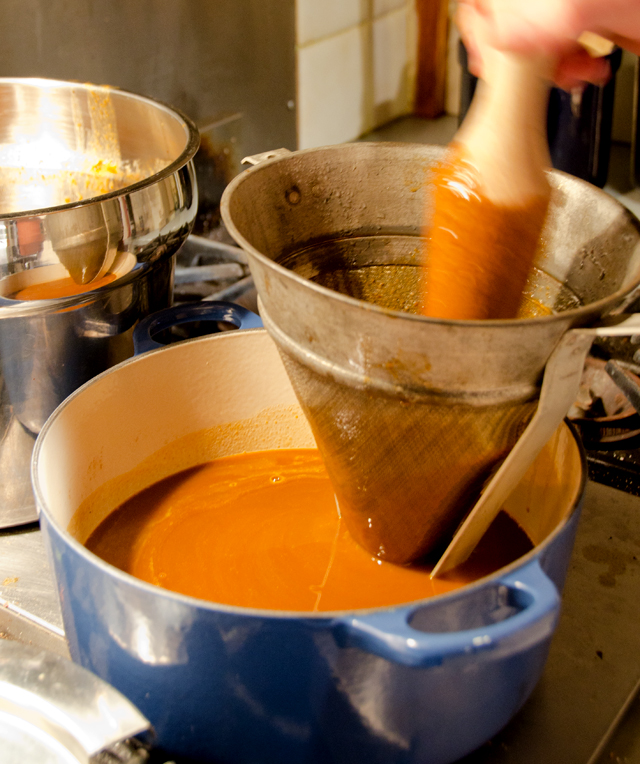
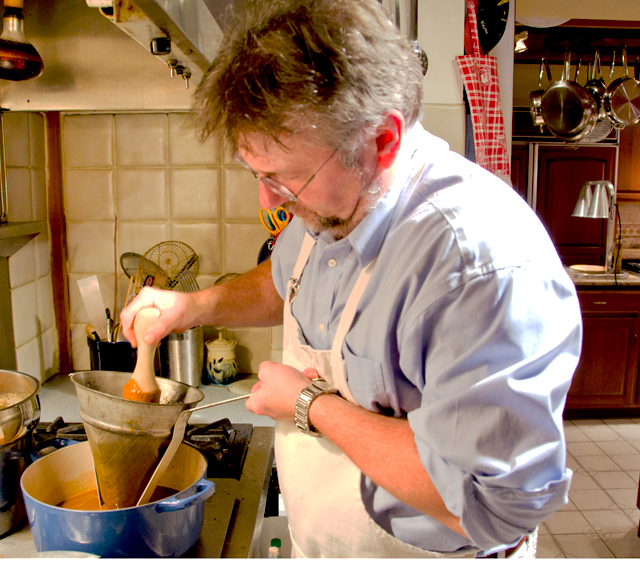
Straining the stock.


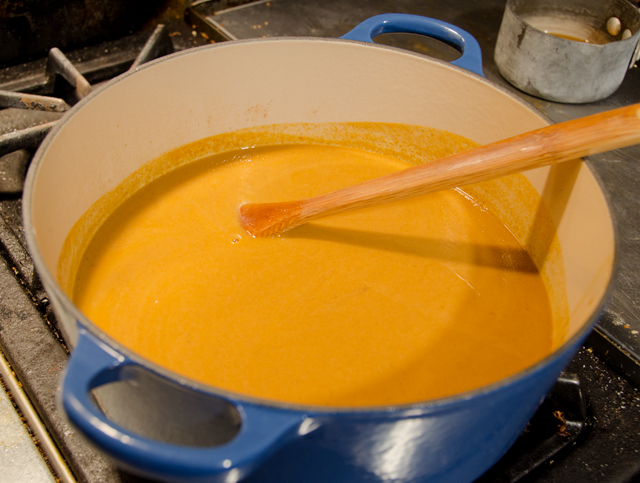
It already looks rich, even without the cream!


Now the cream is added.
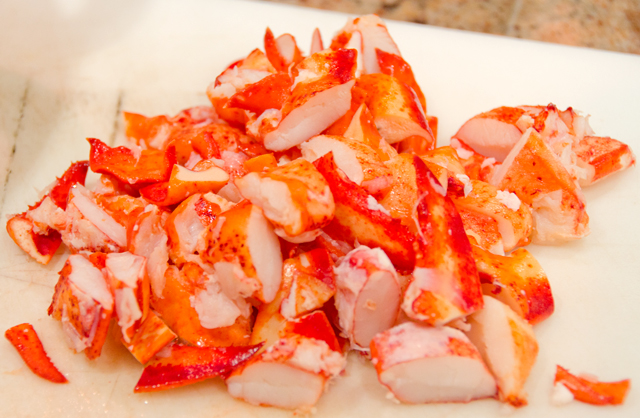
Chunks of lobster meat are a welcome addition to the soup.
Chunks of lobster meat are a delicious addition to the soup.
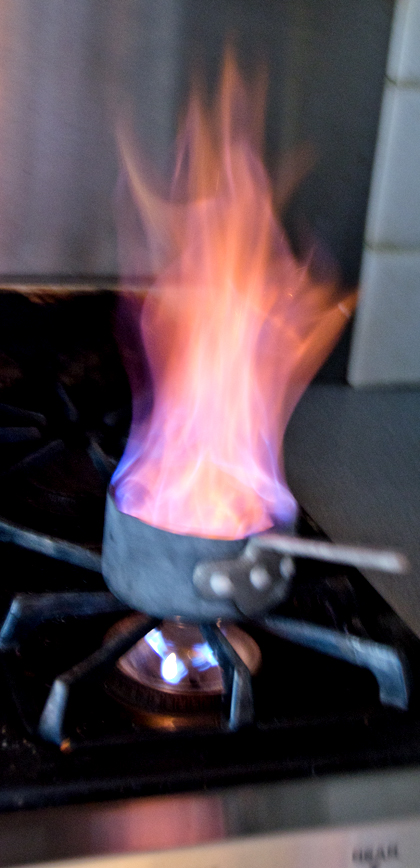
Cognac is flamed and when the flames subside, then added to the bisque.

             DSC_7826a