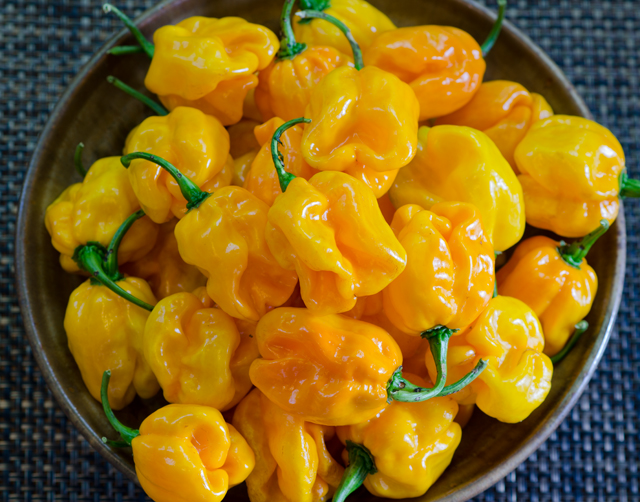
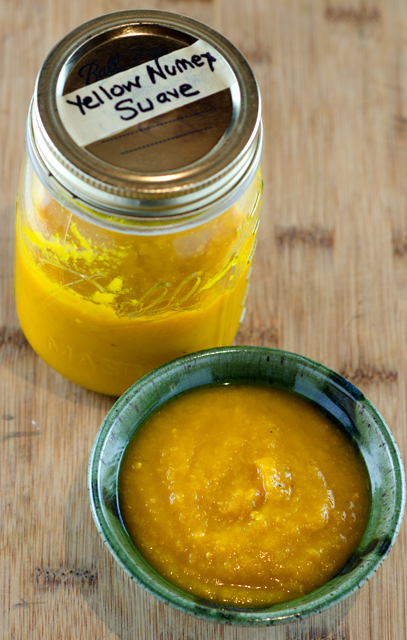
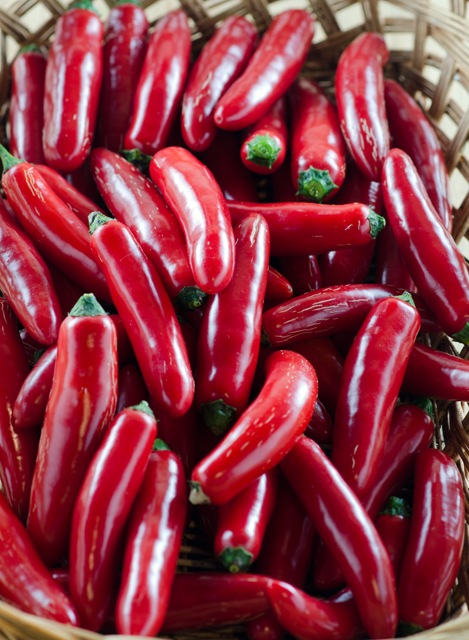
Last weeks plunge into the deep freeze meant it was time for one final harvest of hot peppers. With a formula that worked and an abundant source of peppers the challenge was to make a few hot sauces using the same method as the sriracha sauce from a few weeks ago. I first tried the NuMex Suave Orange peppers and several days later using green and red pasilla peppers and green poblano peppers. The jars fermented on the back kitchen countertop for about a week. I wasn’t sure what the results would be so my expectations weren’t very high.
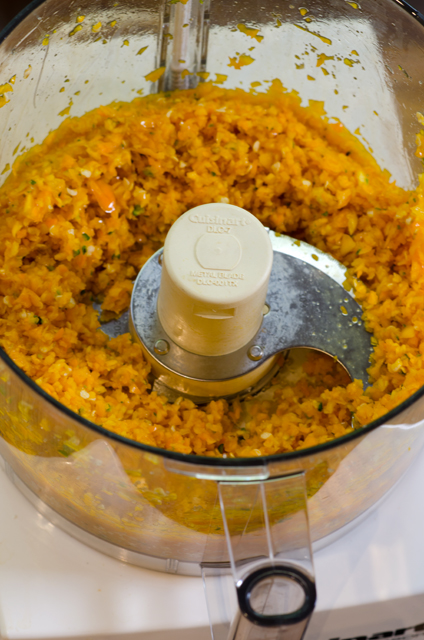
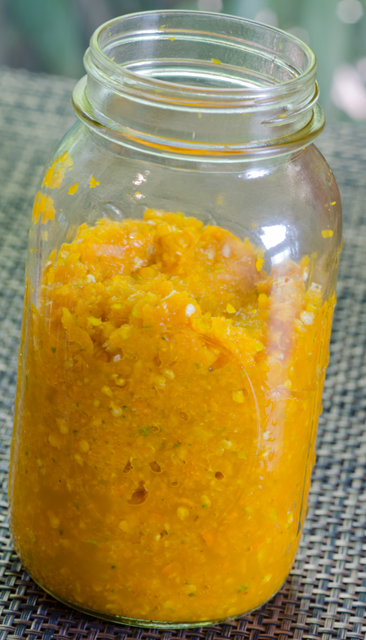
To finish, I followed the same procedure for each variety, transferring the chopped chilis to the food processor, adding enough (1/3 to 1/2cup) white vinegar to puree until smooth. I carefully washed out the processor between peppers to keep each type as pure as possible. I strained the mixture through the medium disc of the food mill to eliminate any seeds. I think it’s easier than the mesh strainer and gives the finished product a little texture.
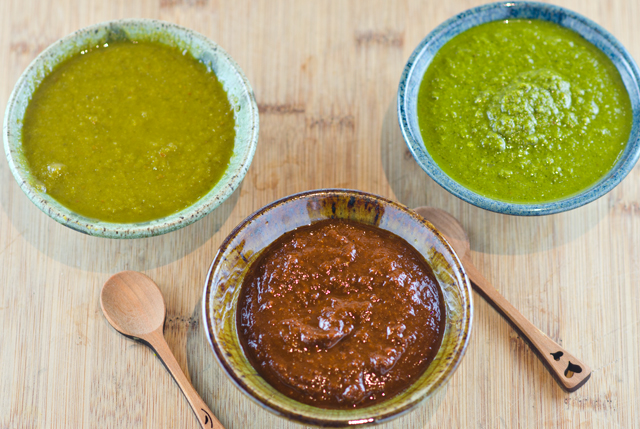
Now for some taste testing. The Numex Suave Orange has the flavor nuances of the habanero that are usually missed because the heat dominates. The sauce has a citrusy flavor with hints of orange and lemon and finishes with a little heat. The green pasilla flavor reminds me of green bell pepper and has a touch of moderate heat. The green poblano has an initial hint of sweetness and finishes with more heat than the green pasilla. I especially like the red pasilla sauce. The color is a deep dark red and the flavor is rich and full but not too hot. I think it would be the perfect addition to a chili recipe.
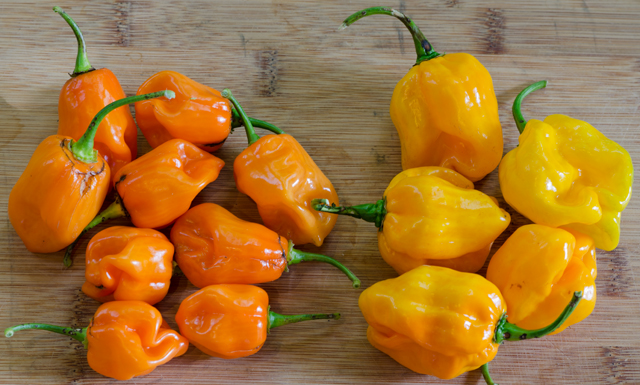
Numex Suave Orange PeppersThe habanero peppers on the left measure a tongue burning 100,000 to 300,000 on the Scoville scale while the Numex Suave Orange on the right are a very mild 800!Adding peppers and garlic to the food processor.Chop the peppers as finely as possible.The peppers ferment for about a week.The finished product
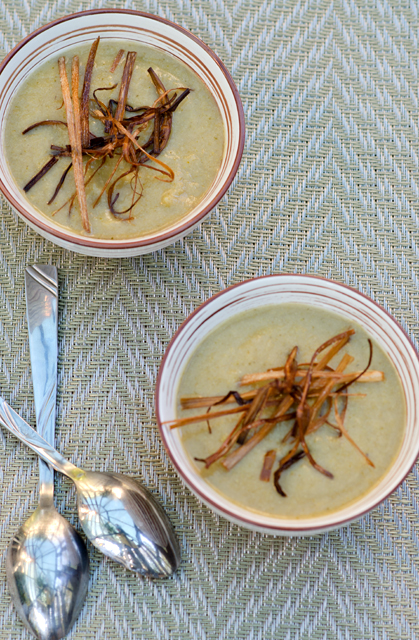
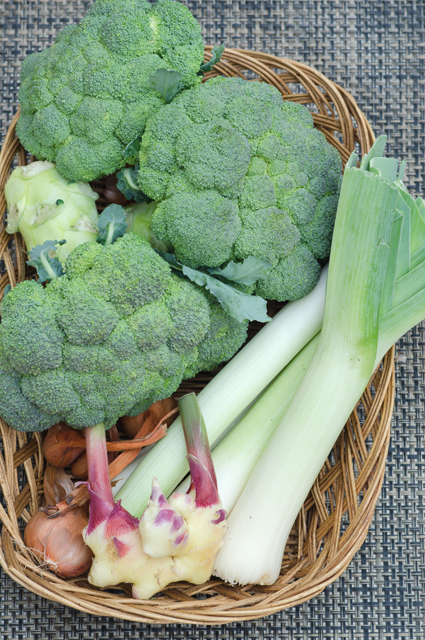
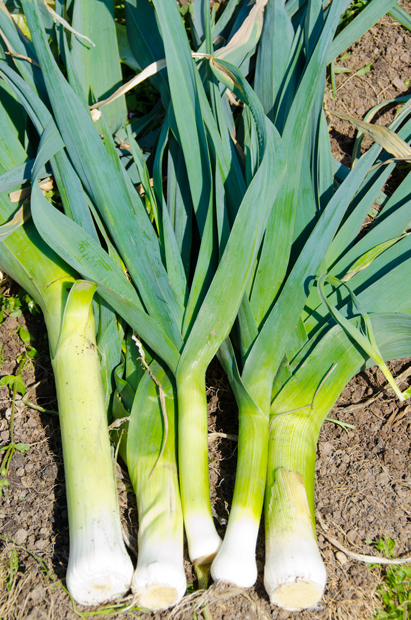
The fall crop of broccoli is making it’s appearance in our farmers market and I love making broccoli soup now that the cooler weather is upon us. This time I combined it with leeks and shallots from our own harvest and one of the more unique offerings at our local farmers market, freshly harvested ginger.
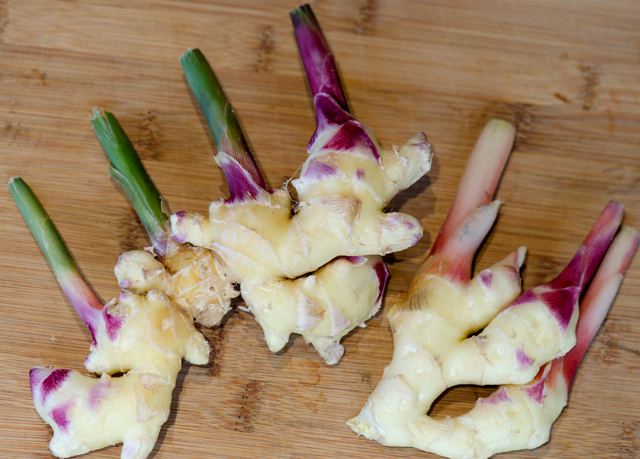
This ginger is younger than the ginger you buy at the grocery store. The skin is a yellowish beige with pink and purple markings. The flavor is milder and the flesh is delicate and juicy, not fibrous. This is the ginger commonly used in pickled ginger. You can substitute fresh ginger in any recipe, but because of it’s milder flavor, you will need to use more.
Ginger from the grocery store that has sprouted can be planted but there is no guarantee if it will be disease and pest free. Our local farm, Blooming Glen Farm buys rhizomes from certified organic farms in Hawaii. They start their plants in the spring and grow them in conditions that are similar to the warm temperatures the plants are accustomed to in Hawaii. The rhizomes are ready for harvest by mid October. A bit pricey, 18.99 a pound, but a nice splurge this time of year. I’m going to hold a few aside for Joe to plant so we can have our own ginger next fall. This soup comes together very quickly and the frizzled leeks that top it are very easy to do and add a nice textural contrast.
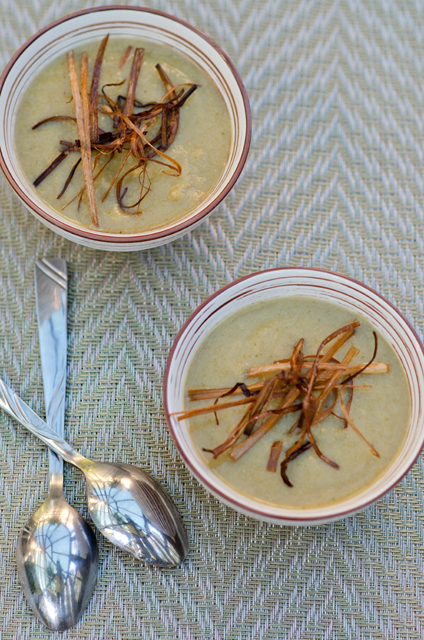
Broccoli Leek Soup with Fresh Ginger
Makes about 6 cups
Ingredients
2-3 T olive oil
¼c chopped shallots
1T finely chopped fresh ginger
3 large leeks, sliced, white and light green parts only
1 large head of broccoli, cut into florets
4-5c chicken or vegetable stock
Kosher salt and freshly ground pepper to taste
Frizzled leeks as garnish-see recipe following
Fresh ginger from the farmers market.Part of the fall leek harvest.
Directions
Add olive oil to a large sauté pan over medium high heat. Stir in the chopped shallots and ginger and sauté for about 3 minutes. Add the garlic and sauté for an additional 2 minutes.
Add the broccoli florets and cook for an additional 2-3 minutes.
Add stock and bring to a boil. Reduce heat to low and simmer for 30-40 minutes.
Puree the soup in batches in a blender. Add additional stock if the soup is too thick.
Season to taste with salt and pepper
Garnish soup with frizzled leeks.
Frizzled Leeks
Ingredients
1 leek, trimmed
Olive oil
Kosher salt and freshly ground pepper
Directions
Cut leek in half lengthwise and rinse away any grit. Slice thinly and pat dry to insure the oil will not splatter.
In a small skillet over medium heat, warm ¼ inch olive oil. Add a handful of leeks and fry until golden brown, about a minute or so. Remove with a slotted spoon and transfer to a paper-towel-lined plate. Sprinkle lightly with salt. Repeat with remaining leeks.
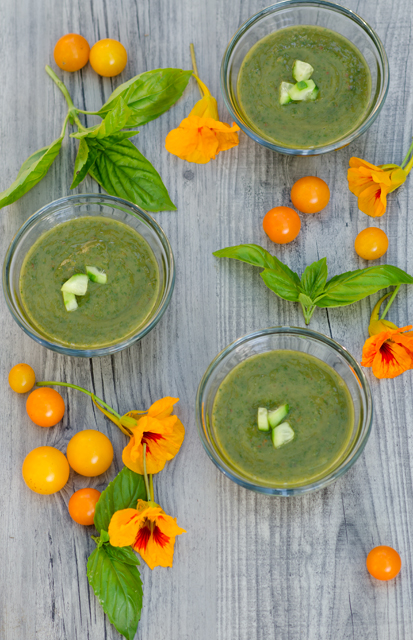
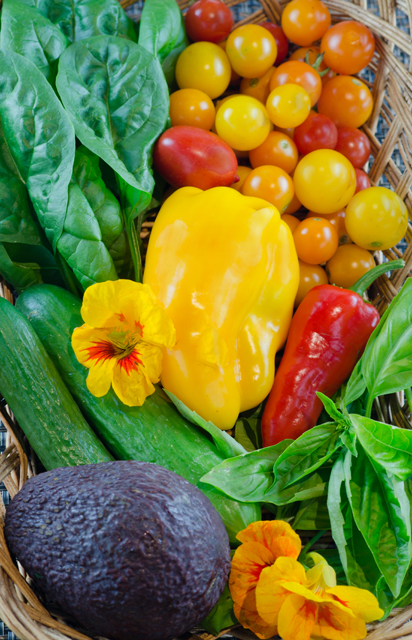
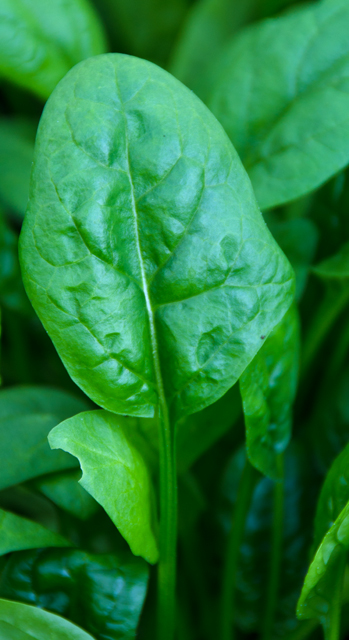
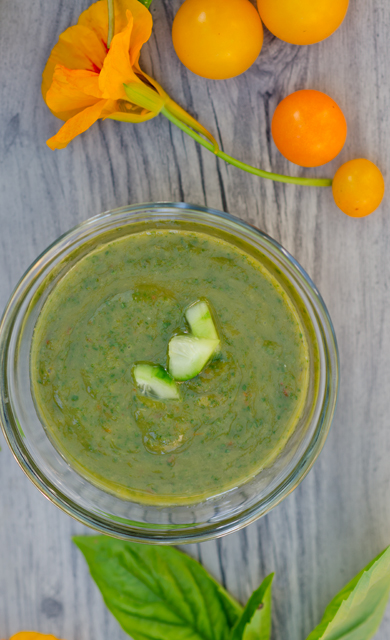
Summer was officially over several weeks ago and the first touch of frost was on our lawn Sunday. That doesn’t mean the garden is giving up yet. There are still some tomatoes, peppers, both sweet and hot, eggplants and herbs ready for the picking.The tomatoes may not be the prettiest, but they are certainly the sweetest. Joe has planted a large crop of spinach and salad greens in the garden greenhouse that we will enjoy for several months to come. After a week of indulging in Denver’s finest cuisine it was time to get back on the healthy eating track. What better way to use some of these ingredients than in a cold refreshing green gazpacho?
Gazpacho by definititon is a liquid salad that originated from the southern Spanish region of Andalusia. The name possibly originated from the Latin word “caspa” meaning fragments, alluding to the small pieces in gazpacho. You can make this as chunky or as smooth as you choose. I love the addition of avocados in our nightly salad with dinner and had a few extra ripe ones to give this soup a creamy texture. I used the bounty of our garden and the addition of a cucumber for it’s crisp sweetness. Give this soup several hours to chill and the flavors to blend.
Substitutions are permitted, watercress for the spinach, that will bring a spicy kick to the soup. Cilantro can sub for the basil, add a touch of Tabasco if you don’t have a fresh hot pepper, I would be happy to share. I always stock up on vinegars at The Tubby Olive and used their Alfoos Mango in my soup, love them in our vinaigrettes too. If you don’t have a fruit vinegar, use white wine vinegar and a touch of honey. A little chopped cucumber as garnish gives a little crunch and since our nasturtiums are still in bloom I couldn’t resist adding a few for their vibrant color and spiciness.
A new crop of spinach in the garden greenhouse is ready for harvest.
End of Summer Green Gazpacho
Makes about 4 cups
2 medium tomatoes or 12-15 small tomatoes
3-4 small cucumbers peeled and cut into chunks
1 avocado, flesh cut into large chunks
½c basil leaves
½c flat leafed parsley leaves
½ to 1 whole hot pepper, jalapeno or serrano
1 sweet pepper, seeded, stemmed and cut into chunks
2c packed baby spinach leaves
2 cloves garlic, finely chopped
2-3T fruity balsamic vinegar (I used Mango from Tubby Olive)
Cold water to blend
Kosher salt and freshly ground pepper
Water as needed
1T extra virgin olive oil
Directions
Reserve ½ cup cucumber chunks and chop finely.
Combine the tomatoes, cucumbers, avocado, basil, hot pepper and sweet pepper, spinach, garlic and balsamic vinegar with cold water as needed in the bowl of a food processor or blender. Process until smooth adding more water as necessary to achieve a smooth texture. Taste and season with salt, pepper and more vinegar if desired.
Refrigerate until cold, pour into bowls and garnish with cucumber chunks.
Over the years I have made my share of homemade condiments. Joe’s ability to produce an abundant harvest from our garden often has me looking for ways to preserve some of that bounty for the fall and winter months. I have made my own ketchup, chili sauce and tomato paste from the tomatoes in our garden. Not to mention homemade mustard, jams, chutneys and preserved lemons. In fact the first cookbook that Joe ever bought me, even before we were married was Better Than Store Bought, a classic to this day for the DIY cook.
The latest to be added to my homemade list is sriracha. As long time fans of Thai cuisine, sriracha has been on our food radar since the early eighties. We love the spicy, garlicky, slightly sweet sauce that was a table condiment at our local Thai restaurant. Back then I would have to travel to local Asian markets to find the thick red sauce that came in a squeeze bottle with a green cap and a rooster on the label. We, and obviously many others, were definitely on to something, over the years the popularity of sriracha has grown by leaps and bounds. Now it can be found in supermarkets everywhere and sriracha flavors products as diverse as popcorn, potato chips, beer and lip balm.
It was first produced in the United States by a Vietnamese immigrant, David Tran, who was unable to find a hot sauce he liked. He developed and named his sauce after one that he tasted in the Thai southern coastal city of Si Racha, where it was made for dishes served at local seafood restaurants. The success of Mr. Tran’s company Huy Fong Foods, named for the boat that brought him to the United States, is legend. Since 1980 sales of sriracha have increased by 20% a year without paid advertising. Unlike other hot sauces, sriracha is made with fresh chilies, Tran says this is what separates sriracha from the competition. So with a large crop of hot peppers in many varieties, I set out to make my own version of sriracha. I looked at quite a few recipes, some promising sriracha in twenty minutes, that might be fine for some, but I knew that fermentation is one of the steps that makes sriracha unique and since I had the time and an abundant supply of peppers, why take any shortcuts? I chose a recipe from Serious Eats, a blog that is dedicated to “definitive recipes, hard core food science, trailblazing techniques and innovative guides to essential food and drink anywhere and everywhere.” Sounds good to me.
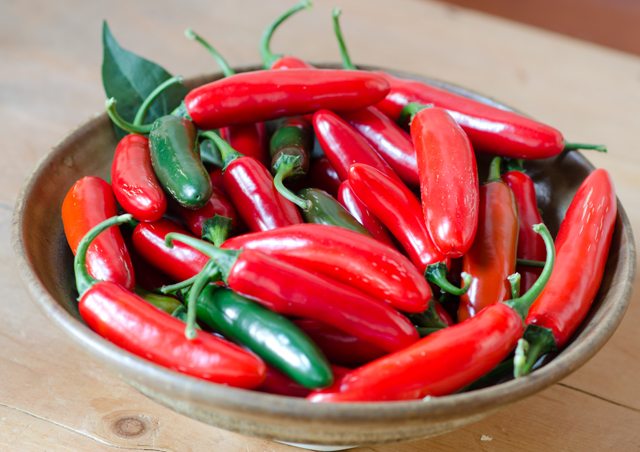
My first consideration was the variety of pepper to use. The Serious Eats recipe used red jalapenos but in one of the reader comments I learned that serranos were the original peppers Huy Fong used to make sriracha until the late nineties. The change to jalapenos was due to production costs. Since I had more than enough serranos, I chose them for my recipe. Since the serrano pepper is hotter than the jalapeno you may want to adjust your recipe accordingly, I didn’t. The peppers are left whole with the stems are snipped with the crown remaining. This brings a floral component to the finished product. As with all hot pepper recipes, take the usual precautions, wear rubber gloves when making the recipe, don’t rub your eyes, and so on. The recipe is very simple with very little handling of the product, peppers, peeled garlic cloves, brown sugar and salt are pulsed to a fine texture in a blender or food processor.
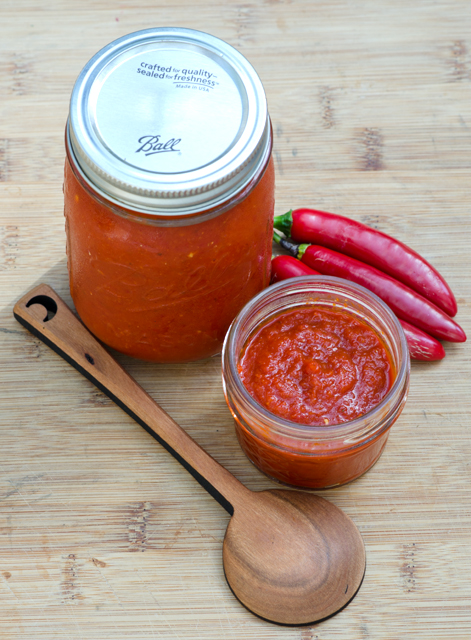
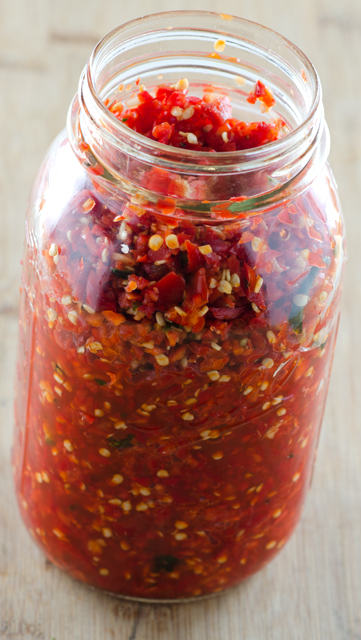
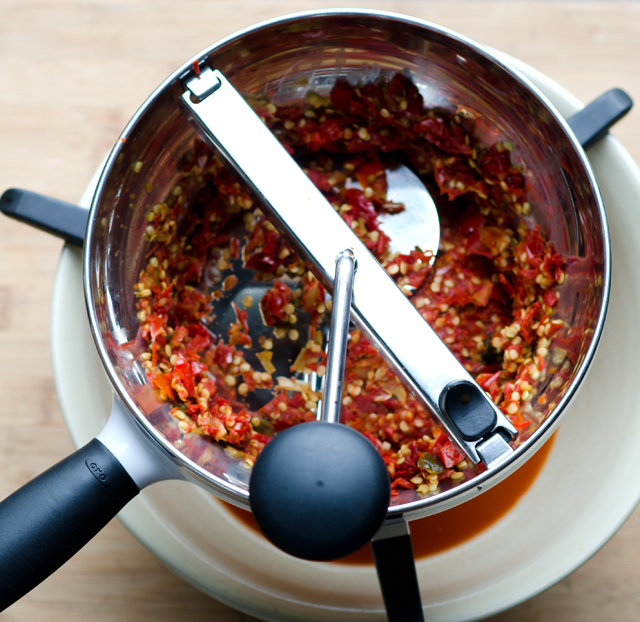
The mixture is transferred to a clean jar, covered and sits at room temperature. I checked the mixture daily to check for little bubbles forming at the bottom of the jar, indicating fermentation. The recipe indicated that the fermentation would begin in 3-5 days, my peppers only began to ferment after 7 days. I will attribute that to the freshness of my peppers. Since my peppers were picked the day I tried the recipe, they were days fresher than any hot pepper purchased in a grocery store. My fermentation was complete in 10 days. I carefully transfered the chopped chili mixture to the bowl of a food processor, my blender is too small, added the distilled white vinegar and pureed it until smooth. The recipe suggests transferring the mixture to a mesh strainer over a medium saucepan and using a rubber spatula to push the pulp through. I wasn’t getting a thick enough consistency so I transferred the peppers to the food mill with a medium disc which gave me a product that resembled sriracha, though a bit more chunky. The mixture is placed in a saucepan, brought to a boil, then simmered until the sauce clings to the back of a spoon, 5 to 10 minutes. Transfer sauce to clean jars and store in the refrigerator for up to six months.
I am very pleased with the consistency of my sriracha, the food mill made that part of the process much easier than the strainer. Since we have other varieties of hot peppers I may try the same recipe with different peppers.
Just picked serrano peppers for my sriracha sauce.
Sriracha Sauce
Recipe slightly adapted from Serious Eats
Ingredients
1 1/2 lbs red jalapeños (or serranos), stems snipped off, leaving green tops intact
6 cloves garlic, peeled
4 tablespoons light brown sugar
1 tablespoon Kosher salt
1/2 cup distilled white vinegar
Directions
Place peppers, garlic, sugar, and salt in bowl of a food processor fitting with steel blade. Pulse until chilies are very finely chopped, stopping to scrap sides of bowl as necessary. Transfer mixture to a clean jar, cover, and let sit at room temperature.
Check jar each day for fermentation, when little bubbles start forming at bottom of jar, about 3-5 days. Stir contents each day, continuing to let ferment until chilies are no longer rising in volume, an additional 2-3 days.
Transfer chilies to jar of a blender or food processor, add in white vinegar, and puree until completely smooth, 1-3 minutes. Transfer to a mesh strainer set atop of a medium saucepan. Strain mixture into saucepan, using a rubber spatula to push trough as much pulp as possible, only seeded and larger pieces of chilies should remain in strainer. I found that a food mill with the medium disc made this easier.
Bring mixture to a boil, reduce heat, and simmer until sauce thickens and clings to a spoon, 5 or 10 minutes. Transfer to an airtight container and store in refrigerator for up to 6 months.
Pureed peppers, garlic, brown sugar and kosher salt ready to be fermented.The food mill gave me the consistency that I was looking for.My finished product was thick even before cooking.
 Last weeks plunge into the deep freeze meant it was time for one final harvest of hot peppers. With a formula that worked and an abundant source of peppers the challenge was to make a few hot sauces using the same method as the sriracha sauce from a few weeks ago. I first tried the NuMex Suave Orange peppers and several days later using green and red pasilla peppers and green poblano peppers. The jars fermented on the back kitchen countertop for about a week. I wasn’t sure what the results would be so my expectations weren’t very high.