August 28, 2012 Yellow Tomato Gazpacho


As summer’s days are waning I am reminded to take full advantage of our garden’s bounty of beautiful vegetables.  The Sweet Gold tomatoes are in abundance now, more than enough to make a refreshing yellow tomato gazpacho. Gazpacho is the signature dish of the Andalusia region of Spain. It descended from an ancient Roman dish of stale bread, garlic, olive oil, salt and vinegar that sustained laborers as they built roads and aqueducts across Spain. The addition of tomatoes and other vegetables didn’t occur until Spanish explorers came to the New World.
Sweet Gold tomatoes are one of a trio of cherry tomatoes called “Garden Candy” available from Renee’s Garden Seeds that we grew this year.  I have posted about all three, the orange Sun Gold were part of a pasta salad and the crimson red Supersweet 100’s were combined with pearled couscous. The Sweet Gold tomatoes are quite firm with a dense flesh and crack free compared to the Yellow Pear variety we have grown in previous years. In this recipe I combined them with a yellow pepper and cucumber from the garden along with red onion and garlic. The low-acid tomatoes benefited from a good quality sherry vinegar and little orange juice added acidity and a little sweetness. I kept it light and didn’t add bread or olive oil. This version did not require the oven or stove top. Just a little chopping, a few spins in the blender and a run through the food mill to give the soup a smooth texture. The perfect starter for any summer meal.

Yellow Tomato Gazpacho

Makes about 8 cups

Ingredients

  • 3 lbs small yellow tomatoes such as Sweet Gold, cut in half
  • 2 cloves garlic
  • 1 medium cucumber, peeled, seeded and cut into chunks
  • 1 medium yellow pepper, seeded and cut into large chunks
  • 1 small red onion, cut into medium chunks
  • 1 small hot chile (or to taste) seeded and cut into medium pieces
  • 1/3c sherry wine vinegar
  • 1/3c fresh orange juice
  • Kosher salt and fresh ground pepper

Directions

  1. In a blender, puree the tomatoes, garlic, cucumber, yellow pepper, red onion, chili, vinegar and orange juice in batches until smooth.
  2. Strain the mixture through a food mill fitted with a medium disc
  3. Season to taste with salt and pepper Refrigerate in an airtight container to blend flavors for at least two hours and up to a day.
  4. To serve, whisk the soup to combine ingredients. Taste the soup and reseason with salt and pepper.  Serve in small bowls garnished with contrasting cherry tomato halves .     
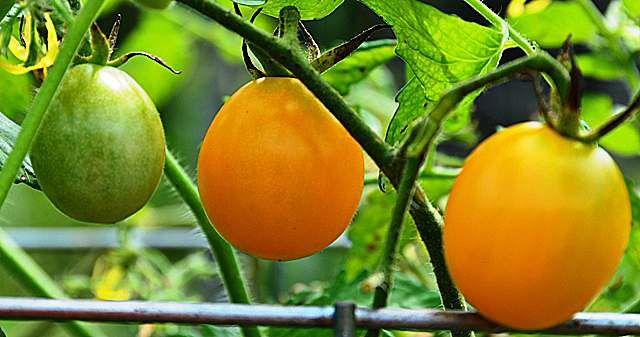
Sweet Golds in various stages of ripeness.                              
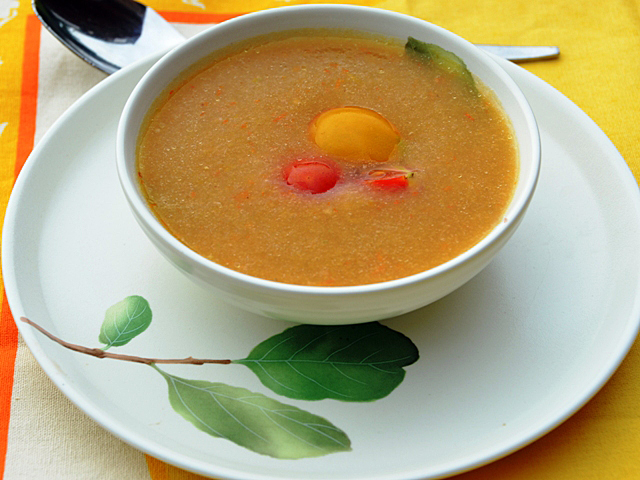
.

August 23, 2012 Pearl Couscous with Olives and Roasted Tomatoes

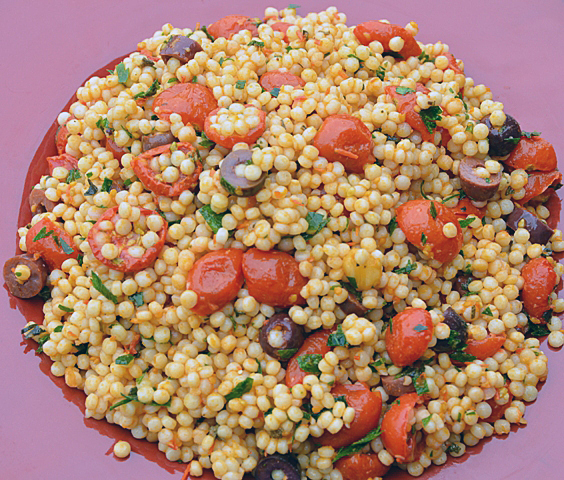
The marinated grilled leg of lamb we were having for dinner led me to look for a complementary side dish with a Middle Eastern flair. After a short search on Epicurious I found a recipe that I wanted to try, Pearled Couscous with Roasted Tomatoes and Olives. Our Supersweet 100’s cherry tomatoes are quite prolific now and one and a half pounds were needed to toss with the couscous and make the dressing in this recipe. I weighed one ounce of tomatoes on my kitchen scale which equaled four tomatoes.Using that formula, I calculated that one and a half pounds of tomatoes or 24 ounces times 4 would equal 96 tomatoes (give or take a few…). I certainly had picked more than enough for the recipe. A serrated knife made easy work of cutting the Supersweet 100’s in half and roasting them concentrated and intensified their flavor.
Pearled or Israeli couscous is not the traditional tiny yellow semolina pasta associated with North African cooking. Resembling barley or tapioca pearls,they are small round granules of semolina coated with wheat flour that are toasted in an open flame oven.Toasting gives Israeli couscous a nutty flavor and the larger size allows the “pearls” to maintain their texture without sticking. So where did the term “Israeli couscous” come from? Opinions differ here. Some say it was a product developed at the behest of Israel’s first prime minister, David Ben-Gurion. Israel as an emerging nation went through a period of food rationing due to the burgeoning population. Ptitim, as it is known in Israel, was developed as a wheat-based rice substitute for emigrating Asian Jews. Others just see it as a marketing term for a product that was already popular in other parts of the Middle East.
The couscous is combined with some of the roasted tomatoes, chopped olives, herbs and dressed with the roasted tomato vinaigrette. The only change I made to the original recipe was to eliminate the mint and add a little more parsley. Strips of grilled chicken or shrimp could make this a light entree. This salad would be a great choice to bring along to a picnic or a summer potluck.

 Pearl Couscous with Olives and Roasted Tomatoes

From the Epicurious website and Gourmet magazine September 2002

Serves eight

Ingredients

For roasted tomatoes and dressing

  • 1 1/2 lbs cherry tomatoes
  • 3 large cloves of garlic, unpeeled
  • 1/4c extra virgin olive oil
  • 1/4c warm water
  • 1t fresh lemon juice
  • 1t salt
  • 1/4t fresh ground black pepper

For couscous

  • 2 3/4c lower sodium chicken broth
  • 2 1/4c pearl (Israeli) couscous
  • 1T olive oil
  • 1/2c brine cured olives (Kalamata) pitted and chopped
  • 1/2c chopped flat-leaf parsley
  • 1t chopped fresh thyme

Directions

  1. Preheat oven to 250F. Halve tomatoes through stem ends and arrange, cut sides up, in one layer in a large one inch deep baking pan. Add garlic to pan and roast until the tomatoes are slightly shriveled around the edges, about 1 hour. Cool in pan for about 30 minutes.
  2. Peel garlic and puree with oil, water, lemon juice, salt, pepper, and 1/2 cup roasted tomatoes in a blender until the dressing is very smooth.

Make couscous:

  1. Bring broth to a boil in a 3 quart heavy saucepan and stir in couscous, then simmer, uncovered, 6 minutes. Cover pan and remove from heat. Let stand 10 minutes.
  2. Spread couscous in a single layer on a baking sheet and let cool for 15-20 minutes.
  3. Transfer couscous to a large bowl and stir in remaining ingredients, dressing, roasted tomatoes, season with salt and fresh ground pepper to taste.

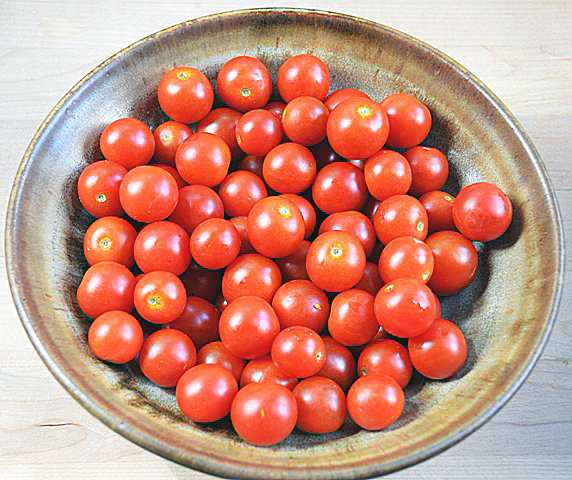
         Sweet 100’s are a delicious pop in your mouth treat!

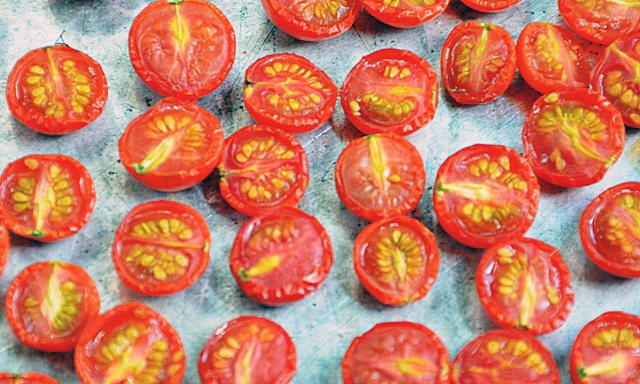
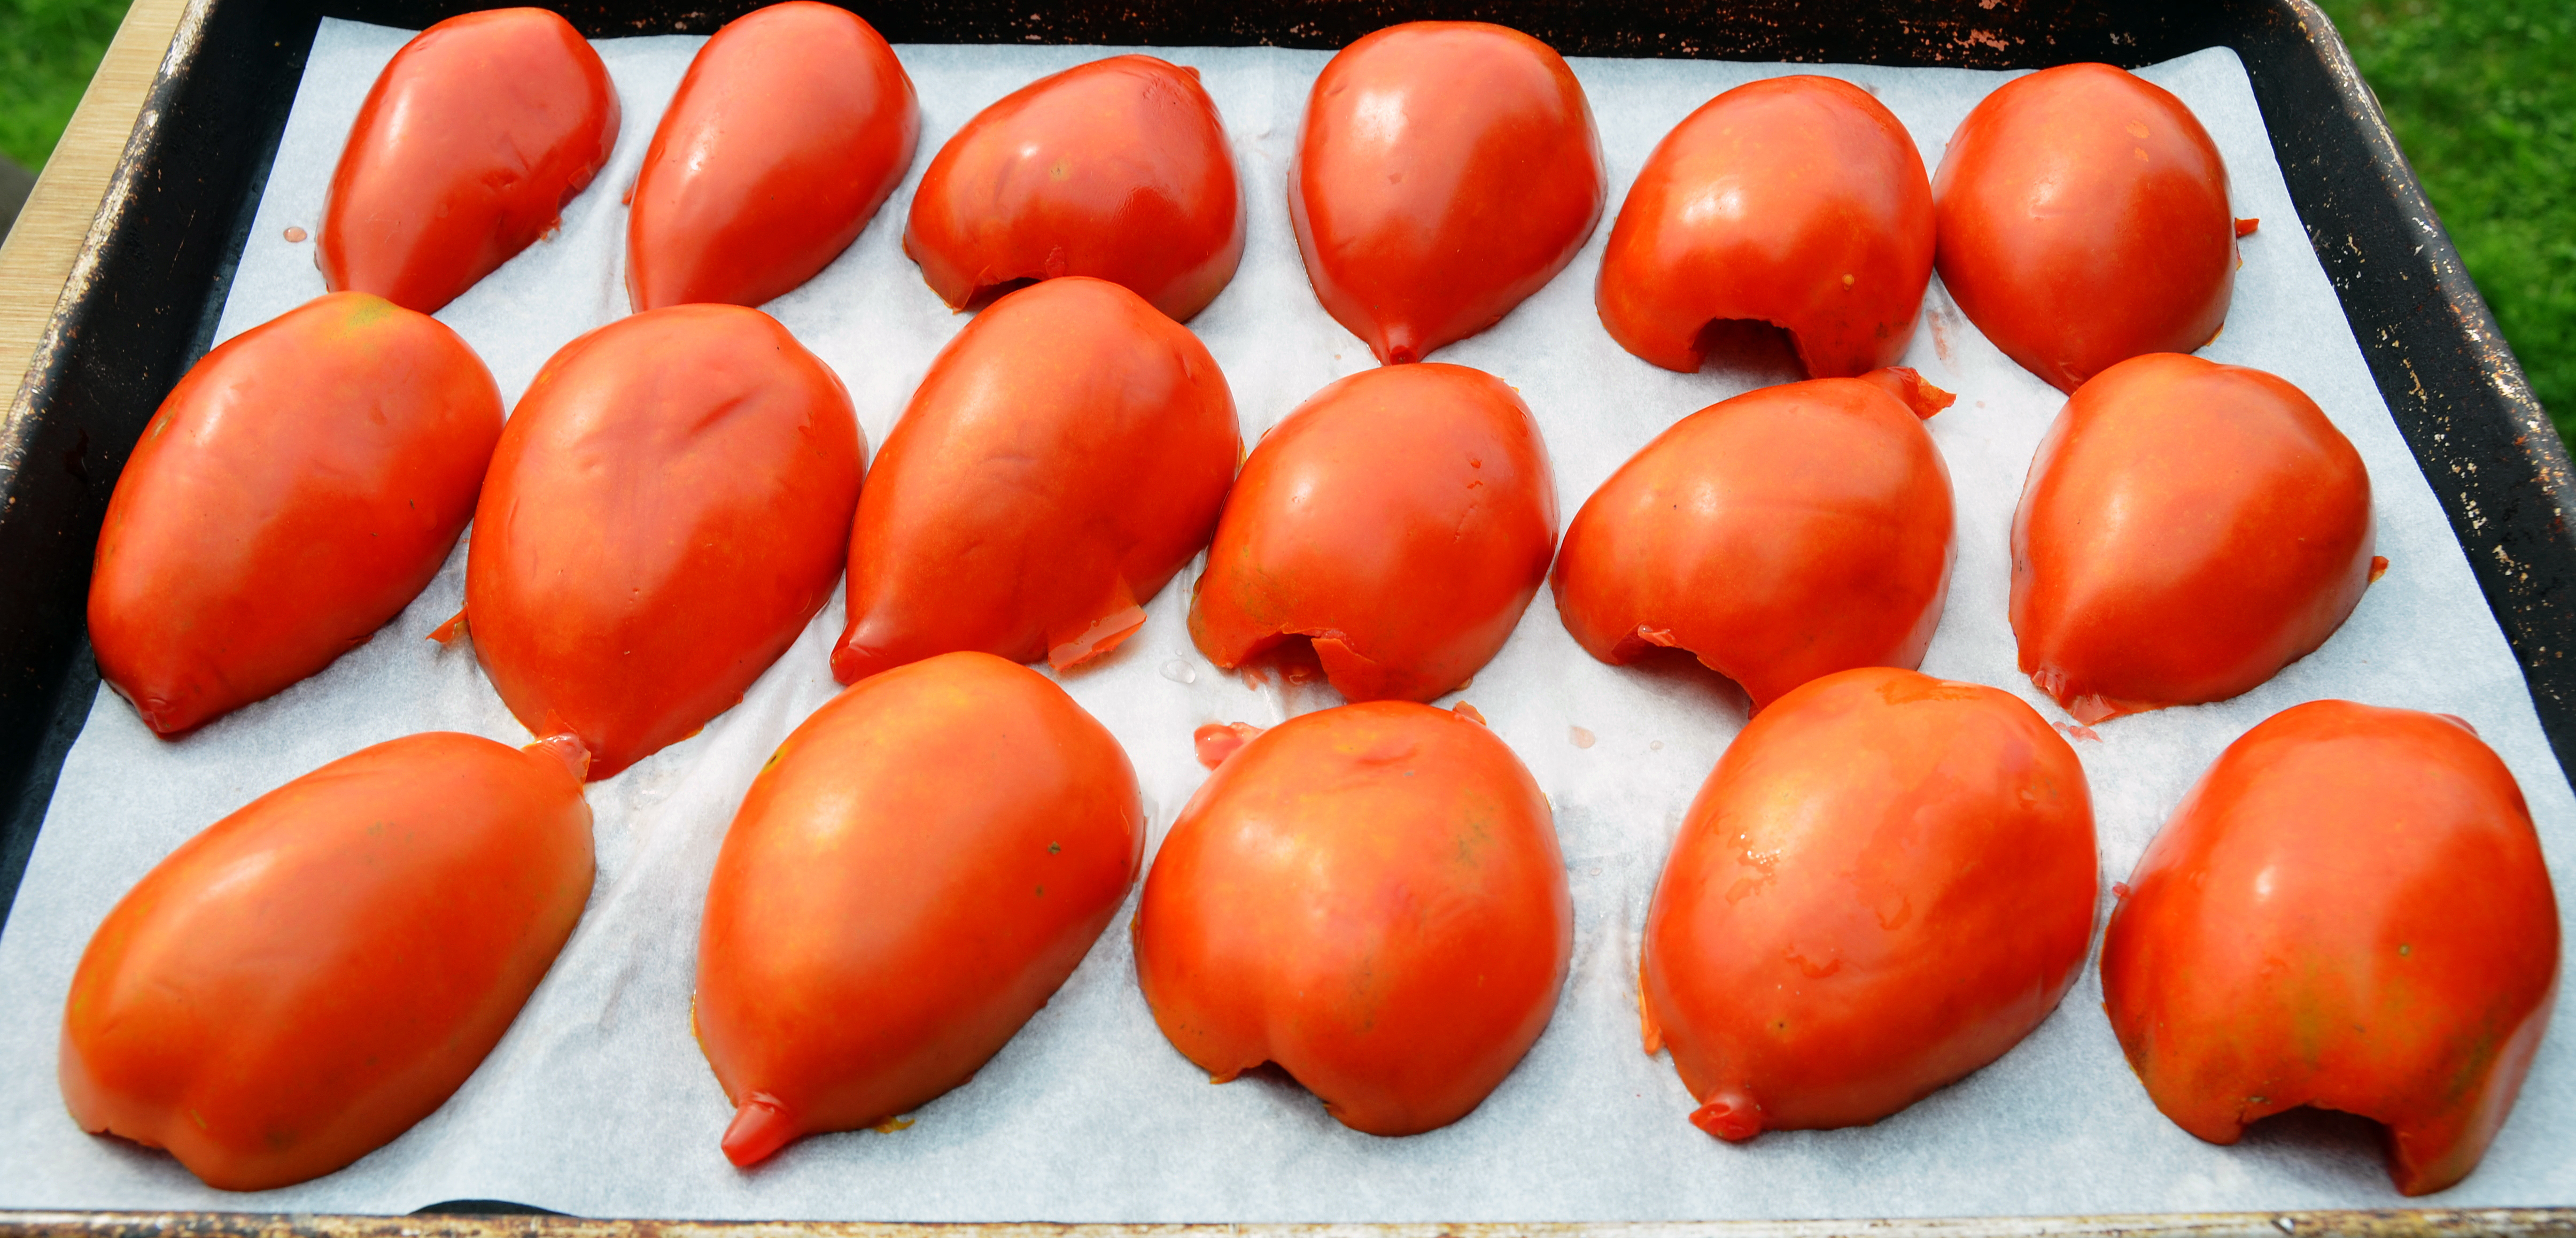
 Roasting the tomatoes cut side up helps the liquid to evaporate and intensifies the flavor.


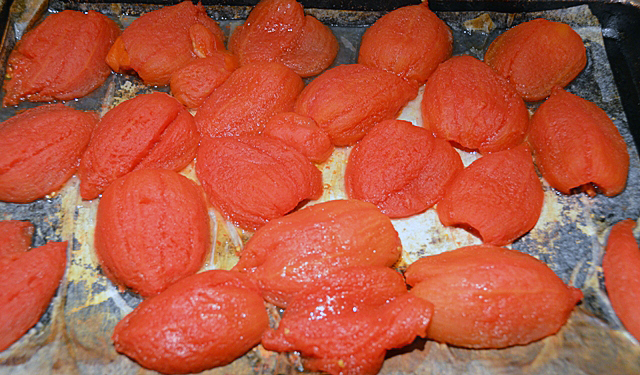
The tomatoes after one hour of roasting.

August 21, 2012 Roasting Tomatoes

One of the joys of gardening is the abundance of produce and one of the sometimes frustrating things about gardening is the abundance of produce. If only I could spread the harvest over a longer period of time.Since I can’t, I have found some ways to enjoy summer’s bounty all year long.
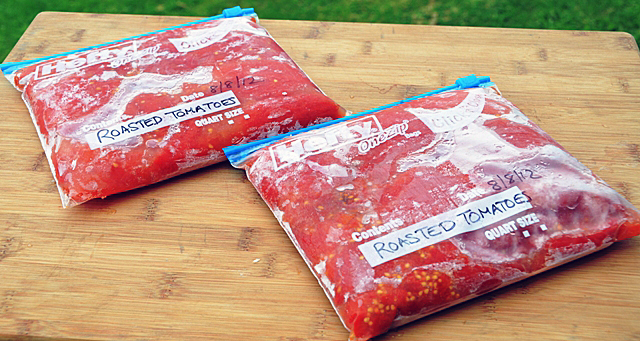
Take tomatoes for example. You wait and wait for the blush on the first fruit and then it happens. Bins and bins of tomatoes on the vine to be picked. When I was catering I canned copious amounts of spicy tomato sauce throughout the summer. I used the sauce through the year for parties and other events in lasagna and other pasta dishes. For several years I have been roasting tomatoes in the oven and freezing them in quart-sized bags. These are not sun-dried, they are juicier with a more concentrated flavor. They are a more versatile product that can not only be used in pasta dishes, but chili, soups and other dishes where a 28 ounces can of tomatoes is needed.
The procedure begins with the harvest. I like Romas best, but any variety can be roasted. I find the Roma exude less liquid than other varieties. I don’t put any additional seasoning on the tomatoes, that can be done when the tomatoes are cooked in the finished product.


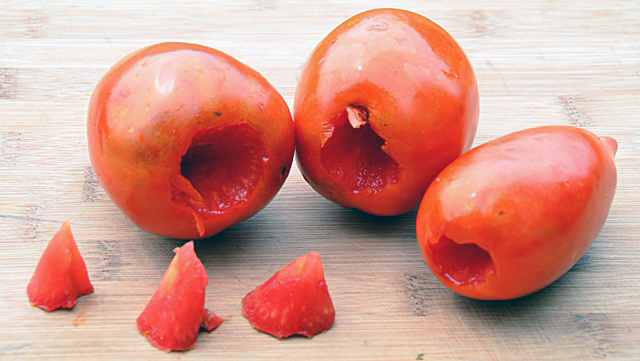
 After the tomatoes are washed, use a small knife to cut out the core of the tomato.

  Cut tomatoes in half and place cut side down on parchment lined baking sheets that have a one inch rim to collect the juices that will accumulate during the cooking process. Parchment paper will not eliminate clean up but will make it easier.


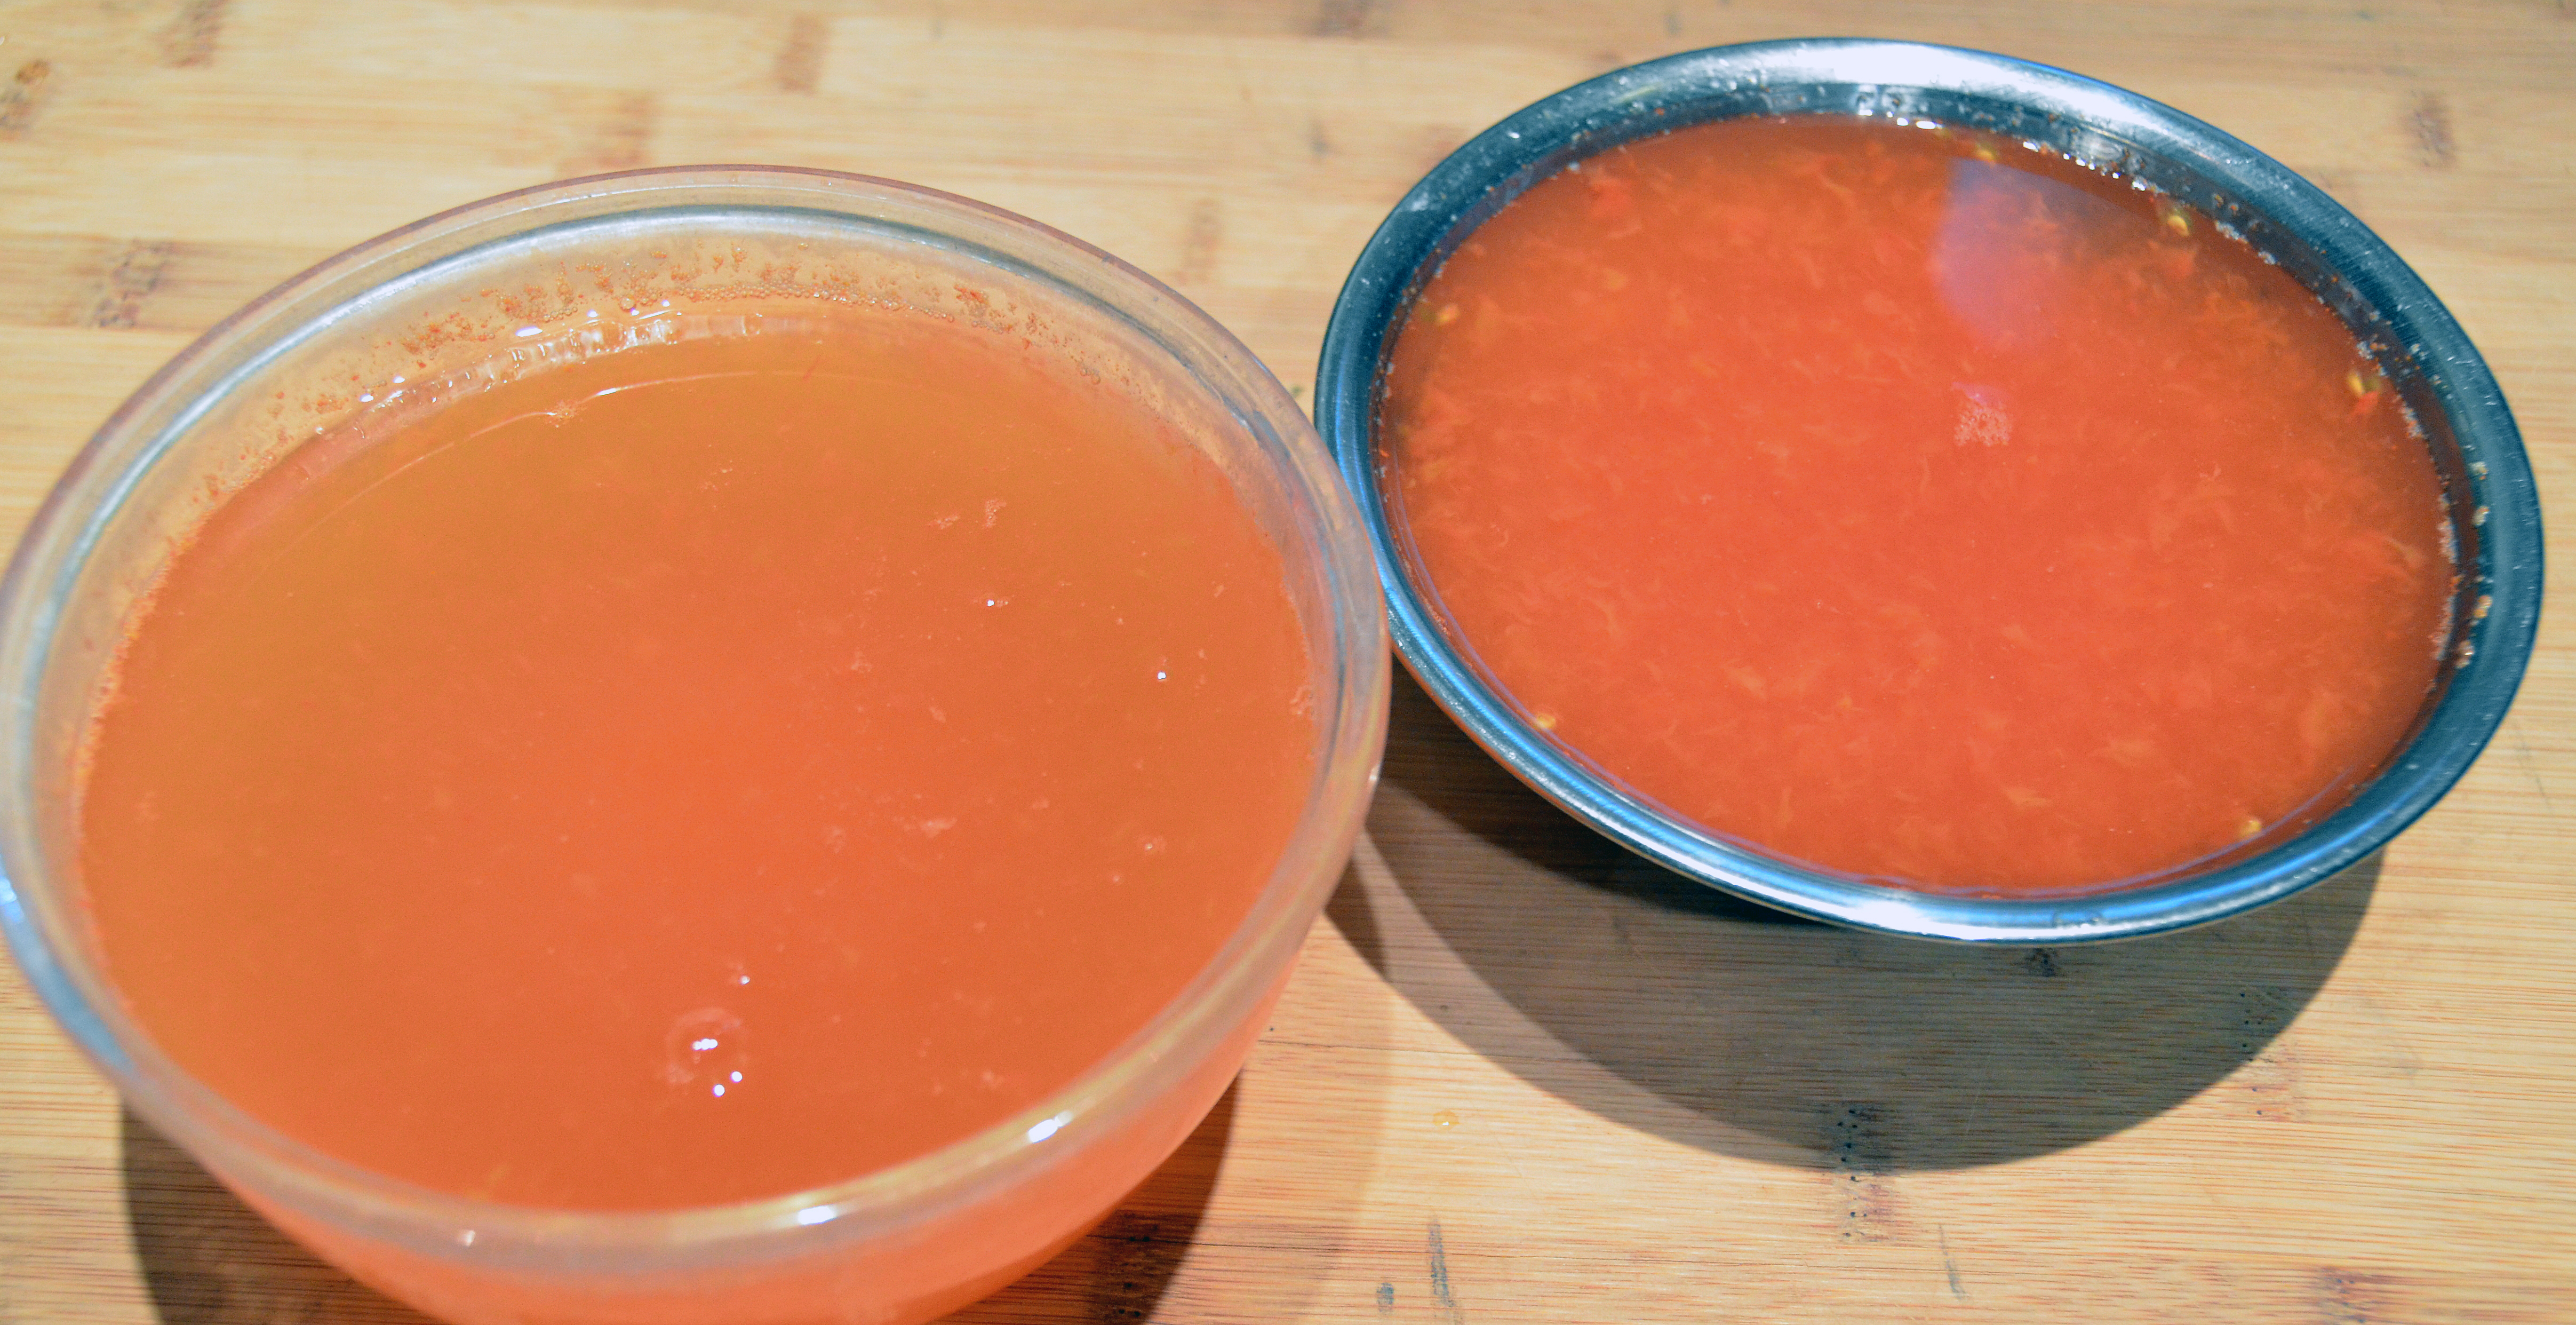
 Roast tomatoes in a 450F oven for about 10 minutes or until the skin starts to shrivel. Carefully remove skins (without burning your fingers!) and pour any accumulated juices into a bowl. Return tomatoes to oven to allow them to cook down more. Pour off any additional juice.

 Lower temperatue of oven to 375F and continue cooking until tomatoes have released most of their moisture, another 10 to 15 minutes.

 The liquid exuded from the tomatoes isn’t the prettiest, but it is the tastiest tomato juice you will ever drink!

 When tomatoes have cooled, transfer to quart-sized freezer bags. Freeze flat for easy stacking.

August 14, 2012 Mediterranean Eggplant and Barley Salad


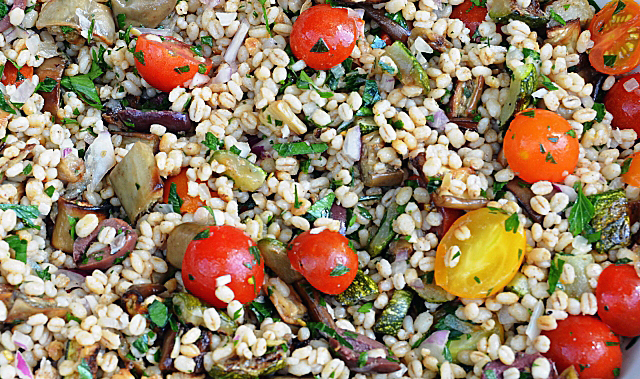
My daily trips to the vegetable garden are a weight-lifting exercise these days. An abundance of tomatoes and eggplant has me scrambling to find new ways to use our bounty.  A grain salad that uses fresh vegetables and herbs is just what we needed to serve along with grilled chicken. A great make-ahead dish, nutty, nutritious barley is combined with seasonal vegetables and a lemony dressing. What starts out as looking like too much zucchini and eggplant is tossed with olive oil and cooks down to toasty little cubes that contrast nicely with the creamy barley. Aromatic spices and shallots are toasted in olive oil before the barley is tossed into the mix and it will have your kitchen smelling wonderful. This would be a great vegetarian entree, just substitute vegetable broth or water for the chicken broth. Not only does the salad taste great, barley is often touted as a “superfood”. Rich in fiber, niacin and thiamine it also helps lower blood cholesterol levels.
I did make some changes to the original recipe. I did not use extra virgin olive oil to toss with the eggplant and zucchini or in the barley preparation. I prefer to use extra virgin olive oil when it is not cooked and you are tasting the oil, as in a vinaigrette dressing. I substituted the more subtle shallots for scallions when cooking the barley. I chopped rather than sliced  the red onion because I preferred the way it looked.  I used a combination of cherry tomatoes from our garden, Sun Gold, Yellow and Sweet 100s. They are small enough that they only needed to be halved, not quartered as you would with a larger variety of cherry tomato. I eliminated the mint, mostly because my husband isn’t a fan, but also mint seems to permeate a cold salad and takes over the dish. The accompaniment to the salad was ricotta salata, in thin slices. Were you supposed to crumble it over the dish? I didn’t feel it was necessary, but some feta crumbled on top might be a nice addition.

Mediterranean Eggplant and Barley Salad

adapted from Gourmet magazine and the Epicurious website

Serves four as a main dish, eight as a side dish

Ingredients

For the vegetables

  • 1 1/2 lb eggplant, cut into 1/2 inch cubes
  • 1 1/2lb zucchini cut into 1/2 inch cubes
  • 5T olive oil (more if needed)
  • 3/4t salt
  • 3/4t fresh ground pepper

For the barley

  • 2T olive oil
  • 3/4 c chopped shallot
  • 1 1/2t ground cumin
  • 1/2t ground coriander
  • 1/4t cayenne pepper
  • 1 1/4c pearl barley
  • 1 14oz can reduced sodium chicken broth
  • 3/4c water

For the dressing

  • 2T lemon juice
  • 1 garlic clove, minced
  • 1/4t sugar
  • 1/4t salt
  • 1/4t pepper
  • 3T extra-virgin olive oil

For final assembly of the salad

  • 1/2 lb cherry tomatoes quartered or Sun Golds, Yellow and Sweet 100’s halved
  • 1/3c Kalamata or other brine cured olives, pitted and halved
  • 1/2c finely chopped red onion, soaked in ice water and drained if desired
  • 1c chopped fresh flat leaf parsley

Directions

  1. Put oven racks in upper and lower thirds of oven and preheat oven to 425F.
  2. In a large bowl toss eggplant and zucchini with 5T oil, 3/4t salt and 3/4t pepper. Spread zucchini and eggplant on two oiled large shallow baking pans.
  3. Roast vegetables in oven, stir occasionally and switch pan positions halfway through baking, until vegetables are golden brown and tender, 20-25 minutes total. Combine vegetables in one pan and cool, reserving other pan for cooling barley.
  4. Heat 2T oil in a 3-4 quart saucepan over moderately high heat until hot but not smoking. Cook the shallot, cumin coriander and cayenne, stirring, until fragrant, about 1 minute. Add barley and cook until well coated with oil and spices, 2 minutes more. Add broth and water and bring to a boil. Reduce heat and simmer, covered, until all the liquid is absorbed and barley is tender, 30 to 40 minutes. Remove from heat and let stand, covered, 5 minutes. Transfer to the reserved shallow baking pan and spread barley to quickly cool, uncovered, to room temperature, about 20 minutes.
  5. Whisk together lemon juice, garlic, sugar and remaining 1/4t salt, 1/4t pepper and 3T olive oil in a large bowl. Add barley, roasted vegetables and remaining ingredients to bowl with dressing and toss until combined well.

Can be made 1 day ahead and chilled, covered. Return to room temperature before serving.


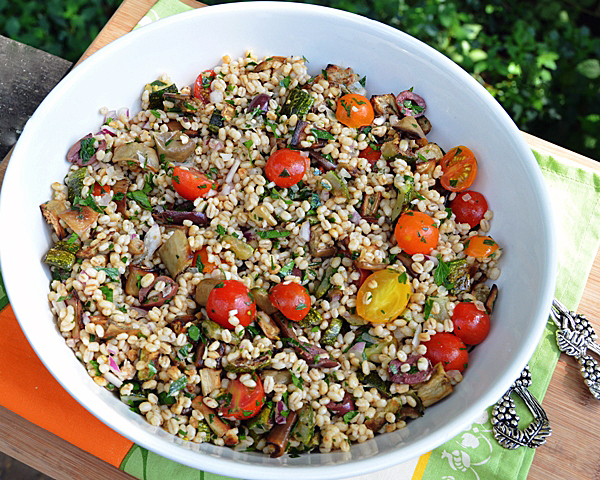
Three colors of cherry tomatoes make this a very colorful salad.


Today’s pick of Globe, Asian Bride and Rosa Bianca eggplants.

August 11, 2012 Cucumber, Red Onion and Feta Salad


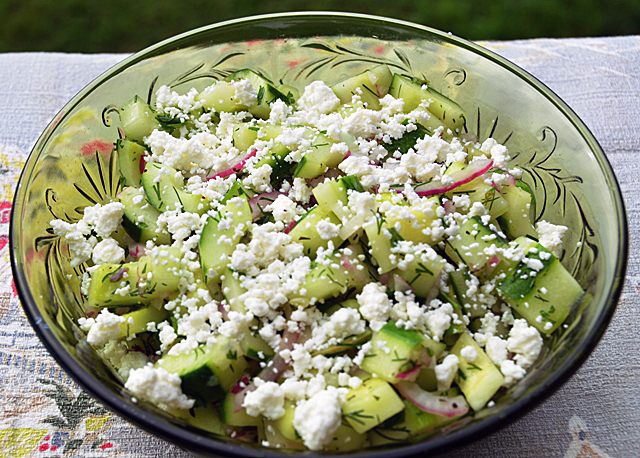
Cucumbers picked right off the vine are a refreshing summertime treat. While the vines are producing more cucumbers than I can handle, I will be making many variations of cucumber salad. The variety that we grew this year was Burpee’s Burpless Sweet.  According to Burpee, burpless cucumbers are bred to contain low or no cucurbitacin,a natural organic compound that causes both bitterness and gives some the susceptibility to “burp” after consuming the fruits. Although cucurbitacin is found mostly in the leaves, stems and roots of the plant, it can also be found in the skin and the light green area beneath the skin. Stressed plants, those that do not receive the proper amount of water, are subject to high temperatures and wide temperature swings, seem to contain more cucurbitacin. So it seems to me that cucumbers would be best grown in a controlled enviroment like a greenhouse. In seasons where I am not growing them I prefer a Kirby-style cucumber that are greenhouse grown. On a positive note, researchers are looking into the anti-cancer properties of cucurbitacin that may inhibit cell development.

 Back to the salad now, I like to leave a small strip of skin for color contrast. Garden or farmer’s market cucumbers are your best choice. Avoid waxed supermarket cucumbers at all costs. Taste your red onion before adding it to the salad. If it is “hot”, a 15 minute ice water soak should take care of that. Cucumbers and dill are a classic combination but you could also use Greek oregano, coriander or even lemon basil. There are several choices for Feta, the classic Greek, but Bulgaria, Israel, France and the United States all make their own Feta cheese. I prefer the French variety which is made from the milk left over in the production of Roquefort cheese. It has a creamier texture and is mild in flavor. Halved cherry tomatoes would be a nice addition to the salad as well.

Cucumber, Red Onion and Feta Salad

Serves 8

  • 3 medium to large cucumbers
  • 1/3 c thinly sliced red onion
  • 1/4c champagne or white wine vinegar
  • 1t sugar
  • 1/4t salt
  • 1/3c thinly sliced red onion
  • 1T or more chopped fresh dill
  • 1/2c crumbled feta cheese or to taste

Directions

  1. Trim ends of cucumbers and peel leaving only thin strips of skin. Cut in half lengthwise, scoop out the seeds if necessary, then cut in quarters again lengthwise. Cut the quartered cucumbers into 1/2 inch chunks.
  2. In a large bowl combine cucumber chunks with thinly sliced onion. In a small bowl combine vinegar, sugar, salt, and dill. Pour dressing over cucumbers and onion and toss lightly.
  3. Sprinkle feta over the salad. Season to taste with fresh ground pepper.


A happy “unstressed” plant!

August 7, 2012 Pasta Salad with Sun Gold Tomatoes, Green Beans and Pesto Dressing

Pasta salad, that ubiquitous summer take along for picnics, barbecues and potlucks doesn’t have to be boring. This particular one was made with fresh ingredients from our garden and a spicy pesto vinaigrette. I picked very sweet and fruity Sun Gold tomatoes and a combination of our second growth of bush beans with the first of the pole beans. I chose penne rigate as the pasta, not just because it was the only acceptable pasta shape we had on hand but the ridges would nicely hold the bits of pesto. The dressing is a slightly deconstructed take on pesto, the toasted pine nuts are added to the salad separately rather than part of the dressing to give the salad some extra crunch. Sun gold tomatoes are a relatively new favorite of ours. They are a tangerine-orange cherry tomato developed in Japan where consumers prefer a tomato that is sweet rather than tart. The recipe is just a canvas to fill in with your own summer ingredients. Choose grilled slices of zucchini, chunks of pepper, cubes of cooked eggplant, or a different variety of tomato. Walnuts would be a good choice to replace the pine nuts and a Grana Padano could replace the more traditional  Parmigiano Reggiano. Just be sure to use freshly grated cheese, not pre grated or the stuff that comes in a green can!

Pasta Salad with Sungold Tomatoes, Green Beans and Pesto Dressing

Created using the Fine Cooking pasta salad recipe maker

Serves eight

Ingredients

For the Vinaigrette

  • 1 1/2 c lightly packed basil leaves
  • 1/2c extra virgin olive oil
  • 1/2 c or more fresh, finely grated Parmigiano-Reggiano cheese
  • 3T red wine vinegar
  • 2T fresh lemon juice
  • 2t  finely chopped garlic
  • 1/2t finely grated lemon zest
  • 1t kosher salt
  • Freshly ground black pepper

For the salad

  • kosher salt
  • 1 lb green, purple and wax beans, trimmed and cut into 2-inch lengths
  • 1/2 lb small chunky pasta
  • 1T olive oil
  • 2 1/2 cups of cherry tomatoes, halved (l love using my Cutco steak knife for this)
  • 3T pine nuts, toasted
  • Freshly ground pepper

Directions for the Vinaigrette

  1. Put the basil, olive oil, Parmigiano, vinegar, lemon juice, garlic and lemon zest in a blender. Blend until smooth. Season with salt and pepper to taste.

Directions for the salad

  1. In a large pot bring 4 quarts of salted water to a boil over high heat
  2. Drop the beans into the boiling water and cook until they are just crisp-tender, about 4-5 minutes. Remove beans from pot with a slotted spoon and place in colander. Rinse with cool water and transfer beans to a baking sheet lined with paper towels to drain and cool.
  3. Return the water to a boil and add the pasta. Cook until al dente, following package instructions. Drain the pasta thoroughly in a colander and transfer to a rimmed baking sheet. Toss the pasta with the olive oil to prevent sticking.
  4. Transfer the cooled pasta to a large serving bowl. Add beans and cherry tomatoes and toss. Add just enough vinaigrette to moisten the pasta, do not over dress. Add the pine nuts and toss again. Let the salad rest for 20 minutes or so to allow the flavors to blend and then taste the salad again. If needed, add a little more vinaigrette, salt and pepper. Grate a little extra cheese on top if desired.


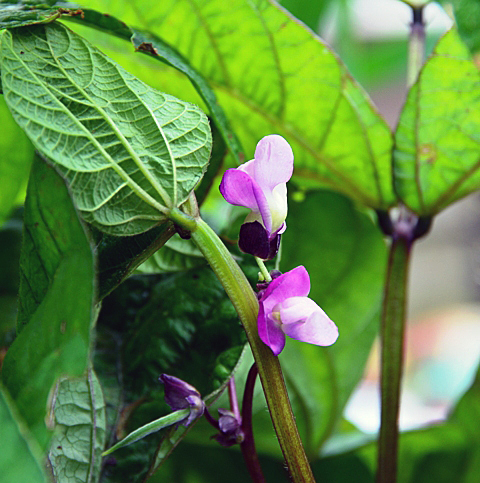
The little green bean at the bottom left of the picture will eventually turn as purple as the blossoms!


Sun Golds at various stages of ripeness.
August 3, 2012 Zucchini “Pasta”

Gardeners, we’ve all done it. You are diligent at first picking zucchini from your garden. For days you happily pluck small to medium zucchini off the vines, sometimes with the blossoms still attached. Then it happens, you get busy doing other things, it rains for several days or you just simply forget. Those compact little fruits are now the size of a major league baseball bat. Well, before you make one more loaf of zucchini bread or sneak it down to the compost pile, I have another idea.

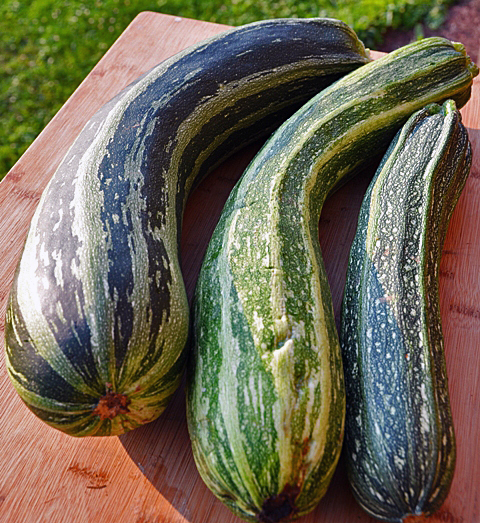
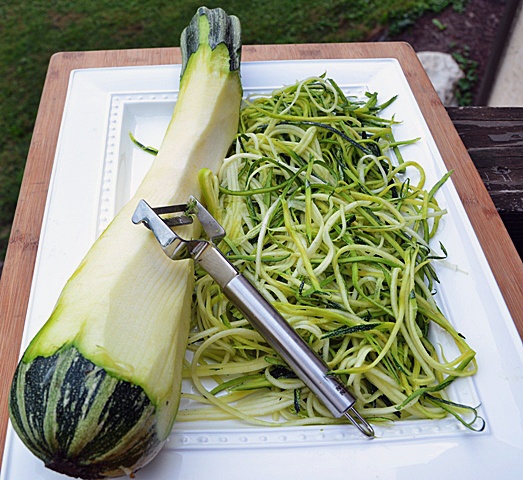
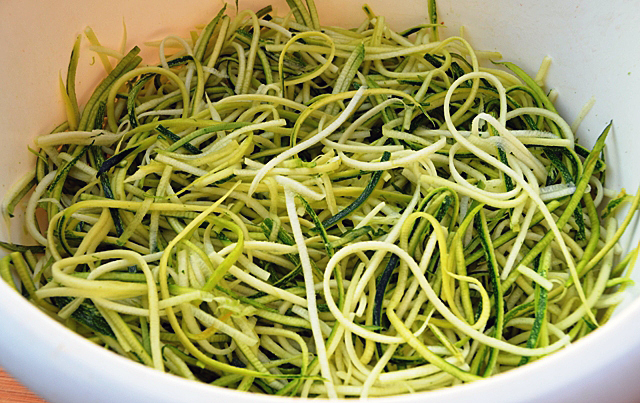
I make something I refer to as “zucchini pasta”. Kuhn-Rikon, a Swiss cookware company has a tool that makes short work of over-sized zucchini. The stainless steel julienne peeler moves effortlessly down the length of the squash. Steady the zucchini with one hand, start at the top, press the teeth of the peeler into the flesh and pull down. You will have the finest Julienne imaginable in no time. Just stop soon enough to avoid the seedy interior. Although all varieties of zucchini work well with this preparation, I especially like the Italian variety Striato d’Italia which translates Italian stripe. When this variety gets bigger, it doesn’t get as fat as other zucchini, it gets longer, making for longer capellini pasta-like shreds. Put your strands into a bowl and separate any that stick together with your fingers. I like to slightly wilt the strands in a saute pan with some olive oil but  they could  be used raw. I like to toss the “pasta” with some pesto and sometimes I will add halved cherry tomatoes, either raw or cooked slightly. You could also pair it with a cooked tomato sauce or just about anything you like on regular pasta.  Don’t just use the julienne peeler for zucchini. Shred carrots and jicama for a slaw or beets for a salad. The possibilities are limitless.

The longest zucchini in this picture is 22 inches!

The julienne peeler makes short work of this zucchini.

Use your fingers to separate any strands that stick together.