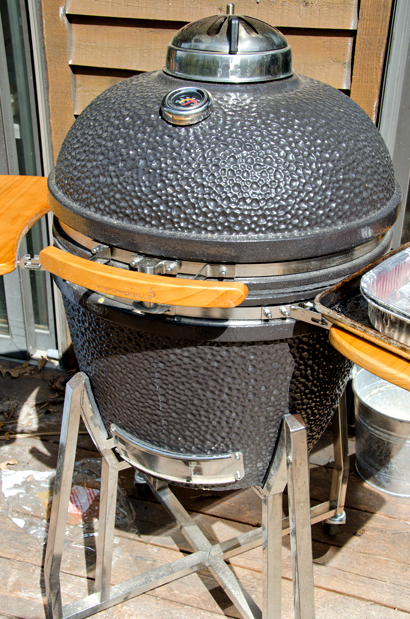
We have been interested in a kamado-style cooker for several years now. The Big Green Egg was the first to catch our eye, but the price plus the accessories had always seemed a bit prohibitive. Last year I spotted a similar cooker at the local Costco but by the time I was able to get Joe to the store, they were all gone. Fortunately this time the grill was in stock and we found assistance to load the 200+ pound grill onto our rolling cart and into the car. Joe was able to get our purchase out of the car in pieces and had it assembled in a relatively short amount of time. With the assistance of a friend, the grill was rolled out on the deck and we were ready to cook.
The mushi (to steam) kamado (cooker, oven or kiln) is based on a Southern Japanese ancient clay cooking vessel. The mushikamado began as a round pot with a domed lid, originally used to steam rice for ceremonial occasions. This versatile cooker was introduced to the United States from Japan after the Second World War by the servicemen who brought them home. An enterprising American pilot began manufacturing the grills in the 1960’s and shortened the name to kamado. A damper and draft-door were added to bring temperature control to the device and the cooking fuel has changed from wood to charcoal. The cookers that once were made of extremely temperature sensitive clay are now constructed with a variety of materials including high-fired ceramics. Ceramic material provides excellent heat retention and more efficient fuel burning. Kamados can achieve consistent temperatures, as low as 225°F and as high as 750°F. and can hold heat for long periods of time. What started as a ceremonial rice cooker has evolved into a multi purpose cooker that smokes, bakes, roasts and slow cooks.
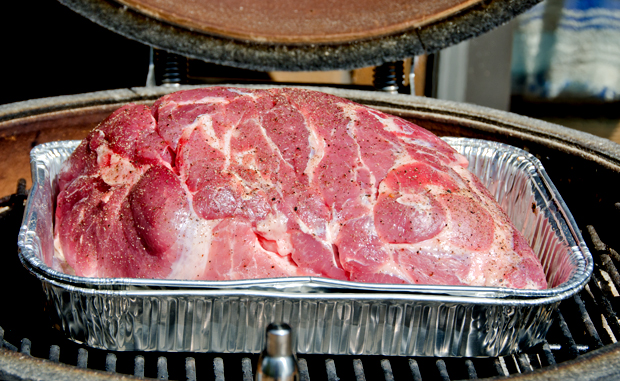
We are still in the process of learning the nuances of the kamado. We revisited a favorite that we usually cook in the oven, a slow roasted pork shoulder. The original post is here.
Our new kamado-style grill.
The pork, seasoned simply with salt and pepper, ready for the grill.
The pork shoulder after several hours of cooking.
Tender, after four hours of cooking
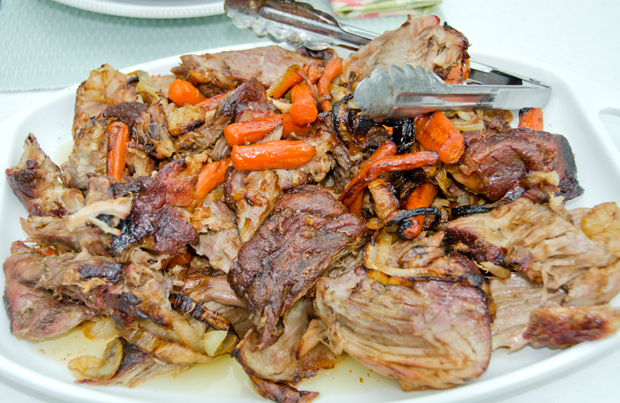
The pork is broken into chunks and onion, garlic and carrots go into the roasting pan. It cooks for one more hour.
The finished dish, we served it with scalloped potatoes, white beans with garlic oil, grilled asparagus and red peppers.
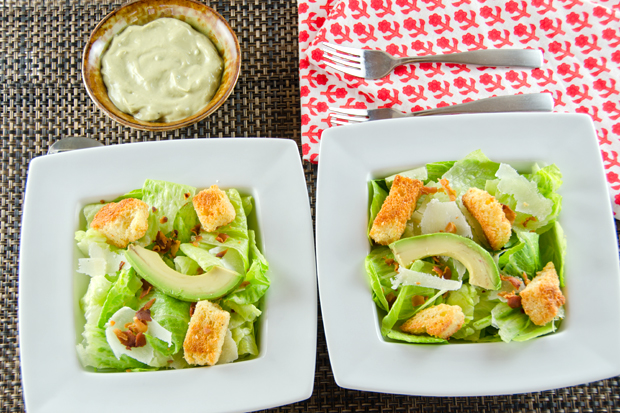
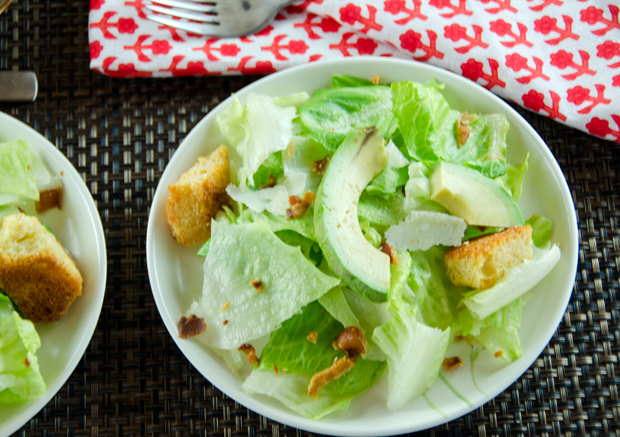
Meat loaf was on the menu for dinner one evening this past week so I decided to go a little retro with the salad as well and made a Caesar salad. By now many have heard the story of Caesar Cardini, Italian by birth, he immigrated to the San Diego area after the first World War. Caesar ran a restaurant just over the border in Tijuana Mexico avoiding the restrictions that Prohibition brought.
Caesar salad originated on a busy fourth of July weekend in 1924 when hungry diners depleted his kitchen’s resources. Mr Cardini was said to have concocted the first Caesar salad with ingredients he had on hand. A dramatic tableside preparation is what set this simple recipe apart. Of course there are other claimants to the recipe, including family members and staff who disputed his version of the story for years. Caesar salad soon became popular with the Hollywood set and British royalty. Even Julia Child had the salad as a teen and she recounts watching it made by Caesar himself in her book In Julia Child’s Kitchen.
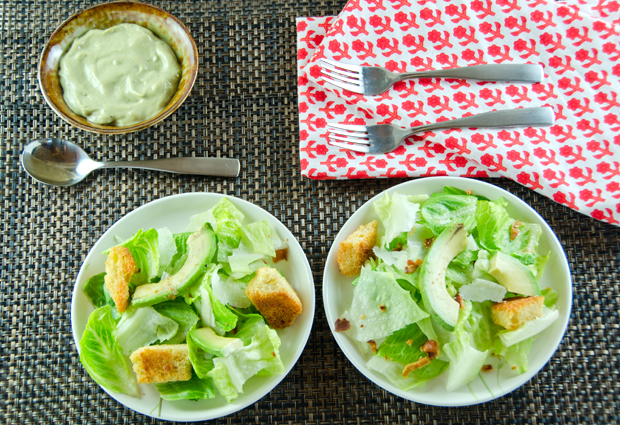
The original recipe is very basic, Romaine lettuce, a simple vinaigrette, Parmesan cheese and croutons. So anchovy haters take heart, you can claim that you are a Caesar purist. In my preparation I gave a nod to the Mexican origins of this dish by adding avocado in both the dressing and the finished salad. Avocados are native to central Mexico and were introduced to the United States in the late nineteenth century. Avocados are a powerhouse of nutrition providing amino acids, fiber, potassium, vitamin E, and B vitamins. Yes they are high in fat, but it is a healthy fat, oleic acid that boosts HDL levels. Haas or Hass? That was the burning question in my mind. For years I have seen the most readily available variety of avocado spelled both ways. Hass is correct, named for the postman who first planted the variety, Rudolph Hass.
In a traditional Caesar a raw egg is an important ingredient because of the creamy texture it gives the salad. Wanting to avoid the raw egg altogether, I remembered a Martha Stewart recipe I used in my catering days. A tablespoon of good quality mayonnaise was substituted for the raw egg yolk. To enhance the lemon flavor I used a Sicilian lemon balsamic vinegar from The Tubby Olive. A combination of lemon juice and a regular balsamic could fill in here. Infusing olive oil with garlic is fairly easy. Bring about a quarter cup of olive oil and several cloves of garlic to a simmer over low heat. Turn off the heat, cover and allow the oil to pick up the garlic flavor, fifteen minutes or more. Strain and cool before using. Croutons are a major player in the recipe and I didn’t want wimpy ones from sliced bread so I tore pieces from part of an unsliced loaf I had in the freezer. Make your croutons as close to serving time as possible. The crispy croutons are a nice contrast to the creaminess of the avocado and the dressing. The original Caesar was to be eaten with the hands, the Romaine leaves were left whole and presented on the dish, stem end out. I prefer to eat my salad with a fork so I tore the greens into bite-sized pieces. Make this into a light entree by adding grilled chicken or shrimp.
Avocado Caesar Salad
Serves four
Ingredients
1 head of Romaine lettuce, rinsed, spun dry and cut into bite-sized pieces
Avocado Caesar dressing (recipe follows)
Garlic croutons (recipe follows)
4-6 slices of pancetta, cooked until crispy, crumbled
Parmesan cheese
1 avocado, sliced
Ingredients for the dressing
1 medium ripe avocado, peeled and pitted
2 minced cloves of garlic
1/4c mayonnaise
1T fresh squeezed lemon juice
1T Worcestershire sauce
3T Sicilian lemon balsamic vinegar
3T extra virgin olive oil
Water to thin out mixture
Directions for Dressing
Combine the dressing ingredients in the bowl of a food processor or a blender and blend/pulse until creamy. You will need to scrape down the sides with a spatula several times during this process.
Add water as needed to thin it out. Taste for seasoning and add salt and freshly ground pepper as needed. Remember the pancetta and Parmesan will add saltiness to the final salad.
Transfer to a bowl and set aside.
Ingredients for the croutons
1 day-old baguette or other unsliced bread
Garlic olive oil or olive oil and garlic powder or olive oil that has been infused with garlic
Kosher salt
Directions for the croutons
Preheat oven to 375°F.
Remove crusts from bread and tear into irregular pieces, about 2 inches in size.
Place bread cubes in a large bowl and toss to coat with oil. Sprinkle lightly with salt; arrange in a single layer on a rimmed baking sheet.
Bake until golden and crisp, tossing with spatula half way through the baking process to insure even browning, about 10 minutes.
Final assembly of the Salad
Place Romaine in a large salad bowl. Add a small portion of the dressing and toss well to coat. You can serve additional dressing on the side for those who want more.
Toss with croutons and crumbled pancetta.
Top each serving with a slice or two of avocado, Parmesan shavings and fresh ground pepper.
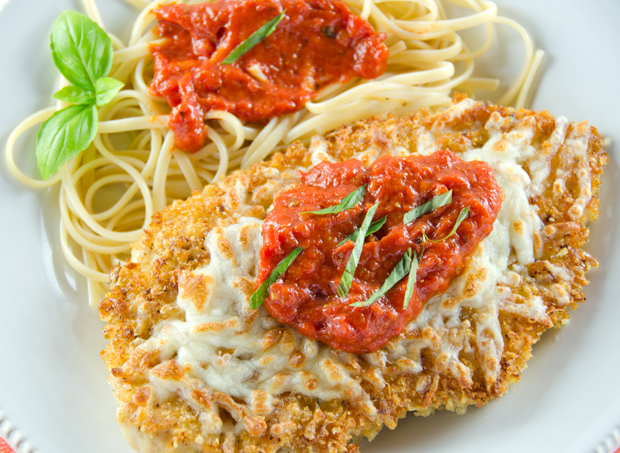
What’s in a name? Sometimes a bit of confusion. You might think a dish with the name Parmesan originated from the city of Parma in the northern Italian region of Emilia- Romagna . Well you would be wrong. Both the island of Sicily and southern region of Campania claim the origins of this dish. There it is known as Parmigiana di Melanzane or Parmesan of Eggplant because of the prominence of Parmigiana-Reggiano in the dish. Author Mary Taylor Simeti offers another interesting explanation in her book, “Pomp and Sustenance: 25 Centuries of Sicilian Food”. Sicilians thought that their local dish of sliced eggplant layered with tomato sauce and caciocavallo cheese was originally Melanzane alla Palmitiana. Palmitiana means shutter in Sicilian and refers to the layered louver-like pattern of eggplant slices. It is said that Sicilians have a difficult time pronouncing the letter “l”, so the dish became known as parmigiana.
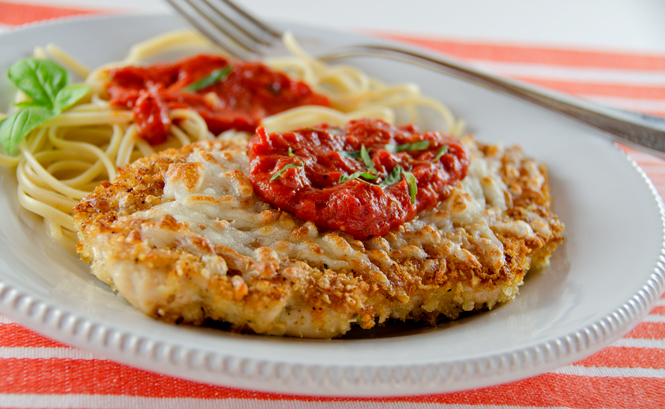
Whatever the explanation, Cooks Illustrated offered their second version of Chicken Parmesan in their March/April 2013 issue. It is a lighter version of the Italian classic. I used my own roasted tomatoes that I froze last summer to make a very simple but flavorful sauce. In the Cooks Illustrated recipe the breast cutlets are sliced horizontally, I like to pound mine to an even thickness. The chicken has a light coating of panko crumbs, herbs and Parmesan cheese. Always buy real Parmigiano-Reggiano not the green powdered stuff in a can.
When Cooks Illustrated did their first redo of this classic fifteen years ago in 1998 they suggested using panko bread crumbs, not widely available at that time. Then you could only get them in Asian markets or by mail order. Now every supermarket and big box store carries panko. Even Emeril has his own brand. Panko differs from other bread crumbs because it is processed into flakes, not crumbs. Flakes result in a broader surface area when frying and gives the finished product a lighter crispy coating. A sprinkling of mozzarella and fontina and the chicken goes under the broiler to finish.Only two tablespoons of the sauce top the finished cutlet That way all the components maintain their integrity; the chicken is juicy with a nice crispy crust, the sauce complements without overwhelming and there is just enough creamy melted cheese to coat it . The recipe makes plenty of sauce so be certain to cook some pasta to enjoy it with the chicken.
Chicken Parmesan
Adapted slightly from Cooks Illustrated #121
Serves four
Ingredients for sauce
1T olive oil
2 minced garlic cloves
1/2t dried oregano
Pinch of red pepper flakes
1 (28oz) can crushed tomatoes (I used 2 quart bags of roasted tomatoes)
1/4t sugar
2T chopped fresh basil
Directions for sauce
Heat the olive oil in a straight sided sautepan over medium high heat until just shimmering.
Add garlic, 1t salt, oregano and pepper flakes, cook, stirring occasionally until fragrant, about 30 seconds.
Stir in tomatoes and sugar, increase heat to high and bring to a simmer.
Reduce heat to medium-low and simmer until thickened, 20-25 minutes. Since I use my own tomatoes this is the point where I put the tomatoes through a food mill to eliminate the seeds and give the sauce a smooth texture.
Off heat, stir in basil. Season with salt and pepper to taste. Cover and keep warm.
Ingredients for the chicken
4 boneless, skinless chicken breasts, 4-6 oz each, pounded 1/2 inch thick
1t kosher salt
1/2c shredded whole milk or part-skim mozzarella cheese
1/2c fontina cheese
1 large egg
1T all-purpose flour
3/4c freshly grated Parmesan cheese
1/2c panko bread crumbs
1/2t garlic powder
1/4 t dried oregano
Freshly ground black pepper
1/3c vegetable oil
1/4c fresh basil, julienned
Directions for the Chicken
Sprinkle each side of the cutlets with 1/8 t of salt and let stand at room temperature for twenty minutes.
Combine the mozzarella and fontina cheese in a bowl. Set aside.
Adjust oven rack 4 inches from the broiler element and heat broiler.
Whisk egg and flour together in a shallow pan until completely smooth.
Combine Parmesan, panko, garlic powder, oregano and a grind of fresh pepper in a second shallow pan.
Pat the chicken dry with paper towels. Working with 1 cutlet at a time, dredge cutlet in egg mixture. Allow excess to drip off.
Coat the cutlets in the Parmesan mixture, pressing gently so crumbs adhere. Transfer to a large plate.
Heat oil in a 10-inch nonstick skillet over medium high heat until shimmering. Carefully place two of the cutlets in the skillet and cook without moving them until bottoms are crispy and golden brown, 1 1/2 to 2 minutes. Using tongs, carefully flip cutlets and cook on second side until golden brown, 1 1/2 to 2 minutes. Transfer cutlets to a paper towel lined plate and repeat with remaining cutlets.
Place cutlets on a rimmed baking sheet and sprinkle cheese mixture evenly over cutlets. Broil until cheese is melted and beginning to brown, 2-4 minutes. Watch carefully! Transfer chicken to serving platter and top each cutlet with 2 tablespoons sauce. Sprinkle with basil, serve immediately, passing remaining sauce separately.
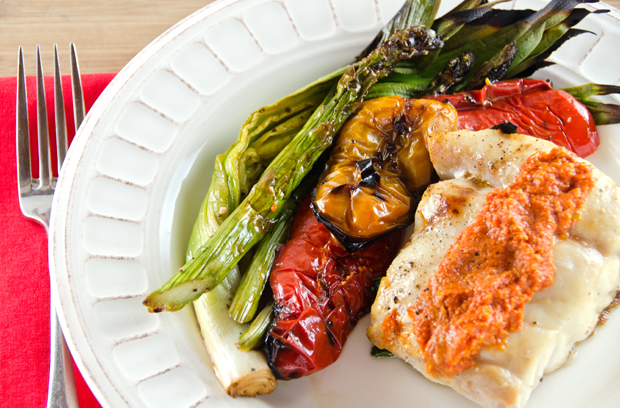
Versatile, that’s a word that accurately describes Romesco sauce. This rich, vibrant condiment is from the coastal town of Tarragona in northeastern Spain. It’s origin is often credited to the local fishermen who added it to seafood dishes. Authentically made with dried Spanish Nora peppers, most of the recipes I consulted used fresh or jarred roasted peppers. As with many traditional sauces, there are many variations on the recipe. My version combines roasted red peppers, almonds, some toasted bread, tomatoes, sherry vinegar and smoked paprika. These traditional Mediterranean ingredients are transformed into a luscious sauce that complements a wide variety of dishes. Romesco sauce can be served as a sauce with chicken, fish or grilled vegetables. It can be tossed with pasta, layered on a sandwich or used as a dip for crudites.
Romesco is a thick sauce, like pesto, and like pesto it is traditionally made with a mortar and pestle but a food processor brings it together in no time at all. If it were late summer I would be using my own roasted peppers, instead I used spicy and sweet piquillo, or bird’s beak peppers that also originate from northern Spain. Be sure to toast the almonds to enhance their nutty flavor, Spanish Marcona almonds would fill in nicely too.
Romesco sauce plays a part in a festival in northern Spain called Calcotada. It is an early spring event that celebrates the harvest of calcots, slender onions similar to baby leeks. After the calcot harvest, community festivals are held where the onions are grilled along with meat and other vegetables on outdoor barbecues. Once charred, the onions are wrapped in newspaper to steam and finish cooking. The not so proper way to eat a calcot is to put on a bib, pull back the blackened exterior, dip it in Romesco sauce, tilt your head back and pop the onion in your mouth, sword-swallower style. We don’t have calcots in our garden, but Joe was able to harvest some of last season’s leeks before they had a chance to go to seed. He grilled the leeks along with some asparagus and peppers to accompany our meal. I topped grouper with this sauce, but other firm fleshed white fish such as monkfish or mahi-mahi would work as well.
My first experience with Vietnamese food was in the late eighties when I accompanied my husband to a conference in Houston Texas. Using what is now an almost extinct method, (the phone book) I was fortunate to contact a dear friend from college, Hue, who was living in the area. In the BF (before Facebook) years it was good to reconnect and catch up in person after almost ten years.
Hue’s parents served in the Peace Corps and part of her childhood and teenage years were spent in Southeast Asia and Africa. That’s where she developed a palate for what were then considered exotic cuisines. Hue had settled in the Houston area and was teaching elementary school with a predominately Spanish speaking population. I don’t even think she spoke Spanish in college, but that’s another story. She knew we appreciated good food and took us to one of her favorite restaurants. They served a cuisine that she thought we were probably not familiar with, Vietnamese. I was only beginning to explore Thai food at that time, I wasn’t familiar with Vietnamese cuisine at all. As it is with our friend from China, you get special attention from the restaurant staff when you can order your meal in their language. Hue spoke Vietnamese (of course) and we enjoyed a wonderful family style meal with dishes and flavors that I had never experienced before.
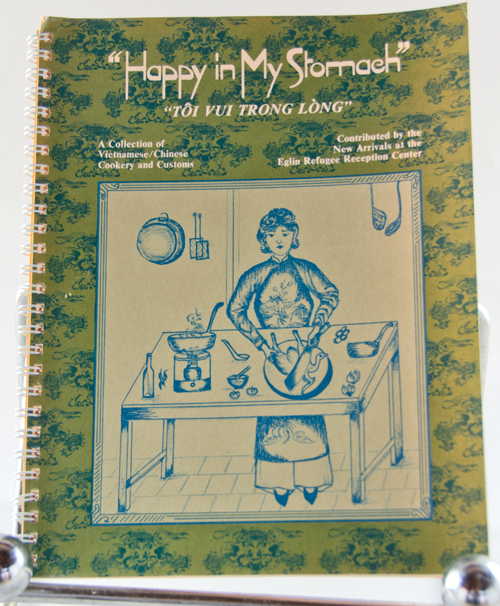
Before we left Houston, Hue gave me a spiral bound cookbook, “Happy in My Stomach”. The phrase “happy in my stomach” is the Vietnamese equivalent of the American expression of a “happy heart”. The book, written in 1975 was a compilation of recipes and customs contributed by Vietnamese emigres and compiled by YMCA refugee services at the Eglin Refugee Reception Center. The intention of the book was to build a bridge through cooking between the Vietnamese and American cultures. I would imagine it was the first English language Vietnamese cookbook. I added it to my growing cookbook collection, but didn’t really use it .
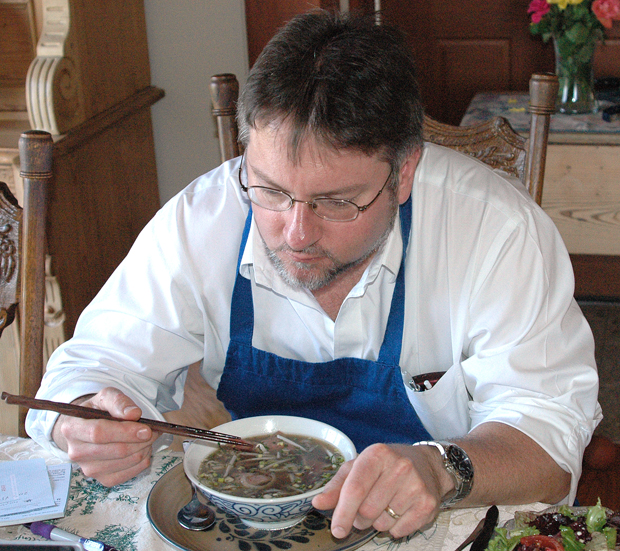
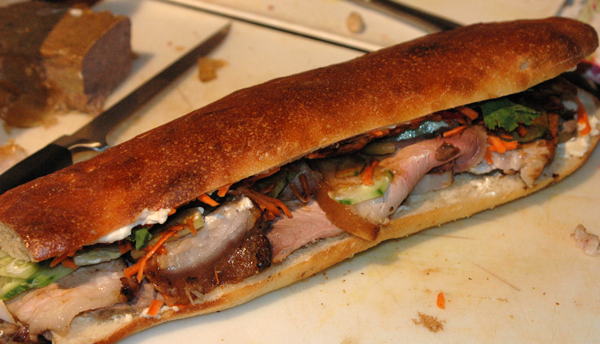
Fast forward ten years and there were now a growing number of Vietnamese restaurants in our area and many new cookbooks written that were devoted to Vietnamese cooking. We were also growing some Vietnamese herbs like rau ram in our garden.To learn more about Vietnamese cooking, I decided to cook my way through some of the more popular Vietnamese recipes I had accumulated. I tried my hand at Pho (phuh to say it correctly), both chicken and beef, rice paper rolls, and the Vietnamese “hoagie” banh mi, making my own roast pork, pate and rolls.
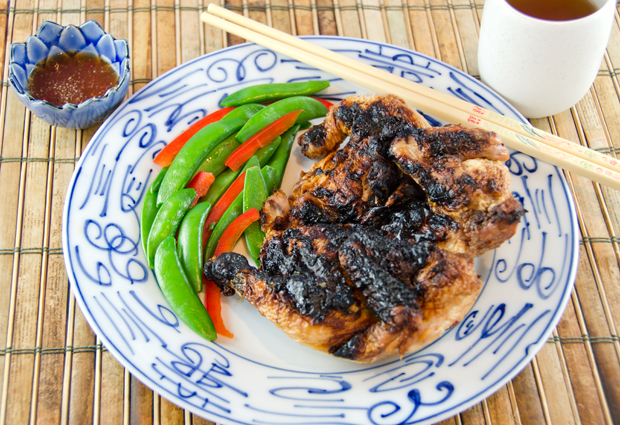
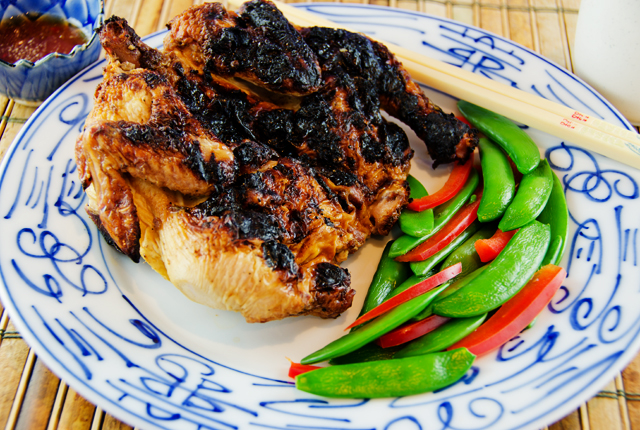
In addition to cookbooks and magazines, I have notebooks with recipes I have collected from other sources. Some I might try once, others become a regular in my cooking repertoire. The recipe for Barbecued Vietnamese five-spice Cornish game hens is a recipe I first tried over five years ago and one we still enjoy to this day. It’s a variation of Ga Roti or Vietnamese rotisserie chicken. The birds marinate overnight in a flavorful mixture of herbs and spices. Grilling the hens gets the skin nice and crispy and the meat stays juicy. The game hen is an individual portion, whether you eat it all, or save half for lunch the next day. Cornish game hens are not actually a game bird but a breed developed in the fifties that produced a larger, more broad breasted chicken at a younger age. They are not very expensive but the cost conscious could substitute chicken thighs. The dipping sauce, nuoc cham really makes the dish special. The flavor combination of sweet, sour, salty and spicy adds another dimension of flavor to this dish. Use your fingers to dig in and appreciate every succulent bite.
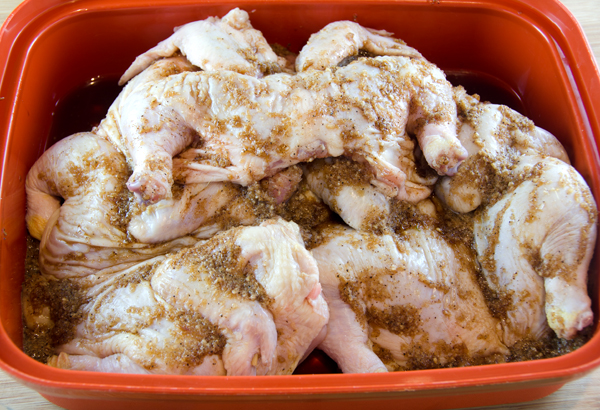
Halve the hens through the breast. This is easy to do with kitchen shears or a very sharp knife. Flatten the breast with the palm of your hand.
In a food processor, mince the garlic, shallots (or green onion) and sugar. Add the salt, pepper, five spice powder, fish sauce, soy sauce and sherry. Pulse to combine ingredients thoroughly. Pour the mixture over the hens. Cover and refrigerate for at least 2 hours or overnight.
Prepare a fire in a barbecue. Let the coals burn down to medium-hot. Set the hens skin side down on the rack and grill over medium hot coals for 15 minutes. Turn and grill for 15 minutes longer, or until they are thoroughly cooked and the skin is crisp and browned. Serve with nuoc cham dipping sauce.
Nuoc Cham Dipping Sauce
Makes 3/4 cup
Ingredients
2 garlic cloves
1 or 2 chile peppers, I used serrano
1T sugar
3T fish sauce
2 1/2T fresh lime juice
4T water
Directions
In a food processor, combine garlic, chile pepper and sugar into a paste. Transfer the mixture to a bowl and add the fish sauce, lime juice and water. Stir to blend. Let the mixture sit for at least 15 minutes until ready to serve. Serve in dipping bowls.
The hens benefit from an overnight marinade in soy and other seasonings.Time to dig in!
Enjoying a bowl of pho in 2008.My homemade banh mi, the Vietnamese version of a hoagie.
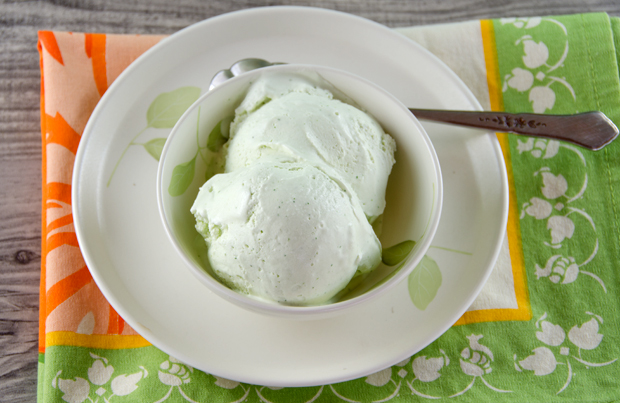
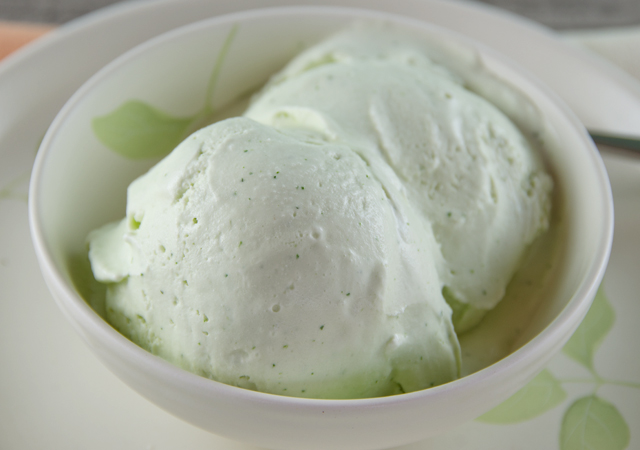
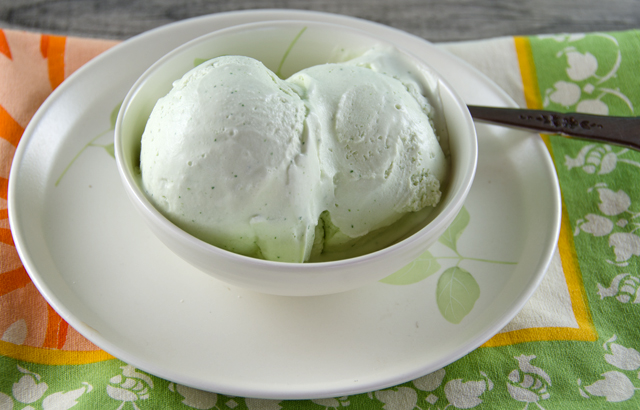
Warmer temperatures this week are letting us know that spring is truly here. Seedlings are poking up and soon we will be picking our first salad of the season. The chervil is thriving and I was looking for another way to use it this past weekend. I have enjoyed the licoricey flavor of anise hyssop ice cream for years, would the delicate flavor of chervil translate into an ice cream? Normally to infuse the flavor of an herb, whether it be anise hyssop, lavender or cinnamon basil, the milk and cream are heated and the herb is steeped off heat for about 30 minutes. The infusion is then strained and then you continue with the next step in the recipe. Chervil is very delicate and loses flavor when heated.
I turned to a method used in the Herbfarm Cookbook. In this recipe, chef Jerry Traunfeld uses a different approach with another delicate herb that loses flavor when heated, lemon verbena. The herb was ground with sugar and stirred into a cooled milk that had been steeped with ginger. I decided not use the ginger since I was concerned about another flavor dominating the chervil. I warmed the cream and milk to a simmer and let it cool to room temperature. Then I added the chervil sugar and let it steep for about a half hour. The mixture is chilled before a whirl in the ice cream maker. The results, very smooth and creamy with tiny, bright green flecks. The addition of sour cream to an ice cream recipe gives it a luscious mouth feel and unexpected tang. If I made it again I would possibly enhance the flavor with a teaspoon of Pernod, that ‘s not cheating, is it? Enjoy this ice cream the same day it is made for maximum flavor.
Chervil Ice Cream
Makes a generous quart
Ingredients
2c heavy cream
1c whole milk
1c gently packed chervil leaves
1c plus 2T sugar
1c full or low fat sour cream or creme fraiche
1t freshly squeezed lemon juice
1/8t kosher salt
Directions
Bring the cream and milk to a simmer over medium heat (bubbles will form around the edges of the pan). Take pan off heat and allow to come to room temperature.
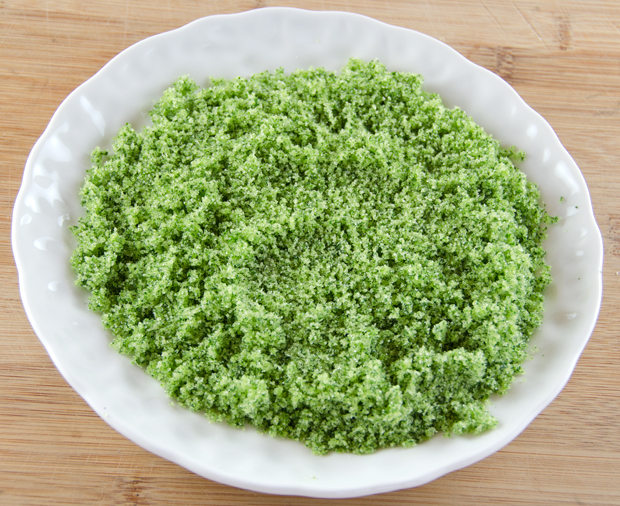
Chop the chervil leaves in the food processor until the leaves are finely ground, about 1 minute. Stir the chervil sugar into the room temperature milk. Allow to steep for 30 minutes. Strain the mixture through a fine sieve. Refrigerate until chilled.
Whisk the sour cream or creme fraiche in a medium mixing bowl to smooth it out. Gradually whisk in the chervil mixture, then mix in the lemon juice and salt.
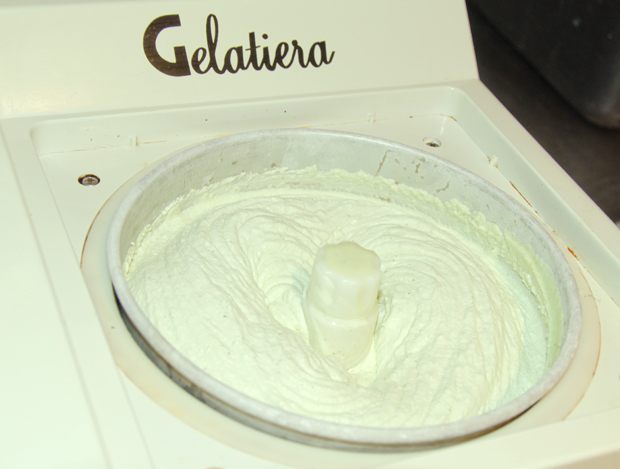
Freeze in an ice cream maker according to the manufacturer’s directions. Allow ice cream to further harden in the freezer for an hour or so before serving.
Grind the chervil with the sugar in a mini-processor.Green sugar, how come you taste so good?
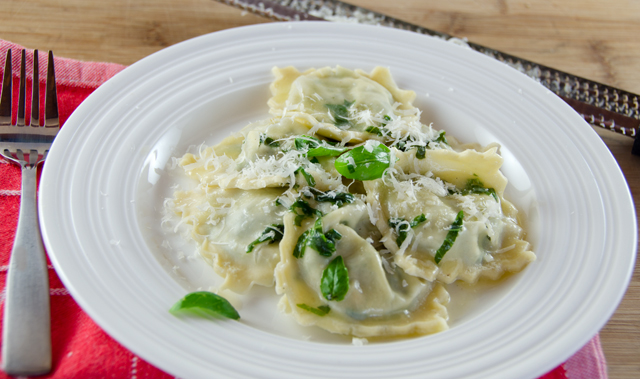
I love using Epicurious as a recipe resource. So many years of the best of Bon Appetit and Gourmet are right at your fingertips. There are times however when I want to go beyond Epicurious to the annals of the food magazines I have collected over the past thirty years. Almost every year around Easter I return to a recipe for a white wine ravioli with an herb butter sauce. The recipe was in Bon Appetit’s monthly feature, “Cooking Class”. This well-worn issue from April 1989 featured Lynne Rossetto Kasper as that month’s teacher. She is the author of the James Beard award-winning cookbook,The Splendid Table and host of the weekly radio program of the same name.
Looking at that issue of Bon Appetit is like a time capsule into the world of food and cooking almost 25 years ago. The Marlboro man still graced the pages beckoning us to “come to where the flavor is.” Uh, no thanks. No www. yet, snail mail address and telephone numbers were the way to find additional information on featured products. A frilled toothpick stuck in the page attests to the many times I turned to recipes from the “Trade Winds Cocktail Party”. I catered quite a few “island style” wedding receptions and parties of our own for many years. Late cookbook author Abby Mandel was teaching us “Shortcuts with Style”, making good use of the food processor and microwave. In an article titled “Great Chefs’ Chocolate Desserts” late chef and cookbook writer, Richard Sax, extols one up and comer, Thomas Keller. As Sax said, “For my money, Keller is one of the best, most tirelessly inventive chefs now cooking in New York.” I would say Sax knew what he was talking about and the rest of the cooking world would soon agree.
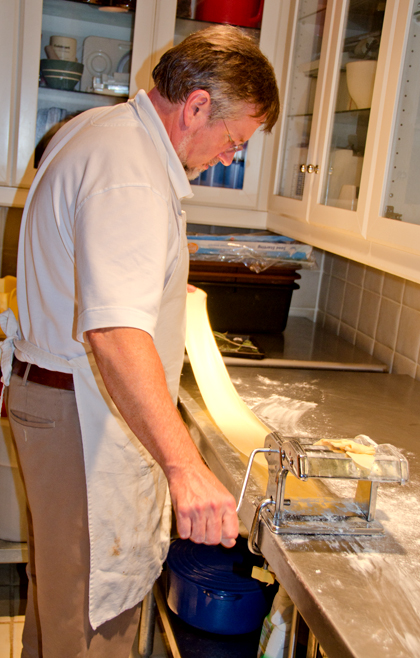
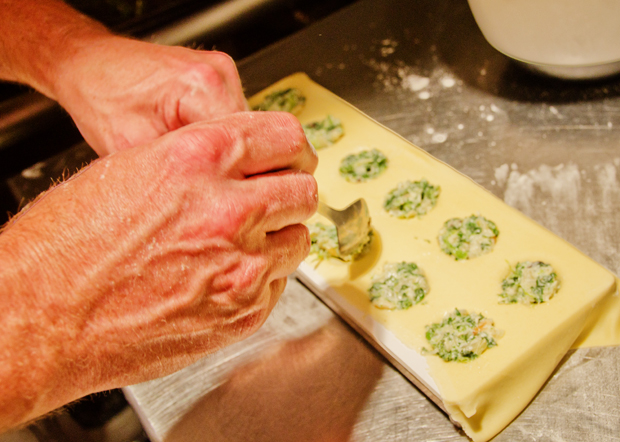
Back to the article, ravioli is described as an “easy dish to make at home” and includes step by step photographs of the pasta making process. She offers two fillings for the ravioli, spinach, pine nut and currant filling and double mushroom, using both fresh and dried varieties. We have made both, but this year chose just to do the spinach filling. It reminds me of the filling I made to fill countless phyllo triangles as a caterer. An “easy dish”? I can’t say that I agree with that, but it can be fun, especially if you have someone to share the duties with. Pasta making takes a definite time commitment, some patience and a nice long countertop to roll out the pasta. Along with parachute pants and mullets, food processor recipes were especially popular in the eighties. The pasta dough could also be made in a stand mixer or by hand. We used a ravioli press to speed along the process but it is not a necessity. Don’t own a pasta machine? Roll out the dough by hand (helps develop strong arm muscles) and use a biscuit cutter. Don’t have the time or desire to make fresh pasta? Won ton, or better yet spring roll wrappers are a reasonable substitute and will give you more time to experiment making different types of filling.
Ingredients for the spinach and pine nut filling.
Ravioli with Herb Butter Sauce
from Bon Appetit April 1989
Makes 6-8 first course servings
Spinach, Pine Nut and Currant Filling
Ingredients
1 10 oz package of frozen chopped spinach, thawed
2T olive oil
1 large onion, minced
3T toasted pine nuts
2T dried currants
1 1/2T chopped fresh basil
1 large clove garlic, minced
1/3t dried oregano
1c reduced fat ricotta cheese
1/3c freshly grated Parmesan cheese
Kosher salt and freshly ground pepper to taste
1 egg
Directions
Squeeze spinach dry; chop finely. Heat oil in heavy medium skillet over medium high heat. Add onion and cook until golden brown, stirring frequently, about 6 minutes. Add spinach, pine nuts, currants, basil, garlic and oregano. Stir until thoroughly combined. Cool mixture before proceeding.
Combine ricotta and Parmesan in a medium bowl. Add spinach mixture. Season with kosher salt and freshly ground pepper. Mix in egg. Spinach filling can be prepared two days ahead. Cover and refrigerate.
White Wine Pasta
Ingredients
2 chilled large eggs
1/4c (or more) dry white wine
Pinch of salt
2 c or more unbleached all purpose flour
Directions
Combine eggs, 1/4c wine and salt in processor. With machine running, add 2 cups flour through feed tube.
Process until slightly sticky dough ball forms. If dough is very sticky, add more flour through the feed tube 1 tablespoon at a time, incorporating each addition before adding next. If dough is dry, add more wine through the feed tube 1 teaspoon at a time, incorporating each addition before adding the next. Process dough for 20 seconds more.
Knead dough on lightly floured surface until smooth, elastic and no longer sticky, about 8 minutes. Wrap in plastic and let rest at room temperature for at least 30 minutes.
Rolling dough and forming ravioli
All purpose flour
1 egg, beaten to blend
Our machine is hand cranked but there are electric versions as well.
Directions
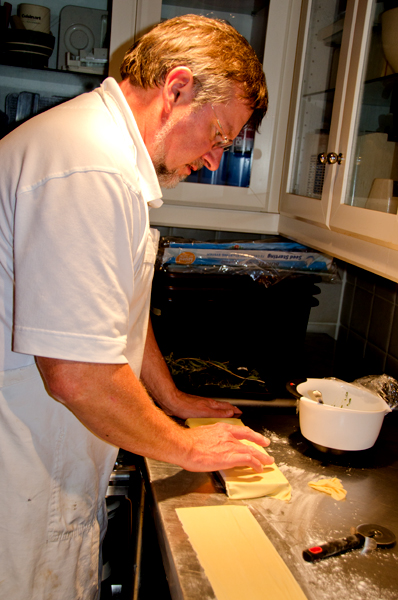
Cover baking sheet with parchment paper. Cut dough into 4 pieces. Flatten 1 piece (keep the remainder wrapped) and dust with flour. Turn pasta machine to widest setting and run dough through twice. Sprinkle with flour, fold in half and run dough through machine twice.
Adjust machine to the next narrowest setting. Run dough through machine 5 times, folding in half and flouring before each run. Repeat, narrowing rollers and running dough through machine 5 times at each setting until the dough is thin, narrowest setting on machine with 6 settings, second to narrowest on the machine with 8 settings.
Arrange dough sheet on floured work surface. Cut in half crosswise. Cover one piece with plastic. Brush remaining piece with egg. Top with 2 rows of 1/2 tablespoon mounds of filling, spacing 1 inch from the edges and 1 inch apart.
Top with second dough sheet. Press with side of hand between mounds of filling down center, then crosswise, forcing out any trapped air.
Cut between mounds to form large squares, using a knife or a pasta cutting wheel.
Transfer ravioli to prepared baking sheets. Press edges of ravioli together to seal.
Repeat the rolling, filling and cutting with remaining dough pieces and filling. Can be prepared ahead. Cover with plastic wrap and refrigerate 1 day or freeze until solid. Transfer to freezer containers and freeze up to one month. Cook ravioli directly from the refrigerator or freezer.
You should almost be able to see your hand through the finished pasta.
Cooking ravioli
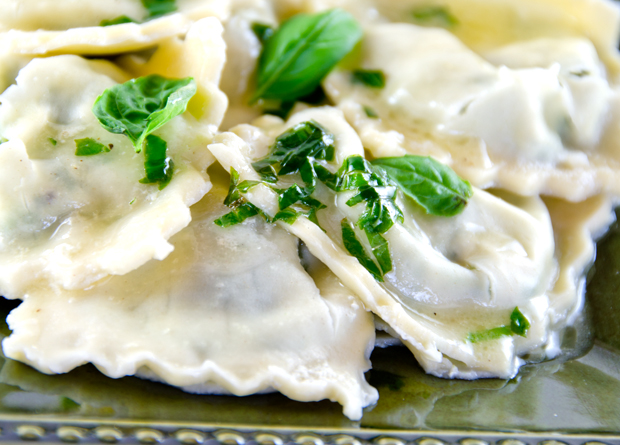
Preheat oven to lowest setting. Bring two large pots of salted water to a boil. Divide ravioii between pots and boil until just tender, about 10 minutes. Transfer to platter using a slotted spoon. Toss with a little olive oil. Cover lightly with foil and keep warm in oven while preparing sauce.
Herb Butter Sauce
Ingredients
6T butter (3/4 of a stick)
3T chicken stock or low salt canned broth
1/4c thinly sliced fresh basil leaves
Freshly ground pepper
Freshly grated Parmesan cheese
Whole fresh basil leaves
Directions
Melt butter in a heavy small saucepan over medium heat. Add stock and sliced basil and simmer one minute. Season with pepper. Drizzle over ravioli.
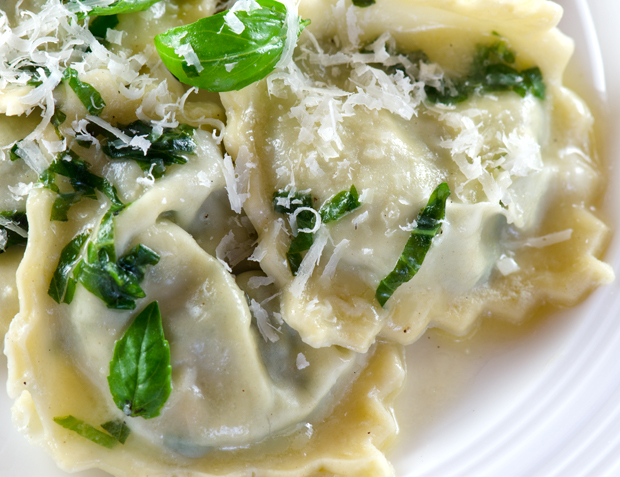
Serve immediately, sprinkling each serving with Parmesan and garnishing with whole basil leaves.
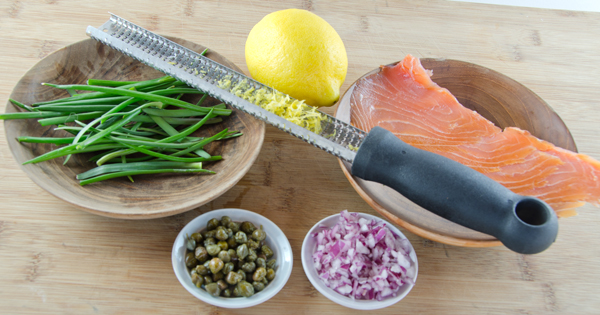
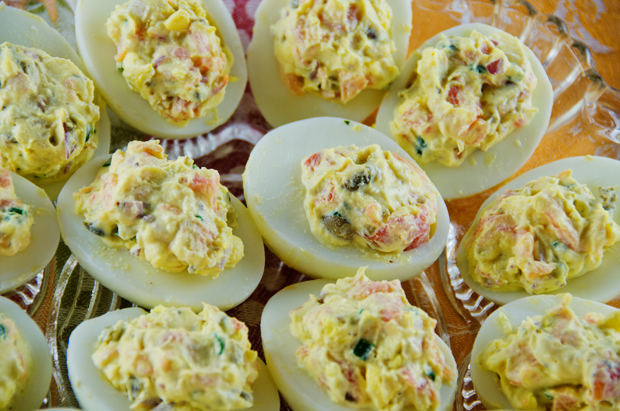
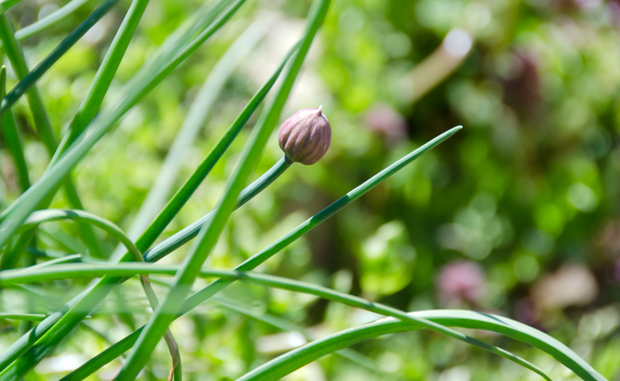
Deviled eggs are a delectable treat and an excellent way to use up all those dyed eggs you might have left over from your Easter baskets. Recipes for stuffed hard boiled eggs have been in existence since the ancient Romans. They mashed the egg yolks with anchovies, olive oil, garlic, pepper and wine before stuffing them. The term “deviled” didn’t come into use until 18th century England. Deviled first referred to meat dishes and later to any variety of dishes prepared with hot seasonings like dried mustard or cayenne pepper. Older eggs are the best for hard boiling. I learned that the hard way last year when the hard cooked eggs I was attempting to peel not only removed the shell but also a large portion of the egg white. To be certain that your hard boiled eggs are easy to peel, refrigerate them for a week to ten days before cooking. This allows the eggs to take in air, helping the membrane to separate from the shell. There are many methods of hard boiling eggs. Every now and then I will come across the latest “fool proof” method only to be disappointed. I have always had success with a method I learned from Julia Child. In her book, The Way to Cook she shares the method developed by the Georgia Egg Board. The eggs are covered with cold water in a pan by about an inch, brought to a boil, removed from the heat and covered for exactly 17 minutes. Then the eggs are transferred to a bowl of ice water for two minutes. I like using my Chinese spider for this step. The chilling shrinks the egg from the shell. The water is brought back to the boil, the eggs are returned to the water for 10 seconds which expands the shell from the egg. The final step is to return the eggs to the ice water, gently cracking the shells in several places. I like to peel my eggs under cold running water, returning them to the bowl of ice water when done. Peeled eggs can be stored, submerged in fresh water for several days. This recipe for smoked salmon deviled eggs could be called “everything but the bagel”, since all the components for the traditional bagel and accompaniments are there. Rich, smoky salmon, briny capers and the first of the season chives from the garden combine with the blank slate of the hard boiled egg. I prefer to keep my components chunky, but you could whiz them up in a food processor if you like to pipe your filling. These are always a big hit in my house. Easy to eat, even the avowed salmon haters enjoy them.
2T capers, rinsed and finely chopped (l like balsamic capers)
1T fresh lemon juice
1/2t packed finely grated lemon zest
Freshly ground black pepper
Directions
Hard boil eggs according to your method of choice. Peel and halve eggs lengthwise.
Remove the yolks and crumble them into a medium bowl.
Add the salmon, 3T of the chives, the mayonnaise, sour cream, onion, capers, lemon juice, zest and a grind of the black pepper to taste. Mix ingredients to combine thoroughly.
Mound the filling into the egg whites. Garnish with remaining chives and pepper to taste.