March 21, 2017 Creamy Poblano Chicken

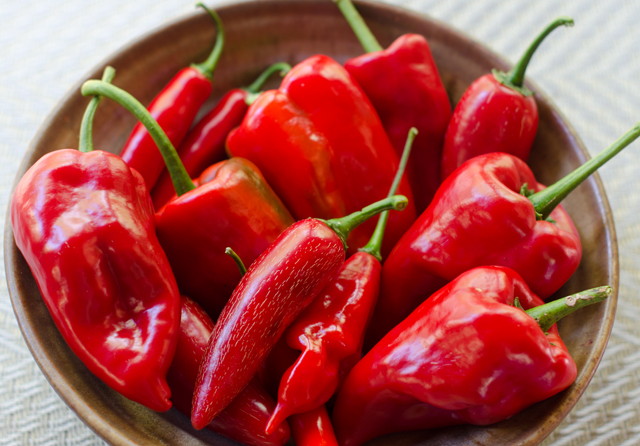
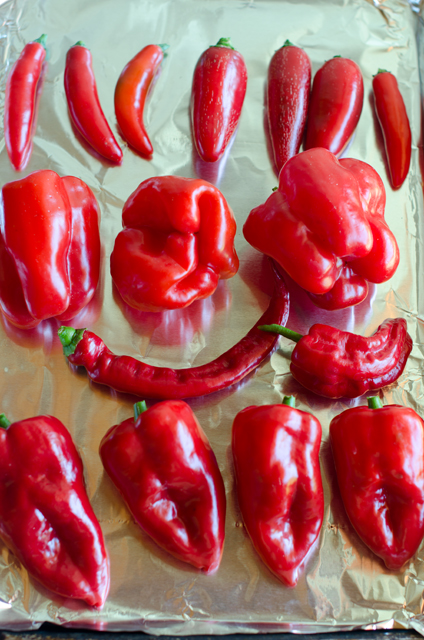
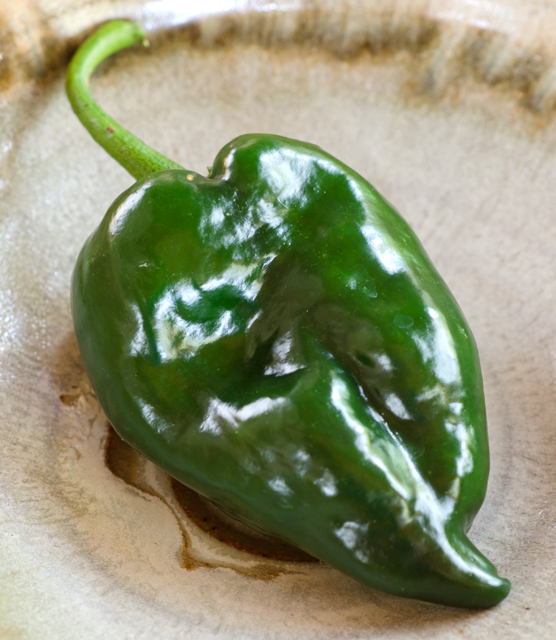
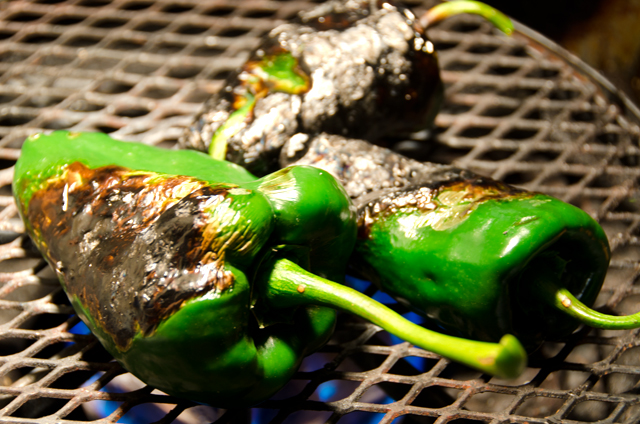
I didn’t think the day would come, but I finally exhausted my supply of freezer pesto. I’ve been using it this winter to top boneless chicken breasts before baking as an easy weeknight supper. A little looking around the freezer and I found the ingredients for this new impromptu sauce. Chicken with poblano cheese sauce is loosely based on a Mexican classic. Poblano peppers have a dark green skin and if left to ripen further on the vine will turn red. They are somewhat heart-shaped, 3-6 inches long and 2-3 inches wide. Poblano peppers are rich and flavorful with a mild to medium heat.

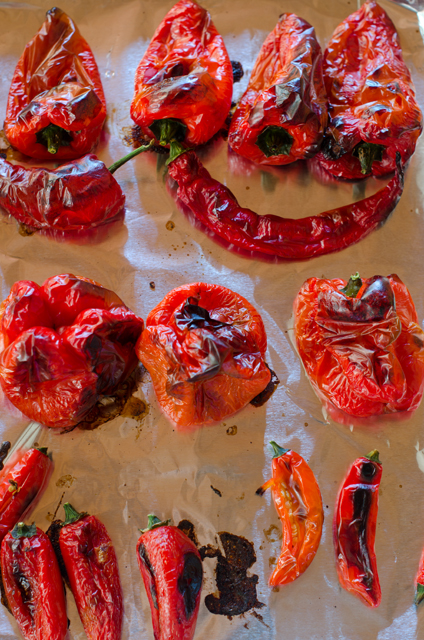
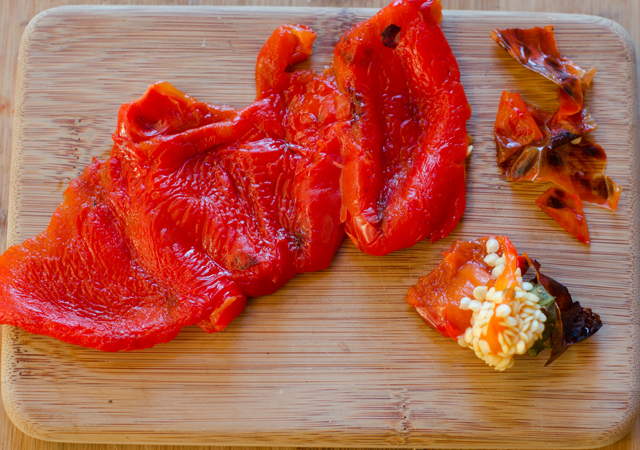
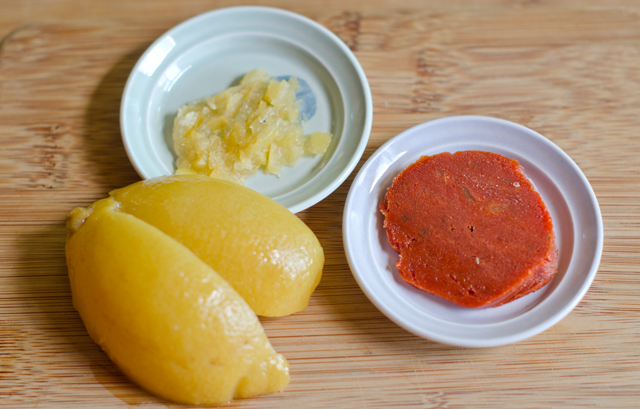
This recipe can be made as mild or as spicy as you like, depending on the number of poblanos added to the sauce. Since most recipes begin with roasted and peeled poblanos, there are several methods for roasting. If you have a gas stove as I do, they can be roasted on an open grated grill known as an asador. If you don’t have a gas stove they can be broiled on a foil lined baking sheet. With either method, turn them often so they char evenly. Put the chilis in a bowl while they are still hot and cover tightly with plastic wrap. Let them rest until they are cool enough to handle, 15-20 minutes. Pull on the stem to remove the seed core and cut the chile open to remove any additional seeds and ribs. Remove the skin by running your hands down the chile, use a damp paper towel to remove any skin that won’t easily come off. Resist rinsing the chiles, you will dilute the flavor.

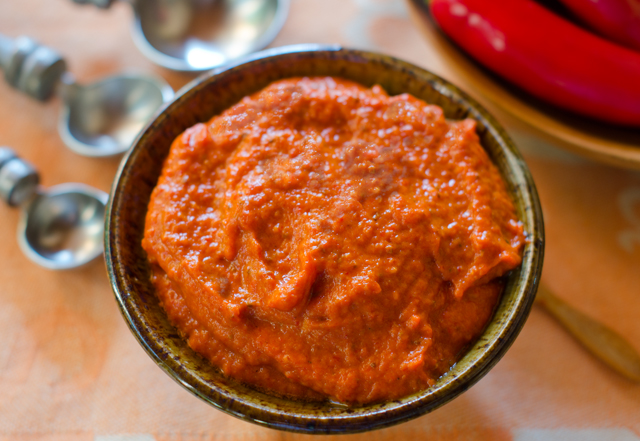
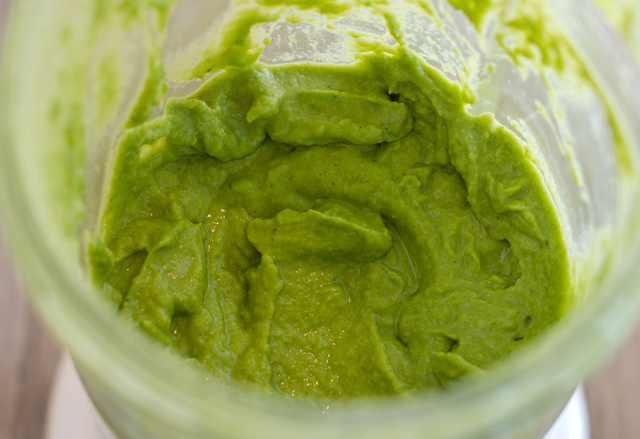
The base is cauliflower Alfredo sauce, a recipe from the blog two summers ago. I wasn’t certain if this would be good to freeze, but I’m pleased to say it reheated well. Since my first step was to see if the sauce held up to freezing, I started with a cup of the cooled down sauce in the food processor. To this I added several roasted poblanos, from the end of last years garden, also from the freezer.

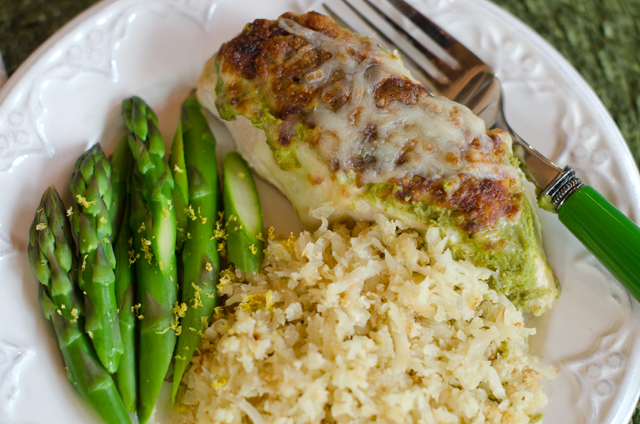
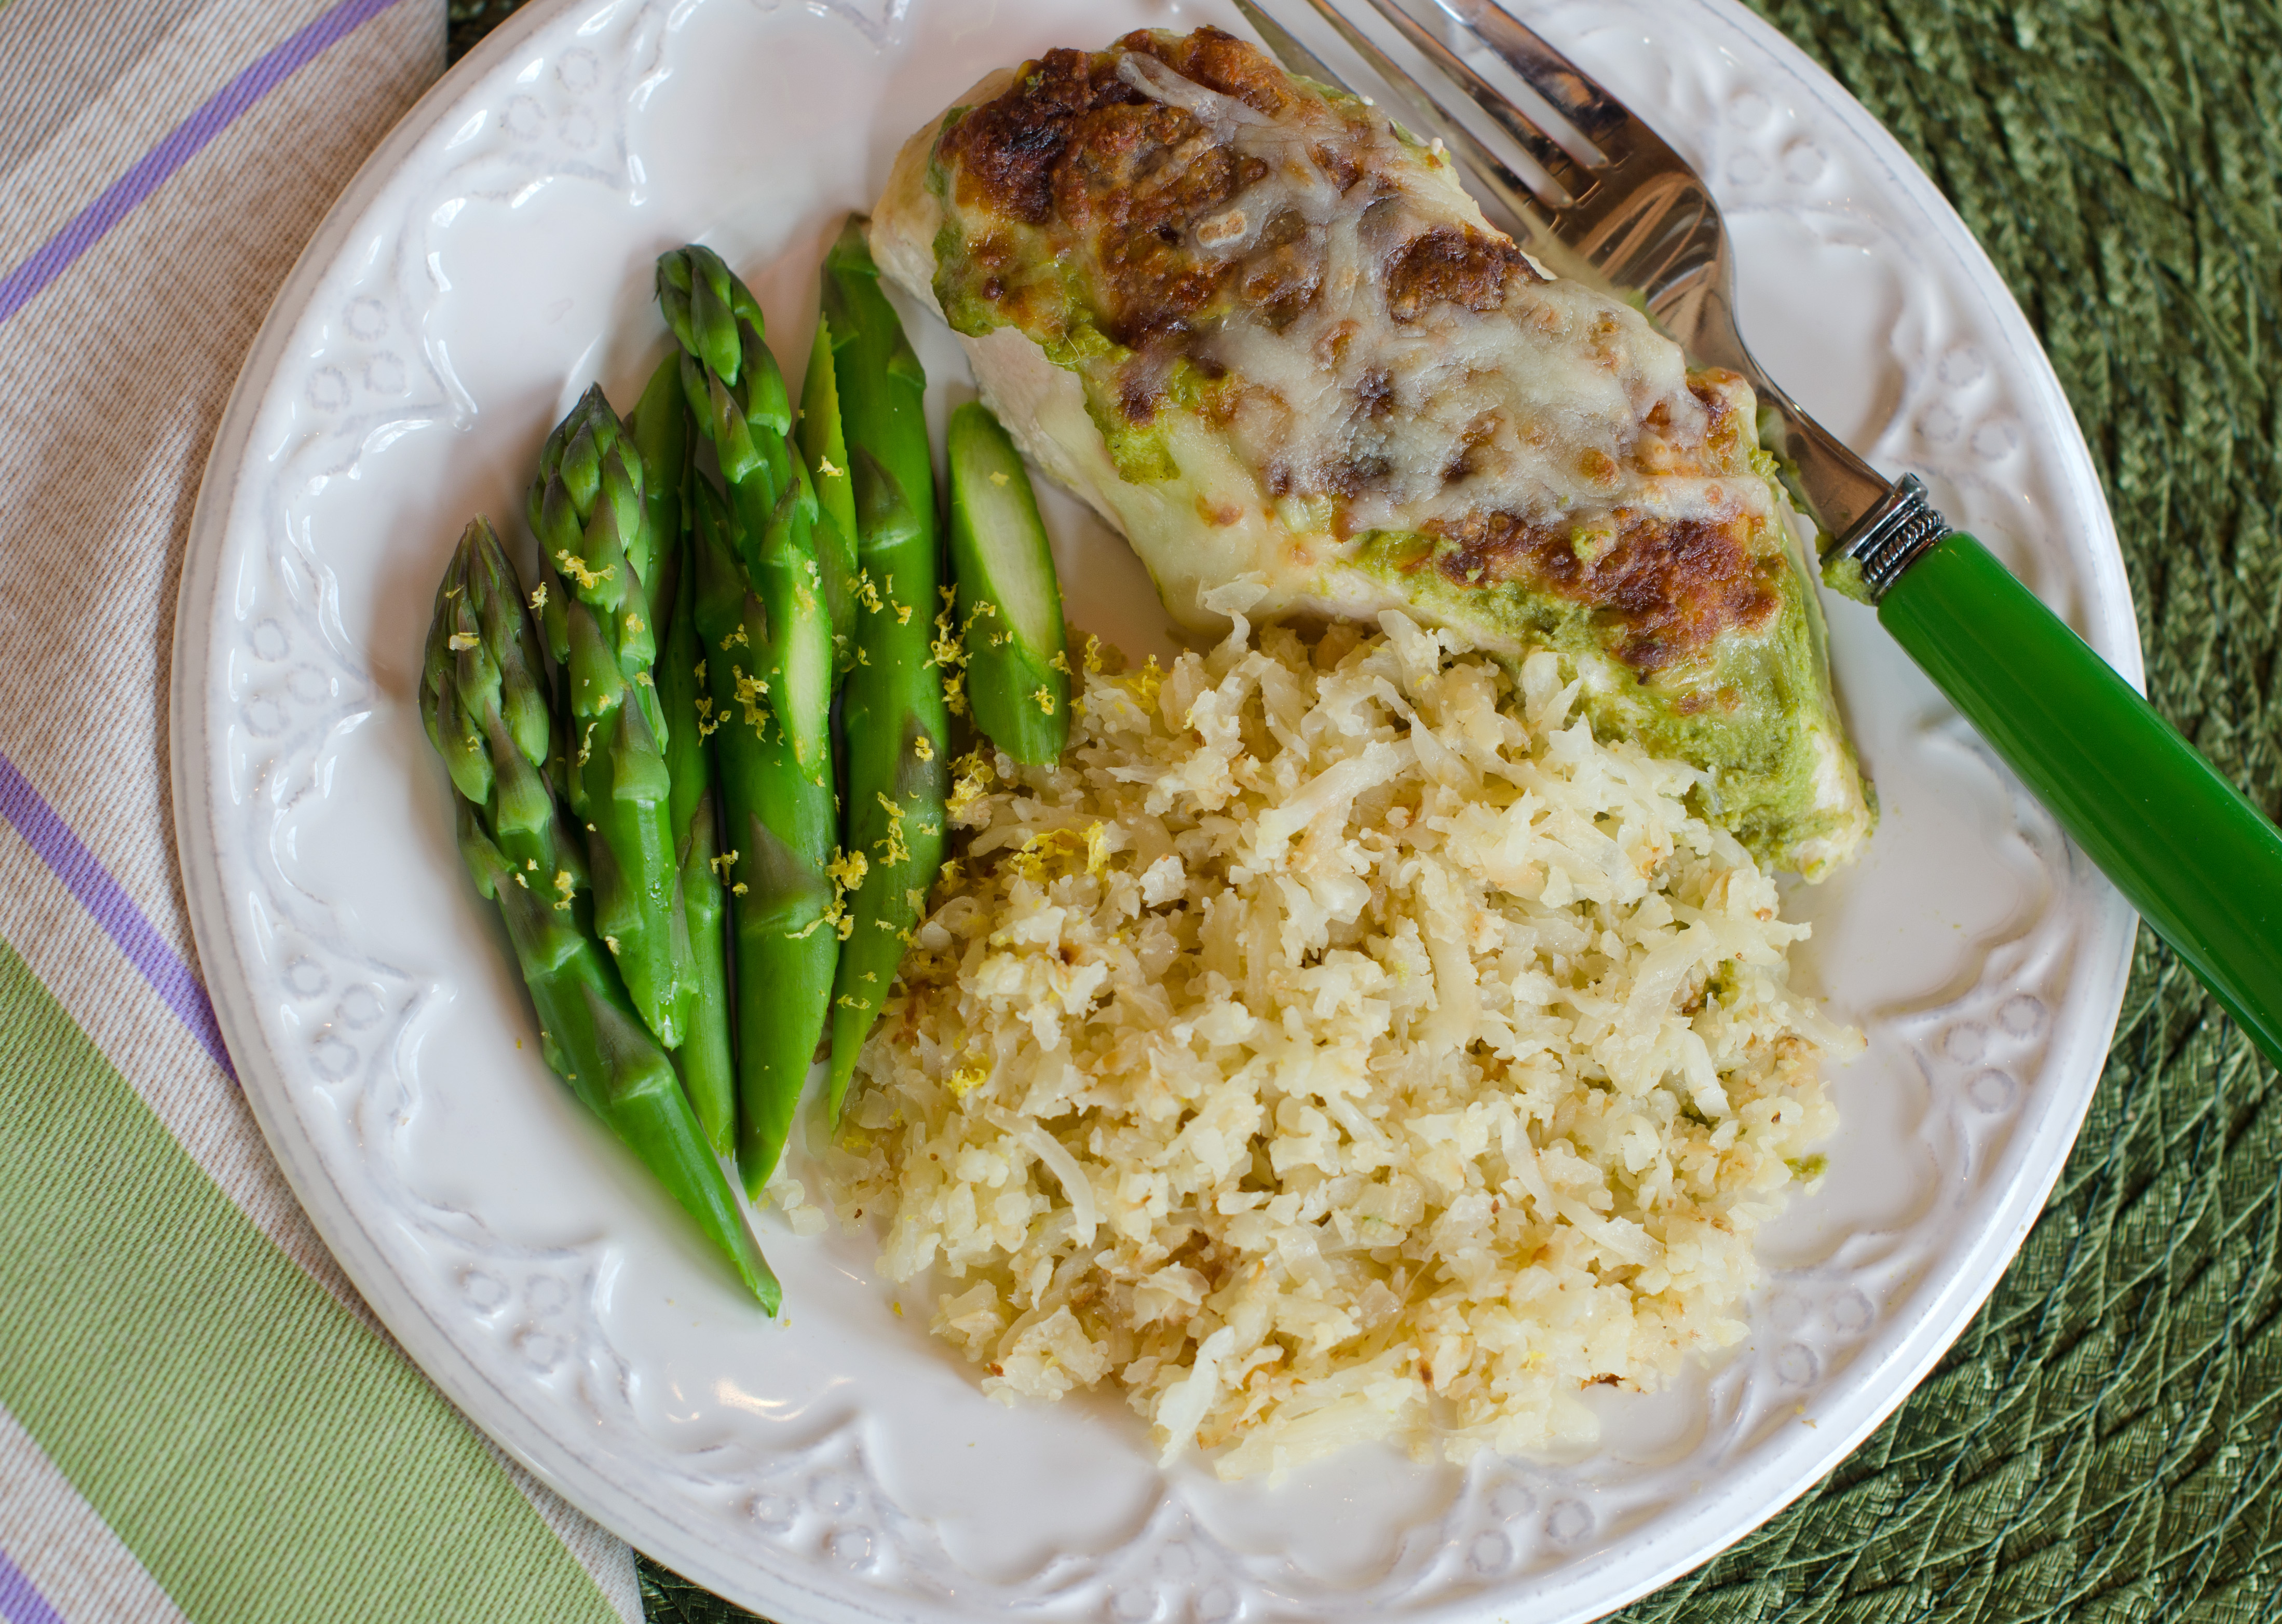
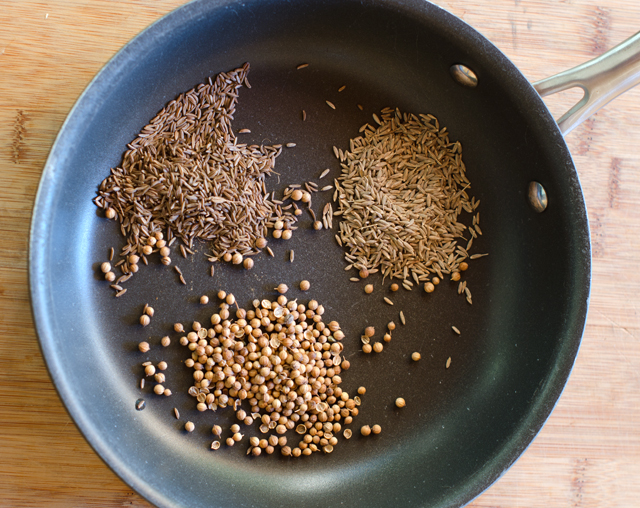
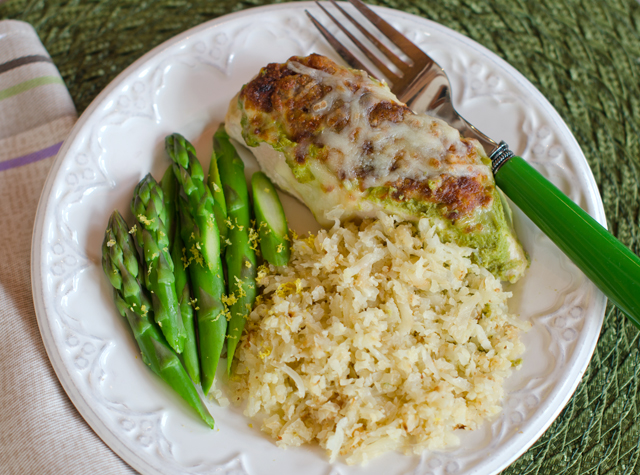
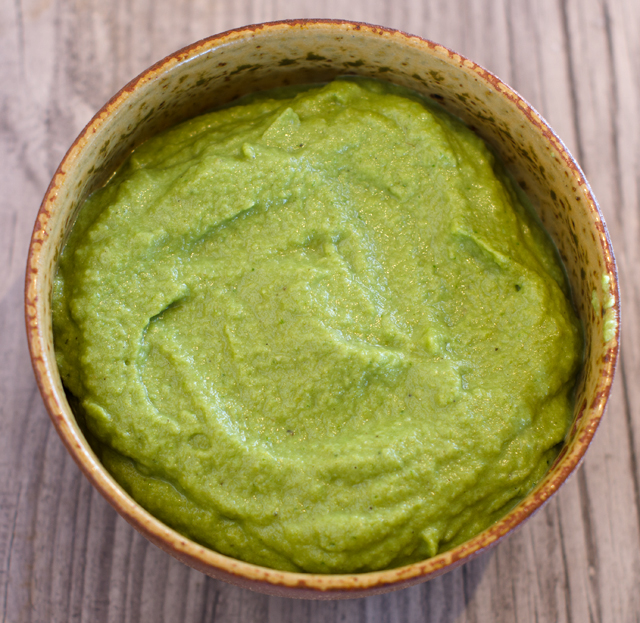
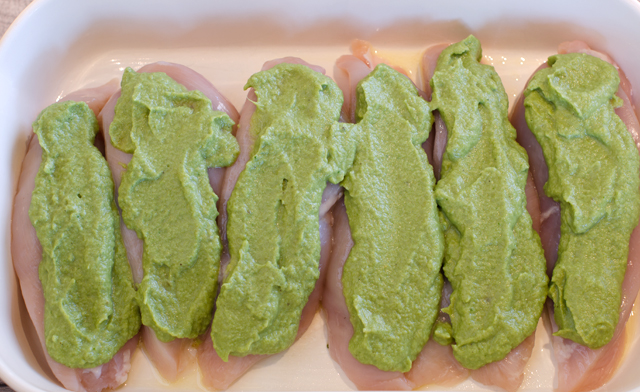
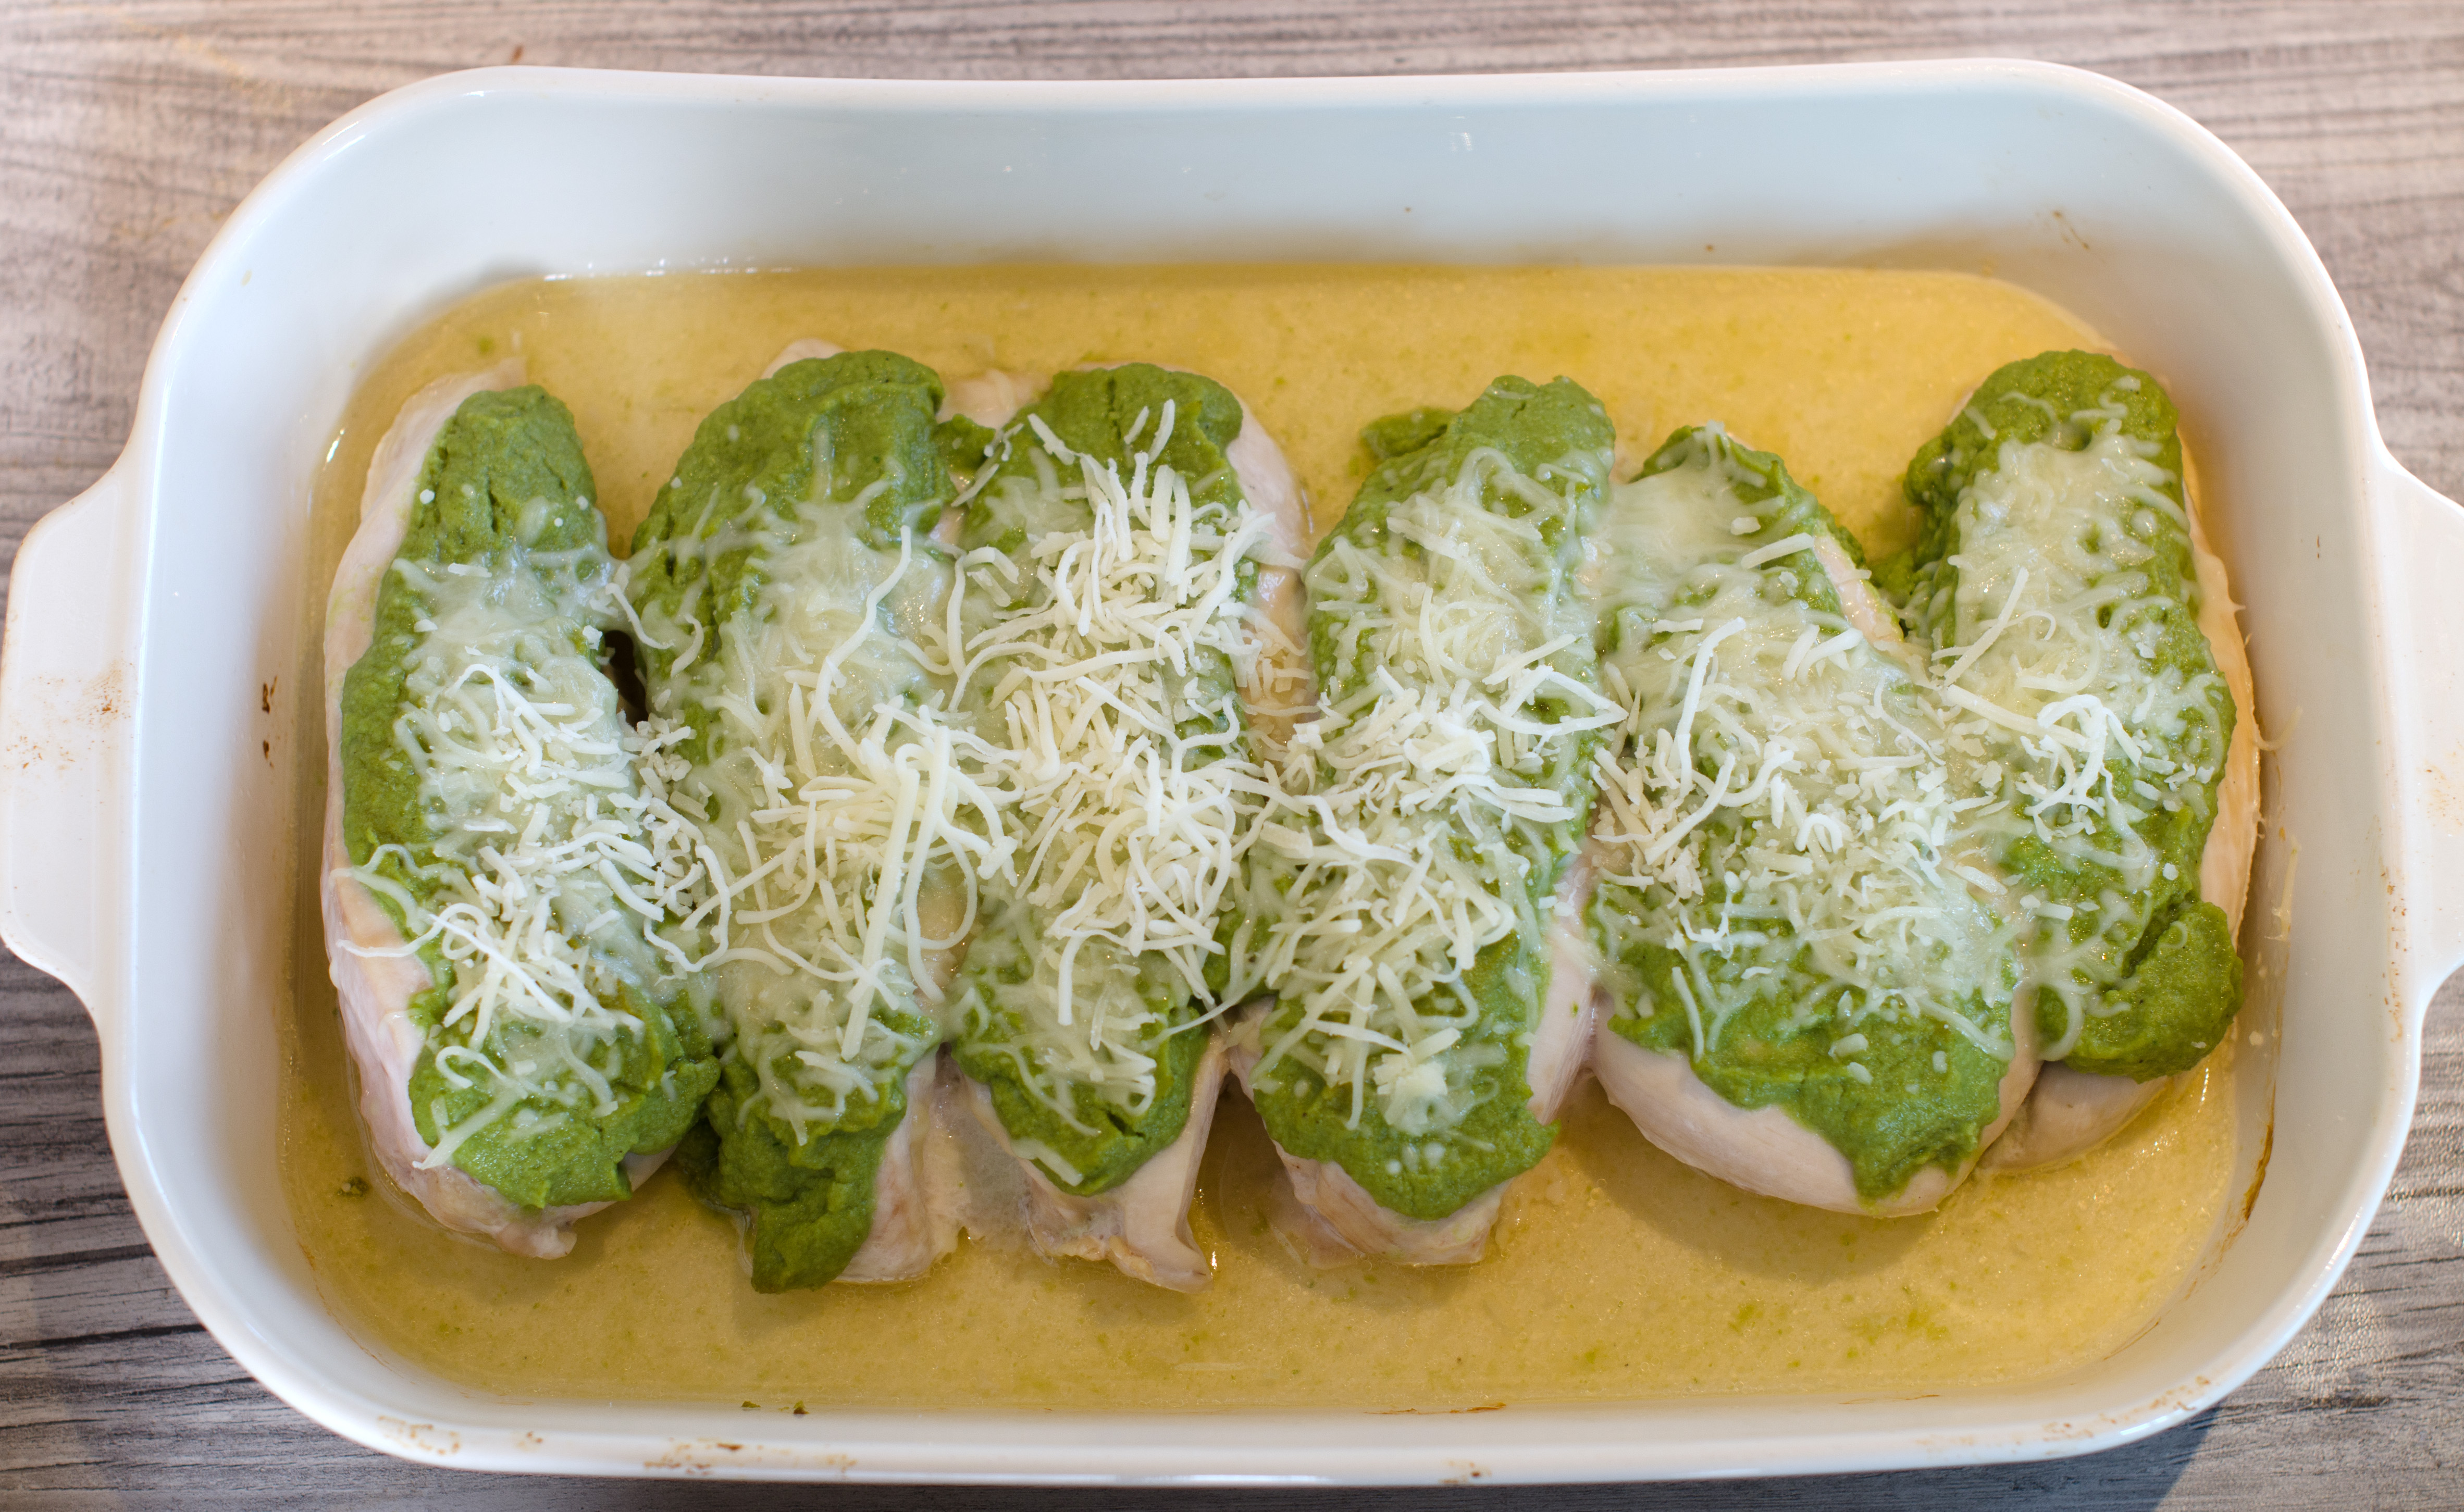
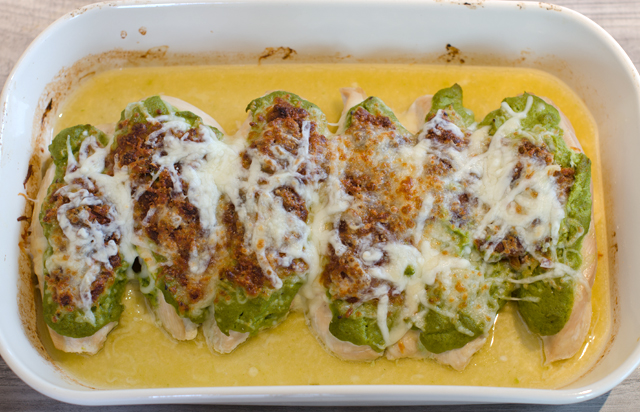
I puréed the sauce, along with a cup of raw spinach leaves, a teaspoon of ground cumin, salt and pepper. Start with one stemmed and seeded poblano, cut into strips and add more as desired just to give a little kick of heat. I topped chicken breasts with this sauce, covered with foil and baked for 23 minutes. After 23 minutes, I took out the chicken, removed the foil and topped with grated cheese and placed under the broiler. Delicious and the chicken is cooked perfectly! Next time I might add some roasted garlic too. This sauce would also be good to top chicken enchiladas or even as a dip for veggies.

Creamy Poblano Chicken

Serves 4

Ingredients

  • 1-1 ½ c cauliflower Alfredo sauce
  • 2-3 roasted poblano peppers
  • 1 c raw spinach leaves
  • 1 t ground cumin
  • kosher salt and freshly ground pepper
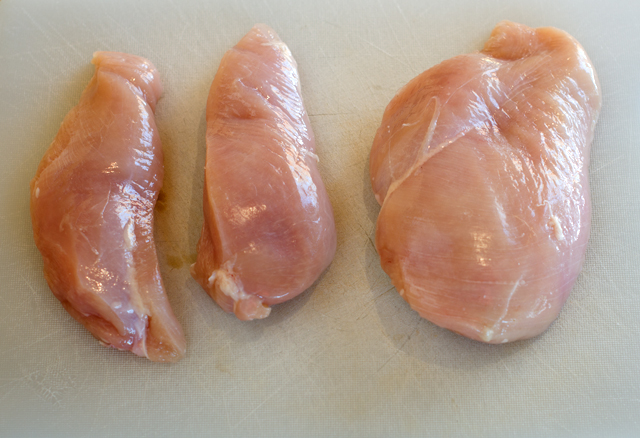
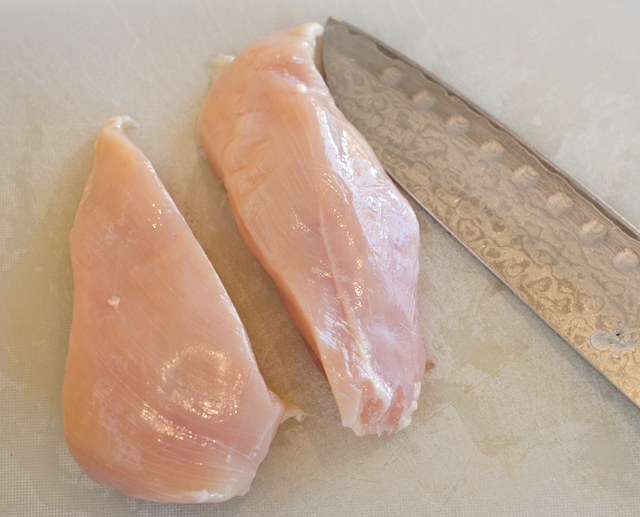
  • 2 lbs boneless skinless chicken breasts, remove tenderloin if attached, breasts cut in equal halves
  • ½c or more shredded cheese, a Mexican blend is good here, mozzarella is fine as well
  • Non stick spray or oil to coat baking dish.
Cut large breast pieces in half.
It’s best to cut on an angle to get even pieces.
Poblano peppers add just the right amount of heat.
I like to cook them on the stovetop on an asador.


The sauce can be made easily in a food processor or blender.

Coat the breast pieces evenly with the sauce.
Cover the chicken tightly with foil before cooking. Be careful of the steam that will escape after cooking.
After cooking they will shrink a bit.
Turn the broiler on and sprinkle chicken with cheese.
The finished product!

Directions

Preheat oven to 375°F

  1. Put the first four ingredients in the bowl of a food processor or blender and pulse until all ingredients are incorporated. Taste for seasoning and add another poblano if desired. Season with salt and pepper to taste. Scrape sauce from processor into a bowl and set aside.
  2. Spray a 9″ X 11″  baking dish with non stick spray or coat lightly with olive oil.
  3. Remove tenderloins from chicken breasts if still attached. Cut each breast in half to make even (as possible) pieces. Place the chicken breast pieces in the baking dish.
  4. Cover each piece generously with the sauce. Cover the baking dish with foil and bake for 23 minutes. Remove baking dish from oven, take off the foil and set oven to broil. Sprinkle cheese over chicken breasts and return baking dish without the foil to the oven. Broil until the cheese is melted and starts to brown in spots, 3-4 minutes. Watch closely. Serve with cauliflower rice to sop up the juices.

September 15, 2016 Harissa

dsc_7983aThe challenge facing us in late summer/early fall is preserving the harvest.  A prime example is hot peppers. In tropical climates they thrive as perennials and can grow for many years. It would be great if I could just walk down to the garden in January to pick a few fresh jalapenos. But given the fact that January temperatures where we live are below freezing and pepper plants prefer a daytime temperature of 65-80°F, it won’t be happening anytime soon . So it is necessary to find methods of preservation now to enjoy them later while the peppers are at their peak. Every year I freeze whole peppers, dry them, make chili flakes, pickle jalapenos, I’m even making sriracha now, but a new method is always welcome.
A very simple recipe I found for eggplant, another garden stalwart, suggested topping grilled slices with prepared harissa and yogurt. In the past I purchased harissa in a jar or a tube at the middle eastern stand at the local farmers market. This time I decided to see if this was something I could make myself. Harissa, is a garlicky spicy condiment found in the Northwest African countries of Algeria, Morocco and Tunisia. It can be used as a condiment for meat or fish, roasted vegetables, stirred into soups and stews and served alongside couscous. Think sriracha with more complexity. It’s ingredients can include roasted peppers, garlic, chile peppers of all varieties, fragrant spices such as coriander, cumin and caraway, dried mint, lemon and olive oil. There is no one master recipe for harissa. The ingredients in harissa vary by country, ethnicity, even neighborhood. You can adjust the heat by the number and type of chilies you use, just remember, harissa is supposed to be hot.

My recipe is a little different from most since I used fresh hot peppers, not dried ones that need to be reconstituted. This meant using double the amount of peppers. I used one red bell pepper, four mild poblano peppers and a mix of jalapeno, cayenne and ancho. I added a little tomato paste for sweetness, preserved lemon peel with just a little juice, chopped garlic, smoked paprika and an aromatic spice blend. I think the spice blend is what really gives this dish its unique flavor. Whole spices, coriander, cumin and caraway are toasted in a small skillet until the fragrance fills your kitchen. I find it easiest to grind them in a mortar and pestle, a mini food processor doesn’t quite give the consistency you are looking for.

All the peppers need to be charred to remove the skin. I did this in a hot oven, turning occasionally to blacken all the sides. I put the charred peppers in a bowl and covered it tightly with plastic wrap to steam the peppers. It is important for to wear rubber gloves when removing the skin, seeds and stem from the hot peppers. Conventional wisdom for years has said that the hottest part of the pepper is the seeds. A recent study however has shown that even though the seeds pack some heat, it’s actually the placenta, the white tissue that holds the seeds that is the source of the most heat. As you peel the peppers put them into piles, no heat, some heat and hottest. That way you can hold back on some of the hottest peppers until you are certain the sauce will be palatable for you.

Combine the chilies, toasted spices, garlic, salt and other optional ingredients in a food processor. With the food processor running, slowly drizzle in the olive oil until you have a smooth, thick paste. Scrape down the sides occasionally. Taste, now is the time to add that extra pepper if desired. As I said before, harissa is supposed to be hot. Season to taste with salt and pepper. Transfer harissa to clean jars, top with a thin layer of olive oil and store in the refrigerator for several weeks. Since I freeze pesto I may try to see if harissa can be frozen too.

As a postscript, the harissa received immediate approval from Joe who topped cucumber slices with harissa as an after work snack.

dsc_7947a
A harvest of both bell and hot peppers.

Harissa

Makes 2 cups

Ingredients

  • 1 medium bell pepper
  • 8 to 10 ounces fresh chili peppers of varying heat, poblano, ancho, jalapeno, cayenne
  • 2 t cumin seed
  • 2 t coriander seed
  • 2 t caraway seed
  • 3 to 4 cloves of peeled garlic
  • 1 T tomato paste
  • 1 t preserved lemon peel
  • 1 t juice from preserved lemon
  • 1 t smoked paprika
  • Kosher salt and fresh ground black pepper to taste
  • 3-4 T extra virgin olive oil

Directions

  1. Preheat oven to 425°F.Line a baking sheet with foil. Place all the peppers on the baking sheet and roast for 10 minutes.
  2. Turn the smaller peppers over and roast for another 10 minutes, until the skins are blackened. Remove them to a bowl. Turn the bell and poblano peppers over and roast for another 10-15 minutes, until the skins are blackened.
  3. Remove all the peppers to the bowl and tightly cover with plastic wrap to steam the skin.
  4. Place the cumin, coriander and caraway seed into a dry skillet over medium heat. Toast until seeds have darkened a bit and have become fragrant.
  5. Pour toasted seeds into the bowl of a mortar and pestle. Crush seeds to a powder.
  6. Using rubber gloves to protect your hands, stem, skin and seed the peppers.
  7. Place the peppers (hold back a few hot ones if you are concerned), toasted seeds, garlic, tomato paste, preserved lemon peel and juice, smoked paprika into the bowl of a food processor. Pulse to combine the ingredients, scraping down the sides.
  8. With the food processor running, add the olive oil in a steady stream until you have a smooth, thick paste. Taste, add salt and pepper to your liking and pulse in the extra peppers if desired.
  9. Transfer harissa to clean jars and top with a thin layer of olive oil. Store in the refrigerator for several months.
Place the peppers on a foil lined baking sheet for easy clean up.

dsc_7952a

Cumin, coriander and caraway seeds are toasted in a dry pan.

dsc_7956a

Pulverize the seeds in a mortar and pestle or spice grinder. Smells great.
dsc_7962a
Stem, seed and skin the peppers. Be sure to wear gloves to protect your hands from the hot peppers.


dsc_7965a
I added some preserved lemon peel and tomato paste.
Everything is combined in the food processor.
Everything is combined in the food processor. Add olive oil to make a thick paste.

dsc_7974a

August 13, 2016 Oven Roasted Ratatouille

DSC_7741aI love recipes that use the bounty of the garden in a single dish and ratatouille accomplishes that in a very delicious way.  In case you didn’t know, ratatouille (rat-uhtoo-ee), is a summer vegetable stew that had it’s origins in the Provencal city of Nice in southern France. Traditionally, each ingredient, eggplant, zucchini, peppers, onion, garlic and tomatoes, is cooked separately on the stove top and tossed together at the very end. So it’s really a sauté that is presented as a stew.

In this version the vegetables are tossed in olive oil and roasted in the oven, eliminating the time cooking over a hot stove. Our red and yellow bell pepper harvest is the earliest I can remember. They must like the hot temperatures and abundant rainfall this year. The orange Valencia peppers are not far behind. I prefer using Chinese or Japanese eggplants for their thin skin and milder flavor. I substituted shallots for onions since our harvest was so plentiful this year. The garlic was also from the garden, a first for us.

Cut the vegetables in similar size so they will get done at the same time. The smaller the cut, the less time it will take to cook.  Lightly toss the vegetables with about a half cup of a good quality olive oil.  Spread them out evenly over two large baking sheets. Rotate the baking sheets top to bottom and front to back half way through the cooking time. Roasting allows the vegetables to retain their shape and they take on a delicious toasted flavor. Move the cooked vegetables to a large serving bowl and tossed with a basil chiffonade. Chiffonade, translates “made of rags” from the French (of course!).  It is a technique for cutting herbs and vegetables into long thin strips, in this case, basil.

Ratatouille can be used in many ways, a side dish, a topping for bruschetta, chicken or fish.  We used it as the topping for an impromptu flatbread pizza. It can be served hot or cold and is even better the next day, if it lasts that long.

DSC_7726a
This season is the earliest we have had ripe bell peppers. I guess they really like the hot and rainy weather.
DSC_7733a
Ingredients for the ratatouille, I substituted shallots for onions since Joe just harvested his crop.


Oven Roasted Ratatouille

Serves four (or two very generously)

Ingredients

  • 2 small onions (about 5 oz. each), cut into ¼-inch-thick half-moons
  • 2 bell peppers, red, yellow or orange, cored, seeded and cut into ¼-inch lengthwise strips
  • Japanese eggplant, about 1 lb, cut crosswise ½ inch thick rounds, then sliced in quarters
  • 1 lb small to medium zucchini, trimmed and cut into ½ inch thick rounds
  • 10 whole cloves garlic, peeled
  • ½ c extra virgin olive oil, and more as needed
  • 1 t chopped fresh rosemary
  • Kosher salt and freshly ground pepper
  • 1½ lbs medium tomatoes (about 4), cored, and cut into 1/2-inch chunks
  • ¼ c basil cut into a chiffonade
DSC_7737a
Toss the ingredients in a large bowl with olive oil, salt and pepper.
DSC_7739a
Transfer the vegetables to two large baking sheets.


Directions

  1. Place racks in the top and bottom thirds of the oven. Heat to 400°F. If using convection heat, 375°F.
  2.  In a large bowl, toss the onions, peppers, eggplant, zucchini, tomatoes, garlic, olive oil, rosemary, and 1-1/2 tsp. kosher salt and a grind of pepper. Spread the vegetables evenly over two large 12 x 16 sheet pans. Don’t spread the vegetables too thin or they may burn (they shrink a lot as they cook).
  3. Roast, stirring the vegetables a few times and swapping the positions of the pans once, until the vegetables are slightly collapsed or shriveled, starting to brown, and very tender, about 35 minutes for my oven. It could take 10 minutes longer if you are not using convection heat.
  4. Scrape all the vegetables and any juices into a serving bowl. Toss with the basil, taste for seasoning, and serve.

DSC_7746a

DSC_7749a
Ratatouille makes a great pizza topping.
DSC_7784a
How could I resist posting a picture of Remy, the star of the movie Ratatouille  who presides over my kitchen from his perch above.