April 29, 2014 Lemon Cheesecake with Lemon Curd

DSC_6770a

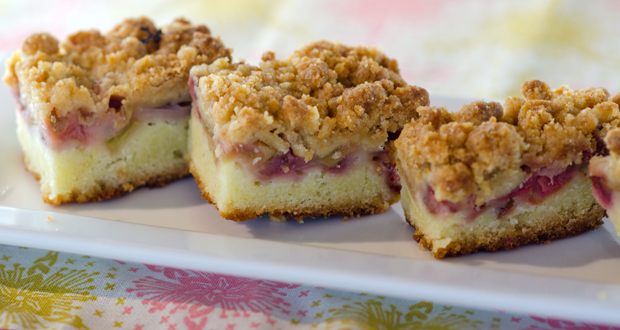
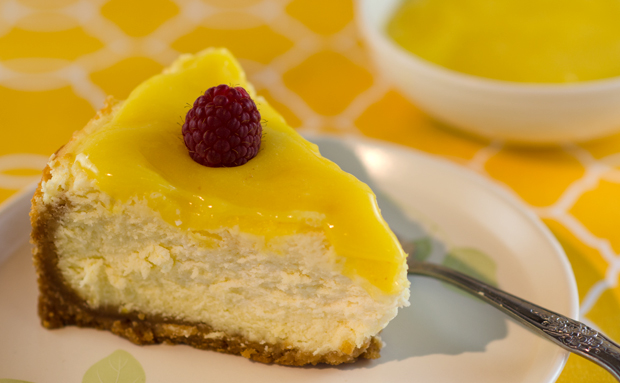
A light lemony cheesecake was the finishing touch for our Easter dinner. This easy to make cheesecake has been a favorite of mine for several years. It is a very simple recipe and always turns out great. It can even be made ahead and frozen, just wrap it very well in several layers of plastic and foil.

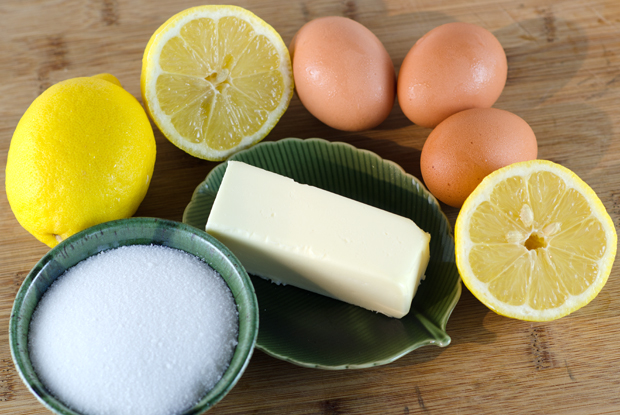
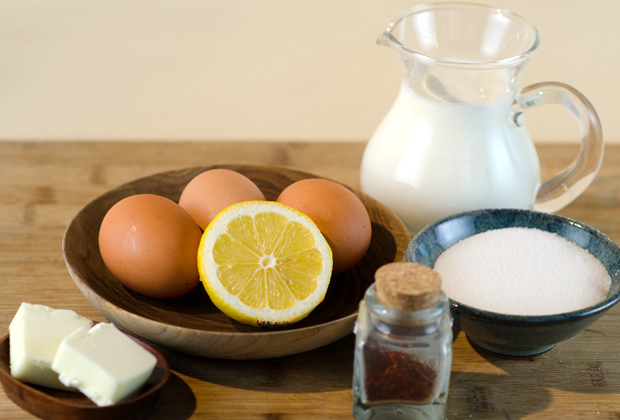
Lemon curd has long been a tea time favorite for topping for scones and shortbread. Here it adds another intense lemony layer to the cheesecake. The ingredients are very basic, eggs, butter, sugar and the zest and juice of lemon.

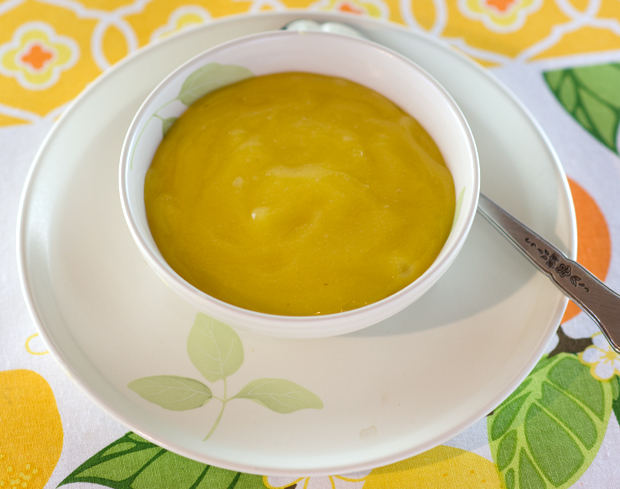
This lemon curd recipe was a real revelation for me. As a caterer I made countless, probably thousands of miniature lemon and lime curd tarts for dessert tables. The recipe I used for years combined the lemon juice and rind, beaten eggs and sugar in the top of a double boiler. The mixture was cooked slowly over simmering water until thick and shiny, making sure the curd never came to the boiling point. It was a long and tedious process. As careful as you might try to be, there was always the possibility of getting unattractive little white specks of egg in the curd. That meant the additional step of straining the curd and losing some of the product.

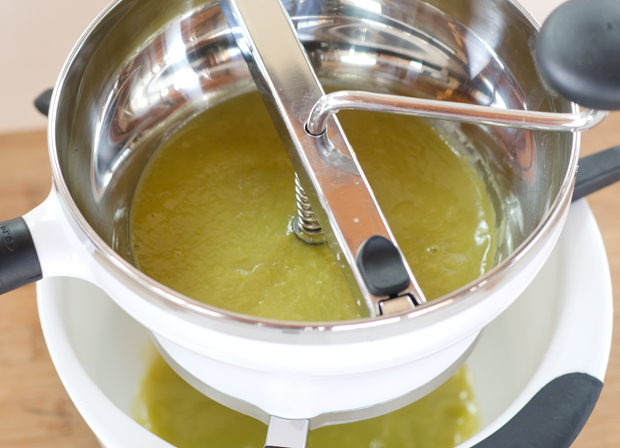
This recipe for lemon curd combines ingredients much in the way when you bake a cake. Room temperature butter and sugar are beaten together until smooth. Next the eggs and the egg yolks are beaten in one at a time. Now the lemon juice is added. Don’t panic, the mixture will appear to be curdled. The butter will start to melt when it’s cooked over low heat and the texture will become silky smooth.  The heat is now raised to medium and the curd is cooked until thickened, about 15 minutes.

Never let the mixture come to a boil. Be sure to get your whisk into every corner of the pan. This is when the curd can overcook if it is not stirred and scraped often.
Why does this method work? The egg proteins are coated in fat from the butter. This prevents them from coagulating into hard bits when the lemon juice is introduced.

All I know is that it works. The finished product may not seem to be as thick as you want it but it will continue to thicken after it is refrigerated. This easy recipe makes a lemon curd that is silky smooth, rich and creamy with just the right amount of tartness. Another bonus is that it can be frozen, so make a double batch and enjoy it now and later.
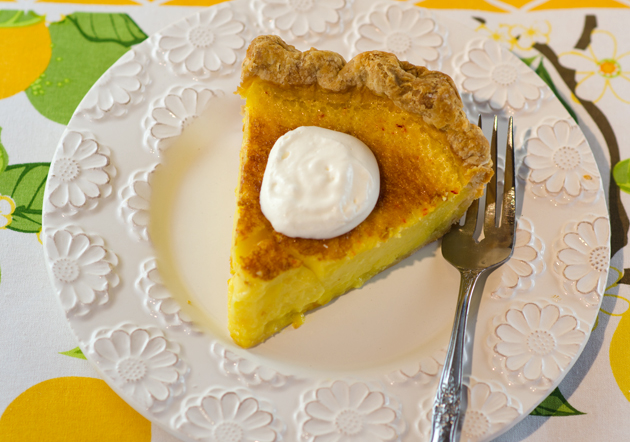
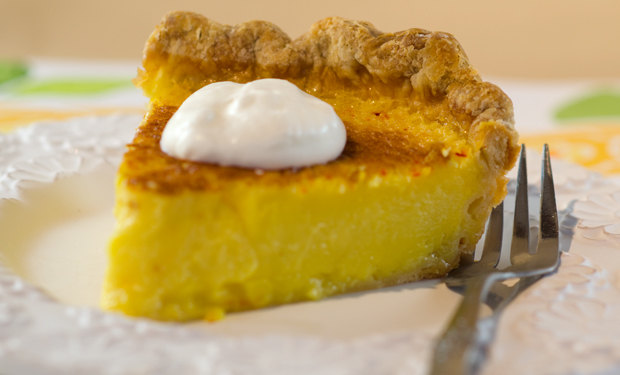
DSC_6767a

Lemon Cheesecake

Ingredients

For the crust:
  • 8 oz. vanilla wafers, finely crushed (2 cups of crumbs)
  • 3 T. granulated sugar
  • 7 T unsalted butter, melted
For the filling:
  • 3 8-oz. packages cream cheese, at room temperature
  • 1 c ricotta (regular or low fat)
  • 2 T. all-purpose flour
  • Table salt
  • 1-1/4 c granulated sugar
  • 2 Tbs. finely grated lemon zest
  • 1 Tbs. pure vanilla extract
  • 4 large eggs, at room temperature
For the garnish:
  • 3/4 cup lemon curd

Directions for the crust

  1. Position a rack in the center of the oven and heat the oven to 375°F.
  2. In a medium bowl, stir together the vanilla wafer crumbs and 3 Tbs. granulated sugar. Mix in the melted butter until the crumbs are evenly moist and clump together slightly. Transfer the mixture to a 9-inch spring form pan and press evenly onto the bottom and about 2 inches up the sides of the pan (to press, use plastic wrap or a flat-bottom measuring cup). Bake until the crust is fragrant and slightly darkened, 9 to 12 minutes. Let the pan cool on a rack. Lower the oven temperature to 300°F.

Directions for filling and baking the cheesecake

  1. In a stand mixer fitted with the paddle attachment, beat the cream cheese, ricotta, flour, and a pinch of table salt on medium speed, scraping down the sides of the bowl and the paddle frequently, until very smooth and fluffy, about 5 minutes. Make sure the cheese has no lumps. Add the 1-1/4 cups granulated sugar and continue beating until well blended and smooth.
  2.  Add the lemon zest and vanilla, and beat until blended, about 30 seconds. Add the eggs one at a time, beating just until blended. (Don’t overbeat once the eggs have been added or the cheesecake will puff too much and crack as it cools.) Pour the filling into the cooled crust and smooth the top.
  3. Bake at 300°F until the center jiggles like Jell-O when nudged, 55 to 65 minutes. The cake will be slightly puffed around the edges, and the center will still look moist. Set on a rack and cool completely. Cover and refrigerate until well chilled, at least 8 hours and up to 3 days. The cake can also be frozen at this point for up to 1 month.
  4. To freeze, put the unmolded, cooled cake on a rimmed baking sheet in the freezer, uncovered, until the top is cold and firm; then wrap it in two layers of plastic and one layer of foil. Thaw overnight in the refrigerator.

DSC_6772a

Classic Lemon Curd

From Fine Cooking magazine

Makes about 2 cups

Ingredients

  • 3 oz. (6 Tbs.) unsalted butter, softened at room temperature
  • 1 c sugar
  • 2 large eggs
  • 2 large egg yolks
  • 2/3 c fresh lemon juice
  • 1 t. grated lemon zest

Directions

  1. In a large bowl, beat the butter and sugar with an electric mixer, about 2 min. Slowly add the eggs and yolks. Beat for 1 min. Mix in the lemon juice. The mixture will look curdled, but it will smooth out as it cooks.
  2. In a medium, heavy-based saucepan, cook the mixture over low heat until it looks smooth. (The curdled appearance disappears as the butter in the mixture melts.) Increase the heat to medium and cook, stirring constantly, until the mixture thickens, about 15 minutes. It should leave a path on the back of a spoon and will read 170°F on a thermometer. Don’t let the mixture boil.
  3. Remove the curd from the heat; stir in the lemon zest. Transfer the curd to a bowl. Press plastic wrap on the surface of the lemon curd to keep a skin from forming and chill the curd in the refrigerator. The curd will thicken further as it cools. Covered tightly, it will keep in the refrigerator for a week and in the freezer for 2 months.
DSC_6602a
Sugar, butter, eggs and lemon, the basic ingredients of lemon curd.
DSC_6603a
It looks curdled after mixing but when it’s heated will smooth out to a silky lemon curd.


DSC_6760a
Delicious lemon curd.

April 24, 2014 Strawberry Rhubarb Crumb Bars

DSC_6692a

Some of Kathy’s friends were asked to bring a dessert for the lunch reception after her memorial service. Wanting to do something special in remembrance of her, I recalled she mentioned liking rhubarb so I knew it had to be part of my dessert contribution. The list of ingredients I have cooked with could rival a Chopped competition  but I had never used rhubarb before. I thought I would be best paired with another springtime favorite, strawberries. Since this lunch was informal, the dessert would need to be eaten out of hand so a bar cookie seemed to be the best choice.
For inspiration I turned to the doyenne of desserts, Martha Stewart. The rhubarb crumb bar on her website looked good and in the end notes she said that strawberries could be substituted for half of the rhubarb. Knowing her dessert recipes were dependable, that was good enough for me.
The first hurdle I encountered was finding a market that carried rhubarb. You would think that one of the harbingers of spring in the north would be in abundance but finding rhubarb was quite a challenge.  I will chalk that up to an exceptionally cold and snowy winter. After several phone calls I located the one farm market that carried it.  Manuevering through the crowds of Good Friday food shoppers, there it was, next to the corn on the cob (still haven’t figured out the logic of that).
I have passed by rhubarb before in markets with casual disinterest, so this was the first time I gave notice to it. To me it just looked like an overgrown stalk of celery or a ruby chard without the leaves. Not that impressive looking I’d say.  I learned that rhubarb leaves contain oxalic acid which is poisonous in large amounts. That’s why you will never see the leaves attached in the store.  Whoever figured out that the stalk wasn’t poisonous must have been very brave or very hungry!

Rhubarb, is also known as “pie plant”  and is a perennial vegetable. Rhubarb shows up most often in sweet dishes like cake, cobblers and crisps but also can show a more savory side in chutneys, salads and even curry. Look for firm, bright red or red-green stalks that can be as long as two feet. It can be wrapped in plastic and stored in the refrigerator for 3-5 days.

The flavor of rhubarb is quite tart and needs to be balanced with a great deal of sweetness.These easy to make bars combine a cake base with a tangy sweet filling of berries and rhubarb and are topped with streusel. Cool the bars completely, an overnight stay in the refrigerator is best, before cutting. Serve as is or dusted with confectioners sugar or “fancied up” with a dollop of sweetened whipped cream.

DSC_6609aDSC_6611aDSC_6612aDSC_6616aDSC_6619aDSC_6625aDSC_6628a

Strawberry Rhubarb Crumb Bars

Adapted from Martha Stewart Website

Makes 16 or more if you cut them smaller

Ingredients for the Streusel

  • 1/2c melted unsalted butter, you will need additional room temperature butter for the pan
  • 3/4c packed light brown sugar
  • 1/4t kosher salt
  • 1 1/4c all purpose flour plus more for the pan

Ingredients for the Bars

  • 1/2lb rhubarb, cut into 1/2″ dice
  • 1/2lb strawberries, hulled and sliced 1/4″ thick
  • 1 1/2T light brown sugar
  • 1 1/3c all purpose flour
  • 1t baking powder
  • 1/2t kosher salt
  • 3/4c unsalted butter at room temperature
  • 1 1/4c confectioners sugar
  • 2 large eggs, beaten lightly
  • 1t vanilla extract

Directions for the bars

  1. Preheat oven to 350ºF. Line a 9″ square baking pan with parchment paper, leaving a 2″ overhang on two sides. A little butter on the edge of the pan will help keep the parchment flush with the pan. Butter and flour the parchment and pan, tapping out excess flour.
  2. Make the streusel. Whisk together butter, brown sugar and salt. Add flour and mix together with a fork or your fingers. Refrigerate until ready to use.
  3. Make the cake. In a medium bowl, combine rhubarb, strawberries, brown sugar and 1/3c flour. Sift or whisk together remaining flour, baking powder and salt, set aside.
  4. Beat the butter and confectioners sugar with a mixer until light and fluffy. Slowly add eggs and vanilla extract.  Stir in flour mix until just incorporated.
  5. Spread batter in prepared pan, top with the strawberry rhubarb mix, then top with streusel.
  6. Bake 50-55 minutes or until golden and a toothpick comes out clean. Let the bars cool in the pan, then remove from the pan using the parchment tabs.
  7. Slice bars to preferred size and serve.

DSC_6693a


April 21, 2014 Creamy Asparagus Soup

DSC_6574a

Spring is finally in the air and asparagus is one of the first spring vegetables to emerge.  When I was examining the asparagus in the supermarket, a fellow shopper asked me if it was local asparagus or not. The sign indicated that the asparagus was from Mexico. My fellow shopper told me she would wait a little longer for the local asparagus. Because of our exceptionally cold and snowy winter I am sure that local asparagus won’t be appearing in our farmers markets until late May and early June. I wanted to make asparagus soup for Easter so I decided to buy it anyway.

When purchasing asparagus, choose spears that are bright green, even purplish with firm, tight tips. Markets usually sell asparagus in one pound bundles. Pick the bunch up and examine for split or broken ends. The cut ends are fibrous, the plant’s reaction to when it is cut in the field. If the stem end is excessively woody or wrinkly,  the asparagus is past its prime.

Fat, thin or in between, when it comes to asparagus you could say they were “born this way”. When we had an asparagus patch the spears varied from skinny ones to very plump ones. Fatter spears of asparagus weren’t left out in the field too long unlike that zucchini you grew that became as thick as a baseball bat. Thickness is a sign of the age of the crown which produces the asparagus stalks. Thinner asparagus originates from younger plants or from crowns  that are planted closer together. Mature crowns and certain varieties produce thicker spears.

Thin asparagus is predominant in the off-season in this area and many view it as more desirable. I personally prefer a medium to slightly thicker stalk when the local farms are producing.The taste testers at Cooks Illustrated liked both thick and thin asparagus. They found the thicker spears to be more tender because the fibers are more concentrated in the thin spears. The trade-off? Thicker spears may need to be peeled.

The best way to store asparagus is to trim the cut ends slightly and stand them in a shallow container of water. Cover the container with a plastic bag and refrigerate for several days. The alternative (my personal favorite) is to wrap the stem ends with a damp paper towel and store in the produce bin of your refrigerator. To snap or to cut? I prefer to cut the ends of asparagus for a more uniform appearance.

Waste not, want not could be the subtitle of this recipe. Every part of the asparagus stalk is used from the ends to the tips. The “waste not” is the woody stems of the asparagus and the dark green tops of the leeks that are usually relegated to the compost bin in most recipes. For the “want not”, these usual discards are combined with celery and onions, herbs and water to make a flavorful vegetable stock. Then the rest of the celery, leeks and garlic are sautéed in butter. The tender stalks of the asparagus along with some potato are added next  to give the soup more body before the vegetable stock is added.  It was not called for in the original recipe, but I put the soup through a food mill to give it a smoother texture. The asparagus tips are blanched separately for a minute or two and added to the soup before serving as a final garnish. Cream is added to the soup as a final touch, you could use half and half or skip the dairy altogether.  Served hot or cold, this soup is a delicious springtime treat.

DSC_6524a
Asparagus stems and leek trimmings combine to make a flavorful stock.
DSC_6530a
Blend it up!
DSC_6595a
Putting the soup through the mill.


Creamy Asparagus Soup

From Fine Cooking magazine

Serves eight

Ingredients

  • 2 lb asparagus
  • 3 ½ T unsalted butter
  • 1 c coarsely chopped celery ribs
  • 2 c coarsely chopped yellow onion
  • 1 large leek (white and green parts), halved lengthwise, thoroughly rinsed, and thinly sliced crosswise (keep dark green parts separate from light green and white parts
  • 8 whole peppercorns
  • 5 sprigs flat leaf parsley
  • 2 sprigs thyme
  • Kosher salt
  • 2 medium cloves garlic, chopped
  • ½ lb small red potatoes, peeled and cut into 1/2 inch dice (1 heaping cup)
  • ¼ c heavy cream or half and half (optional)
  • Freshly ground white pepper

Directions

  1. Snap off the tough ends of the asparagus, but don’t discard them. Cut about 1½ inches of the tips off the asparagus spears and cut the spears crosswise in thirds; set the spears and tips aside separately.
  2. Melt 1½ T of the butter in a 3 quart saucepan over medium low heat. Add the tough asparagus ends, half of the celery, the onion, and the dark green parts of the leek. Cook uncovered, stirring occasionally, until the vegetables look very soft, about thirty minutes. If the vegetable show any sign of browning, reduce the heat to low. Add 6 cups cold water and the peppercorns, parsley, thyme and a ½ t salt. Bring to a boil over high heat, reduce the heat to medium low, cover, and simmer for 30 minutes to make a flavorful vegetable stock.
  3. Meanwhile, bring a 2 quart pot of salted water to a boil over high heat. Add the asparagus tips and cook until just tender, 2 to 3 minutes. Drain in a colander, rinse with cold water to stop the cooking, and drain again. Set aside.
  4. In another 3 quart (or larger) saucepan, melt the remaining 2T butter over medium low heat. Add the white and light green sliced leek and the remaining celery and season with a with a generous pinch of salt. Cook, stirring occasionally, until the leeks look soft but not browned, 3 to 4 minutes. Add the garlic and cook for one minute more. Add the asparagus spears and the potato. Set a wire mesh strainer over the pot and pour the stock from the other pot; discarding the solids. Stir well and bring to a boil over high heat. Reduce the heat to medium low, cover and simmer until the potatoes and asparagus are very tender, about 20 minutes. Turn off the heat and let cool slightly.
  5. Purée the soup in a blender in two or three batches. If you want, put the soup through a food mill for the smoothest texture. Return the puréed soup to the soup pot.
  6. Add cream or half and half if desired, and stir well. Reheat the soup gently over medium low heat. Season to taste with more salt and a large pinch of white pepper. Ladle soup into bowls and scatter in the asparagus tips, distributed them evenly among the bowls.

DSC_6592a

DSC_6585a

April 9, 2014 Seared Scallops with Roasted Cauliflower and Caper-Raisin Sauce

DSC_6510a

I left the house with a busy agenda and a pile of cooking magazines with sticky notes. The plan was to shop for the ingredients needed for a scallop recipe, a curry that looked interesting, unique and not too time consuming. When I pulled out my magazines to make a shopping list I realized I didn’t have the issue of Food and Wine that I needed. So I turned to my phone, googling “Food and Wine magazine scallop recipe”. I didn’t find the recipe I had in mind but found one that sounded just as good, and I had all the ingredients I needed at home.

I didn’t know it when I first chose it but it was the featured recipe in the back page column  “Most Wanted”. The article was titled, “Jean-Georges Vongerichten’s Iconic Seared Scallops”. It is iconic because it is one of the signature dishes from the tasting menu that has been offered at Jean-Georges since 1998.

What makes the recipe unique is the sauce and the way it was discovered.To gain inspiration, Vongerichten will walk around the stations of his restaurant, tasting ingredients. As the story goes, one day he popped a caper in his mouth at one station, a few seconds later, a raisin at another. These two ingredients created a sweet and sour combination, a “taste explosion” in his mouth and caper raisin sauce was born.

I thought the pairing was intriguing and quite plausible, I often make a chard recipe that includes raisins and capers, along with olives, pine nuts, lemon and garlic and capers and raisins are often included in the ingredients for caponata, an Italian eggplant relish.

The vegetable in Vongerichten’s dish was cauliflower, another personal favorite. I love to toss cauliflower florets with olive oil, salt and pepper and roast in a very hot oven. The finished dish I refer to as “cauliflower popcorn” and more often than not, is finished before we sit down to the table.

The one thing I didn’t like, or at least didn’t want to splurge the extra calories on, was the ten tablespoons of butter required in the original recipe! I was certain I could work around that. I seared my scallops in a hot pan as I always do with a neutral cooking oil, not butter. I place my scallops in the pan like the numbers on a clock, starting at 12 and working my way around, extra ones go in the middle. That way I know which scallop to flip first.  I tossed the cauliflower florets with some olive oil and roasted them in the oven, until they started to turn brown in spots. The sauce contained the most butter, a whopping six tablespoons. Golden raisins are a must in this recipe, dark raisins would make a most unattractive color with the green capers. I plumped the raisins and capers in water as directed, drained them, reduced the cooking liquid by one half and added that to the blender to make the sauce along with sherry vinegar. The sauce is sweet and tart from the raisins and sherry vinegar, and briny from the capers Not the exact recipe but definitely a lighter and just as flavorful one.

DSC_6513a

Seared Scallops with Roasted Cauliflower and Caper Raisin Sauce

Serves four as an appetizer

Ingredients

  • 1/3 c capers, drained, not rinsed
  • 1/4c golden raisins
  • 1T sherry vinegar
  • Kosher salt and freshly ground pepper
  • Olive oil
  • Canola oil
  • 4c small cauliflower florets (you will have some leftover, allow for breakage)
  • 2T finely minced parsley
  • 12 large dry packed sea scallops, outer muscle removed

Directions

  1. Preheat oven to 450°F.
  2. In a small saucepan, combine the capers, raisins and 3/4 cup of water. Simmer over moderately low heat until the raisins are plump, about 10-15 minutes. Do not let it come to a boil. Drain the capers and raisins and transfer them to a blender, reserving the liquid. Return the liquid to the pan and boil until it is reduced by one half. With the blender on add the reduced liquid and sherry vinegar until incorporated. Season the sauce to taste with salt and pepper.
  3. In a large bowl toss cauliflower florets with a little olive oil, salt and freshly ground  black pepper. Transfer cauliflower to a baking sheet, and roast, shaking pan occasionally to caramelized all sides, about 10 minutes.
  4. Brush a large non stick skillet lightly with canola oil. Season the scallops with salt and pepper and add one half to the pan. Cook over moderately high heat without turning, until the scallops are golden brown on the bottom, about 3 minutes. Turn the scallops over and cook until browned on the other side. Repeat the process with the remaining scallops.
  5. Rewarm the caper raisin sauce, press through a sieve if a finer texture is desired.
  6. Arrange scallops on plates, spoon some sauce on the plate. Arrange cauliflower on the scallop and garnish with chopped parsley.DSC_6522a

DSC_6517a

April 5, 2014 Lemon Buttermilk Pie with Saffron

DSC_6433a

I am not known for my pie baking skills, I make the ice cream and left that part of the meal to my friend, Kathy. Known for her blue ribbon prize winning pie skills, naming only one of her many talents, she could whip up a pie to compliment any occasion or cuisine. Sadly, Kathy lost her battle of many years to cancer just two weeks ago. She fought a long and ardous ordeal with amazing courage and dignity. So naturally the first dinner we were going to have with our closest friends and family after her passing, I decided to make a pie. What’s the big deal? It’s just a pie, don’t overthink it, just make it. I found a recipe in Bon Appetit, a lemon buttermilk pie with saffron. A bit different, Kathy’s pies were fruit filled, not custard types, so technically I was doing my own thing.

Buttermilk was the star of the dessert recipes in this article and it was in both the crust and the filling. I made my pie dough Friday evening and everything seemed okay, I didn’t overwork it and formed it into a disc to roll out the next day. The directions called for the crust to be rolled out on a well floured surface. I decided to roll mine between layers of waxed paper, I read somewhere that made it easier to transfer it to the pie pan. It got a bit “wrinkly” and fearing it would  stick, I transferred the rolled out dough back to the freezer before peeling it off the waxed paper. The transfer was successful and I trimmed it and made my not so pretty crimped edges. Then I pricked it with a fork and placed it back in the freezer to relax before the blind baking. Blind baking is pre baking the pie crust so that it doesn’t get soggy, important when you are going to add a custard filling. Blind baking accomplished, my only concern was that the bottom of the crust was just a tad too brown.

The custard filling was easy to whip up in the blender  but it looked like there would be more filling than the pie shell would handle. But I trudged ahead, believing something magical would happen when I poured it into the pie shell. It did, custard all over the counter, a ruined soggy crust and I moved my hand the wrong way, sending a new plate I just bought into the air and into several pieces on the ground. Score that one, pie one, me zero.

Determined, I was not going to give up on this, no pie would defeat me, so I made the crust recipe again and found a deeper pie plate to accomodate the filling. Rolling out, baking and filling would wait until Sunday, the day I would serve the pie. In the mean time I watched videos on the proper way to roll out pie crust and how to properly crimp the edge to make a beautiful pie.

I had all the ingredients I needed to make pie number two, I just needed the heavy cream to make whipped cream to accompany it. Joe asked if I should get a “back-up” dessert, just in case. I said no, no safety net here, well I guess if things turned out real bad I would just get some ice cream at the CVS. The rolling went extremely well, this time directly on the counter as the recipe suggested, out from the center, then continual 90 degree turns. I kept rolling until the dough was 4 inches larger in diameter than my pan. No problem transferring the dough to the pan, I trimmed and made reasonably pretty edges for the crust.

Now the blind baking. I pricked the crust all over, chilled it, placed a layer of foil and filled it with pie weights. What happened next I’m not exactly sure. I removed the weights and foil from the crust to finish baking. Much to my horror and dismay the edges of the crust started to shrink back in the pan. I put the foil and weights back in, hoping to salvage the crust and save a trip to the CVS.

It didn’t turn out that bad but wouldn’t be featured in Pie Weekly, if there was such a publication. I added the custard, carefully transferring the pie plate on the baking sheet back into the oven. The perfect pie in Bon Appetit was pale, nicely crimped with flecks of saffron showing up here and there. My pie filling was considerably darker, Joe pointed out that I baked in convection mode, that was why. The pie was not perfect, but still tasted good. And my pursuit of pie making will not end with this attempt, Kathy would have approved.

DSC_6393a
Ingredients for the pie filling.


Lemon Buttermilk Pie with  Saffron

From Bon Appetit

Serves eight

Ingredients for Buttermilk Pie Dough

  • 1 1/4c all purpose flour
  • 1T sugar
  • 1/2t kosher salt
  • 1/2c (1 stick) chilled unsalted butter cut into pieces
  • 1/4c buttermilk

Ingredients for Filling and Assembly

  • 2T all purpose flour, plus more
  • 6 large egg yolks
  • 3 large eggs
  • 1 1/4c buttermilk
  • 1 1/4c sugar
  • 1T finely grated lemon zest
  • 1/3c fresh lemon juice
  • 1/4t kosher salt
  • Pinch of saffron threads
  • 2T unsalted butter, melted and cooled slightly
  • Whipped cream, for serving

DSC_6426a


Directions for Buttermilk Pie Dough

  1. Pulse flour, sugar and salt in a food processor to combine. Add butter and pulse until mixture resembles coarse meal with a few pea-sized pieces of butter remaining.
  2. Transfer to a large bowl and add buttermilk. Mix with a fork, adding more buttermilk by the tablespoon if needed, just until a shaggy dough comes together. Knead lightly until no dry spots remain. Pat into a disc and wrap in plastic. Chill at least 4 hours. Dough can be made 2 days ahead, keep chilled.

Directions for filling and assembly

  1. Preheat oven to 325F. Roll out pie dough on lightly floured surface to a 14″ round. Transfer to a 9″ pie dish, allowing dough to slump down into dish. Trim dough, leaving about 1″ overhang. Fold overhang under and crimp edge. Prick bottom all over with a fork. Freeze 15 minutes.
  2. Line crust with parchment paper or foil, leaving an overhang, and fill with pie weights or dried beans. Place pie dish on a rimmed baking sheet and bake until crust is dry around the edge, 20-25 minutes. Remove foil and weights; bake until surface looks dry, 10-12 minutes longer.
  3. For the filling, blend egg yolks, eggs, buttermilk, sugar, lemon zest, lemon juice, and saffron in a blender until smooth. With motor running, add 2T flour, then the melted butter. Tap blender jar against countertop to burst any air bubbles in filling and pour into warm crust.
  4. Bake pie, rotating halfway through and covering edges with foil if they brown too much before filling is done, filling should be set around the edges but the center will jiggle slightly, 55-65 minutes.
  5. Transfer pie dish to a wire rack and let pie cool. Serve pie with whipped cream.
  6. Pie can be baked 2 days ahead. Keep at room temperature up to 6 hours, cover and chill to hold longer.

DSC_6404a