June 2, 2018 Chicken Marsala Meatballs

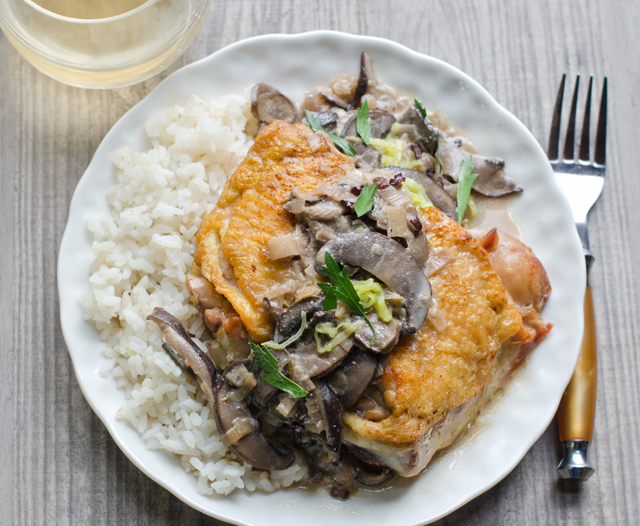
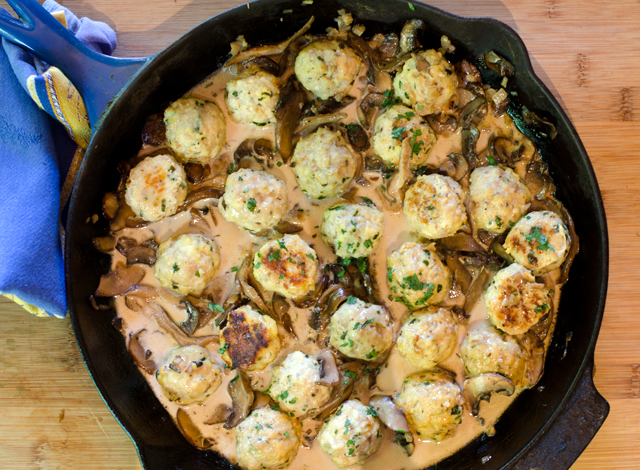
A friend recently texted me some pictures from the meal he had at a new local restaurant. One photo piqued my curiosity, chicken Marsala meatballs. When I had my catering business, chicken Marsala was a client favorite. Tender pieces of chicken in a luxurious, creamy sauce loaded with umami rich mushrooms, what’s not to love? This was a recipe I wanted to try.

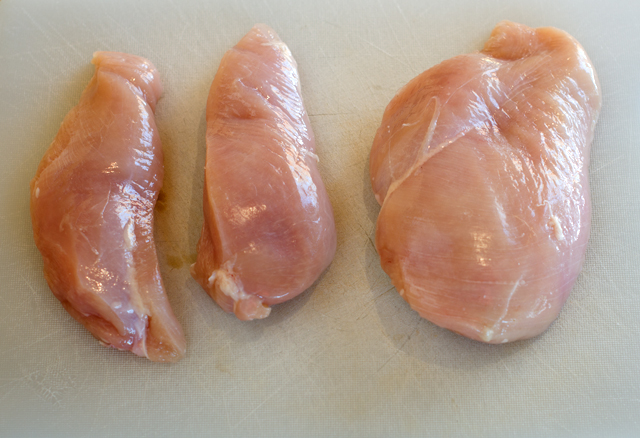
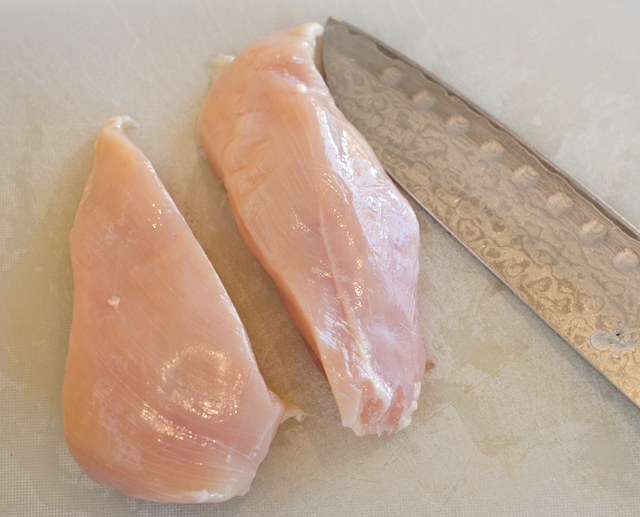
I buy ground turkey quite frequently, ground chicken I have shied away from. I thought that a lean meat like ground chicken would too easily result in a dry dish. But there are ways to ensure that won’t happen. Adding ricotta to meatballs is a tip I learned from chef Michael Symon on The Chew. The mild and creamy consistency of ricotta gives the meatballs a light texture. I prefer a natural ricotta, made with just milk, vinegar and salt. Place ricotta into a sieve and allow it to drain for at least a half hour to ensure a moist, but not watery meatball. I added finely chopped shiitake to the meat mixture to amp up the mushroom flavor and some panko breadcrumbs to lighten the texture of the meatballs.

Take off your rings and roll up your sleeves because it is best to use your hands for the next step. Combine the ingredients until they just come together, don’t over work. It’s easier to feel when everything is well mixed. Use oiled hands or a small cookie scoop to portion out the meat.Be gentle when forming meatballs. If they are packed too tightly and compactly, they will turn out tough, rubbery and chewy.

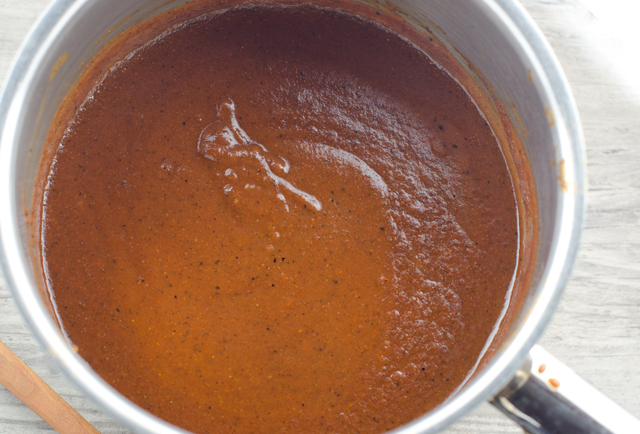
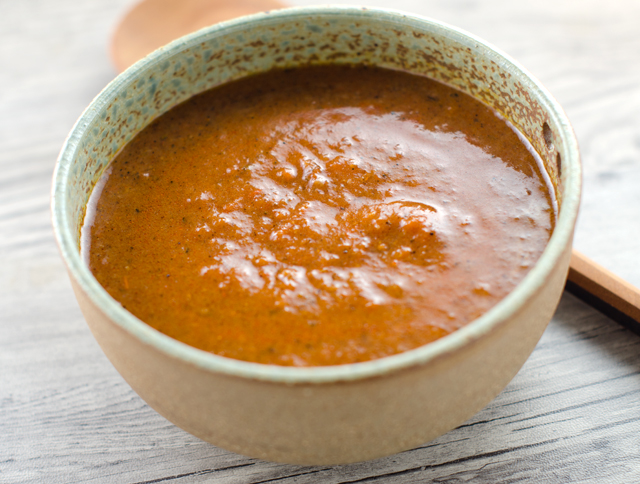
Place the meatballs on a parchment lined baking sheet and lightly coat it with non stick spray. I chose to roast the meatballs in the oven but they could also be fried in oil on the stove top. While the meatballs are cooking, you will have time to make the sauce. The star of the sauce, of course is Marsala wine. Marsala is a fortified wine produced in the region surrounding the Italian city of Marsala in Sicily. Dry Marsala is used in savory preparations like this dish while sweet Marsala is used in desserts. Tiramisu anyone?

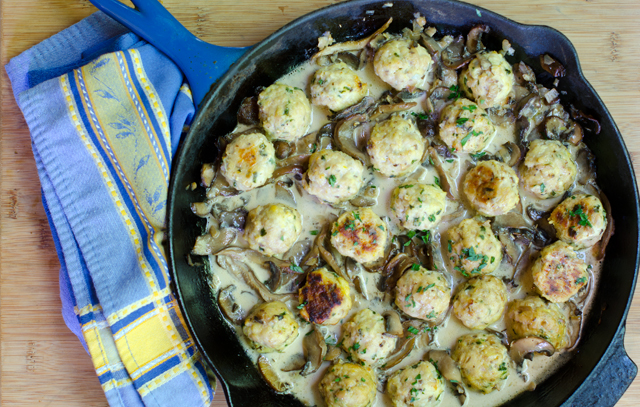
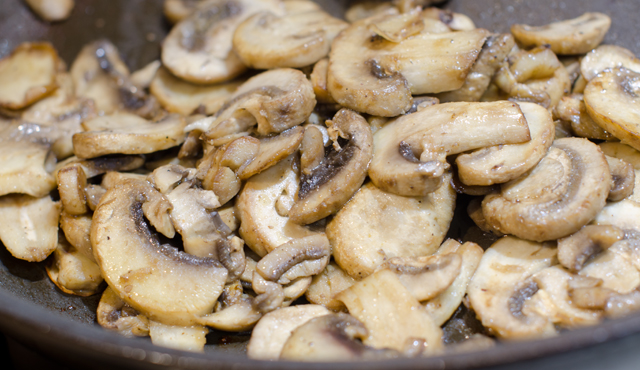
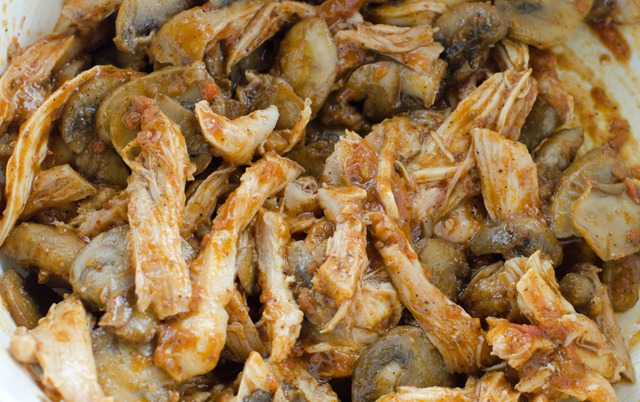
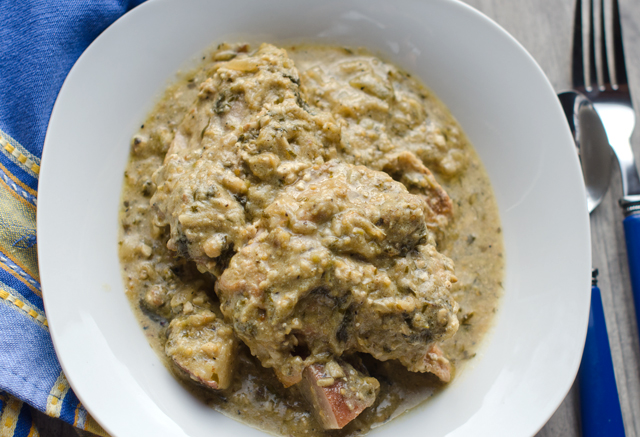
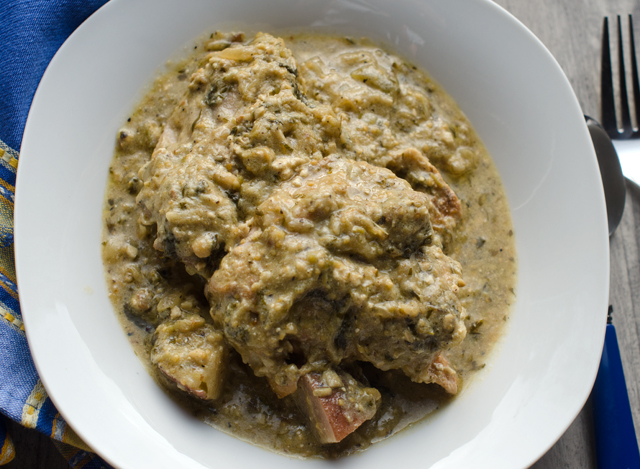
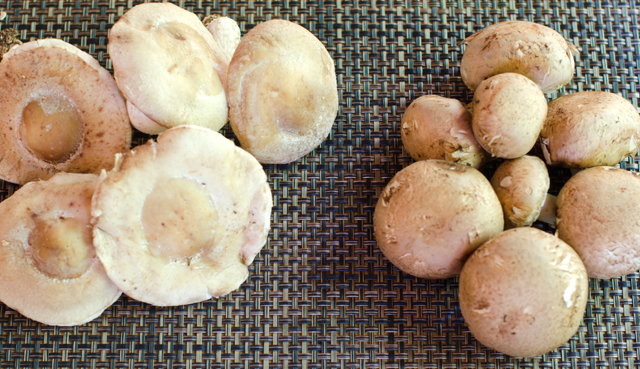
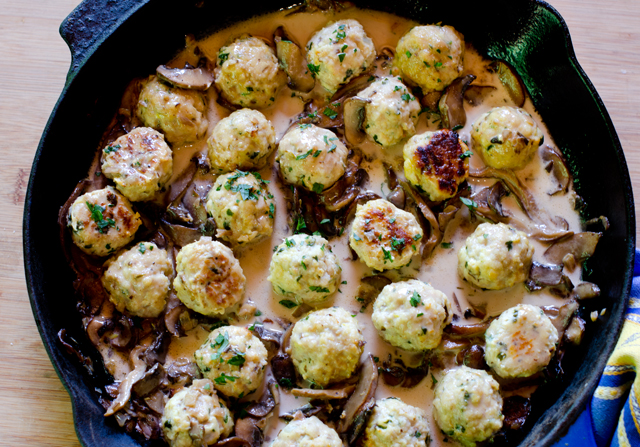
Melt butter in a saute pan large enough to hold the meatballs. Saute shallot, then add mushrooms and garlic to the pan, I used a combination of shiitake and cremini, white button mushrooms are fine as well. Cook, stirring frequently until the mushrooms begin to brown, 3 to 4 minutes. Add Marsala wine to the pan and cook until slightly reduced. Add cream and wine and reduce heat to a simmer. Add meatballs back to the pan tossing gently. Sprinkle with fresh parsley and serve.

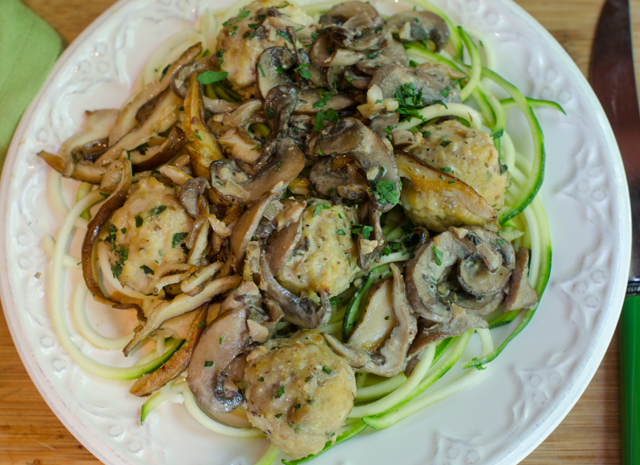
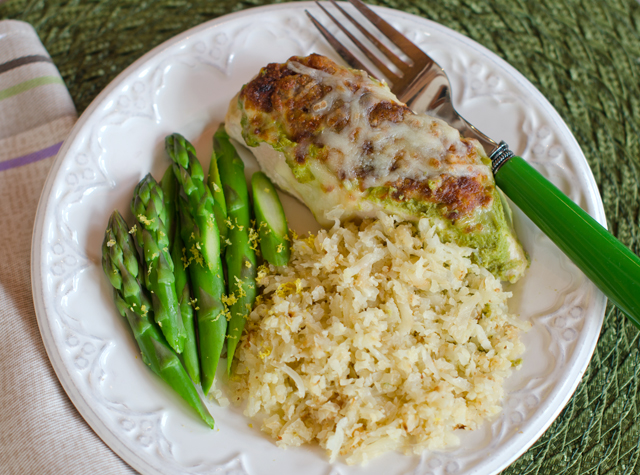
This dish could be prepped ahead of time, make the meatballs and sauce and hold separately in the refrigerator until you are ready to cook dinner. Chicken Marsala meatballs make a great hors d’oeuvre, sandwich filling on a crusty roll or served over wide pasta noodles or like we did, over zucchini “noodles”.

I used cremini and shiitake mushrooms in my preparation, button mushrooms are fine to use as well.
Place meatballs evenly spaced on a prepared baking sheet.

Chicken Marsala Meatballs

Makes 24-27 meatballs

Ingredients for the meatballs

  • 1 lb ground chicken
  • ¾ well-drained ricotta cheese
  • 3 T finely chopped shallot
  • 2 t finely chopped garlic
  • 1 egg, lightly beaten
  • 1 c finely chopped mushrooms
  • ½ c freshly grated pecorino romano cheese
  • ½ c panko breadcrumbs
  • Kosher salt and freshly ground black pepper

Directions for the meatballs

  1. Preheat oven to 375°F. Line a large baking sheet with parchment or foil. Spray the baking sheet with non stick spray, set aside.
  2. In a large bowl combine chicken, ricotta, shallot, garlic, egg, mushroom, cheese, panko, salt and pepper to taste. Be careful not to over mix.
  3. Using your hands or a small cookie scoop, scoop out the meat mixture and roll into balls. Evenly place the meatballs on the prepared baking sheet.
  4. Bake for about 15 minutes, until light golden, rotating the tray halfway through the baking time.  Keep the meatballs warm while you make the sauce.

Ingredients for sauce

  • 1 T unsalted butter
  • 1 T extra virgin olive oil
  • 1 small shallot, finely diced
  • 8 oz thinly sliced mushrooms-more if you like.
  • 1 clove garlic, finely diced
  • 1 c dry Marsala wine
  • ¼ t dried thyme
  • 2 T chopped parsley
  • Kosher salt and fresh ground pepper

Directions for sauce

  1. Melt butter in a large saute pan over medium high heat, add olive oil.
  2. Add shallot to the pan, season with a pinch of salt and pepper. Cook until softened, 1-2 minutes.
  3. Add mushrooms and garlic to the pan. Saute until mushrooms are cooked through, 3-4 minutes, add Marsala wine to the pan, cook until slightly reduced, 4-5 minutes.
  4. Add cream and thyme and bring to a simmer. Add meatballs to the pan, toss gently until well coated.  Reduce the heat to medium-low and cover; let them simmer in the sauce for 10 minutes. Add chopped parsley, taste and adjust for seasoning with salt and pepper.

I served Chicken Marsala meatballs over zucchini noodles.

February 17, 2018 Chicken Mushroom Enchiladas

Now that I’ve mastered the cauliflower tortilla I thought it would be fun to try them in a chicken enchilada recipe. The “caulitillas” are just about the same size as a corn tortilla and not delicate as I was originally concerned, but very pliable and sturdy. Of course corn tortillas are what you would typically use and would be fine in this recipe. You can buy enchilada sauce in the supermarket but it’s quick and quite simple to make your own. You also can control the heat to your own taste. My advice would be to start out on the safe side with the amount of chili powder you add, you can always add more, it’s harder to tame the heat. I used a combination of regular and chipotle chili powder for its smoky quality. Measure out your ingredients before you start the recipe because you will be busy whisking to ensure a smooth sauce.

Heat the oil in a medium saucepan until it begins to sizzle. Add the flour and spices, whisking constantly until the spices become fragrant and deepen in color. Add tomato paste, tomato sauce and chicken stock and continue to whisk constantly to remove any lumps. Allow the sauce to come to a simmer, it will begin to thicken slightly. Taste sauce and adjust seasonings to your liking.

Now it’s time to assemble, you should have ready, a 9 x 13  inch baking dish, the tortillas, the warmed filling, the warmed sauce and shredded cheese.   I chose to make a filling of shredded chicken and sautéed mushrooms but this sauce would be good with many filling combinations. Many recipes call for dipping the tortilla in the chili sauce. I thought that was too messy so I just put a thin layer of sauce in the bottom of my casserole dish.

Lay out your tortilla and spread about two tablespoons of the filling down the center. Roll up the tortilla and place seam side down in the baking dish. Repeat with the remaining filling and tortillas. Top with additional sauce and shredded cheese and bake until the cheese is melted. Not the prettiest dish for certain, but definitely delicious. Leftovers heat up nicely.

Spices and flour for the chili sauce.
Takes only ten minutes to make a delicious complex sauce.


Chicken and mushroom enchilada filling.
Filling the “caulitilla”.
A thin layer of sauce on the bottom of the baking dish.
Rolled and filled tortillas ready to be topped with sauce.
Next the sauce and cheese.
Ready to dig into!


Chicken Enchiladas

Makes 10-12

Red Enchilada Sauce

Makes about 2½ cups

Ingredients

  • 2 T vegetable oil (I used avocado)
  • 2 T all-purpose flour
  • 3 T chili powder-I used 2 T regular and 1 chipotle (Penzey brand)
  • 1 ½ t ground cumin
  • ½ t dried oregano (Mexican is best)
  • ½ t kosher salt
  • 1/8 t cayenne pepper
  • ¼ t cocoa powder
  • pinch of cinnamon
  • 3 oz tomato paste
  • 2 c chicken or vegetable broth
  • ½ to ¾ c tomato sauce

Directions

  1. Measure out the flour and the spices into a small bowl.  Whisk to combine.
  2. In a medium saucepan over medium high heat, warm the oil until it begins to sizzle.
  3. Add the flour/spice mixture and whisk constantly. Cook until fragrant and darkened in color.
  4. Whisk in the tomato paste and sauce until thoroughly combined with the flour/herb mixture. In a steady stream, whisk in chicken broth.
  5. Reduce heat to medium and let sauce come to a simmer. Cook 8 to 10 minutes, sauce will thicken slightly. If not using immediately you may need to thin it out with a little stock or water.
  6. Remove the sauce from the heat and let cool slightly. Add salt and freshly ground pepper to taste.

Shredded Chicken and Mushroom Filling

Ingredients

Directions

  1. In a medium saute pan cook the mushrooms over medium high heat until they release their juices and are softened, 6 to 8 minutes.
  2. In a medium bowl add chicken and slightly cooled mushrooms.
  3. Stir in about a half cup of sauce to moisten the ingredients.

Assembly

  • 9 x 13″ baking dish
  • 10-12 corn tortillas or “caulitillas
  • Chili sauce
  • 2 c shredded Mexican blend cheese
  1. Preheat oven to 375°F
  2. Coat the bottom of the baking dish with a thin layer of the sauce.
  3. Set up an assembly line to make the tortillas: corn or cauliflower tortillas, chicken mushroom filling, cheese and sauce.
  4. Lay out a tortilla and place about 2 generous tablespoons of the filling down the center of the tortilla. Sprinkle a little cheese on top. Roll it up with your fingertips and place in the baking dish, seam side down. Continue rolling and filling the rest of the tortillas.
  5. Pour the remaining sauce over the enchiladas and sprinkle with the remaining cheese. Bake for 20 minutes and serve immediately.


February 3, 2018 Chicken, Butternut Squash and Chickpea Soup

Chicken, butternut squash and garbanzo bean soup is the perfect comfort food loaded with lean protein, delicately sweet butternut squash, nutty garbanzos and spinach for a healthy meal. This hearty main dish soup of my own creation is a complete meal with almost all pantry items with exception of the spinach. Blue potatoes and butternut squash are still a part of the larder from last year’s  garden and I am finally making a dent into the supply of butternut squash from the fall harvest.

To save time you can buy cubed butternut squash in the produce section of most supermarkets. But if you choose to start with a whole squash, this is a method that works for me. I start by washing off the squash, any dirt left behind when you start cutting the squash will be transferred to your knife and subsequently, the squash flesh. Cut off a ½-inch piece at both ends so that they are flat, then I cut it where the neck and the bulb meet. I cut the bottom in half and scoop out the seeds and stringy fibers, a grapefruit spoon works well here. You can discard the seeds but I like roasting them for a snack or a salad topping. Use a vegetable peeler or chef’s knife to remove all of the skin and the green veins that are directly under the skin, your finished product should just be orange flesh. Now you can use a knife to cut the squash into pieces. I was aiming for 1½ inch pieces. The squash I used for this recipe weighed in 3.25 pounds and made about 8 cups of raw squash. In a large bowl, toss the squash with a little olive oil and salt and roast on a baking sheet until the cubes are caramelized but not at the point of disintegrating into the soup. The squash measured 4 ½ cups after roasting.

The soup would be good without it, but I added some chicken to up the protein quotient and really make it feel like a meal. Normally I would use chicken thighs, but I had boneless breasts in the fridge. I wanted to keep the chicken as moist as possible, (there is nothing worse than dried out chicken in your soup) so I turned to a method that I have used in the past, poaching. Poaching is a method that cooks chicken gently and slowly. Boneless breasts are arranged in a single layer and covered with the appropriate aromatics and liquid, water in this case, but a splash of wine is good too. The pot is brought to the boil, then reduced to a simmer. After about eight minutes, check the temperature of the chicken in the thickest part of the breast. Chicken is supposed to be cooked to 165°F but since I knew I would be adding it to my soup pot, I was aiming at 155-158°F so it wouldn’t overcook in that step. Remove from the poaching liquid and let cool, then shred into bite sized pieces. An easier approach? Use the meat from a rotisserie chicken.

Once you are finished these steps, the soup comes together very quickly. In a large Dutch oven, saute the onion, then add the garlic and herbs. The broth, tomatoes and garbanzos are next. Bring to a boil, reduce the heat. Add the squash, chicken and spinach and cook for about ten minutes, until the spinach is wilted.

Freshly cooked garbanzos are a favorite of mine and would be great in this recipe but would require some advanced planning. Puree a few cups of the soup before the last ingredients are added if you want to give the soup a more stew like consistency.

Peeled whole butternut squash.
Preparing the butternut squash.

Chicken, Butternut Squash and Chick Pea Soup

Serves four

Ingredients

  • 1 butternut squash, about 3 lb
  • Extra virgin olive oil-for baking the squash and making the soup
  • Kosher salt
  • ¾ to 1 lb chicken breasts 2-3 relatively the same size or already cooked and shredded chicken, breast or thigh meat
  • 1 medium onion, diced small
  • 2-3 cloves of garlic, finely minced
  • 1 t ground cumin
  • ½ t ground coriander
  • 3-4 c low sodium chicken broth
  • 1-10 oz can diced tomatoes and green chilies (mild or hot)
  • 1-15.5 oz can chick peas, drained and rinsed
  • 4-5 cups spinach leaves

Directions

Preparing the butternut squash

  1. Preheat oven to 375°F. Peel, seed and cut squash into 1½-in cubes. Alternately use 8 cups  of pre-cut squash.
  2. Put the squash cubes in a large bowl, drizzle with olive oil and kosher salt. Toss to coat and place on a baking sheet, distributing the cubes evenly as possible.
  3. On the lower rack of the oven, bake squash for ten minutes. Gently flip the squash pieces so that the sides that aren’t caramelized are on the bottom, bake for another 5 minutes. Redistribute the squash pieces again and cook for another 5-7 minutes. Remove squash from baking sheet and transfer to a plate to cool.

Poaching the chicken

  1. Place the chicken breasts in a heavy bottomed pot, large enough to hold them without overlapping but relatively snug.
  2. Cover the breasts by an inch and a half with cool (not hot) water with a pinch of salt, or broth, garlic, a sprig of thyme or a bay leaf.
  3. Over medium high heat, bring to a boil, then reduce the heat to a simmer. Partially cover and at the eight minute mark insert an instant read thermometer at the thickest point of the breast to check the temperature. I like pulling mine off the heat around 158°F since they will continue to cook a little after they are removed from the cooking liquid and when added to the hot soup will cook a  little more.
  4. Let the chicken cool then shred along the grain into bite sized pieces.

Assembling the soup

  1. In a large 5-quart Dutch oven cook the onion over medium high heat until translucent. Add the garlic and spices are cook for another minute.
  2. Add chicken broth, tomatoes and chick peas and bring to boil.
  3. Reduce heat to a simmer and add squash, chicken and spinach, heat through for about ten minutes or until spinach is wilted.
  4. Serve in warmed bowls.

December 10, 2017 Chicken with Shallots

In the beginning it was Martha for me. Sure there was Julia, James, Jacques and the Silver Palate ladies, but Martha was my main inspiration as someone who was a novice at cooking, entertaining, and in a few years, a budding caterer. As the Martha Stewart empire expanded, so did the number of magazines published under the Martha Stewart brand. Among those titles was Everyday Food, a pocket-sized digest with recipes that were “fast and easy”. The recipes centered around ingredients that could easily be purchased at the grocery store and usually cooked in less than an hour. Quite a departure from many of the recipes in her many of her earlier cookbooks.

Though there are many good recipes from the magazine and accompanying PBS series, there is one that stands out from the rest, braised chicken with shallots. Over the years this recipe has been modified, updated and tweaked, this is my version.

Braised chicken with shallots is a one pot no fuss dish where the sum is definitely greater than the  basic parts. The original recipe used bone in skinless chicken thighs, you could equally substitute bone-in skin on chicken thighs or boneless skinless chicken thighs. I would definitely say choose thighs or chicken quarters (leg and thigh combination) rather than chicken breasts, dark meat holds up much better to braising.

Several versions of the recipe start with a definite no-no, rinse the chicken thighs in water. Washing raw poultry before cooking is not recommended by the USDA. Bacteria in raw chicken (in all meat actually) can be spread to other foods, utensils and surfaces, also known as cross contamination. Cooking chicken to the proper temperature kills the bacteria. So just pat the chicken very dry with paper towels and proceed with the recipe.

Coat the chicken pieces very lightly with flour and sprinkle with salt and pepper. Martha recommends (and I heartily agree) using Wondra flour for this step. If you haven’t noticed, it’s that bright blue canister tucked in next to all those alternative flours like coconut and almond. Wondra is an instant flour, precooked and dried. It dissolves quickly in liquids and makes lump free gravies. In this recipe it gives the chicken an extra light and crispy crust.

Melt butter in a large heavy bottomed skillet or Dutch oven. Cook the chicken three to four minutes per side, in batches if necessary. You want to develop a golden crust and leave behind brown bits that you will cook the shallots in. Remove the chicken from the pan and keep warm.

Shallots, usually a minor player in most recipes takes a starring role here. If you aren’t familiar with shallots, their flavor is sweet and mild, somewhere between an onion and garlic. This recipes uses about a pound, 12-15 medium to large shallots. Peeling shallots can be a tedious task. You can make this easier by soaking the shallots in boiling water for a few minutes and then putting them in an ice water bath so they won’t continue to cook. Make a shallow cut in the top layer and peel the skin and top layer away.

Sauté the shallots in the butter and rendered chicken fat until softened and caramelized. Return the chicken pieces to the pan and add a cup of white wine to bring some acid to the dish and to deglaze the brown bits in the bottom of the pan. I used vermouth, a fortified white wine that is flavored with herbs and spices. If you are going to use vermouth, look for a dry (not sweet) variety.

Stir in the Dijon mustard and add the fresh rosemary sprigs. Put a lid on the pan and simmer for thirty minutes. At the end of the cooking time add two cups of halved cherry tomatoes. Although I am not a fan of out of season tomatoes, there are some I will use as “supporting players” when they are necessary to the dish. With seed sourced from the south of France, Sunset Flavor Bombs are a good choice and available at big box stores.

This is a great dish for the busy cook, cook on a Sunday afternoon, reheat and serve several days later. Serve with noodles or rice to sop up the juices.

Shallots are a member of the onion family, their flavor is milder and reminiscent of garlic.
Chilling off blanched shallots before peeling them.

Chicken with Shallots

Serves 4-6

Ingredients

  • 2½ to 3 lbs chicken thighs (6-8 pieces)
  • 2 T flour (I used Wondra)
  • Kosher salt and freshly ground pepper
  • 2 T unsalted butter
  • 12 medium to large shallots, peeled
  • 1 c vermouth
  • 1½ T Dijon mustard
  • 2 large sprigs rosemary
  • 2 c small tomatoes cut in half or quarters

Directions

  1. Pat the chicken thighs dry with paper towels. Sprinkle them with salt, pepper and flour.
  2. Melt the butter over medium high in a heavy bottomed skillet large enough to fit the chicken pieces comfortably. When the butter begins to foam, cook the chicken, in batches if needed, 6-7 minutes per side. It should be brown and crisp on both sides. Set the chicken aside on a plate and keep warm.
  3. Sauté the peeled shallots in the butter and the chicken fat until they begin to soften and caramelize, 10-12 minutes. Stir in the vermouth with a large wooden spoon to deglaze the pan. Add in the mustard and the rosemary sprigs. Return the chicken thighs to the pan and cover. Turn the heat to low and simmer for 30 minutes.
  4. Add the tomatoes to the pan and stir them in to combine. Serve immediately or cool and refrigerate. Reheat and serve in the next two days.

October 17, 2016 Slow Cooker Chicken Thighs with Leeks and Mushrooms

Several rows in our garden are always reserved for leeks. It all started years ago with the classic book, Crockett’s Victory Garden, a month by month guide to all things (well most) gardening. It was in those pages Joe set his eyes on them for the first time, leeks that looked like they could almost double as baseball bats, actually they were Crockett’s exact words. It inspired him to give leeks a try. In addition, as cooking enthusiasts in the eighties, finding leeks in the supermarket was often futile, or if they had them, very expensive and not that good.. So growing leeks was a logical conclusion.

Leeks are a cool season vegetable that require 120 to 170 days to harvest. Joe starts them indoors and transplants them in the garden anytime after the last frost. At that point the leeks look like skinny blades of grass. He plants them closer together than they should be, so that we have thinnings that can be used like scallions before the mature leeks are ready. We will harvest most of them in the fall but some will winter over until early spring.

Even though we haven’t had much of a stretch of fall weather and it may get up to 80°F today, I am craving the stews and braises that are a natural in the cooler weather. In this dish versatile chicken thighs are slow cooked on top of a bed of leeks and mushrooms. The mild onion flavor of leeks pairs nicely with the savory earthy flavor of the mushrooms.

If you choose to brown the chicken first as I did, pat the chicken pieces dry with paper towels. This helps keep the chicken from steaming instead of searing. You can also substitute chicken leg quarters for the thighs, that’s the thigh and the leg in one portion. Boneless skinless thighs are another option, add those directly to the slow cooker without browning. I chose bone in and skin on for better flavor. I like the skin on and browned, it protects the chicken during the cooking process and makes for a more attractive presentation. You don’t even have to eat the skin if you don’t want to.

It has been stated countless times but is worth repeating. Do not rinse chicken, it just splashes bacteria all over you, your countertops and any other food that is nearby. The heat from cooking is enough to kill any bacteria that are present on the chicken.

The recipe is very simple, you can serve the chicken with the leeks and mushrooms as-is or after removing the chicken, thicken up the sauce a bit. I ladled out some of the broth and stirred in a little flour to thicken it up and added a little sour cream and half and half to make a more substantial sauce. Serve with white basmati rice to absorb all the juices.

A row of leeks.
Not quite baseball bat size but still fine.

Slow Cooker Chicken Thighs with Leeks and Mushrooms

Serves 4-6

Ingredients

  • 3 lbs skin on and bone in chicken thighs
  • 1 T olive oil
  • 4 c assorted sliced mushrooms, white, shiitake, cremini
  • 3 c leeks white and pale green parts only, halved lengthwise, washed well to remove any dirt and sliced thinly
  • 1½ T fresh thyme leaves
  • 1½  T minced fresh sage leaves
  • Kosher salt and fresh ground pepper to taste
  • 2/3 c dry white wine (Chardonnay or Burgundy)
  • 2/3 c chicken broth (homemade or low sodium canned)
  • 1 T all-purpose flour
  • 1/3 c sour cream
  • 1-2 T half and half or heavy cream

Directions

  1. Heat a large non stick skillet over medium high heat.
  2. Pat dry the chicken thighs well with paper towels. Season with kosher salt.
  3. Add olive oil to skillet and add chicken thighs skin side down. Do not crowd, this  should be done in batches. Cook skin side down for three minutes then flip to other side and cook for an additional two minutes. Remove to a plate.
  4. Place the mushrooms, leeks, thyme and sage to the slow cooker. Season with a  little salt and some fresh ground pepper.
  5. Nestle the chicken pieces on top of the vegetables and pour the wine and broth  around them.
  6. Cover and cook on low for six hours. If desired, at the end of cooking remove the chicken pieces to a platter and keep warm. Ladle out about a cup of the broth into a glass measuring cup. Whisk in a tablespoon of flour to thicken and stir in sour cream and half and half or heavy cream. Stir this back into the slow cooker taste and add more salt and pepper as desired. Serve chicken and sauce over rice.
Leeks, mushrooms and herbs into the slow cooker first.
Place chicken on top.
Serve with rice to sop up the juices.

September 24, 2017 Braised Chicken Thighs with Tomatillo Sauce

When is a tomato not a tomato? When it’s a tomatillo. Yes, their aliases include Mexican husk tomato and “tomato verde” and both tomatillos and tomatoes are members of the nightshade family, but that’s where the similarities end.

Years ago tomatillos were one of those “let’s try this and see” additions to the garden. I certainly wasn’t familiar with the sprawling bushy plants that first produce lots of leaves and little yellow flowers. These flowers eventually turn into bright green papery Chinese lanterns. The tomatillo grows inside this husk and when the fruit is mature, the husk dries out and turns a tan color and the tomatillo splits the husk open. Under that husk they look like hard little green tomatoes. They have a bright fresh flavor, a little citrusy and herbal. I have used them for salsa verde and a  chicken tomatillo soup. This time I wanted to use tomatillos in a sauce for braised chicken thighs. I found my inspiration from Mexican cooking authority, Rick Bayless. His recipe for a braised pork loin in tomatillo sauce could be adapted for chicken so I knew I would be getting the direction I needed.

Start the dish by making the tomatillo sauce or salsa, remember, salsa is the Spanish word for sauce. Turn the broiler to high and move the oven rack to the highest position.Remove the papery husks from the tomatillos and rinse off the sticky residue, that residue is a natural deterrent to insects. In this case it took 28 tomatillos to make a pound. Put them on a foil lined baking sheet, stem side down so they won’t roll around as much. It is a good idea to double up on the baking sheets so they won’t buckle under the broiler from the heat. Add one green jalapeno to the sheet and broil until the tomatillos are roasted, even blackened in spots and very soft. Transfer everything, including the juices to a blender and process until smooth. Set the sauce aside while you brown the chicken.

In a 4-5 quart Dutch oven, brown the chicken pieces. You will need to do this in batches, the chicken should be golden brown, not stewed. Rick instructs that you use either all white meat (breast) or all dark (thighs) because the cooking times will be different, I find that dark meat holds up better to the braising process. After the meat is browned it is removed to a plate. No need to rinse the pot, now it’s time to finish off the sauce.

Return the Dutch oven to medium heat and cook the onion and garlic. Raise the temperature to medium high and add the tomatillo puree. Cook until it is dark green and thickened, this concentrates the flavors of the sauce.  A little water thins out the sauce, Rick feels the addition of stock would make the sauce too rich. Now is the time to add some heavy or sour cream if desired. It lightens up the sauce and I liked it with the chicken. Add some fresh cilantro or the more traditional purslane also known as verdolagas in Mexico. I will definitely try that when purslane makes an appearance in the garden again. Nestle the chicken pieces in the sauce, put the lid on and cook in the oven for thirty minutes.

Potatoes add an earthy element to the dish. Parboil some red potatoes while the chicken is cooking, close to the end of the cooking they are nestled in the sauce between the chicken pieces. Serve the chicken topped with sauce with some potatoes on the side. The end result is a rich, warm satisfying dish and the perfect transition from summer to fall cooking.

Tomatillo on the vine, not ready for picking yet.

Ripe green and purple tomatillos.

It took 28 tomatillos to make a pound.
Roast tomatillos until soft and blackened in spots. Make sure the juices go in the blender too.
Blended tomatillos.
Chicken thighs are browned, then nestled in the tomatillo sauce.

Braised Chicken Thighs in Tomatillo Sauce

Serves 4-6

Ingredients

  • 1 lb fresh tomatillos
  • 1 medium jalapeno pepper
  • Kosher salt and fresh ground pepper
  • 8 medium skin on, bone in chicken thighs, 2½ to 3 lbs
  • 1½ T olive oil
  • 1 medium onion, finely sliced
  • 3 cloves of garlic, peeled and finely chopped’
  • 1/3 c chopped cilantro
  • A little crema or heavy cream if desired
  • 1¼ lbs red skinned potatoes, scrubbed and quartered

Directions

  1. Roast the tomatillos and chile on a baking sheet four inches below a very hot broiler until darkly roasted, even blackened in spots, about 5 minutes. Flip them over and roast on the other side for another 4-5 minutes. Tomatillos should be splotchy black and the chile soft and cooked through.
  2. Cool a bit then transfer everything, including the juices that have accumulated on the tray to a blender. Process until smoothly pureed.
  3. Set a 4-5 quart Dutch oven over medium heat, when the oil is hot add chicken pieces skin side down. It is best to do this in batches, you want the chicken to brown, not stew. Brown the chicken on the first side for 5 minutes, then turn over and brown on the other side. Remove the chicken pieces to a plate and keep warm.
  4. In the same Dutch oven over medium heat, add the onion and cook, stirring regularly, until golden, about 7 minutes. Stir in the garlic and cook a minute longer. Raise the heat to medium heat and when the oil is sizzling, add the tomatillo puree all at once. Stir until it is darker and noticeably thicker. Add 1 ½ cups of water and the cilantro. If you desire a mellower sauce add about a ½ cup cream or sour cream to the sauce. Taste and season with a little salt. Stir the sauce well to combine.
  5. Heat oven to 325°F. Nestle the chicken pieces in the warm sauce, cover the pot and set in the oven. Cook for 30 minutes.
  6. While the chicken is cooking, simmer the potatoes in a pan of salted water to cover until tender, about 10 minutes. Drain and set aside.
  7. When the chicken has cooked for thirty minutes, nestle the cooked potatoes into the sauce around the meat. Recover and cook for another 5-10 minutes.
  8. Serve the chicken and potatoes with the sauce over it.

March 21, 2017 Creamy Poblano Chicken

I didn’t think the day would come, but I finally exhausted my supply of freezer pesto. I’ve been using it this winter to top boneless chicken breasts before baking as an easy weeknight supper. A little looking around the freezer and I found the ingredients for this new impromptu sauce. Chicken with poblano cheese sauce is loosely based on a Mexican classic. Poblano peppers have a dark green skin and if left to ripen further on the vine will turn red. They are somewhat heart-shaped, 3-6 inches long and 2-3 inches wide. Poblano peppers are rich and flavorful with a mild to medium heat.

This recipe can be made as mild or as spicy as you like, depending on the number of poblanos added to the sauce. Since most recipes begin with roasted and peeled poblanos, there are several methods for roasting. If you have a gas stove as I do, they can be roasted on an open grated grill known as an asador. If you don’t have a gas stove they can be broiled on a foil lined baking sheet. With either method, turn them often so they char evenly. Put the chilis in a bowl while they are still hot and cover tightly with plastic wrap. Let them rest until they are cool enough to handle, 15-20 minutes. Pull on the stem to remove the seed core and cut the chile open to remove any additional seeds and ribs. Remove the skin by running your hands down the chile, use a damp paper towel to remove any skin that won’t easily come off. Resist rinsing the chiles, you will dilute the flavor.

The base is cauliflower Alfredo sauce, a recipe from the blog two summers ago. I wasn’t certain if this would be good to freeze, but I’m pleased to say it reheated well. Since my first step was to see if the sauce held up to freezing, I started with a cup of the cooled down sauce in the food processor. To this I added several roasted poblanos, from the end of last years garden, also from the freezer.

I puréed the sauce, along with a cup of raw spinach leaves, a teaspoon of ground cumin, salt and pepper. Start with one stemmed and seeded poblano, cut into strips and add more as desired just to give a little kick of heat. I topped chicken breasts with this sauce, covered with foil and baked for 23 minutes. After 23 minutes, I took out the chicken, removed the foil and topped with grated cheese and placed under the broiler. Delicious and the chicken is cooked perfectly! Next time I might add some roasted garlic too. This sauce would also be good to top chicken enchiladas or even as a dip for veggies.

Creamy Poblano Chicken

Serves 4

Ingredients

  • 1-1 ½ c cauliflower Alfredo sauce
  • 2-3 roasted poblano peppers
  • 1 c raw spinach leaves
  • 1 t ground cumin
  • kosher salt and freshly ground pepper
  • 2 lbs boneless skinless chicken breasts, remove tenderloin if attached, breasts cut in equal halves
  • ½c or more shredded cheese, a Mexican blend is good here, mozzarella is fine as well
  • Non stick spray or oil to coat baking dish.
Cut large breast pieces in half.
It’s best to cut on an angle to get even pieces.
Poblano peppers add just the right amount of heat.
I like to cook them on the stovetop on an asador.


The sauce can be made easily in a food processor or blender.

Coat the breast pieces evenly with the sauce.
Cover the chicken tightly with foil before cooking. Be careful of the steam that will escape after cooking.
After cooking they will shrink a bit.
Turn the broiler on and sprinkle chicken with cheese.
The finished product!

Directions

Preheat oven to 375°F

  1. Put the first four ingredients in the bowl of a food processor or blender and pulse until all ingredients are incorporated. Taste for seasoning and add another poblano if desired. Season with salt and pepper to taste. Scrape sauce from processor into a bowl and set aside.
  2. Spray a 9″ X 11″  baking dish with non stick spray or coat lightly with olive oil.
  3. Remove tenderloins from chicken breasts if still attached. Cut each breast in half to make even (as possible) pieces. Place the chicken breast pieces in the baking dish.
  4. Cover each piece generously with the sauce. Cover the baking dish with foil and bake for 23 minutes. Remove baking dish from oven, take off the foil and set oven to broil. Sprinkle cheese over chicken breasts and return baking dish without the foil to the oven. Broil until the cheese is melted and starts to brown in spots, 3-4 minutes. Watch closely. Serve with cauliflower rice to sop up the juices.

November 4, 2016 Pan Roasted Chicken with Harissa and Chickpeas

dsc_8239aI’ve been putting the harissa I made back in September to good use with this recipe that combines browned chicken thighs and chickpeas with a tomato broth infused with onion, garlic and harissa. Harissa is a spicy garlicky condiment native to the cuisines of the northwest African countries of Algeria, Tunisia and Morocco. The recipe varies by country, ethnicity and even neighborhood. My recipe for harissa included fresh sweet and chile peppers, fragrant spices like coriander, cumin and caraway, dried mint, lemon, garlic and olive oil. You can add some to bring an unexpected kick to a tomato sauce, toss with roasted vegetables, stir into hummus or make this middle eastern inspired chicken dish.

I love cooking chicken thighs for a week night dinner. They are not temperamental like the boneless skinless chicken breast that has its brief moment of juiciness, then dries out and disappoints when held for any length of time. Chicken thighs, no matter what preparation you choose, will wait patiently in a warm oven if dinner is delayed. A combination of chicken thighs and legs works well in this recipe also.

Begin this preparation by finding the correct pan. You will need a heavy bottomed, oven proof skillet that fits comfortably in your oven. No plastic handles please, many skillets are marked oven proof on the bottom. Keep a pot holder over the oven door lest you forget and touch the very hot handle with your unprotected hands. I know because I have done it. Preheat the oven to 425°F or as I do, 400°F for convection cooking. Heat the oil over medium high heat and swirl the pan around to evenly distribute the oil. Salt and pepper the chicken pieces and add skin side down to the hot skillet. You may need to do this step in two batches. If you crowd the chicken it will steam, not brown. Brown the chicken on the first side for about five minutes, or until golden and crisp, resist peeking too soon or the skin may tear. Turn on the other side and cook an additional four to five minutes. Add all the browned chicken pieces to a plate and keep warm. Empty all the drippings from the pan except about a tablespoon full into a small metal bowl or glass measuring cup. Hot oil will eat right through that empty plastic yogurt container you considered using and then you will have the additional clean up of hot drippings on your countertop.

Add onion and garlic to your now empty skillet, cook, stirring often until softened, about 3 minutes. Add tomato paste and cook, stirring until it begins to darken, about 1 minute. Add the chick peas, harissa and chicken broth and bring the pan to a simmer. As much as I love fresh chickpeas, canned ones are fine for this recipe. They soak up the flavors in this dish and take on a nutty quality. Harissa, can be found in different forms. I’ve seen a powdered version that needs to be reconstituted, a jarred version, a paste in a tube and one that comes in the kind of container hummus comes in. Whatever version you buy or make, it is important to taste it before adding it to the dish. The recipe calls for a quarter cup of harissa and even though the other ingredients round out the flavor a bit, it is best to hold back if you think it will make the dish too spicy. It’s easier to add more at the end of the cooking time.

I have made this recipe several times on a weeknight which classifies it as a keeper for me. I like the fact that it doesn’t have a lot of ingredients, and most are pantry staples. Since it is finished in the oven, you have time to make a salad or cook a vegetable while the chicken cooks. I have added vegetables when the dish goes in the oven,  for me, end of season baby eggplants, I think quartered Brussels sprouts or small florets of cauliflower would work as well.

dsc_8232a

Pan Roasted Chicken with Harissa and Chickpeas

Serves 4

Ingredients

  • 1 T olive oil
  • 3 lb bone in chicken thighs (6-8 thighs)
  • Kosher salt and freshly ground pepper
  • 1 small onion, chopped
  • 3 cloves garlic, finely chopped
  • 2 T tomato paste
  • 2 15-oz. cans chickpeas, rinsed
  • ¼ c or more to taste harissa paste
  • ½ c low sodium chicken broth
  • ¼ c chopped fresh flat leaf parsley

Directions

  1. Preheat oven to 425°F. Heat oil in a large ovenproof skillet over medium high heat.  Season chicken with salt and pepper. Working in 2 batches, cook until browned, about 5 minutes per side; transfer to a plate.
  2. Pour off all but 1 T drippings from the pan. Add onion and garlic; cook, stirring often, until softened, about 3 minutes. Add tomato paste and cook, stirring, until beginning to darken, about 1 minute. Add chickpeas, harissa and broth; bring to a simmer.
  3. Nestle chicken, skin side up, in chickpeas; transfer skillet to oven. Roast until the chicken is cooked through, 20-25 minutes. Top with parsley and serve with lemon wedges for squeezing over.

dsc_8243a

dsc_8246a

October 13, 2016 Chicken and Butternut Squash Soup

dsc_8161a

Joe begins planning the vegetable garden right after the Christmas holidays. As always, he asked me if there was anything I wanted to add this year. I knew right away I wanted him to grow butternut squash. They were never planted before because the vines need considerable room to grow. Since the ever-expanding garden now includes an area near the orchard and the berry bushes, there would be some more room available. Last year he grew some loofah and bird house gourds in that area but since they were not going to be repeated, butternut squash got the okay.

Butternut is a variety of winter squash. The name is a bit of a misnomer however,  since all winter squashes are frost tender (the plants will die with the first frost) warm season (seeds must be planted when the soil temperature is above 65°) annuals (plants that complete their life cycle in one growing season). With a growing season of 110-120 days for full maturation, they are harvested in the fall and can be kept well through the cold winter months, hence the name. Summer squash like zucchini and yellow crookneck are harvested all summer long while the fruit is still immature and the skin is still tender. Not counting the ones that “get away” and could fill in for baseball bats. And yes, botanically speaking, both winter and summer squash are fruit since they develop from a flower and are the part of the plant that contains the seeds. Winter squash should only be harvested when fully mature. When winter squash is mature, the stem end will turn from green to brown and will appear that the stem is beginning to dry out. The skin should look dull, not shiny and it should be difficult to dent the squash skin with your fingernail. Winter squash do not require refrigeration but should be stored in a cool dark area.

Last weekend the harvest was finally ready and Joe brought them in by the wheelbarrows full, 60 in all. Some of the squash were slightly damaged and they will be the ones I use first. Some I will give away to friends and the rest we are storing on shelves in our basement.

Low in fat and rich in vitamins A, C, fiber and antioxidants, butternut squash is a great addition to many recipes. I like to roast cubes of butternut squash to add to my fall salads.The butternut squash seeds can be tossed with olive oil and salt and roasted for a crunchy snack or a salad topper.

The creamy texture of butternut squash makes a wonderful soup and I have recipes for two on the blog from years past, butternut squash soup with cider cream and butternut squash soup with Asian pear and ginger, both unique and delicious.

Because of fall’s chilly temperatures, I wanted to make a more substantial main course soup. I liked the idea of roasting the vegetables on the baking sheet to bring out their natural sweetness. For easy clean up, I lined the baking sheet with parchment paper. The leek, pepper and squash should be cut into pieces all relatively the same size so they cook evenly. A medium dice works best here, about 1 to 1 ½ inches. Toss the vegetables with olive oil and spread out evenly on a baking sheet, don’t overcrowd. Arrange the chicken thighs on top of the vegetables and season everything with salt and pepper. I think chicken thighs are the best choice for this recipe, the skin keeps the meat moist during the roasting process. Rotate the pan halfway during the cooking process to ensure even cooking.

Transfer the chicken thighs to a plate to cool and add the roasted vegetables to a pot along with the chicken broth and spices. Simmer over medium heat and use a potato masher or the back of a wooden spoon to mash-up some of the vegetables to give the soup a thick, chunky texture. Shred the chicken into bite sized pieces, discarding the skin and bones. Add to the soup and stir in fresh lemon juice, salt and pepper to taste. When the soup is almost done stir in the kale ribbons and cook until they are wilted, an additional five minutes. Additional add ins for this soup could include cannellini beans and fire roasted diced tomatoes. The soup can be frozen or stored in the fridge for several days.

Roasted Chicken and Butternut Squash Soup

Serves four to six

Ingredients

  • 6 bone-in skin-on chicken thighs
  • 1 medium butternut squash, (2½ to 3 lbs) peeled, seeded and diced medium
  • 1 medium leek, sliced medium
  • 1 small red pepper, diced medium  (I added a red poblano too for a little kick)
  • 2 T extra virgin olive oil
  • Kosher salt and freshly ground pepper
  • 4 c low sodium chicken broth
  • ¼ t ground cumin
  • ¼ t ground coriander
  • ¼ t smoked paprika
  • 2-3 cups of thinly chopped kale (avoid thick stems)
  • 2 T fresh lemon juice
  • Fresh parsley or coriander (optional)

dsc_8147a

Directions

  1. Preheat oven to 425°F. In a large bowl toss the squash, red pepper and onion with the olive oil. Spread evenly on a large baking sheet. Arrange the chicken thighs on top, spacing out evenly. Season everything with salt and pepper.
  2. Roast until the squash and chicken are cooked through, rotating pan halfway through the cooking process.
  3.  Transfer the chicken to a plate, loosely cover and let cool. Transfer squash and onions to a medium pot and broth, cumin, coriander and smoked paprika. Simmer over medium high heat.
  4. With a potato masher or the back of a  wooden spoon, mash some of the vegetables until soup is thick and chunky.
  5. Discard the skin and bones from the chicken, cut meat into small pieces and add to the soup. Stir in lemon juice and season with salt and pepper.
  6. Stir in the thinly chopped kale and cook for five minutes more, until the kale is wilted. Taste and adjust seasonings, To serve, top with fresh parsley or cilantro.
Preparing the butternut squash.

dsc_8150a

I used a leek from the garden but an onion will work as well.
Lining the baking sheet with parchment makes for easy clean up.
The "after" picture.
The “after” picture.
Kale ribbons only need about five minutes to wilt into the soup.

dsc_8166a

September 9, 2016 Grilled Chicken with Lemon, Garlic and Oregano

dsc_7944aOur summer barbecues often include the combination of ribs and chicken. The ribs are sourced locally from a pork farm less than ten minutes from our home. The rich, succulent meat pairs very well with a sweet hickory barbecue sauce. I didn’t want to duplicate the same flavor profile for the chicken. I was thinking of a nice contrast, lemon, garlic and herbs. My need wasn’t for a method of cooking the chicken, Joe has mastered that quite nicely, I just wanted a different way to finish the chicken.

I found this very well reviewed method from a 2002 issue of Gourmet magazine. What makes this recipe unique is that the chicken is only seasoned with salt and pepper, grilled, and THEN tossed in a dressing of lemon, oregano, salt, pepper and olive oil. My husband was a bit skeptical but was willing to give it a try.

Sounds too simple but resulted in a surprisingly moist and flavorful dish that we will definitely be making again. We had plenty of fresh oregano from the garden for this, I would imagine that fresh rosemary or thyme would work as well. It’s a dish that can be done out of season as well. Put the chicken, skin side up in a shallow baking pans in the upper and lower thirds of a 500°F oven, switch the pans halfway through baking. Bake until the skin is crisp and chicken is cooked through, about 40 minutes. The lemon slices can be grilled in a grill pan. Toss the chicken pieces in the dressing and serve.

dsc_7943a

Grilled Chicken with Lemon, Garlic and Oregano

Serves 8

Ingredients

  • 2 lemons cut crosswise into 1/3 inch slices
  • ¼ c fresh lemon juice
  • ¼ c finely chopped oregano
  • 2 T minced garlic
  • ½ t kosher salt
  • ½ t coarsely ground black pepper
  • 1/3 c good quality olive oil
  • 6 lbs or more, chicken parts, breasts, thighs and legs

Directions

  1. Whisk together lemon juice, oregano, garlic, salt and pepper in a large bowl. Whisk in the olive oil in a  slow stream.
  2.  Season chicken parts with salt and pepper. Grill chicken according to your usual method on a gas or charcoal grill. Transfer cooked chicken to a tray and keep warm.
  3.  Transfer chicken parts to the bowl and turn to coat the pieces
  4. Grill lemon slices until grill marks appear, about 3 minutes on each side. Transfer to platter with the cooked chicken.

dsc_7940a