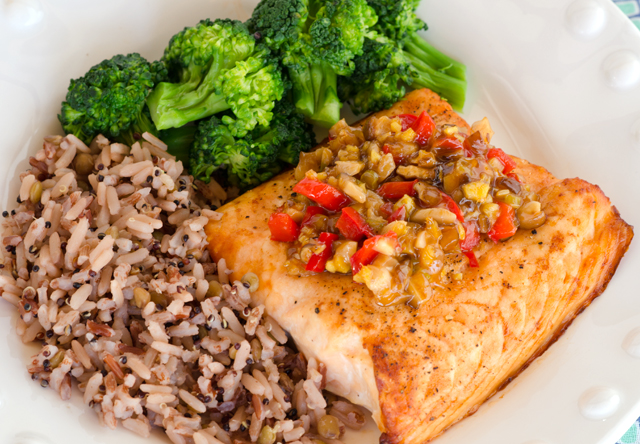
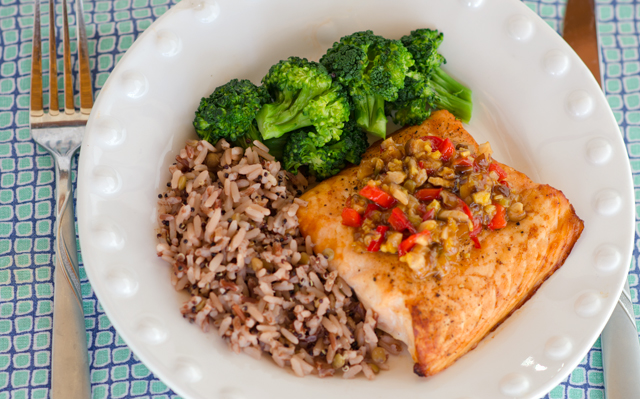
April 2, 2015 Roasted Salmon with Ginger Shiitake Glaze


DSC_2133a

Salmon is on our dinner menu once a week and I am always looking for new and interesting ways to prepare it. Always a healthy dinner choice, salmon is a good source of protein, potassium, selenium, B vitamins and omega 3 fatty acids. This recipe from Fine Cooking magazine , salmon with ginger and shiitakes has become a new favorite for us.

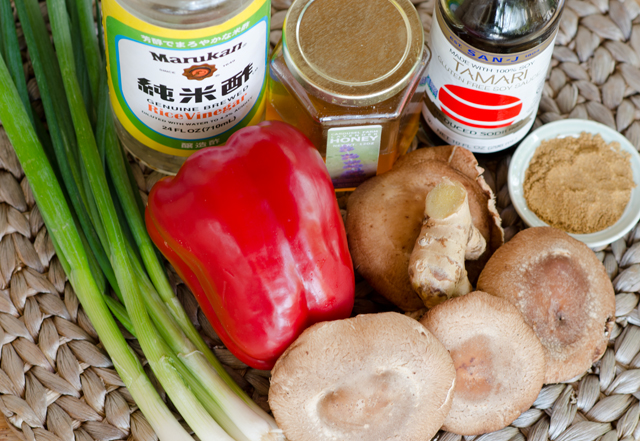
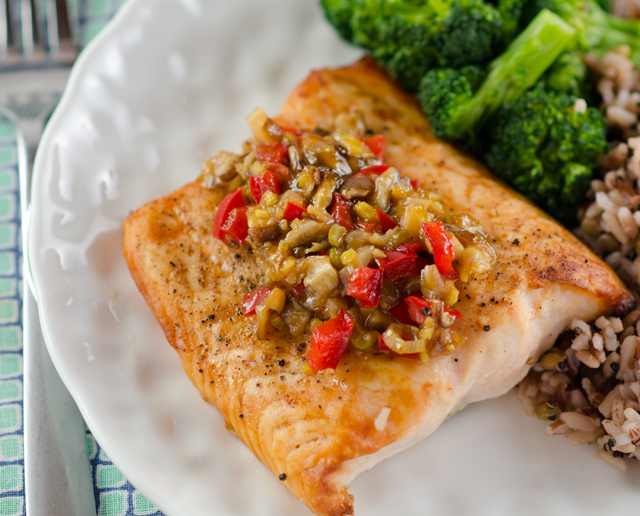
The original recipe called for broiling the salmon but I have adapted it for the way we cook salmon most of the time in non grill months, roasting. The fish is seasoned simply with salt, pepper and  ground coriander, you can use whatever seasoning blend you choose that compliments the recipe. What makes this recipe special is the topping, a marriage of a glaze and chunky vegetable mix that is spooned right before the fish is done. A flavorful combination of red pepper, shiitake mushrooms, ginger and scallions is seasoned with honey, ginger, rice vinegar, soy and sriracha. The topping is easy to do and  can even be made several hours in advance,

I substituted tamari for the low sodium soy sauce that was called for in the original recipe. Maybe you have seen tamari on you supermarket shelf next to the soy sauce and wondered what makes it different. Tamari and soy are both the by-products of fermented soybeans.Tamari is a Japanese soy sauce and is thicker, less salty with an umami quality to it.  It is made by collecting the liquid that drains from miso, fermented soybean paste. Since it is brewed only from soybeans, water and salt, it is gluten free. Sriracha, once a product I could only find in Asian markets is commonplace in supermarkets today. Add Sriracha to your own liking, if you don’t have it, another hot sauce or a few pepper flakes can stand in.  In case you didn’t know, sriracha is a Thai hot sauce made from chili peppers, vinegar, garlic, sugar and salt. I recommend the Huy Fong brand that has a rooster on the label. I plan to make my own version from the large collection of hot peppers we have in the near future.

Roasted Salmon with Ginger Shiitake Glaze

Serves four

Ingredients

  • 1 1/2lbs salmon filet
  • 2T canola oil
  • 1/4t ground coriander
  • Kosher salt and freshly ground pepper
  • 1/3c finely diced red pepper
  • 4 scallions, finely sliced, white and green parts separated
  • 2T finely chopped ginger
  • 1c shiitake mushrooms, stemmed and cut into fine dice
  • 1/4c honey
  • 3T rice vinegar
  • 1T Tamari style soy sauce
  • 1t Sriracha (or to taste)
  • 1t cornstarch mixed with 1t of water

DSC_2249a


Directions

  1. Preheat oven to 450°F. Cut salmon into individual servings and salt and pepper lightly (kosher or sea salt) and sprinkle with ground coriander. Let the fish sit at room temperature while you prepare the sauce.
  2. In a 12″ skillet over medium heat,  cook the red pepper, scallion whites and ginger in 2 tablespoons of canola oil.
  3. Stir occasionally until the pepper and scallions start to soften and brown, about 3 minutes.
  4. Raise the heat to medium high and add the mushrooms and sprinkle with salt. Cook stirring until they soften and brown, about three minutes.
  5. Add the honey, vinegar, tamari, chili sauce and a 1/4c water. Bring to a simmer.
  6. Whisk the cornstarch and water together and stir this into the glaze. Return to a simmer and cook until the glaze thickens, about 1 minute. Remove from the heat.
  7. Coat a pan that will hold the filets comfortably with 1T canola oil or non stick spray. Measure thickest part of filet with a ruler (every 10th of an inch equals 1 minute of cooking time at 450° F.)
  8. At 1 minute prior to calculated time of completion, raise oven temperature to broil,  remove fish from oven and coat evenly with the glaze. Return the salmon to the oven to broil the topping, this could take 1-2 minutes. Watch this step carefully.
  9. Serve immediately or be sure to remove from baking pan immediately (so that the fish does not continue to cook.)
  10. For a more translucent preparation decrease cooking time by 1-2 minutes.
  11. Serve fish on warmed plates.
DSC_2140a

DSC_2136a


March 19, 2015 Beer Battered Fish Tacos

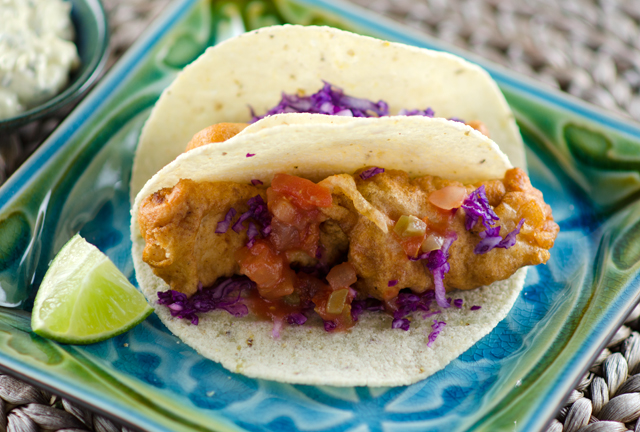
DSC_1911aFresh white fish encased in a crispy batter wrapped in a warm corn tortilla slathered with creamy and spicy tartar sauce and a sprinkling of cabbage and a spritz of lime, what’s not to love?

After all the fish tacos we consumed on our trip to Florida, you might think we would be tired of them about now. But we can’t get our fill of this delicious south of this border treat, so it was time for us to try our hand at them in our own kitchen.

Fish tacos are native to the Baja peninsula of northwestern Mexico, most likely originating in the town of Ensenada. An hour and a half south of the San Diego-Tijuana  border, Ensenada is surrounded by the beautiful Sierra de San Pedro Martir mountains and sits on an inlet of the Pacific Ocean. Fishing is one of the major industries of Ensenada and fishing boats pull up to the dock to unload their abundant fresh catch at the local seafood markets. More than ninety species are commercially fished or farmed in the area. A large portion of the catch is shipped to Asia, but some of it is sold by local vendors.

Though some fish taco recipes call for grilled or blackened fish, the classic fish taco recipe uses fish that is cooked in a tempura like batter. Many believe this is a result of the influence of Japanese immigrants who began settling  in Mexico at the beginning of the twentieth century. A firm fleshed white fish will hold up best for frying. Bass or cod are good choices, but at the suggestion of my fishmonger, I chose triggerfish.  Triggerfish is a delicious fish that takes well to any cooking method. The name refers to  an unusual interlocking dorsal fin that has to be “unlocked” by releasing a trigger shaped spine. They are usually about a foot long and weigh about 2 pounds with strong scales and tough skin.

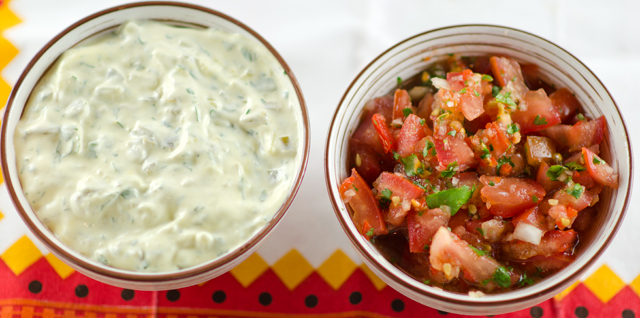
In addition to the usual pico de gallo or tomato salsa, these tacos are accompanied by a spicy tartar sauce. It is a simple sauce of mayonnaise combined with pickle relish, yellow mustard, lime and pickled jalapenos. I am fortunate enough to have my own stash of pickled jalapenos that I canned several years ago. They are nice and briny with quite a potent kick. A little shredded cabbage and a squeeze of lime are the finishing touches to these tacos.

Corn tortillas are the wrappers of choice here. There are several methods to keep them warm. Put five or less on a microwave plate and cover with a damp paper towel. Microwave in 30 seconds intervals and heat until warm. Wrap a small stack in aluminum foil and warm them in a 300 F oven for 15-20 minutes. You can also heat them one at a time in an ungreased skillet.

Beer Battered Fish Tacos

Serves 4-6

Yields 12-16 tacos

Spicy Tartar Sauce

Ingredients

  • 1c mayonnaise
  • 1/4c minced fresh cilantro
  • 3T minced pickled jalapeno
  • 2T dill pickle relish
  • 1T fresh lime juice
  • 1t yellow American mustard
  • 1/4t kosher salt

Directions

  1. Mix all the ingredients in a medium bowl, can be refrigerated for up to 5 days.

Pico de Gallo

Makes about 1 1/2 cups

Ingredients

  • 1/4 c chopped white onion
  • 1/4c coarsely chopped cilantro
  • 3 fresh serrano or jalapeno peppers, cored, seeded and coarsely chopped
  • 2 medium ripe tomatoes, finely chopped
  • Kosher salt and freshly ground black pepper

Directions

  1. Put the onion, cilantro and peppers in the bowl of a food processor and pulse until finely chopped. Transfer to a bowl and stir in the tomatoes. Season with salt and pepper to taste.

DSC_1891a

DSC_1898a

Fish for the tacos

Ingredients

  • About 2 quarts vegetable oil for frying
  • 1c all purpose flour
  • Kosher salt
  • 1c beer
  • 2 egg whites, beaten to soft peaks
  • 1lb firm fillets of mild white fish, I used triggerfish but bass, cod or haddock can also be used, cut into strips about 41/2 inches long and 3/4 inch wide

Directions for the fish

  1. Fill a large, deep heavy pot with vegetable oil to about 1 1/4 inches deep. Heat the oil to about 350°F. Check the oil temperature with a deep fry thermometer or add a cube of bread to the oil, it should bubble immediately.
  2. Mix the flour and 1 teaspoon salt in a medium bowl and stir in the beer until smooth. Gently fold in the egg whites.
  3. Season the fish with salt. To cook the fish, work in batches of about three or four pieces at a time. Using kitchen tongs, dip each piece in the batter, let any excess drip off, carefully submerge the fish in the hot oil, and fry until golden brown and cooked through, about 5 minutes. Transfer to a baking sheet lined with paper towels

To assemble the tacos

  • 12-16 corn tortillas (5-6 inches wide), warmed
  • 1 1/2 cups finely shredded green or purple cabbage
  • 2 limes quartered
  • Pico de Gallo

To serve: Just after the fish comes out of the fryer, arrange on a heated dish on the table. Set out the tartar sauce, hot tortillas, shredded cabbage, lime quarters and pico de gallo for each person to assemble their own tacos.

DSC_1912a


March 15, 2015 Shredded Romaine Salad with Yogurt Dressing

DSC_1889aI enjoy all aspects of cooking, but if asked what I enjoy making the most, it would be salads. My first choice, of course, would be greens picked fresh from the garden. Right now, while the last of the snow is being washed away by the rain, like everyone else, I depend on the greens available in the supermarket. The selection of packaged greens has improved over the last several years and one local supermarket carries greens grown in nearby greenhouses.

When using clamshell or bagged greens, check the date and first be sure you will be able to use what you purchase well before the expiration date. It is better to buy a smaller container that you will use than end up with something that resembles lettuce soup! I examine the package from all angles before I purchase because the freshest container can have quite a few soggy leaves.

The first step is to wash your greens thoroughly, even the packaged lettuces that are “triple washed”. I find that washing revives packaged greens and allows you to remove any damaged leaves. I fill a very clean sink with cold water, add the greens and swish them around, after a minute or so, the dirt and sediment will sink to the bottom.  For very delicate just-picked micro greens that might wind up in the drain,  I put them in the bowl of the salad spinner filled with cold water. The dirt sinks to the bottom and you can scoop the leaves out with your hands. Transfer the greens to the colander part of the spinner. I give them a shake in the colander portion first over the sink to remove excess water then I will start spinning.  I spin and dump the excess water several times. It is also important not to overfill the salad spinner, or the water has nowhere to go, three-quarters of the way is a good stopping point. If you are not using all the greens you have prepared, store them in a gallon storage bag. I like to put a flat paper towel in the bag first to absorb any excess water. Store in the crisper drawer of your refrigerator, and be sure not to store anything on top of it.

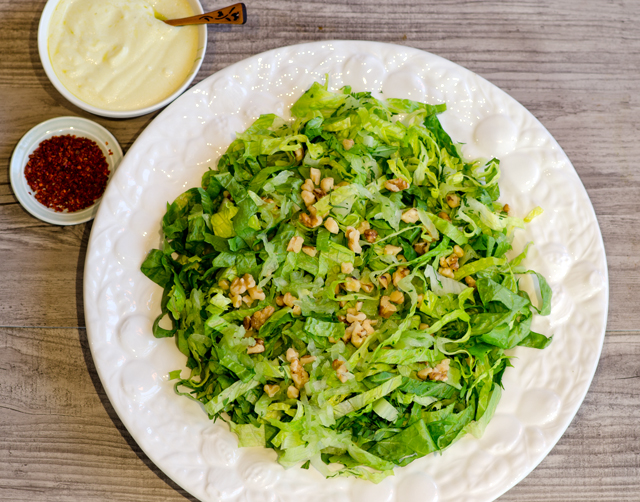
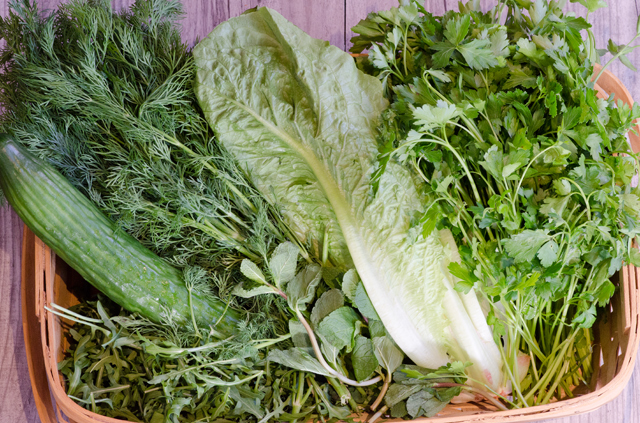
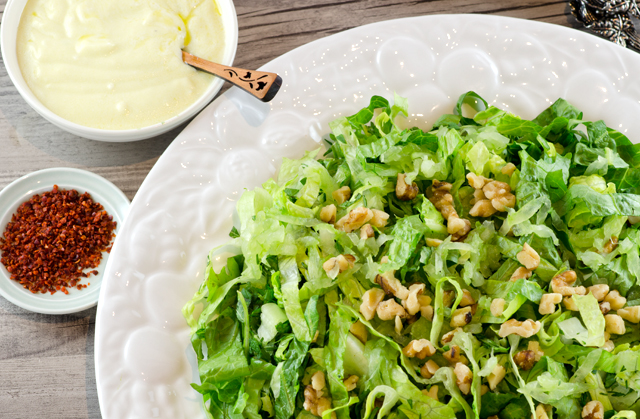
Thinly shredded romaine was a new twist on a green salad for me. In this recipe, again from Ana Sortum in the latest issue of Fine Cooking magazine, romaine lettuce is cut crosswise into quarter inch slices almost giving it a slaw-like quality. The shredded romaine is combined with spicy arugula and a trio of fresh herbs, dill, mint and parsley. Crispy grated cucumber and toasted walnuts are added to the salad.  A creamy yogurt based dressing is the perfect compliment to the greens. A little Aleppo pepper sprinkled on at the end gives a little kick.

Spring starts this week and Joe is more than ready to go out and work the soil.  He started the first crop of salad greens several weeks ago in the Aerogrow and transplanted them yesterday in the greenhouse. So it won’t be long before we will be enjoying our own home grown salads.

Shredded Romaine and Cucumber Salad

Serves 4

Ingredients

For the dressing

  • 2T fresh lemon juice
  • 1T Champagne or Chardonnay vinegar
  • 1 1/2t granulated sugar
  • 1t minced garlic
  • 1/2c plain whole milk or low fat Greek-style yogurt
  • 1/4c  plus 1T extra virgin olive oil
  • Kosher salt and freshly ground pepper

For the salad

  • 1 large head of romaine lettuce
  • 1 English cucumber
  • 1c baby arugula
  • 3/4c lightly toasted walnuts, halves or pieces, reserve 2-3T for garnish
  • 2T chopped fresh dill
  • 1T chopped fresh mint
  • 1T chopped fresh flat leaved parsley
  • Kosher salt and fresh ground pepper
  • 1/4t Aleppo pepper or a scant 1/4t red pepper flakes

DSC_1878a

Directions

For the dressing

  1. In a small bowl, combine the lemon juice, vinegar, sugar and garlic. Let stand for about 10 minutes to mellow the garlic. Whisk in the yogurt. Slowly drizzle in the oil, whisking constantly to combine. Season to taste with salt and pepper. Refrigerate until ready to use. Dressing can be made up to 3 days in advance.

For the salad

  1. Core and separate the romaine leaves, discarding any bruised or damaged outer leaves. Wash and thoroughly dry the romaine, this is important because the dressing won’t cling if the lettuce isn’t dry. Slice the leaves into 1/4 inch crosswise pieces and place into a large bowl.
  2. Peel, halve and grate the cucumber on the large holes of a box grater. Squeeze out the excess water with your hands and add to the lettuce. Add the walnuts to the salad.
  3. Coarsely chop the arugula and add to the bowl along with the herbs. Keep refrigerated until ready to serve.
  4. Toss the salad with dressing to coat generously. Season to taste with salt and pepper. Sprinkle with the Aleppo pepper and reserved walnuts and serve.

DSC_1883a

March 10, 2015 Imam Bayildi Revisited

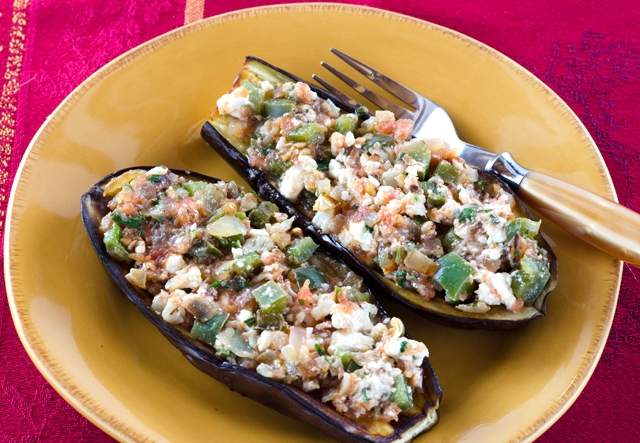
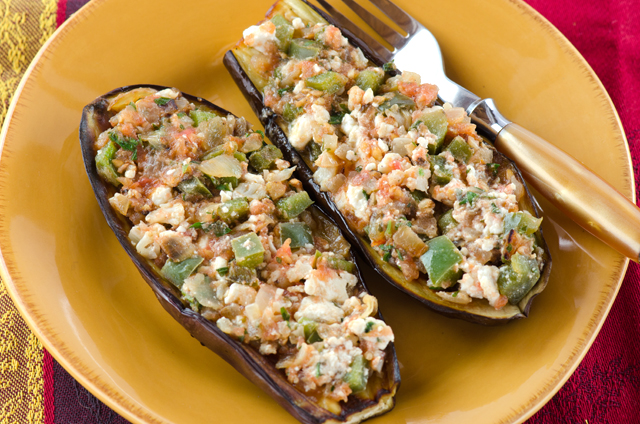
DSC_1861aImam Bayildi translates “the priest fainted”. Was it because the dish was so delicious or was it a reaction of this frugal priest  to the copious amount of expensive olive oil his bride used to make this dish? This is my second interpretation of this popular Turkish dish, one of a group of vegetarian recipes referred to as zeytinyagli or olive oil foods, served cold.  This recipe cuts down considerably in the amount of olive oil traditionally used in the original dish but definitely not on the flavor.

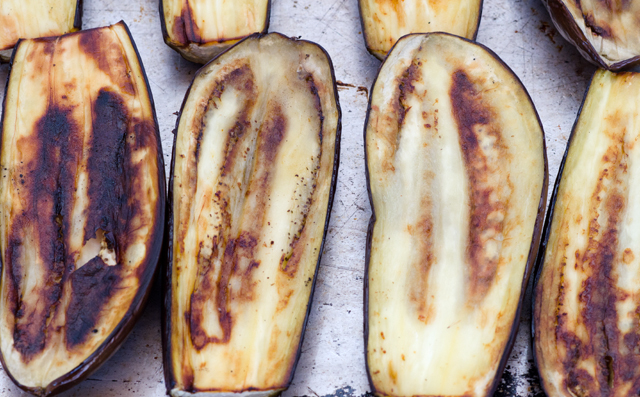
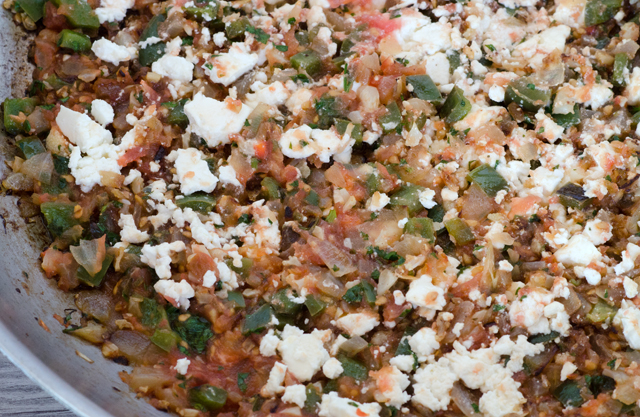
This is another recipe from Ana Sortum, chef at Oleana restaurant in Cambridge Massachusetts.  This recipe is similar to the first one I made in some of the steps.The eggplants are sprinkled with salt and brushed with olive oil and baked until the flesh is soft.  In the first recipe the flesh is scooped out and mixed in with the other ingredients, in the second the other ingredients are combined and pressed into the cooked eggplant, I liked that method. Onions, garlic, tomatoes, oregano and parsley are found in both recipes. Finely diced cauliflower, star ingredient of the moment, is a unique component for Imam Bayildi and adds a different texture and flavor to this dish that I liked. The second recipe also uses green bell pepper, an ingredient that I am not a big fan of. Green peppers are less expensive but not quite as nutritious as their red, yellow and orange counterparts. As a gardener, I have just considered them to be peppers that someone wasn’t patient enough to let ripen.  I am now coming around to seeing green bell peppers as a unique ingredient. In this dish they add an interesting  slightly bitter edge to the sweetness of the onion and the creaminess of the eggplant.

This is the first time I have ever grated tomatoes for a recipe. Choose ripe firm tomatoes and grate them over a shallow bowl with the largest holes of your box grater. Keep your hand flat and grate until the tomato flesh is scraped away from the skin. Discard the skin and you are left with tomato pulp that can be used in a variety of dishes. I am sure this is a technique I will use again.

Aleppo pepper is one of my favorite ingredient discoveries of the last several years. It is dark red, flaky and somewhat oily in texture. It takes it name from the ancient city of Aleppo in northern Syria, just east of the Turkish/Syrian border.  The flavor profile is rich, sweet and fruity with hints of cumin. The heat profile is moderate, just a bit hotter than paprika. As a result of the conflict in Syria, what now is sold as Aleppo is actually an identical pepper plant, Maras, that is grown in Turkey.

DSC_1848a

Imam Bayildi

Serves 8 as a side dish or 4 as an entrée

Ingredients

  •  4 small eggplants, about 1/2lb each
  • 10Tolive oil divided,  4T for brushing eggplants, 3T for sautéing, 3T for drizzling over finished dish.
  • Kosher salt
  • 2 1/2lb tomatoes, halved
  • 2c diced sweet onion
  • 1c diced green bell pepper
  • 1/2c finely diced cauliflower
  • 1T finely chopped garlic
  • 1/2c chopped Italian parsley, more for garnishing the finished dish.
  • 1t finely chopped fresh oregano or 1/2t dried
  • Aleppo pepper or crushed red pepper flakes
  • 3/4c crumbled feta, more for garnish

Directions

  1. Position a rack in the center of the oven and preheat to 375°F.
  2. Halve the eggplants lengthwise and place cut side up on a large rimmed baking sheet. Season the cut sides generously with kosher salt and brush with the first 4T of olive oil. Flip the halves over and bake cut side down until soft, about 30-35 minutes. Set aside until cooled.
  3. While the eggplant bakes, grate the cut sides of the tomato on the large holes of a box grater. It is easiest to put the grater in a bowl. Discard the skins. Drain the pulp in a fine meshed sieve until most of the liquid has drained through, about 20 minutes.
  4. Heat 3T of the oil in a 12-inch skillet over medium heat. Add the onion and cook, stirring occasionally, until soft, about 5 minutes. Add the pepper, cauliflower and garlic, cook, stirring occasionally, until all the vegetables have softened somewhat, about 5 minutes. Remove pan from the heat and stir in the tomato pulp, parsley and oregano. Season to taste with salt and pepper. Stir in the feta.
  5. Use a spatula to flip over the eggplant halves. With a slotted spoon, divide the filling among the eggplant, using the spoon to gently push the filling into the flesh.
  6. Drizzle with the remaining olive oil and bake until hot, about 10 minutes. Sprinkle with more crumbled feta and parsley and serve.

DSC_1856a

DSC_1857a

DSC_1872a

March 4, 2015 Turkish Tarator Sauce

DSC_1788a

What’s in a name? When it comes to food, it may depend on what country you are in. Tarator is a prime example of this. In the Balkans, it is a cold yogurt based soup made with cucumbers and seasoned with dill and lemon, similar to the ingredients in Greek tzatziki. In many Middle Eastern countries, Tarator is a sauce or a dip based on sesame tahini. The tarator of Turkey is a savory sauce, thickened with nuts and used with a wide variety of foods.

This recipe, a Turkish tarator sauce from Fine Cooking magazine is courtesy of  James Beard award winning chef Ana Sortum. Her travels as a young chef exposed her to the exciting, flavorful home cooking of Turkey. When she returned to Cambridge, Massachusetts, she opened her first restaurant, Oleana combinig the bold flavors of the eastern Mediterranean with farm fresh ingredients.

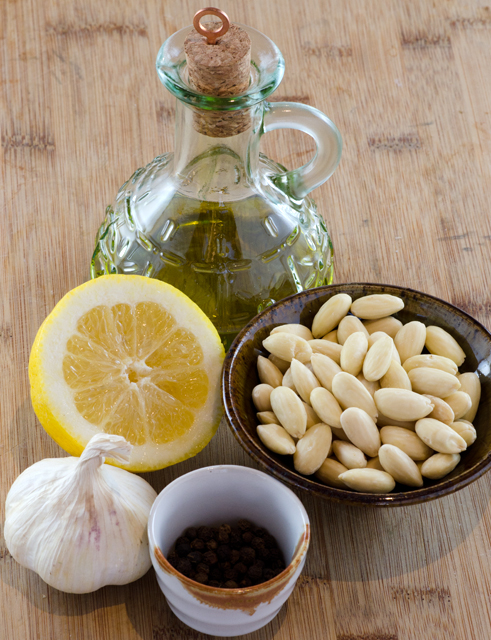
Tarator is very easy to make. As with many traditional sauces, it was first made with a mortar and pestle, but a blender brings this sauce together in less than five minutes. Nuts are the base of the sauce and provide it’s richness. I have seen everything from walnuts, to hazelnuts to pine nuts used in different versions of this recipe, blanched almonds are the chef’s choice in this recipe. Some recipes also include bread as an additional thickener but I found this unnecessary.  Combine nuts, olive oil, lemon juice, water and garlic in the food processor. Blend until smooth and thick, scrape down the sides several times during this process, it takes about 3 minutes.  Season to taste with salt and pepper. When serving, garnish with some toasted almonds.

Use good ingredients, not those nuts that have been sitting in your cabinet for months, fresh lemon juice and a quality extra virgin olive oil. I purchase my best oils from The Tubby Olive. Their oils are sourced from small farm producers and I am able to taste what I buy. Unfortunately not every bottle of olive oil labeled extra virgin, actually is.   If you are interested in some good information regarding the misrepresentation of the origins and quality of some brands of olive oil, check here.

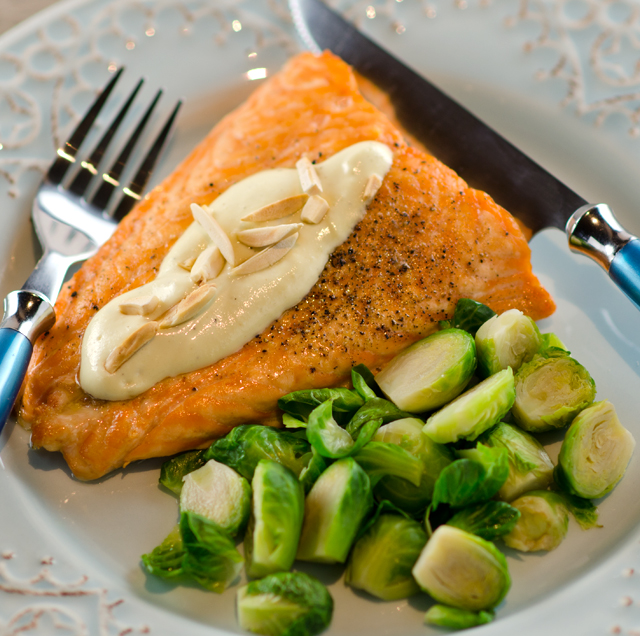
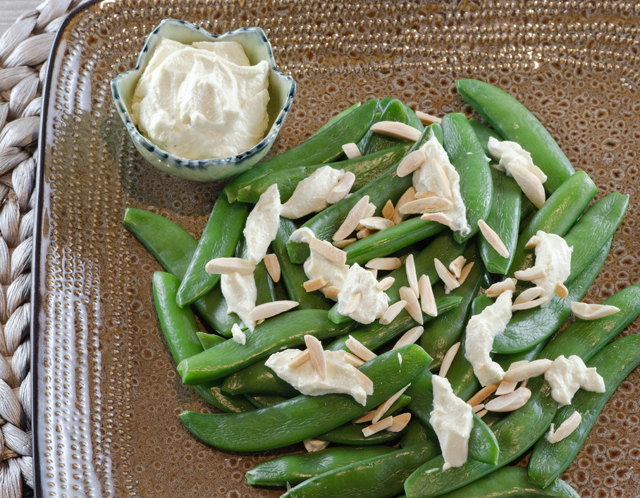
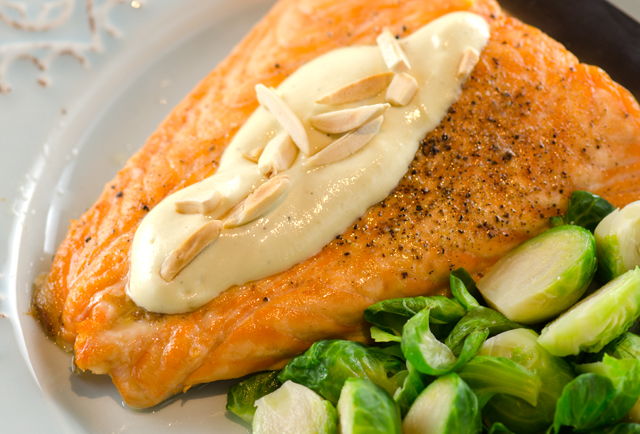
Tarator is traditionally served with a wide variety of dishes, ranging from grilled eggplant, beets and fried seafood. I served it with roasted salmon and lightly blanched sugar snap peas.  It would also be a flavorful dip for crudite or a sauce for fried calamari.

Turkish Tarator Sauce

Makes about a cup

Ingredients

  • 1/2 c blanched whole almonds
  • 2T toasted and chopped almonds for garnish
  • 1/4c extra virgin olive oil
  • 2t fresh lemon juice
  • 1 1/2t chopped garlic
  • Kosher salt and freshly ground pepper

DSC_1779a

Directions

  1. In a blender, puree the whole almonds, olive oil, lemon juice, garlic and 1/2c water until completely smooth and thick, at least 3 minutes.
  2. Season to taste with salt and pepper. Sauce keeps covered and refrigerated up to 3 days.

DSC_1799a

DSC_1790a

February 21, 2015 Chinese New Year Retrospective

_SueCNY

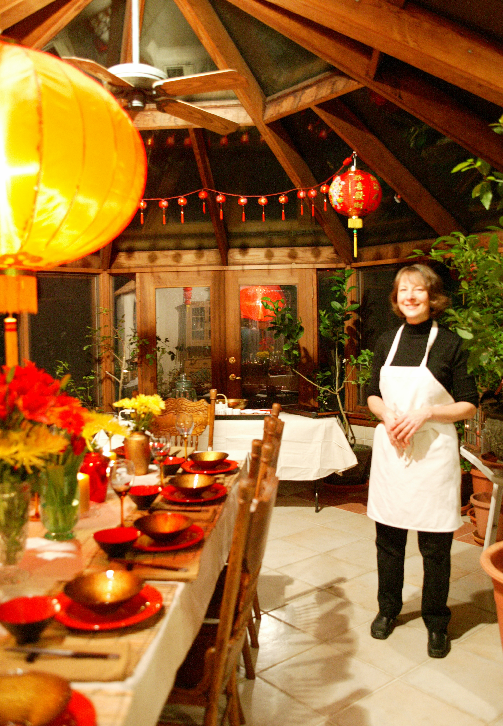
I shouldn’t be home, I should be landing in sunny Florida about now but a snowstorm changed our plans. Since Chinese New Year was this past week, I thought I would share some pictures from our celebrations of previous years.

I make spicy gingerbread cookies with the appropriate cutter for each year.  The dragon (2012) is said to be vital, confident and gifted.
I make spicy gingerbread cookies with the appropriate cutter for each year. The dragon (2012) is said to be vital, confident and gifted.
DSC_0006b
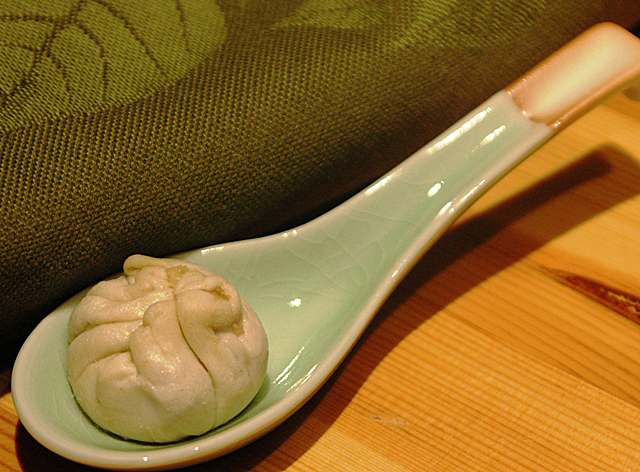
A Chinese soup dumpling. Making and sharing dumplings is a New Year’s tradition that fosters family togetherness and cooperation of spirit. Since dumplings are shaped like gold ingots, eating these “golden nuggets” confers prosperity for the New Year.
DSC_8397a
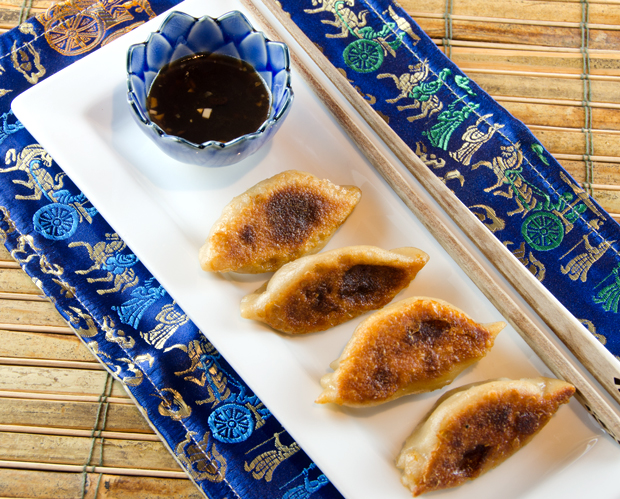
Potstickers and dipping sauce.

DSC_0976b

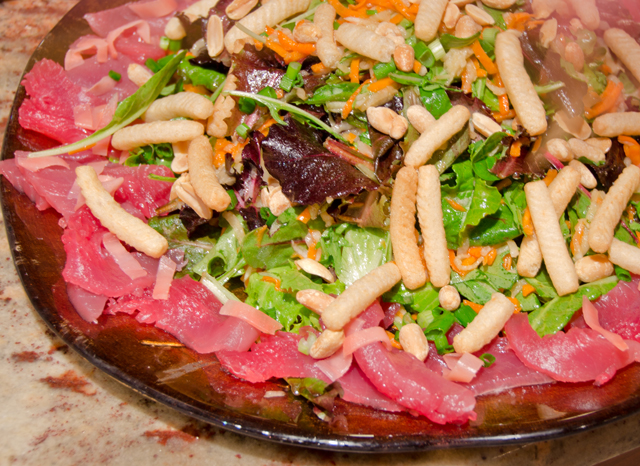
Yu Sheng, the New Year’s salad that probably originated in Singapore. It is served on the seventh day of the celebration and brings diners prosperity and good fortune.
DSC_0930b
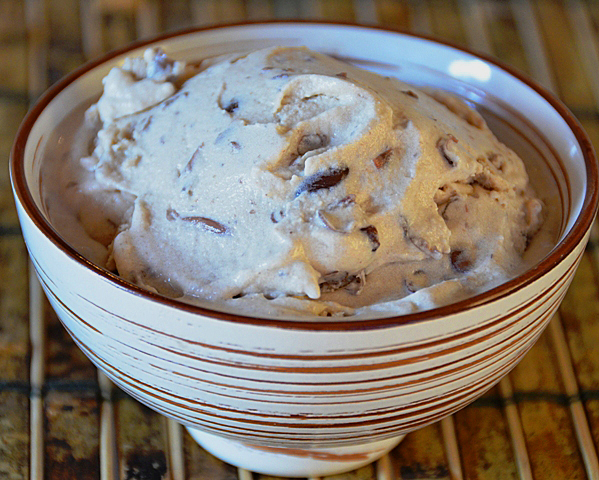
Combining the East with the West, adzuki bean ice cream.


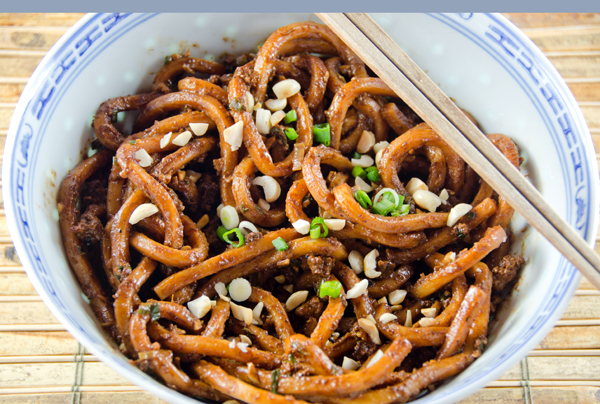
Noodles symbolize longevity. Spicy Sichuan Noodles feature the unique flavor of Sichuan peppercorns, banned in the United States until a few years ago.
DSC_0965b
Ingredients ready for the Chinese Hot Pot, everyone gets in on the cooking with this one.


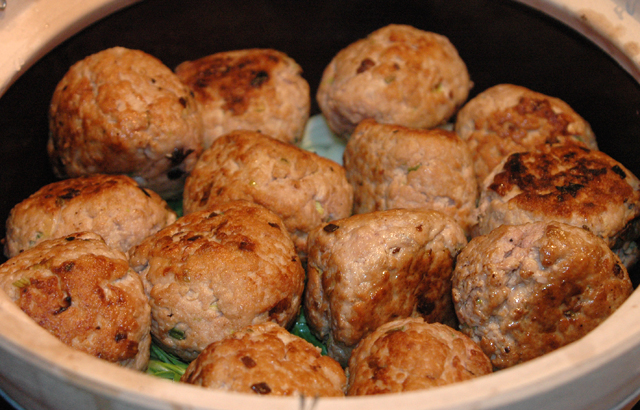
Lion's Head meatballs in a clay pot cooker.
Lion’s Head meatballs in a clay pot cooker.
DSC_0346a
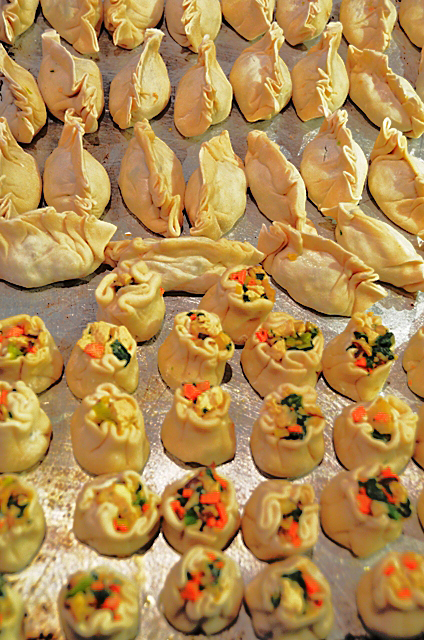
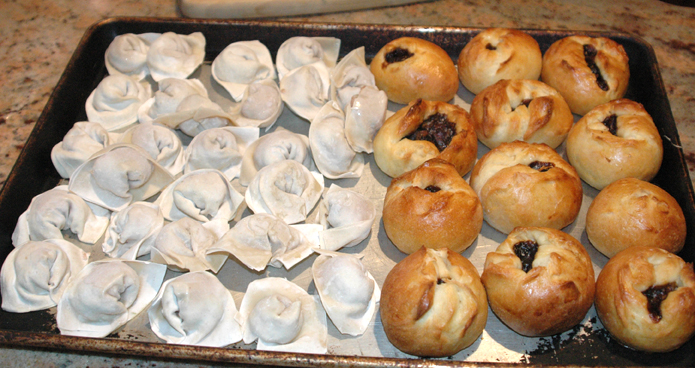
Wontons and pork buns.


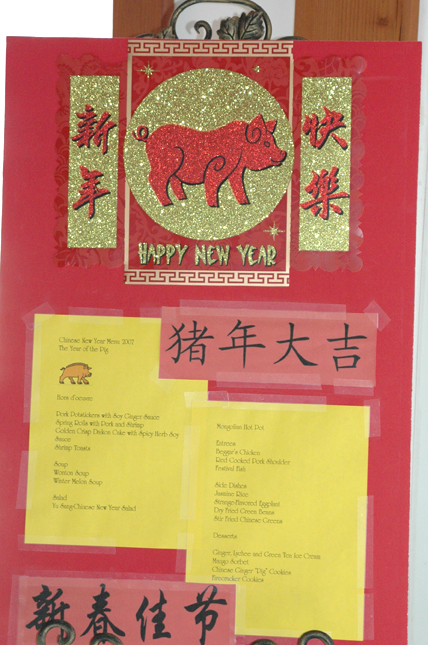
Menu for the Year of the Pig (Boar)
Menu for the Year of the Pig (Boar).

_dinnertablecny

February 17, 2015 Stovetop Smoked Salmon with Kaffir Lime Sauce

DSC_1253a


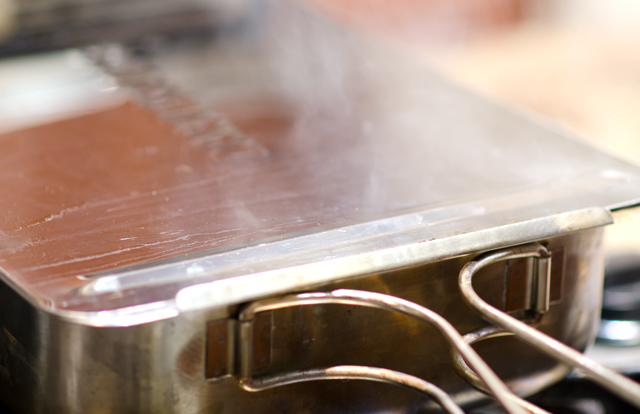
I discovered my love of cooking in the early eighties and a good time for me meant a trip to the cookware store. In those years I was the proverbial gadget queen. Some of them were good purchases, a KitchenAid stand mixer, food processors in different sizes, a serious ice cream maker, all very useful when I was catering. One purchase I made that was a good investment was a stovetop smoker. Made by the Camerons company, the one I purchased thirty years ago looks exactly the same as the one they sell today, at about the same price. The smoker is made from dishwasher safe stainless steel. It is a rectangular box (15″x11″) fitted with a wire rack that sits over a drip tray with a lid that slides on for a snug fit. The handles fold out from the side of the box and stay relatively cool during the cooking time but I would still advise using a potholder. One source said it easily fits over a burner but I have always used it over two burners.

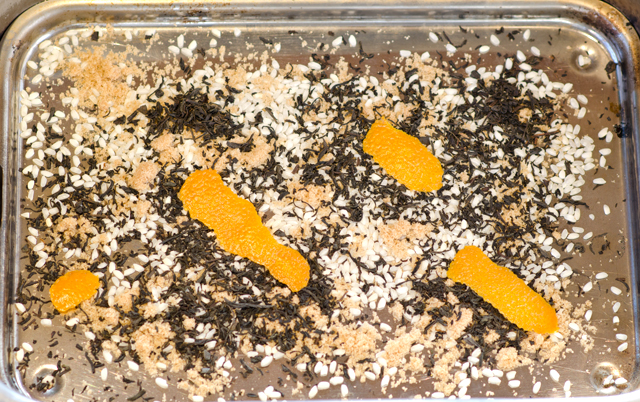
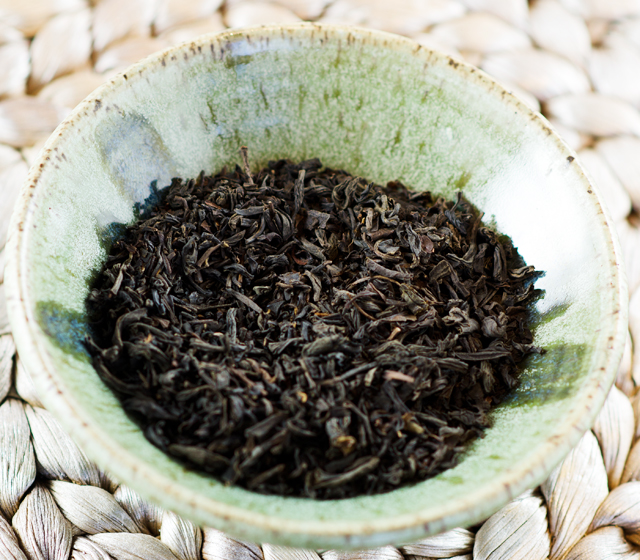
I confess I haven’t used this smoker as much as I probably should. I have smoked cheese, shrimp and, of course, salmon. The Camerons company sells wood chips in oak, alder, hickory and cherry that I have used in the past. This time I chose a different smoking medium, tea. I followed a smoking formula that I have used previously with tea smoked chicken. Brown sugar is used because when sugar caramelizes it forms volatile compounds that enter the air as smoke. This gives the salmon a bittersweet caramel flavor. Rice adds it’s own flavor and absorbs the moisture the sugar creates. This is important because the smoking mixture should be as dry as possible, the goal is to create smoke, not steam. I chose Lapsang souchong, a black tea from the Fujian province of China and Joe’s favorite. The tea is dried over a smoking pine fire that gives it a sweet, clean smoky flavor. I also used some orange peel to add some of it’s aromatics.
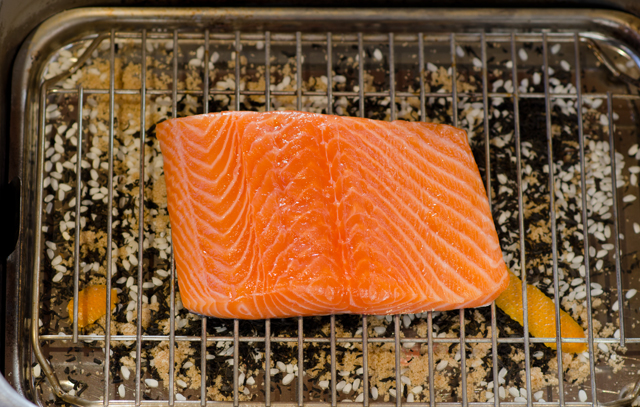
The smoking medium is placed on the base, lining the bottom with foil makes for the easiest clean up. Next is the drip tray, then the wire rack. If you spray the wire rack with a little non stick spray it will make the salmon easy to remove. Place the salmon on the middle of the rack so that the smoke can circulate freely around it. Slide on the lid and close it completely. I turn the burners on to medium high until I see the first puffs of smoke wafting out, then I back it down to a low simmer. The guide states that for every 6 ounces of fish, allow ten minutes cooking time, so the one pound piece of salmon cooked in less than a half hour.

The salmon can be served as an appetizer or a main course. Serve with an accompanying sauce.  Horseradish and sour cream or tzatziki would be good choices. I made a sauce that I found on the Martha Stewart website using both lemongrass and kaffir lime leaves. Since I would venture to guess most people don’t have a stovetop smoker, though it is a good investment, a heavy pot or wok lined with foil with a rack that suspends the food over the smoking mixture and a foil lid would be a reasonable substitute.

The booklet that came with the smoker gives recipes for fish, poultry, meat, sausages, cheese and even eggs! It is also suitable for outdoor use, either over a campfire or on the rack of a barbecue. Quoting directly from the booklet it is, “perfect for slimmers” that’s how dieters are referred to in the U.K..  It describes the smoking technique as one that is “widely used in Europe” and it “puts pleasure back into eating.” I must agree, it is a healthy way of cooking and the salmon turned out moist and quite delicious, just lightly scented with smoke. I won’t wait so long in between next time to use the stovetop smoker.

Stovetop Smoked Salmon

Makes 1 pound

Ingredients

  • 1 lb. salmon fillet, pin bones removed
  • Kosher salt and granulated sugar

Smoking medium

  • 1/3c loose tea (I used Lapsang souchong, other aromatic teas could substitute)
  • 1/3c rice (any type)
  • 1/3c brown sugar
  • Several strips of orange zest.

Directions

  1. Check the salmon for any pin bones and sprinkle the surface generously with sugar and kosher salt. Place in refrigerator uncovered for one hour.
  2. Set up the smoker and line the bottom with foil for the easiest cleanup.
  3. Scatter the smoking ingredients over the bottom of  the pan.
  4. Place the drip tray over the bottom.
  5. Spray the food rack with non stick spray for easy removal of the fish
  6. Center the salmon on the rack so that the smoke will circulate around the fish easily.
  7. Slide the lid on and turn the burners on to medium high. As soon as you see the first puff of smoke, turn the burners down to a simmer. You should still see some smoke escaping, if not, turn the burners up a little.
  8. Smoke the salmon for about 25 minutes or to your desired doneness.
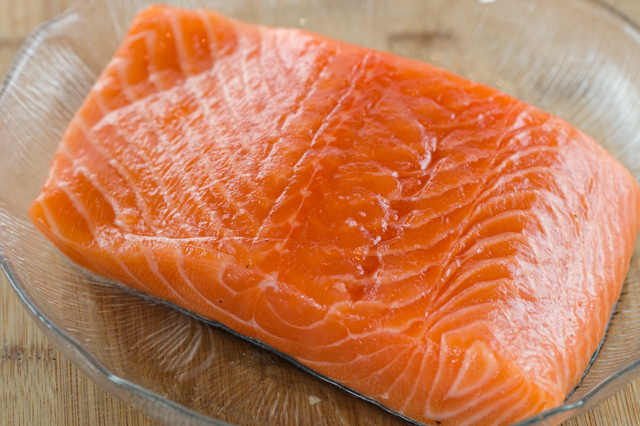
Sprinkle the salmon with kosher salt and a little sugar to bring out the moisture in the fish.


I still keep the smoker in the original box.
The smoking mixture of brown sugar, rice, Lapshang souchong tea and orange peel.
Center the salmon on the rack over the smoking medium.
Lapsang souchong tea has a smoky aroma.
Now we're smoking!
Now we’re smoking!
One pound of salmon will takes less than a half hour.


Kaffir Lime Sauce

Ingredients

  • 1T olive oil
  • 3 medium shallots, finely chopped
  • 3-4 stalks lemongrass, cut crosswise into 2-inch lengths
  • 6 kaffir lime leaves, fresh or dried, cut into thirds
  • 1T chili paste (I used sambal oelek)
  • 1/4c red wine
  • 1c canned crushed tomatoes
  • 2T heavy cream
  • Kosher salt and freshly ground pepper


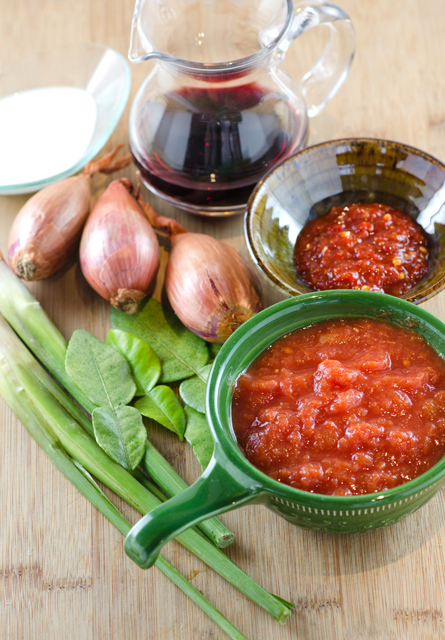
Ingredients for the sauce.
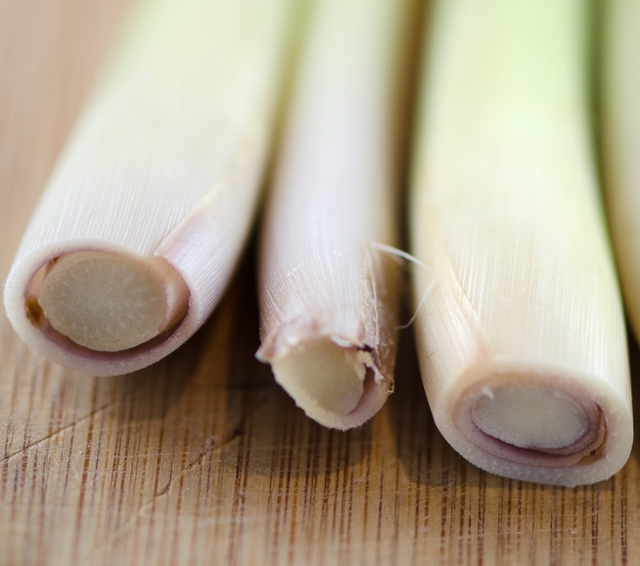
Lemongrass
Lemongrass

Directions

  1. Heat olive oil in medium skillet over low heat. Add shallots and cook until soft and translucent, about 1 minute. Crush the lemongrass pieces and add to the skillet; cook for 30 seconds. Rub the lime leaves between your hands to bring out their aroma, add them to the skillet and cook 30 seconds more.
  2. Add chili paste and cook, stirring, until browned, about 15 seconds. Add wine and cook until reduced by half, about 2 minutes.
  3. Add tomatoes and bring mixture to a boil. Immediately reduce to a simmer and cook for 30 minutes. Strain mixture into a small saucepan through a fine mesh sieve; discard solids, I used a food mill for this step. Add cream to saucepan and place over medium heat. Cook sauce until liquid is reduced slightly, about 5 minutes. Serve warm.
February 11, 2015 Kung Pao Brussels Sprouts

DSC_1210a

Magazine features come and go over the years and often reveal the trends of the time. In the first issue of Bon Appetit I purchased back in 1982 (!) readers could find a column featuring recipes created using a relatively new appliance, the food processor, “Bon Vivant”, a “who’s who and what’s new in the world of food, wine and spirits”, columns featuring cooking for two, wine and spirits, travel and “Too Busy to Cook”, time saving reader recipes.

One column that has lasted all these years is “R.S.V.P.”, reader’s requests of restaurant recipes. Back in 1982 you could find a baker’s dozen of recipes, everything from zucchini nut muffins to sole wellington with a recipe for homemade sausage thrown in for good measure.

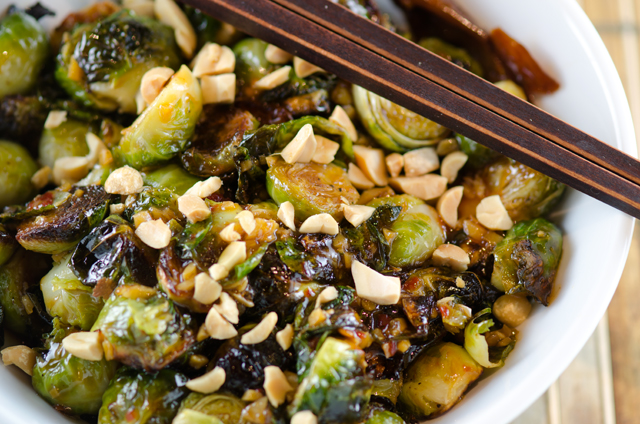
In 2015, “R.S.V.P.” still graces the opening pages of the magazine in a paired down format. The February issue has just three recipes, one per page with an accompanying illustration. One recipe in particular caught my eye this month, Kung Pao Brussels sprouts. This recipe comes from Kevin Gillespie, Top Chef “cheftestant” season six and fan favorite. Kevin is presently the chef owner of Gunshow in Atlanta and the author of a best selling cookbook, Fire in My Belly.

I liked the idea of using the kung pao technique with a vegetable.  In the elevated role of the vegetable in today’s cuisine, the first real star was kale and recently that title has been handed over to cauliflower, I feel it’s only a matter of time that Brussels sprouts will take over the spotlight. Like it’s counterparts, kale and cauliflower, Brussels sprouts are a member of the brassica family with the same health benefits. They are packed with antioxidants, vitamin C, folic acid and minerals such as potassium, iron and selenium. Their season is from about mid September to March, and as we have learned from other brassicas, those harvested after the first hard frost are the sweetest.

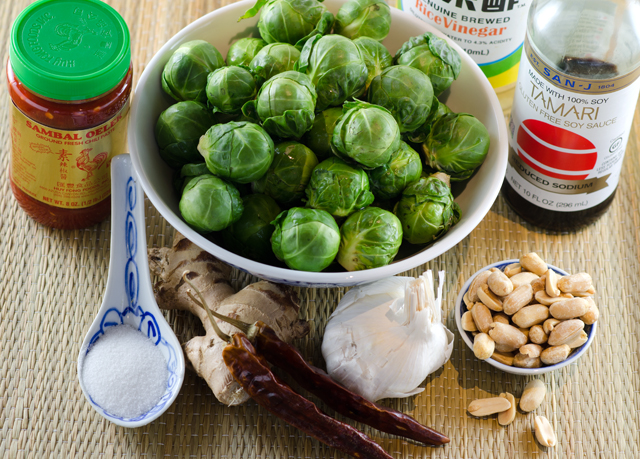
Kung Pao originates from the Szechuan province of China. The classic preparation involves two main ingredients, spicy chiles that contrast with the crunchy, fatty peanuts.  Several sources recount the origins of this dish in similar ways with slight variations. It was either created by or it was the favorite dish of the Gong Bao, a high government official in the nineteenth century. I will leave out the part about the chicken needing to be cut into small pieces because of his dental problems or that the name Kung Pao fell out of favor during the Cultural Revolution. Or maybe you like the alternate explanation, the name Kung Pao loosely translates as “hot firecrackers”. The recipe calls for chile de Arbol  but I thought this would be a perfect opportunity to use dried Kung Pao peppers with similar heat that were harvested from our garden.

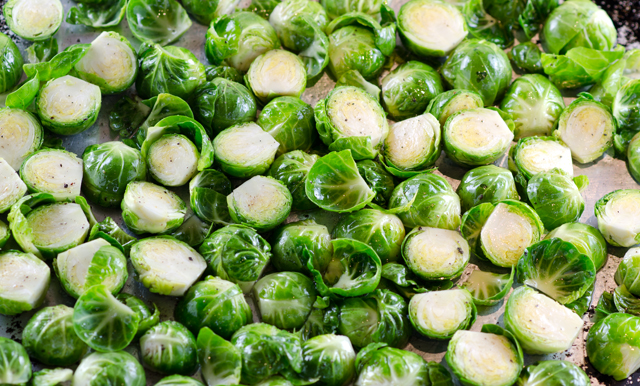
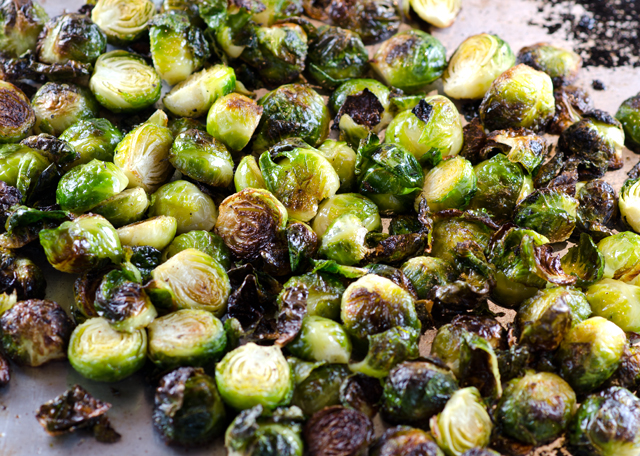
Rinse the sprouts well and trim the bottoms. Slice in half lengthwise and remove any yellowed or damaged leaves. Toss the sprouts with oil, kosher salt and a generous grind of pepper. At the halfway point I take them out, toss them around a bit and flip the baking sheet in the opposite direction. I took my sprouts out about five minutes sooner than the original recipe called for because I was baking in convection mode.  Adjust the heat of the dish to your own comfort level. The dish is supposed to be hot but remember you can always add a little more sambal oelek or another chili pepper, but you can’t take them away.

Assemble the sauce ingredients while the sprouts are baking. Cook the garlic and ginger until deliciously fragrant. Add sambal oelek, chilis and remaining ingredients, thicken with cornstarch and simmer.  I found that using half the amount of sugar, 1 1/2 tablespoons, gave the right amount of hot to sweet balance in the dish.

Would I make this again? Definitely and Joe agrees, this sauce could be used with other vegetables, eggplant, green beans or in a stir fry using several vegetables. And that September 1982 issue of Bon Appetit? There’s a recipe for Red Snapper Szechuan, with surprisingly similar ingredients to the Brussels sprouts  that looks pretty good to me.

DSC_1187aDSC_1190a

DSC_1191a

Kung Pao Brussels Sprouts

Ingredients

Serves 6

  • 2 pounds Brussels sprouts, halved
  • 5 tablespoons vegetable oil, divided
  •  Kosher salt and freshly ground black pepper
  •  1 tablespoon cornstarch
  • 3 garlic cloves, finely chopped
  •  2 tablespoons finely chopped peeled ginger
  •  2 tablespoons hot chili paste (sambal oelek)
  •  6 dried chiles de árbol, lightly crushed (I used Kung Pao chilies)
  •  ½ cup soy sauce
  •  3 tablespoons sugar
  •  2 teaspoons unseasoned rice vinegar
  •  ⅓ cup unsalted, roasted peanuts

Directions

  1. Preheat oven to 425°F. Toss brussels sprouts and 4 Tbsp. oil on a rimmed baking sheet; season with salt and pepper. Roast, tossing once, until softened (but not soft) and browned, 20–25 minutes. Set aside.
  2.  Meanwhile, mix cornstarch and 1 Tbsp. water in a small bowl until smooth.
  3. Heat remaining 1 Tbsp. oil in a medium saucepan over medium-high. Add garlic and ginger and cook, stirring often, until garlic is golden brown, about 2 minutes.
  4. Add chili paste and cook, stirring, until darkened, about 2 minutes. Add chiles, soy sauce, sugar, vinegar, and ½ cup water and bring to a boil; stir in cornstarch slurry. Simmer, stirring, until sauce coats spoon, about 2 minutes. Let cool slightly.
  5. Toss brussels sprouts with sauce and serve topped with peanuts.
DSC_1213a
Dried Kung Pao peppers from our garden.

DSC_1208a


February 10, 2015 Thai Lettuce Wraps

DSC_1162a


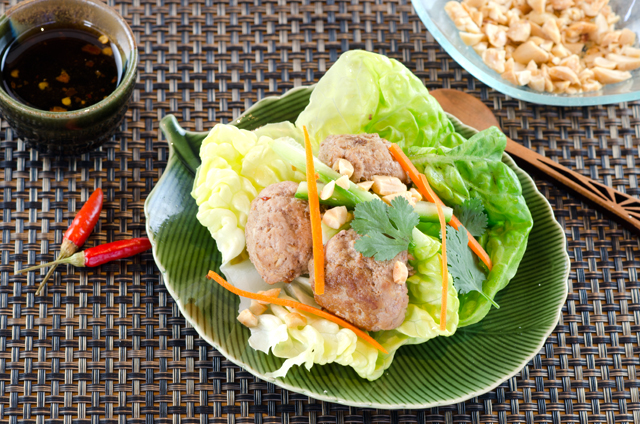
If I told you, “we’re having meatballs” you might conjure up a vision of succulent, tender meatballs in a garlicky fragrant tomato sauce, or maybe you are imagining nutmeg scented  Swedish meatballs in a creamy gravy. But the meatball is not confined to the West, the Chinese have the Lion’s Head, oversized pork meatballs traditionally cooked in a clay pot and southeast Asian countries such as Thailand, Laos and Cambodia enjoy the street food of seasoned ground meat wrapped in crispy lettuce leaves.

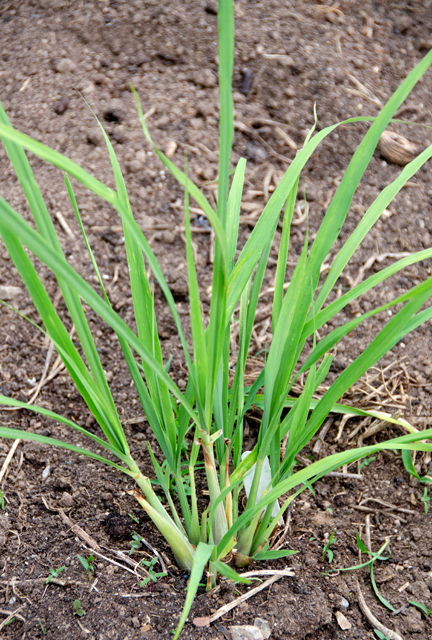
Our love of Thai food has led Joe to grow some of the ingredients that haven’t always been that common in the local supermarket. We have a lemongrass plant that gets large and bushy in the garden every summer. We harvest a large portion of the stalks and freeze them for recipes like this. The significantly cut back plant is brought indoors to winter over. The greatest danger the lemongrass plant meets inside is our Golden Retriever, Cody, who when given the chance, loves to nibble on the leaves. We have three kaffir lime trees that have never produced a lime. That’s okay though, they are grown for their leaves that when crushed produce an intense citrus aroma. We also grow Thai chiles and basil, Vietnamese mint and the herb that no one is on the fence about, coriander.

The dish this is loosely based on larb, a southeast Asian favorite.  This recipe makes a do it yourself appetizer or a light lunch . Set out all of your ingredients and let everyone assemble their own wrap. To eat, take a lettuce leaf, top with several meatballs, add some julienned vegetables, an herb leaf or two, a spoonful of sauce and a sprinkling of chopped peanuts. Roll it up and dig in!

DSC_3888a
Lemongrass plant in early summer. It will become many times this size by the Fall.


Thai Lettuce Wraps with Meatballs

Make about 2 dozen meatballs

Dipping sauce

Ingredients

  • 1/4c fish sauce, I am partial to the Three Crabs brand
  • 1/4c fresh lime juice
  • 1T Asian sesame oil
  • 2t minced Thai chilis, substitute red pepper flakes if necessary
  • 1t brown sugar
  • 1T minced cilantro

Directions

  1. Combine fish sauce, lime juice, sesame oil, chili, brown sugar and cilantro in a small bowl. Let the flavors blend while you make the meatballs.

Meatballs

Ingredients

  • 1lb ground pork or turkey
  • 1t finely minced garlic
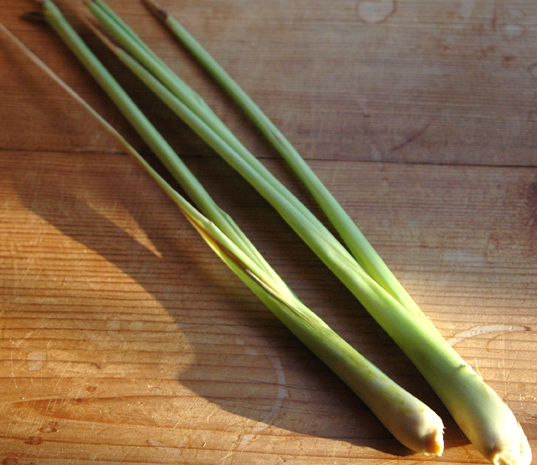
  • 1T finely minced lemongrass, bulb end only
  • 1T finely minced ginger
  • 2T finely minced shallots
  • 1t rice vinegar (the type with no sugar added)
  • 1T Asian sesame oil
  • 1-2t low sodium soy sauce
  • Peanut or grape seed oil to fry the meatballs

Directions

  1. Combine the garlic, lemongrass, ginger, shallots, vinegar, sesame oil and soy sauce in a medium bowl. Add pork and use your hands to combine ingredients thoroughly. If you have time, chill the mixture for about a half hour, this will  make it easier to roll the meatballs.
  2. Use a tablespoon sized scoop to make the balls, you should have about two dozen. Place on a rimmed baking sheet. Cover and chill for at least an hour.
  3. Heat several tablespoons of oil in a large skillet over medium high heat. Cook in two batches so you don’t crowd the skillet. Cook, turning occasionally to brown all sides, about 8 to 10 minutes. Transfer to a platter and keep warm.

For final assembly

Ingredients

  • Lettuce leaves, Romaine or Bibb work best here
  • Finely julienned cucumber, carrot and daikon radish
  • Coriander and mint leaves
  • Finely chopped unsalted peanuts.

Directions

  1. Separate lettuce leaves as carefully as possible not to tear them. The inside leaves work the best as wrappers.  Wash and spin dry in a salad spinner.
  2. Julienne the cucumber, radish and carrot by hand or with a julienne tool.
  3. Wash herb leaves and separate into individual leaves.
  4. Chop peanuts.
  5. Place all the above items on a large serving dish.
  6. Serve with meatballs and sauce.
DSC_0064a
Lemongrass stalks. The bulb end is used in cooking.


Though not used in this recipe,  this is what the Kaffir Lime looks like. The distinct double leaf has a pointed point and a rounded bottom section.
Though not used in this recipe, this is what the Kaffir Lime looks like. The distinct double leaf has a pointed point and a rounded bottom section.

February 6, 2015 Mediterranean Style Pan Seared Chicken Breasts

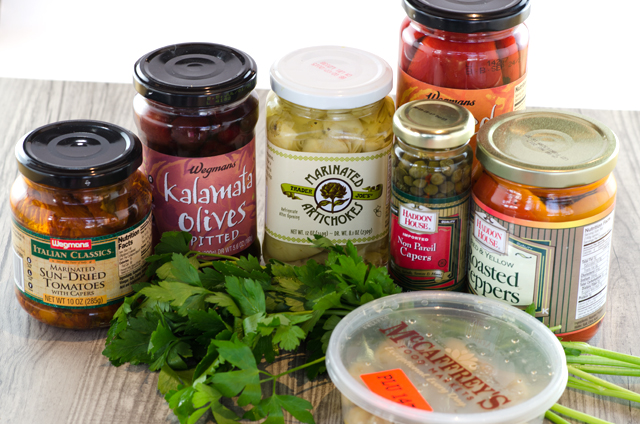
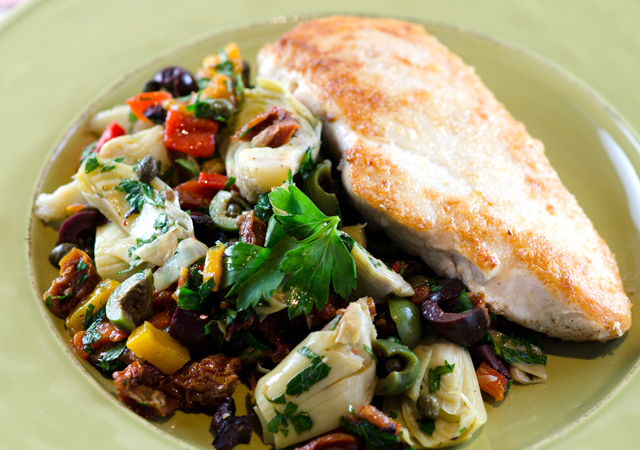
DSC_1136aMy yearly “pantry purge” brought to my attention some items that would expire in the next few months and needed to be used sooner rather than later.  The jar of marinated artichoke hearts I bought at Trader Joe’s last year would reach it’s expiration date in a month.  Not wanting to waste them, I started with the artichoke hearts as a foundation. I looked for other items on the shelf that would add some complimentary Mediterranean flavors.  Also in the pantry I found jarred sun dried tomatoes and roasted peppers. In the refrigerator I found a container of olives, a previously opened  jar of capers and some fresh parsley. I was set to put together an improvised combination that would work well as a topping for the chicken breasts I planned on cooking that evening. I was calling it a “salsa” though Joe pointed out there was nothing sauce-like about it.

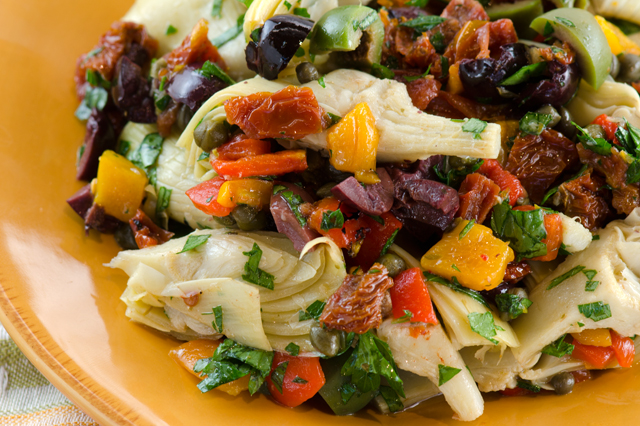
To make this dish I started with the marinated artichoke quarters, draining and reserving the marinade in case I needed to add some to the finished dish. The sun dried tomatoes were next, and even though I drained some of the oil off,  they retained enough to give the right balance.  Capers add a salty element to the dish so I made sure to rinse them well before adding them to the dish. I used Kalamata olives and Castelvetrano, an olive with a mild buttery flavor and one of my favorites. The red and yellow roasted peppers,  just needed to be drained and chopped. Combining all of the ingredients in a medium bowl I tasted for seasoning and in this case, a little bit of lemon juice and  a splash of balsamic vinegar was the right addition.

So what should I call this? It’s not quite a sauce, but is a versatile topping for fish, chicken, pasta, it could also be used as an omelet filling or even as a topping for a flatbread pizza.  The ingredients are interchangable as well. Petite diced canned tomatoes could be substituted for the sun dried tomatoes, mushrooms for the artichoke hearts, a little pesto would be a good addition, you can see what I mean. It’s just important to taste as you go to achieve the right balance of flavors.

This would have been great over the poached chicken breasts I made from the last post but I decided to learn another method.  In this recipe, also from Cooks Illustrated, boneless chicken breasts are lightly salted, then parcooked in a covered casserole in the oven. The chicken is then pan seared in a moderately hot skillet and kept moist with a slurry of flour, butter and cornstarch that is brushed on at the end. It gives a nice coating to the chicken and helps it stay moist. As with all meat, poultry and fish recipes, an instant read thermometer takes away the guesswork  and is essential for the best results.

DSC_1107a
The ingredients for the topping.

Mediterranean Topping

Makes about 4 cups

Ingredients

  • 2c marinated, quartered artichoke hearts from a 12oz jar, drained (save liquid)
  • 2T capers, drained and rinsed
  • 1/2c sun dried tomatoes, drained, chopped and lightly patted dry
  • 1/2c olives, combination of green and black, pitted and chopped
  • 1/3c chopped roasted peppers
  • 1/4c chopped fresh parsley
  • Balsamic vinegar and lemon juice to taste
  • Kosher salt and freshly ground pepper

Directions

  1. In a medium bowl combine the artichoke hearts, capers, sun dried tomatoes, olives, roasted peppers and parsley.
  2. Add balsamic vinegar, salt and freshly ground pepper to taste.

DSC_1115a

DSC_1124a

Pan Seared Chicken Breasts

From Cooks Illustrated March 2010

Serves 4

Ingredients

  • 4 boneless skinless chicken breasts, 6-8 ounces each, trimmed of excess fat
  • 2t kosher salt (1t regular salt)
  • 1T canola oil
  • 2T unsalted butter melted
  • 1T all purpose flour
  • 1t cornstarch
  • 1/2t freshly ground black pepper

Directions

  1. Place oven rack in the lowest position and heat to 275°F. Poke the thicker end of the chicken breast with a fork five to six times and sprinkle evenly with the salt. Place the chicken, smooth side down in a 9×13″ baking dish. Cover the dish tightly with foil. Bake until the thickest part of the breast registers 145-150°F on an instant read thermometer, start checking at the 30 minute mark, it could take as long as 40 minutes.
  2. Remove pan from the oven and transfer the chicken with tongs to a towel-lined plate and pat dry. Heat the oil in a 12-inch skillet over medium high heat until smoking. While you are waiting for the pan to heat up, whisk the melted butter, cornstarch and flour together. Brush the top of the chicken with half of the butter mixture. Place the chicken in the skillet, coated side down and cook until browned, 3-4 minutes. While the chicken is browning, coat the other side of the chicken with the remaining mixture. Flip the chicken over with tongs, reduce heat to medium and cook until the second side is browned and the thickest part of the breast registers 160°F, another 3-4 minutes. Transfer chicken to a serving plate.
  3. Serve chicken with Mediterranean topping.

DSC_1120a