February 3, 2018 Chicken, Butternut Squash and Chickpea Soup

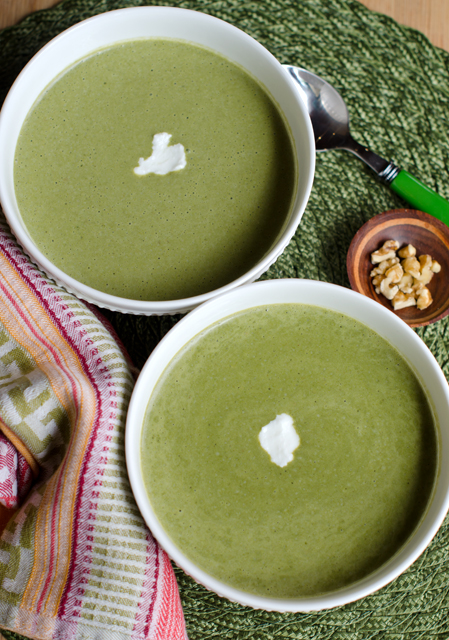
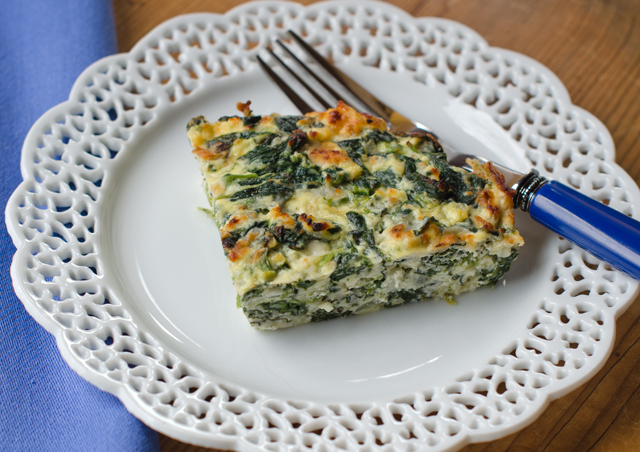
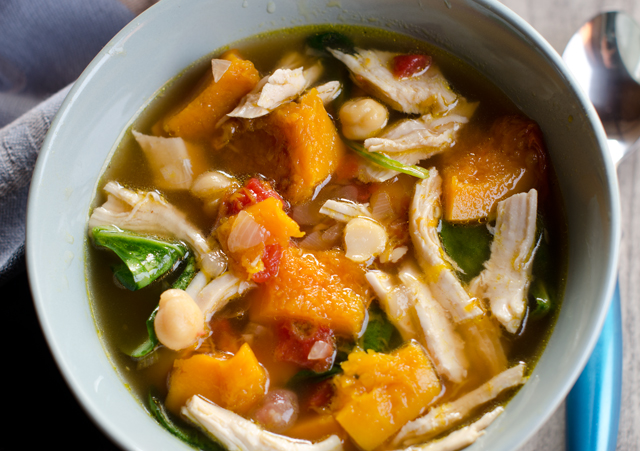
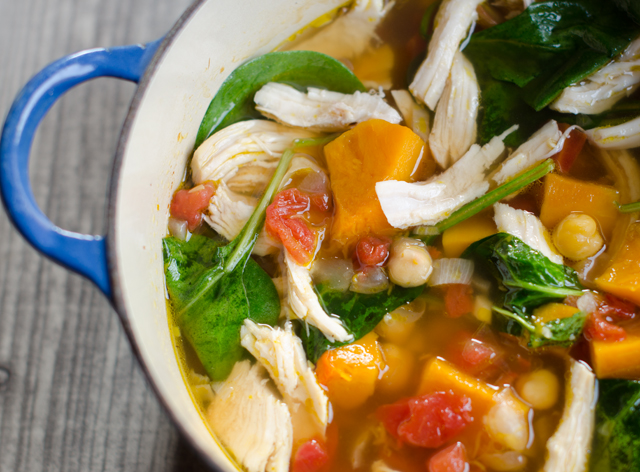
Chicken, butternut squash and garbanzo bean soup is the perfect comfort food loaded with lean protein, delicately sweet butternut squash, nutty garbanzos and spinach for a healthy meal. This hearty main dish soup of my own creation is a complete meal with almost all pantry items with exception of the spinach. Blue potatoes and butternut squash are still a part of the larder from last year’s  garden and I am finally making a dent into the supply of butternut squash from the fall harvest.

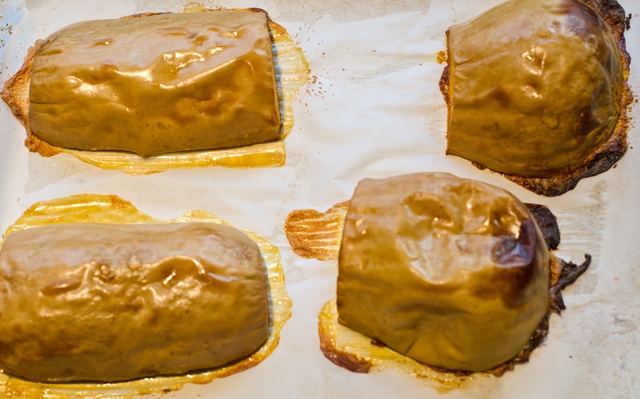
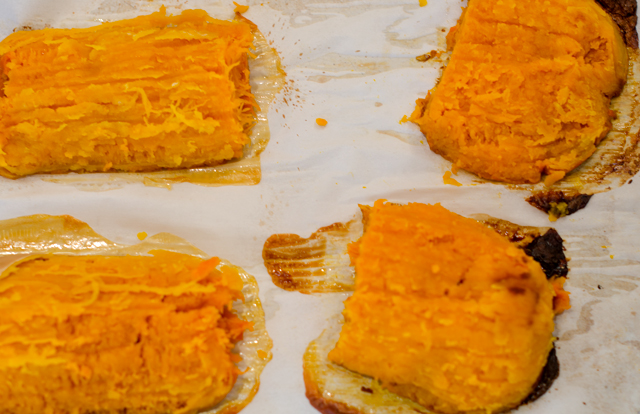
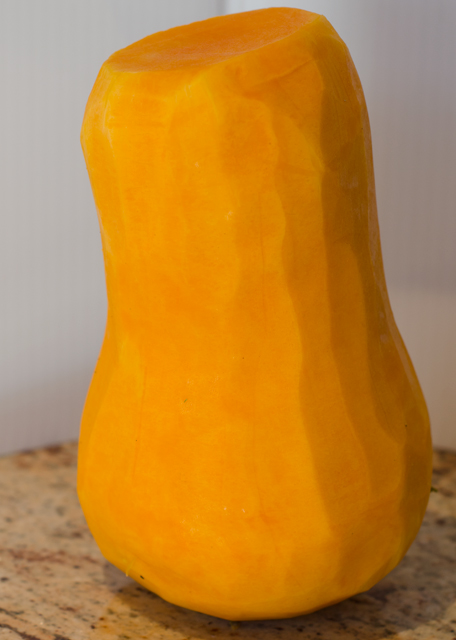
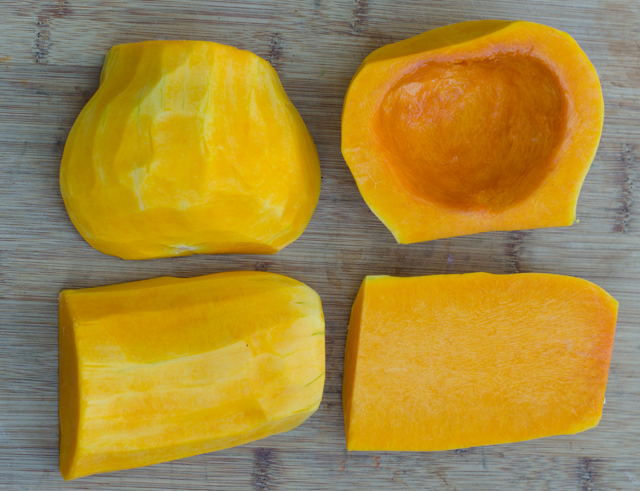
To save time you can buy cubed butternut squash in the produce section of most supermarkets. But if you choose to start with a whole squash, this is a method that works for me. I start by washing off the squash, any dirt left behind when you start cutting the squash will be transferred to your knife and subsequently, the squash flesh. Cut off a ½-inch piece at both ends so that they are flat, then I cut it where the neck and the bulb meet. I cut the bottom in half and scoop out the seeds and stringy fibers, a grapefruit spoon works well here. You can discard the seeds but I like roasting them for a snack or a salad topping. Use a vegetable peeler or chef’s knife to remove all of the skin and the green veins that are directly under the skin, your finished product should just be orange flesh. Now you can use a knife to cut the squash into pieces. I was aiming for 1½ inch pieces. The squash I used for this recipe weighed in 3.25 pounds and made about 8 cups of raw squash. In a large bowl, toss the squash with a little olive oil and salt and roast on a baking sheet until the cubes are caramelized but not at the point of disintegrating into the soup. The squash measured 4 ½ cups after roasting.

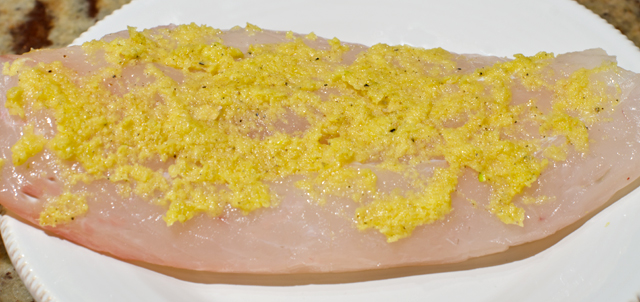
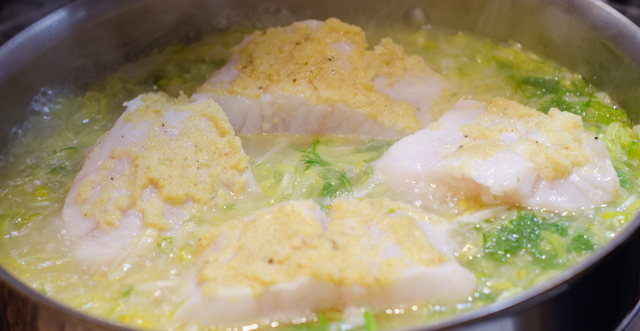
The soup would be good without it, but I added some chicken to up the protein quotient and really make it feel like a meal. Normally I would use chicken thighs, but I had boneless breasts in the fridge. I wanted to keep the chicken as moist as possible, (there is nothing worse than dried out chicken in your soup) so I turned to a method that I have used in the past, poaching. Poaching is a method that cooks chicken gently and slowly. Boneless breasts are arranged in a single layer and covered with the appropriate aromatics and liquid, water in this case, but a splash of wine is good too. The pot is brought to the boil, then reduced to a simmer. After about eight minutes, check the temperature of the chicken in the thickest part of the breast. Chicken is supposed to be cooked to 165°F but since I knew I would be adding it to my soup pot, I was aiming at 155-158°F so it wouldn’t overcook in that step. Remove from the poaching liquid and let cool, then shred into bite sized pieces. An easier approach? Use the meat from a rotisserie chicken.

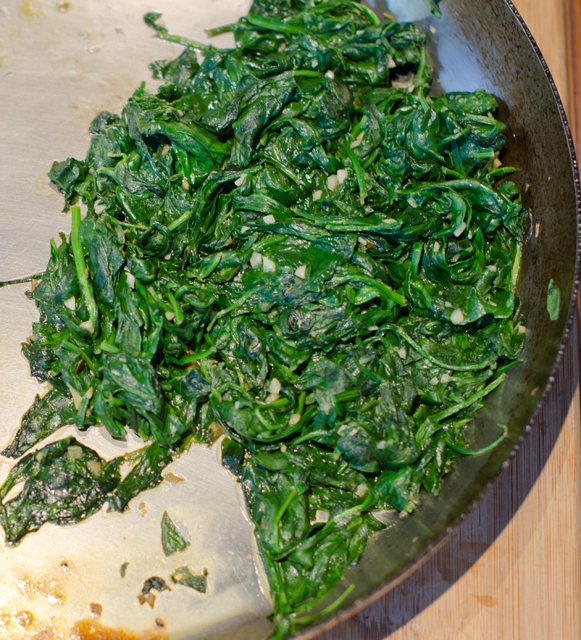
Once you are finished these steps, the soup comes together very quickly. In a large Dutch oven, saute the onion, then add the garlic and herbs. The broth, tomatoes and garbanzos are next. Bring to a boil, reduce the heat. Add the squash, chicken and spinach and cook for about ten minutes, until the spinach is wilted.

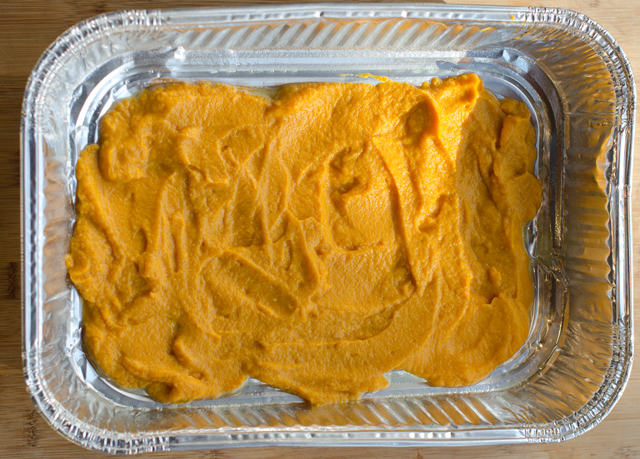
Freshly cooked garbanzos are a favorite of mine and would be great in this recipe but would require some advanced planning. Puree a few cups of the soup before the last ingredients are added if you want to give the soup a more stew like consistency.

Peeled whole butternut squash.
Preparing the butternut squash.

Chicken, Butternut Squash and Chick Pea Soup

Serves four

Ingredients

  • 1 butternut squash, about 3 lb
  • Extra virgin olive oil-for baking the squash and making the soup
  • Kosher salt
  • ¾ to 1 lb chicken breasts 2-3 relatively the same size or already cooked and shredded chicken, breast or thigh meat
  • 1 medium onion, diced small
  • 2-3 cloves of garlic, finely minced
  • 1 t ground cumin
  • ½ t ground coriander
  • 3-4 c low sodium chicken broth
  • 1-10 oz can diced tomatoes and green chilies (mild or hot)
  • 1-15.5 oz can chick peas, drained and rinsed
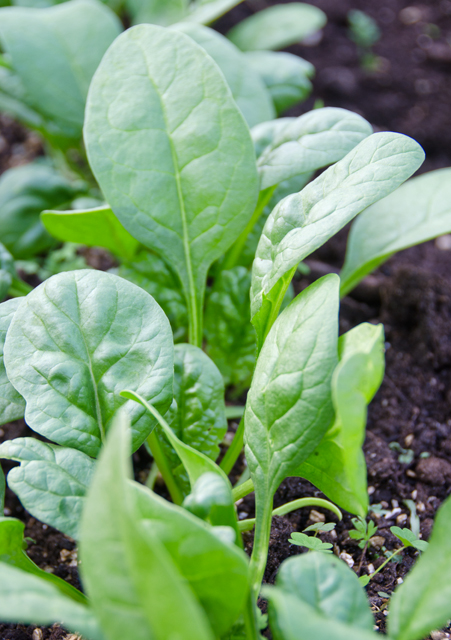
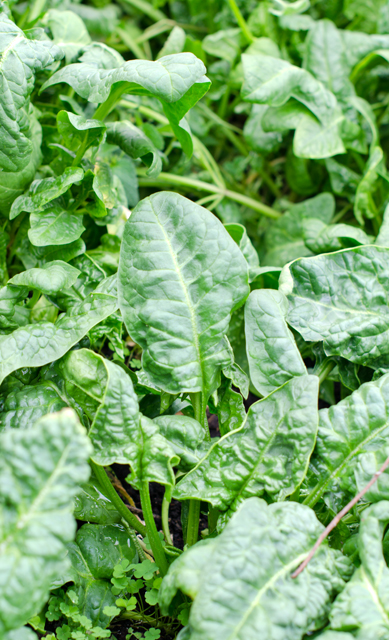
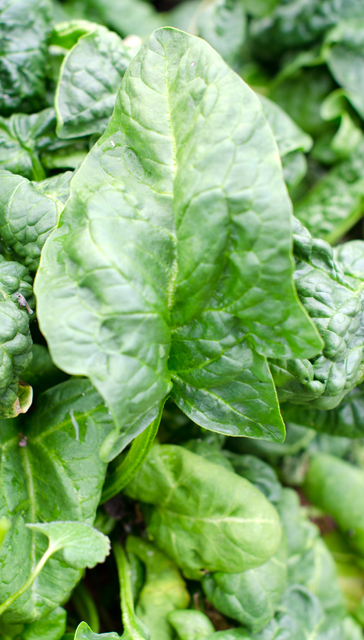
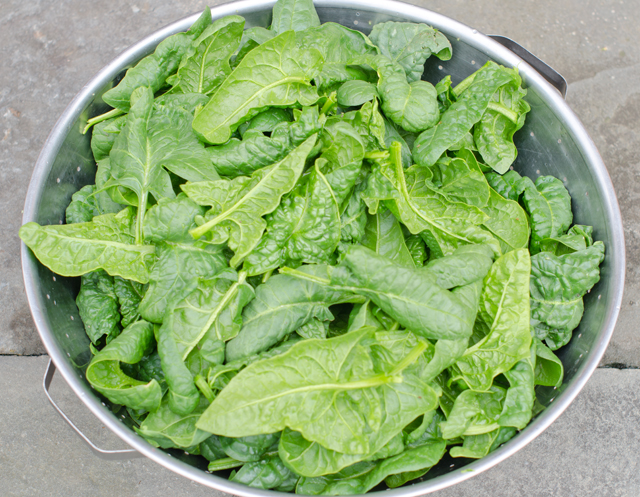
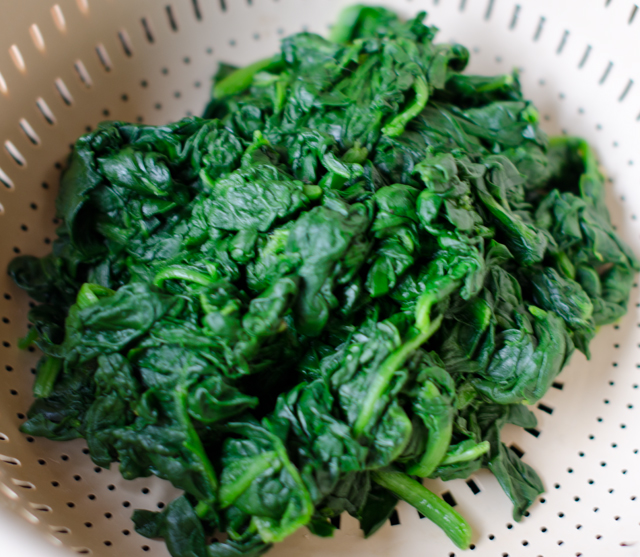
  • 4-5 cups spinach leaves

Directions

Preparing the butternut squash

  1. Preheat oven to 375°F. Peel, seed and cut squash into 1½-in cubes. Alternately use 8 cups  of pre-cut squash.
  2. Put the squash cubes in a large bowl, drizzle with olive oil and kosher salt. Toss to coat and place on a baking sheet, distributing the cubes evenly as possible.
  3. On the lower rack of the oven, bake squash for ten minutes. Gently flip the squash pieces so that the sides that aren’t caramelized are on the bottom, bake for another 5 minutes. Redistribute the squash pieces again and cook for another 5-7 minutes. Remove squash from baking sheet and transfer to a plate to cool.

Poaching the chicken

  1. Place the chicken breasts in a heavy bottomed pot, large enough to hold them without overlapping but relatively snug.
  2. Cover the breasts by an inch and a half with cool (not hot) water with a pinch of salt, or broth, garlic, a sprig of thyme or a bay leaf.
  3. Over medium high heat, bring to a boil, then reduce the heat to a simmer. Partially cover and at the eight minute mark insert an instant read thermometer at the thickest point of the breast to check the temperature. I like pulling mine off the heat around 158°F since they will continue to cook a little after they are removed from the cooking liquid and when added to the hot soup will cook a  little more.
  4. Let the chicken cool then shred along the grain into bite sized pieces.

Assembling the soup

  1. In a large 5-quart Dutch oven cook the onion over medium high heat until translucent. Add the garlic and spices are cook for another minute.
  2. Add chicken broth, tomatoes and chick peas and bring to boil.
  3. Reduce heat to a simmer and add squash, chicken and spinach, heat through for about ten minutes or until spinach is wilted.
  4. Serve in warmed bowls.

May 17, 2017 Spinach and Butternut Squash Salad

Spinach and butternut squash salad certainly isn’t the first thing that comes to mind when you think of a spring dish, but right now it makes perfect sense to me. I still have a few squash to use from last fall’s harvest and spinach plants that still have some nice leaves to offer before they go to seed.

Begin the recipe with a medium-sized squash, 2 to 2 ½ lbs, using a sharp knife, cut off a half-inch piece at the stem and base ends. Cut the squash in half where the neck meets the bulb. I find it easiest to use my Kuhn Rikon peeler to remove not only the skin but also the white flesh and green fibers below the surface, the peeled squash should be completely orange. Scoop out the seeds, I like to toast mine for snacking and can also be used to garnish salads and soups. Cut the squash into 1 inch cubes, they will shrink during the roasting process. Toss the cubes with olive oil and spread them out evenly on a lined baking sheet and season with salt and freshly ground pepper.

While the squash cubes are roasting, make the warm bacon dressing. Fry four slices of bacon in a large skillet until crispy. Place the cooked bacon on a paper towel lined plated to drain. Pour off the bacon fat into a metal bowl, the hot oil might melt a plastic bowl.  In the residual fat that is left in the skillet, saute a medium chopped shallot until soft. Stir in the other dressing ingredients along with some of the warm bacon fat, keep over very low heat.

Place the spinach leaves in a large bowl and toss with the warm dressing. I prefer to place the other ingredients on top of the individual salads rather than tossed with the spinach, since they are heavier and inevitably sink to the bottom. Rather than the traditional fall version of this salad that would include dried cranberries or pomegranate arils, I added some thin strips of roasted pepper. I used toasted pecan halves, some creamy feta, and some of the bacon crumbled on top to complete the salad. Make it your own with toasted walnuts or butternut squash seeds and crumbled Roquefort instead of the feta.


Spinach and Butternut Squash Salad

Serves two

Ingredients for the Salad

  • 5-6 cups of spinach
  • 1 medium butternut squash
  • 1 T or more of extra virgin olive oil
  • ½ c toasted pecan halves
  • ¼ c roasted red pepper slivers
  • 1/3 c crumbled feta
Spinach that is going to seed but perfectly good enough for a salad.
Peeled whole butternut squash.

Ingredients for the Dressing

  • 4 slices of bacon
  • 1 medium shallot
  • ¼ c apple cider vinegar
  • 1 t Dijon mustard
  • 1 T or more honey
  • Kosher salt and freshly ground pepper

Directions for the Salad and Dressing

  1. Preheat oven to 400°F convection or 425°F standard. Line a large baking sheet with parchment or aluminum foil.
  2. Peel and seed the squash, cut it into 1 inch cubes. In a large bowl toss sure even browning. Set cubes aside to cool. You will have enough for several days worth the squash with olive oil and place evenly on the prepared baking sheet. Season with salt and pepper. Roast until golden brown, about 20 minutes, at the halfway point carefully move the cubes around on the sheet to enof salads.
  3. In a large frying pan, cook bacon over medium high heat until crisp, about 5 minutes. Transfer to a paper towel lined plate and pour the bacon fat into a small metal bowl.
  4. Cook the shallot in the same pan until soft, 4 minutes. Stir in vinegar, mustard and honey and mix well. Whisk in two tablespoons of the bacon fat and stir to combine. Season with salt and pepper.
  5. Place the spinach leaves in a large bowl and toss with the warm dressing. Divide the salad onto two plates. Top each with about a half cup of butternut squash cubes, pecan halves, pepper strips, feta and some of the crumbled bacon. Season to taste with freshly ground pepper.

December 27, 2016 Butternut Squash and Spinach Lasagna


In this unique lasagna, perfect for the fall and winter months, a ricotta enriched butternut squash purée takes the place of a marinara sauce. A cheesy spinach filling complements the creamy squash for this satisfying and healthy vegetarian main dish.

You will need a medium size butternut squash, weighing two and a half to three pounds. Cut the stem end off the butternut squash then cut the squash in half where the bulb end meets the neck. Cut both pieces in half lengthwise. scoop the seeds and fiber out of the bulb end, save seeds for later use. I  rinse the seeds off and dry them between layers of paper towels. Toss with a little bit of olive oil and sprinkle with salt. Bake in a 375°F oven until they pop and become toasty brown. They are great for topping salads and for snacking.

Cover a large baking tray with parchment paper. Brush the squash pieces lightly with olive oil and place the four sections of squash cut side down on the baking sheet. Bake in a 375° oven for about 50 to 55 minutes, until the squash pierces easily with the tip of the knife. Let cool for 10 minutes, the skin should come off easily. Place the squash pieces in the bowl of a food processor fitted with the metal blade. If necessary, add a little additional liquid, purée until smooth, you will have about 2½ cups. Add 1 cup of ricotta cheese and purée again, season to taste with salt and pepper and a little freshly grated nutmeg.

Place the spinach in a large bowl. Lightly rinse the spinach and toss in the bowl. The moisture will help wilt the spinach quickly. I used a 1 pound container of organic triple washed spinach.  Finely chop two garlic cloves.  Heat a large sauté pan over high heat and add the olive oil and swirl it around. Saute the garlic for a few minutes then add the spinach by the handfuls, adding more each time as it wilts down.  After squeezing out any additional liquid, the end result will be one generous cup of spinach.

You can make this version with regular lasagna noodles or if you are following a gluten-free diet, I would recommend  brown rice pasta noodles from Tinkyada, easily found in large grocery stores. They are actually good and have a nutty brown rice flavor. Follow package instructions with regular noodles, I would suggest cooking brown rice noodles for about 10 minutes, no longer. Drain them in a colander, rinse with cold water and dry on parchment lined baking sheets. I haven’t tried this recipe with no bake noodles, my suggestion would be just be certain that the ingredients in your lasagna are moist enough to cook the noodles properly. There are 14 noodles in the package of brown rice noodles, I cook them all in case of breakage. You can always make a lasagna roll up with any leftover purée and cheese.

In a medium bowl mix the well-drained garlic spinach with one and a quarter cups of ricotta cheese and a cup of mozzarella cheese or a cheese blend that you prefer. Season to taste with salt and freshly ground pepper.

To assemble the lasagna, spray the bottom of your baking tray with nonstick spray.I used a disposable pan with dimensions of 11 x 8 x 2 . Spread one-third of the butternut squash mixture over the bottom of the tray. Top with three lasagna noodles. Dollop one half of the spinach cheese mixture over the noodles. Continue to layer and finish with the remaining butternut squash, sprinkle with a generous amount of cheese, and a sprinkle of dried basil and oregano. Cover with aluminum foil and bake for a half hour. After the half hour take off the foil reattach any cheese that has attached to the foil and bake uncovered for another 10 to 15 minutes.

Since lasagna is a time-consuming dish you could do this in stages, make the butternut squash puree one day, the spinach filling the next and assemble and cook on the third day. You could substitute frozen spinach rather than cooking down your own. Possible additions to the dish include sautéed onions, sage leaves, even toasted walnuts. Serve with a crisp salad of arugula, fennel and apples. As it is with all lasagna, it’s even better the next day.

One of our very own butternut squash.
After baking, the skin pops off easily.
Skin off, ready to puree.
A large container of spinach cooks down to about a cup.
First layer of butternut squash ricotta puree .
Just a sprinkling of mozzarella cheese on top.
Lasagna noodles next, these are the brown rice noodles.
Next is the spinach and ricotta filling.
Repeat layers and finish with squash puree, a generous sprinkling of cheese, dried basil and oregano.
Out of the oven..


Delicious!!

Butternut Squash and Spinach Lasagna

Serves 6-8

Ingredients for butternut squash filling

  • 1-3 lb butternut squash
  • Olive oil
  • 1¼ c regular or low-fat ricotta cheese
  • ½ t salt
  • ¼ t freshly ground nutmeg

Ingredients for spinach layer

  • 1 lb fresh spinach
  • 1 t olive oil
  • 2 t minced garlic
  • 1 c regular or low-fat ricotta cheese
  • 1¼ c mozzarella cheese
  • Kosher salt and freshly ground pepper to taste

To assemble the lasagna

  • 1 lb lasagna noodles (regular or gluten-free)
  • Shredded mozzarella cheese
  • Shredded Parmesan cheese
  • Dried basil and oregano

Directions for making the squash puree

  1. Preheat oven to 375°F.
  2. Line a large baking sheet with parchment paper and spray lightly with nonstick spray.
  3. With a sharp knife cut the squash in half where the neck meets the bulbous end. Cut both of these pieces in half lengthwise. Scoop out the seeds and reserve for toasting if desired.
  4. Brush the cut sides lightly with olive oil and place the four squash pieces on a baking sheet cut side down. Bake in preheated oven 25 minutes, rotate and bake another 25 minutes. The squash should be easily pierced with the tip of a knife.
  5. Cool the squash for about ten minutes, until it can be handled. Scoop out the flesh and place in the bowl of a food processor fitted with the metal blade. Puree squash until smooth.  Add the ricotta cheese, nutmeg and salt and puree again. Taste and adjust seasonings. Add a little more ricotta if necessary, the puree should have the consistency of a thick marinara sauce. Set puree aside for the assembly. Leave oven on at 375° if you will be finishing the lasagna.

Directions for the spinach filling

  1. Place the fresh spinach in a large colander that is set inside a large bowl. Sprinkle the spinach lightly with water and toss spinach lightly.
  2. Heat olive oil in a 12″ saute pan. Add garlic and saute until light golden brown. Add the spinach by the handful, adding more as it wilts down. After draining the spinach of excess liquid, you will have a generous cup.
  3. In a medium bowl combine spinach and garlic along with ricotta, mozzarella, salt and freshly ground pepper. Taste and adjust seasonings.

Directions for assembling the lasagna

  1. Bring a large pot of lightly salted water to a boil over high heat. Add  lasagna noodles and cook according to package directions. Stir noodles occasionally to prevent them from sticking. Drain well and rinse with cool water.
  2. To assemble the lasagna, spray the bottom of the baking dish with nonstick spray. I used a disposable tray with dimensions of 8″ x 11″ x 2″.
  3. Spread one-third of the butternut squash puree over the bottom of the pan. Sprinkle lightly with mozzarella cheese. Top with three lasagna noodles. Dollop one half of the spinach cheese mixture over the noodles, sprinkle lightly with mozzarella cheese. Top this layer with the second layer of noodles.
  4. Spread your second layer of butternut squash over the noodles. Sprinkle with mozzarella cheese, then top with the third layer of lasagna noodles.
  5. Top this with the remaining spinach cheese mixture and sprinkle with mozzarella cheese.
  6. Top with the remaining butternut squash puree and spread evenly over the noodles. Sprinkle this layer generously with shredded mozzarella and Parmesan cheese. Sprinkle lightly with dried basil and oregano.
  7. Cover the baking dish tightly with foil and bake for 30 minutes. After 30 minutes remove the foil, reattach any cheese clinging to the foil and continue to bake uncover for another 10 to 15 minutes. You can turn the broiler on for a few minutes if you want to brown the cheese.

June 8, 2016 Spinach, Strawberry, Snow Pea and Radish Salad

DSC_7109aThe vegetable garden, now that summer is fast approaching,  is about creating recipes for fruit and vegetables that are harvested at the same time. That was the  inspiration for this spinach, snow pea, strawberry, and radish salad.

It was time to make one last spinach salad before the plants go to seed. I snipped the smallest leaves off the bolting plants before pulling them out. Joe will plant spinach again in the fall when the cooler temperatures return.

I  pick about a quart of snow peas each day. Their season is short and the warm temperatures of last week were less than ideal for them. This week promises to be cooler and as usual they will be with us until the end of June.

Since they grow quickly, Joe does consecutive plantings of radishes so they aren’t all ready to harvest at once. A new crop emerges in about 3 weeks. They are another vegetable that prefers cool weather, summer heat renders them woody and hot. I picked small radishes, thinning out a row, allowing the ones left behind a few more days to mature.

Our strawberry patch is in it’s third season now and is doing better than ever. I spent some time cleaning out the weeds this past weekend that seem to take over if given the opportunity. Fresh strawberries are delicious. We even get a second crop at the end of summer.

A strawberry vinaigrette is the perfect complement to this salad. For the dressing I combined garlic, Dijon mustard, strawberry balsamic vinegar, a touch of honey and extra-virgin olive oil.

When making of salad be sure to use a bowl that gives you plenty of room to combine the ingredients. Start by tossing the spinach lightly with dressing to coat and then add some strawberries, peas and radishes and toss again.  I leave the rest of them to top the salad. That way you can be certain that the last person served doesn’t get all the heavier ingredients that sink to the bottom of the bowl.

DSC_7101a

Spinach, Strawberry, Snow Pea and Radish Salad

Serves two 

Ingredients

For the vinaigrette

  • 1 small clove garlic, minced
  • 3 T balsamic vinegar (strawberry works nicely here)
  • ½-1 t honey
  • 1 t Dijon mustard
  • ½ c extra virgin olive oil
  • Salt and freshly ground pepper

For the salad

  • 6 c baby spinach
  • 1 c strawberries, hulled, halved and sliced
  • 1 c snow peas, strings removed
  • 3-4 medium radishes, sliced thin
  • ¼ c toasted sunflower seeds

DSC_2901a

DSC_2601aDSC_7027aDSC_7118aDSC_7727aDSC_7499aDSC_2666aDirections

  1. In a small bowl, combine the vinegar, mustard, and garlic. Add the oil in a slow steady stream, whisking constantly. Season with salt and pepper to taste.
  2. Add the snow peas to a small pot of boiling water, count to ten, remove from heat and drain well in a colander. Pat dry and let cool.
  3. Place the spinach in a large bowl and toss with some of the vinaigrette and taste. Add about half of the other ingredients, toss again, adding more of the dressing if necessary. Top individual salads with the remaining ingredients. Season each portion to taste with freshly ground black pepper. Reserve remaining vinaigrette for a later use.

DSC_7102a

DSC_7095a

May 1, 2016 Smoked Salmon and Spinach Frittata

DSC_6759aSpinach again, this time combined with eggs, cheese and smoked salmon to make a frittata. Quick to make, they are as good at breakfast as they are as an impromptu supper. Once again, I used the basic recipe of a frittata from Cooks Illustrated, for broccoli rabe and sun dried tomatoes. substituting the spinach and smoked salmon.

A large oven proof non stick skillet is a must for making this recipe, check first that it fits in your oven. Be sure to have a pot holder draped over the oven door so you are not tempted to touch the handle with your bare hands. I learned that lesson the hard way many years ago. Sauté the spinach just enough to wilt it down, then add garlic and Aleppo pepper, a favorite ingredient of mine. Small cubes of cheese are added to the eggs, for this recipe I like a Jarlsberg or a Havarti with dill.

The eggs are cooked for a short time on the stove top. Add the smoked salmon when the eggs are setting up on the bottom before they go in the oven. Once the frittata is spotty brown and puffed, remove it from the oven. Allow it to sit for 5 minutes, the residual heat will finish the cooking. Loosen the frittata from the pan with a spatula and move it to a platter or cutting board for serving.

DSC_6760a

Smoked Salmon and Spinach Frittata

Ingredients

  • 12 large eggs
  • 3 T half and half or heavy cream
  • Kosher salt and freshly ground black pepper
  • 2 t olive oil
  • 3-4 c spinach, large stems removed
  • 1 medium clove garlic minced
  • ¼ t Aleppo pepper or paprika
  • ¾ c cheese cut into small cubes, Jarlsberg or Havarti with dill
  • ½ c smoked salmon chopped into pieces

DSC_6742a

Directions

  1. With oven rack in the upper middle position, heat broiler. Whisk eggs, half and half, a dash of salt and pepper in a medium bowl until well combined. Set aside.
  2. In a non stick 12″ oven safe skillet heat oil until shimmering. Add the spinach and cook until wilted, 2-3 minutes. Add garlic and pepper flakes and cook until fragrant, 30 seconds or so.
  3. Stir cheese into the eggs; add egg mixture into the skillet and cook, using spatula to stir and scrape the bottom of the skillet. Large curds will form but the mixture will still seem somewhat wet, about 2 minutes. Shake skillet to distribute eggs evenly; cook without stirring for 30 seconds to set the bottom. Sprinkle smoked salmon pieces evenly over the surface of the frittata.
  4. Slide skillet under broiler and broil until the frittata has risen and the surface puffs and turns spotty brown, three to four minutes. Remove skillet from the oven and let stand 5 minutes to finish cooking.
  5. Using a spatula, loosen frittata from the skillet and slide onto a platter or cutting board. Cut into wedges and serve.

DSC_6744a

DSC_6748a

DSC_6756a

April 26, 2016 Spinach and Mushroom Quesadillas with Tomatillo Salsa

DSC_6739a

Still inspired by an abundance of, you guessed it, spinach, I was looking for yet another way to use our bounty. Inspiration this time came to me in the form of a quesadilla. Crispy on the outside and melted and creamy inside, spinach adds a healthy component to this popular dish. Quesadillas are easy and delicious any time of day, as a quick snack, lunch, even for breakfast. To accompany the quesadillas I made a simple tomatillo salsa.

With the exception of the cilantro and garlic, the ingredients for the tomatillo salsa came straight from our freezer. Preparing tomatillos for the freezer is easy, I remove the papery husks and freeze them whole and raw in quart bags. A previously frozen tomatillo will not hold up to roasting but are fine in raw preparations like this. The Numex Joe E. Parker pepper used in this recipe is an Anaheim style pepper with a long slender shape and mild heat. We have an interesting variety of frozen hot peppers from gardens past,  milder ones like Joe E Parker and poblanos to hotter ones, cayenne, jalapeno, serrano and Thai hot. The surprising thing is that freezing them does not diminish their heat in the least. When a recipe calls for several hot peppers, I start with one, it is much easier to add heat than to take it away.

As always, picking the spinach takes more time than most of the steps in the recipe. The filling is easy to make and used twelve cups of fresh spinach, a real plus for me. If you don’t have an abundance of spinach in your garden, use bagged baby spinach. The slightly more assertive flavor of cremini mushrooms compliments the spinach nicely.

The options for cheese are endless. I used pepper jack and cheddar cheese, a good melting cheese is important here. Choose a large heavy bottom skillet to cook quesadillas. Just a light brushing of oil in the pan is all that’s necessary to brown the tortilla and keeps it from getting greasy. You can either fold one tortilla in half or stack one on top of another. I press lightly on the quesadilla in the pan to allow the cheese to melt a bit and hold the layers together before it is flipped.  The pizza wheel is the perfect tool to cut it into portions. Finished quesadillas can be held in an oven on low heat for 20 minutes.

Spinach and Mushroom Quesadillas

Makes four 8″ quesadillas

Ingredients for the filling

  • 1½ T olive oil or bacon drippings
  • 8 oz mushrooms, button or cremini, stemmed and sliced
  • 2-3 cloves garlic, finely chopped
  • ¼ c finely chopped red onion
  • 12 c spinach, large stems removed

DSC_6706a

Directions for the filling

  1. In a large skillet heat the oil or bacon drippings over medium high heat.
  2. Add the mushrooms, stirring constantly, until they begin to brown.
  3. Add the onion and garlic and continue cooking, stirring frequently until it looks translucent.
  4.  Add the spinach by the handful, wilting it before adding more, until it is all used.  Do not overcook.  Season with salt to taste.

Ingredients for assembling the quesadillas

  • Eight 8″ soft tortilla or taco shells, I used whole grain
  • Olive Oil
  • 1½-2 c grated cheese, I used a combination of pepper jack and cheddar

DSC_6712a

DSC_6715a

Directions for assembling and cooking the quesadillas

  1. Preheat oven to 180°F.
  2. Place four tortillas on two baking sheets, divide evenly the spinach and mushroom filling and the grated cheese between them.
  3. Top with the four remaining tortillas and lightly press to seal.
  4. Place a 12″ heavy bottomed skillet over medium high heat.  Brush the skillet lightly with olive oil.
  5. Place the quesadillas in the skillet one at a time, pressing down lightly but firmly and cook for about 3 minutes on each side. You can peek by lifting up with a spatula to see if it is getting golden brown. Transfer the cooked quesadillas to a baking sheet and keep warm in the oven, lightly covered with foil.
  6. Slice each quesadilla into 6-8 wedges, a pizza cutter works well here, and serve hot with tomatillo salsa or your own favorite.

DSC_6719a

DSC_6723a

DSC_6733a


Tomatillo Salsa

Ingredients

  • 3 cloves garlic, peeled
  • 1 jalapeno pepper, stemmed and seeded and quartered
  • 1 Numex pepper, stemmed and seeded and quartered
  • ¼ c roughly chopped red onion
  • 1 lb tomatillos, husked, rinsed and cut into quarters
  • ¾ c loosely packed, lightly chopped cilantro

DSC_6702a

Directions

  1. With a food processor or blender running, drop in the garlic cloves one at a time letting each piece get finely chopped before adding the next. Add the peppers, onion,  tomatillos and cilantro and process until smooth.

DSC_6731a


April 10, 2016 Spinach Soup with Middle Eastern Spices

DSC_6651aSpring made an early entrance this year, but it’s not quite sure if it wants to stick around permanently yet. One day it’s rainy and seasonably warm, the next we are anticipating wet snow that will bring a coating to possibly an inch to grassy surfaces.

The occasional warm day we’ve been having is causing the spinach in the greenhouse to bolt, that is, go to seed. It ‘s time to pick as much as possible, so recipes that use mass quantities of spinach look good to me. This recipe for spinach soup with middle eastern spices uses a pound and a half of fresh spinach. That translates into approximately 18 cups of spinach, and I say, bring it on!

Cookbook author and New York Times food columnist Martha Rose Shulman got her inspiration for this soup from a Syrian pan cooked spinach recipe. The warming spices, clove, allspice, nutmeg, cinnamon and coriander are a pleasing contrast to the sweet, mild flavor of freshly picked spinach.

To start, saute a medium chopped onion and celery in a Dutch oven. I checked with the NOA, National Onion Association and they say a medium onion equals about 1 cup chopped onion. When the vegetables soften, add a few cloves of chopped garlic and cook until fragrant. Add stock, rice, bouquet garni and a generous pinch of salt. Bring the mixture to boil and simmer for 30 minutes. This infuses the broth with flavor and cooks the rice which thickens the soup. Remove the bouquet garni and add the spices and the spinach. It is best to add the spinach in batches to the hot broth, continue to add more until it is all wilted. Cover and cook for five minutes, no longer. The spinach should retain it’s bright green color, any longer it could turn gray.

Puree the soup in batches in a blender or blend in the pot with an immersion blender. The final touch is the addition of some tangy yogurt, half is blended into the soup and the rest is a garnish for each bowl. Sprinkle a few chopped walnuts on top before serving. I served it hot but I think it would be good cold as well.

DSC_6459a

Spinach Soup with Middle Eastern Spices

Makes 4-6 servings

Ingredients

  • 1T extra virgin olive oil
  • 1 medium onion, chopped
  • 1/3 c finely diced celery
  • Salt to taste
  • 2 garlic cloves, minced
  • ¼ to ½c medium grain rice
  • 6 c chicken or vegetable stock
  • Bouquet garni of a few sprigs parsley and thyme and a bay leaf
  • 1 ½ lbs fresh spinach, washed thoroughly, large stems removed
  • ¼t ground allspice
  • 1/8 t ground cloves
  • 1/8 t freshly ground nutmeg
  • ¼ t ground cinnamon
  • 1t coriander seeds, lightly toasted and ground
  • Kosher salt and freshly ground pepper
  • 2 c Greek yogurt (low or full fat)
  • ¼ c chopped walnuts to garnish

DSC_6628a

DSC_6632a

Directions

  1. Heat the olive oil in a large heavy soup pot or Dutch oven. Add the chopped onion and celery and cook until tender, about 5 minutes. Add the garlic and a pinch of salt and cook until garlic is fragrant, about 1 minute.
  2. Add the stock, rice, bouquet garni and salt to taste and bring to a boil. Reduce heat to a simmer, cover and cook for 30 minutes.
  3. While the stock is simmering you will have time to measure out the spices and toast and grind the coriander.
  4. After the stock has simmered, remove the bouquet garni. Add the spices and add the spinach in batches, wilting it as you go. Cover and simmer for 5 minutes. Spinach should still retain its bright color.
  5. Puree the soup in batches in a blender. Be sure to not to overfill and hold down the lid tightly. Alternately you could puree the soup in the pot with a hand blender. Stop at this step if you are not serving the soup immediately.
  6. Return the soup to the pot and heat through, stirring occasionally.  Whisk half of the yogurt into the soup and season to taste with salt and pepper.
  7. Serve the soup with a swirl of yogurt and garnish with chopped walnuts.

DSC_6640a

March 24, 2016 Spinach and Roasted Garlic Hummus

DSC_6542aWhen I am looking for a snack, hummus is a healthy choice I feel good about adding to my shopping cart. But the truth is, it’s takes just minutes to make my own, and it’s healthier (no additives), tastier and cheaper too. The word hummus in Arabic means chickpea so strictly speaking, hummus is the term for a chickpea dip. Hummus bi tahini means chickpeas with tahini, a paste of ground sesame seeds.  Whether you add tahini or not, a basic hummus includes garlic, lemon juice, olive oil and salt.

One of my favorite food memories is a chickpea soup Joe made for me one Valentine’s Day. I absolutely love the sweet nutty flavor of freshly cooked chickpeas and in a perfect world I would always use them when I make hummus. However, dried chickpeas need to be soaked overnight, drained the next day and cooked for 1-3 hours, depending on freshness. I don’t always have time for that and the delayed gratification it requires.

However if you have the time, substitute one half the quantity of dried beans for the canned. The standard 15 ounce can of chickpeas drained is about 9 ounces or 1 ½ cups of beans. This translates into 4.5 ounces of dried beans or ¾ cup. Many cooks add a pinch of baking soda to tenderize dried beans to both the soaking and cooking water. The United States dried bean council (of course there’s one!) points out that it destroys part of the thiamine (aka vitamin B 1), making the amino acids less digestible and negatively affects the nutritional value. I’ll leave that heavy decision up to you.

A basic hummus recipe is easy and delicious and just the jumping off point for countless variations. I have previously shared a beet hummus recipe, this time I added fresh spinach and roasted garlic to the recipe.

If you are not already roasting garlic cloves, you should. It takes more time to get your oven up to temperature than in does to get this kitchen staple together. The first time I roasted garlic I winged it but I am pleased to say my uninformed guess was pretty much on target. This is the basic recipe; cut about the top quarter off each head of garlic with a sharp knife to expose all the cloves. Slowly pour olive oil over each head, letting it soak into and around the cloves. Wrap the prepared heads of garlic in foil and bake in a 425°F oven. Start checking the garlic at the 45 minute mark. The finished cloves should be soft, golden and slightly protruding from the skins. I always roast more than what I need, it will keep in the fridge for about a week, that is if it lasts that long. You can also freeze roasted garlic for several months.

Everything goes into the food processor or blender, except the reserved chickpea liquid. I added three cloves of roasted garlic to my basic hummus recipe, along with three loosely packed cups of spinach leaves. I added a half teaspoon each of some appropriate dried herbs, cumin, for it’s smoky flavor, smoked paprika also brings smokiness and a little heat. Sumac is the herb you may not be familiar with, it has a fruity astringent taste, milder than a lemon. I shared more background on it in this post. It is readily available from several of the herb and spice mail order sights.

Add the additional bean liquid to get it completely smooth and holds it’s shape. Taste and add more salt if needed. Transfer mixture into a serving dish. Garnish with a dash of olive oil and a sprinkle of smoked paprika. Serve at room temperature.

DSC_6534a

DSC_6538a

Spinach and Roasted Garlic Hummus

Makes about 2 cups

Ingredients

  • 1-15 ounce can garbanzo beans (chickpeas) drained and liquid reserved
  • 3-4 c spinach leaves, large stems removed
  • 1/3 c tahini
  • 3 T fresh squeezed lemon juice
  • 3-4 cloves roasted garlic, or to your taste
  • ½ t salt, and more to taste
  • 1 t each cumin, sumac and smoked paprika
  • 1-2 T extra virgin olive oil
  • A dusting of smoked paprika for the topping

DSC_6536aDirections

  1. Add all the ingredients to your food processor or blender. Pulse, adding additional bean liquid as needed to get the hummus completely smooth.
  2. Taste and add salt if desired.
  3. Scoop into a serving bowl and sprinkle top with smoked paprika and a little olive oil if desired.
  4. Serve with the dippers of your choice.

March 17, 2016 Spinach Pie

DSC_6530aFor once it looks like the groundhog was right, winter is over. Last week’s tease of highs in the 80’s has now settled back into a mostly rainy week with temperatures in the 50’s and 60’s. Spring arrives this weekend and it’s time to head back to the garden. Our garden’s first offering is spinach. Planted as a fall crop, it wintered over nicely in the greenhouse . It’s not the delicate baby spinach that you would want in a salad, but larger, very crinkly spinach, perfect for cooked dishes. I will attest that is still sweet and flavorful, after nibbling on some stems when I picked a large colander full today.

I found this recipe for Spinach Pie on the Epicurious website from a book called Irish Country Cooking, quite appropriate since St. Patrick’s Day is today. My choice was further confirmed when I read the author’s comment that three generations of her family have enjoyed this dish and this recipe was often made to use up her father’s seasonal harvest of spinach.

It takes a lot of spinach to make a pound, twelve cups to be exact. When that spinach is cooked down it will yield about a cup. Wash spinach in a large sink in several exchanges of cold water, those crinkles can hide a lot of dirt and debris. Remove any large stems and trim away any discolored leaves. The recipe called for steaming the spinach, I chose to cook it down in batches in a non stick skillet, which was just as easy. Drain spinach in a colander or better yet squeeze in your hands to remove excess moisture. Roughly chop spinach and in a large bowl combine with onion, beaten eggs and the cheeses. Mix well to be certain the spinach is mixed thoroughly with the other ingredients. Transfer this mixture to a quiche dish or individual dishes. If you like it could even be made in a crust. Different cheeses could be substituted as long as they have the same texture, cheddar for the mozzarella, I substituted ricotta for the cottage cheese. The addition of some chopped smoked salmon or a little crumbled sausage would be nice too.  A 10 ounce container of frozen spinach, thawed and well drained can be substituted for the fresh spinach.

Spinach pie is appropriate at any meal, breakfast, a light luncheon entree, a side at dinner. You could also bake this in a rectangular baking dish and cut it into small squares as an hors d’oeuvre. I barely made a dent into the spinach that’s in the greenhouse so it looks like I will be making this again in the weeks to come.

DSC_6460a

DSC_6462a

DSC_6485a

DSC_6490a

Spinach Pie

Ingredients

  • 1 lb 4 oz spinach, washed or a 10 ounce container of frozen chopped spinach, thawed and well drained of excess liquid
  • 1 medium onion, finely chopped
  • 2 eggs, beaten
  • 10 oz ricotta or cottage cheese (regular or low fat)
  • 10 oz freshly grated Parmesan cheese
  • Kosher salt and freshly ground pepper to taste
  • ¼ t freshly ground nutmeg

DSC_6515a

Directions

  1. Preheat oven to 350°F, 325°F if using convection heat
  2. Wilt the spinach in a large non stick saute pan with the water that is still clinging to the leaves, drain well and roughly chop.
  3. In a large bowl, mix the cooked spinach with the onion, beaten eggs and cheeses. Be sure that the spinach is thoroughly combined with the other ingredients. Season the mixture with salt, pepper and nutmeg.
  4. Transfer mixture to one or several smaller baking dishes that have been coated with non stick spray. Bake in preheated oven for 25 to 30 minutes.

DSC_6520a

DSC_6523a

DSC_6526a

DSC_6533a

March 3, 2016 Lemon-Ginger Poached Grouper with Leeks and Spinach

DSC_5982aFish is on the menu three to four nights a week at our house and I am always looking for new and healthy ways to prepare it. This Asian influenced light main course from Fine Cooking is both easy to prepare and delicious enough for company.

Originally the recipe called for halibut, but since it can be quite expensive (over thirty dollars a pound) any mild tasting firm fleshed fish will work. Our choice was grouper but sea bass or cod would also be a good substitute. The recipe begins with a simple but flavorful rub of ginger, garlic, and lemon. A microplane makes it easy to grate all three. Lightly pat this mixture on one side of the fish. The fish is added to a simmering broth that is enhanced with sauteed leeks and lemon juice. Add any additional stock needed to almost cover the fillets. Poaching ensures a moist flavorful fish. Transfer the cooked fish to shallow bowls and keep warm. The spinach, mint and scallions are quickly wilted in the broth. I confess I didn’t use the mint, Joe is not a big fan and I would only use some of the milder mint that we grow.

While the fish is cooking, you will have time to cook the soba noodles. Soba is both the Japanese word for buckwheat and the noodle made with buckwheat flour. They have a delicate texture and a nutty flavor. Soba can also be flavored with everything from green tea to wild yam. Years ago when I was first experimenting with Japanese recipes it took a special trip to the Asian market to find soba, now they are available in most grocery stores.  Soba noodles are usually eaten cold, but in this recipe they are great warm for sopping up the broth.
.

Lemon-Ginger Poached Halibut with Leeks and Spinach

Serves four

Ingredients

  • 2 t finely grated fresh ginger
  • 1 t finely grated garlic
  • Finely grated zest and the juice of one lemon
  • 2 T plus 1 t extra-virgin olive oil
  • Kosher salt and freshly ground black pepper
  • Four 1-inch thick skinless fillets of a firm fleshed white fish (halibut, grouper, sea bass etc.)
  • 2 medium leeks, white and light green parts only, halved lengthwise, rinsed well and thinly sliced
  • 3 c lower salt chicken broth or vegetable broth; more as needed
  • Water- to cook the soba noodles
  • Soba noodles, a handful or a wrapped portion per per person
  • 4 c lightly packed spinach leaves, rinsed
  • ¼ c roughly chopped fresh mint
  • ¼ c thinly sliced scallions

Directions

  1. In a small bowl, mix the ginger, garlic, lemon zest, 1 tsp of the olive oil, 1 tsp salt and ½ tsp pepper. Pat the mixture evenly over one side of the fish. Put a large pot of water on to cook the noodles, do not add salt to the water. Bring water to a boil.
  2. In a 10-inch straight sided saute pan, heat the remaining 2 Tbs. oil over medium heat. Add the leeks and saute, stirring constantly, until softened, about 5 minutes.
  3. Add the broth and 1 Tbs. of the lemon juice. Cover and bring to a simmer over high heat.
  4. Arrange the fish lemon-ginger side up in a single layer on top of the leeks. If necessary add more broth until the fillets are almost but not completely submerged. Cover and turn the heat to low. Gently simmer until the fish is cooked through, 8 to 10 minutes.
  5. While the fish is  cooking, add the soba noodles to the boiling water and give them a quick stir so they all go underwater. Cook the noodles uncovered for 6-8 minutes, they should be slightly al dente. Drain the noodles into a colander and rinse with cold water to remove excess starch.
  6. With a slotted spatula, transfer the fish to shallow bowls and keep warm.
  7. Add the spinach, mint and scallions to the broth and stir until slightly wilted, about 1 minute.
  8. Season to taste with more lemon juice, salt and pepper. Ladle the vegetables and broth around the fish, add the noodles to the bowl and serve.
DSC_5971a
A rub of ginger, garlic, lemon and olive oil is patted on one side of the fish.
DSC_5976a
Poaching the fish in a chicken broth that is enhanced with leeks and lemon juice.