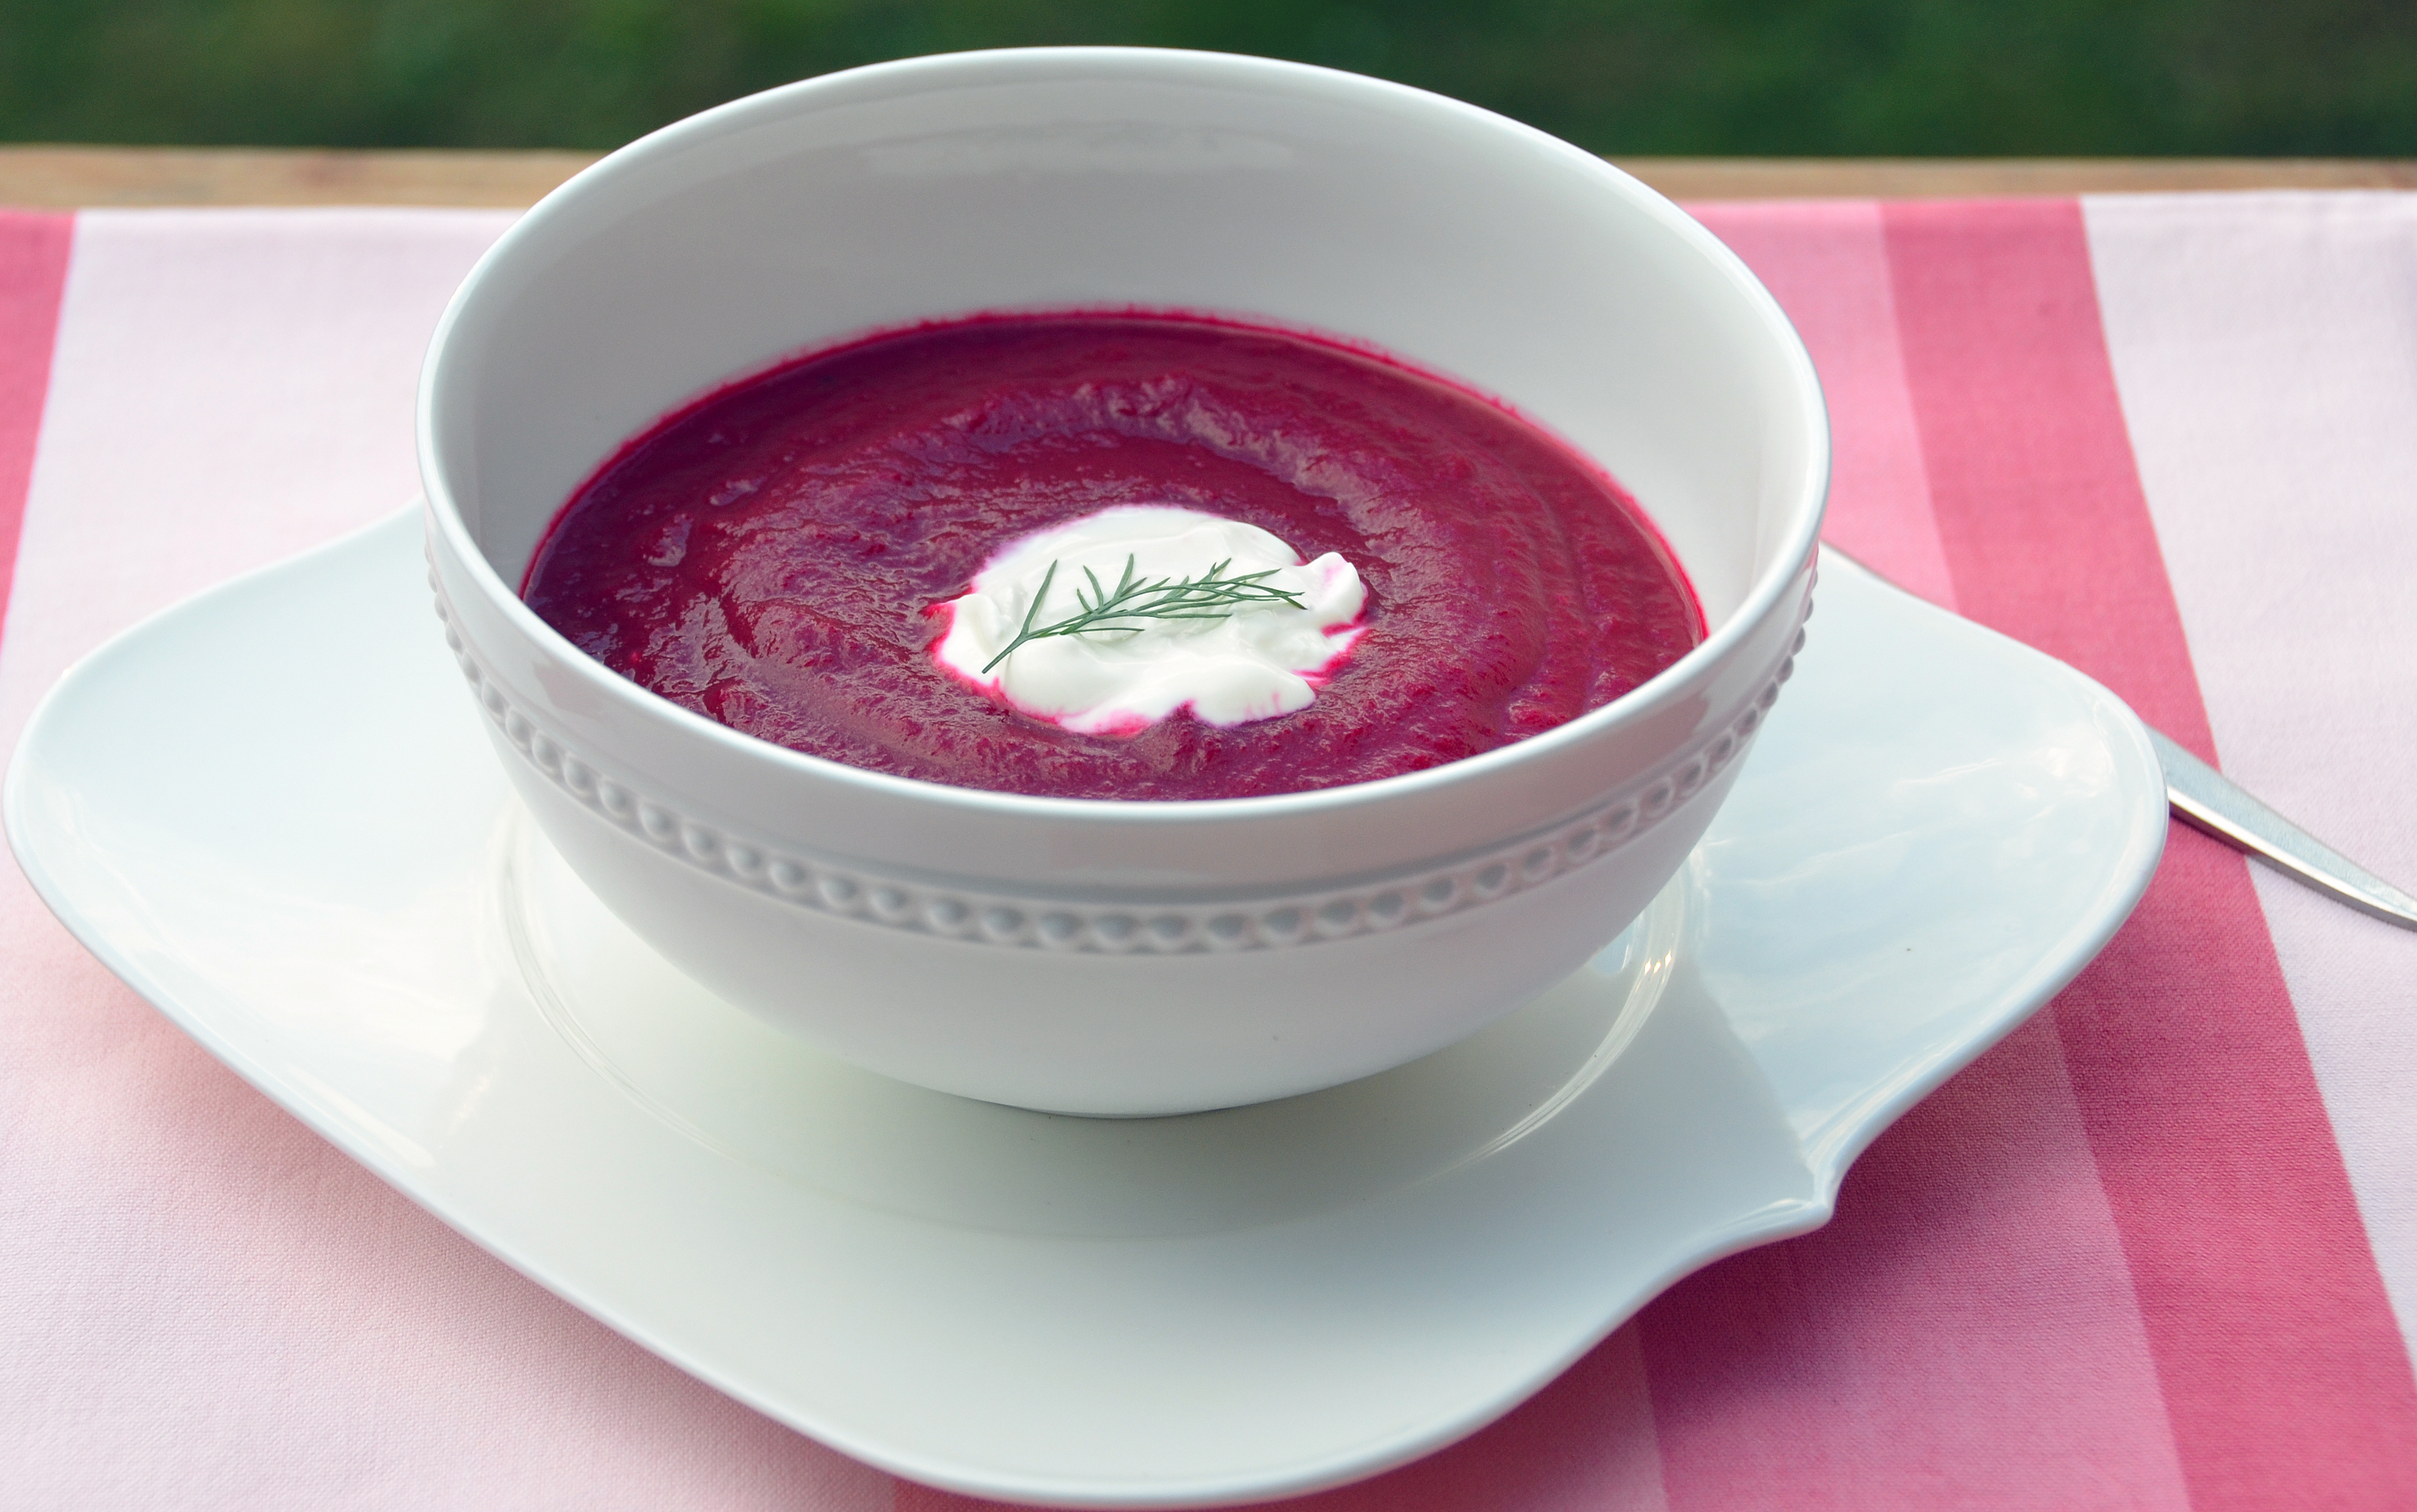
July 31, 2012 Chilled Beet Soup with Horseradish Sour Cream


Our healthy crop of beets this summer have permanently turned my hands, nails, cutting boards and  bowls a bright magenta-red. Not that I’m complaining, garden fresh beets have a sweet earthy quality that no canned or frozen product can match.They are rich in nutrients such as antioxidants, folate, maganese, potassium and dietary fiber. Enjoy just picked beets from your garden or farmer’s market as soon as possible because the sugars that make beets so sweet and flavorful eventually turn to starch.  One of the reasons I’m certain why many people say they don’t like beets.

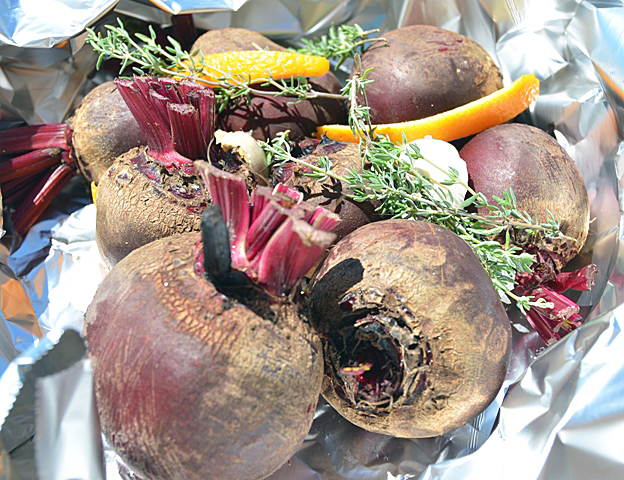
Roasting beets in foil intensifies their flavor and is an easy and neat way to cook them. Just scrub the beets, trim the root ends and the leaves (you can cook them separately as well) and place them on foil. Top with some olive oil, herbs, salt and pepper and wrap them up. Depending on their size, start checking after an hour to see if they are done. They should be able to pierce easily with a fork.
The hot and humid weather we’ve been enduring the last several days called for a cold beet soup.This recipe combines the rich sweetness of beets with the bright tang of citrus. This is a good time to pull out a better quality vinegar since you will be tasting it in the soup. I chose a Cabernet red wine vinegar, a citrus vinegar could be interesting as well. I find the heat in different brands of horseradish vary quite a bit. I prefer a local product, Kelchners horseradish, made in Dublin Pennsylvania.  A dollop of silky horseradish sour cream and a sprig of dill completes this refreshing soup.

Chilled Beet Soup with Horseradish Sour Cream

From Fine Cooking magazine

Serves four

Ingredients

  • 1-1/2 lb. small or medium fresh beets
  • 4 cloves of garlic, unpeeled
  • 3 strips (3 inches long) orange zest
  • 3 sprigs fresh thyme
  • Kosher salt and freshly ground white or black pepper
  • 2T olive oil
  • 2-1/2c low salt chicken broth
  • 2t honey
  • 1/3c fresh orange juice
  • 2T red wine vinegar
  • 1/2c sour cream
  • 1T or so prepared horseradish
  • A few tsp cream or water as needed
  • Fresh dill sprigs for garnish

Directions

  1. Heat oven to 375F. Put the beets and garlic on a large sheet of heavy-duty aluminum foil. Scatter on the orange zest and thyme. Season with salt and pepper and drizzle with olive oil. Fold up the sides of the foil and crimp to make a tight packet.  Place the packet on a baking sheet and slide into the preheated oven.
  2. After one hour start checking your beets. Open the packet carefully and check the beets to see if they are done with the tip of a sharp knife. The knife should slide in easily. If it doesn’t, reseal packet and continue baking, check again in 15-20 minutes.
  3. When fully cooked, set beets aside to cool for 15 to 20 minutes. Rub the skins off the beets with a paper towel and cut the beets into chunks. Peel the garlic cloves. Discard the orange zest and thyme sprigs but save any juices that have collected in the foil packet.
  4. Drop about one third of the beet chunks, the garlic and the collected juices in a blender. Add some of the chicken broth and the honey. Blend to a smooth puree and transfer to a bowl. Continue in batches, pureeing all the beets. Stir in the orange juice and vinegar. Season to taste with salt and pepper. Cover and refrigerate to chill the soup.
  5. Stir the horseradish into the sour cream. If the sour cream is too stiff, stir in a few teaspoons of cream or water to loosen it. Keep refrigerated until serving time.
  6. To serve, ladle the soup into bowls or cups and spoon some horseradish sour cream onto each serving. Garnish with fresh dill sprigs.
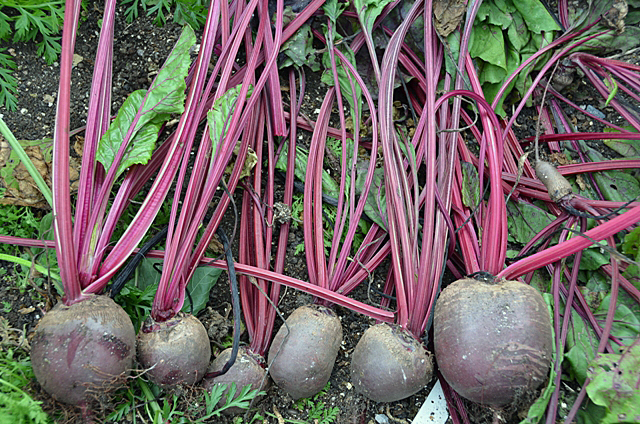
 

  Beets picked fresh from the garden. Don’t forget, beet greens are edible as well.

 Trimmed beets topped with fresh thyme sprigs and orange peel ready to be wrapped for the oven.


The beets turned the blender bowl a bright magenta red
July 26, 2012 Chicken with Eggplant, Tomatoes and Almonds

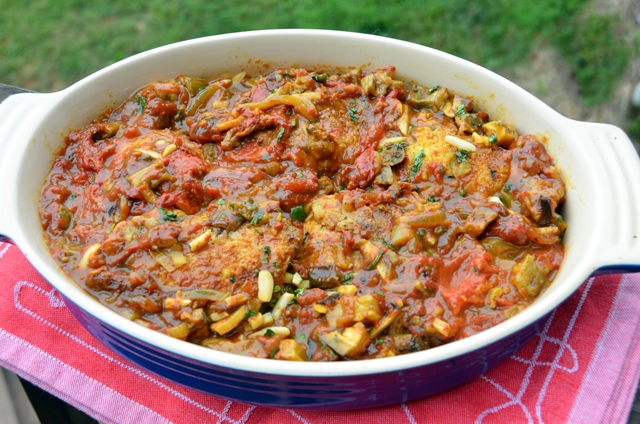
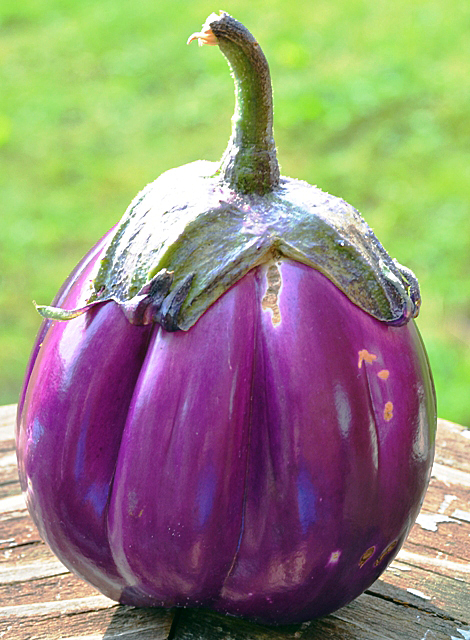
Chicken with eggplant, tomatoes and almonds is a dish I revisit every summer. It gave me the opportunity to use the last of our frozen roasted tomatoes from summer 2011 with our garden’s first eggplant, a Rosa Bianca. One of the pleasures of gardening is the interesting varieties of vegetables that are available to you. In the past few years some of our newer favorites are from an Italian seed company, Franchi Seeds. We have found several unique varieties of zucchini, candy striped Chiogga beets and Rosa Bianca eggplant to name just a few. The Rosa Bianca is a teardrop shaped Italian heirloom variety of eggplant with rosy lavender skin. It has milky-white flesh that is denser than most eggplant. No need to salt and weight this eggplant to get rid of bitterness. When cooked, it has a delicate creamy flavor. In this dish it cooks down to almost a sauce. Aromatic spices make this a dish that smells as good as it tastes.
This is a good make-ahead meal, keep the chicken and the eggplant separate until finishing the dish. When eggplants are plentiful, I will double up on the amount of eggplant I use in the recipe. A can of drained chickpeas would be a good addition. Serve with Israeli couscous or basmati rice to sop up all the wonderful juices.

Chicken with Eggplant, Tomatoes and Almonds

Adapted from Bon Appetit

Ingredients

  • 3 T olive oil, divided
  • 1 ½ c thinly sliced onions
  • 3 cloves minced garlic
  • 1 ½ t Hungarian sweet paprika
  • 1 ½ t coarse kosher salt
  • ½ t turmeric
  • ½ t ground coriander
  • 1 t fennel seeds, ground
  • 1 t freshly ground pepper
  • ½ t ground cumin
  • ¼ t ground ginger
  • 1 28 oz  canned tomatoes or one quart roasted tomatoes
  • 1 ½T fresh lemon juice
  • 8 bone-in skin-on chicken thighs
  • 1 large eggplant, unpeeled, cut into 1-inch cubes
  • 1 T fresh oregano
  • ¼ c slivered almonds
  • Chopped fresh cilantro

Directions

  1. Pat chicken thighs dry. Season on both sides with salt and pepper.
  2. Heat 1 T olive oil in a large heavy-bottomed Dutch oven over medium-high heat until shimmering, not smoking, add chicken, skin side down, do not crowd. Cook on first side until skin is golden, 4 to 5 minutes. With tongs, flip on other side and cook for an additional 4 minutes. Transfer chicken to a plate and set aside.
  3. Add onions cook until soft, about 6-8  minutes. Add garlic to pot and saute until fragrant, about 30 seconds. Add paprika, salt, turmeric, coriander, fennel, pepper, cumin, and ginger; stir 1 minute. Add tomatoes with their juices and lemon juice, bring to a boil.
  4. Arrange chicken in a single layer in the Dutch oven, spoon some sauce over the chicken. Bring to a boil. Reduce heat to low, simmer until chicken is cooked through, about 40 minutes turning chicken pieces with tongs halfway through cooking, While the chicken is cooking, preheat oven to 400°F. Brush a large rimmed baking sheet with olive oil. Place eggplant and 2 T olive oil in a large bowl. Season with salt and pepper and toss to coat. Spread eggplant out on prepared baking sheet and bake until soft and brown, stirring occasionally, about 25 minutes.
  5. Stir eggplant and oregano into chicken. Simmer uncovered 10 minutes to heat through and blend flavors. Season to taste with more lemon juice, salt and pepper. Transfer chicken to shallow serving bowl. Sprinkle with almonds and cilantro.


Beautiful Rosa Bianca eggplant.

July 24, 2012 Summer Salad

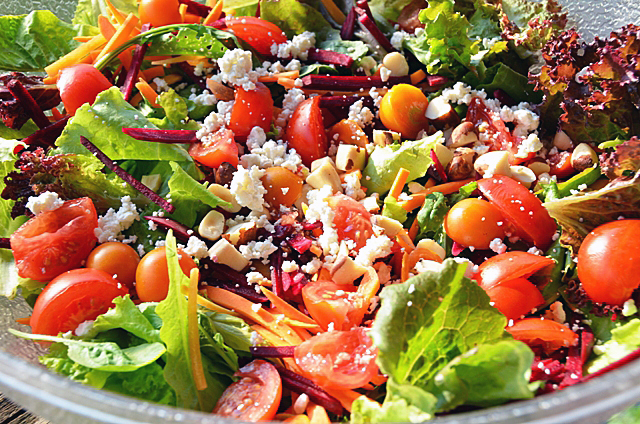
A salad with tomatoes, beets and carrots? Not your typical summer salad definitely. When sweet crunchy carrots and beets and the first of the season Fourth of July and Sungold tomatoes are ready to harvest at the same time, they meet up in our summer salads. Summer is not the best season to grow lettuce.  Lettuce prefers to grow in the cooler temperatures of spring but there are some varieties that are more heat tolerant.  We plant lettuce every other week or so and harvest greens while they are young before the heat causes them to bolt.  A combination of arugula, oak leaf lettuce, lolla rosa and mustard greens are some of the greens we are harvesting now. The beets and carrots, both raw are very finely julienned and add both color and crunch. I like to make a vinaigrette with a touch of sweetness to counterbalance the slight bitterness of the greens.  Some crumbled goat cheese and Brazil nuts give this salad additional flavor and texture.

Summer Salad for two

Ingredients

  • 1/4 c white wine or champagne vinegar
  • 1T white balsamic vinegar
  • 1t Dijon mustard
  • 1t or so of honey or agave sweetener (depends on how bitter your greens are)
  • 3/4 c extra virgin olive oil
  • Kosher salt and freshly ground pepper
  • Mixed salad greens-about 4-5 cups
  • 1 small beet, peeled and finely julienned
  • 1 medium carrot, peeled and finely julienned
  • 1 cup or more of Sungold and Fourth of July tomatoes, halved
  • 1/3c crumbled goat cheese
  • 1/4c coarsely chopped Brazil nuts
  1. Combine the first five ingredients in a small bowl, whisk to combine, add salt and pepper to taste
  2. Separate lettuce into leaves, wash and spin in salad spinner
  3. Place lettuce on serving platter, top with beets, carrots, tomatoes, goat cheese and Brazil nuts
  4. Toss with enough dressing to lightly coat, there will be some left. Top with fresh ground pepper to taste


July 21, 2012 Cinnamon Basil Peach Ice Cream

A southern style dinner of pulled pork called for a southern style dessert. I had Georgia on my mind when I decided on cinnamon basil peach ice cream with toasted pecans. Herbal ice creams are a delicious way to capture the flavors of summer. Infuse your herb of choice in a warmed cream and milk mixture before proceeding with your recipe. This year I have used lavender, anise hyssop, lemon grass with lemon basil and cinnamon basil. Cinnamon basil is a cultivar of regular basil. It is a smaller plant with small dark green leaves tinged with purple. It gets it’s cinnamon flavor and aroma from a chemical compound, cinnamite.  Peach is a nice complement to the cinnamon basil. Be sure to taste the pureed peaches for sweetness before adding them to the base. I also added a small piece of cinnamon stick to the infusion to accentuate the cinnamon flavor.

For this recipe I chose to make a custard or French ice cream. Ice cream comes in two different styles, Philadelphia style and custard. Custard style ice cream contains eggs or just egg yolks that are cooked gently with milk and heavy cream. The egg yolks are emulsifiers that make the ice cream smooth and rich. Philadelphia style ice cream contains cream, sugar and a flavor base, such as vanilla bean with no eggs. It is less rich than custard ice cream but is said to have a more intense flavor. Let me add making a Philadelphia style ice cream would be more desirable for a beginner, no chance for sweetened scrambled eggs!

Cinnamon Basil Peach Ice Cream

Made with the assistance of  Fine Cooking’s ice cream recipe maker

Makes a generous quart

Ingredients

  • 2 c heavy cream
  • 1 c whole milk
  • 3/4 c granulated sugar
  • table salt
  • 1 c tightly packed, coarsely torn cinnamon basil leaves
  • 1 vanilla bean, split lengthwise, seeds scraped out
  • 1 4-inch cinnamon stick broken in half
  • 5 large egg yolks
  • 1-1/2 fresh peaches, peeled, pitted, cooked to soften, and pureed
  • 1/2 c toasted pecan pieces

Directions

  1. In a medium saucepan, mix 1 cup of the cream with the milk, sugar and a pinch of salt. Warm the cream mixture over medium-high heat, stirring occasionally, until the sugar dissolves and tiny bubbles begin to form around the edge of the pan, 3 to 4 minutes.
  2. Stir in the basil, split vanilla bean and cinnamon stick. Cover, remove from heat, and let sit for 1 hour. Taste and let sit longer if you want a stronger flavor.
  3. While the mixture is steeping, prepare an ice bath by filling a large bowl with several inches of ice water. Set a smaller metal bowl  (one that holds at least 1 1/2 quarts) in the ice water. Pour the remaining cup of cream into the inner bowl. This helps cool the custard cool quicker when you pour it in later. Set a fine strainer on top. Whisk the egg yolks in a medium bowl.
  4. Rewarm the cream mixture over medium high heat until tiny bubbles begin to form around the edge of the pan, 1 to 2 minutes. In a steady stream pour half of the warm cream mixture into the egg yolks, whisking constantly to prevent the eggs from curdling.
  5. Pour the egg mixture back into the saucepan and cook over low heat, stirring constantly and scraping the bottom with a heatproof rubber spatula until the custard thickens slightly (it should be thick enough to coat the spatula and hold a line drawn through it with a finger), 4 to 8 minutes. An instant read thermometer should read 175 degrees to 180 degrees F at this point. Do not let the custard overheat or boil, or it will curdle. Immediately strain the custard into the cold cream in the ice bath. Press firmly on the basil, vanilla bean and cinnamon in the strainer with the spatula to extract as much flavor as possible.
  6. Cool the custard to below 70 degrees F by stirring it over the ice bath. Taste your peach puree for sweetness and adjust accordingly.  Stir the peach puree into the cooled custard.
  7. Refrigerate the custard until completely chilled, at least 4 hours or preferably over night.
  8. Toast pecan pieces in a small dry non-stick skillet until lightly browned and fragrant. Set aside to cool.
  9. Freeze the custard in your ice cream maker according to the manufacturer’s instructions.  When the ice cream is at the soft serve stage, stir in the nuts.
  10. Transfer the just-churned ice cream to an air-tight container and freeze for at least 4 hours or up to 2 weeks (if it lasts that long…)

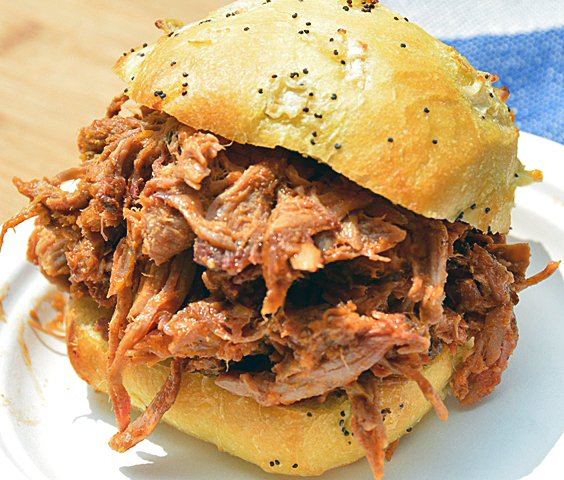
July 19, 2012 Barbecued Pulled Pork on a Charcoal Grill


Juicy, succulent pulled pork has become one of our recent barbecue favorites. Boston Butt, a well marbled cut of pork, is smoke-cooked low and slow. Slow cooking allows the flavorful fat and connective tissue to break down and produce meat that does not dry out.  The pork becomes tender enough to pull apart, hence the name. The Carolinas are most closely associated with pulled pork. The western mountain Piedmont region of North Carolina roasts pork shoulders. Eastern coastal North Carolina prefer roasting the whole hog.  Both Western and Eastern North Carolina sauces are vinegar based, the Western part of the state adds tomatoes. South Carolina’s sauce is mustard based. 
This preparation was, as with all our grill meals, a joint effort. I bought the roast, made the rub and the barbecue sauce. Joe, as always, was my grill man. Read the directions well ahead so you can allow yourself enough time before you plan to serve dinner. The pork requires a great deal of unattended time when you can prepare the rest of the meal.  Serve pulled pork on soft rolls. Traditional accompaniments are cole slaw  and pickle chips. Our accompaniments included a sweet potato salad, zucchini with pesto, corn on the cob and chard gratin. Next time I think I might try all three styles of barbecue sauce for a comparison.

Barbecued Pulled Pork on a Charcoal Grill

(source: Cooks Illustrated July 1997)

Serves eight or more

Spicy Chili Rub

  • 1 T ground black pepper
  • 1-2 t cayenne pepper
  • 2 T chili pepper
  • 2 T ground cumin
  • 2 T dark brown sugar
  • 1 T dried oregano
  • 4 T paprika
  • 2 T table salt
  • 1 T granulated sugar
  • 1 T ground white pepper

Pork

Other equipment needed; disposable aluminum roasting pan (half-chafer size), heavy duty aluminum foil and a large brown paper grocery bag.

Directions

  1. Mix all spicy chili rub ingredients in a small bowl, then set aside.
  2. Massage dry rub into meat. Wrap tightly in plastic wrap, refrigerate for three hours and up to three days.
  3. Remove roast from refrigerator an hour before cooking. Unwrap and allow it to come to room temperature. Soak 4 (3 inch) wood chunks in cold water to cover for an hour and drain. Meanwhile, light a large chimney starter filled less than halfway with charcoal briquettes (2 1/2 qts, approximately 40 briquettes), and burn until all the charcoal is covered with a layer of fine gray ash.
  4. Empty the coals into the grill; build a modified two-level fire by spreading the coals onto one side of the grill, piling them up in a mound 2 to 3 briquettes high, leaving the other half with no coals. Open the bottom vents completely. Place the soaked wood chunks on the coals. Position the cooking grate over the coals, cover the grill, and heat until hot, about 5 minutes (you can hold your hand 5 inches above coals for 2 seconds). Use a grill brush to scrape the cooking grate clean.
  5. Set unwrapped roast in a disposable aluminium pan and place it on the grate opposite the fire. Open grill lid vents three-quarters of the way and cover, turning lid so that vents are opposite chunks to draw smoke through the grill. Cook, adding about 8 briquettes every hour or so to maintain an average temperature of 275F, for three hours.
  6. Adjust oven rack to middle position and preheat oven to 325 degrees Fahrenheit. Place roast in pan and wrap with heavy-duty foil to cover completely. Place pan in oven and cook until meat is fork-tender, about 2 hours.
  7. Slide the foil-wrapped pan with the roast into a brown paper bag. Crimp top shut; rest roast 1 hour. Transfer roast to cutting board and unwrap. Drain any accumulated juices into a saucepan. Reduce the juices on medium heat until thickened. Add reduced juices to barbecue sauce. When cool enough to handle, “pull” pork  by separating roast into muscle sections, removing fat and tearing meat into shreds with finger and/or forks. Place shredded meat in large bowl; toss with 1 cup barbecue sauce, adding more to taste. Serve with remaining sauce passed separately. 

Western Carolina Style Barbecue Sauce

Makes 2 cups

Ingredients

  • 1 T vegetable oil
  • 1/2 medium onion, minced (I used a Vidalia)
  •  2 medium cloves garlic, minced
  • 1/2 c cider vinegar
  • 1/2 c Worcestershire sauce
  •  1 T dry mustard
  •  1 T dark brown sugar
  •  1 T paprika
  •  1 t table salt
  •  1 t cayenne pepper
  •  1 c ketchup

Directions

  1. Heat oil in a medium saucepan over medium heat.  Add onion and garlic; saute until softened, 4-5 minutes. Stir in all the remaining ingredients except ketchup; bring to a boil. Reduce heat to low, then add ketchup.  Cook, stirring occasionally, until thickened, about 15 minutes.


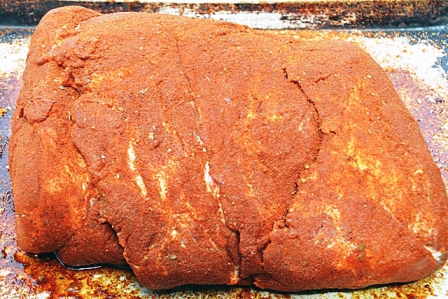
The Boston butt rubbed and ready for the grill.


We used cherry wood for our smoking chunks.


After the first hour of cooking.


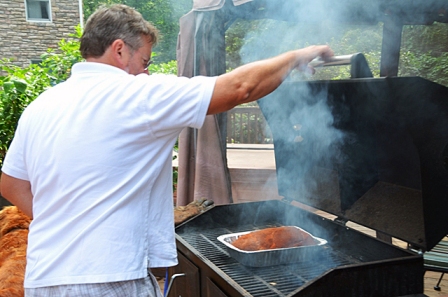
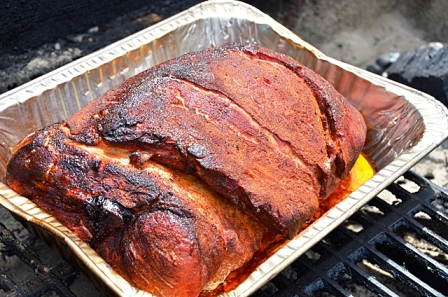
The meat is slow cooked and smoked by indirect heat.


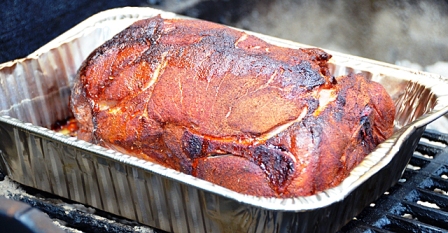
After hour three, ready for the oven.


Pulling the pork. Just add the sauce of your choice.

July 12, 2012 Swiss Chard


Let’s begin with two misconceptions regarding chard. Swiss chard is not from Switzerland, but the botanist who named it in the nineteenth century was, and named it for his homeland.  Second, it is pronounced chard, not shard. I can understand why the mistake can occur. Chardonnay, a wine grape varietal, is referred to in a shorthand kind of way  by many people (moi included) as “shard”. The “ch” is pronounced “sh” in French, like chalet. Also a shard is a sharp piece of glass, not something one would consume.

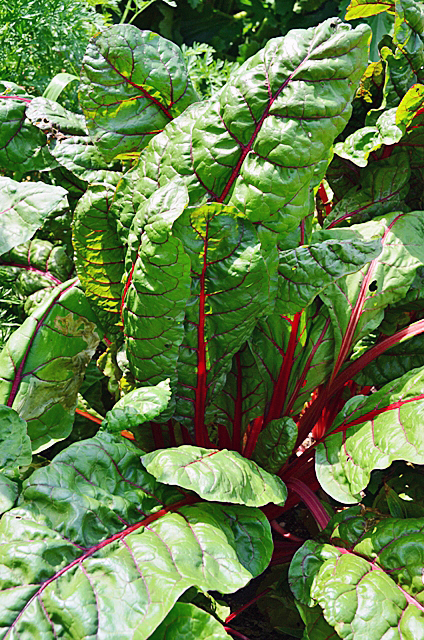
Chard is from the Latin and the French for the word “thistle”. However, chard is not a member of the thistle family but belongs to the beet family.  Chard is cultivated for the leaves and stems of the plants, not the roots.  It is the cooked green of choice in the summer months in our house. We grow many varieties that are as pretty to look at as they are nutritious for you. Varieties like Rhubarb with its bright red stems and Bright Lights with its neon pink, orange and yellow stems give beautiful accents of color in the garden. Chard is a nutritional powerhouse with vitamins K, A and C, and is  a good source of potassium, iron and fiber.
European cooks are partial to chard stems discarding the leafy part and in America most cooks use the leaf and discard the stem. I take advantage of both the stems and the leaves .  The tiniest leaves are an interesting addition to salad mixes. When using larger leaves, the stems need to be separated from the leaves to cook both parts correctly. This is a recipe with the gardener in mind. If you don’t grow your own, your local farmer’s market is a good source for chard. Supermarket chard looks sad for the most part and wouldn’t make a chard lover out of anyone.

Swiss Chard with Garlic

Serves 4-6

Ingredients

  • 1 large bunch of chard
  • Kosher salt and fresh ground pepper
  • Low sodium chicken broth
  • Extra virgin olive oil
  • Several cloves of garlic, peeled and chopped

Directions

  1. Trim the bottoms of the stems and wash chard in several changes of water
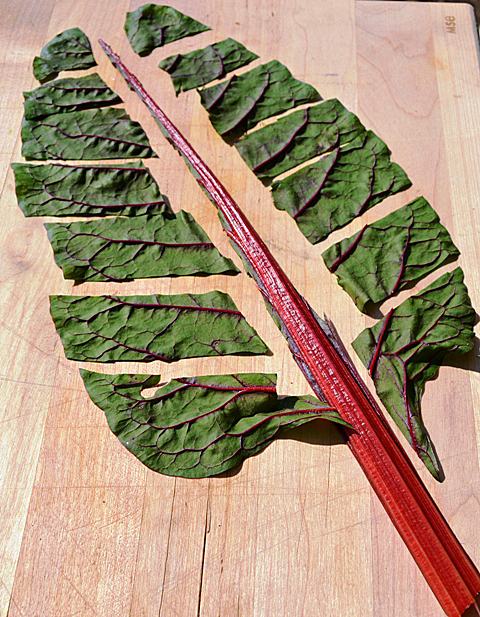
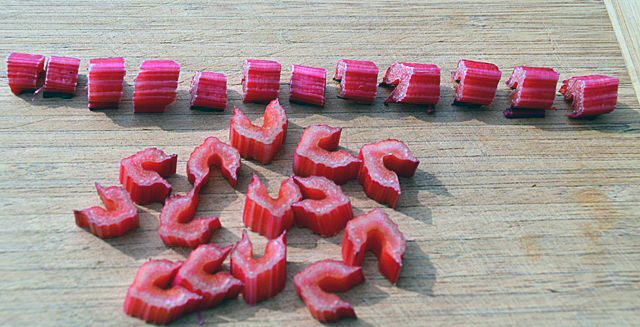
  2. Cut the stems from the leaves. Chop stems into 1/2 to 1 inch pieces. Cut leaves into 1 to 2 inch ribbons. Stacking leaves on top of leaves and stems in an even row  makes the task go quicker.
  3. Bring a large pot of well-salted water to a boil. Add chard stems and blanch for 4-5 minutes. The timing will depend on how thick you cut the stems and how soft you want them to be. Remove stems from water with a slotted spoon or spider. Add a little more water to the pot if necessary and keep at a boil.
  4. Add chard leaves in batches and blanch until wilted, 2-3 minutes. Drain in a large colander. Squeeze out excess liquid when cool enough to handle.
  5. Heat a tablespoon or so of extra virgin olive oil in a large skillet over medium high heat for about a minute. Add stems and toss gently to coat. Add wilted chard leaves and stir often, until tender, adding a little chicken broth if the mixture seems too dry. Push chard to one side of pan, add a little more olive oil, add garlic to pan and saute garlic until golden, another minute or two.
  6. Serve warm. Cooked chard could be added to a frittata or omelet as well.


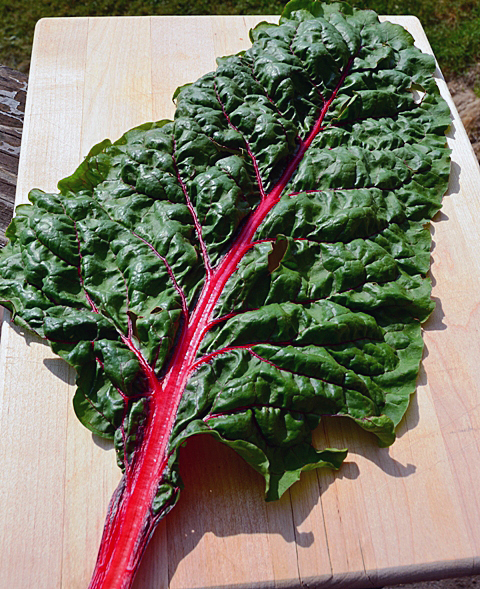
Crinkly rhubarb chard leaf with bright red stem.
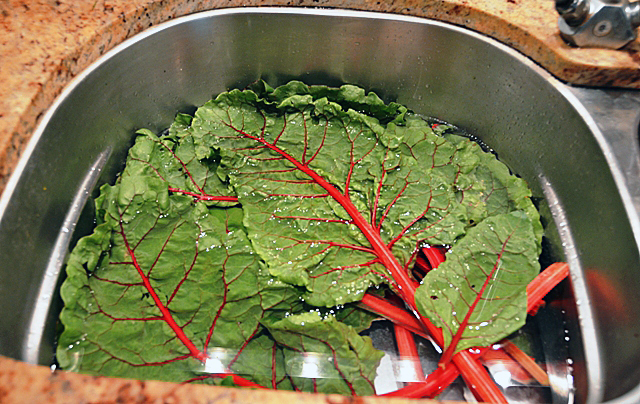
Soak chard leaves in several changes of water. Dirt will sink to the bottom when you lift the leaves out. Drain chard in a colander.


Trim the bottom of the chard leaves. Cut the leaf away from the stalks, I prefer using scissors or a small serrated knife. Chop leaves in 1-2 inch ribbons. Stacking the leaves speeds the process along.

Chop stalks into 1/4 to 1/2 inch pieces.


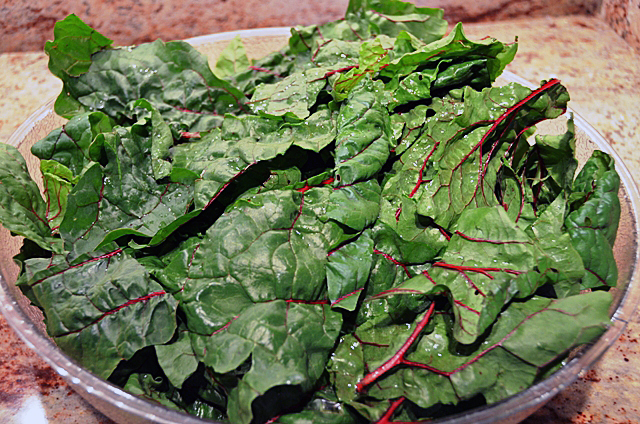
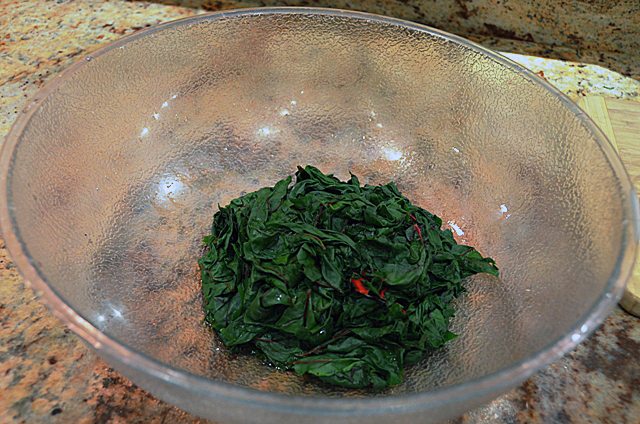
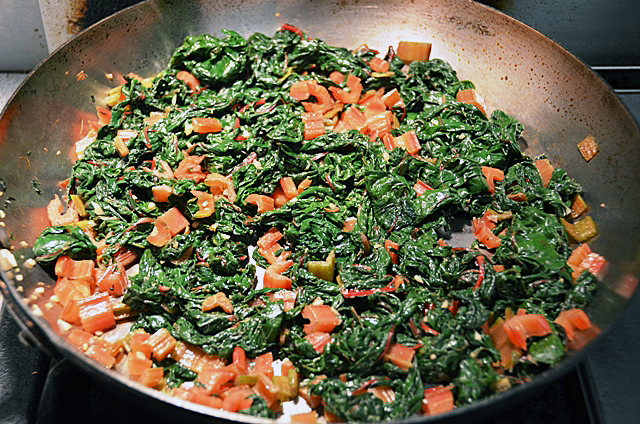
Always cook more chard than you think you will need. This large bowl cooked down to this.


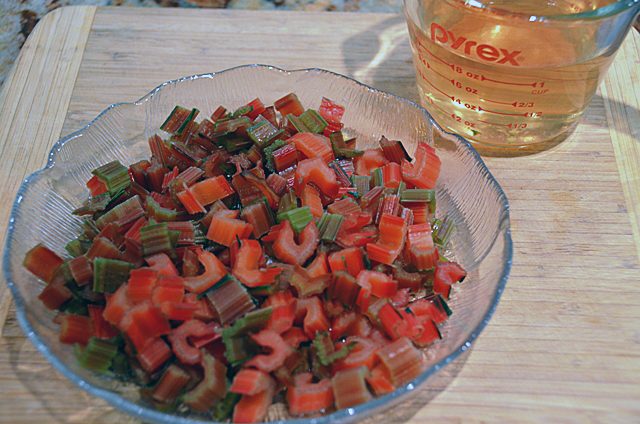
As you can see from the measuring cup, some of the color leaches out during the blanching process but they remain predominately red.


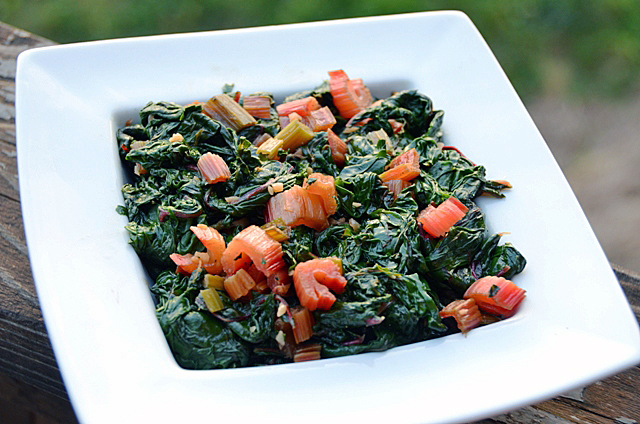
Saute the stems and leaves together and finish with a little chopped garlic.  A flavorful extra virgin olive oil will really enhance the flavors in this dish.


July 9, 2012 Rib Roast Done Like a Steak


Our grilling fare is pretty typical. Burgers, hot dogs, chicken and ribs all make appearances during the summer season. I know that my hubby is often hesitant to try new approaches (if it ain’t broke, don’t fix it) but when I watched the video of chef, Adam Perry Lang cooking Rib Roast like a Steak, I knew it would get his attention.
Adam Perry Lang is a graduate of distinction from the CIA. Working in some of New York’s finest restaurants you wouldn’t necessarily expect him to turn his attention to barbecue. But that’s what happened, winning several competitions in his first year on the national barbecue circuit. His third book, Charred and Scruffed, showcases his very distinctive take on barbecue.
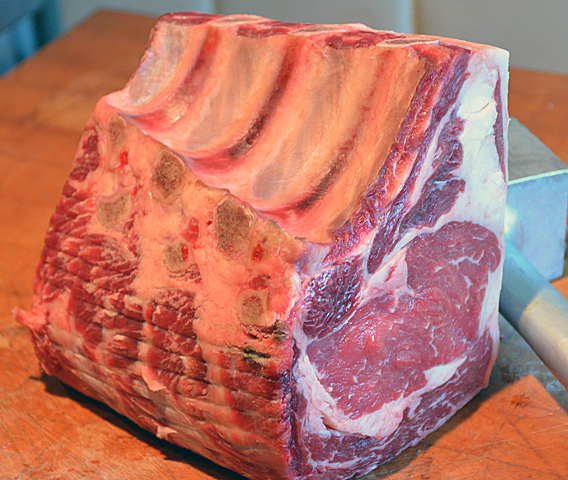
The video begins with the chef’s question, “what happens if we pound a roast into a steak?” He takes a rib roast, cuts the bones to pry it open a bit and starts pounding it out with a modified baseball bat to increase the surface cooking area. Pounding both compresses the meat and adds density, he says.  Since we didn’t have a baseball bat, Joe used the side of a meat mallet and achieved the same results. Perry Lang advocates agressive seasoning of the meat with a four seasons blend, rubbing it in and then using wet hands to make a paste that creates a glaze. He eschews conventional wisdom that dictates once meat goes on the grill, it should be moved as little as possible. Perry Lang’s term “scruffing” is a mistake gone right. Sticking and tearing are good, increasing surface area for more browning of the meat a.k.a. the Maillard reaction. Sprigs of assorted herbs are tied to a wooden spoon to make an herb brush. We picked herbs from the garden to expand on Perry Lang’s choices. Our brush was made up of variegated sage, rosemary, English thyme, lime mint, garlic chives, oregano and lemon basil. The brush is used for both spreading the basic baste and imparts the flavors of the herbs to the meat.  He uses bricks to vary the elevation of the grill and as supports when cooking all four sides of the meat on the grill.  The herbs are finally chopped up and added to the board dressing which gives the meat a final layer of flavor. A very different approach with excellent results and a bit of theater included.

Get the recipe here.

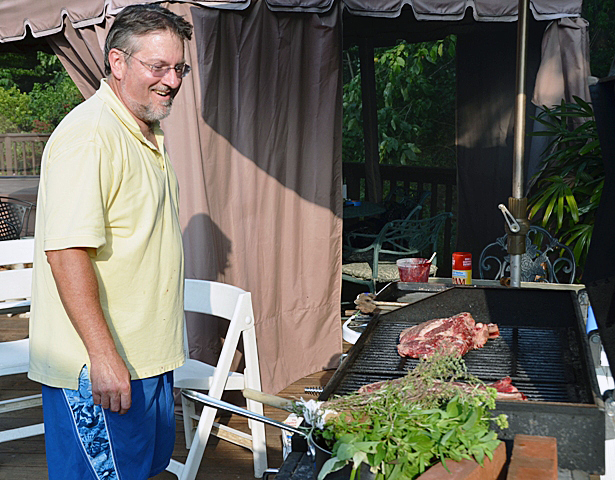
The three bone rib roast was from Wegmans
Joe trying his hand at “aggressively” seasoning the meat.
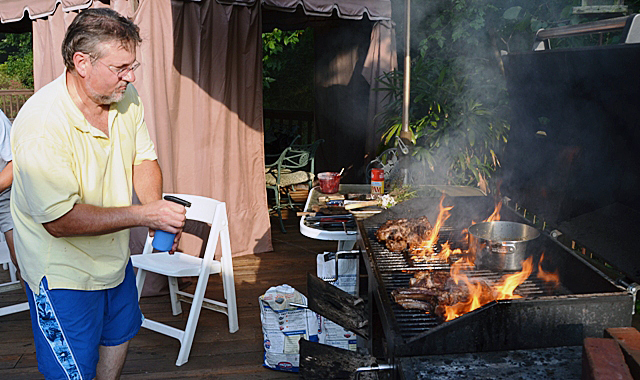
As you can see, grilling makes Joe happy.


Perry Lang says embrace the flare-up, it boosts carmelization.
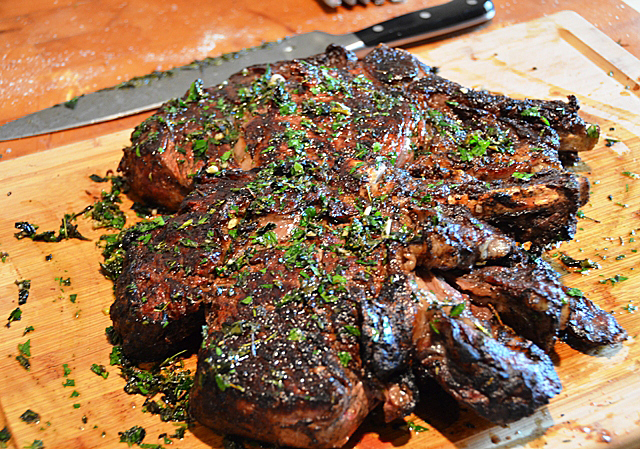
Steak with chopped herbs and board dressing

July 7, 2012 Turnip Fries


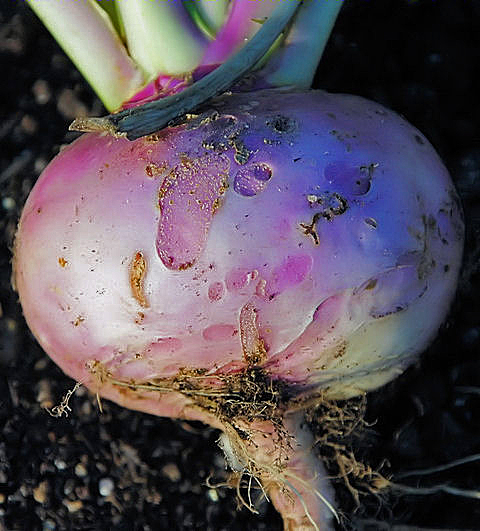
In the last several years we have added more root vegetables to our gardening repertoire, carrots, kohlrabi, daikon radish, rutabagas for the first time and turnips. We use turnip and beet top thinnings as a cooked green and now the last of the spring turnips have been harvested and a new crop will be planted for fall. Since we pick them on the small side, they are a nice crispy addition to slaws or cold salads. I wanted to try something a little different. Searches I did on my computer turned up roasted, pureed, glazed dishes, usually from the November and December issues of magazines when cooks are looking for hearty fare. Finally Saveur magazine provided me with the recipe I was looking for, turnip fries. Turnips are cut into julienne, tossed with olive oil, parmigiano-reggiano and nutmeg and baked until golden.
This is one of those dishes that never quite makes it to the dinner table due to pre-meal munching. A dipping sauce next time perhaps…

Turnip Fries

Ingredients

  • 4 medium peeled trimmed turnips
  • 1/4 cup olive oil
  • 1/4 cup grated parmigiano-reggiano
  • 2 pinches grated nutmeg
  • Kosher salt and freshly ground black pepper

Directions

  1.  Preheat oven to 450F. Cut turnips into 1/2″ sticks and toss in a bowl with oil, grated parmigiano-reggiano,nutmeg, and salt and pepper. Spread turnips out on an oiled sheet pan. Bake until golden, 18-20 minutes.


July 5,2012 Soft Shell Crabs with Mojo Sauce


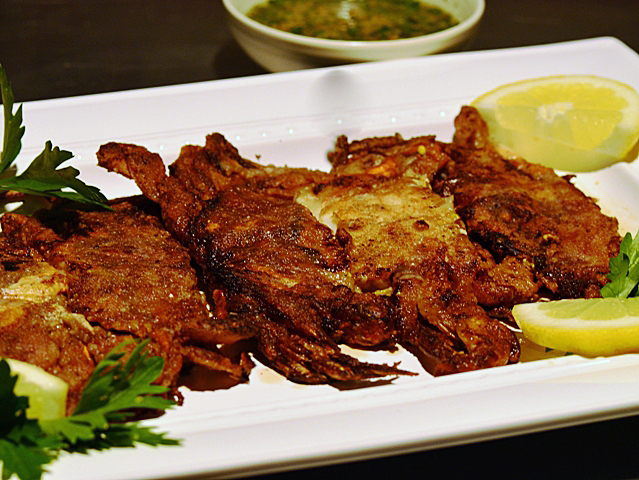
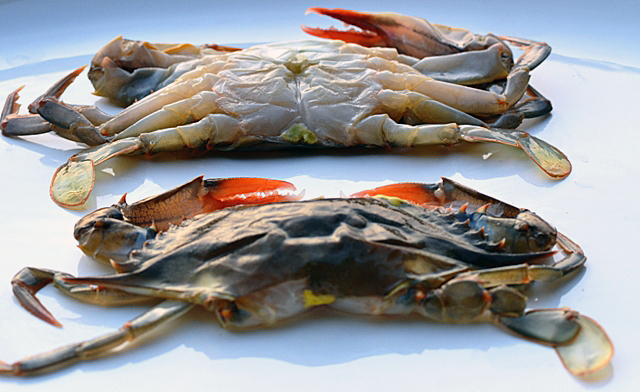
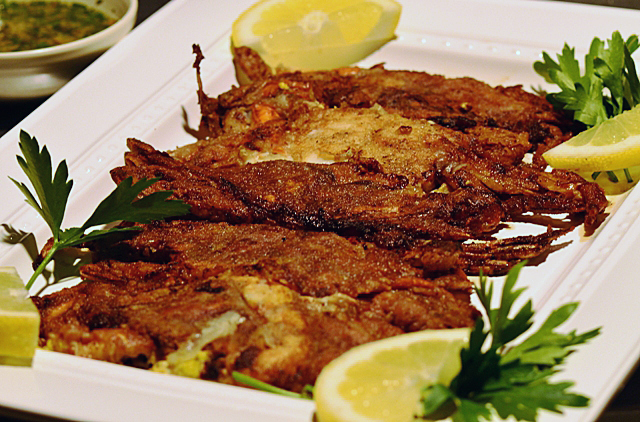
Callinectus sapidus, from both the Greek and Latin translates into English as “savory beautiful swimmers”. What a descriptive name for a delectable spring and summer treat, soft shell crabs. Soft shell season begins with the first full moon in May and ends in September. During these months, blue crabs begin the molting process. Crabs shed their hard outer shell as they grow. This may occur as many as 23 times in their three year life cycle. When the crab backs out of it’s shell, it is only soft for a few hours. Crabbers need to remove their catch from the water at this point or the shell will become hard again. Although available frozen year round, we prefer them fresh and in season. When selecting soft shells rely on your nose, they should smell fresh, like the sea.  Have your fishmonger prepare them for cooking. Pack a cooler with ice to transport them home and plan on eating them the same day.
Although soft shell crabs can be baked, grilled, sauteed or deep fried, the method of cooking we like was demonstrated by David Rosengarten. In the early days of the TV Food Network, Mr. Rosengarten was the enthusiastic host of one of our favorite programs, Taste. Each episode focused on one dish that he had thoroughly researched. He would then demonstrate how to prepare the dish in what he thought was the best method possible.

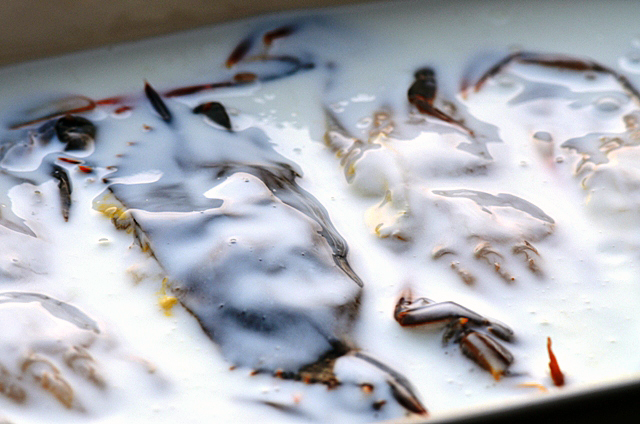
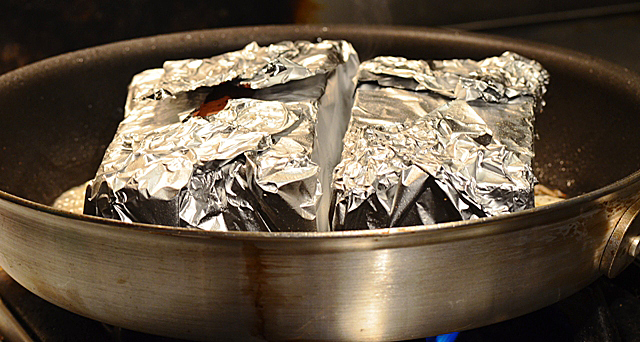
His approach is first to soak the soft shells in buttermilk for an hour. This helps plump up the crabs during the cooking process. The next trick is to cook the crabs under a brick. The brick helps to squeeze out excess water, condenses the meat and makes the soft shell crabs extra crispy. A garlicky tart mojo is a great for dipping sauce for the crab.

Soft Shell Crabs with Mojo Sauce

Ingredients

Mojo sauce

  • 1T olive oil
  • 4 garlic cloves, finely minced
  • 1/3 c freshly squeezed lime juice
  • Kosher salt and freshly ground pepper to taste
  • 2T minced fresh cilantro

Directions

  1. Place olive oil in a small heavy saucepan over moderately low heat.  Add garlic and cook slowly for about 5 minutes. The garlic should be golden, not brown.
  2. Add lime juice, stir and bring to a boil. Remove from heat, season with salt and pepper, and add the cilantro. Let sauce cool to room temperature.

Soft Shell Crabs

  • 6 small to medium soft shell crabs
  • Kosher salt and freshly ground pepper to taste
  • 1 cup buttermilk
  • Wondra flour
  • 1-2 T unsalted butter
  1. Season the crabs with salt and pepper. Pour 1 cup buttermilk in a shallow bowl and soak crabs for one hour. Remove crabs from buttermilk and pat dry.
  2. Place crabs on a plate and sprinkle Wondra flour on both sides of the crabs. Melt butter over medium high heat in a saute pan large enough to hold the crabs in a slngle layer. When the butter is melted and the foam subsides, add the crabs. Place a second pan large enough to cover the crabs over the first pan and place a heavy weight in this pan. I use my special “cooking bricks”.  Cook for three minutes, turn the crabs over, top with the pan and weights again, and cook for three minutes more. Remove from heat and serve immediately.


Front and back views of a soft shell crab before cooking.
Crabs in the buttermilk soak


Weighting the crabs with foil wrapped bricks.