December 10, 2017 Chicken with Shallots

In the beginning it was Martha for me. Sure there was Julia, James, Jacques and the Silver Palate ladies, but Martha was my main inspiration as someone who was a novice at cooking, entertaining, and in a few years, a budding caterer. As the Martha Stewart empire expanded, so did the number of magazines published under the Martha Stewart brand. Among those titles was Everyday Food, a pocket-sized digest with recipes that were “fast and easy”. The recipes centered around ingredients that could easily be purchased at the grocery store and usually cooked in less than an hour. Quite a departure from many of the recipes in her many of her earlier cookbooks.

Though there are many good recipes from the magazine and accompanying PBS series, there is one that stands out from the rest, braised chicken with shallots. Over the years this recipe has been modified, updated and tweaked, this is my version.

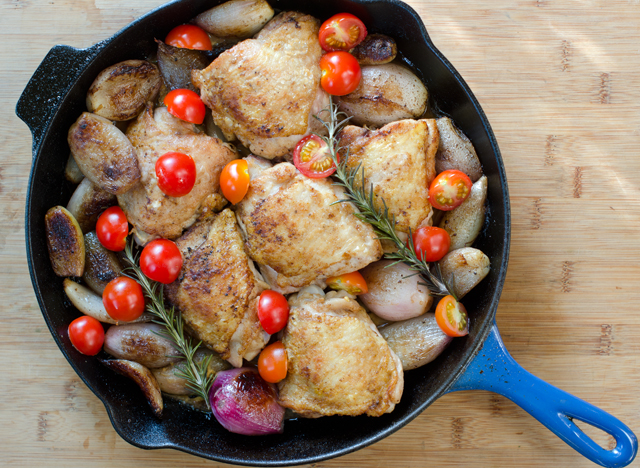
Braised chicken with shallots is a one pot no fuss dish where the sum is definitely greater than the  basic parts. The original recipe used bone in skinless chicken thighs, you could equally substitute bone-in skin on chicken thighs or boneless skinless chicken thighs. I would definitely say choose thighs or chicken quarters (leg and thigh combination) rather than chicken breasts, dark meat holds up much better to braising.

Several versions of the recipe start with a definite no-no, rinse the chicken thighs in water. Washing raw poultry before cooking is not recommended by the USDA. Bacteria in raw chicken (in all meat actually) can be spread to other foods, utensils and surfaces, also known as cross contamination. Cooking chicken to the proper temperature kills the bacteria. So just pat the chicken very dry with paper towels and proceed with the recipe.

Coat the chicken pieces very lightly with flour and sprinkle with salt and pepper. Martha recommends (and I heartily agree) using Wondra flour for this step. If you haven’t noticed, it’s that bright blue canister tucked in next to all those alternative flours like coconut and almond. Wondra is an instant flour, precooked and dried. It dissolves quickly in liquids and makes lump free gravies. In this recipe it gives the chicken an extra light and crispy crust.

Melt butter in a large heavy bottomed skillet or Dutch oven. Cook the chicken three to four minutes per side, in batches if necessary. You want to develop a golden crust and leave behind brown bits that you will cook the shallots in. Remove the chicken from the pan and keep warm.

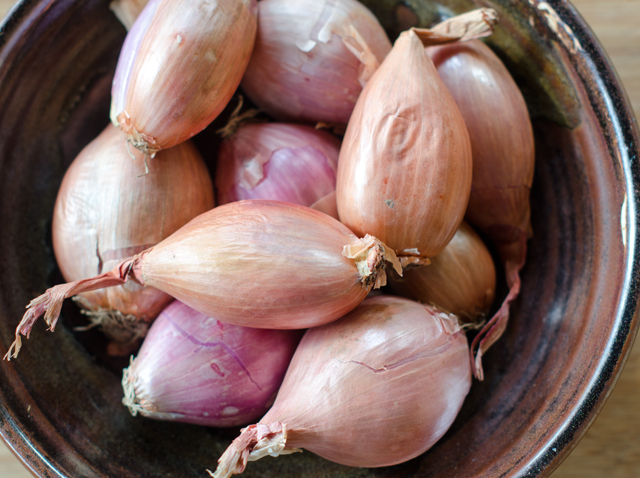
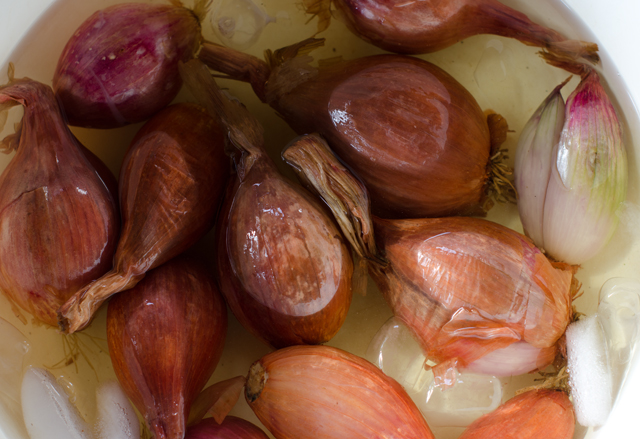
Shallots, usually a minor player in most recipes takes a starring role here. If you aren’t familiar with shallots, their flavor is sweet and mild, somewhere between an onion and garlic. This recipes uses about a pound, 12-15 medium to large shallots. Peeling shallots can be a tedious task. You can make this easier by soaking the shallots in boiling water for a few minutes and then putting them in an ice water bath so they won’t continue to cook. Make a shallow cut in the top layer and peel the skin and top layer away.

Sauté the shallots in the butter and rendered chicken fat until softened and caramelized. Return the chicken pieces to the pan and add a cup of white wine to bring some acid to the dish and to deglaze the brown bits in the bottom of the pan. I used vermouth, a fortified white wine that is flavored with herbs and spices. If you are going to use vermouth, look for a dry (not sweet) variety.

Stir in the Dijon mustard and add the fresh rosemary sprigs. Put a lid on the pan and simmer for thirty minutes. At the end of the cooking time add two cups of halved cherry tomatoes. Although I am not a fan of out of season tomatoes, there are some I will use as “supporting players” when they are necessary to the dish. With seed sourced from the south of France, Sunset Flavor Bombs are a good choice and available at big box stores.

This is a great dish for the busy cook, cook on a Sunday afternoon, reheat and serve several days later. Serve with noodles or rice to sop up the juices.

Shallots are a member of the onion family, their flavor is milder and reminiscent of garlic.
Chilling off blanched shallots before peeling them.

Chicken with Shallots

Serves 4-6

Ingredients

  • 2½ to 3 lbs chicken thighs (6-8 pieces)
  • 2 T flour (I used Wondra)
  • Kosher salt and freshly ground pepper
  • 2 T unsalted butter
  • 12 medium to large shallots, peeled
  • 1 c vermouth
  • 1½ T Dijon mustard
  • 2 large sprigs rosemary
  • 2 c small tomatoes cut in half or quarters

Directions

  1. Pat the chicken thighs dry with paper towels. Sprinkle them with salt, pepper and flour.
  2. Melt the butter over medium high in a heavy bottomed skillet large enough to fit the chicken pieces comfortably. When the butter begins to foam, cook the chicken, in batches if needed, 6-7 minutes per side. It should be brown and crisp on both sides. Set the chicken aside on a plate and keep warm.
  3. Sauté the peeled shallots in the butter and the chicken fat until they begin to soften and caramelize, 10-12 minutes. Stir in the vermouth with a large wooden spoon to deglaze the pan. Add in the mustard and the rosemary sprigs. Return the chicken thighs to the pan and cover. Turn the heat to low and simmer for 30 minutes.
  4. Add the tomatoes to the pan and stir them in to combine. Serve immediately or cool and refrigerate. Reheat and serve in the next two days.

December 3, 2017 Creamy Kale and Goat Cheese Gratin


Kale and goat cheese gratin is the ultimate winter comfort food and a great addition to any potluck or holiday feast. The original recipe from Fine Cooking called for dandelion greens but I have made it with baby chard greens and spinach as well, depending on the season. This time I used the bounty of fall kale from our garden. Joe planted several varieties, for this recipe I used a combination of Lacinato or Tuscan, Red Russian with its purple veins and stems and curly Dwarf Blue Curled. If we’re lucky, some of the plants that don’t die off this winter will provide us an early spring kale crop.

When shopping for kale look for moist, crisp, unwilted bunches, unblemished by tiny holes, which indicate insect damage. The leaves should not be yellowed or brown. Wrap unwashed kale in paper towels, then store in plastic bags in the refrigerator crisper for a few days. When you are ready to cook, submerge the leaves in a sinkful of cold water, swishing them around to remove any dirt. To trim for cooking, lay a leaf bottom side up on a cutting board and run a paring knife along each side of the center stem. I like using a Cutco steak knife in this step for the traction it gives. Repeat until all the stem are removed. Then cut the leaves in the size your recipe calls for, in this case, 2 inch strips. If you are so inclined, chop the stems into smaller pieces, store them in freezer bags and add them the next time you make a vegetarian stock.

Bring a large pot of well salted water to a boil and cook the kale for 3-4 minutes or until tender. You can do this step in batches if necessary. If you are doing this in batches, remove the kale with a Chinese strainer and allow the water to come back to a boil before adding the next bunch of leaves. Transfer the blanched leaves to a colander to drain well and cool. Put the cooled leaves in a clean cotton dish towel and gently wring the greens and get rid of any excess moisture. There’s nothing worse than a watery gratin!

Chop the greens coarsely and put in a large mixing bowl and combine with Parmesan and a creamy goat cheese. Combine well, don’t be afraid to use your hands for this. Spread the greens in a buttered baking dish and add cream that has been infused with garlic and lemon. Be sure to use a shallow gratin dish rather than a deeper, smaller one. The larger surface area helps reduce the cream. Top with the breadcrumb mixture and bake until the crumbs are brown and the liquid is bubbly and has reduced below the crumb level.

The kale and goat cheese gratin can be prepped in advance. Prepare the kale filling and add the cream to the dish but hold off on adding the crumb topping until right before you bake it. Cover with plastic wrap and refrigerate. If you have refrigerated the dish, bring it back to room temperature, or if baking right from the fridge, add a little extra time to your cooking.

Creamy, cheesy greens topped with a crunchy Parmesan crumb crust, what’s not to love? This flavorful dish is great served with lamb or turkey (of course!) and makes excellent leftovers.

Lacinato, Tuscan or Dinosaur kale.
Dwarf blue curled kale
Red Russian kale
It takes a lot of kale to make a pound.
Trimming the leaves.
It just needs a breadcrumb crust now.

Creamy Kale and Goat Cheese Gratin

Serves six or more

Ingredients

  • ½ t unsalted butter
  • Kosher salt
  • 1 lb. kale, stemmed, leaves cut into 2-inch strips
  • 1 c coarse fresh breadcrumbs
  • 3 T plus ¼ c finely grated Parmesan
  • 1-1/3 c heavy cream
  • 2 garlic cloves, peeled and smashed
  • ¼ t finely grated lemon zest
  • Freshly ground black pepper
  • 2 oz fresh soft goat cheese

Directions

  1. Position a rack in the center of the oven and heat the oven to 375°F. Coat a shallow medium-sized gratin dish with the butter.
  2. Bring an 8-quart pot of well-salted water to a boil over high heat. Working in batches, boil the kale just until tender, about 3 minutes. Drain well.
  3. Use a dish towel to gently wring the greens and get rid of any excess moisture.
  4. In a small bowl, combine the breadcrumbs, 3 T Parmesan and a pinch of salt.
  5. In a medium saucepan over medium high heat, bring the cream and garlic to a boil, about 5 minutes. As soon as the cream has come to a vigorous boil (but before it boils over), remove the pan from the heat and let sit for 5 to 10 minutes. Add the lemon zest and season with a little salt and pepper. Stir well and remove the garlic cloves.
  6. Transfer the greens to a cutting board and chop them coarsely. Put them in a large mixing bowl and add the remaining ¼ c Parmesan and the goat cheese. Using your fingers, mix well. Spread the mixture in the prepared gratin dish. Pour the cream over and stir gently with a spoon to distribute evenly.
  7. Season to taste with salt and pepper. Top the gratin evenly with the breadcrumbs.
  8. Bake the gratin until the crumbs are browned and the liquid has reduced below the crumb level, about 30 minutes. Serve warm.