December 31, 2016 Seven Fishes Christmas Eve

We have adopted the Italian/Italian American tradition of seven fishes and it has been our Christmas eve feast we share with friends for the past six years. I explained the tradition of the seven fishes in a post from 2012.

This year our seafood included oysters straight from the Chesapeake Bay courtesy of Nik.  The extra large succulent oysters are enjoyed both raw with lemon and a splash of cranberry pear vinegar and baked a la Oysters Kenwood. We had a traditional (for us) shrimp scampi pizza as well as a newly inspired creation of a clam and bacon pizza. Both were delicious. We had a refreshing calamari salad, seafood stew, the best stuffed clams ever, just hope Joe remembers the recipe. Homemade pasta was served in two forms, mussels diavola with fettuccine and delicious crab ravioli served with a delicate lemon butter sauce. Golden brown seared scallops were served on a bed of microgreens with mixed sautéed mushrooms. The last course was swordfish skewers and pearl onions with a balsamic sweet and sour sauce. Some years Joe has cooked these in the fireplace grill but due to exceptionally warm weather this year they were cooked outdoors on the grill.

We start the party a little earlier each year, so that we aren’t finishing the last course at midnight. That actually happened the first few years. To finish things off, we left just enough room to finish off the meal with delicious Italian cookies and pastries from Chambersburg, an Italian neighborhood in Trenton, courtesy of Rich.

Nik power washes the oysters before they come inside for shucking..
Joe and his wonderful stuffed clams.
Stuffed clams had bacon in them too.
Oysters Kenwood, oysters baked with tomato sauce, bacon and cheddar cheese. Delicious!!
Shrimp scampi pizza.
Clam and bacon pizza, this year’s new creation.
Delicate crab ravioli with lemon butter sauce.
Homemade fettuccine with mussels diavola.
Seared scallops on a bed of microgreens and sautéed mushrooms.


July 17, 2015 Pesto for Seasons Without Basil

DSC_3686a
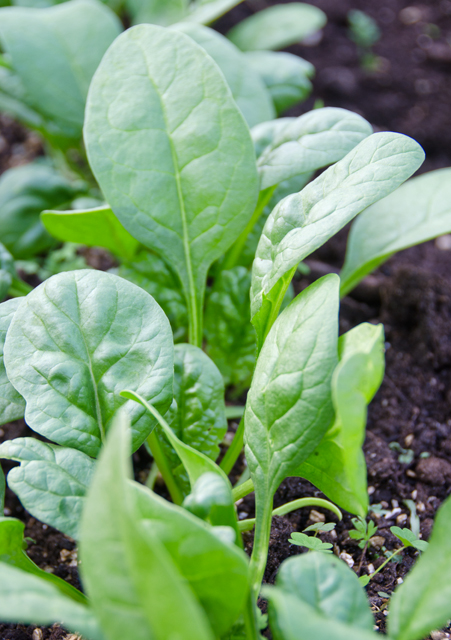
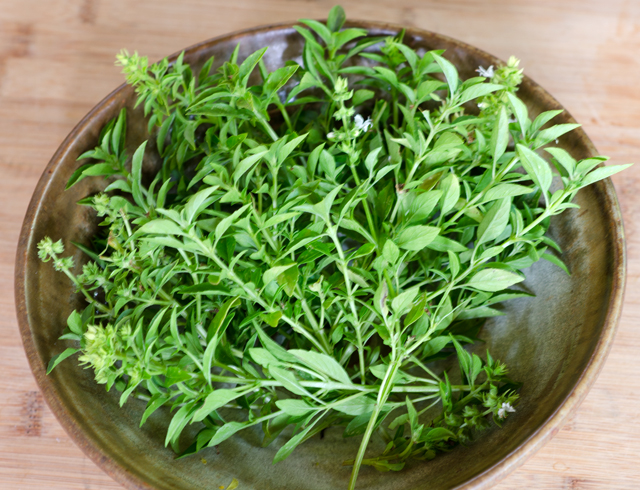
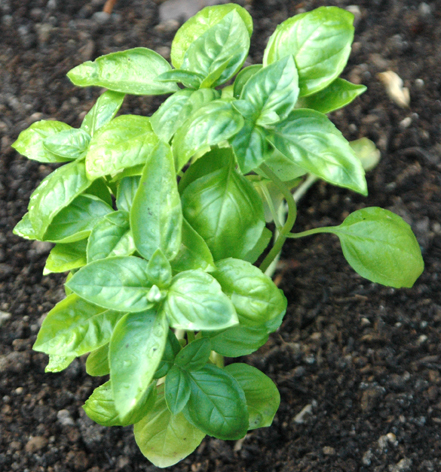
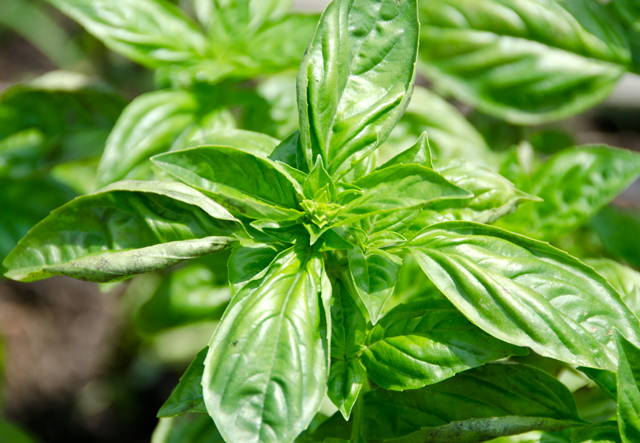
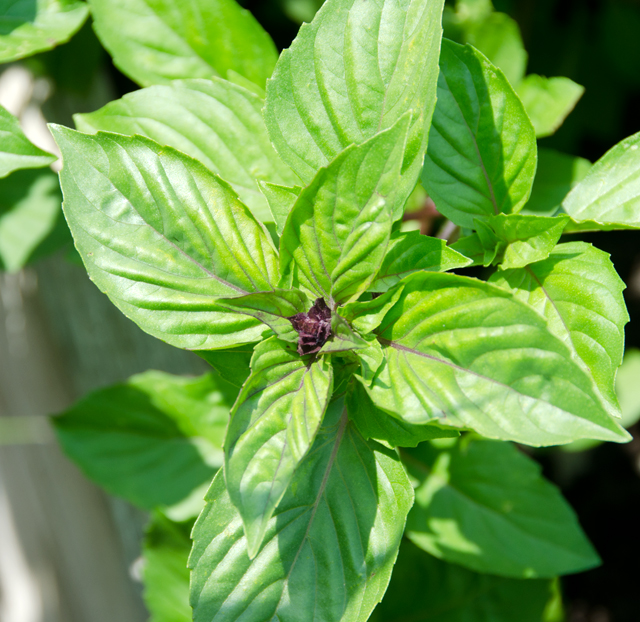
Whether you’ve grown it from seed or purchased your plants at the local home improvement store, those basil plants in your garden are loving the warm temperatures and rain we have been receiving recently. It’s about now that your basil plants have probably sent out spikes of tiny white flowers. Since basil is a true annual, when allowed to flower the plant will go to seed, the leaves will become bitter and your plant will eventually die off.  Now is the time to begin harvesting basil leaves.

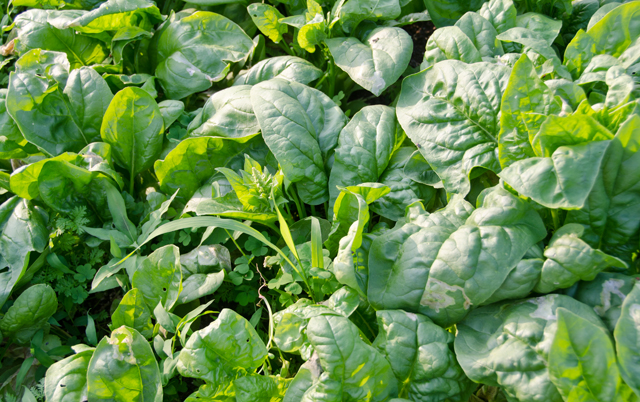
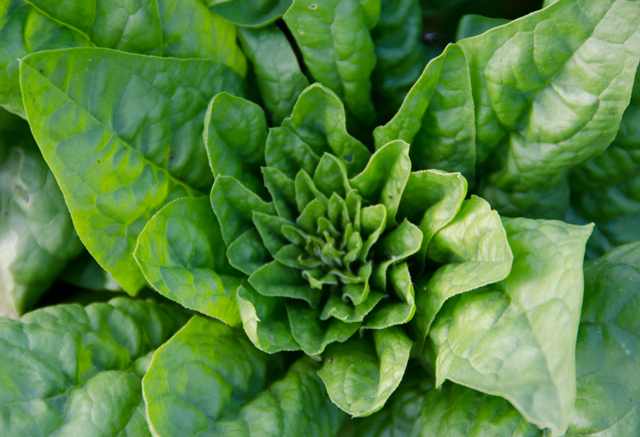
As soon as you see that your basil is flowering, pinch them off so the energy in the plant stays diverted to foliage growth. Cutting back your basil plants regularly  encourages full, bushy plants. To harvest, cut leaves from the top of the plant, pinch out the top of the stem. This should include small new leaves or a flower stalk and a pair of full sized leaves growing below the tip.

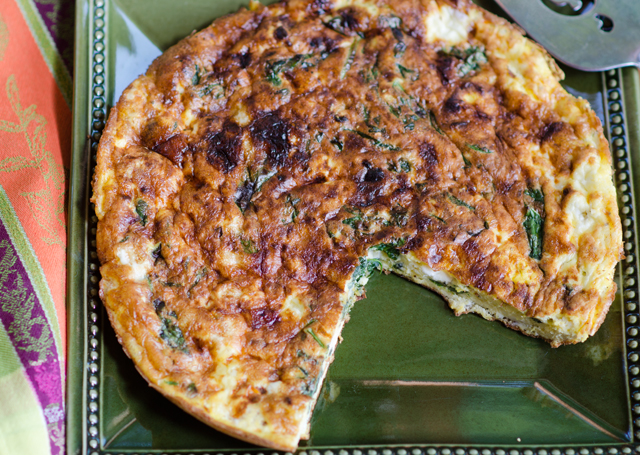
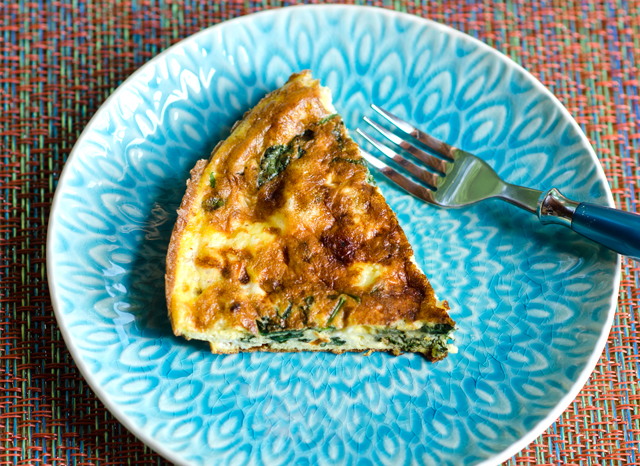
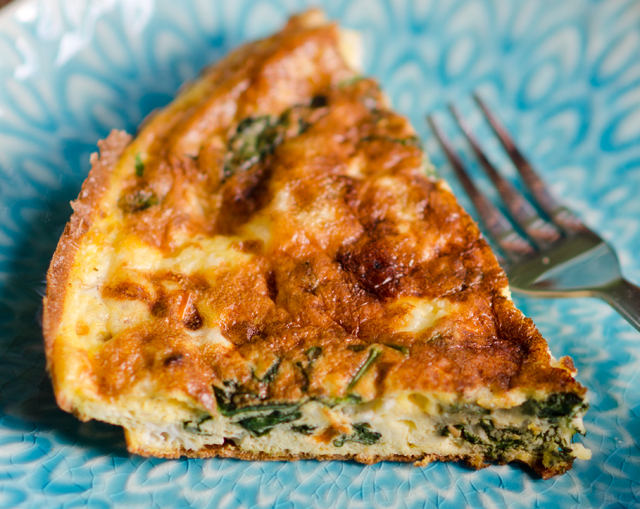
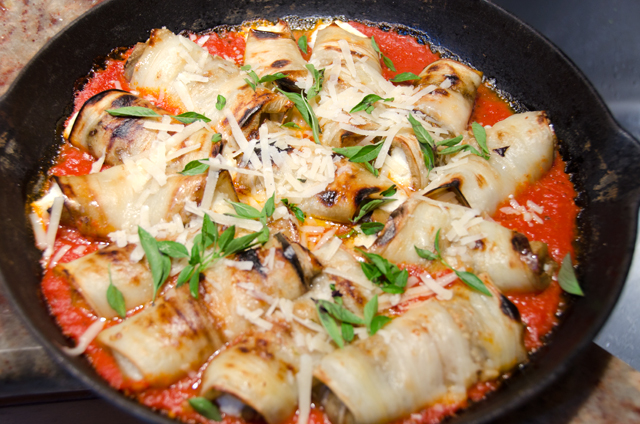
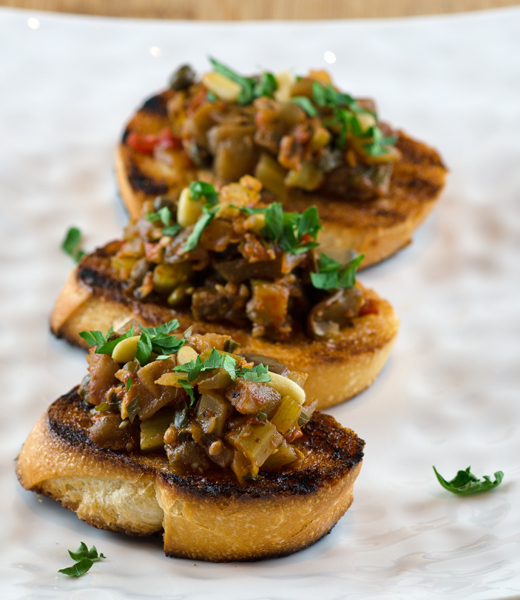
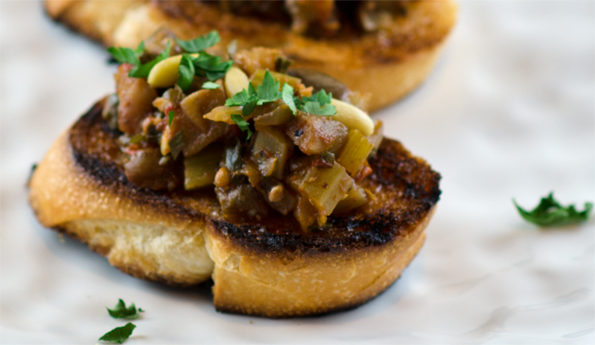
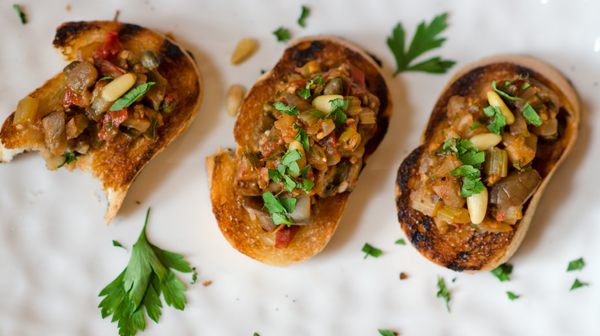
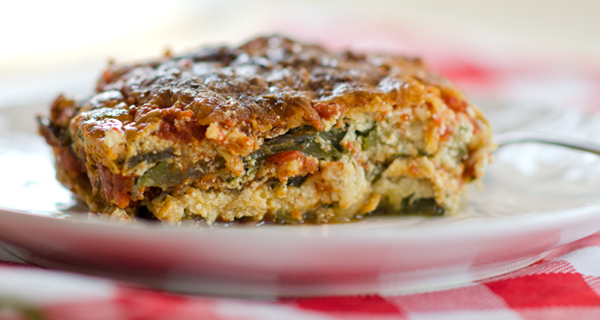
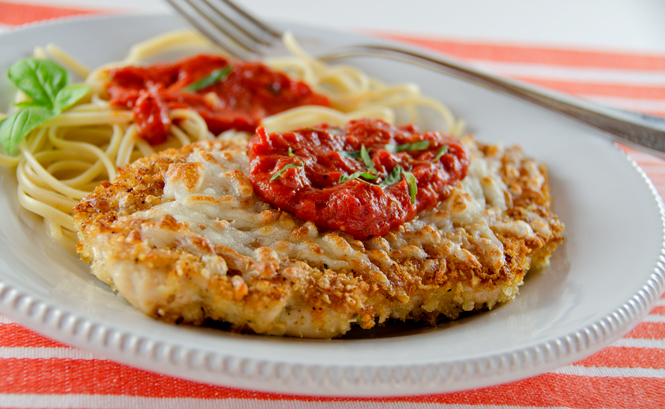
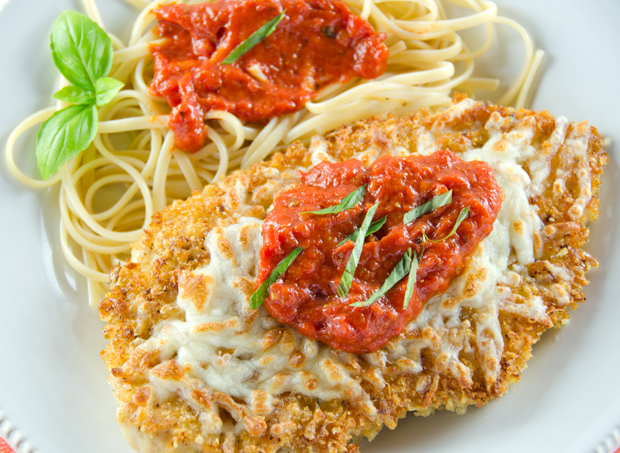
My favorite thing to do with the basil harvest is to make pesto. We have pesto with pasta, as a sauce for vegetables or chicken, as a dip, on pizza, the possibilities are limitless. But, at least in our climate, as soon as the first frost comes, basil  is the first victim, the leaves of the plant will turn black and wither. It’s now that you should start preserving that classic taste of summer with freezer pesto.

I have been making this recipe for years now from a classic cookbook of the eighties, Fancy Pantry. Written by former food editor and a three time winner of the Tastemaker award, Helen Witty, Fancy Pantry is a collection of recipes subtitled, “Well preserved, prettily pickled, candied, brandied, potted, bottled, sun dried and otherwise put-by elegant edibles”. My well worn copy attests to it’s usefulness and I recommend it highly.

Mrs Witty attributes this recipe to the late Marcella Hazan. Long before there was Lidia and Mario, there was Marcella.  Marcella Hazan was a cookbook author and authority on Italian cooking. My introduction to Italian cooking came through her classic volume, The Classic Italian Cook Book: The Art of Italian Cooking and the Italian Art of Eating and it’s subsequent follow up, More Classic Italian Cooking. My cookbooks written by Mrs. Hazan fall open naturally now to recipes I used countless times. I appreciated her clear and concise recipes written in a voice that was both warm and encouraging.

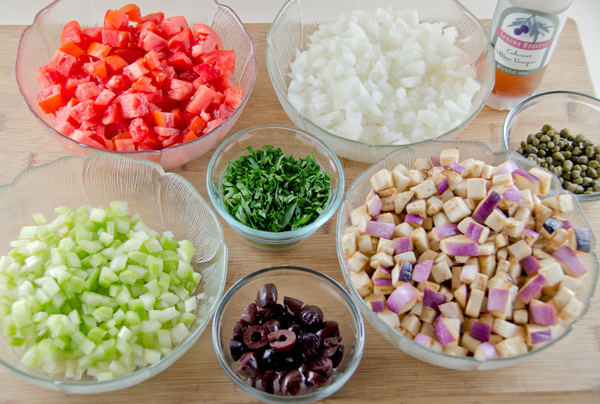
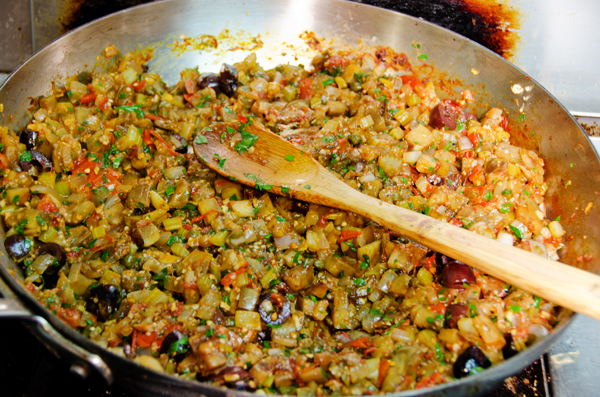
Her pesto recipe is quite straightforward; mix all the ingredients, basil, pinenuts, garlic, olive oil and a pinch of salt in a blender. Seal tightly and freeze pesto in one cup jars. The cheese or butter as she suggests, should be added right before using it. Most modern recipes call for just Parmesan cheese in pesto. Marcella points out that in Genoa, where pesto originated, they use equal quantities of Parmesan and a special, mildly tangy sheep’s milk Pecorino cheese from Sardinia .  That cheese was not available to American cooks when the book was written, back in the seventies. I found several online sources that sell it now.  Her solution to the problem then was to use 3 parts Parmesan to 1 part Romano and suggests to adjust this to taste. She states, “a well rounded pesto is never made with all Parmesan or all pecorino”. Point taken.

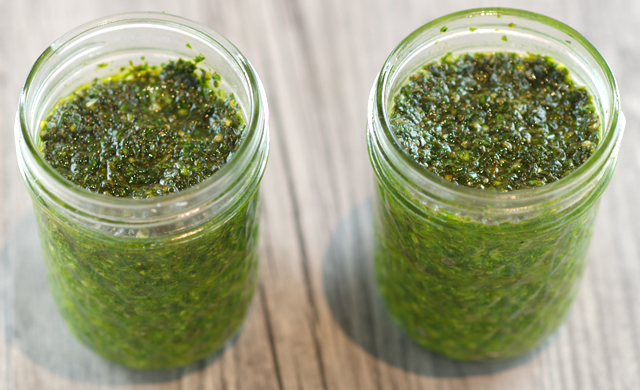
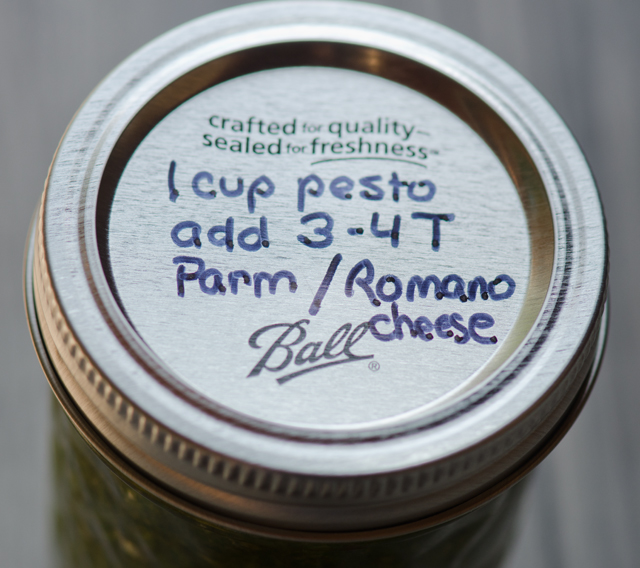
I make my pesto in 2 cup batches and freeze in one cup glass canning jars with the amount of cheese needed to finish the recipe written on the lid. Plastic freezer containers are fine as well. When I purchase any nuts, I buy from bulk containers and store them in the freezer until I am ready to use them. They thaw quickly and freezing nuts prevents them from going rancid quickly. I often substitute walnuts for the pine nuts, since the more delicately flavored Mediterrannean variety are sold at one local market for 12.99 for four ounces! When Marcella was writing her book, the food processor was still years away from being a commonplace kitchen item.  The question for her was whether to make pesto in a blender or with the classic mortar and pestle. She recommends and I concur that everyone should try to make pesto at least once with the mortar and pestle “because of the greater character of the texture and its indubitably richer flavor.”

But Marcella was a practical cook and felt blender pesto was so good that it could be enjoyed “with a clear conscience” whenever there wasn’t time or patience to make pesto in a mortar and pestle. Of course, fresh pesto is always the best but as Marcella said, “since fresh basil has a brief season and pesto keeps quite well in the freezer”, I am going to make enough pesto now to satisfy all those out of season cravings.

DSC_3689a

DSC_3678a

Basil Pesto for the Freezer

Makes about 2 cups

Ingredients

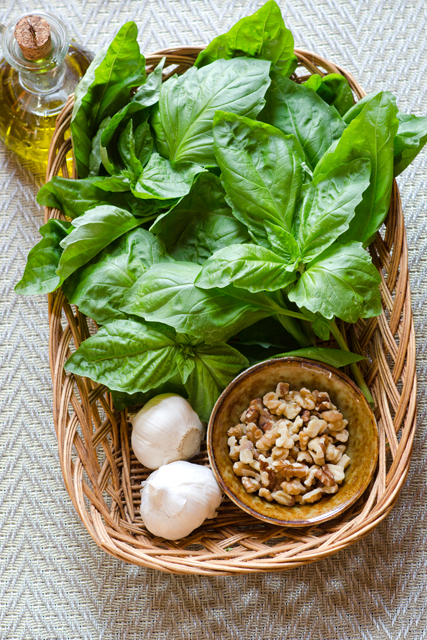
  • Freshly picked basil, rinsed, leaves stripped off and blotted dry, gently packed down to measure 3 cups
  • ¾ to 1 cup of a good quality olive oil
  • 3 large cloves of garlic, or more to taste, peeled and chopped
  • 3T pine nuts or coarsely chopped toasted walnuts
  • ½ to 1 t salt, or to taste
  • At the time of use: Parmesan and Romano cheese

Directions

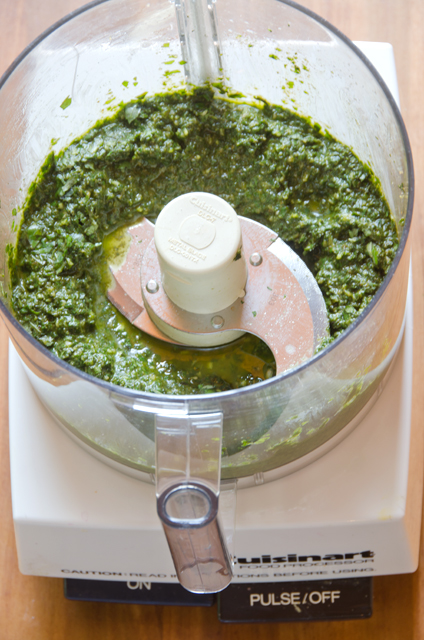
  1. Combine everything except the cheese in the bowl of a food processor or blender. Turn the motor on and off rapidly, scraping down the sides of the container once or twice, to process the pesto to the texture you like, some prefer smooth, others, a fine chopped mixture.
  2. Pack the pesto into small freezer containers such as straight sided half pint canning jars, leaving ½ inch of headroom to permit expansion. Seal the containers and store in the freezer.
  3. To use the pesto: Thaw the amount you’ll need in the refrigerator, if time permits. A cupful is enough for 4-5 servings of pasta. Blend your cheese into the thawed pesto, adding 3-4 tablespoons freshly grated cheese to each cup of sauce. Check the seasoning of the mixture, you may want more salt, depending on the saltiness of the cheese. Use in the recipe of your choice.
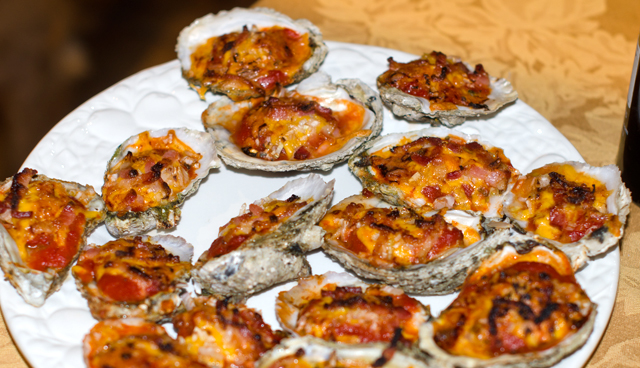
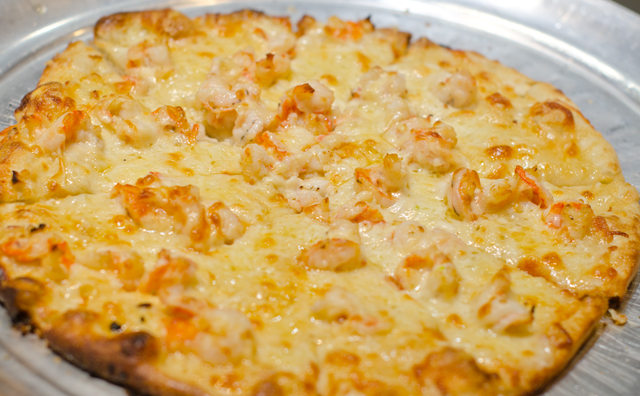
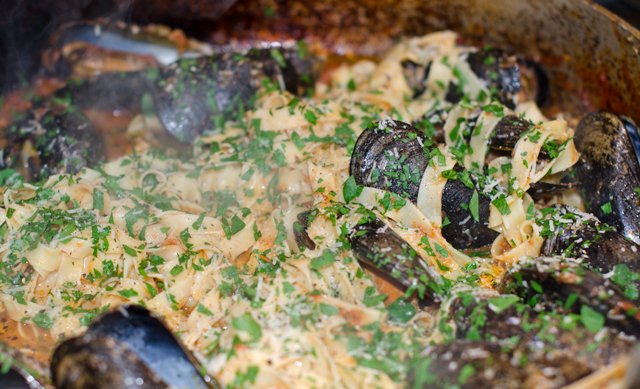
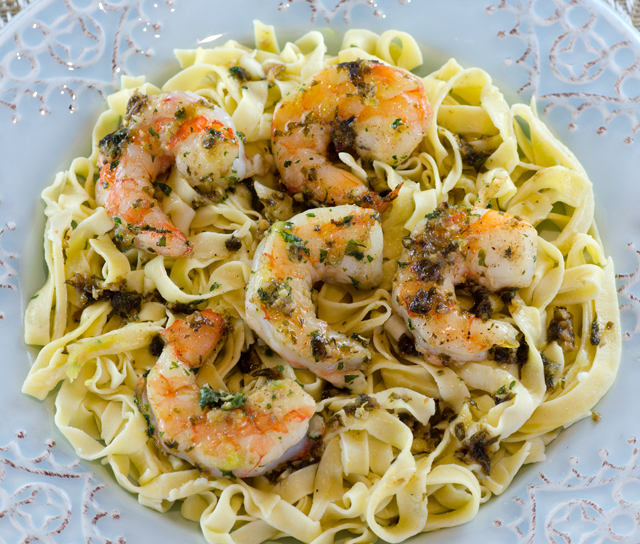
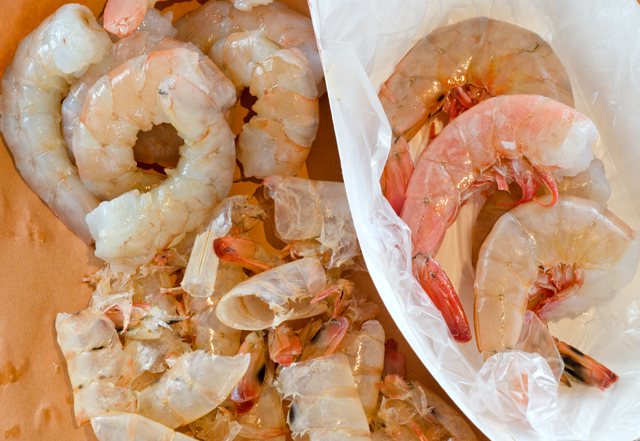
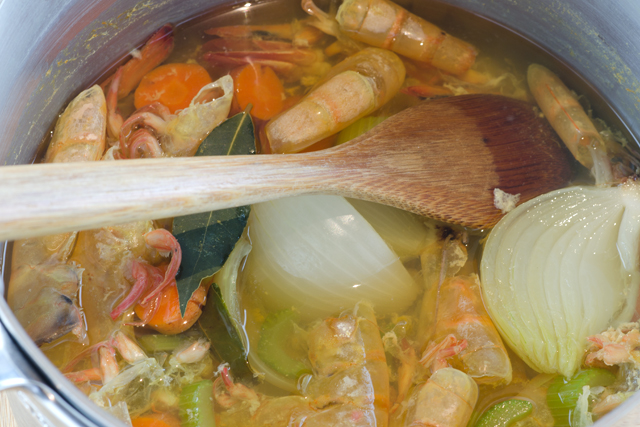
DSC_3690a

DSC_8399a

DSC_8366a

DSC_8406a


June 2, 2015 Spinach, Sun Dried Tomato and Feta Frittata

DSC_2848aI was looking for a different way to use some of our abundance of spinach and decided a frittata would be a good choice. Frittata is the Italian name for a flat open faced omelet. They are quick to make and can be enjoyed warm or at room temperature, not only just for breakfast, but at lunch and dinner as well.  In the late Marcella Hazan’s The Classic Italian Cookbook, she delineates three distinctions between the omelet and the frittata.

  • An omelet is cooked briefly over high heat, a frittata is cooked slowly over low heat.
  • An omelet is creamy and moist, just short of runny. A frittata is formed and set, although by no means, stiff and dry.
  • An omelet is rolled or folded over into an oval tapered shape. Frittatas are flat and perfectly round.

This recipe’s framework came from a recipe on the Cooks Illustrated website. It called for a dozen eggs and just a few tablespoons of half and half to add some creaminess. The original recipe was for a frittata with broccoli rabe, sun dried tomatoes and fontina cheese. I substituted four cups of lightly packed spinach with the large stems and ribs removed for the rabe. The spinach was just picked and washed so I was able to cook it down quickly with just the water that clung to the leaves, so very little oil was needed in the pan. I substituted my favorite French feta for the fontina, since spinach and feta are such a good combination. The sun dried tomatoes called for in the original recipe were oil packed. The sun dried tomatoes I used were ones I made last summer with Sun Gold tomatoes from the garden. They just needed to be reconstituted in some warm water for about ten minutes to bring them back to life. I was surprised (and pleased) that the skin came off in the process. I chopped them roughly before adding them to the frittata.

A  heavy bottomed oven safe non stick skillet is absolutely necessary to make the frittata. Before you proceed with the recipe be sure the skillet fits comfortably under the broiler without a great deal of maneuvering. The handle on my skillet was a bit high and made getting it in and out of the oven quite challenging. Have thick potholders at the ready so you don’t burn your fingers pulling the pan out of the oven. Once out, leave the potholder over the handle to remind yourself the pan is still hot. Use a spatula to loosen the frittata from the pan and transfer to a platter or cutting board. Of course, there are countless variations of the frittata and as the season moves on my add-ins will change.  Whatever you put in yours, it’s a great quick weeknight supper to serve alongside a simple green salad.

DSC_2601a
Spinach, just a few weeks ago.
DSC_2902a
That same spinach a few days ago.

DSC_2901a

Spinach, Sun Dried Tomato and Feta Frittata

Makes one 12″ frittata

Ingredients

  • 12 large eggs
  • 3 T half and half
  • 1 teaspoon olive oil
  • 4 c loosely packed spinach, large ribs and stems removed, cut into 1 inch pieces
  • 1 clove garlic, finely minced
  • 1/8t red pepper flakes
  • 3/4c lightly crumbled feta cheese
  • 1/4c coarsely chopped sun dried tomatoes

DSC_2850a

Directions

  1. Adjust oven rack to upper middle position, about 5 inches away from the heating element. Heat broiler.
  2. Whisk eggs, half and half, ½t salt and ¼t freshly ground pepper in a medium bowl until well combined, about 30 seconds. Set eggs aside.
  3. Heat oil in a 12-inch non stick skillet over medium heat until shimmering; add spinach and cook until it wilts, about 1 minute. Add garlic and red pepper flakes and cook until fragrant, about 30 seconds. Stir crumbled Feta and sun dried tomatoes into eggs; add egg mixture to skillet and cook, using spatula to stir and scrape bottom of skillet, until large curds form and spatula begins to leave wake but eggs are still very wet, about 2 minutes. Shake skillet to distribute eggs evenly, cook without stirring for 30 seconds to allow the bottom to set.
  4. Slide skillet under broiler and broil until frittata has risen and surface is puffed and spotty brown, 3 to 4 minutes; when cut into with a paring knife the eggs should still be slightly wet. Remove skillet from oven and let stand 5 minutes to finish cooking; using spatula, loosen frittata from skillet and slide onto platter or cutting board. Cut into wedges and serve.


DSC_2855a

April 21, 2015 Shrimp Scampi

DSC_2352a

It’s not every day that fresh Florida shrimp are available at my local fish market, that was reason enough for me to prepare a dish that showcases their pristine sweet flavor, shrimp scampi.

Most “fresh” shrimp  sold in supermarkets are shipped frozen and thawed for the seafood counter. That means the shrimp you will find with the frozen seafood is exactly the same and maybe even a little cheaper than what is being presented as fresh, it just hasn’t been sitting on a bed of ice all day. Thawed shrimp are a convenience to use only when you need them immediately.  The shelf life of thawed shrimp is only a day or so at best, while frozen shrimp retain their quality for several weeks in the freezer.

Most shrimp sold today are IQF or individually quick frozen, so it is easy to remove the amount of shrimp you need for a recipe. The best way to thaw shrimp is to put it in the fridge overnight or for a quicker thaw, put it in a colander of cold water and let some cold water trickle into the bowl while the excess goes down the drain. The shrimp should be ready to cook in about 15 minutes.

Shrimp are sold by the count, the number of shrimp to make a pound, so the lower the count, the bigger the shrimp.  The names that correspond with the sizes range from extra colossal, under 10 per pound to extra small, 61 to 70 shrimp per pound. The descriptions are not standardized however so one vendor’s extra large could be another’s jumbo. So it is always best to stick with looking at the count when buying shrimp.

According to Italian cookbook author Lidia Bastianich, shrimp scampi is one of the those creations in which immigrant cooks adapted Italian techniques to American ingredients. Scampi is the Italian word for a prawn or langoustine, more closely related to lobsters.   One traditional way of preparing them in Italy was to sauté them with garlic, onion, olive oil and white wine.  When Italians immigrated to America they adapted the preparation, substituting  the more readily available shrimp. The dish was called shrimp scampi and the name stuck, meaning shrimp prepared in the scampi style.

This recipe is from Melissa Pellegrino, cookbook author and contributing editor to Fine Cooking magazine,. What makes this interpretation of shrimp scampi unique is the addition of shrimp stock which further enhances the flavors in this dish.

Begin by peeling the shrimp, you can leave the tails on for presentation if you choose. The next step is to devein the shrimp, which isn’t a vein at all but the digestive tract. It is not absolutely necessary and you can eat shrimp with the vein still in, but one thing I know for certain, it will always get you Chopped. To devein, make a shallow slit down the middle of the back which exposes the intestine. Lift the vein out with the tip of a paring knife and wipe the blade with a clean paper towel. You can also do this under cold running water. There are also inexpensive tools that allow you to devein in one fell swoop.

The shrimp stock is made with the shrimp shells along with the usual ingredients used in stock making, onion, celery, carrot and a bay leaf. The ingredients are brought to a boil, simmered and strained. Only ¼ cup of the stock is needed so the rest can be frozen for future use.

Aromatic garlic, parsley and lemon peel are added to melted butter in the skillet. The shrimp are cooked in this mixture until they turn pink. Wine and shrimp stock are reduced to make a sauce with a final additon of pepper flakes, lemon peel and, of course, more butter. Served over pasta, rice or just accompanied with some crusty bread, shrimp scampi is a quick delicious entree easy enough for weeknights and elegant enough for special occasions.

DSC_2338a
Shrimp shells are used to make a flavorful stock.
Shrimp shells are combined with onion, celery, carrot and a bay leaf.
I used the juice and peel from our Ponderosa lemon.


Shrimp Scampi

Serves four

Ingredients

  • 1½ lb. 16-20 count shrimp (these may be called jumbo or extra jumbo) peeled and deveined (shells reserved) tails may be left on if you choose
  • 1 medium carrot, chopped
  • 1 medium rib celery, chopped
  • 1 small yellow onion, halved
  • 1 bay leaf
  • Kosher salt and freshly ground pepper
  • 4T unsalted butter
  • ¼c finely chopped Italian parsley
  • 2T minced garlic
  • 1T finely grated lemon zest
  • ¼c dry white wine
  • 1t fresh lemon juice
  • Crushed red pepper flakes
  • Lemon wedges for serving

Directions

  1. In a 4-quart saucepan , combine the reserved shrimp shells, carrot, celery, onion and bay leaf. Add four cups of water. Bring to a boil over medium-high heat, reduce to a simmer and cook for 30 minutes.
  2. Strain the stock through a fine-mesh sieve and reserve ¼cup for the scampi. The rest of the shrimp stock can be frozen for future use.
  3. Pat the shrimp dry and season with ½teaspoon salt and a grind of pepper.
  4. In a 12-inch heavy skillet, melt 3Tof the butter over medium heat. Add the parsley, garlic and lemon zest and cook, stirring occasionally until the garlic is lightly golden, 1-2 minutes. Raise the heat to high, add the shrimp and cook until they start to turn pink, about 1 minute. Add the wine and cook until reduced by half, 1 to 2 minutes. Add the lemon juice and crushed red pepper flakes and stir to coat.
  5. Transfer the shrimp to a serving plate using a slotted spoon. Whisk the remaining 1T butter into the sauce. If the sauce seems too thin, simmer for a minute or so to thicken. Season to taste with salt and pepper, pour over the shrimp and serve with lemon wedges on the side.

DSC_2350a

DSC_2354a


September 25, 2014 Eggplant Involtini

DSC_9067aWith lots of caponata, grilled eggplant, ratatouille, and a double batch of eggplant parmesan under my belt, I was looking for another way to enjoy the bounty of our eggplants this season. It came in the July/August issue of Cooks Illustrated magazine, eggplant involtini.

After all these years (30+) I still look forward pouring over the latest issues of the cooking magazines I subscribe to. Since the magazines are a little in advance of what is ready to harvest from the garden, I put a yellow sticky note on the seasonal recipes I would like to try. Eggplant involtini was in the July/August issue that arrived in June when our eggplants didn’t even have their first flowers, so I have been waiting several months to try this recipe.

Involtini are neat little bundles of stuffed meat, fish or vegetables. Fillings can be as varied as your imagination. Eggplant works especially well as a wrapper for involtini. Use your largest, broadest eggplants to make the planks. Lop off the stem and hold the eggplant upright. With a very sharp knife, make approximately 1/2″ thick planks. For the first and last pieces you will need to trim off the rounded outer edge. I found that a vegetable peeler handled the problem nicely.

Instead of frying, which is called for in many involtini recipes, the slices are brushed lightly on both sides with olive oil, and seasoned with salt and pepper and baked. This makes the slices pliable enough to roll without falling apart.

Once the slices have cooled a bit, fill with the fatter edge closest to you and roll up. Ricotta, though it doesn’t have much flavor of it’s own is a good binder for the more flavorful ingredients, pecorino romano and basil. The addition of fresh lemon juice brightens the flavors. A generous tablespoon of filling is enough for each slice. The original recipe called for some bread crumbs in the filling to bind it a little, I didn’t include this step and thought my filling held up nicely.

While you are cooking the eggplant there’s time to make a very basic sauce. Canned whole tomatoes, garlic, oregano, kosher salt and pepper are all you need. I always use my whole roasted tomatoes from the garden that I freeze for months without tomatoes. We had a bumper crop this year so I will be making a lot of chili, lasagna, stuffed peppers over the winter months. As for the canned varieties, in a taste test done by Cooks Illustrated, Muir Glen Organic Whole Tomatoes was the winner. Muir Glen is about a dollar more per can than the more familiar runner up, Hunts.

The involtini rolls, are added to the thickened sauce and brought to a simmer. Once the sauce is warmed, additional cheese is sprinkled on top. The rolls are browned and the cheese is melted in the broiler. Finish off with a sprinkle of basil, mini basil leaves worked well here.

Not the quickest or easiest preparation, but both the rolls and the sauce can be made in advance and assembled right before serving. An impressive dish good enough for company.

Eggplant Involtini

Serves 4 to 6

Ingredients

  • 2 large eggplants, shorter wider eggplants are best (1 1/2 pounds each), if skin is thick, peel, I did not peel mine
  • 6T olive oil
  • Kosher salt and pepper
  • 2 cloves garlic, finely minced
  • 1/4t dried oregano
  • Pinch red pepper flakes
  • 1 28oz canned whole peeled tomatoes drained with juice reserved, chopped coarse-I used my garden roasted tomatoes
  • 1c  whole-milk or part skim ricotta cheese
  • 3/4c hard Italian grating cheese like Gran Padano or Pecorino Romano
  • 1/4c plus 1 tablespoon chopped fresh basil or torn mini basil
  • 1T fresh lemon juice

Directions

  1. Slice each eggplant lengthwise into 1/2-inch-thick planks (you should have 12 planks). Trim rounded surface from each end piece so it lies flat. I found that using a vegetable peeler made this easier. Adjust 1 oven rack to lower-middle position and second rack 8 inches from broiler element. Heat oven to 375°F.
  2. Line 2 rimmed baking sheets with parchment paper and spray generously with vegetable oil spray.
  3. Arrange eggplant slices in single layer on prepared sheets. Lightly brush 1 side of eggplant slices with oil and sprinkle with kosher salt and pepper. Turn slices over and repeat brushing and seasoning.
  4. Bake until tender and lightly browned, 30 to 35 minutes, switching and rotating sheets halfway through baking. This process took about 10 minutes less in my convection oven.  Let cool for 5 minutes. Using thin spatula, flip each slice over. Heat broiler.
  5. While the eggplant is cooking, heat remaining 1 tablespoon oil in 12-inch broiler-safe skillet, over medium-low heat until just shimmering. Add garlic, oregano, pepper flakes, and 1/2 teaspoon salt and cook, stirring occasionally, until fragrant, about 30 seconds.
  6. Stir in tomatoes and their juice. Increase heat to high and bring to simmer. Reduce heat to medium-low and simmer until thickened, about 15 minutes. Cover and set aside.
  7. Stir together ricotta, 1/2 cup cheese, 1/4 cup basil, lemon juice, and 1/2 teaspoon salt in medium bowl.
  8. With widest ends of eggplant slices facing you, evenly distribute ricotta mixture on bottom third of each slice. Gently roll up each eggplant slice and place seam side down in tomato sauce.
  9. Bring sauce to simmer over medium heat. Simmer for 5 minutes. Transfer skillet to oven and broil until eggplant is well browned and cheese is heated through, 5 to 10 minutes. Sprinkle with remaining 1/4 cup Pecorino and let stand for 5 minutes. Sprinkle with remaining 1 tablespoon basil and serve.
DSC_8719a
The variety I used for this dish was Clara, a pure white Italian style eggplant.
DSC_9051a
Eggplant slices are brushed with olive oil and seasoned lightly with salt and pepper.
DSC_9054a
After baking the slices are soft enough to roll but don’t fall apart.
DSC_9055a
I used roughly torn mini basil in my filling.
DSC_9059a
The very simple filling made of ricotta cheese, Pecorino Romano, fresh lemon juice and mini basil.
DSC_9060a
The eggplant slices are easy to roll up. Place them seam side down in the warmed sauce.

DSC_8993aDSC_9079a

September 3, 2013 Eggplant Caponata revisited

DSC_2138a


Summer is berry season and each month brings a new arrival. June is time for plump juicy strawberries. July brings succulent raspberries and blueberries. August brings one of my favorite berries, eggplant. A berry? you say. First, the members of the nightshade family, tomatoes, pepper and eggplants to name just a few, are actually fruit, not vegetables. Botanically speaking, fruit are seed bearing structures that develop from the ripened ovaries of flowers. But eggplant are not just any old fruit, they are considered berries because they are indehiscent which means they do not sprout open when ripe. With these technicalities aside, there are two burning questions that most people have when it comes to eggplant; should I salt or not? and are there male and female eggplants?

DSC_2012a
A round up of the varieties of eggplant we grow.


Young eggplants, picked fresh from the garden or purchased at the farmers market will not need salting. They will have thinner skin and fewer seeds. The bitterness originates in the seeds which contains nicotinic alkaloids. Did I mention tobacco is another member of the nightshade family? So the larger the eggplant, the greater the likelihood of it having more seeds. Salting, also known as degorging, is good for drawing out excess liquid from the eggplant so that it doesn’t absorb as much oil in the cooking process, but it is only successful in masking bitterness.

The male vs. female eggplant was a tale that even I fell victim to. I was surprised at the number of websites that propose the theory of male and female eggplants as fact. The story goes that a dash-shaped slit on the bottom of the fruit indicates a female eggplant and a deep round indent indicates a male. The male eggplant reportedly has fewer seeds and is more desirable. It’s debunking time again. Fruit, like eggplants develop from the female flower on the plant but have no sex of their own.

So, how do you choose the best eggplant?  Look for eggplant that have smooth, bright, shiny skin. When you press on the skin it should spring right back. Select eggplant that are heavy for their size, indicating younger fruit. The calyx, the green leaves at the stem end should be fresh and green, not dried out and brown.

Our garden in the month of August yields an abundance of the nightshade family, tomatoes, peppers and eggplants. While our tomato harvest is better than last year, this has proven to be not the best year for eggplants and peppers. I wanted to take advantage of the eggplants we did grow and make one of our favorites, caponata.

I posted a different recipe for caponata last year, this is one from my catering days.  A great room temperature dish, caponata always tastes better the second day, after the flavors had the chance to meld. It is an agro dolce, a sweet and sour dish from Sicily that shows the influence of North African flavors on the region. Serve on grilled baguette slices and garnish with toasted pine nuts and chopped flat leafed parsley.

DSC_2117a


Eggplant Caponata

Serves 6-8 as a side dish

Ingredients

  • 1/3c olive oil
  • 3c diced eggplant
  • 1 1/2c chopped onion
  • 1c thinly sliced celery
  • 2c chopped tomatoes
  • 3T minced garlic
  • 2T tomato paste
  • 1/4c red wine vinegar
  • 1c sliced green or black olives
  • 1/3c capers, well drained
  • 1 or 2 anchovies, drained and chopped
  • 1T sugar
  • 1/2t crushed red pepper flakes
  • 1/2c minced flat leafed parsley
  • Kosher salt and freshly ground black pepper
DSC_2065a
A lot of chopping but the dish comes together quickly after that.

DSC_2069a


Directions

  1. Heat the olive oil in a large skillet. Add the eggplant and sauté until somewhat soft, 3-4 minutes. Add the onions, celery, tomatoes and garlic and cook for another 10-12 minutes, stirring occasionally.
  2. Remove from the heat, add the remaining ingredients and toss lightly. Refrigerate until ready to serve, preferably the next day. Bring to room temperature before serving.

DSC_2131a

DSC_2122aDSC_2145a-copy

August 22, 2013 Zucchini Lasagna

DSC_1857a

When you grow big zucchini, make zucchini lasagna. In this recipe, zucchini or yellow squash “noodles” replace the usual pasta. I cut the zucchini in half lengthwise first so that I would have a flat surface to work with. A mandoline works best here. In case you didn’t know, a mandoline, also spelled mandolin is a hand operated kitchen tool with adjustable blades that produces uniform slices. They can cost anywhere from about  two hundred dollars for a professional stainless steel style model all the way down to less than twenty dollars for a plastic model. The more expensive models will slice, julienne and waffle cut, the less expensive ones just slice. Whatever model you choose, use the hand/finger guard when you run the food against the blade, believe me, I speak from personal experience.  If you have steady hands and no slicer, use a sharp knife and be sure to use a cutting board to stabilize the squash to ensure even slices. Since zucchini is 95% water it is best to precook it to reduce excess moisture that will end up in your finished dish. Some of the recipes I saw suggested parboiling, sautéing, but I found that grilling worked well for me. My version is totally vegetarian. If you want something more substantial, add ground beef, turkey or sausage to your sauce. Just like regular lasagna, it tastes even better the next day, if it lasts that long!

DSC_1993a


Zucchini Lasagna

Serves four to six

Ingredients

  • 3-4 long zucchini/yellow squash
  • 4 c thick tomato sauce
  • 1 15 oz container of regular or low-fat ricotta cheese
  • 3 lightly beaten eggs
  • 2 T fresh chopped basil
  • 2 T fresh chopped flat leaf parsley
  • 1 t dried oregano
  • Kosher salt and fresh ground pepper to taste
  • 1 ½ c grated Parmesan cheese or other similar grated cheese
  • 1 lb grated mozzarella cheese

Directions

  1. Preheat oven to 350° F. Place baking rack in the lower position.
  2. Cut squash into ¼ inch thick slices, to fit the pan lengthwise, if your squash is shorter, just orient the slices in the opposite direction, just be sure they cover the pan.  You should have enough slices to make three layers.
  3. Heat a grill pan or an outdoor grill to medium high heat. Brush both sides of the slices lightly with olive oil.
  4. Grill squash slices on both sides so that they have grill marks, 3-5 minutes each side. Squash should be cooked but not falling apart.
  5. In a medium bowl, combine the ricotta, eggs, parsley, basil, oregano and a cup of the Parmesan cheese. Reserve the rest for the top layer.
  6. In a 9×13 glass or ceramic dish, spoon a thin layer of sauce on the bottom of the pan.
  7. Place the first layer of squash over the sauce. Spoon a third of the ricotta mixture over the squash. Sprinkle with a third of the mozzarella cheese. Repeat the layers two more times, sauce, “noodles” ricotta, ending with the mozzarella cheese and reserved Parmesan from step four.
  8. Bake for one hour, rotating pan half way through cooking time. Let lasagna rest for at least a half hour before serving.
DSC_1844a
I used my Matfer mandolin slicer, a gift many years ago to get neat uniform slices.
DSC_1976a
Slices should be 1/4″ thick
DSC_1850a
Use the grill or a grill pan to slightly cook the zucchini.
DSC_1998a
Fresh zucchini with tomato sauce, delicious!

DSC_1982a

April 23, 2013 Chicken Parmesan

DSC_9878a

What’s in a name? Sometimes a bit of confusion. You might think a dish with the name Parmesan originated from the city of Parma in the northern Italian region of Emilia- Romagna .  Well you would be wrong. Both the island of Sicily and southern region of Campania claim the origins of this dish.  There it is known as Parmigiana di Melanzane or Parmesan of Eggplant because of the prominence of Parmigiana-Reggiano in the dish. Author Mary Taylor Simeti offers another interesting explanation in her book, “Pomp and Sustenance: 25 Centuries of Sicilian Food”. Sicilians thought that their local dish of sliced eggplant layered with tomato sauce and caciocavallo cheese was originally Melanzane alla Palmitiana. Palmitiana means shutter in Sicilian and refers to the layered louver-like pattern of eggplant slices. It is said that Sicilians have a difficult time pronouncing the letter “l”, so the dish became known as parmigiana.
Whatever the explanation, Cooks Illustrated offered their second version of Chicken Parmesan in their March/April 2013 issue. It is a lighter version of the Italian classic. I used my own roasted tomatoes that I froze last summer to make a very simple but flavorful sauce. In the Cooks Illustrated recipe the breast cutlets are sliced horizontally,  I like to pound mine to an even thickness. The chicken has a light coating of panko crumbs, herbs and Parmesan cheese. Always buy real Parmigiano-Reggiano not the green powdered stuff in a can.

When Cooks Illustrated did their first redo of this classic fifteen years ago in 1998 they suggested using panko bread crumbs, not widely available at that time. Then you could only get them in Asian markets or by mail order. Now every supermarket and big box store carries panko. Even Emeril has his own brand. Panko differs from other bread crumbs because it is processed into flakes, not crumbs. Flakes result in a broader surface area when frying and gives the finished product a lighter crispy coating. A sprinkling of mozzarella and fontina and the chicken goes under the broiler to finish.Only two tablespoons of the sauce top the finished cutlet  That way all the components maintain their integrity; the chicken is juicy with a nice crispy crust, the sauce complements without overwhelming and there is just enough creamy melted cheese to coat it .  The recipe makes plenty of sauce so be certain to cook some pasta to enjoy it with the chicken.

DSC_9894a

Chicken Parmesan

Adapted slightly from Cooks Illustrated #121

Serves four

Ingredients for sauce

  • 1T olive oil
  • 2 minced garlic cloves
  • 1/2t dried oregano
  • Pinch of red pepper flakes
  • 1 (28oz) can crushed tomatoes (I used 2 quart bags of roasted tomatoes)
  • 1/4t sugar
  • 2T chopped fresh basil

Directions for sauce

  1. Heat the olive oil in a straight sided sautepan over medium high heat until just shimmering.
  2. Add garlic, 1t salt, oregano and pepper flakes, cook, stirring occasionally until fragrant, about 30 seconds.
  3. Stir in tomatoes and sugar, increase heat to high and bring to a simmer.
  4. Reduce heat to medium-low and simmer until thickened, 20-25 minutes. Since I use my own tomatoes this is the point where I put the tomatoes through a food mill to eliminate the seeds and give the sauce a smooth texture.
  5. Off heat, stir in basil. Season with salt and pepper to taste. Cover and keep warm.

Ingredients for the chicken

  • 4 boneless, skinless chicken breasts, 4-6 oz each, pounded 1/2 inch thick
  • 1t kosher salt
  • 1/2c shredded whole milk or part-skim mozzarella cheese
  • 1/2c fontina cheese
  • 1 large egg
  • 1T all-purpose flour
  • 3/4c freshly grated Parmesan cheese
  • 1/2c panko bread crumbs
  • 1/2t garlic powder
  • 1/4 t dried oregano
  • Freshly ground black pepper
  • 1/3c vegetable oil
  • 1/4c fresh basil, julienned

Directions for the Chicken

  1. Sprinkle each side of the cutlets with 1/8 t of salt and let stand at room temperature for twenty minutes.
  2. Combine the mozzarella and fontina cheese in a bowl. Set aside.
  3. Adjust oven rack 4 inches from the broiler element and heat broiler.
  4. Whisk egg and flour together in a shallow pan until completely smooth.
  5. Combine Parmesan, panko, garlic powder, oregano and a grind of fresh pepper in a second shallow pan.
  6. Pat the chicken dry with paper towels. Working with 1 cutlet at a time, dredge cutlet in egg mixture. Allow excess to drip off.
  7. Coat the cutlets in the Parmesan mixture, pressing gently so crumbs adhere. Transfer to a large plate.
  8. Heat oil in a 10-inch nonstick skillet over medium high heat until shimmering. Carefully place two of the cutlets in the skillet and cook without moving them until bottoms are crispy and golden brown, 1 1/2 to 2 minutes. Using tongs, carefully flip cutlets and cook on second side until golden brown, 1 1/2 to 2 minutes. Transfer cutlets to a paper towel lined plate and repeat with remaining cutlets.
  9. Place cutlets on a rimmed baking sheet and sprinkle cheese mixture evenly over cutlets. Broil until cheese is melted and beginning to brown, 2-4 minutes. Watch carefully! Transfer chicken to serving platter and top each cutlet with 2 tablespoons sauce. Sprinkle with basil, serve immediately, passing remaining sauce separately.
DSC_0470a
Can’t wait for the basil in the garden.


DSC_5375
Some of last year’s tomato harvest.

DSC_9884a