July 30, 2013 Middle Eastern Party Side Dishes

DSC_1071a

Every good meal deserves some delicious and interesting side dishes and our Middle Eastern feast was no exception. I combined some past favorites with new additions.

Every Middle Eastern country seems to have their own variation of an eggplant dip, baba ghanoush (also spelled ghanouj) is the Lebanese variety of this classic. This dish, often referred to as eggplant caviar is smooth, creamy and smoky. Char your eggplants first over a grill or a gas stove top to give it’s classic smoky flavor. The creamy eggplant flesh is combined with tahini (sesame seed paste), fragrant cumin and tart fresh squeezed lemon juice. Whether purple, white, speckled, fat and round or long and thin, choose eggplant that have firm, taut exteriors with unblemished glossy skin. So what does baba ghanoush mean? Middle Eastern cooking authority, Clifford Wright states the phrase “baba ghanoush” is untranslatable. Everyone agrees that baba is the Arabic word for an endearing form of the word father, think daddy… So Wright’s premise is that the eggplant is the “daddy” of the Arabic vegetable kingdom. Ghanoush, well that’s another story. I have seen everything from cute, coquettish, to spoiled or pampered. Could the originator of this classic been a privileged sultan? We may never know….

Correctly stated, tabbouleh is a Lebanese herb salad with bulgur and not a bulgur salad with herbs. My second side dish is similar to, but not tabbouleh since it does start out with copious amounts of  garden fresh parsley, mint and cilantro combined with bulgur wheat.  This recipe swaps out the traditional tomatoes and cucumbers for tangy sweet apricots and delicately nutty pistachios. Bulgur is whole wheat grain that has been cracked and sifted into four sizes ranging from fine to coarse. It is sometimes referred to as cracked wheat, but that is a misnomer. It differs from cracked wheat since bulgur has been partially cooked by parboiling or steaming. Cracked wheat is uncooked wheat that is dried and coarsely cracked, preserving the bran and germ layers. Bulgur cooks in half the time of cracked wheat.  Bulgur is a nutritional powerhouse, high in fiber, protein, iron, magnesium and B vitamins. Perfect as a take along for picnics and potlucks, bulgur salad with apricots and pistachios could become a main dish with the addition of chicken or shrimp. To properly eat your bulgur salad, scoop it up with a leaf of romaine lettuce, not with a pita or fork and knife.

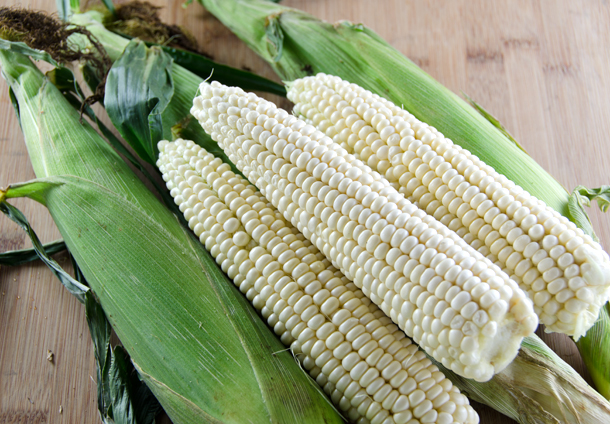
Israeli couscous is a subject I covered extensively last summer in this post. Pearled or Israeli couscous, like regular couscous is a whole grain made with semolina or wheat flour. It has a slightly chewy texture. In this recipe, Israeli or pearled couscous is combined with the garden’s first of the season yellow beans and pickled red onions. Toasting the grains before cooking gives them a nutty flavor. I found it is best to drain the pickled onion before adding to other ingredients to prevent the vinegar from overwhelming the dish. The pickled red onions will turn your couscous pink. One thing is certain, I have found no “written in stone” cooking proportions of Israeli couscous to water or broth, but I have found that 2 to 1, liquid to Israeli couscous works for me, otherwise the couscous retains too much liquid and doesn’t mix well with the other ingredients.

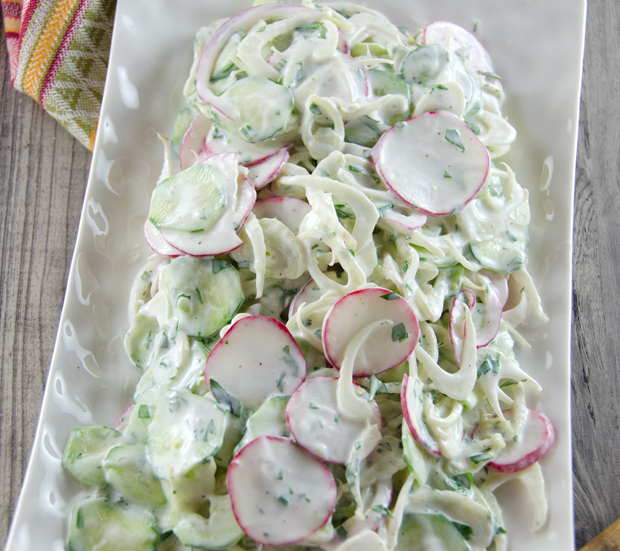
Chickpeas are a staple of Middle Eastern cuisine and the base for two of the classics, hummus and falafel. Chickpea, carrot and parsley salad took advantage of our carrot and radish harvest and made a colorful side with our meal.  Fresh cooked chickpeas are a revelation. The first time I had them was as a part of a Valentine’s day dinner my dear husband cooked for me many years ago. I’m not saying that canned are bad, in most instances I prefer the convenience of canned. Just cook them sometime to appreciate the wonderful nutty flavor of fresh chickpeas.

DSC_1082a 
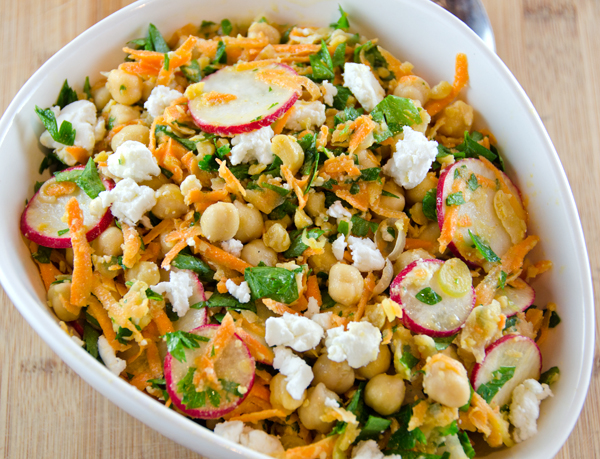
Chickpea, Carrot and Parsley Salad Serves 4-6

from Fine Cooking magazine

Ingredients

  • 2c chickpeas, drained and rinsed
  • 1c loosely packed coarsely chopped fresh flat leaved parsley
  • 1/2c sliced radishes
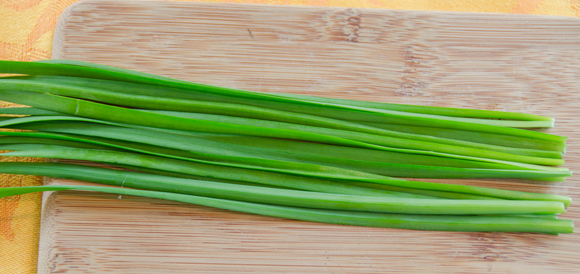
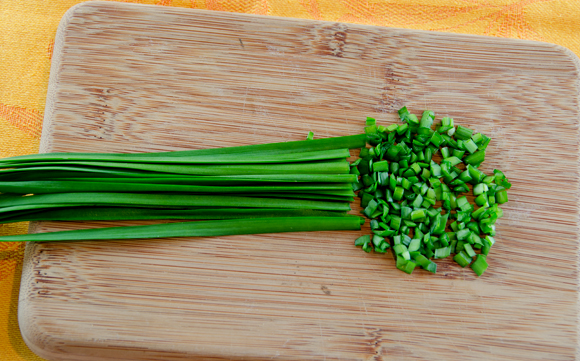
  • 1/4c chopped scallions
  • 3T fresh lemon juice
  • 1t ground coriander
  • 1t ground cumin
  • Kosher salt and fresh ground pepper
  • 6T extra virgin olive oil
  • 1/3c crumbled feta cheese
  • 1/3c toasted pine nuts

Directions

  1. Mash 1/2c chickpeas into a coarse paste with a potato masher or wooden spoon.
  2. Toss in the remaining chickpeas, parsley, carrots, radishes and scallions. Stir to combine.
  3. Whisk together the lemon juice, spices, 1/2t salt and a generous grind of pepper. Whisk ingredients while adding the olive oil in a slow steady stream. Pour over the salad and toss gently. Season to taste with salt and pepper. Top with feta cheese and pine nuts and serve.

DSC_1064a 
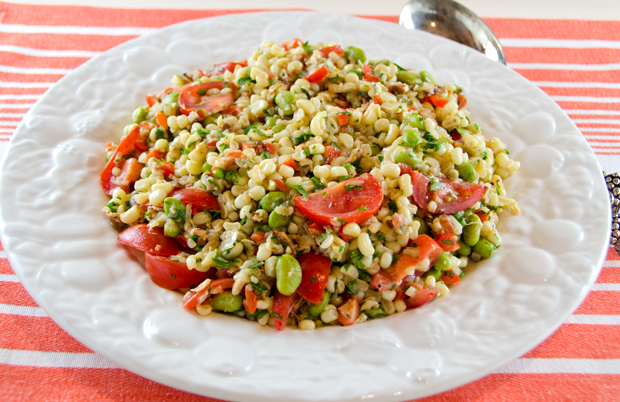
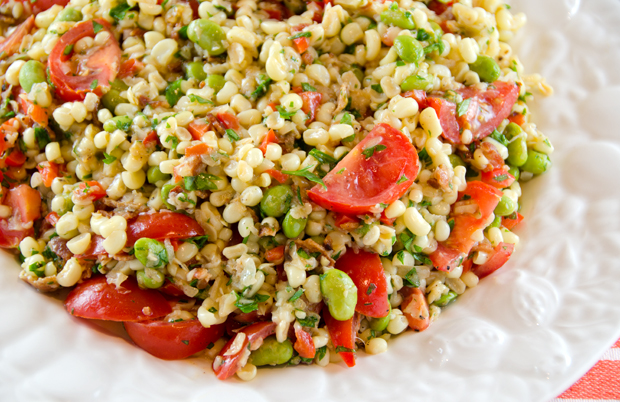
Israeli Couscous, Yellow Bean and Pickled Red Onion Salad

Serves six

Adapted slightly from Fine Cooking magazine

Ingredients

  • 1/2c red onion in small dice
  • 1/4c red wine vinegar
  • 1T granulated sugar
  • Kosher salt
  • 3/4lb yellow or green beans trimmed and cut into 1/2″ pieces\
  • 1/2c pearled or Israeli couscous
  • 1c water or broth
  • 2T coarsely chopped fresh flat-leafed parsley
  • 2T extra-virgin olive oil
  • Freshly ground black pepper
DSC_1021a
Untoasted and toasted pearled or Israeli couscous.

Directions

  1. Put the onions in a bowl. In a small saucepan, bring the vinegar, sugar and 1/2T salt to a boil. Pour the mixture over the onions and let sit for 20 minutes. Drain and reserve liquid.
  2. Bring a medium saucepan of well salted water to a boil over high heat and cook the beans until crisp tender, about 4-5 minutes. Drain beans in a colander.
  3. Toast the couscous in a dry skillet stirring over medium heat until golden brown, about 3-4 minutes. In a small saucepan bring water or broth to a boil. Cook the couscous in the boiling water until tender, about 8-10 minutes. Drain in a colander.
  4. In a medium bowl toss the couscous, beans, onion, parsley and olive oil and toss. Add a little of the reserved vinegar to the salad if desired. Season to taste with salt and pepper and serve.

DSC_1070a 
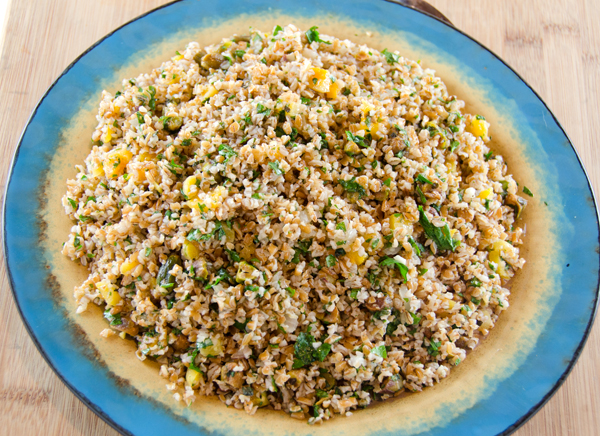
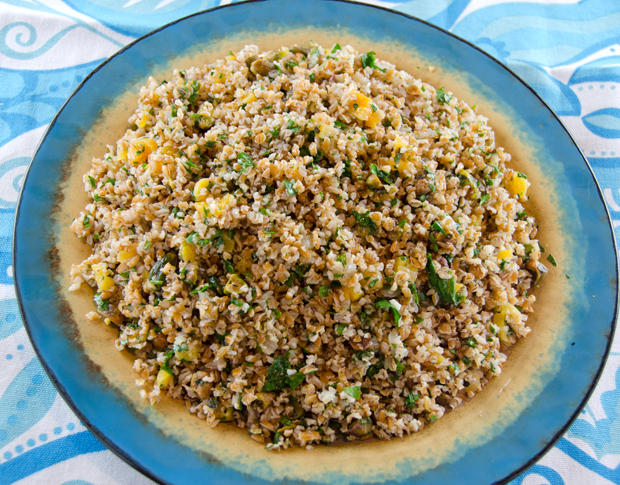
Bulgur Salad with Herbs, Pistachios and Apricots

Serves 8 as a side dish

Adapted from Fine Cooking magazine

Ingredients

  • 2c medium bulgur
  • Kosher salt
  • 2/3c plus 2T extra virgin olive oil
  • 1/3c minced shallots
  • 1T minced garlic
  • 1/2c medium chopped dried apricots
  • 1c coarsely chopped fresh flat leafed parsley
  • 1/2c coarsely chopped fresh cilantro
  • 1/2c coarsely chopped fresh mint
  • 1/2c chopped roasted pistachios
  • 1/3c fresh lemon juice
  • Freshly ground black pepper
DSC_1010a
Fresh parsley from the garden that has been washed and spun in a salad spinner. Next I lay them out to further dry on clean cloth dishtowels.
DSC_1013a
Just a rough chop is needed for the parsley.

Directions

  1. In a large skillet, toast the bulgur over medium heat, stirring constantly with a wooden spoon, until aromatic and a shade darker. Transfer to a bowl.
  2. In a medium saucepan bring 2 cups of water and 1t salt to a simmer over medium high heat.
  3. While you are waiting for the water to come to a simmer, heat 2T oil in the skillet over medium high heat.  Add the shallot and the garlic and cook, stirring until tender, about 3 minutes. Stir in the bulgur, apricots, 1t salt and the now simmering water.
  4. Put a lid on the skillet and remove it from the heat. Let stand until the bulgur is tender and has completely absorbed the liquid, 35-40 minutes. Gently fold in the herbs and pistachios.
  5. In a small bowl, whisk the lemon juice with a 1/4t each salt and pepper. Slowly whisk in the remaining 2/3c olive oil in a slow stream.
  6. Drizzle the salad with the dressing, season to taste with salt and pepper and serve. Salad can be made a day ahead. Bring to cool room temperature before serving. Season to taste with additional salt and pepper if necessary.
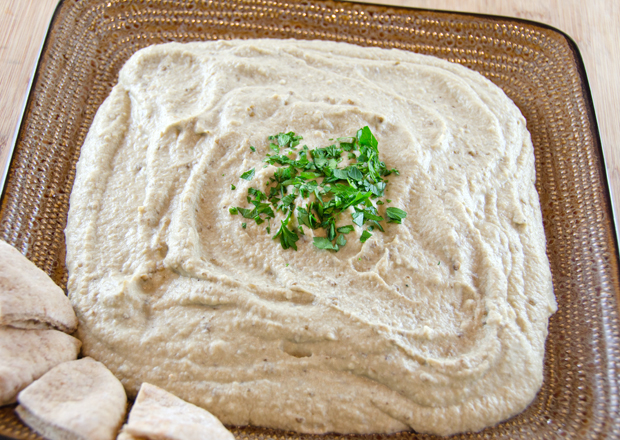
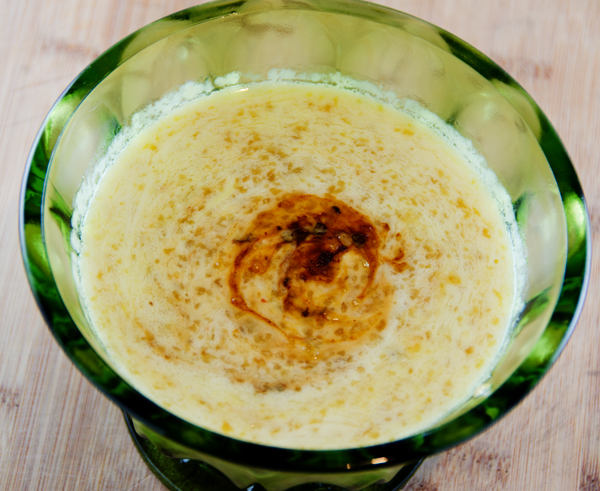
DSC_1042a

Baba Ganoush

Serve 6-8 as a side dish

Ingredients

  • 2 large eggplants
  • 5 cloves garlic, minced
  • Kosher salt
  • 1/2c tahini
  • 1/2t ground cumin
  • 1/2c fresh lemon juice
  • 1T extra virgin olive oil
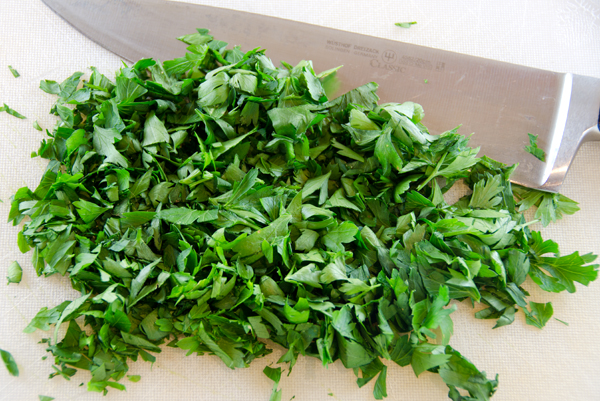
  • Fresh chopped flat leaf parsley

Directions

  1. Preheat oven to 375°F
  2. Char eggplant over a grill or a gas cooktop, turning occasionally until the skin turns black, 5-10 minutes.
  3. Place the eggplants on a baking sheet and bake until very soft, 15-20 minutes. Cool the eggplant and peel the skin.
  4. Place the pulp in a food processor and pulse to make a smooth paste. Add garlic, salt, cumin, tahini and lemon juice to taste and pulse to combine. Season with additional lemon juice or salt if needed.
  5. Spread the puree on a plate. Drizzle with additional olive oil if desired and sprinkle with parsley. Serve at room temperature with pita bread.

July 23, 2013 Tavuk Kebabi and Grilled Lamb Kofte

DSC_1092a


Two entrees were on the menu for our Middle Eastern cookout, one chicken and the other lamb. Both dishes were types of shish (skewered) kebab (cubes of grilled meat).

Our Turkish chicken recipe came from Saveur’s June/July issue featuring barbecue from around the world. In Turkey the masters of the kebab are called ustas. Ustas, who are always men, begin their apprenticeship from youth, learning butchery, mastering techniques of the grill and eventually taking over their own business. But it is more than just a business, ustas are the pride of their city, local heroes, revered for carrying on the culinary traditions of the kebab. Tavuk Kebabi is a recipe that translates “chicken cubes of grilled meat”. In this recipe, boneless chicken thighs are marinated in a flavorful blend of mint, thyme, Aleppo pepper and sweet red pepper paste. Time restraints prohibited me from ordering the Turkish sweet pepper paste called for in the recipe. I substituted the more available harissa, a spicy pepper condiment and cut back on the additional hot pepper in the recipe. Aleppo pepper is a worthy addition to your pantry. It is native to the northern Syrian town of Aleppo and also is grown in Turkey. The peppers are sun dried, seeded and crushed into flakes. Aleppo peppers are dark red in color with a high oil content. Their flavor is mildly spicy and fruity with cumin-like undertones.

The lamb kebabs were courtesy of a recipe in Cooks Illustrated.  Not truly kebabs these were kofte, long cylinders of spiced ground lamb. Popular thorough out the Middle East and southeast Asia, kofte (plural kofta) comes from the Persian word “to grind”. Kofta usually feature some type of ground meat but there are also vegetarian versions based on beans, spinach or grains. As with any meatball they can be sautéed in gravy but these were grilled over a charcoal fire.

This version of kofte uses a Turkish blend of spices called baharat.  Baharat translates to “spice” in Arabic and the combination of spices in baharat will vary with the region. It will usually include black pepper, cumin, cinnamon and coriander. Shaping the ground lamb, onion and pine nuts into a cigar shape makes them easier to maneuver over a grill. Wrap the grilled kofta in a flatbread and serve with a yogurt-garlic sauce accented with a little sesame paste.

DSC_1040a
Ingredients for the marinade


Tavuk Kebabi  slightly adapted from Saveur Magazine June/July 2013

Mint and Aleppo Pepper Marinated Chicken Kebabs

Serves 6-8

Ingredients

  • 1 c olive oil
  • 1 T chopped fresh mint
  • ¼ t crushed red chile flakes
  • 1 T dried thyme
  • 1 T Aleppo pepper
  • 1 T tomato paste
  • 1 T harissa
  • 1 t freshly ground black pepper and kosher salt to taste
  • 1½ lbs boneless skinless chicken thighs
  • 6 12″ metal skewers
DSC_1067a
Marinade for 30 minutes and up to 2 hours.


Directions

  1. Mix oil, mint, chile flakes, thyme, Aleppo pepper, tomato paste, red pepper paste, black pepper and salt in a large bowl. Add chicken and toss to coat. Cover bowl with plastic wrap and let sit at room temperature for at least 30 minutes or refrigerate for up to two hours.
  2. Heat a charcoal grill, bank coals on one side. Remove chicken from marinade and thread onto  skewers. Grill on hottest part of grill, turning as needed, until the chicken is slightly charred and cooked through, 12-15 minutes. If the outside starts to burn before the chicken is fully cooked, move to the cooler side of the grill until done.
DSC_1089a
Getting a nice char on the chicken kebabs
DSC_1092 copy
Kebabs ready to serve.

DSC_1083a


Grilled Lamb Kofte

Serves 4 to 6

Ingredients for the Yogurt-Garlic Sauce

  • 1 T plain Greek yogurt
  • 2 T fresh lemon juice
  • 2 T tahini
  • 1 garlic clove, minced
  • ½ t salt

Directions for the Yogurt-Garlic Sauce

  1. Whisk all ingredients together in bowl. Set aside.

Ingredients for Kofte

  • ½ c pine nuts
  • 4 cloves of garlic, peeled
  • 1 ½ t smoked paprika
  • 1 t salt
  • ½ t pepper
  • 1 t whole cumin
  • ½ t whole coriander
  • ¼t ground cloves
  • 1/8 t ground nutmeg (ground from whole if possible)
  • 1/8 t ground cinnamon
  • 1 ½ lbs ground lamb
  • ½ c grated onion, drained
  • 1/3 c minced flat-leaved parsley
  • ¼c minced fresh mint
  • 1 ½ t unflavored gelatin

Directions for the Kofte

  1. Process pine nuts, garlic, paprika, salt, cumin, pepper, coriander, cloves, nutmeg and cinnamon in food processor until a smooth paste forms, 30 to 45 seconds. Transfer mixture to large bowl. Add lamb, onion, parsley, mint and gelatin; knead with your hands until thoroughly combined and the mixture feels slightly sticky, about 2 minutes. cylinder about 1 inch in diameter. Using 8 (12 inch) metal skewers, thread 1 cylinder onto each skewer, pressing gently to adhere. Transfer skewers to lightly greased baking sheet, cover with plastic wrap, and refrigerate for at least 1 hour and up to 24 hours.
  2. Remove kebabs from refrigerator 30 minutes before grilling. Prepare a grill for medium high heat. Grill kebabs directly over heat, turning to brown on all sides, until cooked through, about 8 minutes.
DSC_1026a
Mixture of ground lamb, onion, pine nuts, herbs and spices
DSC_1031a
Knead with your hands until thoroughly combined.
DSC_1032a
Shape lamb mixture into 5 inch cylinders and thread onto skewers.
DSC_1086a
Ready to fold into flatbreads and top with yogurt-garlic sauce.

July 21, 2013 Cucumber-Fennel Salad with Herb Yogurt Dressing

DSC_1121a

My subscription to Food and Wine expired, not intentionally, I guess I just didn’t heed their latest “this may be your last issue” notice. Magazines start sending out those warnings six months before the actual expiration date and sometimes you can get a little numb to their pleas. I like that within the last year, most magazine subscriptions include a subscription for your IPad as well. Certainly cuts down on clutter when you travel and many magazines include special features like videos for the IPad. I like Food and Wine, especially the chef recipes that are a part of every issue. I realized my grievous mistake at the chiropractor’s office. When I walked into the exam room I saw a cover that I was not familiar with, a colorful vegetable ceviche with the caption “Vegetables now”. How appropriate for the August issue when vegetables are at their peak. I had my adjustment, asked if I could take the magazine (yes!!) and was on my way.

Vegetables are a big part of our summer menus. The garden supplies us with an ever increasing bounty as the season progresses and we love to find new ways to present them. Food and Wine editor Dana Cowin in this issue proclaimed vegetables to be “the new pork, the new cupcake and the new craft beer all in one….they’re more interesting to cook than meat.” As a long time veggie lover I could have told her that long ago. Though it is great to enjoy just-picked vegetables prepared as simply as possible, finding new ways to feature them in recipes is one of the joys of summer cooking.

Tom Colicchio, cookbook author, restaurant owner and sage overlord of the Top Chef series is featured in an article “At the Judge’s Table”. The recipes he offers in the article revolve around local ingredients sourced near his home on Long Island’s North Fork. I am happy to say that Mr. Colicchio hasn’t just recently jumped on the vegetable bandwagon. His 1990 cookbook, Think Like a Chef has several chapters divided by season devoted to vegetables.  As an east coast gardener who cooks and gardens with the seasons I appreciate that. Even before it was the popular thing to do he was advising his readers to seek out locally grown produce. His recipe for roasted tomatoes is one I have used for years and freezing roasted tomatoes is my way to preserve them for the winter months. That recipe has saved me the many hours I used to spend over a hot stove canning tomatoes.

In this simple recipe, thinly sliced cucumbers and fennel are napped in a yogurt dressing enhanced with fresh seasonal herbs. It’s a slightly expanded version of tzatziki, the Greek salad of cucumbers and yogurt. Chef Colicchio uses a goat yogurt described as “tangy and funky” from a Long Island dairy farm. I used a non-fat Greek yogurt with good results though this weekend I will look to see if goat’s milk yogurt is available at my local farmers market. To extract excess water from the cucumbers, place the slices in a colander set over a bowl and sprinkle a little salt on them. Let the cucumbers drain for about a half hour and blot dry with paper towels. I replaced the celery and scallions in the original recipe with spicy radishes and red onion. Either combination would produce good results, it’s all a function of what’s in your kitchen that day. This crisp salad would be a cooling contrast to spicy dishes.  Paired with meat or fish or scooped into a pita for a quick lunch, this is a recipe that is quick to assemble and one I am sure to come back to again this summer.

Cucumber-Fennel Salad with Herb Yogurt Dressing

Adapted from Food and Wine Magazine August 2013

Serves Six to Eight

Ingredients

  • 1c plain non or low fat Greek yogurt
  • 3T white wine vinegar
  • 1/2c chopped flat leaf parsley
  • 3T snipped garlic chives
  • Kosher Salt and freshly ground pepper
  • 4-5 Kirby-style cucumbers, peeled and sliced thinly
  • 2 fennel bulbs, halved lengthwise, cored and thinly sliced
  • 4-5 radishes, thinly sliced
  • 1/3c thinly sliced red onion

Directions

  1. In a large bowl, whisk the yogurt with the white wine vinegar, parsley and chives. Season the dressing with salt and pepper to taste. Fold in the sliced cucumbers, fennel, radishes and onion, season the salad with salt and pepper and serve.
DSC_1115a
I left some of the peel on for color and sliced them thinly on my Kyocera mandolin.
DSC_1112a
Baby fennel from the farmers market.

July 18, 2013 Za’atar-Spiced Beet Dip with Goat Cheese and Hazelnuts

DSC_1054a

We plant beets in the garden in early spring. The first thinnings are one of the greens in our salads, later the slightly larger thinnings are sautéed with garlic as a side dish. The first harvest of the beets is just about completed and I was pleased to use them in a new way.  We chose a Middle Eastern theme for the Sunday cookout and I learned from popular London chef and cookbook author, Yotam Ottolenghi, that beets have a strong presence in the cuisine in every ethnic group in Jerusalem. My first thoughts went to borscht, the hearty Eastern European soup often identified with the Jewish community made with beets and other root vegetables. In this recipe, Ottolenghi purees them to make the very delicious za’atar spiced beet dip with goat cheese and hazelnuts.

Za’atar is a Middle Eastern spice blend composed of dried thyme, sesame seeds and sumac. Though I’m sure everyone is familiar with the first two, sumac is a spice most of us are not acquainted with. When you say sumac to me, my arms develop a rash and start to itch and my first thoughts turn to poison sumac. Until recently all the “poisons,” oak, ivy and sumac were classified under the genus, Rhus, along with the varieties of sumac that do not cause skin rashes. In recent years the “poisonous three”  were moved to a different genus, Toxicodendron, Latin for the word “poison tree”.

So on to sumac, it was first used by the Romans for it’s sour flavor before the arrival of lemons from Asia.  Sumac is a decorative bush that thrives in the temperate and sub tropical climates of the Middle East and southern Europe. The dark purple berries are dried and ground have a fruity astringent taste. Along with dried thyme, sesame seeds (toasted or not), salt and with the occasional addition of marjoram, oregano or cumin, they compose this versatile, fragrant spice blend.

When it comes to cooking beets, my method of choice is always roasting, I think it brings out the sweetness in any root vegetable. Just scrub your beets very well, no need to peel now, cut off the root and stem ends, you can use the greens separately. Take a large piece of heavy duty aluminum foil and place the beets in the center. A sprinkle of salt, a little drizzle of olive oil, wrap them up securely, place on a baking sheet in case of drippings and into a 350°F oven they go. My beets are always different sizes, I check after the first hour and any that can be pierced easily with the tip of a knife are removed from the foil. Then back into the oven for the larger ones until all are ready. Once sufficiently cooled, the skin peels off easily with your now pink fingers. If that is an issue for you, I suggest rubber gloves! The beets are cut into manageable wedges along with garlic, a small hot pepper, I chose a tiny Thai pepper that provided all the heat I wanted, creamy plain non fat Greek yogurt, a little real maple syrup and the za’atar. A sprinkling of toasted hazelnuts and a little goat cheese “gild the lily” and make for a vibrantly colored, delicious dip to enjoy with raw vegetables or pita chips.

DSC_1019a
Up close and personal with za’atar, a Middle Eastern spice blend.

Za’atar-Spiced Beet Dip with Goat Cheese and Hazelnuts

Adapted slightly from Food and Wine Magazine Sept 2012

Makes 3 cups

Ingredients

  • 6 medium beets (1 1/2lbs) trimmed
  • 2 small garlic cloves, minced
  • 1 small red chile, seeded and minced
  • 1c plain Greek yogurt
  • 3T extra-virgin olive oil
  • 1 1/2T pure maple syrup
  • 1T za’atar
  • Salt
  • 1/4c roasted skinned hazelnuts, chopped
  • 2T goat cheese, crumbled
  • Raw vegetables or chips for serving

Directions

  1. Preheat the oven to 350°F. Wrap the beets securely in foil and bake for about an hour, until beets are tender. Let cool slightly.
  2. Peel the beets, cut into wedges and transfer to a food processor. Add the garlic, chile, yogurt and pulse until blended. Add the olive oil, maple syrup and za’atar and puree. Season with salt to taste. Scrape into a wide, shallow bowl. Scatter the hazelnuts and goat cheese on top and serve with raw vegetables or pita chips.
DSC_1007 copy
The root and stem ends of the beet are trimmed before weighing. Yes that is a baby scale!
DSC_1016ajpg
The beets are peeled and cut into wedges before they go into the food processor.
DSC_1052a
The beet dip is delicious with raw vegetables or pita chips.


July 16, 2013 Roasted Lobster with Mojo Mayonnaise

DSC_0998a

Lobster is a once and a while treat for us and a sale at a local market was enough motivation to pick up a few and to pull out an old favorite recipe. When I was buying cookbooks on a regular basis and life was a bit simpler, I would occasionally try to cook my way through my latest purchase. Such was the case with the Rick Bayless cookbook, Mexico, One Plate at a Time.

Mexico, One Plate at a Time, written thirteen years ago is the fourth cookbook written by Mexican food authority, teacher, restaurant owner, cookbook writer and PBS television host, Rick Bayless. His motivation for writing this book was to help the average cook take the first steps toward understanding real Mexican cooking, not the Mexican American cooking so many of us are familiar with. He provides not only the history and culture behind some of Mexico’s classic dishes, he offers his best recipe for the classic and a contemporary take on the dish that brings it into the twenty-first century. The food stained pages attest to my efforts. I began by covering the basics, guacamole, salsa, moved into new territory with ceviches and found a new way to use the poblano chilis from our garden with delicious chiles rellenos. For entrees I tried the complex turkey mole, added red snapper vera cruz into our dinner rotation and discovered the rich, delicious roasted lobster tails with mojo mayo.

This lobster variation finds it’s roots in Seafood in Mojo de Ajo. He describes mojo de ajo as a bath of golden slow-cooked garlic that traditionally dresses shrimp or a white fish. Garlic, as with other foods (onions, cilantro) we might assume to be native to Mexico, actually were brought by the Spanish explorers of the sixteenth century. Most of us won’t be able to find the red-tinged ajo criollo that he recommends and Mexican cooks love, but it is important to find the freshest garlic available. Look for firm, plump heads that feel heavy for their size. A lighter head is a sign of dehydration. Also, stay away from garlic that is sending out green shoots, that garlic will most likely be bitter.

The garlic cooks in a good quality vegetable oil that will bubble gently at a very low simmer. This is where the mojo magic occurs, the sharp taste of raw garlic is mellowed and it’s sweetness emerges. Keep a watchful eye on your simmering pan, the final product should become the color of light brown sugar. If the garlic turns dark in color it will be bitter and inedible.

The dish reaches the next step when the cooled oil is added slowly to a base of egg yolks, fragrant lime juice and smoky chipotle peppers resulting in a lusicious mojo mayonnaise that will bring not only lobster but any seafood preparation to a new level.

As Mr. Bayless states at the beginning of his book, food, even a classic dish, is a dynamic evolving creation and he is certainly willing to adapt and accommodate his recipes for the time challenged modern cook. The cookbook version of the recipe for mojo de ajo requires peeling 3/4 of a cup of garlic cloves and a half hour of occasional stirring and temperature moderation of the slow cooked garlic. Two steps that require a certain amount of time and might have steered some (many) home cooks away from this recipe.

My recent observations both on his website, as well as a video from a Chicago block party segment he did on the Rachael Ray show from 2010 show how he has adapted the preparation of mojo de ajo from the original recipe in the book.  Although he did mention using fresh garlic he also gave approval to peeled garlic from the supermarket as a reasonable substitute. He told the large audience that over the course of years he developed an easy way to make a large quantity of the mojo. Rather than chop the garlic by hand, he puts it in a plastic bag and crushes it with a rolling pin. The garlic is then placed in a square baking pan and covered with three cups of olive oil. After cooking for 45 minutes in a 325°F oven he adds some lime juice and cooks for another fifteen minutes. In his book Mr. Bayless originally expressed that oven cooking the garlic in oil would result in a less reliable product, it is now the standard for the recipe on his website The liquid gold, as he often refers to it, can be stored in the refrigerator for several weeks, making it well worth the effort the home cook would put into it.  Mojo de ajo can also be used in vinaigrettes, hash brown potatoes or drizzled over hot pasta tossed with chili flakes and breadcrumbs. A compromise you say? If it gets more people in the kitchen and stimulates cooking creativity, then I would say no harm done.

Roasted Lobster Tails with Mojo Mayonnaise

Serves 6

Ingredients

  • 3/4c peeled garlic cloves
  • 1 1/4c good quality canola oil and a little more for brushing the tails
  • 2 large egg yolks
  • 3T fresh lime juice
  • 2 canned chipotle chiles in adobo, seeded and finely chopped
  • Kosher salt
  • Six 6 ounce lobster tails in their shell

Directions

  1. Either chop the garlic finely by hand into small pieces or drop the cloves through the feed tube of a food processor with the motor running and process until the pieces are 1/8 inch in size. You should have about 1/2 cup of chopped garlic. Scoop the garlic into a small saucepan and add all of the oil and set over medium low heat. Stir occasionally as the oil barely comes to a simmer. Adjust the heat to maintain the gentle simmer (bubbles will rise in the pot like sparkling mineral water) and cook, stirring occasionally until the garlic is a soft golden color, about 30 minutes. Cool to room temperature and transfer to a measuring cup with a spout.
  2. In a food processor or blender, combine the egg yolks and lime juice. Pulse to combine and then, with the machine running, slowly (I can’t emphasize slowly enough…) dribble in the oil along with stray pieces of garlic. The mixture will thicken into a mayonnaise. When all of the oil is in and the mayonnaise is thick, spoon in the rest of the garlic and process just long enough to combine. Scrape into a bowl, stir in the chopped chipotles and season with salt to taste. Cover the mojo mayonnaise and refrigerate until using.
  3. Kill and cut up the lobsters, if this is something you are uncomfortable doing, opt for lobster tails that just need an overnight thaw in the refrigerator.
  4. Heat the broiler. Crack open the lobster pieces. Lay the prepared lobster pieces or tails on a heavy duty baking sheet, for a whole lobster you will have a split front half, a split tail, 2 arms and 2 claws.  Brush the lobster meat with oil. Place about 8 inches below the broiler. Broil for 5 minutes. Remove from the broiler and check one of the tails for doneness by cutting off about 1/2 inch of the meat at the front, it should be just about tender but still have a hint of translucency at the center. If it is far from done, return the lobster to the broiler for about a minute or so. Smear all sides of the lobster meat evenly with an 1/8-inch layer of mojo mayonnaise and return to the broiler. Broil until the mayonnaise is a golden brown, about 1 minute more.
  5. Transfer the lobster to a serving platter, serving the remaining mayonnaise separately.
DSC_0960a
Oil and garlic slowly simmering in the pan, bubbles will rise in the pot like sparkling mineral water.
DSC_0969a
The garlic should turn a soft pale golden color, like the color of light brown sugar.
DSC_0989a
Mojo mayonnaise with tart lime juice and smoky and spicy chipotles en adobo.


July 9, 2013 Roasted Potato Salad

DSC_0951a“Maybe we can try them again.” That was Joe’s response as he chuckled while reading about the “hall of fame” vegetables that I mentioned in my last post. Specifically, he was talking about revisiting potatoes.  I certainly concur with that idea. Potatoes don’t take up a great deal of growing room, in fact they can be grown in containers. Home grown just harvested potatoes definitely taste fresher than ones that have been sitting on the supermarket shelf for weeks.  In previous seasons we grew varieties like Yellow Finn, Russian Banana, Red Norland and Purple Peruvian. Specialty potatoes are becoming more common  but they come with a hefty price. I prefer harvesting potatoes when they are relatively small and at their sweetest. . Small red potatoes are often labeled as “new” but any variety harvested before maturity is technically a new potato. Unlike purple/blue beans that turn a muddy green when cooked, blue or purple potatoes maintain their bright color when cooked. A combination of red, white and blue varieties made for a rather patriotic looking potato salad at our cookout one year.

For this Fourth of July holiday I wanted the simplest of potato salads to accompany the baby back ribs and grilled chicken that were on the menu. After some thought, I decided to use the recipe for roasted potatoes that I often make for dinner. Red bliss, or any other low starch potato will work best for this recipe. Low starch potatoes have a creamy texture and stay firm when they are cooked.  I looked for the smallest potatoes I could find and cut them in half, tossing them with salt and pepper and enough olive oil to coat. For optimal browning the potatoes need to be cut side down in a single layer and if you have one, a dark colored baking sheet helps this process along.  Cover the potatoes with foil for the first twenty minutes of cooking. A word of caution, when you remove the foil, be careful of the steam facial that will be released.

If you choose to plant garlic chives remember they can take over your garden.  To minimize their invasive potential, remove their flower stalk before they have a chance to broadcast their seeds.  Garlic chives have a mild flavor of garlic and the leaves are flat and strap-like with a white tall spiky flower as opposed to the purple flowers and tubular leaves of regular chives. To use garlic chives, I cut a handful, line them up and snip with scissors.

The cooled potatoes were tossed with just enough of a good quality balsamic vinegar, salt, freshly ground pepper and a sprinkling of freshly snipped garlic chives. The results were exactly what I had in mind and suited the rest of the menu quite nicely.

DSC_0975a
Line up your chives before chopping on a cutting board or gathering in your hand to snip with scissors

 DSC_0978a

DSC_5722a
The tall white spiky flower of the garlic chive appears in mid July.


Roasted Potato Salad

Roasted potato recipe adapted from Cooks Illustrated

Serves 4-6

Ingredients

  • 2 1/2lbs small low starch potatoes such as Red Bliss,
  • 3T Olive Oil, use a good quality, extra virgin is not necessary though
  • Kosher salt and freshly ground pepper
  • 1-2T Balsamic vinegar
  • 1-2T Freshly snipped garlic chives

Directions

  1. Adjust oven rack to lowest position and preheat to 425F.
  2. Cut potatoes in half and place in a medium sized bowl. Toss potatoes and olive oil to coat, season to taste with salt and pepper and toss again to blend.
  3. Place potatoes cut side down in a single layer on a baking sheet, cover tightly with foil and bake for about 20 minutes. Carefully remove foil and continue to bake about 10 minutes more. Remove pan from oven and carefully turn potatoes over with a metal spatula. Press the spatula against the metal as it slides under the potatoes to protect the crispy crusts. Return pan to oven and bake about 5 minutes more, the potato skins will start to wrinkle a bit. Remove pan from oven and allow potatoes to cool for about 10 minutes.
  4. Transfer cooled potatoes to a medium sized bowl. Toss with balsamic vinegar and snipped garlic chives. Serve potato salad at room temperature.

July 5, 2013 Corn Maque Choux

DSC_0935a

We had a wonderful crab fest last weekend courtesy of Nik. Along with a half bushel of crabs he brought our first fresh corn of the season from the Eastern Shore of Maryland. We love corn and take advantage of the local harvest for as many weeks as it lasts. We even grew corn at one point but it entered our “too much work to warrant growing it” hall of fame along with asparagus and potatoes. It’s been so long since we’ve grown it I almost don’t remember why we stopped. When we grew our own corn, Joe wanted as little time as possible to pass between the harvesting and the cooking. He certainly had a good point there, as soon as corn is cut from the stalk, the sugars begin converting to starch. I just read in Fine Cooking that some varieties will lose 50 percent of their sweetness when left at room temperature for only a few hours. Therefore, if you grow it, you should take advantage of the freshness.  I would fill up a large pot of water on the stove and get it ready for the boil. Then he would run down to the corn patch, harvest the corn, quick shuck the ears and cook it.  A little salt, melted butter, ah perfection!!

The corn and crabs of Sunday were wonderful and we had about six ears left uncooked. I have made corn pudding and black bean and corn salad with leftover fresh corn in the past, this time I decided on corn maque choux. Maque choux or “smothered corn”  is pronounced “mock shoe” and is a Cajun interpretation of a Native American dish. It is typically a side dish but it can also be the base of entree of shrimp, seared scallops, or chicken.

One of the books I consulted likened maque choux to succotash, a dish of corn kernels, lima beans and sweet peppers. I wanted to add some beans since I didn’t quite have enough corn to make the quantity I desired. Not being a fan of lima beans (both Joe and I have bad childhood memories) I decided edamame would make an excellent substitute for the limas.

Edamame, in case you didn’t know already, are immature soybeans, picked before the “hardening” stage. They are sold both in the pod and shelled, shelled worked out fine for this recipe. Edamame have a sweet, nutty flavor, not dried out and mushy like the canned or frozen limas of years ago.   Frozen corn could be used for this recipe but now is the time to take advantage of the fresh corn that is or will be appearing in your local farmers market.

The best way to remove the kernels from the ears? For me, I first shuck the ears and remove the silk.  To remove the corn from the cob, hold the stem end of the husked ear of corn and rest the tip of the ear on the bottom of a very large shallow bowl. Use a very sharp paring knife to cut off corn kernels and let them fall into the bowl. Be careful to cut just the kernels and not include any of the tough, inedible cob. It’s better, in fact, to leave some kernel behind than to include some cob!  Continue cutting around the ear to remove all kernels. Cutting the kernels into a bowl makes much less mess of splattering corn “milk” and makes it easier to hold the ear at an angle that allows you to cut down around the ear safely.

Considering the low carb, low fat diet everyone seems to following these days, corn, bacon, butter and whole milk put this dish in the category of occasional splurge. But it is also those ingredients that make it a flavorful way to “repurpose” those extra ears from your last cookout.

DSC_0923a
Delicious sweet corn from Maryland.

Corn Maque Choux

Serves 6 as a side dish

Ingredients

  • 5 slices of bacon
  • 1 c of finely chopped onion
  • 2t chopped garlic
  • 4T unsalted butter
  • 4c fresh corn kernels
  • 1c edamame, cooked according to package directions
  • 1/2 finely chopped red pepper
  • 1/4c chicken broth
  • 1/4c whole milk
  • 1c chopped tomato
  • 1/4c finely chopped Italian parsley
  • Kosher salt and fresh ground pepper

Directions

  1. Cook bacon in a large heavy bottomed pot over medium high heat until crisp, about 12 minutes. Transfer to a paper towel lined plate to drain, then coarsely chop.
  2. Add onion to the bacon drippings in the pot and cook until golden and softened, about 10 minutes. Add garlic and cook until fragrant, about 2 minutes. Add butter, corn, and cook for about 8 minutes. Then add edamame and red pepper and cook until heated through, another 3-4 minutes.
  3. Return bacon to pot, add broth and milk and bring to a boil. Reduce heat and simmer until most of the liquid has evaporated, about 3 minutes. Remove from heat and stir in tomato and parsley. Season to taste with kosher salt and freshly ground pepper. Dish can be served warm or at room temperature. Maque choux can be made up to a day ahead and stored in refrigerator; bring to room temperature before serving.
DSC_0931a
Corn, butter, bacon, what’s not to love?