Tater tots are a mid twentieth century (1953) invention born out of the frugality of brothers F. Nephi and Golden Grigg. Co founders of Ore-Ida, they were looking for a way to use the potato pieces left over when making their french fries. The pieces were used as feed for the livestock on the family farm or just tossed in the trash. The brothers Grigg knew that there had to be a way to consume the discards.They chopped the potato pieces, added seasonings and salt, put them through an extruder where they got their tot shape then into the deep fryer.
Fast forward to the twentieth first century and Americans consume 70 million tots a year. They are loved by young and old alike, everyone from high end chefs like Daniel Boulud to mommy bloggers. Mommy bloggers have taken tots beyond the potato. To their delight they discovered that their little ones would eat veggies they wouldn’t touch before when they were presented in tot form. Broccoli, cauliflower, sweet potatoes, carrots, beets and zucchini have all been used to make tots.
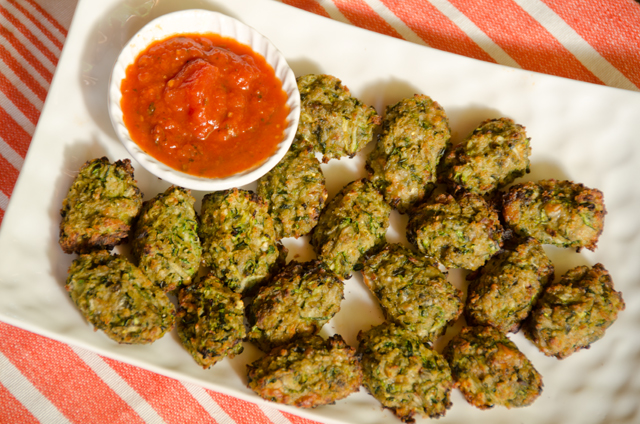
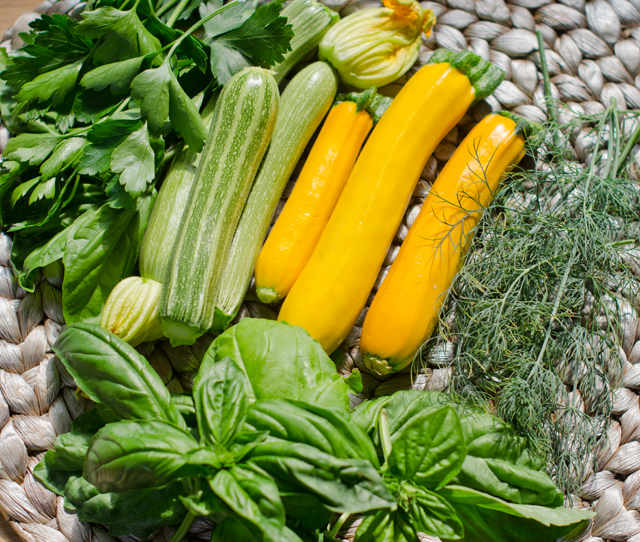
So it was time for me to take on the tot. I chose two things we have in abundance, zucchini and basil. Basil is in season so why not make some pesto? Whatever vegetable you choose for your tots it is important to squeeze as much water out of the shredded vegetable as possible. A clean linen dishcloth is what I recommend. If time is short and you don’t have time to make the tot shape, divide the mixture evenly into well greased mini muffin pans. Make a double batch and freeze half for later. To eat, place frozen tots on a baking sheet and bake at 400°F 10-15 minutes, until heated through.Crispy on the outside and soft on the inside, zucchini pesto tots make a great snack or side dish.
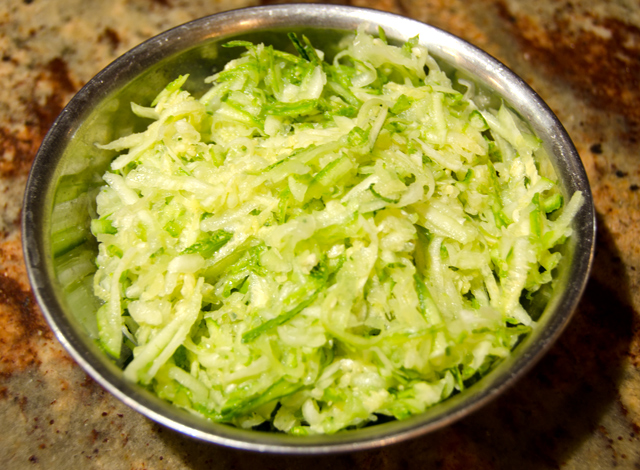
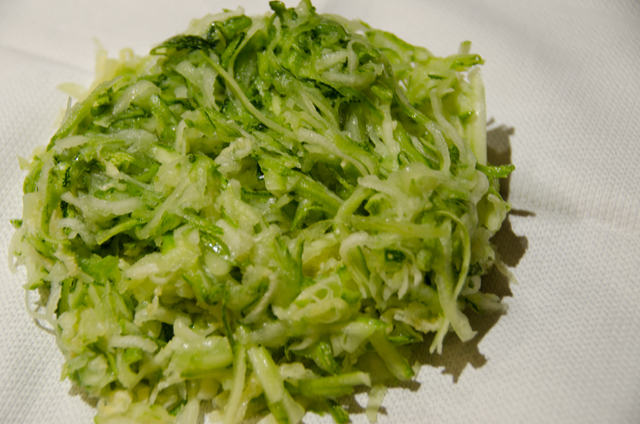
Shredded zucchiniShredded zucchini after squeezing
Zucchini Pesto Tots
Ingredients
1¼ lb zucchini
2-3 T basil pesto
1 large egg, lightly beaten
½ c panko bread crumbs
½ c grated Parmesan cheese
Kosher salt and freshly ground black pepper
Directions
Preheat oven to 400° F. Line a large baking sheet with parchment paper.
Grate the zucchini with the large holes of a box grater.
Transfer the grated zucchini to a large dish towel and strain out as much liquid as possible.
Transfer the grated zucchini to a large bowl then add the pesto, egg, Parmesan and kosher salt and freshly ground pepper to taste. Mix together until well blended.
Spoon a generous tablespoon into your hand and roll it into a cylinder. Place on the prepared baking sheet. Repeat with remaining zucchini mixture.
Bake 18-20 minutes, rotating the baking sheet half way through, until golden brown. Serve with your favorite dipping sauce.
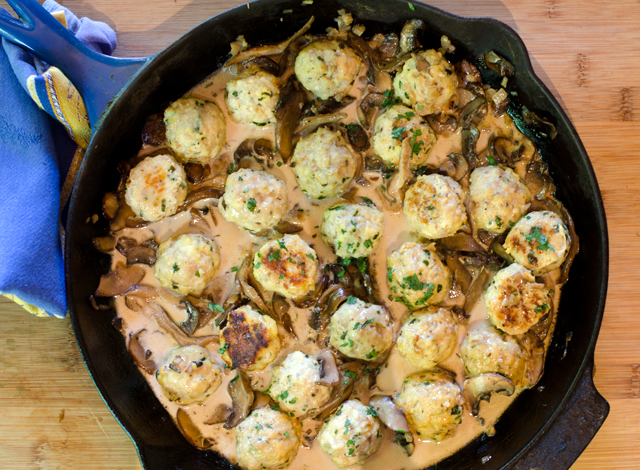
A friend recently texted me some pictures from the meal he had at a new local restaurant. One photo piqued my curiosity, chicken Marsala meatballs. When I had my catering business, chicken Marsala was a client favorite. Tender pieces of chicken in a luxurious, creamy sauce loaded with umami rich mushrooms, what’s not to love? This was a recipe I wanted to try.
I buy ground turkey quite frequently, ground chicken I have shied away from. I thought that a lean meat like ground chicken would too easily result in a dry dish. But there are ways to ensure that won’t happen. Adding ricotta to meatballs is a tip I learned from chef Michael Symon on The Chew. The mild and creamy consistency of ricotta gives the meatballs a light texture. I prefer a natural ricotta, made with just milk, vinegar and salt. Place ricotta into a sieve and allow it to drain for at least a half hour to ensure a moist, but not watery meatball. I added finely chopped shiitake to the meat mixture to amp up the mushroom flavor and some panko breadcrumbs to lighten the texture of the meatballs.
Take off your rings and roll up your sleeves because it is best to use your hands for the next step. Combine the ingredients until they just come together, don’t over work. It’s easier to feel when everything is well mixed. Use oiled hands or a small cookie scoop to portion out the meat.Be gentle when forming meatballs. If they are packed too tightly and compactly, they will turn out tough, rubbery and chewy.
Place the meatballs on a parchment lined baking sheet and lightly coat it with non stick spray. I chose to roast the meatballs in the oven but they could also be fried in oil on the stove top. While the meatballs are cooking, you will have time to make the sauce. The star of the sauce, of course is Marsala wine. Marsala is a fortified wine produced in the region surrounding the Italian city of Marsala in Sicily. Dry Marsala is used in savory preparations like this dish while sweet Marsala is used in desserts. Tiramisu anyone?
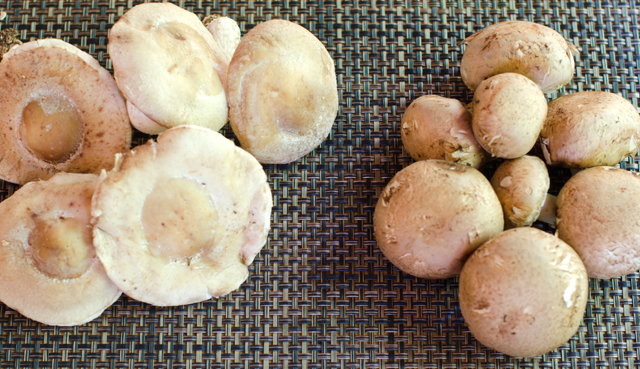
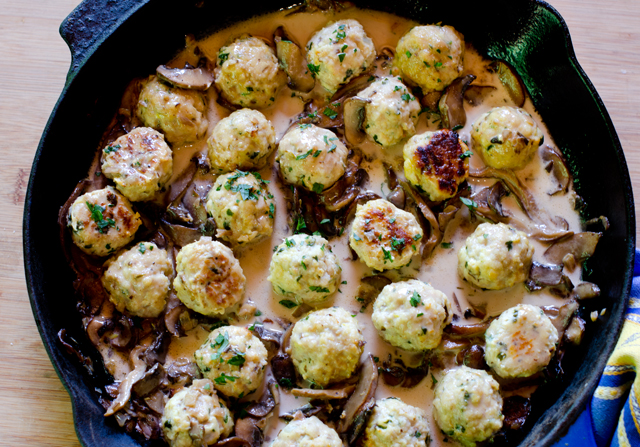
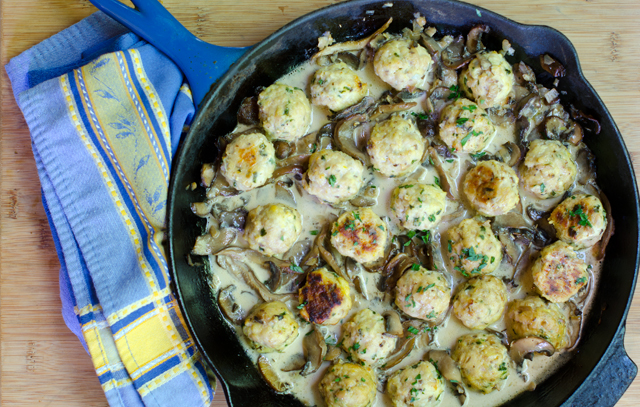
Melt butter in a saute pan large enough to hold the meatballs. Saute shallot, then add mushrooms and garlic to the pan, I used a combination of shiitake and cremini, white button mushrooms are fine as well. Cook, stirring frequently until the mushrooms begin to brown, 3 to 4 minutes. Add Marsala wine to the pan and cook until slightly reduced. Add cream and wine and reduce heat to a simmer. Add meatballs back to the pan tossing gently. Sprinkle with fresh parsley and serve.
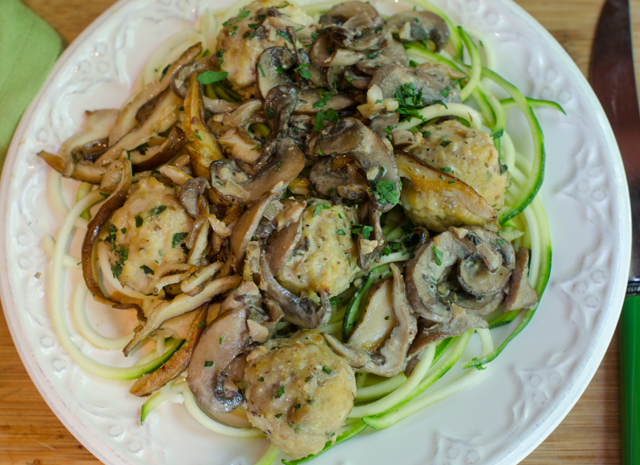
This dish could be prepped ahead of time, make the meatballs and sauce and hold separately in the refrigerator until you are ready to cook dinner. Chicken Marsala meatballs make a great hors d’oeuvre, sandwich filling on a crusty roll or served over wide pasta noodles or like we did, over zucchini “noodles”.
I used cremini and shiitake mushrooms in my preparation, button mushrooms are fine to use as well.Place meatballs evenly spaced on a prepared baking sheet.
Chicken Marsala Meatballs
Makes 24-27 meatballs
Ingredients for the meatballs
1 lb ground chicken
¾ well-drained ricotta cheese
3 T finely chopped shallot
2 t finely chopped garlic
1 egg, lightly beaten
1 c finely chopped mushrooms
½ c freshly grated pecorino romano cheese
½ c panko breadcrumbs
Kosher salt and freshly ground black pepper
Directions for the meatballs
Preheat oven to 375°F. Line a large baking sheet with parchment or foil. Spray the baking sheet with non stick spray, set aside.
In a large bowl combine chicken, ricotta, shallot, garlic, egg, mushroom, cheese, panko, salt and pepper to taste. Be careful not to over mix.
Using your hands or a small cookie scoop, scoop out the meat mixture and roll into balls. Evenly place the meatballs on the prepared baking sheet.
Bake for about 15 minutes, until light golden, rotating the tray halfway through the baking time. Keep the meatballs warm while you make the sauce.
Ingredients for sauce
1 T unsalted butter
1 T extra virgin olive oil
1 small shallot, finely diced
8 oz thinly sliced mushrooms-more if you like.
1 clove garlic, finely diced
1 c dry Marsala wine
¼ t dried thyme
2 T chopped parsley
Kosher salt and fresh ground pepper
Directions for sauce
Melt butter in a large saute pan over medium high heat, add olive oil.
Add shallot to the pan, season with a pinch of salt and pepper. Cook until softened, 1-2 minutes.
Add mushrooms and garlic to the pan. Saute until mushrooms are cooked through, 3-4 minutes, add Marsala wine to the pan, cook until slightly reduced, 4-5 minutes.
Add cream and thyme and bring to a simmer. Add meatballs to the pan, toss gently until well coated. Reduce the heat to medium-low and cover; let them simmer in the sauce for 10 minutes. Add chopped parsley, taste and adjust for seasoning with salt and pepper.
I served Chicken Marsala meatballs over zucchini noodles.
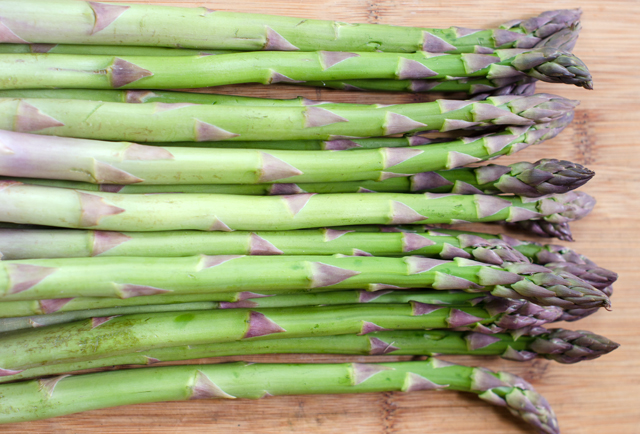
Our spring vegetable garden includes several varieties of lettuce, spinach, radishes, Japanese turnips, beets, kohlrabi, sugar snap peas and cooking greens. However there is one spring vegetable that we don’t grow that makes my trip to the farmers market worthwhile, fresh local asparagus. Asparagus is a real sign that spring is here. and the season is fleeting. I will serve it roasted, grilled, raw in salads, in stir fries and a new way (at least for me) I heard about from a new “friend”, Alexa.
Alexa is a digital assistant that performs tasks, like turning on Sirius radio when I’m in the kitchen. “Alexa, play Seventies on Seven”. You can ask her the score of the game, will it be sunny today and even turn the lights on if you have the right smart home device. Our Amazon Echo has a screen that always shows the time, weather and rotating news headlines, fun facts and even recipes. One afternoon I noticed that a recipe for oven baked asparagus fries popped up. I was too busy at the time but thought that this was one I needed to try. On line I found many recipes, this is my interpretation of this popular dish.
Look for medium-sized asparagus for this recipe, twenty spears weighed about a pound. If you are storing the asparagus for any length of time, leave the rubber band on, trim about an inch off the bottom. Stand the spears up in a jar with about two inches of cool water and cover loosely with a plastic bag.
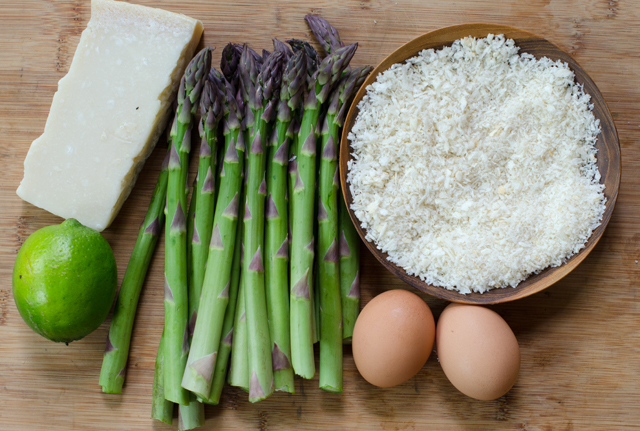
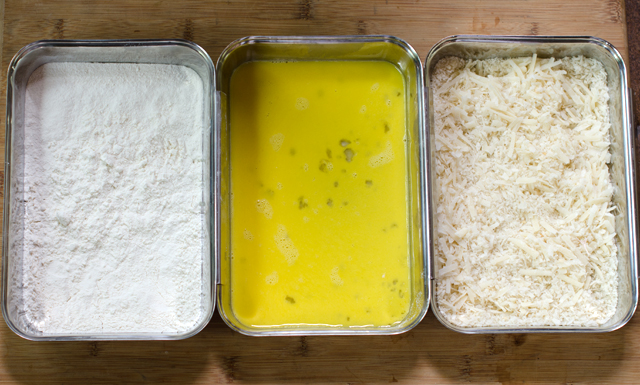
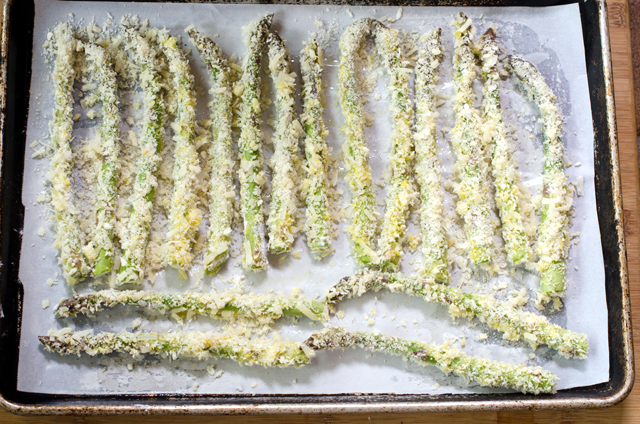
When you are ready to proceed with the recipe, preheat the oven to 425° F. Line a large baking sheet with parchment paper or foil for easy clean up and brush with a tablespoon of oil or coat lightly with cooking spray. Set up your breading station by lining up three containers that are long enough to accommodate the asparagus spears. Place the flour in the first container. Add the beaten eggs to the second container. Combine panko and Parmesan and season with salt and pepper for the third container. Trim off the tough ends and lightly rinse the asparagus. Coat the spears with flour, dip in the egg then turn to coat in the Parmesan panko mixture. Place on baking sheet, lining up in a row but not touching. Lightly coat the spears with olive oil cooking spray. Bake in preheated oven, turning spears over halfway during the cooking process to ensure even baking.
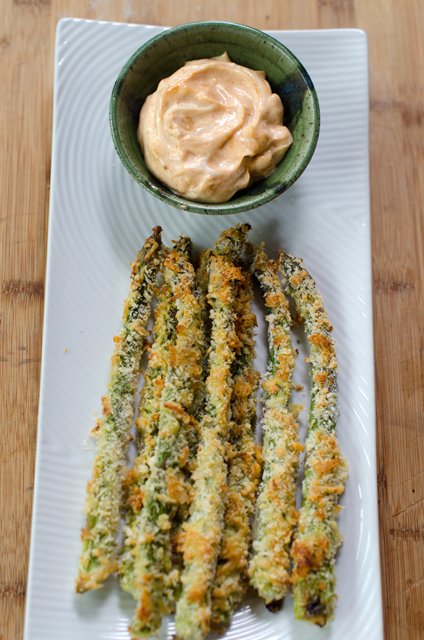
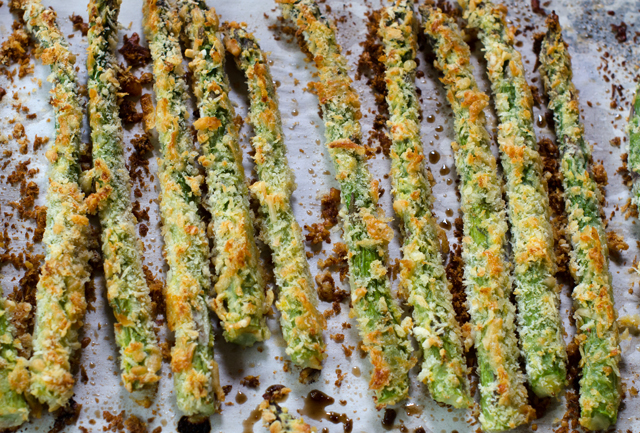
In the category of “in case you didn’t know” panko is a Japanese style white breadcrumb that is light and airy with a texture like crushed corn flakes. You can easily find them in the Asian section of your supermarket. I prefer to only put a third of the breadcrumb mixture in the dredging pan at a time. After you have rolled several eggy spears in the crumbs, they tend to make the crumbs wet, so adding more dry crumbs as needed makes the process easier and neater. Remember the rule of wet hand dry hand. Designate one hand to do the dry steps, flour and breadcrumbs and the other to do the wet step-the egg mixture.These are best served right from the oven. Serve plain or with smoked paprika aioli.
I love my Williams-Sonoma interlocking stainless steel pans for my breading station.Ready to go into the oven.Crispy, brown and delicious!
Baked Parmesan Panko Asparagus Fries
Serves four
Ingredients
1 lb asparagus-medium thickness
½ c or more unbleached all-purpose flour
2 eggs, beaten
1 T fresh lime juice
1 c panko breadcrumbs
1 c freshly grated Parmesan cheese
Kosher salt and fresh ground pepper
Non stick spray or olive oil
Directions
Preheat oven to 425°F. Line a large baking sheet with parchment and lightly coat with a tablespoon of olive oil or olive oil cooking spray.
Rinse the asparagus and snap or cut tough ends off.
In a large bowl stir with a fork to combine the Parmesan and panko
Set up your breading station: line up three shallow bowls or dishes that are long enough to accommodate the spears. Put the flour in the first dish. Place the beaten eggs in the second and lightly beat in the lime juice. Place the Parmesan panko crumbs in the third, season crumbs with salt and pepper to taste.
Dredge the spears first in the flour, dip in the egg mixture and roll in the crumbs to coat on all sides, pressing crumbs in.
Place asparagus on the prepared baking sheet, spears close together but not touching. Coat lightly with olive oil cooking spray.
Bake the asparagus until browned, crisp and crunchy, about 10-12 minutes. Flip spears over halfway through the cooking time for even baking.
Serve immediately with smoked paprika aioli or your favorite dipping sauce.
Smoked Paprika Aioli
Makes about a cup
Ingredients
4-5 cloves roasted garlic
¾ c mayonnaise (homemade or prepared)
1 t smoked paprika
1 t fresh lemon juice
Kosher salt and freshly ground pepper
Directions
To make roasted garlic, cut off top third of a head of garlic, drizzle with olive oil, wrap in foil and bake in a 375°F oven for about 40 minutes or until garlic is soft and brown.
With a fork, mash 4-5 roasted cloves in a medium bowl. Add mayonnaise, smoked paprika, lemon juice and whisk to combine. Adjust seasonings and salt and pepper to taste.
Refrigerate for at least an hour to meld the flavors.
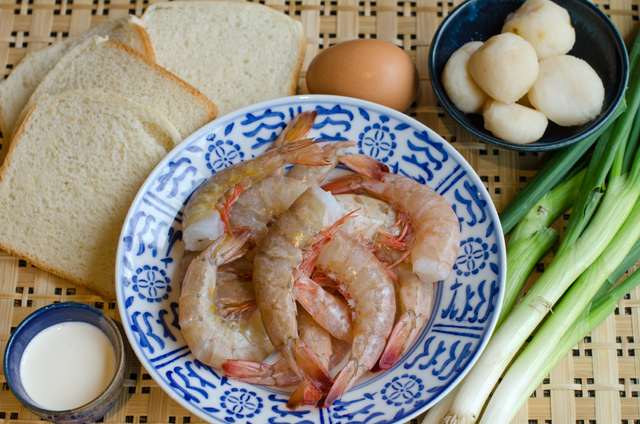
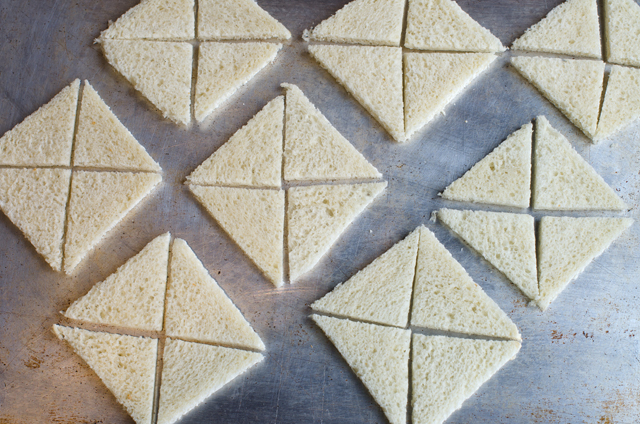
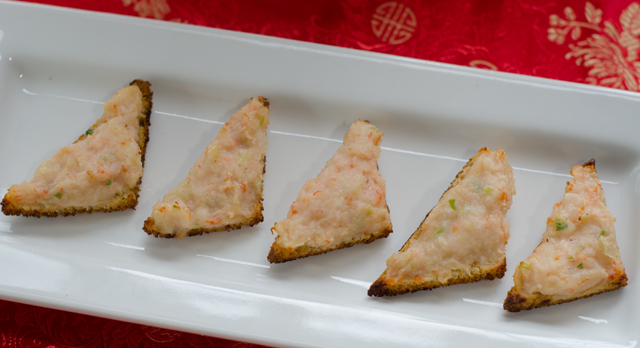
Shrimp toasts, bite-sized triangles of bread topped with shrimp paste are a popular dim sum item and a new addition to our Chinese New Year celebration. It is said the dish originated in Guangzhou (Canton) in China nearly a hundred years ago. There are others who claim it is a hybrid of a traditional Chinese shrimp recipe and bread, not native to China but introduced by foreign travelers to Hong Kong. I chose to use a recipe from Susannah Foo, a popular and highly acclaimed Philadelphia chef who eponymous restaurant closed in 2009. Shrimp toasts are often fried, this version is baked and can be made ahead and frozen, a big plus when you are serving an extensive menu. This year we celebrate the year of the rooster, which comes after a monkey year and before a dog year. Roosters are said to honest, bright, communicative and ambitious.
Baked Shrimp Toasts
Makes 3 dozen or more
Ingredients
10 to 12 slices thinly sliced white bread, crusts removed
1 large egg white
1 lb medium or large shrimp, peeled and deveined
2 T heavy cream
1 T vodka
1 t kosher salt
½ c chopped water chestnuts
2 scallions, minced
Directions
Preheat oven to 250° Cut each piece of bread into 4 triangular pieces. Place on a baking sheet and bake for about twenty minutes, until the bread is dry but not browned; leave oven on.
While the toast is drying, beat the egg white lightly. Dry the shrimp well with a paper towel and place in a food processor; puree.
Add the egg white, cream, vodka and salt. Process until just pureed. Transfer to a bowl.
Add the water chestnuts and scallions to the shrimp mixture and mix just until all the ingredients are combined.
If you are baking the shrimp toasts immediately, increase the oven temperature to 375°F and coat a baking sheet lightly with non stick spray.
Spread 2 heaping teaspoons of the shrimp mixture on each piece of bread. Repeat with the remaining triangles.
At this point, the shrimp toast can be frozen for later use. Place the triangles on baking sheets and freeze. Once frozen, remove from the baking sheets, place in freezer bags and return to the freezer.
Bake frozen shrimp toasts directly from the freezer, about 10 minutes, the shrimp will be cooked through, all the ingredients hot and the toast is golden brown on the bottom. Triangles that were not frozen will take a little less time.
When Christopher Kimball left Cooks Illustrated to start a new multimedia venture, Milk Street, that includes a website, cooking school, TV and radio show and print magazine I was curious how the new magazine would differ from Cooks Illustrated, the publication he founded over twenty years ago. I have always been a big fan of Cooks Illustrated and have saved every issue since the first one came out in 1993. Could I justify subscribing to one more cooking publication?
The magazines are about the same size, Cooks Illustrated is a tad longer and both are 32 pages long. Both accept no advertising, unless you count the subscription inserts. Cooks Illustrated uses mostly black and white photography and illustration with color photographs of all the finished dishes on the inside back cover. Color photographs abound in Milk Street, though they aren’t the life-sized glamour shots we see on many popular blogs, they are accurate representations of the finished dishes. One thing Milk Street does not have are the wonderful back cover illustrations of John Burgoyne that are a welcome part of each issue. Whether it is a page of eggplant varieties, classic American cookies, crustaceans or heirloom tomatoes I always look forward to seeing his detailed and realistic work. On the other hand, Milk Street has Christopher Kimball’s folksy and entertaining letters from Vermont.
Commenting on the new publication, Mr Kimball said that Milk Street would bring techniques from the world’s kitchens, focusing on simple dishes with easy to find ingredients. The term, “easy to find” has certainly changed since I started cooking over thirty years ago. The coconut milk and fish sauce I can find on any supermarket shelf now would have taken a special trip to an ethnic market back then. Although that was enjoyable and educational at the time, I appreciate the convenience now.
Looking at a recent issue of Cooks Illustrated I found recipes for shredded tacos, walkaway ratatouille, grilled pizza and paella on the grill, the typical representation of the Americas and western Europe. There is usually one recipe with an Asian influence, in this issue one for Korean fried chicken wings. Milk Street’s inaugural issue reflected the global emphasis they promised with recipes for harissa from north Africa, pie crust that uses a Japanese baking technique, Chinese white cooked chicken, Thai coleslaw, French carrot salad and the one I chose to make first, Pinchos Morunos.
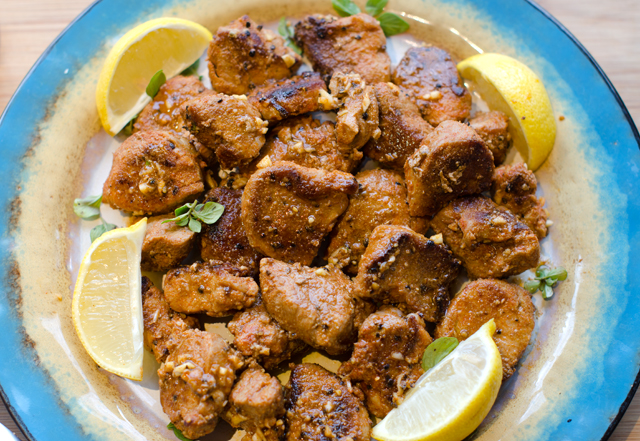
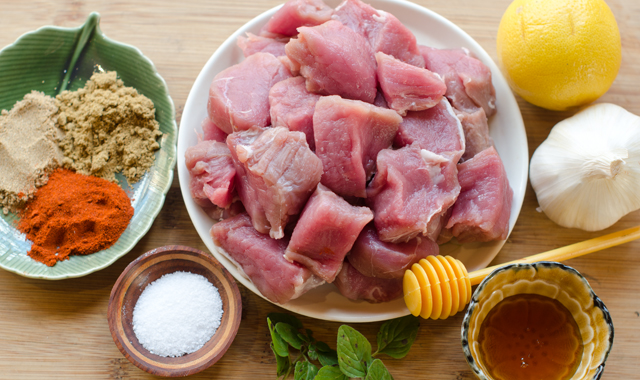
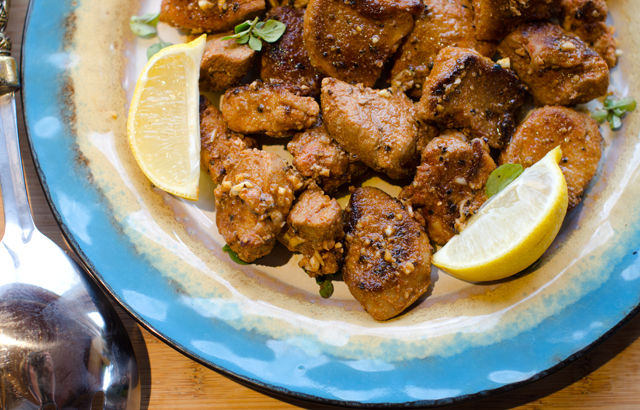
Pinchos morunos are grilled skewered meat kabobs. A pincho, or pintxo as it is called in Basque country, is a thorn or a spike. This can either refer to the skewer the meat is cooked on or the cocktail pick that is attached to a piece of bread when pinchos are served as part of a tapas menu. Morunos refers to the Moors who influenced Spanish food and culture for centuries. The meat in the original recipe was most likely lamb, the Moors were Muslim and did not eat pork. When the Spanish adopted this recipe, the meat of choice became pork. The meat was tossed with a Moroccan spice blend, ras el hanout. The term ras el hanout translates to “head of the shop” and refers to the best spices the shop has to offer. Ras el hanout can have as many as ten spices, this recipe streamlines that number to three, salt and pepper not included.
This version of pinchos morunos eliminates the skewers and brings the meat right to the saute pan. The pork is cut into 1 to 1 ½ inch cubes and tossed with a flavorful spice rub of cumin, coriander and smoked paprika. The cubes of pork are just the right size to absorb the rub and flavor the meat. The meat only needs to sit for about an hour before proceeding with the recipe. While the pork is absorbing the flavor of the spices, mix the garlic, lemon juice and honey in a small bowl.
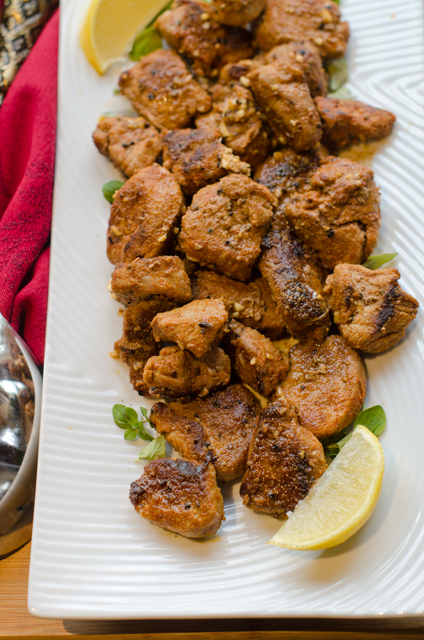
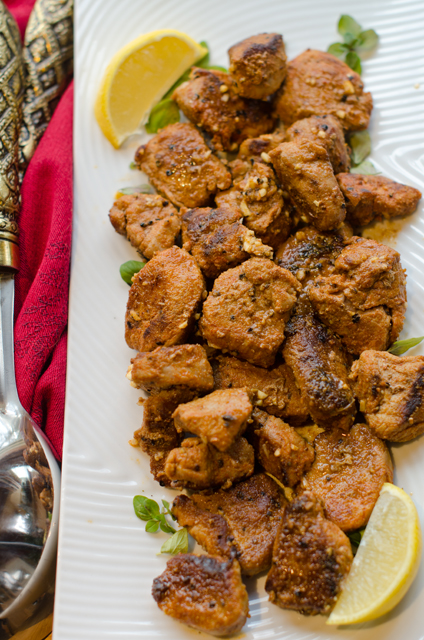
Place a large skillet over high heat, coat lightly with olive oil and heat until smoking. Add the seasoned pork cubes in one layer and cook without moving for about 3 minutes. You want all of the meat to develop a deep brown crust. Flip the pork with tongs and cook, turning the pieces occasionally as they continue to brown. The additional cooking time is 2-3 minutes, the pork will continue to cook even after you take it off the heat and you don’t want the pork to dry out. While the pork is still hot, pour the garlic, lemon, honey mixture over the meat and garnish with oregano. Serve immediately to optimally appreciate the flavors. You can prep the components of the dish earlier in the day. Cut the meat into cubes, cover with plastic wrap and make the spice blend and lemon honey mixture . An hour before serving, bring the meat out of the fridge and proceed with the recipe.
We have enjoyed this recipe several times for dinner. Serve with rice or couscous and a salad. It would also make a great hors d’oeuvre accompanied with a saffron aioli for dipping.
Pinchos Morunos
Serves 2-3
Ingredients
1½ t ground coriander
1½ t ground cumin
1½ t smoked paprika
¾t each kosher salt and fresh ground pepper
1 lb pork tenderloin, trimmed and cut into 1 to 1½ inch pieces
1 T lemon juice plus lemon wedges for serving
1 T honey
1 large clove of garlic, finely grated
2 T extra virgin olive oil
1 T chopped fresh oregano
Directions
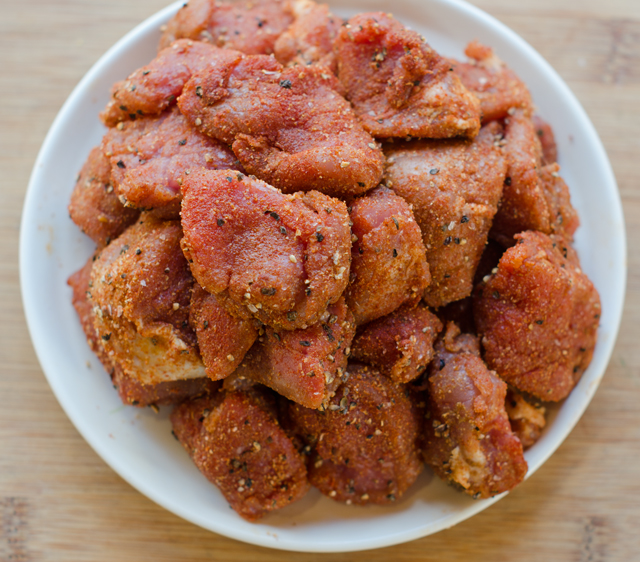
Combine coriander, cumin, smoked paprika, salt and pepper in a medium bowl.
Add the cubed pork to the bowl and toss to coat thoroughly until no dry rub remains.
Let the pork sit at room temperature for 30 minutes and up to 1 hour.
While the pork is sitting at room temperature, combine the lemon juice, honey and garlic in another bowl.
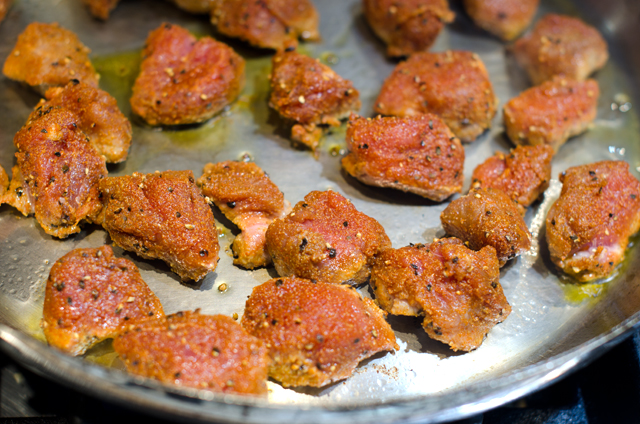
In a large skillet over high heat, heat 1 tablespoon of the oil until smoking. Add the meat in a single layer and cook without moving until deeply browned on one side, about 3 minutes. Using tongs flip the meat over and continue to cook until browned on all sides, another 2-3 minutes.
Take meat off the heat and pour the lemon juice and garlic mixture over the meat and toss until evenly coated. Transfer the meat to a serving platter.
Drizzle the meat with the remaining olive oil, sprinkle with oregano and serve with lemon wedges.
Toss the pork cubes with the spice blend.Be sure the pork develops a nice crust on the first side.
One of the highlights of last summer was our trip to the Food and Wine Classic in Aspen Colorado. It is touted as America’s premier culinary event, and certainly lived up to those expectations. We enjoyed three days of cooking demonstrations, wine tastings and best of all, the grand tasting pavilion. It was there that we, and 5000 other fanatical foodies sipped, savored and sampled our way around the massive white tents. One area we were certain to stop at during each grand tasting was to sample the offerings of Food and Wine magazines best new chefs. Everything we tried was imaginative and delicious as well. Not coincidentally, the July issue of Food and Wine magazine offered recipes from each of these up and coming chefs.
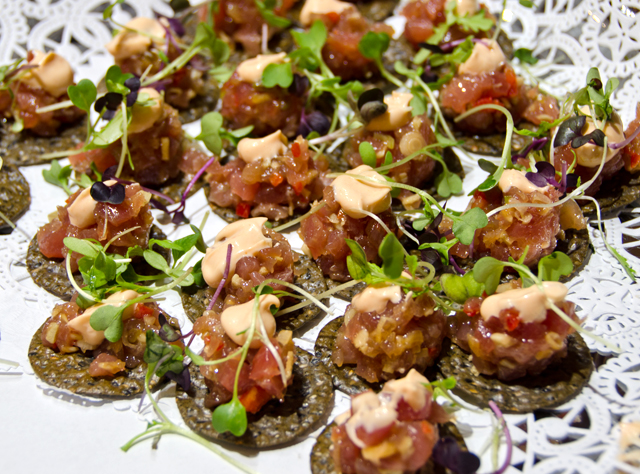
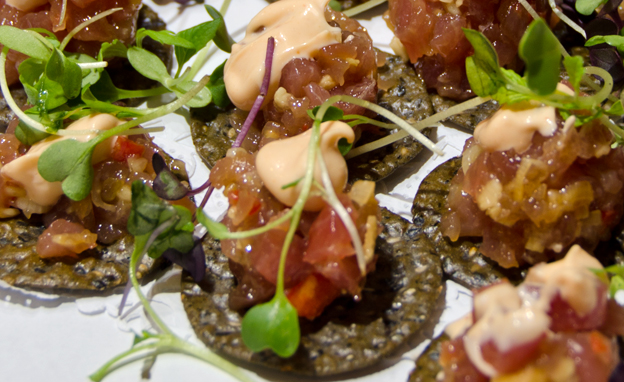
With memories of the wonderful small plates we enjoyed at the classic, it was time to try some of their dishes for ourselves. This summer I tried the rather ambitious, summer squash with lemon curd and citrus vinaigrette from chef Brad Kilgore. Joe was more interested in the Tuna Poke on Nori Crackers. This very simple version is from Ravi Kapur, chef at Liholiho Yacht Club, a San Francisco restaurant with Hawaiian, Indian and Chinese influences.
If you are not familiar with it, poke, pronounced POH-keh is a raw fish salad. Poke, means chop or chunk, which refers to the bite sized pieces the fish is cut into. It is commonplace in Hawaii, found everywhere from the deli departments of grocery stores to fine dining establishments.
The first time we tried it just for ourselves and the poke passed our taste test with flying colors. The nori crackers are a nice “cheffy” touch but speaking on behalf of the cleanup crew, messy and not necessary for the home cook. For this recipe, make the poke with sushi grade ahi tuna from the most reputable vendor you can find. The spicy mayo has only three ingredients, tamari, sriracha and mayo. So it’s very simple, finely chopped tuna, scallion, ginger, jalapeno, tamari and dark sesame oil combined in a bowl and seasoned with salt. Spoon the poke on black sesame crackers, I like the ones from Edward and Sons, easily found in large supermarkets. Dollop or pipe some of the spicy mayo on top. Garnish with some Asian microgreens and a few toasted sesame seeds. We have served it at two parties so far this year, both to rave reviews.
Tuna Poke
Serves 6-8
Ingredients for the Spicy Mayo
¼ c good quality mayonnaise
¼ t tamari
1 t sriracha (or to taste)
Ingredients for the Poke
12-oz sushi grade tuna cut into ¼-inch dice
4 t minced scallions
2 t minced peeled fresh ginger
2 t seeded and minced jalapeno
1 t tamari
½ t toasted sesame oil
Kosher salt
Black sesame crackers
Asian microgreens and toasted sesame seeds for garnish
Directions for the Spicy Mayo
In a small bowl whisk all the ingredients together until smooth.
Directions for the Poke
In a large bowl, fold all the ingredients except the garnishes together; season with salt.
Spoon the poke on the black sesame crackers and dollop with some of the spicy mayo. Garnish with sprouts and sesame seeds.
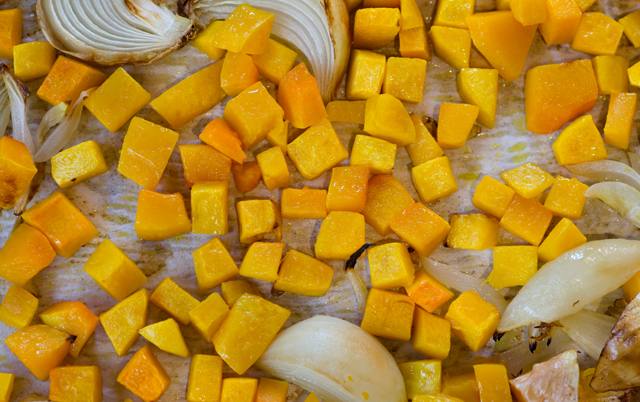
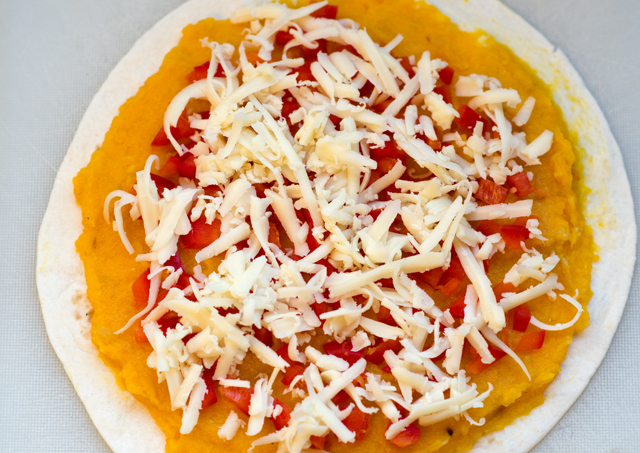
An often requested hors d’oeuvre from my catering days were butternut squash quesadillas with chipotle lime dipping sauce. They were a lighter alternative to classics like miniature beef wellingtons or scallops wrapped in bacon. A recipe I originally found in Gourmet magazine and now on the Epicurious website, it seemed to be universally liked by everyone. Crunchy on the outside, sweet roasted butternut squash and melted cheese inside, they disappeared as quickly as wait staff could get them out to hungry guests. The flavors of the roasted squash, onion and garlic are a perfect combination with creamy jack cheese, and sweet red pepper.
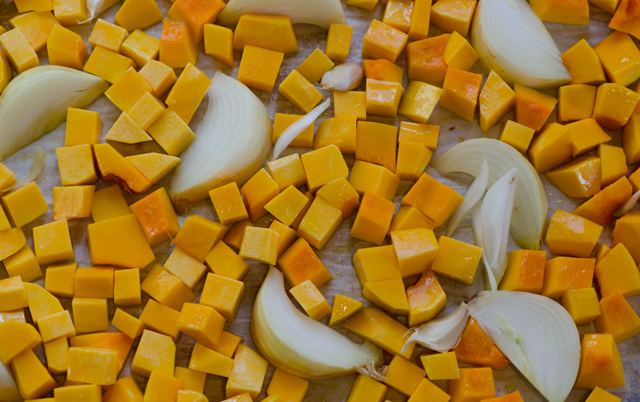
Begin the recipe by roasting squash cubes, an unpeeled onion cut in segments and several cloves of garlic. Since we had a large butternut squash crop this year, I am getting faster at peeling and chopping my own squash. But if you don’t want to take the time, you can purchase butternut squash that has already been peeled and cubed. It is considerably more expensive for the convenience. For the best results, roast cubes rather than baking squash halves . Although the roasted squash will be puréed before it is spread on the quesadilla, roasting cubed squash and the onion, allows the natural sugars in the vegetables to caramelize and enhances the flavor.
On a rimmed baking sheet, drizzle the squash cubes, onion and garlic with a neutral oil (vegetable, safflower) and toss lightly. Spread them out as evenly as possible so the squash will roast, not steam. Halfway through the cooking time use a plastic spatula to toss the cubes around a bit to maximize the surface area that gets browned. The garlic will be done first, use tongs to remove it to a work surface. Continue to roast the squash and onion until tender, as much as 15 more minutes, I like to check about every five minutes or so at this point. The squash will be soft and browned in places. Remove the peel from the onion and the garlic.
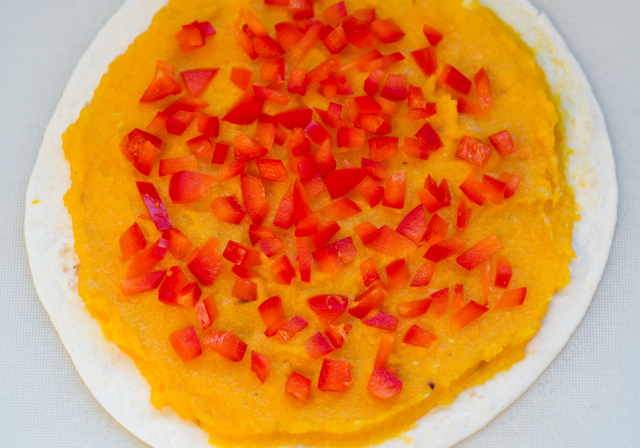
While the squash is cooking you will have time to chop the red pepper. Cut it into small dice, it will make for neater pieces when you cut the quesadillas. Place chopped pepper and jack cheese into separate bowls at your work station.
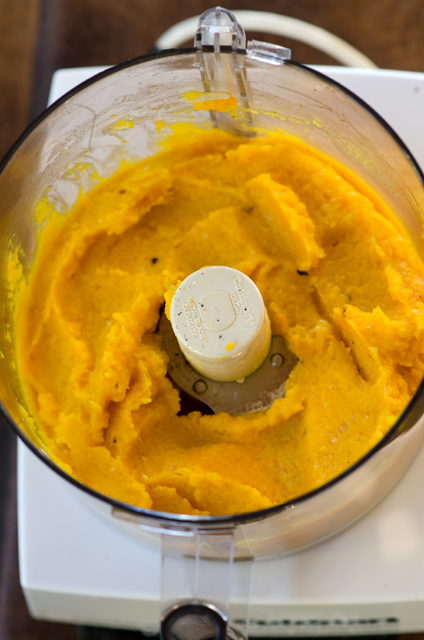
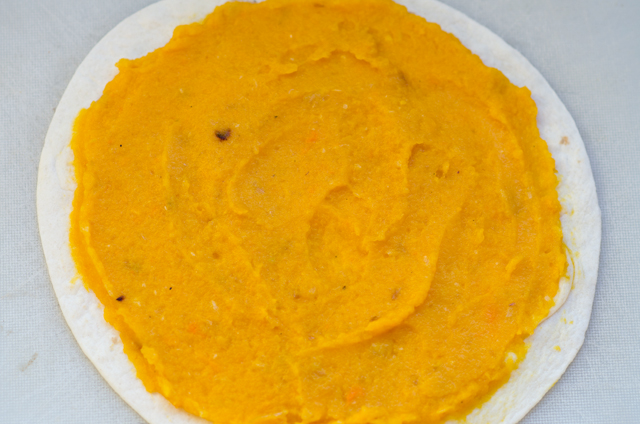
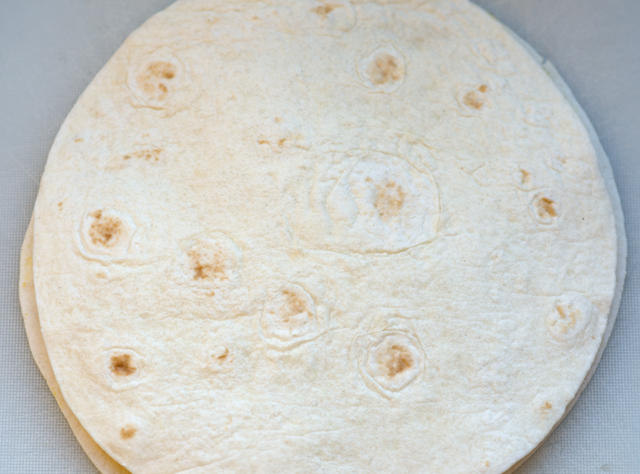
In a food processor or blender, purée the squash, onion and garlic until not quite smooth, leave it just a little chunky and transfer to a bowl. On a work surface spread out four tortillas. Next to the tortillas, place your bowls of squash puree, pepper and onion. Since you will be using one-fourth of each item on the tortillas, it’s relatively easy to “guesstimate” how much to use. Spread the puree first, evenly, almost but not quite to the edges, then sprinkle on the red pepper and then the cheese. Top with a second tortilla and press lightly to adhere. Spread a light coating of softened, not melted butter on either side of each tortilla. This step is little messy, you can put a sheet of waxed paper on two large baking sheet to cut down on the butter getting all over your work surface.
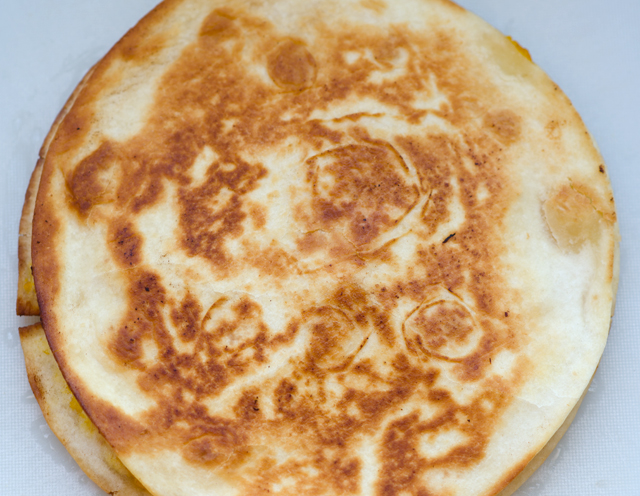
Heat a 7 inch non stick skillet over medium high heat until hot and cook the quesadillas. While the first side is cooking, press down lightly on the quesadilla so that everything sticks together, it will make the flipping easier. Cook the quesadillas about 3 minutes per side, you can lift up a little to see if you have achieved the light toasty brown color. I use a plastic spatula to flip them over, with a little help from my hand. Repeat with the remaining quesadillas and regulate the heat as necessary. Transfer to a warm oven while you are cooking the remaining quesadillas. Cut the quesadillas into 6 to 8 wedges, I have found a pizza wheel makes the neatest cuts.
Serve quesadillas with chipotle lime dipping sauce. Years ago when I first made this recipe it was difficult to obtain chipotles, now they are available at any supermarket. Chipotle peppers are smoked and dried jalapenos that are marinated in a tangy sweet red sauce. A little chipotle goes a long way. It is better to add a little at first to see how it tastes. The sour cream will mellow the chili out and the lime adds a nice contrast.
The dip can be made ahead, and even though the recipe doesn’t say so, the quesadillas can be made ahead. Reheat the quesadillas in a warm oven for about 10 minutes or until they feel hot. The important thing to remember whether fresh or reheated is to let the quesadilla rest for a few minutes before cutting. Too hot and the filling oozes out and is a mess to eat.
I have always used the recommended flour tortillas, I’m sure other varieties would work too. If you like your food spicy, pepper jack cheese could be substituted or any other good melting cheese. They would make a good vegetarian entree or a light lunch along with a green salad.
Butternut Squash Quesadillas
Makes 24 to 32 pieces
Ingredients
5 c butternut squash, peeled and cut into ¾ inch pieces
1 medium onion, unpeeled and cut into eights
1 large garlic clove, unpeeled
1 T vegetable oil
8- 5 to 6-inch flour tortillas
1 c chopped red pepper
1 c coarsely grated jack cheese
½ stick unsalted softened butter
Directions
Preheat oven to 400°F.
Arrange squash cubes, onion and garlic in a single layer on a shallow baking sheet. Drizzle with oil and toss lightly to coat.
Roast vegetables in the oven for about 15 minutes, until the garlic is softened. Transfer garlic to cutting board.
Roast squash and onion for an additional 15 minutes or until tender. Discard peels from the onion and garlic.
Purée the squash, onion and garlic in a food processor. Season to taste with salt and pepper.
On a work surface, spread out four tortillas. Spread one-fourth of the squash purée on each of the four tortilla. Sprinkle each tortilla with one fourth each of the red pepper and the cheese. Top each quesadilla with a plain tortilla, pressing gently together. Spread each side of the quesadillas with a thin layer of softened butter.
Heat a medium non stick skillet over medium high heat until hot and cook quesadillas, 1 at a time until golden, about 3 minutes on each side, transferring to a cutting board.
Cut each quesadilla into 6 to 8 wedges and serve with chipotle lime dip.
Chipotle Lime Dip
Makes one cup
Ingredients
1 canned chili in adobo, minced
2 t fresh lime juice
1 c sour cream
Directions
In a small bowl stir the chili and lime juice into the sour cream until well combined. Can be made ahead, cover and chill.
Spread out squash, onion and garlic on a parchment lined baking sheet.After roasting the vegetables.Process until not quite smooth, you want the butternut squash to have some texture.Spread the puree evenly over four tortillas to about a half inch from the edges.Next is the finely diced red pepper.Top it with an even layer of Jack cheese.And another tortilla. Press down so everything sticks together.Cook individual tortillas in a non stick pan on both sides until they are golden brown.
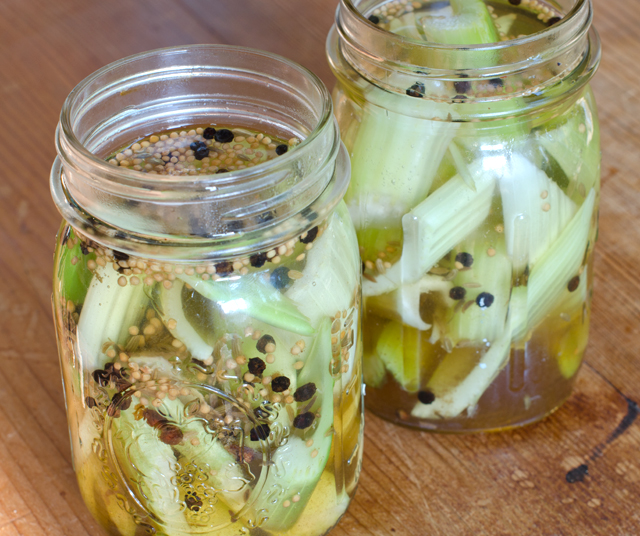
As mentioned in my previous post, from day one, the traditional accompaniments for buffalo wings have been celery sticks and blue cheese dressing. Last week, we were pleasantly surprised with the sweet pickled celery served with the buffalo cauliflower at The Vault. It requires no special canning equipment and you can make it in small batches. No delayed gratification here, you can enjoy it as soon as the canning liquid cools.
This quick and easy recipe is courtesy of celebrity Chef Gordon Ramsay. I have been enjoying the most recent season of Ramsay’s reality cooking competition, MasterChef, while I exercise on the elliptical machine. For some reason our new Xfinity cable box saved several seasons of MasterChef as something we might enjoy. Well I am happy to say “cable box, you get me.” With all of his swearing and in your face style with the contestants, I forgotten what an amazing chef he is.
This recipe is from Ramsay’s Ultimate Home Cooking cookbook and was an accompaniment for buttermilk fried chicken. Interesting, since the episode I watched today featured a fried chicken challenge for the losing team on MasterChef. No chicken here, just pickled celery.
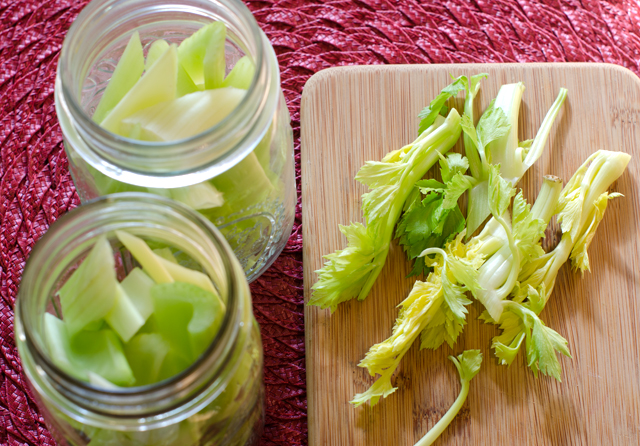
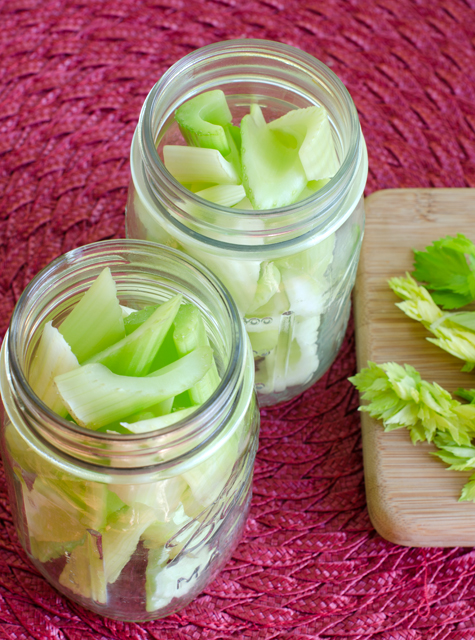
Start with a head of celery, separate into individual ribs or stalks, remove any strings and wash and rinse well. Cut celery on the diagonal into one inch lengths and place in pint jars with lids that have been sterilized with hot soapy water. Over medium high heat make a simple syrup of equal parts 1 cup water to 1 cup sugar. Stir to dissolve the sugar. Add peppercorns, herbs and vinegar and bring mixture to a boil. Carefully pour the hot liquid over the celery filled jars. The celery will cook a bit, shrink and resettle from the hot liquid. You will be able to add more celery when this happens. When the liquid cools, the celery is ready to eat. It will be even better if you have time to refrigerate it overnight.
Great as an accompaniment to buffalo cauliflower, an antipasto platter or chopped finely and added to chicken or egg salad.
Sweet Pickled Celery
Ingredients
1 medium bunch celery
1 c water
1 c sugar
1 t black peppercorns
1 t mustard seeds
1 t fennel seeds
½ t cloves
½ t salt
6 T white wine vinegar
Directions
Cut celery into individual stalks, wash and cut into one inch long diagonal pieces and place into sterilized pint canning jars. Fill the jars to the top. Keep extra celery aside to add later.
Create a simple syrup of one cup water and one cup sugar. Add to a medium size pot along with the peppercorn, mustard and fennel seeds, cloves, salt and white wine vinegar. Over medium high heat, stir to dissolve sugar and bring to a rolling boil.
Carefully pour the hot liquid into the canning jars. Wait a minute or two, the hot liquid will cook the celery a bit and shrink it, leaving more room for additional celery left over from the first step. Pack the celery in tightly, covered with the pickling liquid.
As soon as the liquid cools, the celery can be eaten. Even better if you refrigerate it overnight.
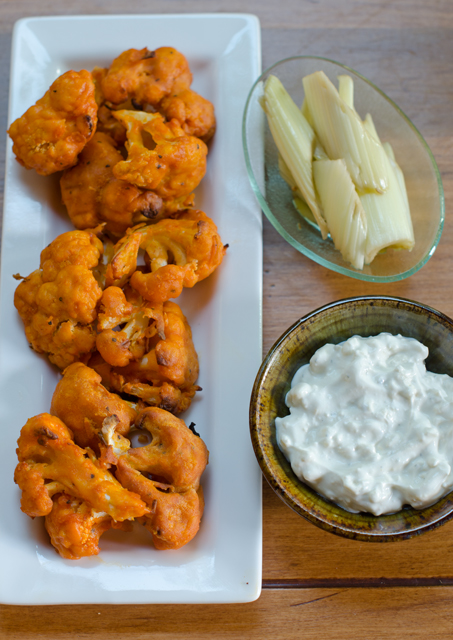
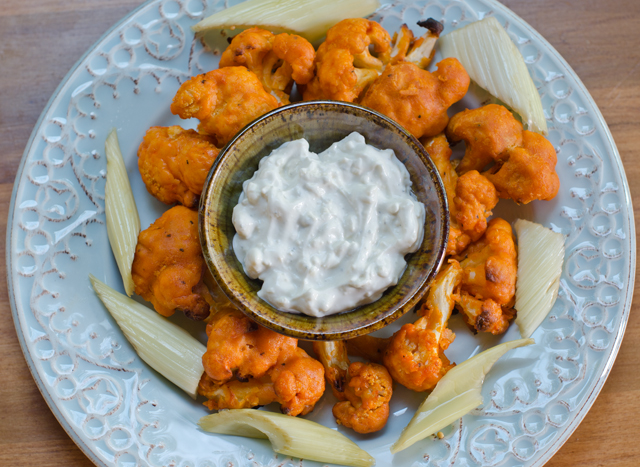
The final product served with blue cheese sauce and pickled celery.
Inspiration for the recipes at Sue’s Seasonal Palate comes from many sources. Sometimes it’s a magazine article I’ve read, an intriguing recipe from the internet or a dish I’ve recently tried in a restaurant. The latter was the case for this recipe.
Last weekend we got together with some long time friends at a popular brewpub called The Vault. It’s located in a former bank built in 1889 in the historic borough of Yardley Pennsylvania. The owners of the Vault bring their own brand of sophistication to the brewpub concept and have turned it into an experience that is unique. No deafening pop or rock music or a bank of televisions tuned to the latest sports programs, they have chosen to feature live and recorded jazz that enhances the relaxed atmosphere and is more conducive to conversation. The beer is brewed on premises and the offerings from the kitchen are made in-house or sourced locally. Both the kitchen and the brewery are open to view. Though I am more of a wine drinker I really enjoyed the Sweet Potato Ale. The menu includes a nice selection of starters along with sandwiches, interesting salads and pizzas from their wood fired oven. The menu is definitely a cut above the average pub fare and one of their appetizers made me want to recreate it at home.
Our server suggested we start off with an appetizer of buffalo cauliflower to share for the table while we were pondering our other food choices. For a brief history of the buffalo wing we only need to go back to 1964 where they originated in, no surprise here, Buffalo, New York. The story has several versions but the most popular and my favorite, is that one evening, Teressa Bellissimo, co-owner of the Anchor Bar was challenged to whip up a late night snack for her son and his friends. “Mother Teressa” found some large chicken wings that had been deemed too meaty for the stockpot. Bellissimo chopped the wings into two sections, deep-fried them and tossed them with some hot sauce. She served them with celery that was part of the Anchor Bar’s antipasto and some of the house blue cheese dressing. The wings were reported to be an immediate local success and the first official Chicken Wing Day was celebrated on July 29, 1977. Over fifty years later they are a national favorite consumed everywhere from bars, to sporting venues to “competitive eating events” like the Philadelphia Wing Bowl and Buffalo’s annual National Buffalo Wing Festival.
It wasn’t enough for cauliflower to be a substitute for mashed potatoes, couscous and even pizza crust, the versatile vegetable takes the place of chicken wings in this recipe. The Vault’s buffalo cauliflower is described on the menu as buttermilk cauliflower, house buffalo sauce, chive sour cream and the real surprise, sweet pickled celery. The calorie count for six pieces of deep-fried chicken wings at one website I looked at was 616. Though I have nothing against traditional buffalo wings I also thought this recipe was worth the somewhat healthier do-over.
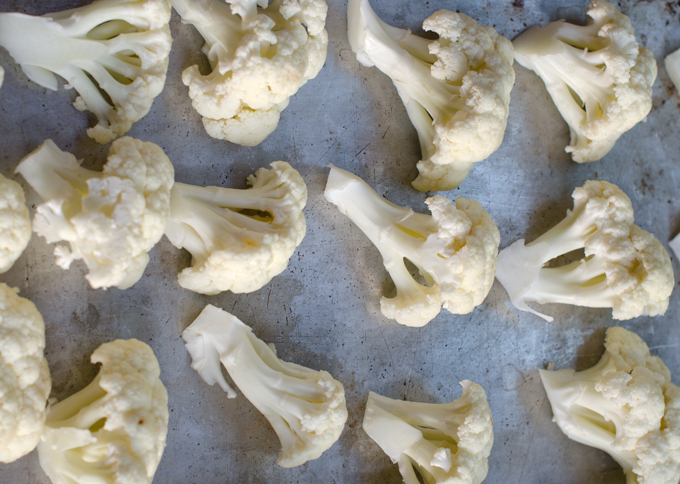
Start with a large head of cauliflower and break into chicken wing size florets. I was aiming for 1½ in by 2½ inches in length, you should have 5 to 6 cups of “wings” and probably more. Some recipes I found called for the cauliflower to be roasted with olive oil, salt and pepper. I wanted the florets to have a bit more substance so I coated the cauliflower with a simple batter of flour, milk and spices. Substitutions can be made here, almond milk for vegans, rice flour for a gluten-free diet. If you use rice flour as I did, you may need to thin the batter out a bit more.
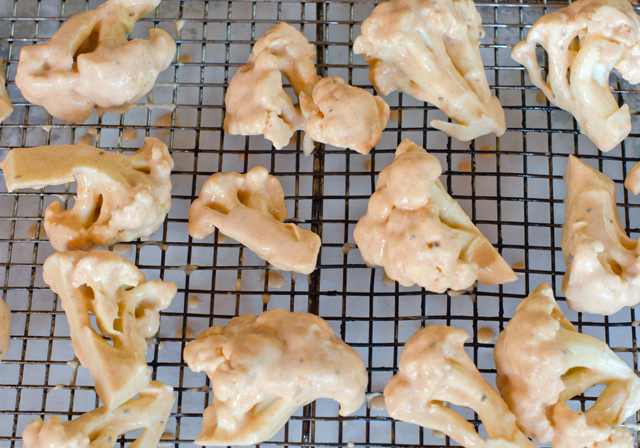
I tried at first to dip the pieces by using the handle at the bottom of my cauliflower “wing”. This turned out to be a very messy approach., It is easier to use tongs to dip the individual pieces in the batter. Dip each piece thoroughly, lift out and allow the excess batter to drip back into the bowl. To minimize clean up, line the baking sheet with foil or parchment. Since several of the blogs I read mentioned excess batter clumping up and sticking to the baking sheet, I chose to place the florets on a wire rack thoroughly sprayed with Pam over the baking sheet. Preheat oven to 425°F, (convection heat) and bake for about twenty minutes or until golden. I flipped the pieces halfway through the baking process.
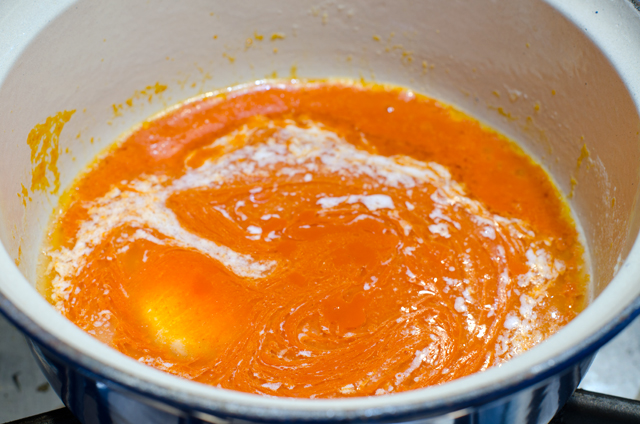
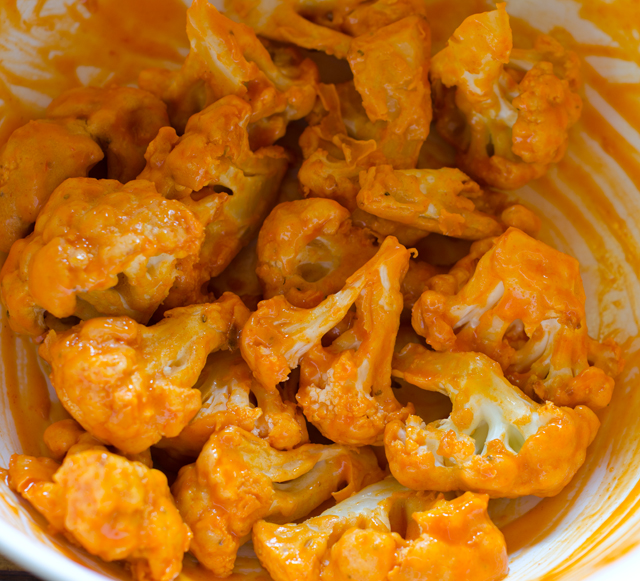
While the cauliflower is baking, melt the butter in a small saucepan over medium heat. Add the hot sauce and stir to combine. In a medium bowl, combine the cooked cauliflower and sauce, toss gently to combine. Place the cauliflower back on the baking sheet and bake for another 10 minutes, until the cauliflower begins to crisp. Serve immediately with plain or sweet pickled celery and blue cheese dressing or sauce.
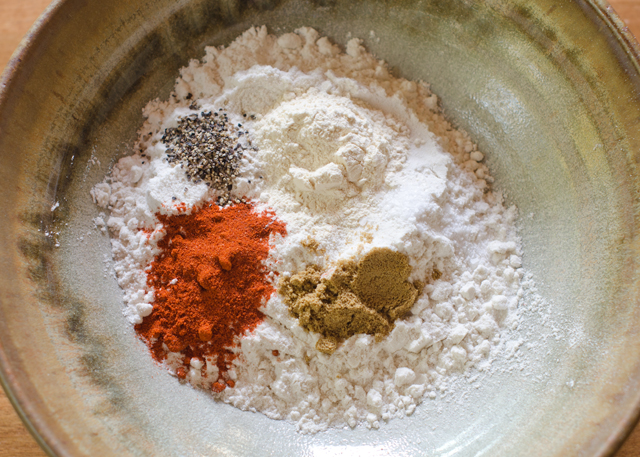
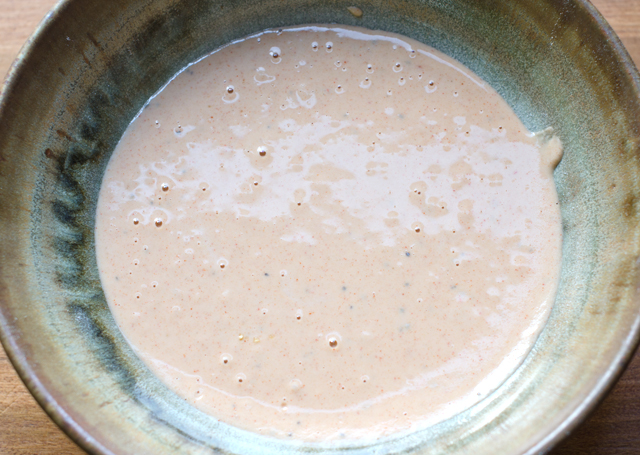
Cauliflower pieces shouldn’t be too small.Ingredients for the batter.A simple batter of flour, spices and milk.Dip cauliflower pieces in the batter. Place on a wire rack above the parchment lined baking tray for easy clean up.While the cauliflower is baking, stir together melted butter and hot sauce.After the cauliflower has baked to a golden brown, mix with hot sauce and butter. Bake until crisp.The final product served with blue cheese sauce and pickled celery.
Buffalo Cauliflower Bites
Serves four or two very hungry people
Ingredients
1 c flour, can be all-purpose, whole wheat, brown rice etc.
1 c milk, almond milk or water
1 t garlic powder
1 t cumin
1 t smoked paprika
1 tsp. salt
½ t ground paprika
1 head cauliflower,cut into florets
½ c hot sauce (I used Franks Original)
3 T butter
Directions
Preheat oven to 425°F. Line a large baking sheet with parchment paper or foil. Spray a large wire rack with cooking spray to place over the baking sheet.
Combine flour, water, spices, salt and pepper in a large bowl and stir until smooth. Using tongs, dip cauliflower pieces in the batter. Coat well, lift out and allow the excess to drip back into the bowl.
Arrange cauliflower in a single layer on the wire rack that is on top of the baking sheet. Bake 20 minutes or until golden.
In a small saucepan, melt the butter, add the hot sauce and stir to combine. Pour evenly over cauliflower. Toss gently until cauliflower is evenly coated.
Bake 10 minutes or until cauliflower begins to crisp, rearranging florets occasionally if needed. Serve with celery and blue cheese dressing.
I love recipes that use the bounty of the garden in a single dish and ratatouille accomplishes that in a very delicious way. In case you didn’t know, ratatouille (rat-uh–too-ee), is a summer vegetable stew that had it’s origins in the Provencal city of Nice in southern France. Traditionally, each ingredient, eggplant, zucchini, peppers, onion, garlic and tomatoes, is cooked separately on the stove top and tossed together at the very end. So it’s really a sauté that is presented as a stew.
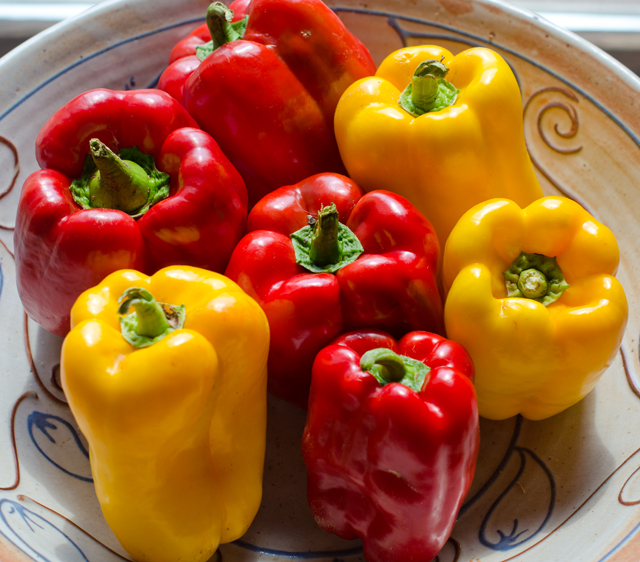
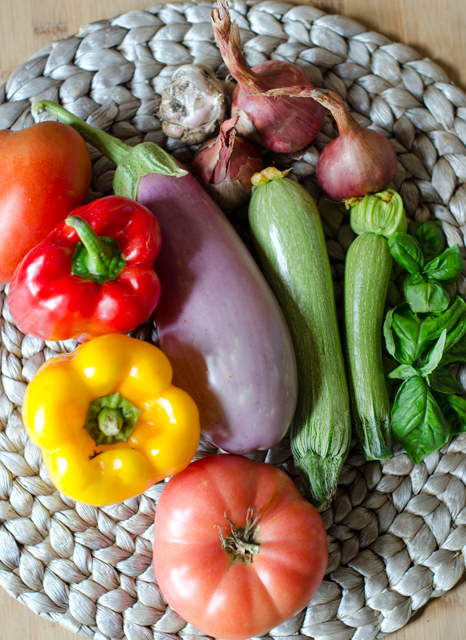
In this version the vegetables are tossed in olive oil and roasted in the oven, eliminating the time cooking over a hot stove. Our red and yellow bell pepper harvest is the earliest I can remember. They must like the hot temperatures and abundant rainfall this year. The orange Valencia peppers are not far behind. I prefer using Chinese or Japanese eggplants for their thin skin and milder flavor. I substituted shallots for onions since our harvest was so plentiful this year. The garlic was also from the garden, a first for us.
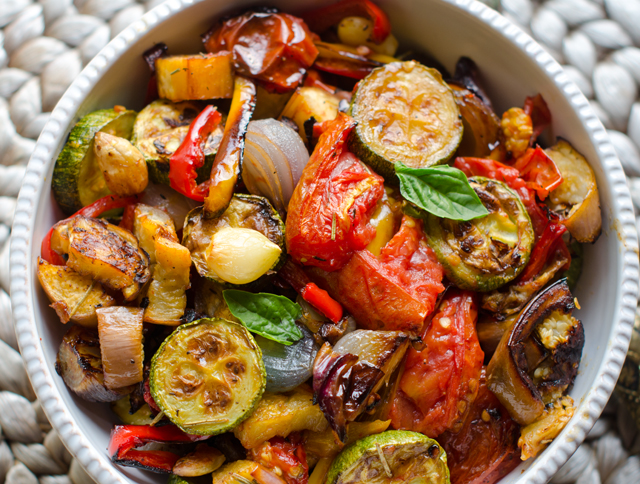
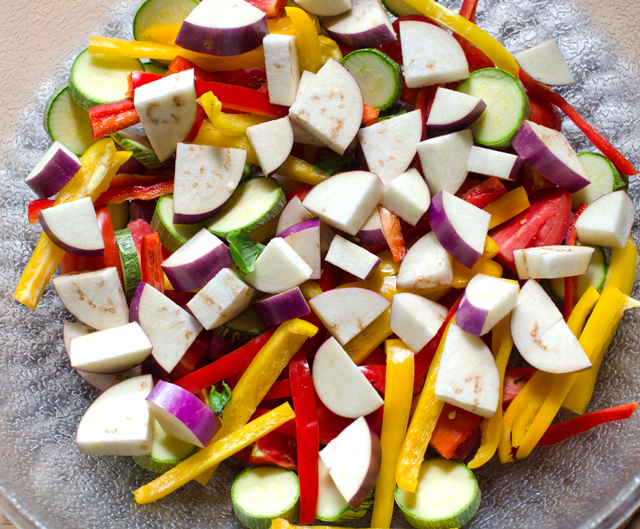
Cut the vegetables in similar size so they will get done at the same time. The smaller the cut, the less time it will take to cook. Lightly toss the vegetables with about a half cup of a good quality olive oil. Spread them out evenly over two large baking sheets. Rotate the baking sheets top to bottom and front to back half way through the cooking time. Roasting allows the vegetables to retain their shape and they take on a delicious toasted flavor. Move the cooked vegetables to a large serving bowl and tossed with a basil chiffonade. Chiffonade, translates “made of rags” from the French (of course!). It is a technique for cutting herbs and vegetables into long thin strips, in this case, basil.
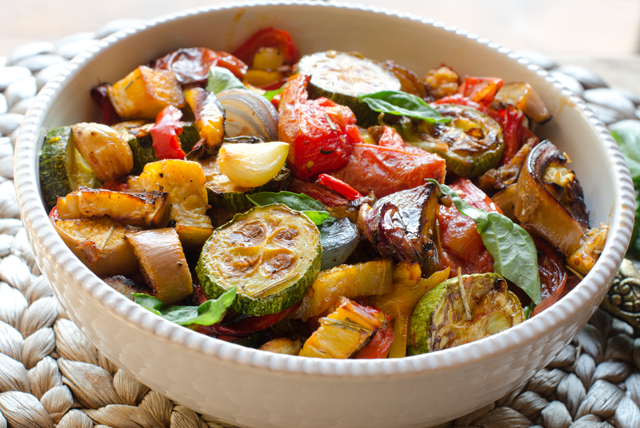
Ratatouille can be used in many ways, a side dish, a topping for bruschetta, chicken or fish. We used it as the topping for an impromptu flatbread pizza. It can be served hot or cold and is even better the next day, if it lasts that long.
This season is the earliest we have had ripe bell peppers. I guess they really like the hot and rainy weather.Ingredients for the ratatouille, I substituted shallots for onions since Joe just harvested his crop.
Oven Roasted Ratatouille
Serves four (or two very generously)
Ingredients
2 small onions (about 5 oz. each), cut into ¼-inch-thick half-moons
2 bell peppers, red, yellow or orange, cored, seeded and cut into ¼-inch lengthwise strips
Japanese eggplant, about 1 lb, cut crosswise ½ inch thick rounds, then sliced in quarters
1 lb small to medium zucchini, trimmed and cut into ½ inch thick rounds
10 whole cloves garlic, peeled
½ c extra virgin olive oil, and more as needed
1 t chopped fresh rosemary
Kosher salt and freshly ground pepper
1½ lbs medium tomatoes (about 4), cored, and cut into 1/2-inch chunks
¼ c basil cut into a chiffonade
Toss the ingredients in a large bowl with olive oil, salt and pepper.Transfer the vegetables to two large baking sheets.
Directions
Place racks in the top and bottom thirds of the oven. Heat to 400°F. If using convection heat, 375°F.
In a large bowl, toss the onions, peppers, eggplant, zucchini, tomatoes, garlic, olive oil, rosemary, and 1-1/2 tsp. kosher salt and a grind of pepper. Spread the vegetables evenly over two large 12 x 16 sheet pans. Don’t spread the vegetables too thin or they may burn (they shrink a lot as they cook).
Roast, stirring the vegetables a few times and swapping the positions of the pans once, until the vegetables are slightly collapsed or shriveled, starting to brown, and very tender, about 35 minutes for my oven. It could take 10 minutes longer if you are not using convection heat.
Scrape all the vegetables and any juices into a serving bowl. Toss with the basil, taste for seasoning, and serve.
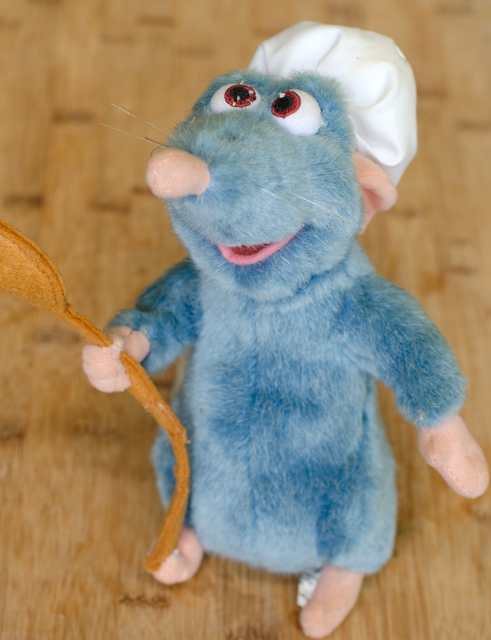
Ratatouille makes a great pizza topping.How could I resist posting a picture of Remy, the star of the movie Ratatouille who presides over my kitchen from his perch above.