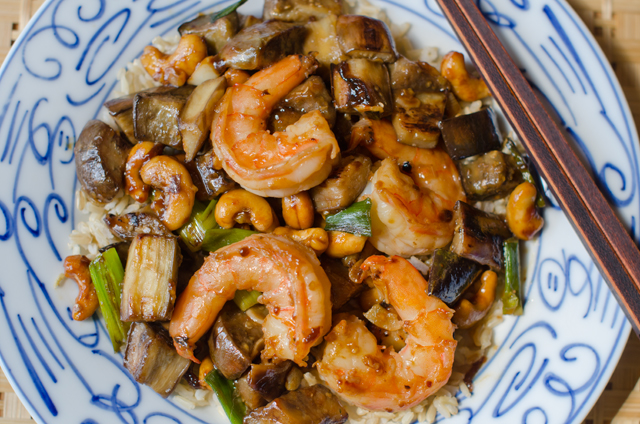
August 21, 2017 Stir Fried Shrimp with Eggplant and Cashews

It’s a great time of year to try out some new eggplant recipes. Whether from the farmers market, your local CSA or your own garden, freshly harvested eggplants are at their best. Our garden has produced an amazing array of colorful eggplants this summer. Bright fuchsia Asian Bride, slender dark violet Farmer’s Long, pure white Charming, beautifully variegated Listada de Gandia, all the varieties we have harvested this year have thin skin and minimal seeds.

During the eggplant season I have time to revisit the classics, eggplant Parmesan, caponata, moussaka and to look for new ways to serve this versatile vegetable that’s actually a fruit, but I digress. Stir fry recipes are quick and relatively easy, so why not shrimp and eggplant? Cook’s Illustrated magazine tests recipes countless times to understand how they work and in turn, offer the best version. So I knew I could try their recipe for stir fried shrimp with garlic, eggplant and cashews with confidence.

In perfecting this recipe they discovered several things that make this recipe stand out.

Soaking the shrimp for 30 minutes in salt, oil and aromatics yields a deeply flavored and tender finished product. The salt enters the flesh, allowing the shrimp to stay juicy. The oil picks up the flavor of the aromatics, in this case garlic, and distributes it over the shrimp. They also address the issue of the typical home stove that lacks the high heat of restaurant burners. This problem is solved by cooking the components of the dish in batches and trading in the wok for a skillet to ensure maximum surface area for even cooking.

As with all stir fry dishes, everything should be ready and portioned out when you start the recipe. Soak the shrimp in the seasoned brine. Whisk the sauce together next. My personal trick here is when you are making a sauce with both wet and dry ingredients I measure out the dry ingredients first since they will not stick to the measuring spoon, like soy sauce does.

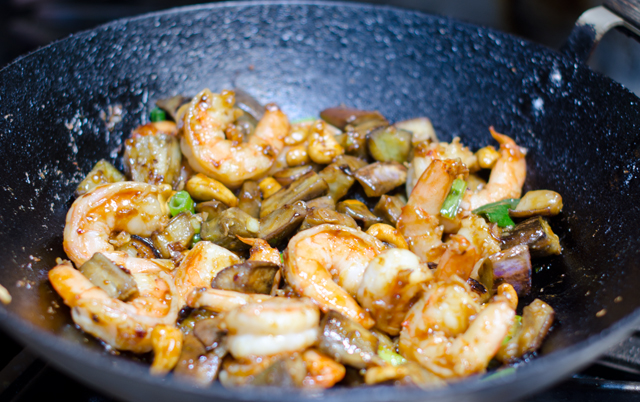
The components of the dish are cooked in batches. First, the eggplant and scallion greens are cooked until lightly browned and transferred to a bowl. Next in are the aromatics, thinly sliced garlic and scallions. Cook until browned, don’t burn that garlic! To the aromatics, add in the shrimp. The shrimp are cooked to a light pink on both sides, then the sauce is added to the pan. Raise the heat to high to thicken the sauce and finish cooking the shrimp. The eggplant is returned to the skillet and tossed, ready to absorb the flavors of the sauce.

I made some changes to the original recipe. I used one tablespoon of sugar instead of two in the sauce, the oyster sauce adds its own sweetness. I also used more eggplant than called for since it cooks down considerably.  Serve with white or brown rice, this is a dish that is quick to execute and quite delicious.
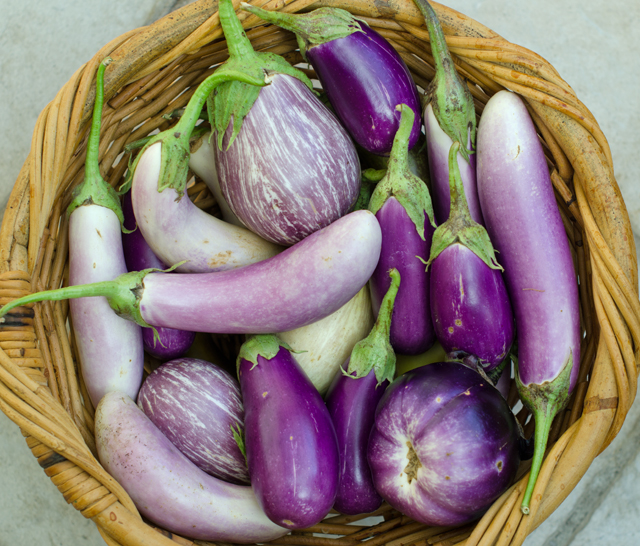
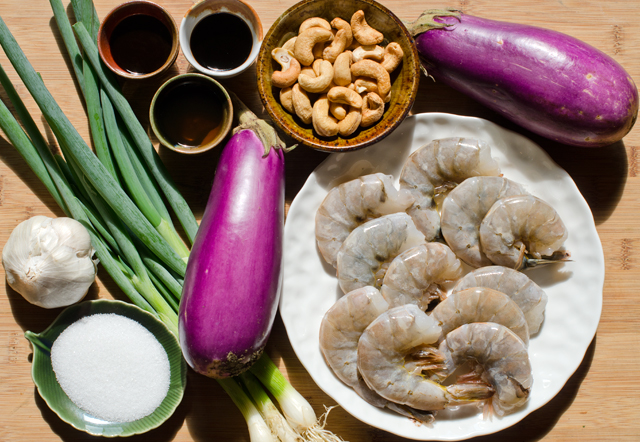
A recent harvest of all the varieties of eggplant we are growing.

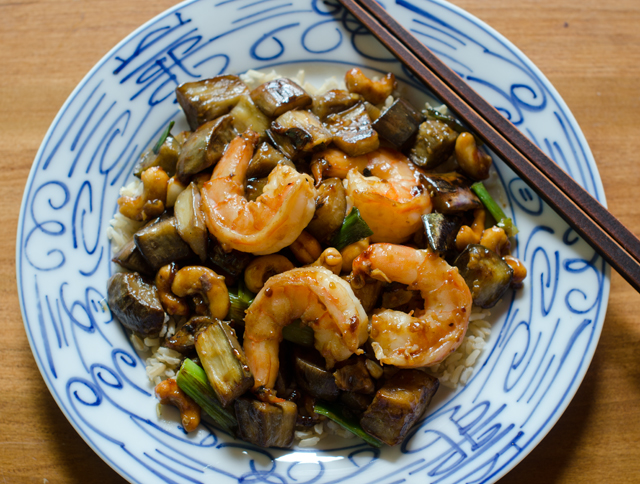
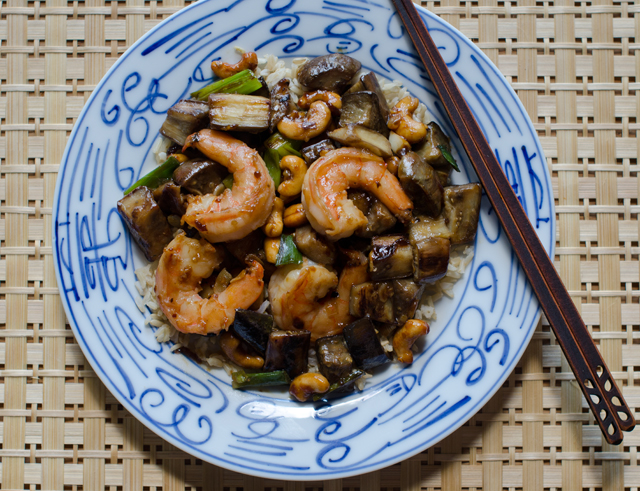
Stir Fried Shrimp with Eggplant and Cashews

adapted from Cooks Illustrated

Serves 4

  • 6 medium garlic cloves, 1 minced or pressed through garlic press, 5 thinly sliced 
  • 1 pound extra-large (21-25) shrimp, peeled, deveined, and tails removed 
  • 3 T vegetable oil 
  • ½ t table salt 
  • 2 T soy sauce (I use low-sodium Tamari)
  • 2 T oyster sauce 
  • 2 T dry sherry or Shaoxing wine
  • 1 T sugar 
  • 1  T toasted sesame oil
  • 1 T white vinegar (I use rice vinegar)
  • 1/8 t red pepper flakes 
  • 2 t cornstarch 
  • 6 large scallions, greens cut into 1-inch pieces and whites sliced thin 
  • ½ c cashews, unsalted 
  • 1 medium eggplant (about 3/4 pound), cut into 3/4-inch dice 

Directions

  1. Combine minced garlic with shrimp, 1 tablespoon vegetable oil, and salt in a medium bowl. Let shrimp marinate at room temperature 30 minutes.  Depending on your particular brown rice (regular, instant, etc.) start your rice as appropriate.
  2. Meanwhile, whisk soy sauce, oyster sauce, sherry, sugar, sesame oil, vinegar, red pepper flakes, and cornstarch in small bowl. Combine sliced garlic with scallion whites and cashews in another small bowl.  Heat 1 tablespoon oil in 12-inch nonstick skillet or a wok over high heat until just smoking. Add eggplant and cook, stirring frequently, until lightly browned, 3 to 6 minutes. Add scallion greens and continue to cook until scallion greens begin to brown and eggplant is fully tender, 1 to 2 minutes longer. Transfer vegetables to medium bowl.
  3. Heat remaining tablespoon oil to now-empty skillet/wok. Add cashew mixture and cook, stirring frequently, until just beginning to brown, about 30 seconds. Add shrimp, reduce heat to medium-low, and cook, stirring frequently, until shrimp are light pink on both sides, 1 to 1½ minutes. Whisk soy sauce mixture to recombine and add to skillet/wok.  Return to high heat and cook, stirring constantly, until sauce is thickened and shrimp are cooked through, 1 to 2 minutes. Return vegetables to skillet, toss to combine, and serve.
July 21, 2017 Spicy Chipotle Shrimp with Zucchini and Chorizo


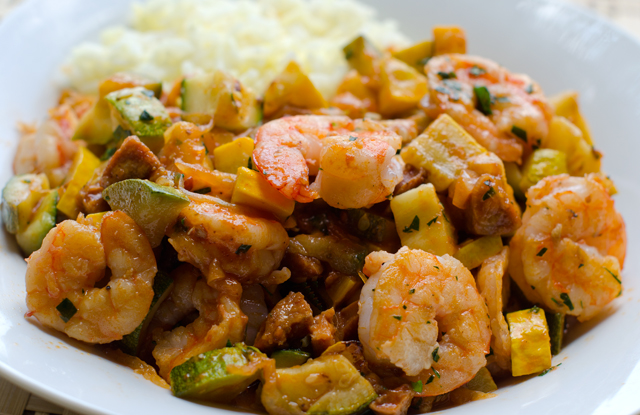
Spicy chipotle shrimp with chorizo and zucchini is an entrée that is flavorful, easy to prepare and uses only one pan. If that isn’t enough, it’s a great way to use that July abundance of zucchini and yellow squash from your garden or farmers market.

I always have some frozen shrimp on hand for a quick dinner. Though my local seafood market on occasion has fresh (never frozen) Florida shrimp, in my area of the country (mid-Atlantic) frozen shrimp is not a bad thing. The shrimp you see sitting on ice at the supermarket seafood counter have been thawed out. Convenient yes, but you can’t be certain how long they have been sitting there. I prefer to buy individually quick frozen (IQF) shrimp in 1 or 2 pound plastic bags, then I can just defrost what I need in 15-20 minutes. I prefer larger shrimp because there is less of a chance to overcook them. Look for the count of shrimp per pound, in this case 21-25 count, rather than a size designation like extra-large or jumbo.

Easy peel, meaning the shell is split down the back and deveined is the easiest way to make this or any recipe calling for shrimp. Always devein shrimp before cooking, many an eliminated Chopped contestant rues the day they didn’t. It’s not hard to do, either use a small pairing knife or the tool specifically made for that purpose. It’s not actually a vein but the shrimp’s digestive tract and when it is dark in color,  it is filled with grit. Removal is not essential, nor will it make you ill, deveining just makes for a more attractive presentation.

Pat the shrimp completely dry with paper towels before cooking. Any extra moisture on the surface of the shrimp prevents them from searing and browning. Preheat your skillet for a few minutes before adding the oil. Wait a minute until the oil is shimmering before adding the shrimp. Place the shrimp in a single layer, leaving a little space between each. Don’t be tempted to flip the shrimp too soon, give them time to brown on the first side, a little pink will start to show, now flip. You want the shrimp to be slightly underdone since they will be added back to the pan later.

Transfer the shrimp to a plate, add the second 2 tablespoons of oil to the pan along with the diced chorizo. Spanish chorizo is a dried and cured (fully cooked) pork sausage seasoned with smoked paprika, garlic and other herbs. There is also Mexican chorizo that comes in casings and must be cooked before eating. It is used in tacos, tortillas and often served at breakfast with eggs. I would definitely say that the Spanish chorizo is the best choice here.

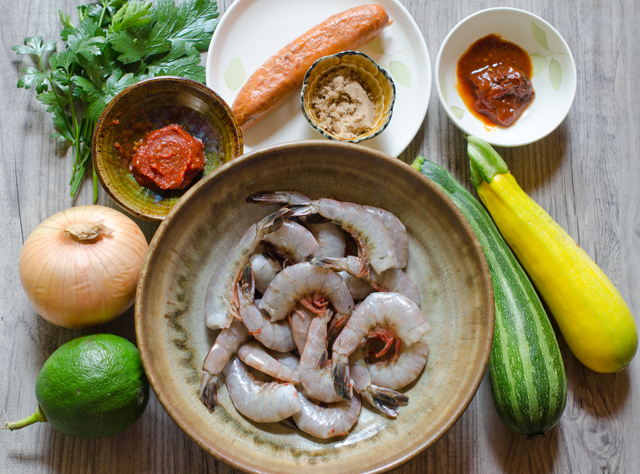
Add the cubed zucchini, onion and yellow squash, cook until the zucchini starts to brown, 3-4 minutes. Now it’s time to add the broth mixture. A chipotle chili and adobo sauce give it a real kick and the tomato paste and brown sugar mellow out the heat. Chipotles are small jalapeños that are dried by a smoking process that gives them a dark color and a distinct smoky flavor. They are canned in a red sauce, adobo, that has a smoky flavor as well. Start with the quantity given in the recipe and if you really like it hot, add a little more. Just remember it’s easier to add heat than take it away. Since you will not be using the entire can, store the remaining chilis in adobo in a well labeled plastic container or zip-loc bag in the freezer. I wasted too many opened cans of chilis before I got in this habit.

Bring the sauce to a boil, then reduce it to medium low and add the shrimp back in along with the lime juice and parsley. Cook for an additional 2-3 minutes, the zucchini should be tender and the shrimp opaque throughout. You can check for doneness by cutting a shrimp in half at its thickest point. It should be creamy white, firm and springy but still moist. You can add some strips of red pepper to the recipe and swap out cilantro for the parsley. Give a final seasoning with salt, pepper and more lime juice. Serve immediately garnished with the rest of the parsley on a bed of rice.


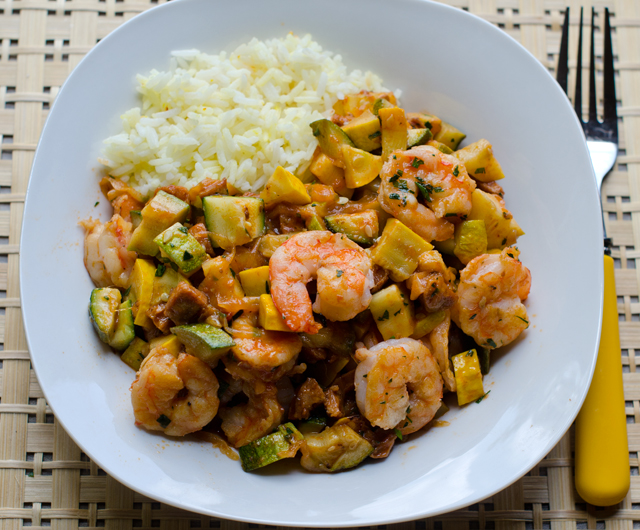
Spicy Chipotle Shrimp with Zucchini and Chorizo

Serves 2-3

Ingredients

  • ½ c low-salt chicken broth
  • ½ small chipotle, seeded and minced, plus 2 T adobo sauce (from a can of chipotles in adobo
  • 1 T tomato paste
  • 1 t brown sugar
  • 1 lb shrimp (21-25 per lb), peeled, deveined, rinsed and patted dry
  • 1 t kosher salt; more as needed
  • Freshly ground black pepper
  • ¼ c olive oil, divided
  • ¼ lb chorizo, cut into ¼ inch dice, a little less than a cup
  • 3 c combination of zucchini and yellow squash, cut into ½ inch dice
  • 1 cup thinly sliced yellow onion
  • ¼ c chopped parsley or cilantro
  • 2 T fresh lime juice; more as needed

Directions

  1. In a one cup measure, whisk together chicken broth, chipotle, adobo sauce, tomato sauce and brown sugar.
  2. Sprinkle the shrimp with a ¼ t salt and a few generous grinds of black pepper. Put a skillet (not non-stick) over medium high heat, when the skillet is hot, add 2 tablespoons oil. When it starts to shimmer, add the shrimp in a single layer. Cook the shrimp undisturbed until it browns nicely, a little less than 2 minutes. Flip and brown the shrimp on the other side, about 1 ½ minutes. Transfer the shrimp to a plate, it should be slightly under cooked.
  3. Add the remaining 2 tablespoons oil and the chorizo to the pan and cook, tossing occasionally, until it starts to brown, about 1 minute. Add the zucchini, yellow squash and onion, sprinkle with a little salt. Cook, tossing frequently, until the zucchini starts to brown and is tender, about 4 minutes.
  4. Add the broth mixture to the skillet and bring to a boil. Reduce the heat to medium low. Stir in the shrimp, half of the parsley and the lime juice.
  5. Cook, stirring often, until the zucchini and squash are tender and the shrimp are opaque, 2-3 minutes. Cut one in half to check if necessary. Season to taste with salt, pepper and more lime juice. Serve immediately, sprinkled with the remaining parsley.
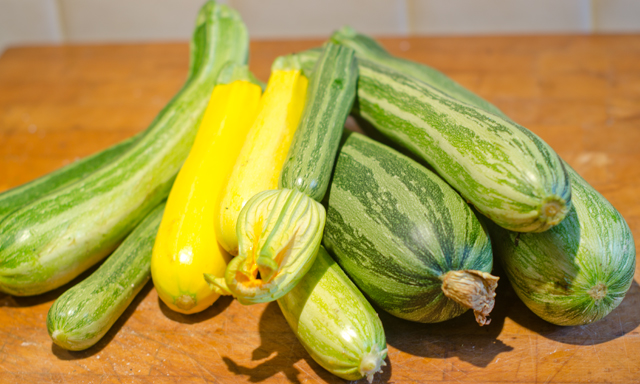
One day’s pick of zucchini and yellow squash.


March 7, 2017 Pad Thai, a light version

Since Joe has already lost ten pounds on a South Beach phase 1 diet, I am looking for ways to adapt recipes we already like to fit the plan. My latest “rework” is Pad Thai. Pad Thai is a stir fried noodle dish, typical food cart fare in Thailand that over the last thirty years has gained popularity worldwide.

Most of the Thai cookbooks I own are over thirty years old and I was surprised to see that I rarely found a listing for Pad Thai in the index. What I did find were recipes for “Noodles, stir fried Thai style”. I learned that Pad Thai was made popular in the 1930’s and ’40s as part of an attempt to modernize and revitalize the economy of the country. The full name of the dish is  Kway teow phat Thai. Kway teow means rice noodles in a Chinese dialect and phat Thai means Thai-style, hinting at the possible Chinese origins of the dish.

The dish is a harmonic combination of flavors, umami (fish sauce), sour (lime or tamarind paste), salty (soy sauce or tamari) and sweet (palm sugar). Fish sauce used to require a special trip to the Asian grocer, now it can be found in most large supermarkets. I prefer tamari in recipes over soy. A by product of miso production, it is thicker and less salty than soy sauce. Palm sugar is a sweetener made from the sap of the flowers of the coconut palm tree. The taste is similar to brown sugar with caramel and butterscotch notes. Tamarind comes from the pods of a large tropical tree and adds a pleasant sweet tart note to dishes. . If you look at the list of ingredients on a Worcestershire sauce bottle, tamarind extract is one of the ingredients. Lime juice is usually substituted when tamarind isn’t available. Another recipe I found in my research called for apricot or prune puree if a substitute for tamarind was needed. One well known cookbook author recommended ketchup as a substitute for tamarind, texture yes, taste, not like any ketchup I’ve tried.

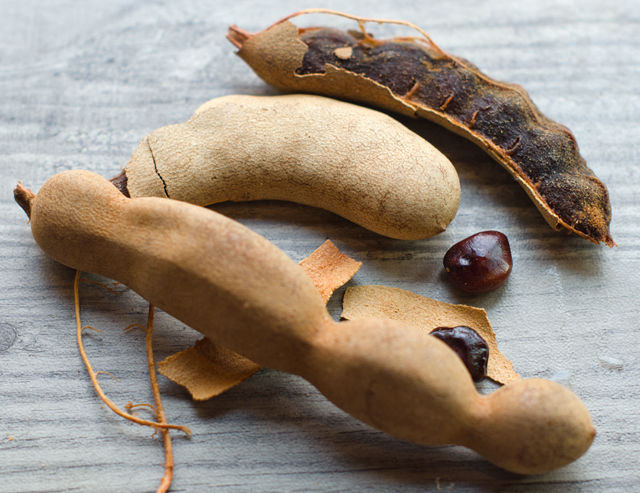
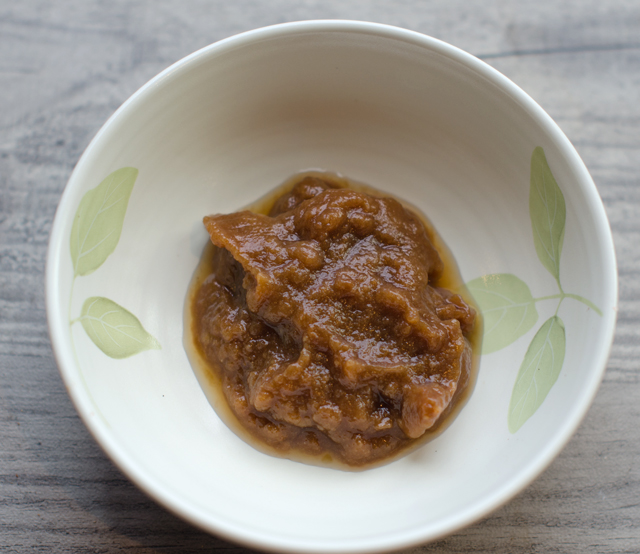
Several months ago I bought a container of tamarind pods with no specific reason other than to possibly use them some day. This recipe presented my opportunity, but I really had no idea how to extract the pulp from the pods. My first step was to remove the dried outer pods. Don’t expect them to come off neatly, they will break off in pieces. When the dried brown pods are removed, the sticky pulp is exposed along with strings that run the length of the pods, remove as many of the strings as possible. In the middle of the pulp are the smooth shiny seeds that almost look like they have been polished. After reading several articles I came up with the approach that worked for me. I put the pulp that still contained the seeds in a bowl. I covered the pulp with warm water for about twenty minutes. Then I put the softened pulp in a sieve and pressed on the solids with a pestle to extract as much pulp as possible. I got a decent amount of pulp and some tamarind water too. Next time I think I will take the easy route and order tamarind paste on line.

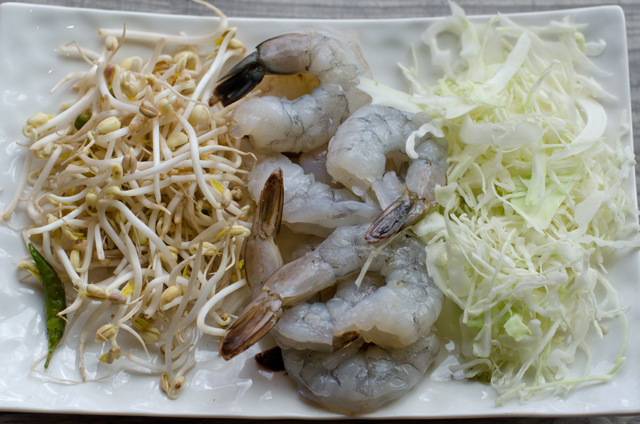
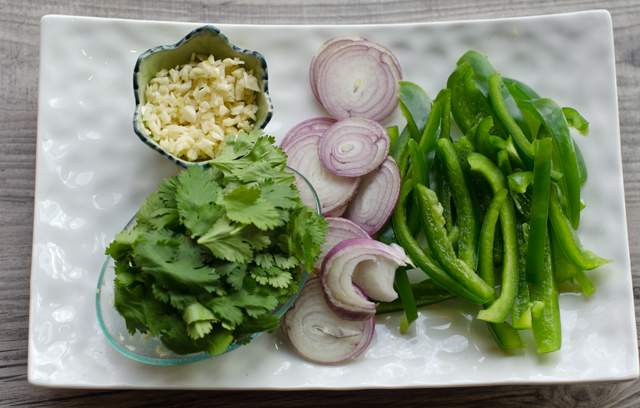
My version substitutes shredded cabbage for the traditional rice noodles since they aren’t part of phase one of the diet. Cabbage provides a good base for the dish and adds sweetness too. Noodles made from zucchini or daikon radish would work here too. I used shrimp as the protein in this dish, but chicken and either of those combined with tofu works as well. The secret to making any stir fry dish is to have all your components ready before you start cooking. It comes together in less than a half hour and I must say we enjoyed it very much.

Tamarind pods
Tamarind puree

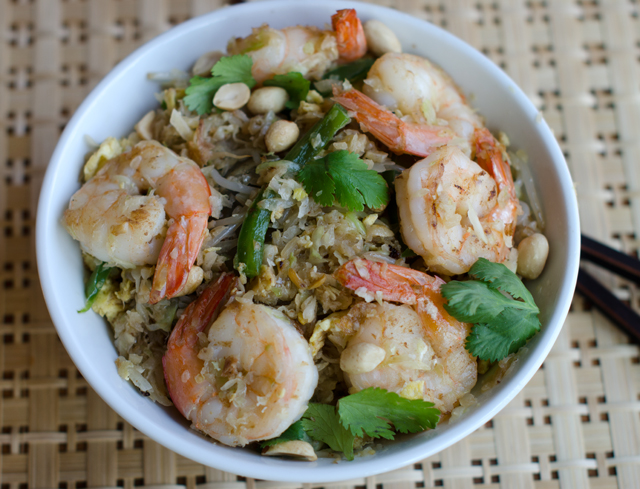
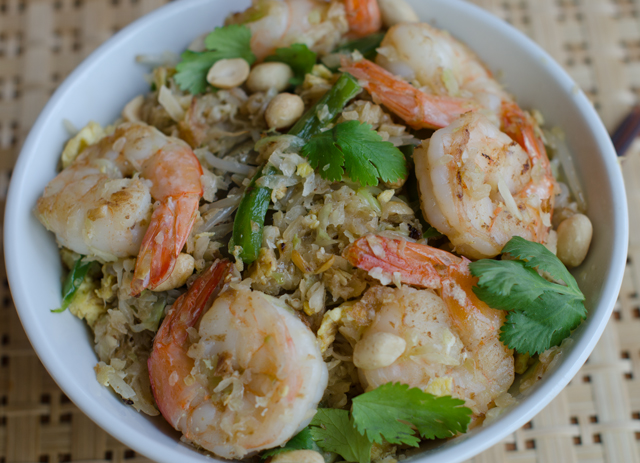
Pad Thai

Serves 3-4

Ingredients

  • 6-8 cups finely shredded green cabbage
  • 5 T peanut or neutral oil like grapeseed (divided)
  • 2 eggs, lightly beaten
  • 4 garlic cloves, finely minced
  • 12 oz to 1 lb shrimp, peeled and deveined
  • 1 green pepper, stemmed, seeded and finely sliced
  • 1 large shallot, finely sliced
  • 1 cup of mung bean sprouts, rinsed and trimmed
  • 2 t or more of nam pla (Thai fish sauce)
  • 2 t tamarind paste or lime juice
  • 1 T tamari or  soy sauce
  • ¼ c chopped peanuts
  • ¼ c cilantro leaves
  • 1-2 Thai chiles (optional)
  • 1 lime cut into wedges

Directions

  1.  Heat 2 teaspoons cooking oil in a large wok over medium high heat. Swirl the oil around to coat the entire pan, then add the cabbage. Season with some fresh ground pepper and stir fry until barely crisp tender, 3-4 minutes. Remove to a  bowl.
  2. Add a little more oil to the wok and add the eggs, and scramble quickly with a fork. Cook until set and remove to a cutting board and cut into thin strips.
  3. Add oil as necessary and add the garlic and the shrimp and cook, stirring occasionally, until the shrimp lose their grey color, 2-3 minutes. Remove from the pan with a slotted spoon to a plate.
  4. Add the shallot and green pepper to the wok. Season with salt and pepper and stir fry and stir fry until crisp tender, 4-5 minutes.
  5. Raise the heat to high and add a tablespoon or more of oil as needed Add the cabbage, eggs, shrimp and sprouts to the wok. Season to taste with the nam pla, tamari and tamarind or lime juice. Cook until all the ingredients are heated through.
  6. Add the chopped peanuts, cilantro leaves and optional pepper. Toss once or twice and transfer the contents of the pan to a serving platter. Serve with lime wedges.

February 20, 2017 Shrimp Fried Cauliflower Rice

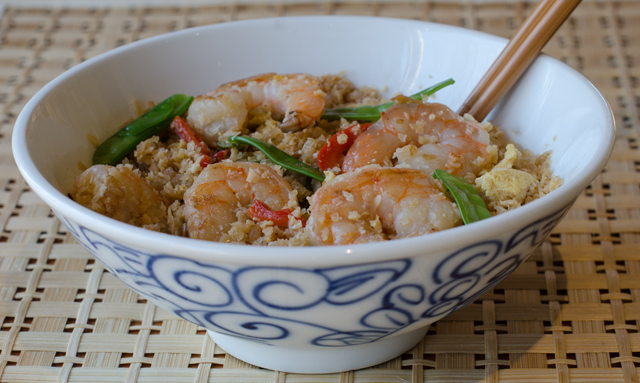
Cauliflower florets are a low carb substitute for white rice in this savory one pot, or should I say one wok, dish. It’s low glycemic, gluten-free and South Beach Diet friendly. Packed with juicy shrimp and colorful vegetables, this recipe is perfect for an easy go-to weeknight meal.

Cauliflower is sold by the head, not by weight. Depending on the time of year a standard head can vary greatly in size. Cauliflower is a cool weather crop in our area and harvested in the fall. When they appear at the farmers markets they can be huge, five pounds or more. In the winter months, imports from the West Coast are fairly small.  The head I used weighed in at 2.13 pounds and half of the head made 5 cups, just what I needed for this recipe.

Stores like Trader Joe’s are now selling prepackaged cauliflower rice, but it’s easy enough to make your own. Cut the cauliflower into florets by quartering the head through the stem end and cut away the piece of core from each quarter. Then cut the cored cauliflower into florets. You can use a box grater with medium-sized holes or the food processor fitted with the grater blade. With both techniques you are aiming for little pieces the size of rice granules. I like to press out any additional moisture from the rice by placing it in a clean cotton tea towel and squeezing to remove remaining water. No excess moisture equals a dish that won’t turn out soggy.

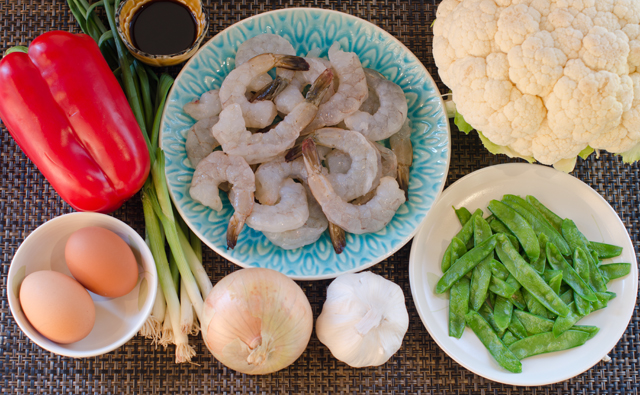
As with all stir fry preparations, all of your ingredients should be ready to go when it’s time to cook. Trying to stay with a South Beach friendly preparation I used red pepper strips and snow peas. The peas were frozen from last year’s garden and perfect for a meal like this. Other possibilities are peas, carrots, and water chestnuts. Heat your wok, the pan is hot enough when a bead of water instantly sizzles and evaporates on contact. Once this happens, add one tablespoon of a neutral oil; peanut or canola are fine here.  Swirl it around to thoroughly coat the pan. Add the shrimp all at once and spread them out over the pan so they are not overlapping. Cook shrimp on first side for one minute then flip and cook for thirty seconds. The shrimp should be almost cooked but not quite, they will finish cooking when you add them back to finish the recipe. Remove shrimp to a plate.

Add the eggs in next, stir and break them apart to get scrambled egg pieces. When the eggs are not quite cooked through, add them to the plate with the shrimp. Keep warm.
Wipe out your pan with a paper towel and return it to high heat. Add the second tablespoon of oil and swirl to coat the pan. The aromatics are in next, onion, garlic and ginger. Cook, stirring often until the onion is translucent, 3-4 minutes. Stir in your choice of vegetables and cook for another 3 minutes. Add the scallions and cook for 15 seconds. Add the cauliflower rice to the pan and sprinkle the tamari and sesame oil over the rice. Warm the cauliflower rice through and finally add in the shrimp and eggs. Let the shrimp and eggs heat back up and finish cooking. Toss to mix the rice evenly with all the ingredients. Taste for seasoning, adding more tamari and sesame oil if desired. Serve hot.

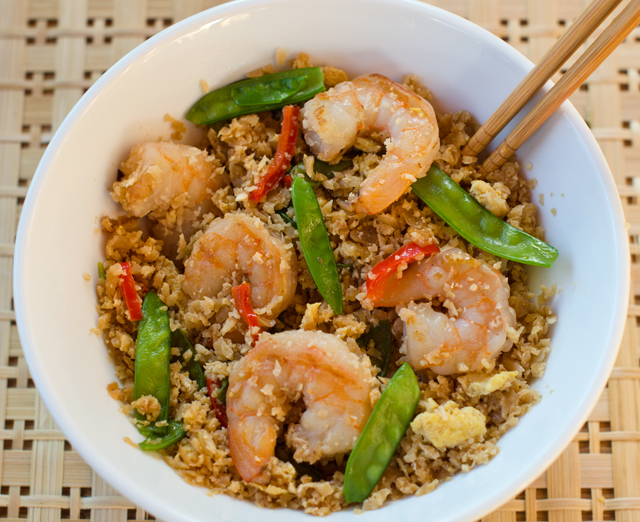
Shrimp Fried Cauliflower Rice

Ingredients

  • 1 medium head of cauliflower
  • ¾ to 1 lb medium uncooked shrimp, shelled and deveined
  • ½ t kosher salt
  • Black pepper
  • 2 tablespoons peanut oil, divided
  • 2 eggs, beaten in a small bowl
  • 1 small onion, finely chopped
  • 2 cloves garlic, minced
  • 4 scallions, minced
  • 1-2 c vegetables, I used a combination of snow peas and red pepper slivers. Peas, carrots, water chestnuts can be used.
  • 1 T tamari and more to taste
  • 1 teaspoon and more toasted sesame oil


Directions

    1. For the cauliflower rice, cut the cauliflower in half, cut out the core and discard. Cut the cauliflower into chunks.  Place the cauliflower into a food processor and pulse until it’s the consistency of grains of rice. Alternately you can a small handheld cheese grater or a chef’s knife. Set aside 4-5 cups for this recipe.
    2. Season shrimp with salt and pepper, set aside.
    3. Heat a wok or large sauté pan on high heat. When the pan is hot enough for a bead of water to instantly sizzle and evaporate, add 1 tablespoon of the oil and swirl to coat pan.  Add the shrimp, quickly spreading out around the pan so that they are not overlapping. Cook the shrimp untouched for a minute then flip over and let the other side cook for 30 seconds, or until about almost cooked through. Remove the shrimp from the pan onto a plate, leaving as much oil in the pan as possible.
    4. Turn the heat to medium high and let the pan heat up again. Pour in the eggs, stirring in a quick motion to break up and scramble the eggs. When the eggs are almost cooked through, scoop out of the wok onto the same plate as the cooked shrimp.
    5. Use a paper towel to wipe the pan clean and return to high heat with the remaining 1 tablespoon of cooking oil, swirling to coat. When the oil is very hot, add the garlic, ginger and onion to the skillet, and cook, stirring often, until onions have become translucent, about 3-4 minutes. Stir in red pepper strips and snow peas, and cook, stirring constantly, until vegetables are tender, about 3-4 minutes.
    6. Add green onions and stir fry until fragrant, about 15 seconds. Add in the cauliflower rice and stir well to mix in the green onions throughout.
    7. Drizzle the sauce all around the rice and toss. Add the cooked eggs, shrimp and sesame oil, tossing to mix the rice evenly with all of the ingredients. Finish cooking the shrimp and eggs and let everything heat back up again. Taste for seasoning and add additional tamari and sesame oil if desired. Serve hot.


January 31, 2017 Baked Shrimp Toasts

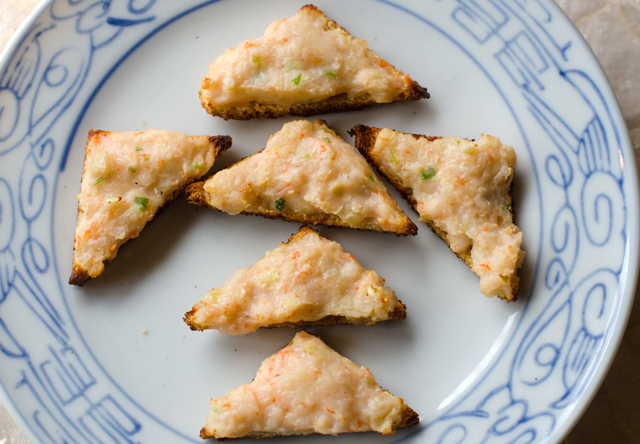
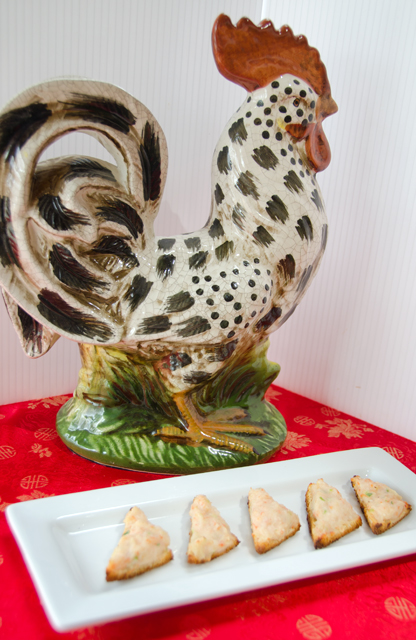
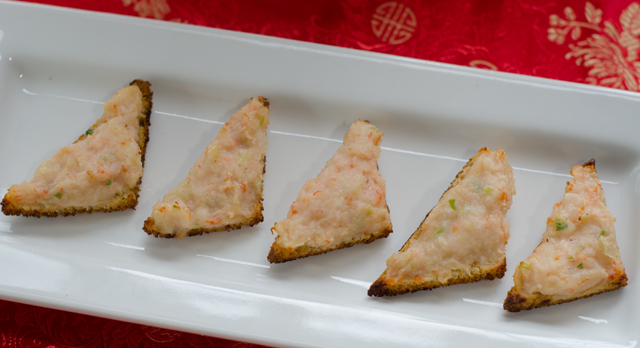
Shrimp toasts, bite-sized triangles of bread topped with shrimp paste are a popular dim sum item and a new addition to our Chinese New Year celebration. It is said the dish originated in Guangzhou (Canton) in China nearly a hundred years ago. There are others who claim it is a hybrid of a traditional Chinese shrimp recipe and bread, not native to China but introduced by foreign travelers to Hong Kong. I chose to use a recipe from Susannah Foo, a popular and highly acclaimed Philadelphia chef who eponymous restaurant closed in 2009. Shrimp toasts are often fried, this version is baked and can be made ahead and frozen, a big plus when you are serving an extensive menu. This year we celebrate the year of the rooster, which comes after a monkey year and before a dog year. Roosters are said to honest, bright, communicative and ambitious.

Baked Shrimp Toasts

Makes 3 dozen or more

Ingredients

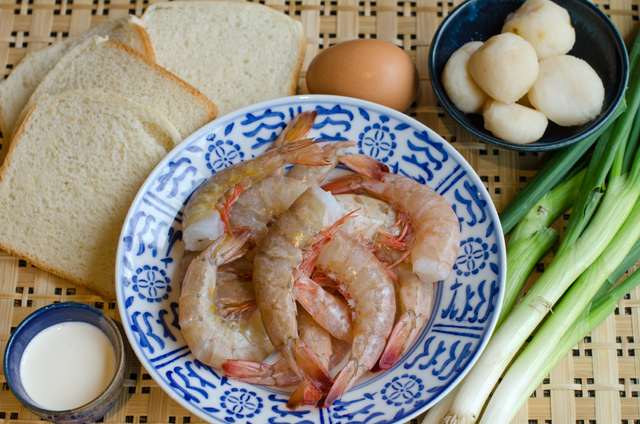
  • 10 to 12 slices thinly sliced white bread, crusts removed
  • 1 large egg white
  • 1 lb medium or large shrimp, peeled and deveined
  • 2 T heavy cream
  • 1 T vodka
  • 1 t kosher salt
  • ½ c chopped water chestnuts
  • 2 scallions, minced

Directions

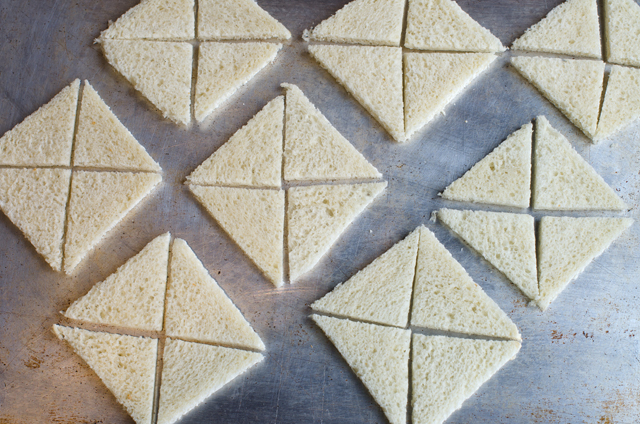
  1. Preheat oven to 250° Cut each piece of bread into 4 triangular pieces. Place on a baking sheet and bake for about twenty minutes, until the bread is dry but not browned; leave oven on.
  2. While the toast is drying, beat the egg white lightly. Dry the shrimp well with a paper towel and place in a food processor; puree.
  3. Add the egg white, cream, vodka and salt. Process until just pureed. Transfer to a bowl.
  4. Add the water chestnuts and scallions to the shrimp mixture and mix just until all the ingredients are combined.
  5. If you are baking the shrimp toasts immediately, increase the oven temperature to 375°F and coat a baking sheet lightly with non stick spray.
  6. Spread 2 heaping teaspoons of the shrimp mixture on each piece of bread. Repeat with the remaining triangles.
  7. At this point, the shrimp toast can be frozen for later use. Place the triangles on baking sheets and freeze. Once frozen, remove from the baking sheets, place in freezer bags and return to the freezer.
  8.  Bake frozen shrimp toasts directly from the freezer, about 10 minutes, the shrimp will be cooked through, all the ingredients hot and the toast is golden brown on the bottom. Triangles that were not frozen will take a little less time.

April 21, 2015 Shrimp Scampi

DSC_2352a

It’s not every day that fresh Florida shrimp are available at my local fish market, that was reason enough for me to prepare a dish that showcases their pristine sweet flavor, shrimp scampi.

Most “fresh” shrimp  sold in supermarkets are shipped frozen and thawed for the seafood counter. That means the shrimp you will find with the frozen seafood is exactly the same and maybe even a little cheaper than what is being presented as fresh, it just hasn’t been sitting on a bed of ice all day. Thawed shrimp are a convenience to use only when you need them immediately.  The shelf life of thawed shrimp is only a day or so at best, while frozen shrimp retain their quality for several weeks in the freezer.

Most shrimp sold today are IQF or individually quick frozen, so it is easy to remove the amount of shrimp you need for a recipe. The best way to thaw shrimp is to put it in the fridge overnight or for a quicker thaw, put it in a colander of cold water and let some cold water trickle into the bowl while the excess goes down the drain. The shrimp should be ready to cook in about 15 minutes.

Shrimp are sold by the count, the number of shrimp to make a pound, so the lower the count, the bigger the shrimp.  The names that correspond with the sizes range from extra colossal, under 10 per pound to extra small, 61 to 70 shrimp per pound. The descriptions are not standardized however so one vendor’s extra large could be another’s jumbo. So it is always best to stick with looking at the count when buying shrimp.

According to Italian cookbook author Lidia Bastianich, shrimp scampi is one of the those creations in which immigrant cooks adapted Italian techniques to American ingredients. Scampi is the Italian word for a prawn or langoustine, more closely related to lobsters.   One traditional way of preparing them in Italy was to sauté them with garlic, onion, olive oil and white wine.  When Italians immigrated to America they adapted the preparation, substituting  the more readily available shrimp. The dish was called shrimp scampi and the name stuck, meaning shrimp prepared in the scampi style.

This recipe is from Melissa Pellegrino, cookbook author and contributing editor to Fine Cooking magazine,. What makes this interpretation of shrimp scampi unique is the addition of shrimp stock which further enhances the flavors in this dish.

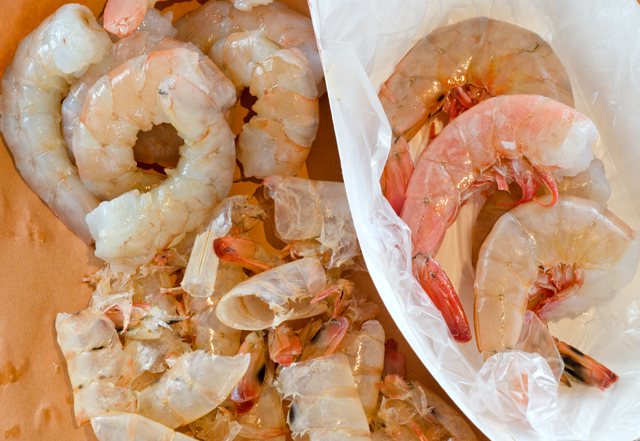
Begin by peeling the shrimp, you can leave the tails on for presentation if you choose. The next step is to devein the shrimp, which isn’t a vein at all but the digestive tract. It is not absolutely necessary and you can eat shrimp with the vein still in, but one thing I know for certain, it will always get you Chopped. To devein, make a shallow slit down the middle of the back which exposes the intestine. Lift the vein out with the tip of a paring knife and wipe the blade with a clean paper towel. You can also do this under cold running water. There are also inexpensive tools that allow you to devein in one fell swoop.

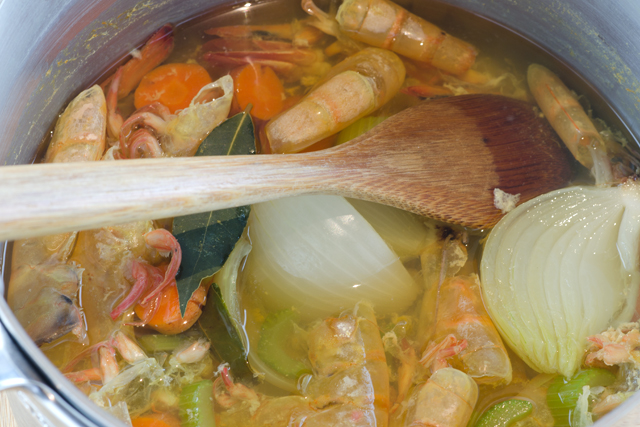
The shrimp stock is made with the shrimp shells along with the usual ingredients used in stock making, onion, celery, carrot and a bay leaf. The ingredients are brought to a boil, simmered and strained. Only ¼ cup of the stock is needed so the rest can be frozen for future use.

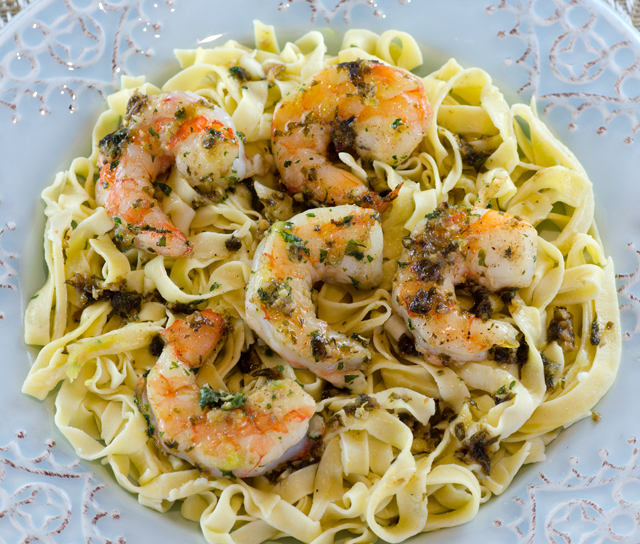
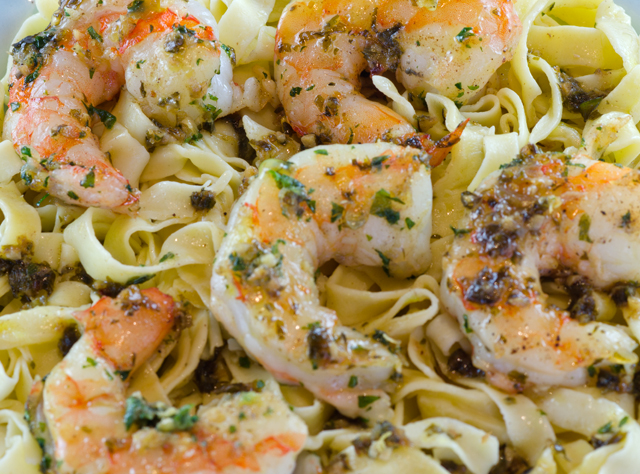
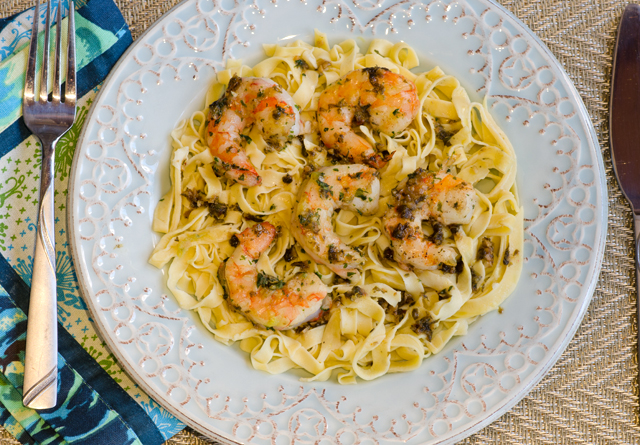
Aromatic garlic, parsley and lemon peel are added to melted butter in the skillet. The shrimp are cooked in this mixture until they turn pink. Wine and shrimp stock are reduced to make a sauce with a final additon of pepper flakes, lemon peel and, of course, more butter. Served over pasta, rice or just accompanied with some crusty bread, shrimp scampi is a quick delicious entree easy enough for weeknights and elegant enough for special occasions.

DSC_2338a
Shrimp shells are used to make a flavorful stock.
Shrimp shells are combined with onion, celery, carrot and a bay leaf.
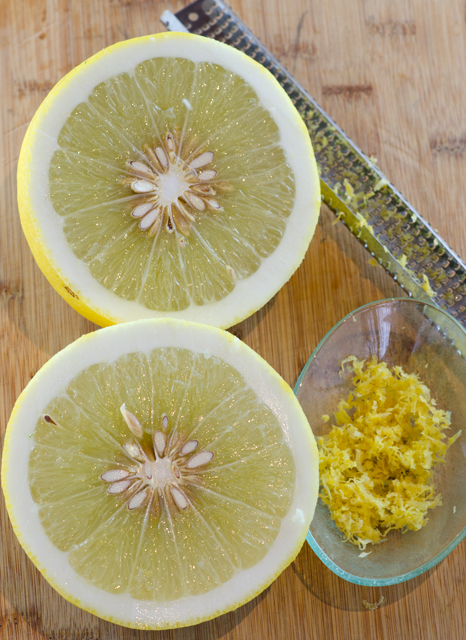
I used the juice and peel from our Ponderosa lemon.


Shrimp Scampi

Serves four

Ingredients

  • 1½ lb. 16-20 count shrimp (these may be called jumbo or extra jumbo) peeled and deveined (shells reserved) tails may be left on if you choose
  • 1 medium carrot, chopped
  • 1 medium rib celery, chopped
  • 1 small yellow onion, halved
  • 1 bay leaf
  • Kosher salt and freshly ground pepper
  • 4T unsalted butter
  • ¼c finely chopped Italian parsley
  • 2T minced garlic
  • 1T finely grated lemon zest
  • ¼c dry white wine
  • 1t fresh lemon juice
  • Crushed red pepper flakes
  • Lemon wedges for serving

Directions

  1. In a 4-quart saucepan , combine the reserved shrimp shells, carrot, celery, onion and bay leaf. Add four cups of water. Bring to a boil over medium-high heat, reduce to a simmer and cook for 30 minutes.
  2. Strain the stock through a fine-mesh sieve and reserve ¼cup for the scampi. The rest of the shrimp stock can be frozen for future use.
  3. Pat the shrimp dry and season with ½teaspoon salt and a grind of pepper.
  4. In a 12-inch heavy skillet, melt 3Tof the butter over medium heat. Add the parsley, garlic and lemon zest and cook, stirring occasionally until the garlic is lightly golden, 1-2 minutes. Raise the heat to high, add the shrimp and cook until they start to turn pink, about 1 minute. Add the wine and cook until reduced by half, 1 to 2 minutes. Add the lemon juice and crushed red pepper flakes and stir to coat.
  5. Transfer the shrimp to a serving plate using a slotted spoon. Whisk the remaining 1T butter into the sauce. If the sauce seems too thin, simmer for a minute or so to thicken. Season to taste with salt and pepper, pour over the shrimp and serve with lemon wedges on the side.

DSC_2350a

DSC_2354a