June 24, 2018 Carrot Top Chimichurri Sauce

When I exercise on our elliptical machine I catch up on my version of “must-see t.v.”. Right now I am watching the current season of Iron Chef America. For those not familiar with the show, two chefs,  a world-class “Iron Chef”  competes against an up and coming chef. The chefs create a menu in one hour from appetizer to dessert that prominently features that week’s secret ingredient. Two weeks ago it was ” Battle Kobe Beef”. This weekend I tuned into “Battle Carrot”. The show is fun to watch and also stimulates my own creativity in the kitchen. I’m pretty sure when I went to the farmers market after my workout I had carrots on the brain. So along with all the other goodies I found, a lovely bunch of recently harvested carrots went into my bag.

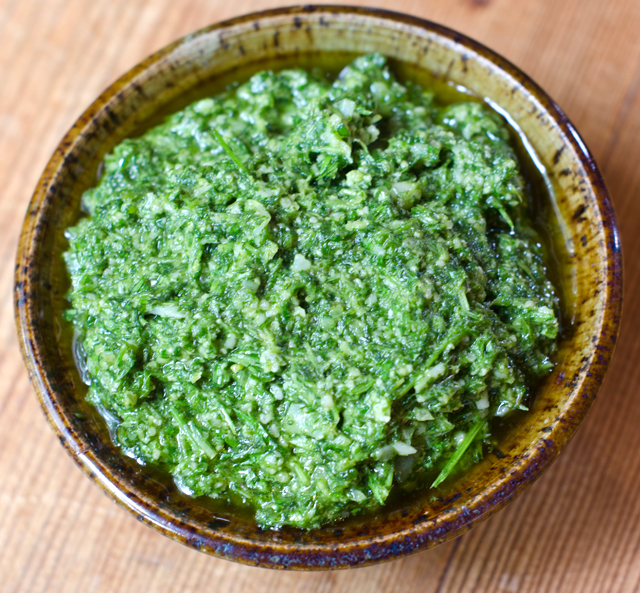
My plan was to roast the carrots and in the spirit of “root to stem” cooking, use the greens as well. Carrot tops are edible and rich in vitamins A,C, calcium, iron and dietary fiber. They have an earthy, herbal, slightly bitter taste. Carrot top pesto was a success last year, this time I was looking for something a little bit different. Chimichurri sauce was a natural for this dish. This rich herby sauce from Argentina was already a favorite of ours. I have served as an appetizer at parties, spooned over rare beef tenderloin on crostini. It was easy enough to swap out the parsley in the original recipe for carrot tops. After all they are both members of the same plant family, along with fennel, dill  and coriander.

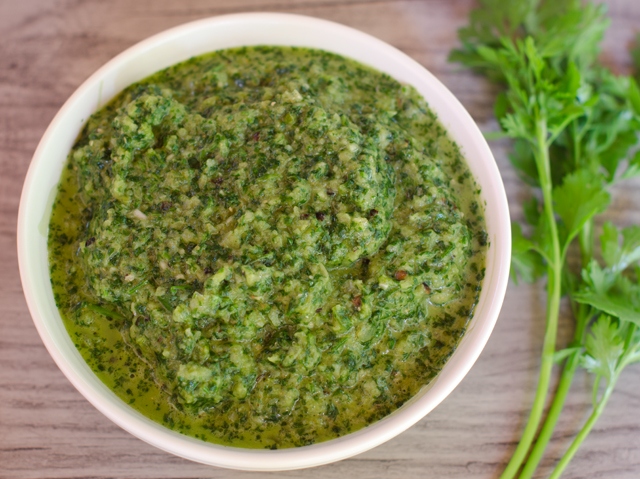
Wash the greens well and pat dry with paper towels. The most time-consuming part of this recipe is separating the leaves from the slightly harder stems. Aim for a lightly packed cup, if you want this thicker to use as a dip, either cut back on the olive oil or add a quarter cup more of leaves. Blend all of the ingredients until smooth in a food processor. Taste and adjust the seasonings. Give the chimichurri at least an hour to fully combine the flavors, over night is even better. If you don’t have carrot tops, substitute the traditional parsley or a combination of parsley and cilantro.

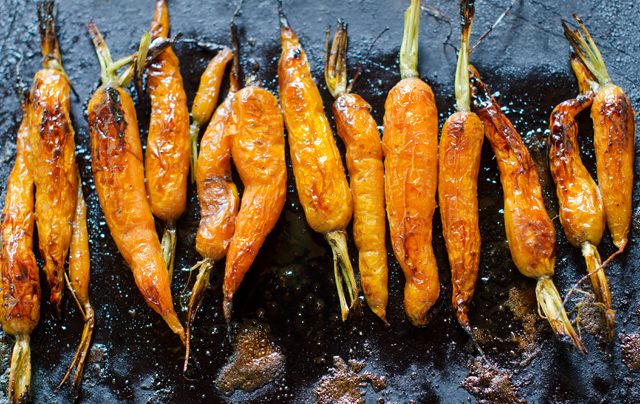
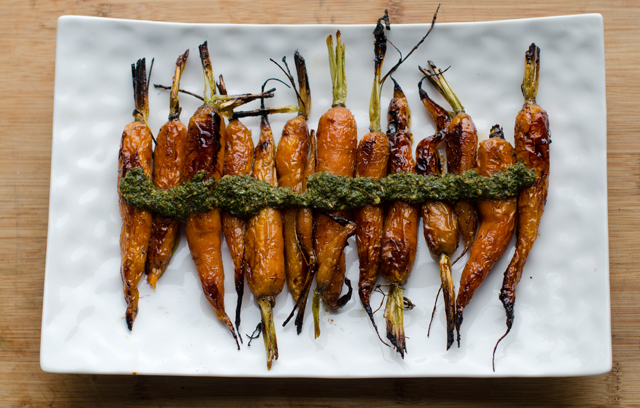
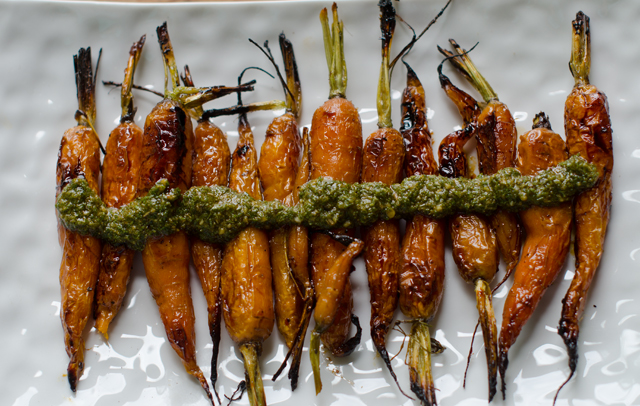
I served my chimichurri over roasted carrots. Traditionally this is served with steak but I think it would be just as good as a sauce with grilled chicken or lamb chops. Store in the refrigerator in an airtight container for up to a week.
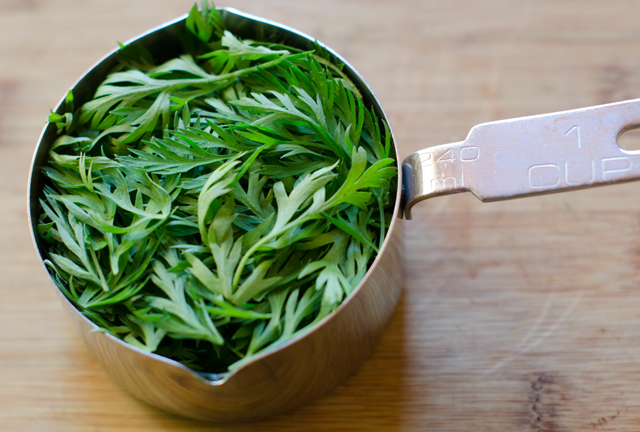
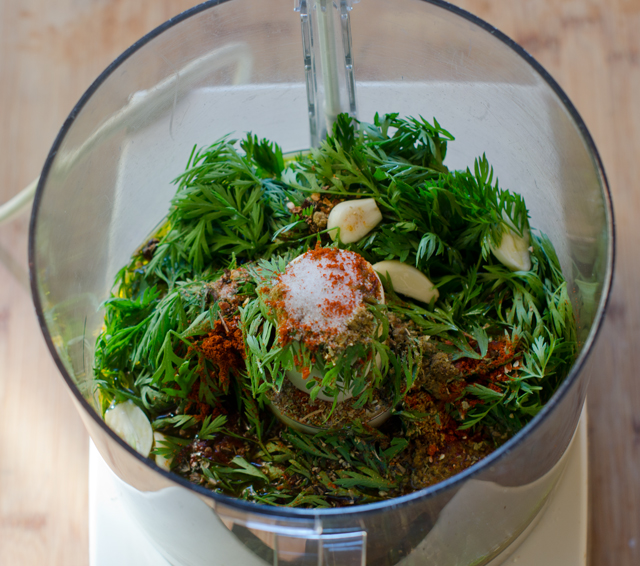
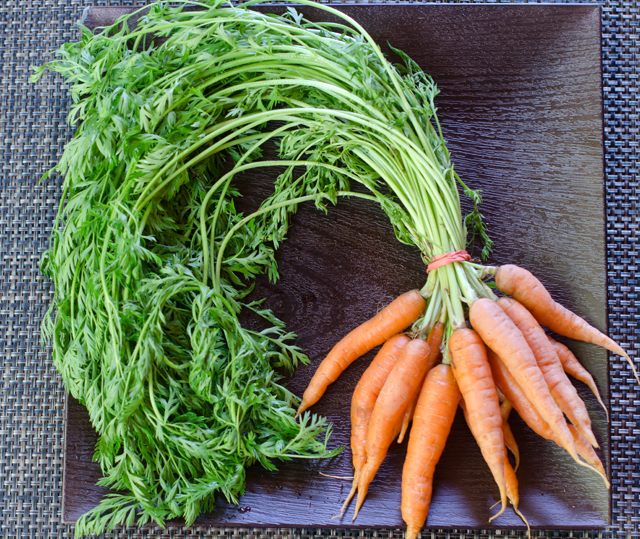
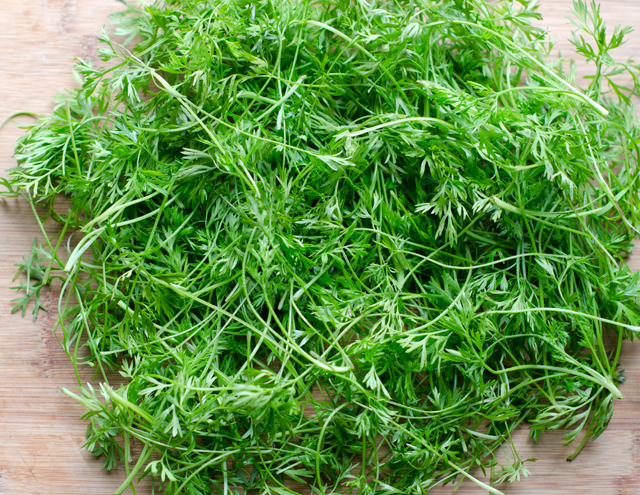
A cup of lightly packed carrot leaves.
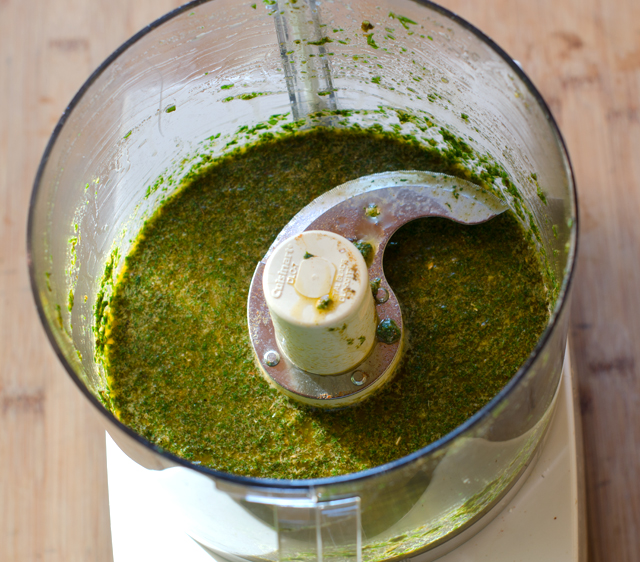
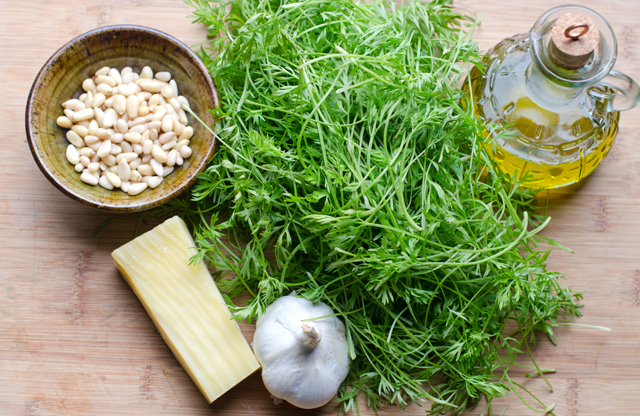
Everything goes in the food processor.


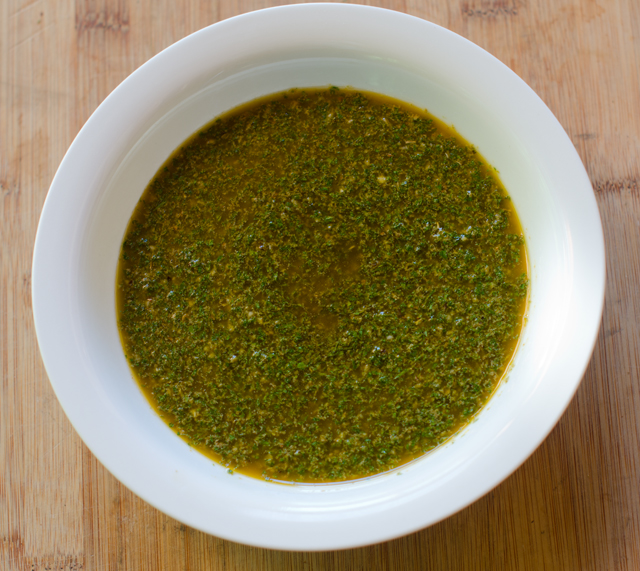
Carrot Top Chimichurri Sauce with Roasted Carrots

Makes about a cup

Ingredients for Chimichurri Sauce

  • 1 c lightly packed fresh carrot top leaves
  • ¾ c extra virgin olive oil
  • 3 T red wine vinegar
  • 1 T dried oregano
  • 2 t ground cumin
  • 1 t salt
  • 3 cloves garlic, peeled and roughly chopped
  • ½ t smoked paprika
  • ½ t dried crushed red pepper

Directions

  1. Combine all of the ingredients in a food processor and blend until smooth.
  2. Refrigerate for at least one hour but tastes even better the next day. Store in an airtight container. Use within a week.

Roasted Carrots

Ingredients

  • 1 lb fresh carrots, scrubbed well, tops reserved for chimichurri sauce
  • 1 T extra virgin olive oil
  • 1 T honey
  • Kosher salt and freshly ground black pepper

Directions

  1. Preheat oven to 425°F. Coat a large baking sheet with non stick spray.
  2. In a bowl large enough to accommodate the carrots, mix together the olive oil and honey.
  3. Add the carrots to the bowl and toss them with the oil and honey. Salt and pepper to taste.
  4. Spread carrots evenly on the baking sheet and use a spatula to scrape the rest of the honey-oil mixture over the carrots.
  5. Roast carrots for about 15 minutes, shaking pan halfway through the cooking process for even browning.
  6. Remove carrots from oven, allow to cool slightly.  Serve carrots topped with chimichurri sauce.
 

June 13, 2017 Green Harissa

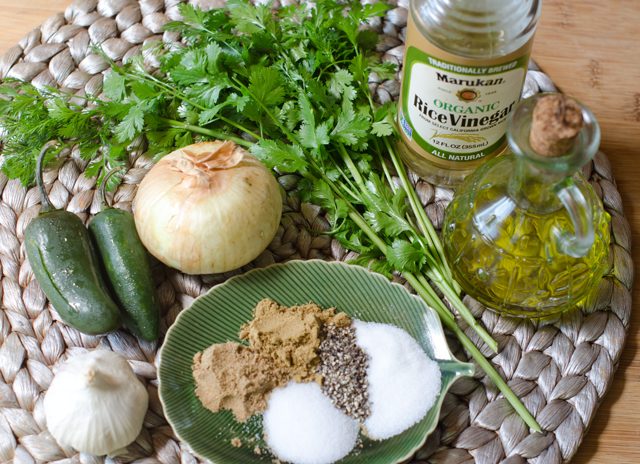
Harissa is a spicy and aromatic chili sauce, commonly found in the cooking of the North African countries of Tunisia, Morocco and Algeria. The basic recipe calls for hot peppers, garlic, salt, olive oil and spices. This version from Vedge , a vegetarian restaurant in Philadelphia, uses green jalapenos, onions, garlic, a generous amount of fresh cilantro, along with dried coriander and cumin. Cilantro haters can substitute parsley or half parsley and half fresh spinach. Some mint might be interesting in the mix.

The original recipe called for 2 jalapenos, one was enough for my palate, remember you can always add more heat, it’s harder to take it away. It’s a good idea to wear gloves when handling chilies. Chili oil on sensitive parts of your body (hands, lips, eyes etc.) will burn for a long time. Chili oil is not water soluble, it’s fat soluble. So if you get some on your hands, rub some cooking oil into your hands before washing with soap and water.

Serve green harissa as a sauce for grilled vegetables and fish, lamb burgers, an unconventional taco topping, the possibilities are endless.

Green Harissa

Makes 1 cup

Ingredients

  • 2 c loosely packed cilantro leaves
  • 1 c finely chopped onion
  • 2 garlic cloves
  • 2 jalapeno peppers, stems and seeds removed
  • 2 T or more olive oil
  • 2 T rice wine vinegar
  • 1 t ground coriander
  • 1 t ground cumin
  • 1 t salt
  • 1 t freshly ground black pepper
  • 1 t sugar
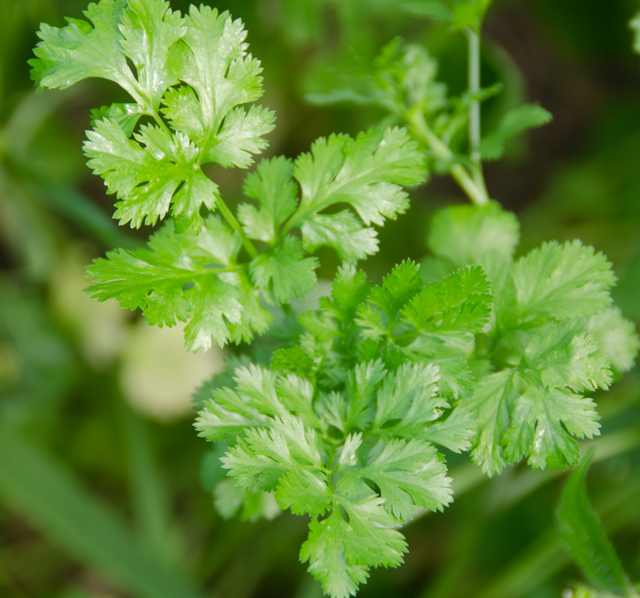
Cilantro in the greenhouse.


Directions

  1. Combine all of the ingredients in a blender and blend until smooth

June 11, 2017 Carrot Top Pesto

Spring is an ideal time for planting root vegetables like turnips, beets and carrots. They especially love the cooler temperatures that we have been blessed with this spring. We try to be frugal with seeds, so the ones that aren’t planted are saved from season to season. I catalog them alphabetically like a card file in clamshell plastic containers that in a previous life held spinach or lettuce from a big box store. I use 3×5 cards to separate them into specific categories, beets, cucumbers, fennel etc. This year I even did a little clean up, getting rid of all packets before 2013.

Last year a friend gave Joe quite a few packets of carrot seeds he purchased on sale. Some were planted but most went into storage in the fridge over the winter. He wasn’t certain how many of them would germinate this season so he planted them very densely. As luck would have it, every carrot seed germinated.  Now it was time for some serious thinning.

Thinning is a necessary step in vegetable gardening if you want to have mature healthy plants. This can be done in stages. Armed with my Cutco scissors, I did the first thinning when the plants were about four inches tall. Pulling out the unwanted seedlings can often pull out the ones you wanted to leave growing. I snipped the plants at the soil line. With a colander full of the lacy feathery tops I thought about how I could use them. I remembered that parsley and carrots are related so I tasted a few of them. They have an herbaceous flavor, that to me was reminiscent of parsley.

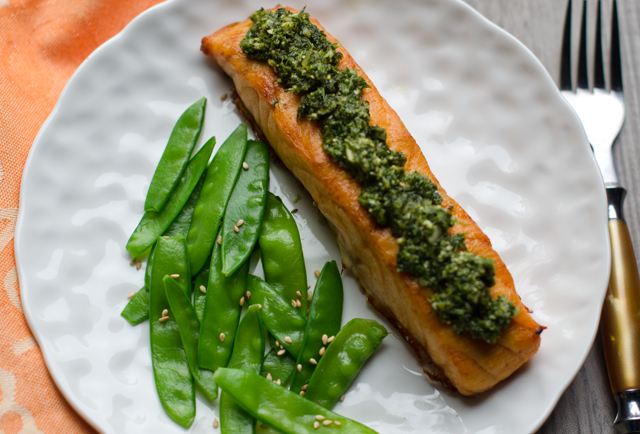
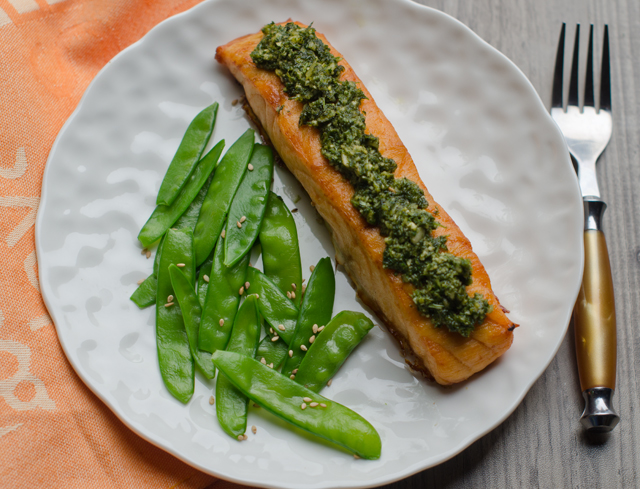
I have made pesto with basil and arugula, why not carrot tops? I used a basic formula that I have used to make other types of pesto, herbs or a green, in this case carrot tops, garlic, nuts, a hard cheese and olive oil. Baby carrot greens are more delicate in flavor and are a special reward for the gardener. Organically grown full-sized carrot greens can be used too, eliminating any thick stems. I used my pesto as a topping for roasted salmon. It would work with chicken breasts and of course, roasted carrots.

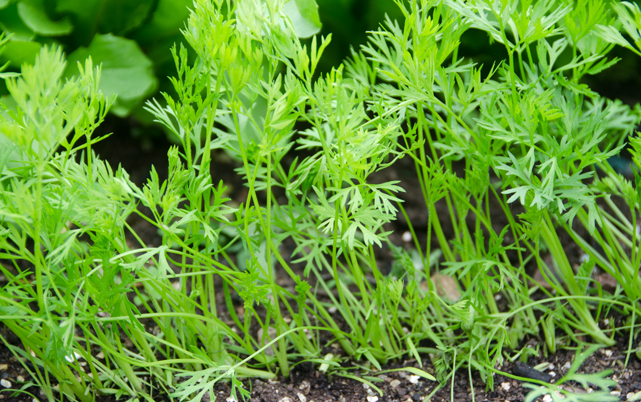
Time to thin the carrots.
The first thinning of carrot greens.

Carrot Top Pesto

Makes about a cup

Ingredients

  • 3 cups lightly packed carrot tops
  • 1 clove of garlic
  • 3 T pine nuts
  • ¼ c extra virgin olive oil, more if needed to make a paste
  • ¼ c grated Parmesan cheese
  • Kosher salt and pepper to taste

Directions

  1. Place the carrot tops, garlic and pine nuts in the bowl of a food processor.
  2. Pulse until coarsely chopped. With the motor running, slowly add olive oil until a paste forms. Add cheese and pulse several times to combine.
  3. Season with salt and pepper to taste. Use immediately or cover tightly with plastic wrap and refrigerate for up to 2 days.

April 1, 2017 Mayan Citrus Salsa (Xec) with Salmon

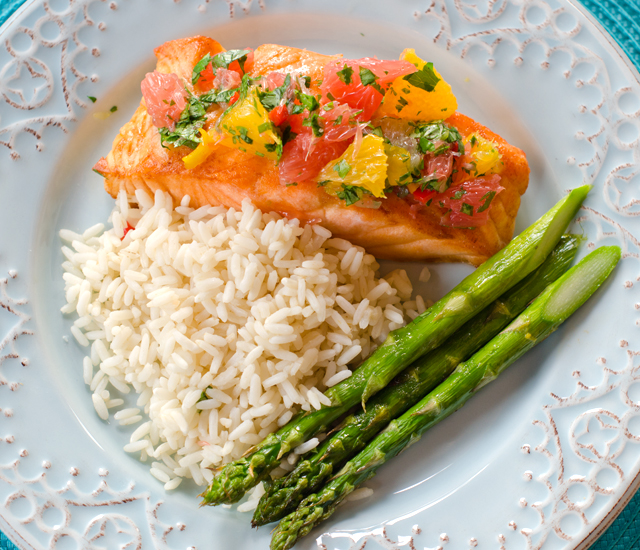
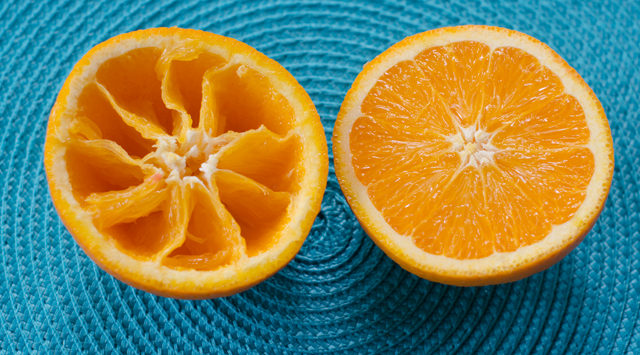
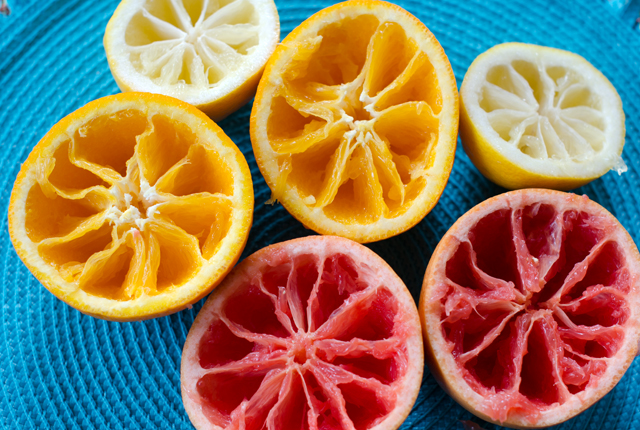
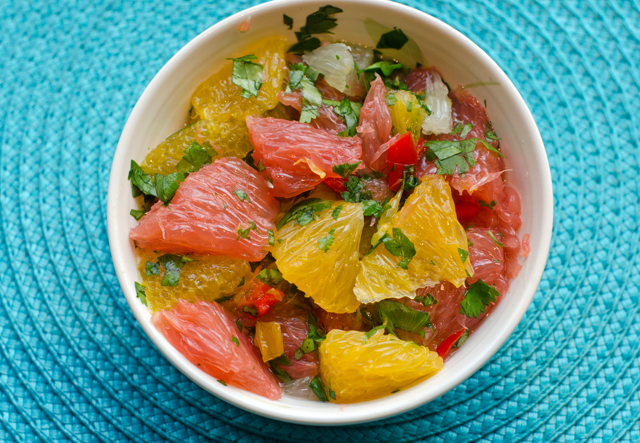
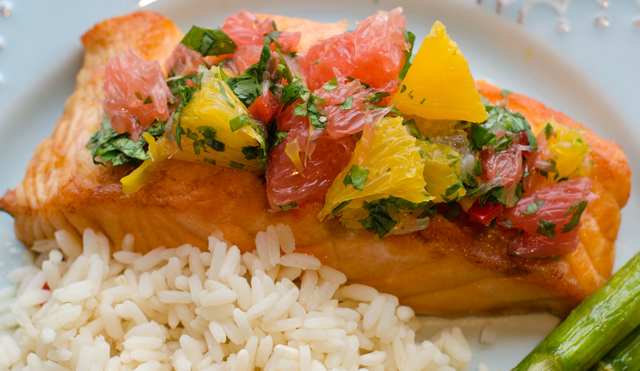
A vibrant combination of juicy grapefruit, orange, lemon and lime sections, accented with fragrant and spicy habanero pepper, the Yucatan peninsula is home to this colorful and healthy salsa. The Mayan name for this dish is Xec, pronounced, shek which roughly translates, “mixed”. It is an easy to prepare dish, all of the fruit is cut vertically and sectioned, the way you would cut into your morning grapefruit. If you prefer, the citrus could also be cut into supremes or segments.

The salsa gets its heat from habanero chiles. Lantern shaped and bright red, orange or yellow in color, the habanero is the hottest chile available in grocery stores. For perspective, a habanero registers in at 300,000 to 475,000 units on the Scoville scale, the standard for measuring the heat of a chili pepper, the jalapeno only 2,500 to 10,000 units. Treat all hot peppers with a certain amount of caution, wear gloves when working with them and keep your hands away from your face. It is best to add a little bit of chili pepper to see what your heat tolerance is before ruining a dish with too much at once.
I am fortunate to have a supply of NuMex Suave Orange peppers from the garden to add to the salsa. NuMex Suaves have the citrusy flavor that most people miss in the habanero, without the numbing heat. I like this salsa with fish, but it would pair with chicken or pork as well.
Mayan Citrus Salsa (Xec)

Makes four servings

Ingredients

  • 1 large orange
  • 1 medium grapefruit
  • 1 medium lemon
  • 1 lime
  • Finely chopped habanero pepper (according to your heat tolerance)
  • 1 NuMex suave pepper
  • ½ c finely chopped cilantro
  • Salt to taste
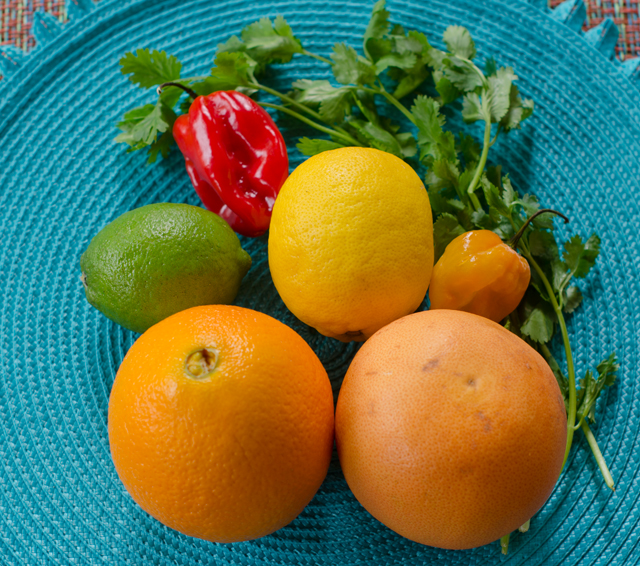
A combination of sweet, tart and sour citrus, habanero and cilantro are the ingredients for xec.
Section all the citrus the way you would a grapefruit.

Directions

  1. Cut orange in half horizontally and section it as you would a grapefruit. Do this over a bowl to capture all the juice. Remove the seeds and combine flesh and juice in a bowl. Repeat with the grapefruit, lemon and  lime. Stir in habanero, NuMex suave and cilantro. Season with salt.

October 30, 2016 Sweet Pickled Celery

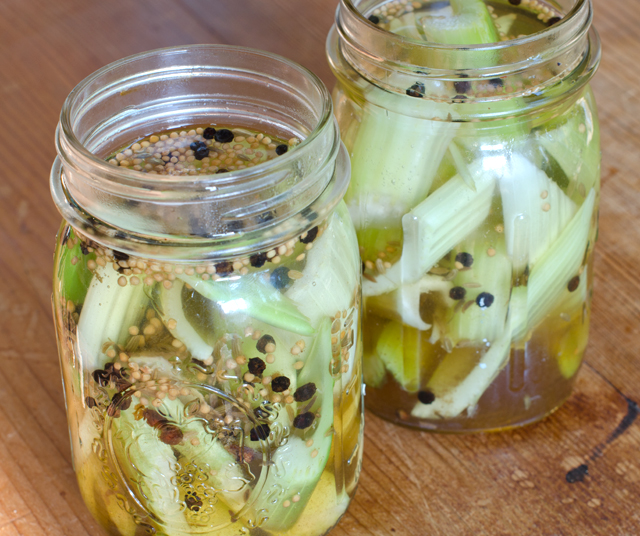
dsc_8190aAs mentioned in my previous post, from day one, the traditional accompaniments for buffalo wings have been celery sticks and blue cheese dressing. Last week, we were pleasantly surprised with the sweet pickled celery served with the buffalo cauliflower at The Vault. It requires no special canning equipment and you can make it in small batches. No delayed gratification here, you can enjoy it as soon as the canning liquid cools.

This quick and easy recipe is courtesy of celebrity Chef Gordon Ramsay. I have been enjoying the most recent season of Ramsay’s reality cooking competition, MasterChef, while I exercise on the elliptical machine. For some reason our new Xfinity cable box saved several seasons of MasterChef as something we might enjoy. Well I am happy to say “cable box, you get me.” With all of his swearing and in your face style with the contestants, I forgotten what an amazing chef he is.

This recipe is from Ramsay’s Ultimate Home Cooking cookbook and was an accompaniment for buttermilk fried chicken. Interesting, since the episode I watched today featured a fried chicken challenge for the losing team on MasterChef. No chicken here, just pickled celery.

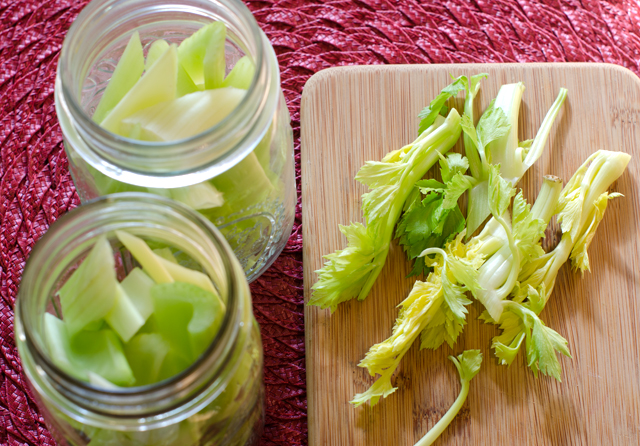
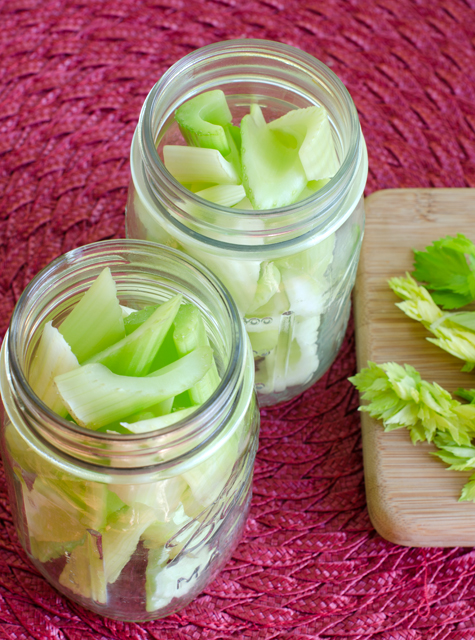
Start with a head of celery, separate into individual ribs or stalks, remove any strings and wash and rinse well. Cut celery on the diagonal into one inch lengths and place in pint jars with lids that have been sterilized with hot soapy water. Over medium high heat make a simple syrup of equal parts 1 cup water to 1 cup sugar. Stir to dissolve the sugar. Add peppercorns, herbs and vinegar and bring mixture to a boil. Carefully pour the hot liquid over the celery filled jars. The celery will cook a bit, shrink and resettle from the hot liquid. You will be able to add more celery when this happens. When the liquid cools, the celery is ready to eat. It will be even better if you have time to refrigerate it overnight.

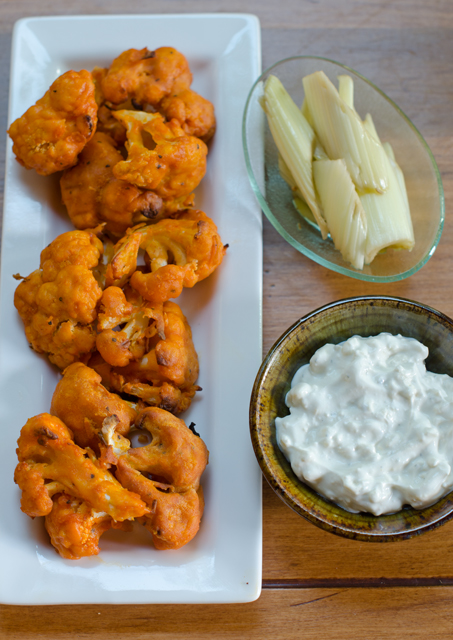
Great as an accompaniment to buffalo cauliflower, an antipasto platter or chopped finely and added to chicken or egg salad.

dsc_8176a

Sweet Pickled Celery

Ingredients

  • 1 medium bunch celery
  • 1 c water
  • 1 c sugar
  • 1 t black peppercorns
  • 1 t mustard seeds
  • 1 t fennel seeds
  • ½ t cloves
  • ½ t salt
  • 6 T white wine vinegar

dsc_8185a

Directions

  1.  Cut celery into individual stalks, wash and cut into one inch long diagonal pieces and place into sterilized pint canning jars. Fill the jars to the top. Keep extra celery aside to add later.
  2. Create a simple syrup of one cup water and one cup sugar. Add to a medium size pot along with the peppercorn, mustard and fennel seeds, cloves, salt and white wine vinegar. Over medium high heat, stir to dissolve sugar and bring to a rolling boil.
  3. Carefully pour the hot liquid into the canning jars. Wait a minute or two, the hot liquid will cook the celery a bit and shrink it, leaving more room for additional celery left over from the first step. Pack the celery in tightly, covered with the pickling liquid.
  4. As soon as the liquid cools, the celery can be eaten.  Even better if you refrigerate it overnight.
The final product served with blue cheese sauce and pickled celery.

September 15, 2016 Harissa

dsc_7983aThe challenge facing us in late summer/early fall is preserving the harvest.  A prime example is hot peppers. In tropical climates they thrive as perennials and can grow for many years. It would be great if I could just walk down to the garden in January to pick a few fresh jalapenos. But given the fact that January temperatures where we live are below freezing and pepper plants prefer a daytime temperature of 65-80°F, it won’t be happening anytime soon . So it is necessary to find methods of preservation now to enjoy them later while the peppers are at their peak. Every year I freeze whole peppers, dry them, make chili flakes, pickle jalapenos, I’m even making sriracha now, but a new method is always welcome.
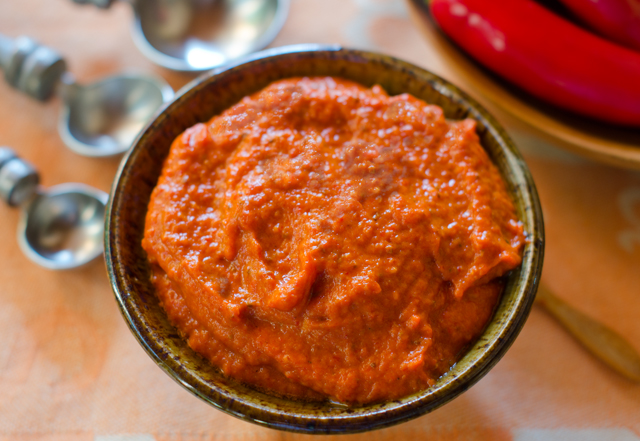
A very simple recipe I found for eggplant, another garden stalwart, suggested topping grilled slices with prepared harissa and yogurt. In the past I purchased harissa in a jar or a tube at the middle eastern stand at the local farmers market. This time I decided to see if this was something I could make myself. Harissa, is a garlicky spicy condiment found in the Northwest African countries of Algeria, Morocco and Tunisia. It can be used as a condiment for meat or fish, roasted vegetables, stirred into soups and stews and served alongside couscous. Think sriracha with more complexity. It’s ingredients can include roasted peppers, garlic, chile peppers of all varieties, fragrant spices such as coriander, cumin and caraway, dried mint, lemon and olive oil. There is no one master recipe for harissa. The ingredients in harissa vary by country, ethnicity, even neighborhood. You can adjust the heat by the number and type of chilies you use, just remember, harissa is supposed to be hot.

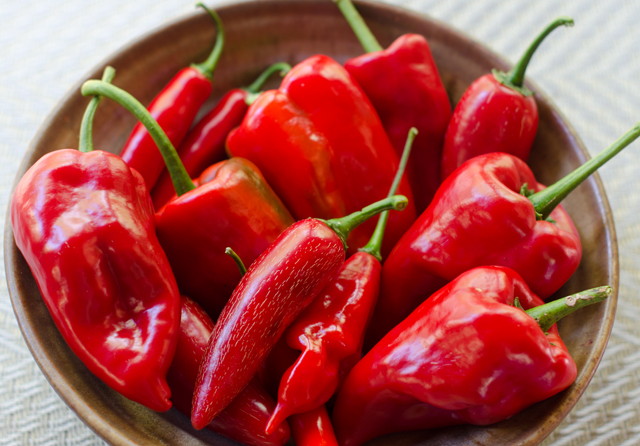
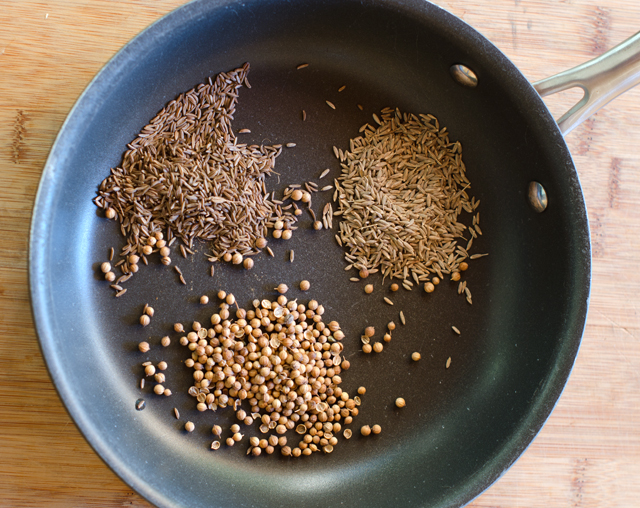
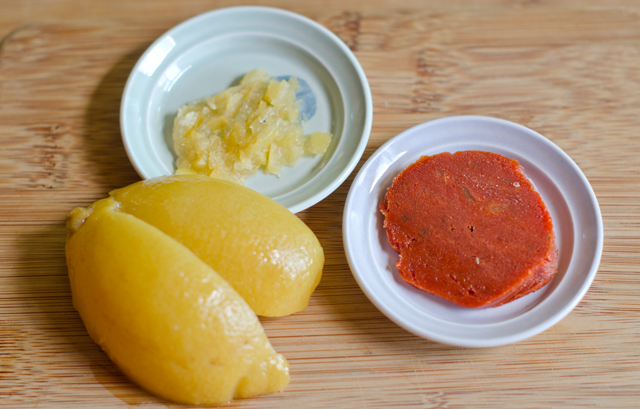
My recipe is a little different from most since I used fresh hot peppers, not dried ones that need to be reconstituted. This meant using double the amount of peppers. I used one red bell pepper, four mild poblano peppers and a mix of jalapeno, cayenne and ancho. I added a little tomato paste for sweetness, preserved lemon peel with just a little juice, chopped garlic, smoked paprika and an aromatic spice blend. I think the spice blend is what really gives this dish its unique flavor. Whole spices, coriander, cumin and caraway are toasted in a small skillet until the fragrance fills your kitchen. I find it easiest to grind them in a mortar and pestle, a mini food processor doesn’t quite give the consistency you are looking for.

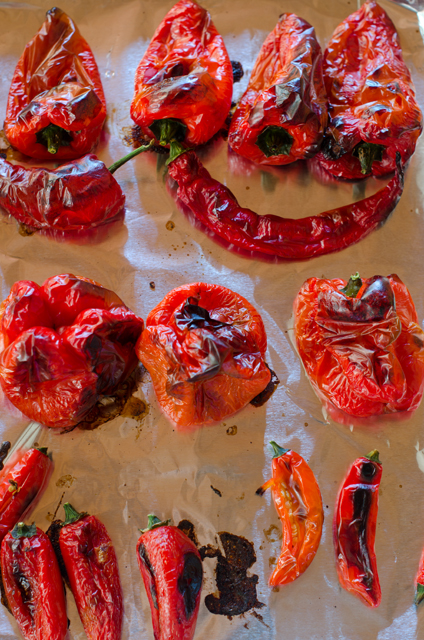
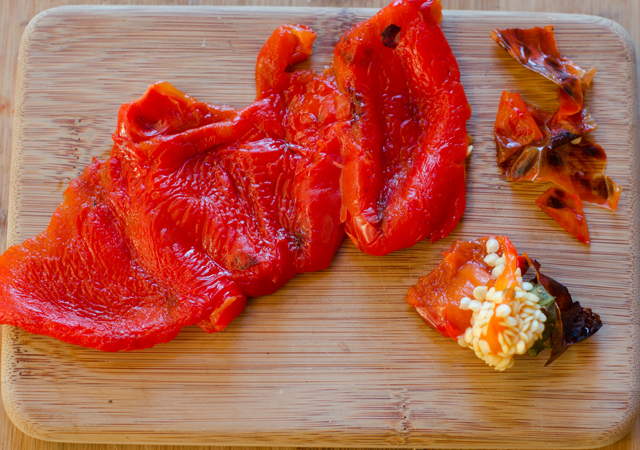
All the peppers need to be charred to remove the skin. I did this in a hot oven, turning occasionally to blacken all the sides. I put the charred peppers in a bowl and covered it tightly with plastic wrap to steam the peppers. It is important for to wear rubber gloves when removing the skin, seeds and stem from the hot peppers. Conventional wisdom for years has said that the hottest part of the pepper is the seeds. A recent study however has shown that even though the seeds pack some heat, it’s actually the placenta, the white tissue that holds the seeds that is the source of the most heat. As you peel the peppers put them into piles, no heat, some heat and hottest. That way you can hold back on some of the hottest peppers until you are certain the sauce will be palatable for you.

Combine the chilies, toasted spices, garlic, salt and other optional ingredients in a food processor. With the food processor running, slowly drizzle in the olive oil until you have a smooth, thick paste. Scrape down the sides occasionally. Taste, now is the time to add that extra pepper if desired. As I said before, harissa is supposed to be hot. Season to taste with salt and pepper. Transfer harissa to clean jars, top with a thin layer of olive oil and store in the refrigerator for several weeks. Since I freeze pesto I may try to see if harissa can be frozen too.

As a postscript, the harissa received immediate approval from Joe who topped cucumber slices with harissa as an after work snack.

dsc_7947a
A harvest of both bell and hot peppers.

Harissa

Makes 2 cups

Ingredients

  • 1 medium bell pepper
  • 8 to 10 ounces fresh chili peppers of varying heat, poblano, ancho, jalapeno, cayenne
  • 2 t cumin seed
  • 2 t coriander seed
  • 2 t caraway seed
  • 3 to 4 cloves of peeled garlic
  • 1 T tomato paste
  • 1 t preserved lemon peel
  • 1 t juice from preserved lemon
  • 1 t smoked paprika
  • Kosher salt and fresh ground black pepper to taste
  • 3-4 T extra virgin olive oil

Directions

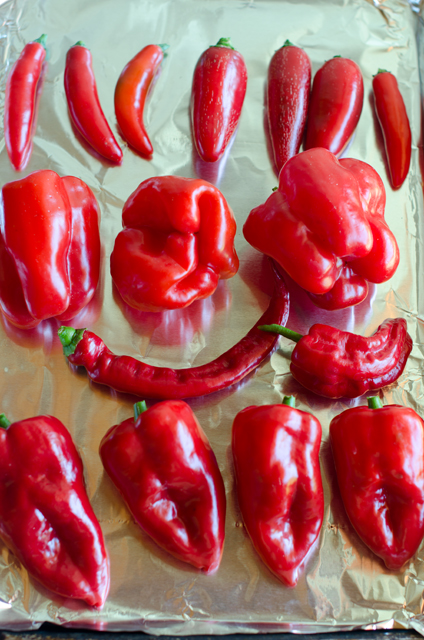
  1. Preheat oven to 425°F.Line a baking sheet with foil. Place all the peppers on the baking sheet and roast for 10 minutes.
  2. Turn the smaller peppers over and roast for another 10 minutes, until the skins are blackened. Remove them to a bowl. Turn the bell and poblano peppers over and roast for another 10-15 minutes, until the skins are blackened.
  3. Remove all the peppers to the bowl and tightly cover with plastic wrap to steam the skin.
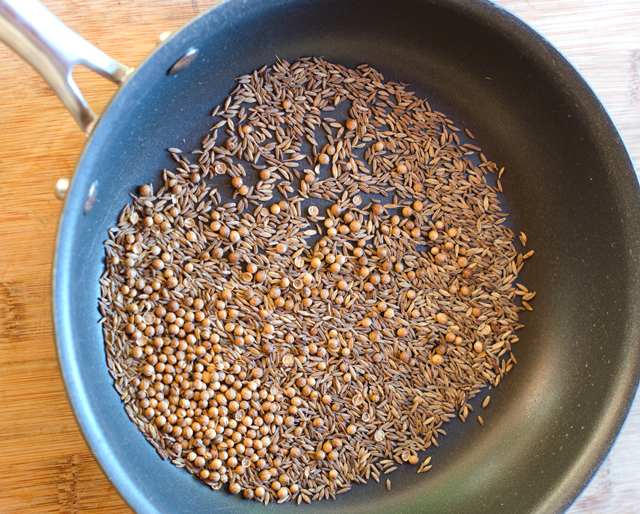
  4. Place the cumin, coriander and caraway seed into a dry skillet over medium heat. Toast until seeds have darkened a bit and have become fragrant.
  5. Pour toasted seeds into the bowl of a mortar and pestle. Crush seeds to a powder.
  6. Using rubber gloves to protect your hands, stem, skin and seed the peppers.
  7. Place the peppers (hold back a few hot ones if you are concerned), toasted seeds, garlic, tomato paste, preserved lemon peel and juice, smoked paprika into the bowl of a food processor. Pulse to combine the ingredients, scraping down the sides.
  8. With the food processor running, add the olive oil in a steady stream until you have a smooth, thick paste. Taste, add salt and pepper to your liking and pulse in the extra peppers if desired.
  9. Transfer harissa to clean jars and top with a thin layer of olive oil. Store in the refrigerator for several months.
Place the peppers on a foil lined baking sheet for easy clean up.

dsc_7952a

Cumin, coriander and caraway seeds are toasted in a dry pan.

dsc_7956a

Pulverize the seeds in a mortar and pestle or spice grinder. Smells great.
dsc_7962a
Stem, seed and skin the peppers. Be sure to wear gloves to protect your hands from the hot peppers.


dsc_7965a
I added some preserved lemon peel and tomato paste.
Everything is combined in the food processor.
Everything is combined in the food processor. Add olive oil to make a thick paste.

dsc_7974a

August 13, 2016 Oven Roasted Ratatouille

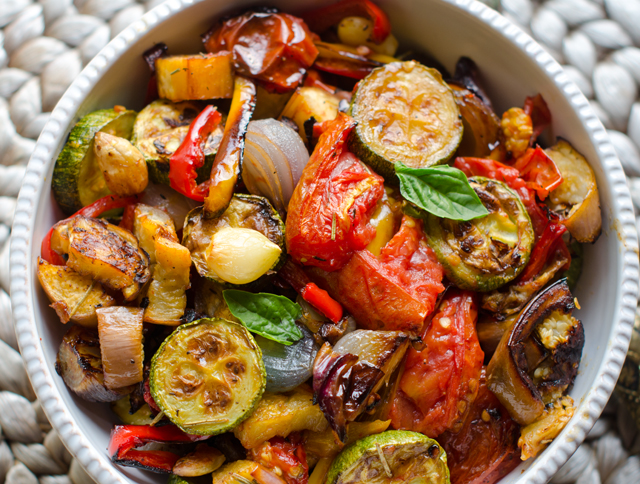
DSC_7741aI love recipes that use the bounty of the garden in a single dish and ratatouille accomplishes that in a very delicious way.  In case you didn’t know, ratatouille (rat-uhtoo-ee), is a summer vegetable stew that had it’s origins in the Provencal city of Nice in southern France. Traditionally, each ingredient, eggplant, zucchini, peppers, onion, garlic and tomatoes, is cooked separately on the stove top and tossed together at the very end. So it’s really a sauté that is presented as a stew.

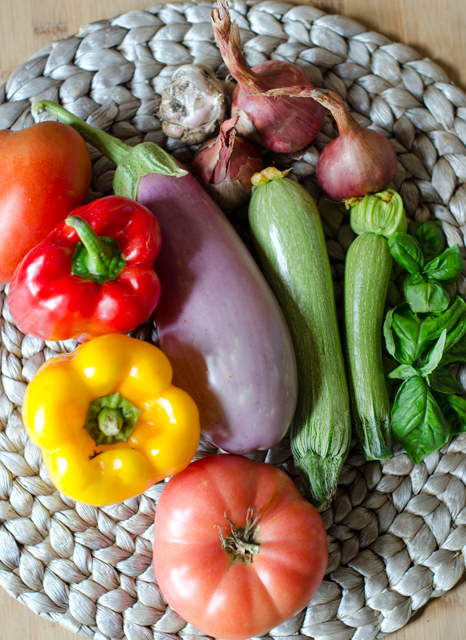
In this version the vegetables are tossed in olive oil and roasted in the oven, eliminating the time cooking over a hot stove. Our red and yellow bell pepper harvest is the earliest I can remember. They must like the hot temperatures and abundant rainfall this year. The orange Valencia peppers are not far behind. I prefer using Chinese or Japanese eggplants for their thin skin and milder flavor. I substituted shallots for onions since our harvest was so plentiful this year. The garlic was also from the garden, a first for us.

Cut the vegetables in similar size so they will get done at the same time. The smaller the cut, the less time it will take to cook.  Lightly toss the vegetables with about a half cup of a good quality olive oil.  Spread them out evenly over two large baking sheets. Rotate the baking sheets top to bottom and front to back half way through the cooking time. Roasting allows the vegetables to retain their shape and they take on a delicious toasted flavor. Move the cooked vegetables to a large serving bowl and tossed with a basil chiffonade. Chiffonade, translates “made of rags” from the French (of course!).  It is a technique for cutting herbs and vegetables into long thin strips, in this case, basil.

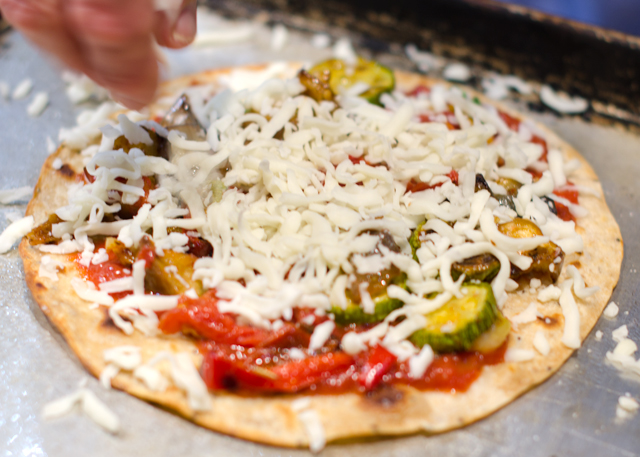
Ratatouille can be used in many ways, a side dish, a topping for bruschetta, chicken or fish.  We used it as the topping for an impromptu flatbread pizza. It can be served hot or cold and is even better the next day, if it lasts that long.

DSC_7726a
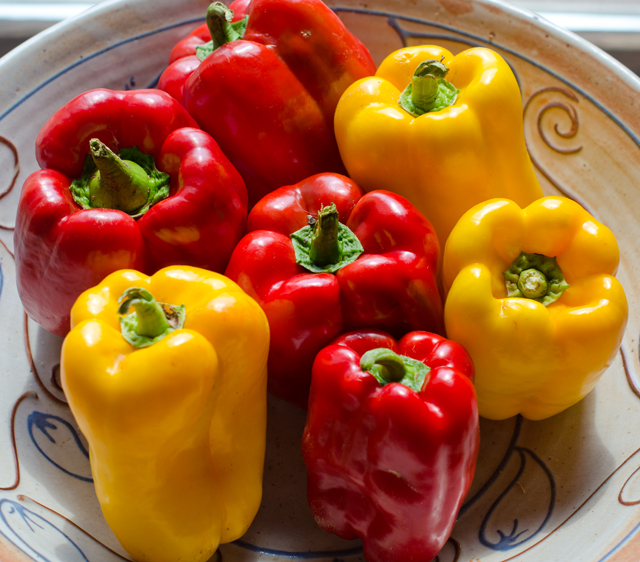
This season is the earliest we have had ripe bell peppers. I guess they really like the hot and rainy weather.
DSC_7733a
Ingredients for the ratatouille, I substituted shallots for onions since Joe just harvested his crop.


Oven Roasted Ratatouille

Serves four (or two very generously)

Ingredients

  • 2 small onions (about 5 oz. each), cut into ¼-inch-thick half-moons
  • 2 bell peppers, red, yellow or orange, cored, seeded and cut into ¼-inch lengthwise strips
  • Japanese eggplant, about 1 lb, cut crosswise ½ inch thick rounds, then sliced in quarters
  • 1 lb small to medium zucchini, trimmed and cut into ½ inch thick rounds
  • 10 whole cloves garlic, peeled
  • ½ c extra virgin olive oil, and more as needed
  • 1 t chopped fresh rosemary
  • Kosher salt and freshly ground pepper
  • 1½ lbs medium tomatoes (about 4), cored, and cut into 1/2-inch chunks
  • ¼ c basil cut into a chiffonade
DSC_7737a
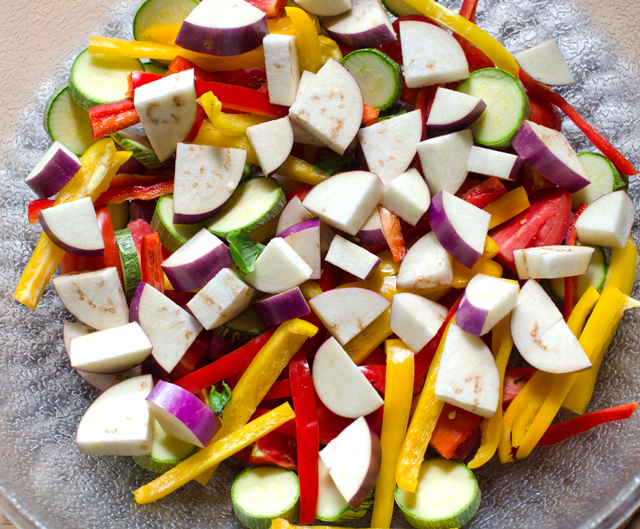
Toss the ingredients in a large bowl with olive oil, salt and pepper.
DSC_7739a
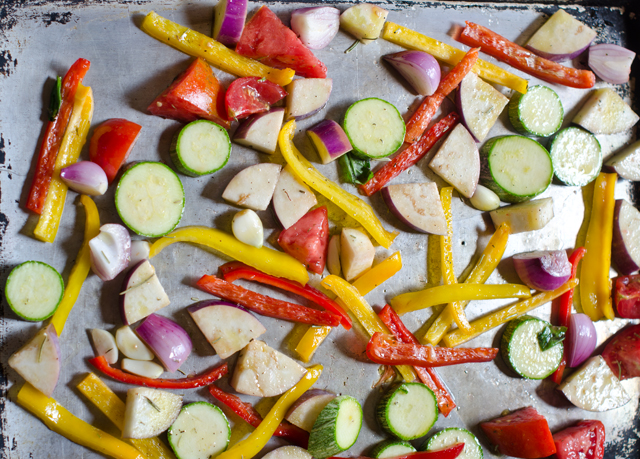
Transfer the vegetables to two large baking sheets.


Directions

  1. Place racks in the top and bottom thirds of the oven. Heat to 400°F. If using convection heat, 375°F.
  2.  In a large bowl, toss the onions, peppers, eggplant, zucchini, tomatoes, garlic, olive oil, rosemary, and 1-1/2 tsp. kosher salt and a grind of pepper. Spread the vegetables evenly over two large 12 x 16 sheet pans. Don’t spread the vegetables too thin or they may burn (they shrink a lot as they cook).
  3. Roast, stirring the vegetables a few times and swapping the positions of the pans once, until the vegetables are slightly collapsed or shriveled, starting to brown, and very tender, about 35 minutes for my oven. It could take 10 minutes longer if you are not using convection heat.
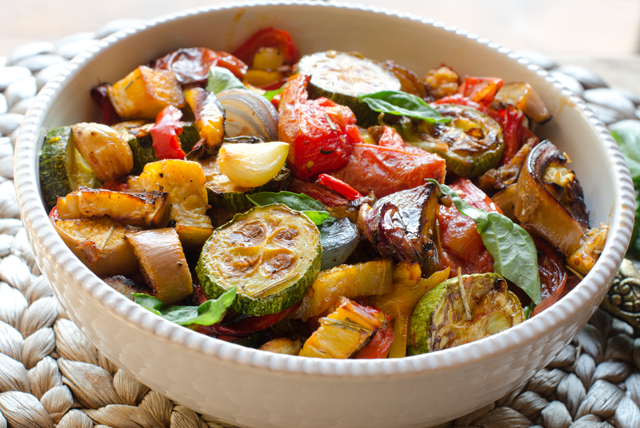
  4. Scrape all the vegetables and any juices into a serving bowl. Toss with the basil, taste for seasoning, and serve.

DSC_7746a

DSC_7749a
Ratatouille makes a great pizza topping.
DSC_7784a
How could I resist posting a picture of Remy, the star of the movie Ratatouille  who presides over my kitchen from his perch above.

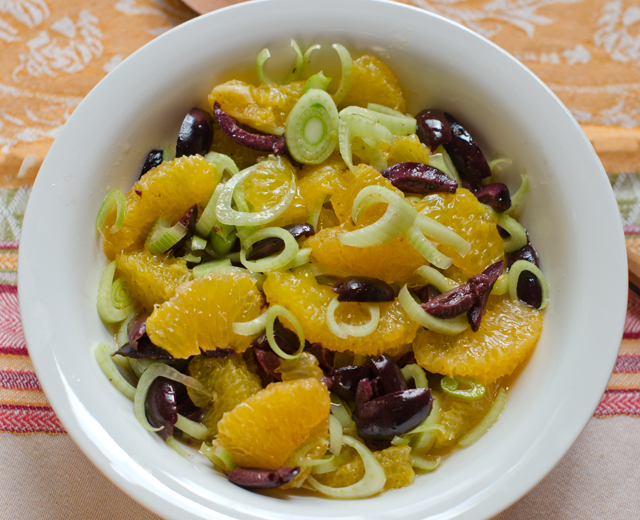
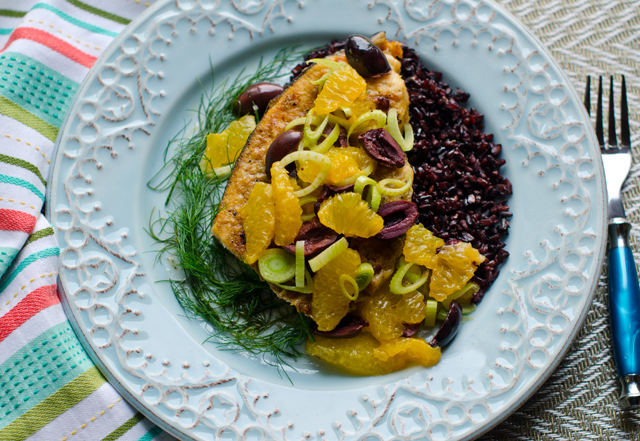
August 5, 2016 Swordfish Steaks with Orange, Fennel and Kalamata Olive Salad

DSC_7633aWhen I am looking for a quick and easy fish entree that comes together in about 15 minutes, swordfish is one of my first choices. I love it’s rich, meaty texture and like to balance it with something that is tart, a bit sweet and a little salty. This palate pleasing salad of oranges, fennel and olives takes it’s inspiration from Sicily.

The orange supremes take some careful knife work but are worth the effort. Using your sharpest pairing knife, trim off the top and bottom of the orange. Rest the orange on one of the cut ends and trim off the peel and pith in large strips, carefully following the contours of the fruit. Cut the segments free from the membrane. Be sure to do this over a bowl to catch all the juices. Squeeze the remaining membrane to capture every last drop of juice. I reduced the juice in a small saucepan to intensify the flavor in the vinaigrette.

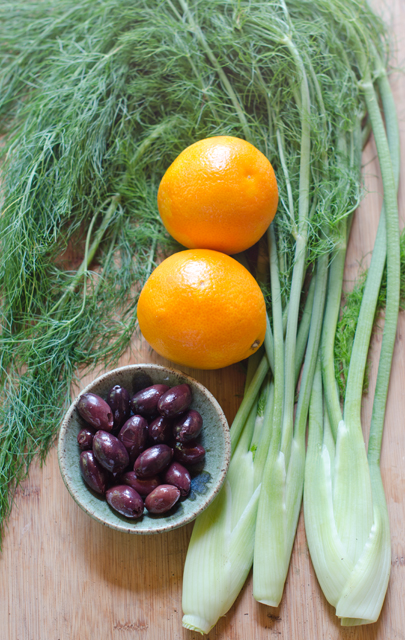
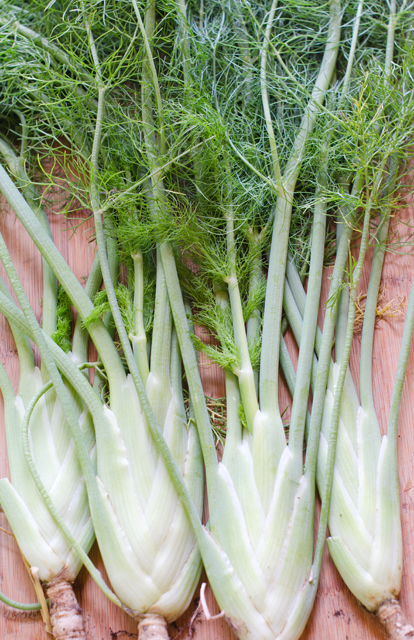
I think fennel is a greatly under used vegetable. Related to carrots, parsley, dill and coriander, it has a crunchy texture and refreshing licoricey flavor popular in Mediterranean cooking. To cut, trim the feathery foliage and stalks off where they meet the top of the bulb. The stalks and foliage can be used as a bed for cooking the fish. Cut the bulb in quarters lengthwise and cut out the core. Slice the sections thinly using a mandoline or a very sharp knife. I used fennel thinnings from the garden. They didn’t have a hard solid core so I used the entire fennel bulb.

Kalamata olives are almond shaped and dark purple in color. They are cured in a red wine vinegar brine that gives them a rich, fruity flavor. They are often found on the Mediterranean bar in many supermarkets. To pit olives, place them on a flat surface and lightly crush with the side of a broad flat chef’s knife. Remove the pit and cut the olives in half lengthwise.

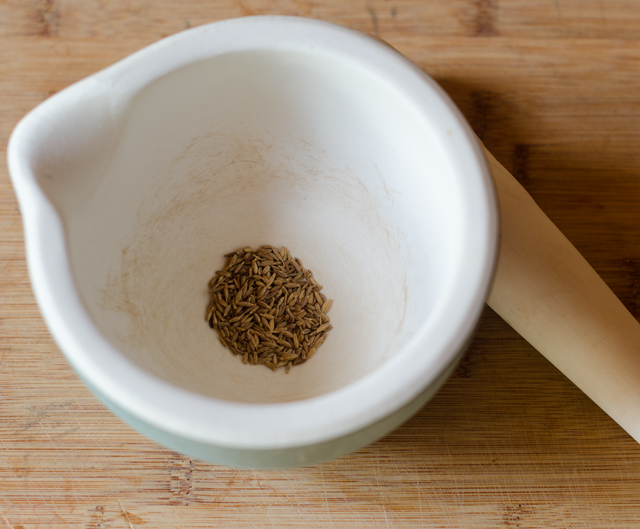
Cumin is one of my favorite spices and toasting cumin seeds really intensifies their flavor. Use a small dry skillet over medium to medium high heat. Keep the pan in constant motion, the seeds will darken and your kitchen will be filled with a warm toasty aroma. Immediately remove them from the pan and transfer to a bowl or a mortar and pestle. Crushing the toasted seeds brings out their flavor even more. If you don’t have a mortar and pestle, put the seeds in a plastic bag and crush them with the bottom of a heavy pan or a rolling pin.

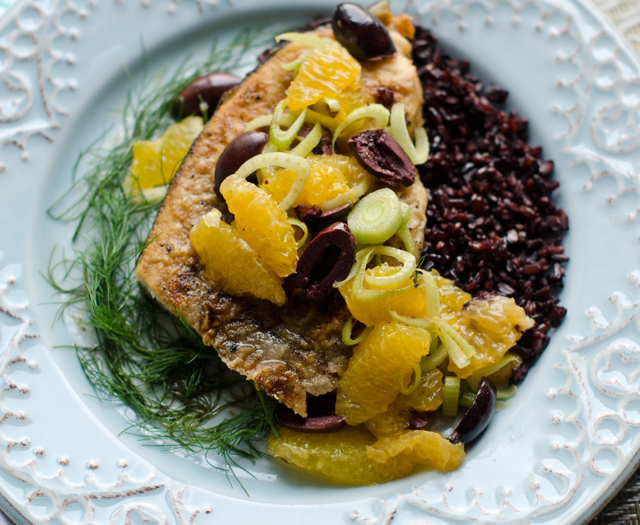
Combine the reduced orange juice, toasted fennel and olive oil. Pour the dressing over the salad ingredients and lightly toss. Serve salad with the fish and garnish the plates with fennel fronds.

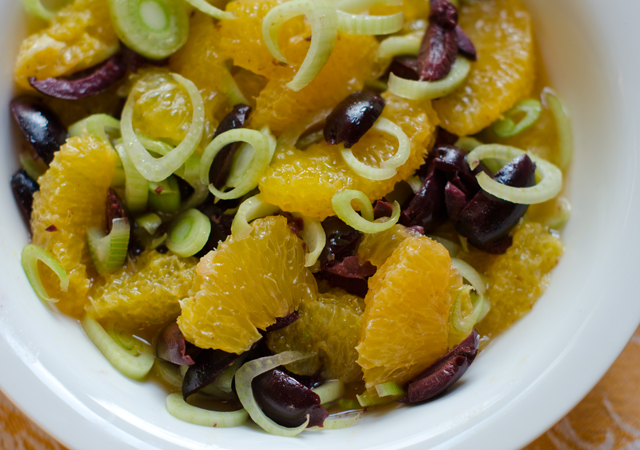
DSC_7602aOrange, Fennel and Kalamata Olive Salad

Ingredients

  • 1 small to medium fennel bulb
  • 2-3 medium oranges
  • 1//3 c kalamata olives, pitted and cut in half lengthwise
  • ½ t cumin seed
  • 2 T extra virgin olive oil
  • Kosher salt and pepper to taste

DSC_7606a

Directions

  1. Cut the fennel in quarters lengthwise, removing the core. Thinly slice the fennel, preferably with a mandoline. You will need 1 cup.
  2. Remove peel and pith from the oranges using a sharp paring knife. Working over a bowl to catch the juice, carefully cut between membranes, to remove segments. Squeeze remaining membrane to extract juice. In a small saucepan reduce the orange juice to two tablespoons. Set aside.
  3. Toast the cumin seed in a small non stick saute pan until fragrant and toasted. Grind toasted cumin seed in a mortar and pestle. In a small bowl combine reduced orange juice, cumin and olive oil, stir together.
  4. In a medium bowl combine the sliced fennel, orange segments, and olives. Pour the dressing over and lightly toss.  Season to taste with kosher salt and pepper.
DSC_7598a
Baby fennel from the garden.

DSC_7608a

Ingredients

  •  2- 6 oz swordfish steaks
  • Kosher salt and freshly ground pepper
  • Wondra flour
  • 1 T each olive oil and unsalted butter

Directions

  1. Preheat oven to 450°F.
  2. Measure steaks using the Canadian method to calculate total cooking time.
  3. Season swordfish steaks with salt and pepper. Dust with Wondra flour.
  4. Heat an oven-proof saute pan over medium high heat.
  5. Melt butter and oil in a saute pan large enough to hold the fish without crowding and small enough to fit in your oven.
  6. Brown swordfish for two minutes on each side.
  7. Move saute pan to oven. Finish in oven, subtracting four minutes from your total cooking time. For example 1″ fish=10 minutes cooking time minus four minutes equals six minutes in the oven.
  8. Using oven mitts, remove from pan from oven, transfer fish to serving plate with spatula. Serve with the orange, fennel and kalamata salad.

DSC_7614a

DSC_7631a

July 16, 2016 Puffed Rice

DSC_7537a I was excited to show my friend Leslie the puffed rice I made as a garnish for the Summer Squash Salad in the previous post. Leslie enjoys cooking and trying new things in the kitchen as much as I do. She asked a good question regarding puffed rice that I didn’t have an answer for, why can’t you just make it in a popcorn popper?

I did a little research and learned this. Only varieties of corn with hard, thick hulls can be popped. Popcorn kernels can be puffed or popped with something as simple as a kettle with hot oil and a lid or a popcorn popper that circulates hot air through the kernels. The hard outer shell encases the moisture in the kernel and allows it to be popped without exploding into pieces. Rice lacks this hard outer shell. So you can’t toss some cooked rice in the popcorn popper and expect it to pop.

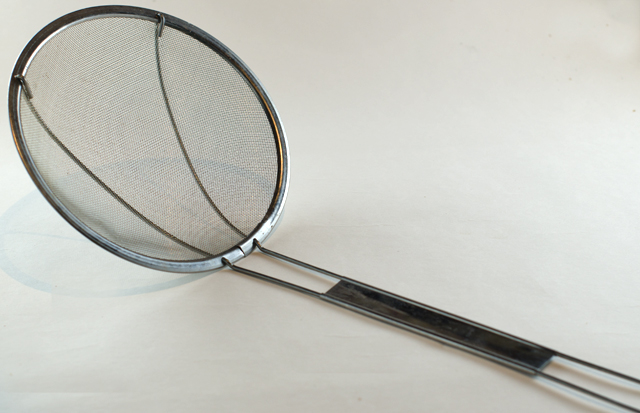
This recipe doesn’t require much work but does take a bit of time in preparation. Be certain the rice is completely dried out before puffing it in oil.  I found that a wok and a fine Chinese strainer was the easiest way to get all the puffed kernels out before they get too brown. It’s an easy recipe and I think you will be pleased with the results.

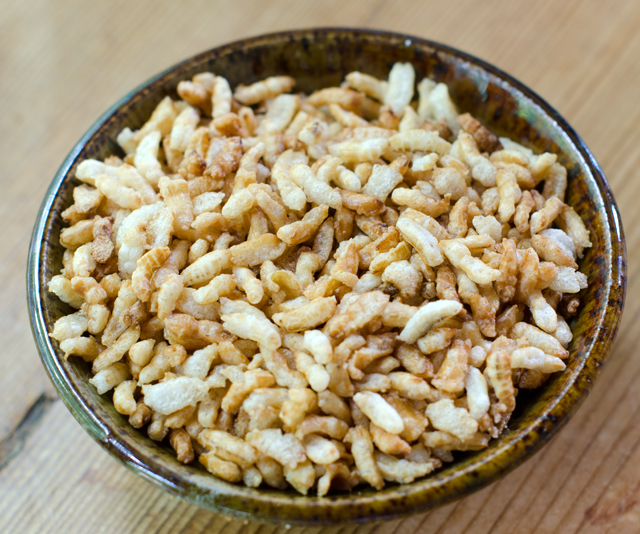
Puffed rice smells great, all warm and toasty. Use it as a salad garnish, out of hand snacking or put your own spin on a crispy rice sweet treat.

Puffed Rice

Makes about 3 cups

Ingredients

  • 1 cup of short grain brown rice
  • 1 ¾ cups of water
  • a pinch or two of sea salt
  • several cups of sunflower (or another) high-heat oil
I loved making puffed rice!
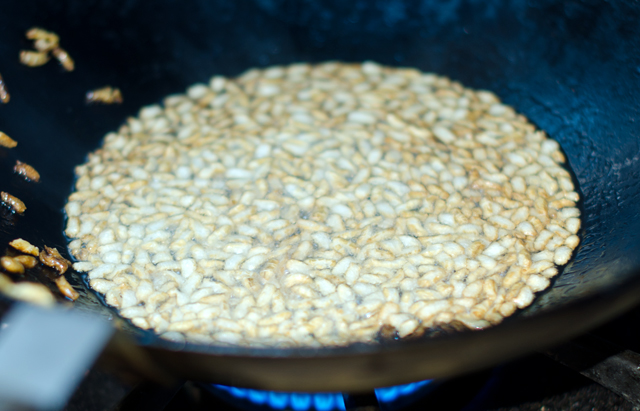
Rice puffing up in the hot oil.
DSC_7545a
This strainer is easy to find in Asian grocery stores and is relatively inexpensive.

Directions

  1. Place the rice, water and salt into a medium saucepan. Bring to a boil, cover, and reduce to a simmer. Cook for 40 minutes. Remove from the heat and let it sit, covered, for another 10 minutes.
  2. Preheat the oven to 250°F.
  3. Spread the rice out evenly onto a large baking sheet. Bake (dehydrate) in the oven for 2 hours. The rice should be dry and hard when it’s done. Place the rice into the fridge to cool off for at least an hour. Or leave it in the oven (turned off of course) overnight to cool.
  4. In a wok add enough oil so that it comes up to about ½” on the side, and heat the oil over medium heat until it’s shimmering, if you have a thermometer 375°F. Test to make sure it’s ready by adding a single piece of rice to the oil. If it sizzles all around the rice kernel, then it’s ready. Add about one quarter to one third  of the rice to the pot and cook for ten to twenty seconds, just until the rice puffs up. This happens very quickly, and you do not want to overcook it, otherwise the rice will get too dark and will be too crunchy. Use a fine strainer to remove the rice and place it onto a paper-towel lined plate. Do this until all of the rice is puffed.
  5. Store puffed rice in an air tight container.

March 24, 2016 Spinach and Roasted Garlic Hummus

DSC_6542aWhen I am looking for a snack, hummus is a healthy choice I feel good about adding to my shopping cart. But the truth is, it’s takes just minutes to make my own, and it’s healthier (no additives), tastier and cheaper too. The word hummus in Arabic means chickpea so strictly speaking, hummus is the term for a chickpea dip. Hummus bi tahini means chickpeas with tahini, a paste of ground sesame seeds.  Whether you add tahini or not, a basic hummus includes garlic, lemon juice, olive oil and salt.

One of my favorite food memories is a chickpea soup Joe made for me one Valentine’s Day. I absolutely love the sweet nutty flavor of freshly cooked chickpeas and in a perfect world I would always use them when I make hummus. However, dried chickpeas need to be soaked overnight, drained the next day and cooked for 1-3 hours, depending on freshness. I don’t always have time for that and the delayed gratification it requires.

However if you have the time, substitute one half the quantity of dried beans for the canned. The standard 15 ounce can of chickpeas drained is about 9 ounces or 1 ½ cups of beans. This translates into 4.5 ounces of dried beans or ¾ cup. Many cooks add a pinch of baking soda to tenderize dried beans to both the soaking and cooking water. The United States dried bean council (of course there’s one!) points out that it destroys part of the thiamine (aka vitamin B 1), making the amino acids less digestible and negatively affects the nutritional value. I’ll leave that heavy decision up to you.

A basic hummus recipe is easy and delicious and just the jumping off point for countless variations. I have previously shared a beet hummus recipe, this time I added fresh spinach and roasted garlic to the recipe.

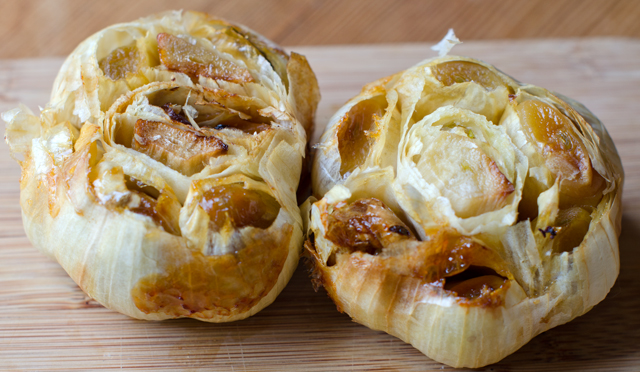
If you are not already roasting garlic cloves, you should. It takes more time to get your oven up to temperature than in does to get this kitchen staple together. The first time I roasted garlic I winged it but I am pleased to say my uninformed guess was pretty much on target. This is the basic recipe; cut about the top quarter off each head of garlic with a sharp knife to expose all the cloves. Slowly pour olive oil over each head, letting it soak into and around the cloves. Wrap the prepared heads of garlic in foil and bake in a 425°F oven. Start checking the garlic at the 45 minute mark. The finished cloves should be soft, golden and slightly protruding from the skins. I always roast more than what I need, it will keep in the fridge for about a week, that is if it lasts that long. You can also freeze roasted garlic for several months.

Everything goes into the food processor or blender, except the reserved chickpea liquid. I added three cloves of roasted garlic to my basic hummus recipe, along with three loosely packed cups of spinach leaves. I added a half teaspoon each of some appropriate dried herbs, cumin, for it’s smoky flavor, smoked paprika also brings smokiness and a little heat. Sumac is the herb you may not be familiar with, it has a fruity astringent taste, milder than a lemon. I shared more background on it in this post. It is readily available from several of the herb and spice mail order sights.

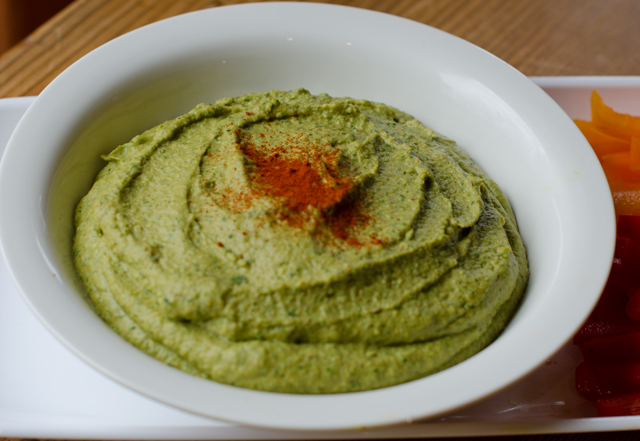
Add the additional bean liquid to get it completely smooth and holds it’s shape. Taste and add more salt if needed. Transfer mixture into a serving dish. Garnish with a dash of olive oil and a sprinkle of smoked paprika. Serve at room temperature.

DSC_6534a

DSC_6538a

Spinach and Roasted Garlic Hummus

Makes about 2 cups

Ingredients

  • 1-15 ounce can garbanzo beans (chickpeas) drained and liquid reserved
  • 3-4 c spinach leaves, large stems removed
  • 1/3 c tahini
  • 3 T fresh squeezed lemon juice
  • 3-4 cloves roasted garlic, or to your taste
  • ½ t salt, and more to taste
  • 1 t each cumin, sumac and smoked paprika
  • 1-2 T extra virgin olive oil
  • A dusting of smoked paprika for the topping

DSC_6536aDirections

  1. Add all the ingredients to your food processor or blender. Pulse, adding additional bean liquid as needed to get the hummus completely smooth.
  2. Taste and add salt if desired.
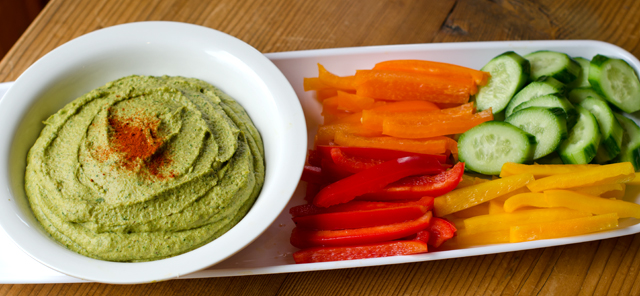
  3. Scoop into a serving bowl and sprinkle top with smoked paprika and a little olive oil if desired.
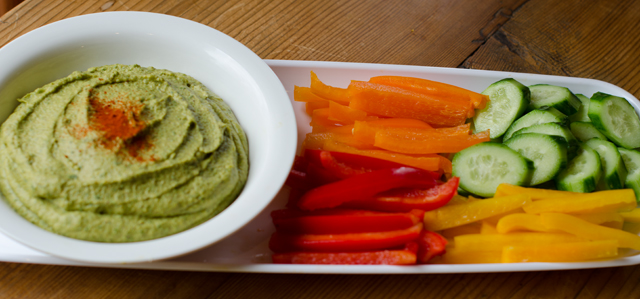
  4. Serve with the dippers of your choice.