September 14, 2013 Yellow Tomato Soup

DSC_2187a


The tomatoes in our garden come in every color of the rainbow. We are growing red ones like the Brandywine, Big Mama and Bloody Butcher, orange ones like the Mandarin, Amana and Sun Gold, Green Zebras that remain green when ripe, and even a tomato that is named Rainbow, it has a yellowish orange flesh with streaks of bright red.

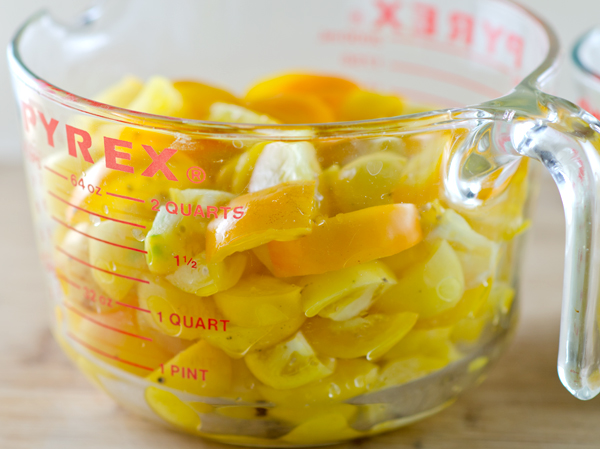
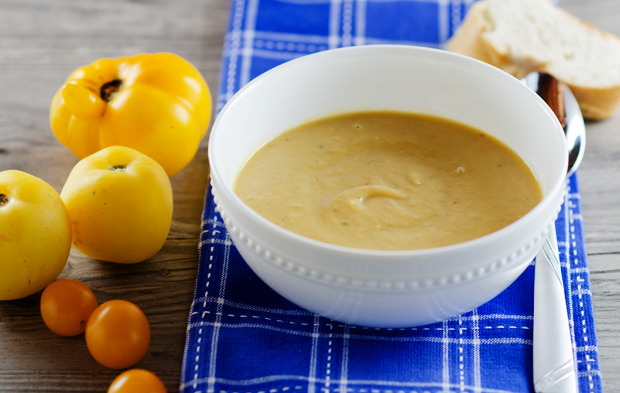
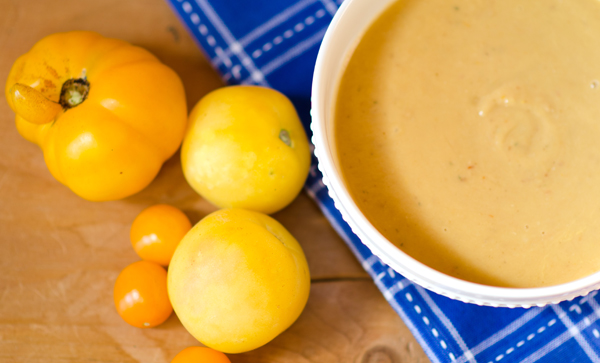
One of the most interesting tomatoes we grow is the Garden Peach. True to it’s name, the fruits are small, about 3 ounces, yellow in color with a peachy pink blush when ripe. The skin of the Garden Peach is light and fuzzy, reminiscent of a peach. That slight blush sometimes carries over to the tomatoes’ flesh. They are an heirloom tomato, more than fifty years old and an indeterminate variety, Garden Peaches will produce fruit throughout the tomato season. Their simple sweet flavor is a contrast to the bright acidity in red varieties.

Garden Peach is crack resistant and stores well. It produces fruit up to the first frost and many gardeners bring in the last of their crop to ripen on kitchen counter tops. Maybe I’ll remember to do that this year!

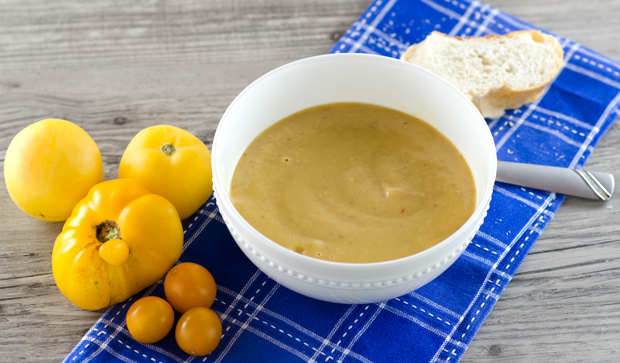
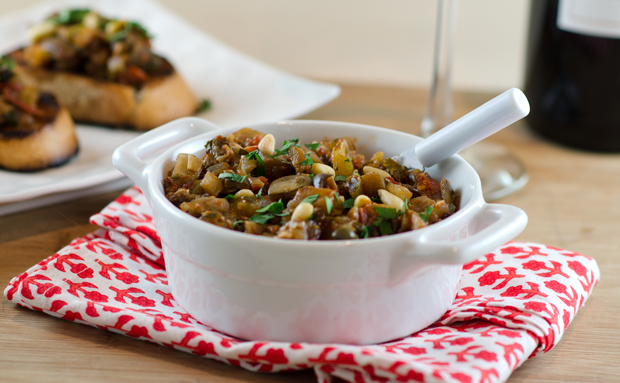
Many of our tomato plants have been quite prolific this year. I have been roasting and freezing countless bags of tomatoes to be made into sauces, chilis and soups. We will enjoy them when the weather turns cold and we are missing the vibrant flavor that only a fresh tomato can bring. Since we have a bumper crop of Garden Peaches along with other yellow varietals, I decided to make some of  them into a soup. The sweetness of the yellow tomatoes contrasts nicely with the smoky bacon and the spiciness of the chiles in adobo sauce. The addition of heavy cream is good, but not really necessary. You can substitute half and half or low fat sour cream with good results. It will last several days in the refrigerator but I made several batches to freeze so that we can enjoy this delicious soup on chilly autumn evenings.

DSC_2196a-copy


Yellow Tomato Soup

Makes 6-8 cups

Ingredients

  • 2 1/2 c chopped onion
  • 6 bacon slices, chopped
  • 6-8 c chopped yellow tomatoes
  • 3 cloves garlic, minced
  • 1/2 c dry Sherry
  • 3 c chicken stock or low sodium chicken broth
  • 1-2 t minced canned chipotle chiles
  • 1 t dried oregano
  • 1/2 c cup heavy cream (if desired) you can substitute half and half or low fat sour cream

Directions

  1. Sauté onion and bacon in a heavy large pot over medium-high heat until onion is tender and beginning to brown, about 12-15 minutes.
  2. Add tomatoes and garlic and simmer until tomatoes are tender and juicy, stirring occasionally, about 20 minutes. Add sherry and simmer another 5 minutes.
  3. Add stock and simmer until mixture is reduced to about 6 cups, 15 minutes or so.
  4. Stir in chipotle chiles and dried oregano. Working in batches, puree soup in blender.
  5. If freezing, pack soup in freezer containers, refrigerate until thoroughly chilled. Then transfer to freezer. If serving immediately, return to pot and stir until heated through, add cream if desired.
  6. Season to taste with salt and pepper and serve.
DSC_2079a
The Garden Peach variety is yellow with a pinkish peach blush.
DSC_2087a
I used about 8 cups of yellow tomatoes in this recipe.
DSC_2210a
The sweet flavor of yellow tomatoes contrasts nicely with smoky bacon and spicy chipotles in adobo.

DSC_2206a

September 8, 2013 Anise Hyssop Ice Cream

DSC_2170a


Herbal ice creams are a delicious way to capture the flavors of summer. I can’t let the season go by without making one of my favorite treats, sweet licorice flavored anise hyssop ice cream.

Anise hyssop is indigenous to North America and has been used for many years by Native Americans as a medicinal cure for everything from bad breath to a “dispirited heart”. The name can be misleading, it doesn’t belong to the same genus as anise or hyssop, though it smells like anise and it’s flower and stem are similar to hyssop. Anise hyssop belongs to the mint family, it’s botanical name is Agastache foeniculum and is sometimes referred to as licorice mint.

The plant can grow to 3 feet tall with beautiful blue-violet 4 to 6 inch spikes reminiscent of the flowers of a lavender plant. We have been growing anise hyssop for many years. The plants are a colorful addition to our herb garden and the blossoms attract both butterflies and bees. The plants die back in the winter, some plants will come back in the spring while others reseed themselves. The leaves are surprisingly sweet, the sweetest leaves are the ones closest to the blossoms.

The flowers and stems can be used in various infusions. Try infusing a simple syrup with anise hyssop for poaching summer fruit or in milk or cream for a crème brulee or a custard sauce. It’s blossoms can add a touch of sweetness to a fruit salad. It makes a tea with natural sweetness either hot or iced.  I have always used anise hyssop on it’s own in making ice cream but it could be combined with summer fruits like apricots, nectarines or peaches for a refreshing treat.   As with all herbal ice creams, the milk and some of the cream are first heated and then the anise hyssop sprigs are pushed under the surface of the liquid. The milk and cream mixture infuse off heat, an hour is sufficient to achieve the fullest flavor. I chose to make custard style ice cream that requires tempering eggs and produces a richer ice cream. An easier choice would be a Philadelphia style ice cream that is just made with cream and milk.

Anise Hyssop Ice Cream

Made with the Fine Cooking Recipe Maker

Makes one quart

Ingredients

  • 2c heavy cream
  • 1c whole milk
  • 3/4c granulated sugar
  • Table salt
  • 6 4-inch anise hyssop sprigs, with flower buds if possible
  • 5 large egg yolks
  • 1t vanilla extract or vanilla paste

DSC_2163a

Directions

  1. In a medium saucepan, mix 1 cup of the cream with the milk, sugar and a pinch of salt.  Warm the cream mixture over medium-high heat, stir occasionally, until the sugar dissolves and tiny bubbles begin to form around the edge of the pan, 4-5 minutes.
  2. Stir anise hyssop sprigs into warmed mixture. Cover and remove the pan from the heat and let sit for 1 hour. After 1 hour, taste and let sit longer if you desire a stronger flavor.
  3. Prepare an ice bath by filling a large metal bowl with several inches of ice water. Set a smaller metal bowl in the ice water. This will help the custard to cool quickly. Set a fine strainer over the smaller bowl.
  4. Whisk the egg yolks in a medium bowl.
  5. Rewarm the cream mixture over medium high heat until tiny bubbles begin to form around the edges of the pan, 3-4 minutes. In a steady stream, pour half the warm cream mixture into the egg yolks, whisking constantly to prevent the eggs from curdling.
  6. Pour the egg mixture back into the saucepan and cook over low heat. Stir constantly and scrape the bottom of the pan with a heat proof spatula until the custard thickens slightly. The custard will be thick enough to coat a spoon and hold a line drawn through it with a finger. An instant read thermometer will read 175°F to 180°F. It is important to remove the custard immediately from the heat at this point to prevent it from curdling. Immediately strain the custard into the cold cream in the ice bath. Press firmly on the anise hyssop in the strainer with the spatula to extract as much flavor as possible.
  7. Cool the custard to below 70°F by stirring it over the ice bath. Stir the vanilla extract or paste into the cooled custard.
  8. Refrigerate the custard until completely chilled, at least 4 hours or overnight. Freeze the custard in your ice cream maker according to manufacturer’s directions. Transfer the ice cream to an air-tight container for 4 hours and up to a week before serving.
DSC_1841a
Infusing the milk and cream with anise hyssop leaves and blossoms.
DSC_1823
Both butterflies and bees love anise hyssop!

DSC_1817aDSC_2163a

September 3, 2013 Eggplant Caponata revisited

DSC_2138a


Summer is berry season and each month brings a new arrival. June is time for plump juicy strawberries. July brings succulent raspberries and blueberries. August brings one of my favorite berries, eggplant. A berry? you say. First, the members of the nightshade family, tomatoes, pepper and eggplants to name just a few, are actually fruit, not vegetables. Botanically speaking, fruit are seed bearing structures that develop from the ripened ovaries of flowers. But eggplant are not just any old fruit, they are considered berries because they are indehiscent which means they do not sprout open when ripe. With these technicalities aside, there are two burning questions that most people have when it comes to eggplant; should I salt or not? and are there male and female eggplants?

DSC_2012a
A round up of the varieties of eggplant we grow.


Young eggplants, picked fresh from the garden or purchased at the farmers market will not need salting. They will have thinner skin and fewer seeds. The bitterness originates in the seeds which contains nicotinic alkaloids. Did I mention tobacco is another member of the nightshade family? So the larger the eggplant, the greater the likelihood of it having more seeds. Salting, also known as degorging, is good for drawing out excess liquid from the eggplant so that it doesn’t absorb as much oil in the cooking process, but it is only successful in masking bitterness.

The male vs. female eggplant was a tale that even I fell victim to. I was surprised at the number of websites that propose the theory of male and female eggplants as fact. The story goes that a dash-shaped slit on the bottom of the fruit indicates a female eggplant and a deep round indent indicates a male. The male eggplant reportedly has fewer seeds and is more desirable. It’s debunking time again. Fruit, like eggplants develop from the female flower on the plant but have no sex of their own.

So, how do you choose the best eggplant?  Look for eggplant that have smooth, bright, shiny skin. When you press on the skin it should spring right back. Select eggplant that are heavy for their size, indicating younger fruit. The calyx, the green leaves at the stem end should be fresh and green, not dried out and brown.

Our garden in the month of August yields an abundance of the nightshade family, tomatoes, peppers and eggplants. While our tomato harvest is better than last year, this has proven to be not the best year for eggplants and peppers. I wanted to take advantage of the eggplants we did grow and make one of our favorites, caponata.

I posted a different recipe for caponata last year, this is one from my catering days.  A great room temperature dish, caponata always tastes better the second day, after the flavors had the chance to meld. It is an agro dolce, a sweet and sour dish from Sicily that shows the influence of North African flavors on the region. Serve on grilled baguette slices and garnish with toasted pine nuts and chopped flat leafed parsley.

DSC_2117a


Eggplant Caponata

Serves 6-8 as a side dish

Ingredients

  • 1/3c olive oil
  • 3c diced eggplant
  • 1 1/2c chopped onion
  • 1c thinly sliced celery
  • 2c chopped tomatoes
  • 3T minced garlic
  • 2T tomato paste
  • 1/4c red wine vinegar
  • 1c sliced green or black olives
  • 1/3c capers, well drained
  • 1 or 2 anchovies, drained and chopped
  • 1T sugar
  • 1/2t crushed red pepper flakes
  • 1/2c minced flat leafed parsley
  • Kosher salt and freshly ground black pepper
DSC_2065a
A lot of chopping but the dish comes together quickly after that.

DSC_2069a


Directions

  1. Heat the olive oil in a large skillet. Add the eggplant and sauté until somewhat soft, 3-4 minutes. Add the onions, celery, tomatoes and garlic and cook for another 10-12 minutes, stirring occasionally.
  2. Remove from the heat, add the remaining ingredients and toss lightly. Refrigerate until ready to serve, preferably the next day. Bring to room temperature before serving.

DSC_2131a

DSC_2122aDSC_2145a-copy