Tater tots are a mid twentieth century (1953) invention born out of the frugality of brothers F. Nephi and Golden Grigg. Co founders of Ore-Ida, they were looking for a way to use the potato pieces left over when making their french fries. The pieces were used as feed for the livestock on the family farm or just tossed in the trash. The brothers Grigg knew that there had to be a way to consume the discards.They chopped the potato pieces, added seasonings and salt, put them through an extruder where they got their tot shape then into the deep fryer.
Fast forward to the twentieth first century and Americans consume 70 million tots a year. They are loved by young and old alike, everyone from high end chefs like Daniel Boulud to mommy bloggers. Mommy bloggers have taken tots beyond the potato. To their delight they discovered that their little ones would eat veggies they wouldn’t touch before when they were presented in tot form. Broccoli, cauliflower, sweet potatoes, carrots, beets and zucchini have all been used to make tots.
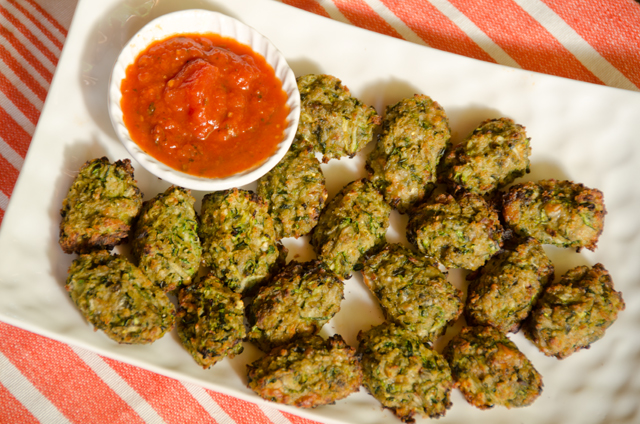
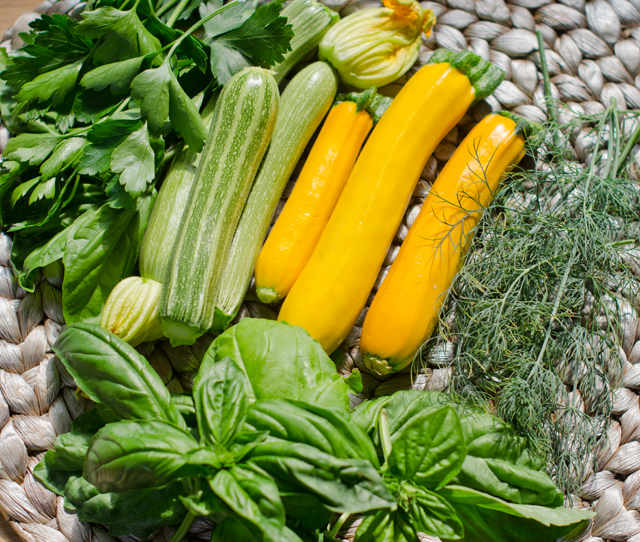
So it was time for me to take on the tot. I chose two things we have in abundance, zucchini and basil. Basil is in season so why not make some pesto? Whatever vegetable you choose for your tots it is important to squeeze as much water out of the shredded vegetable as possible. A clean linen dishcloth is what I recommend. If time is short and you don’t have time to make the tot shape, divide the mixture evenly into well greased mini muffin pans. Make a double batch and freeze half for later. To eat, place frozen tots on a baking sheet and bake at 400°F 10-15 minutes, until heated through.Crispy on the outside and soft on the inside, zucchini pesto tots make a great snack or side dish.
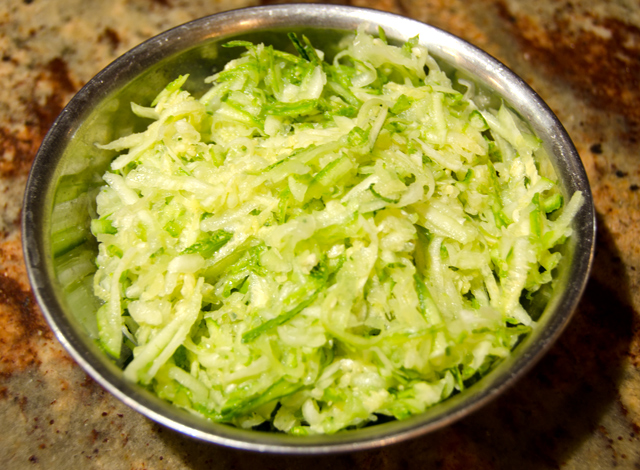
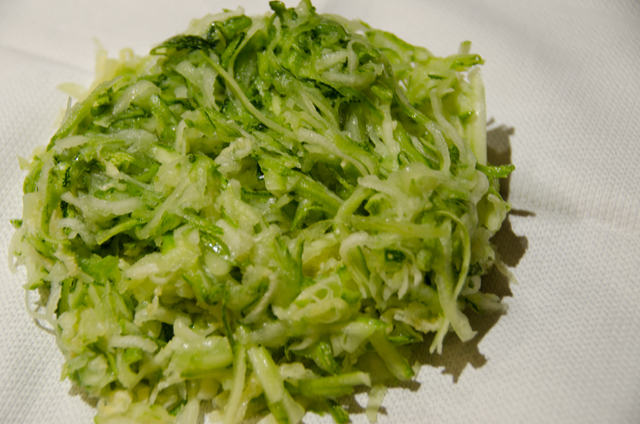
Shredded zucchiniShredded zucchini after squeezing
Zucchini Pesto Tots
Ingredients
1¼ lb zucchini
2-3 T basil pesto
1 large egg, lightly beaten
½ c panko bread crumbs
½ c grated Parmesan cheese
Kosher salt and freshly ground black pepper
Directions
Preheat oven to 400° F. Line a large baking sheet with parchment paper.
Grate the zucchini with the large holes of a box grater.
Transfer the grated zucchini to a large dish towel and strain out as much liquid as possible.
Transfer the grated zucchini to a large bowl then add the pesto, egg, Parmesan and kosher salt and freshly ground pepper to taste. Mix together until well blended.
Spoon a generous tablespoon into your hand and roll it into a cylinder. Place on the prepared baking sheet. Repeat with remaining zucchini mixture.
Bake 18-20 minutes, rotating the baking sheet half way through, until golden brown. Serve with your favorite dipping sauce.
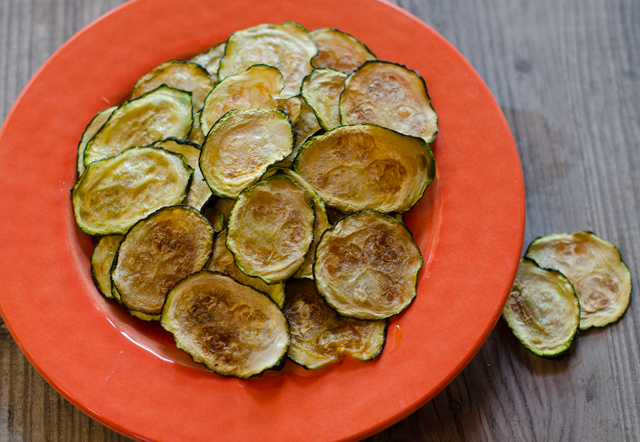
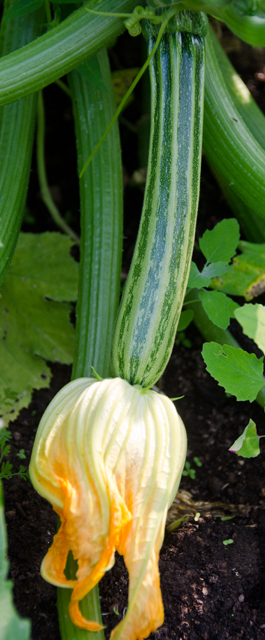
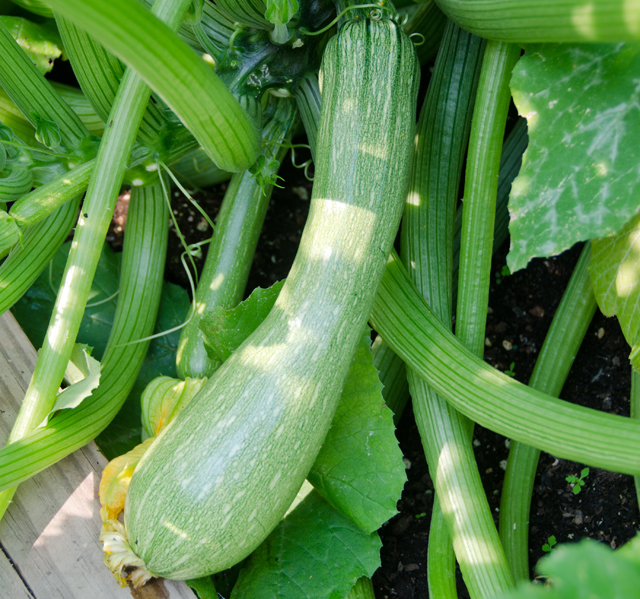
Fellow vegetable gardeners, we’ve all done it. You diligently pick small to medium-sized zucchini, sometimes even with the blossom still in tact. Then it happens, you get busy doing other things, it rains for several days or you just forget. The once compact little fruits now resemble a major league baseball bat. If you are running out of ideas, zucchini chips are a quick and easy way to use up “the ones that got away”.
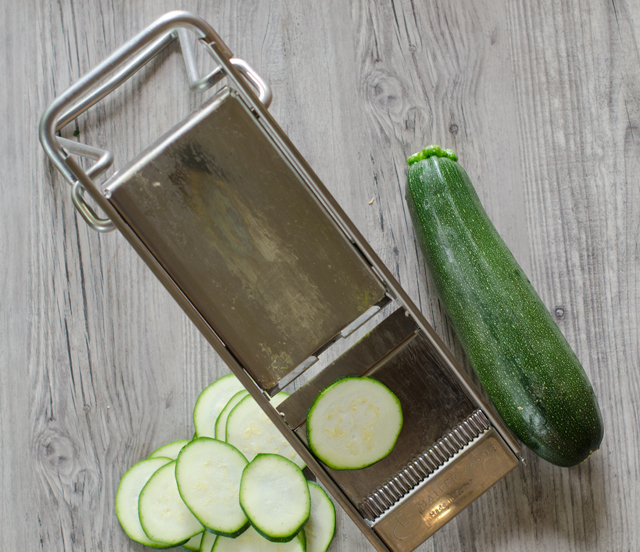
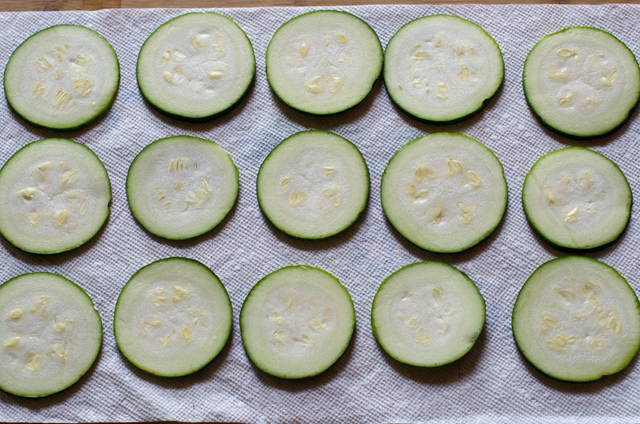
This recipe works best with medium to large zucchini because the chips shrink as they bake. Slice into 1/8 inch rounds, a mandolin works best here for uniform slices. Place the slices on paper towels and top with another layer of paper towels. Press down lightly to remove excess liquid. Move the slices to parchment lined baking sheets that have been lightly coated with olive oil or olive oil spray. I used half sheet pan (18×13) sized trays. Brush rounds lightly with extra virgin olive oil and season lightly with salt or your favorite seasoning blend. Bake in a 235°F oven for about 1 ½ hours, rotating trays at the half way point. If some of the chips are not ready, remove the crisp chips and put the damp chips back in the oven to finish baking. Let the chips cool a bit before devouring. Enjoy warm or at room temperature. Chips can be stored in zip-lock bags, that is, if any are left over.
A mandolin is perfect for achieving even slices.
Line zucchini slices on paper towels to blot excess moisture.
Zucchini Crisps
Makes about 80 crisps
Ingredients
2 or 3 medium to large zucchini
Extra virgin olive oil
Kosher Salt and any spice mix
Directions
Preheat an oven to 235°F (convection is best). Cover two large baking sheets with parchment and lightly coat with olive oil or olive oil spray.
Wash and dry off the zucchini and cut off the stem end. Thinly slice (1/8 inch) the zucchini, a mandolin makes this easy.
Lay the slices out on paper towels and cover the slices with a second layer of paper towels.
Press down lightly on the paper towels to blot up excess moisture.
Place the sliced zucchini on the baking sheets, being careful not to overlap.
Brush the slices lightly with extra virgin oil and sprinkle with salt.
Bake until crisp and golden, 1½ to 2 hours, At the halfway point, switch the pans around to ensure even baking.
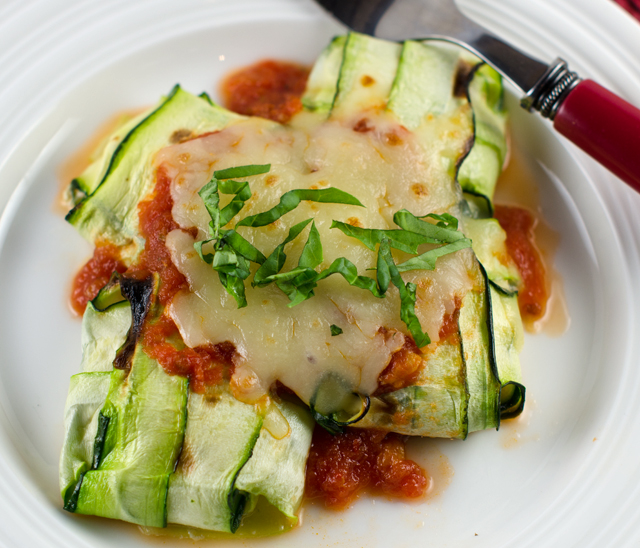
Normally I wouldn’t share a recipe for zucchini in the middle of January, but this time I had to make an exception. I am always looking for new ways to prepare for the buckets of zucchini that our garden produces every summer, so I had to try out this recipe I saw on The Chew, “Herby” Ricotta Zucchini Ravioli. In this recipe, very thinly shaved zucchini slices take the place of pasta and are filled with a herbed ricotta filling.
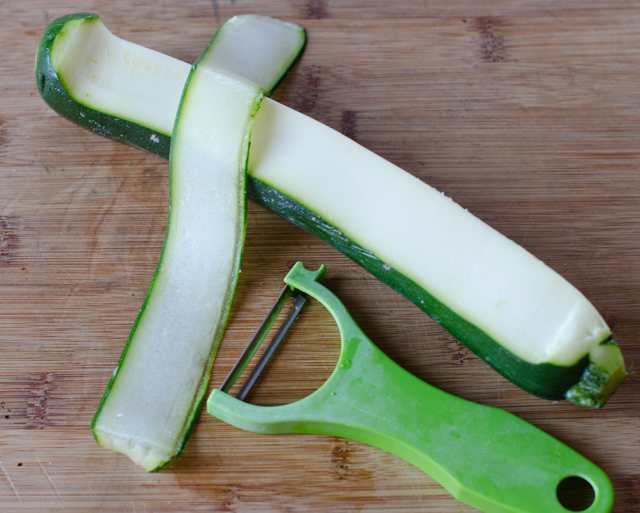
The zucchini could be sliced on a mandoline, but to simplify things, a Y peeler works just as well. Remove the first strip of skin, then a few more slices until you have a flat surface. Make slices down the length of the zucchini until you reach the seedy core. Look for medium length zucchini. I found that strips 5-6 inches long and 1½ inches wide were the right size to accommodate a generous tablespoon of the filling. Place the slices on baking trays lined with paper towels and lightly salt to draw out any excess liquid.
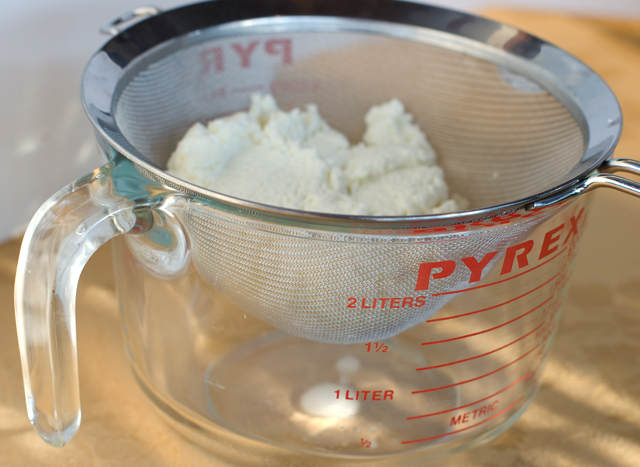
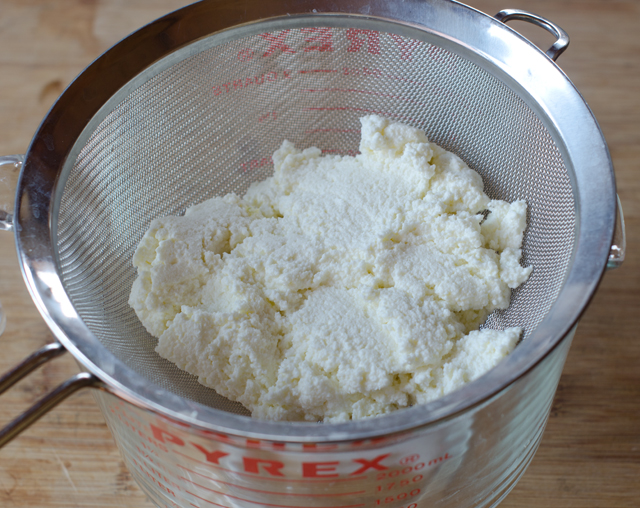
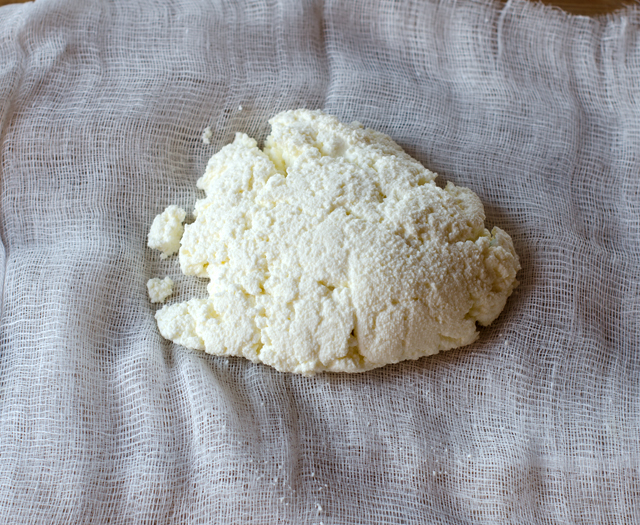
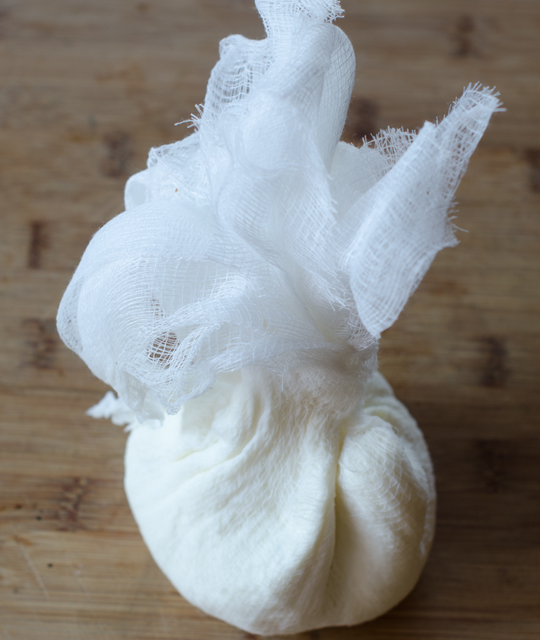
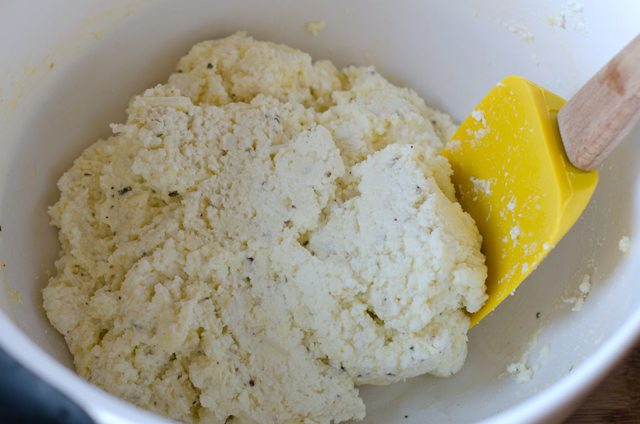
The filling is very simple, ricotta cheese with an egg, grated Parmesan and seasonal herbs. Fresh ricotta is always best but one without preservatives is a good second choice. Drain the ricotta in a fine strainer to draw out excess liquid then squeeze it out in cheesecloth to make it as dry as possible. There aren’t any fresh herbs in the garden on this very cold January day, but Joe has brought some into the conservatory. For this recipe I used parsley, thyme and a little dried oregano. Let the ricotta herb mixture sit for 10 to 15 minutes to allow the flavors to blend.
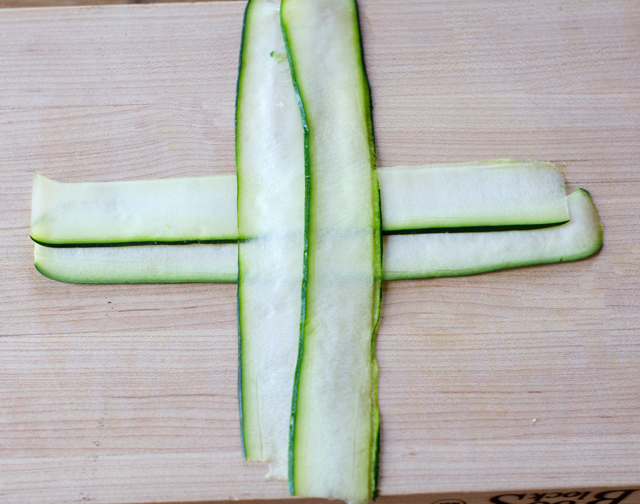
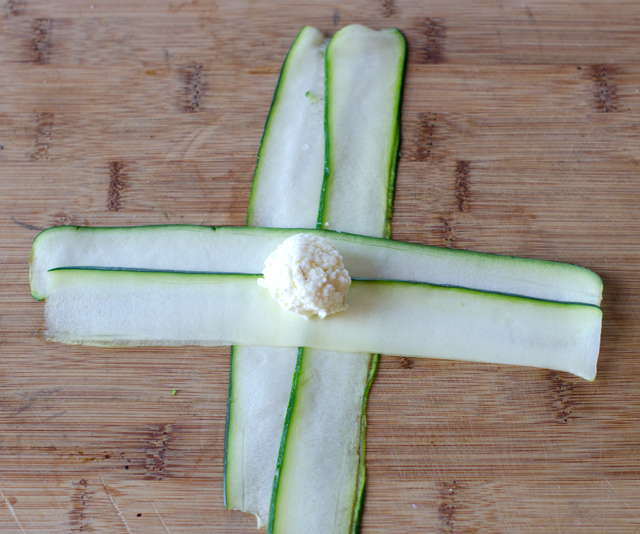
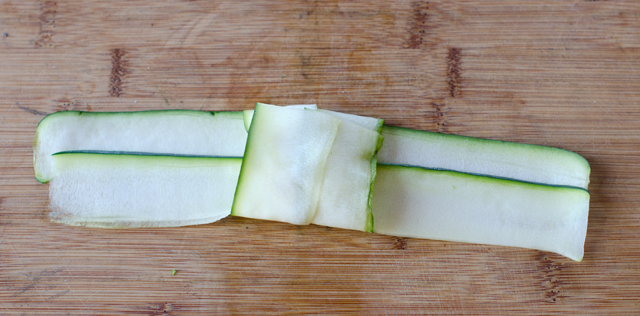
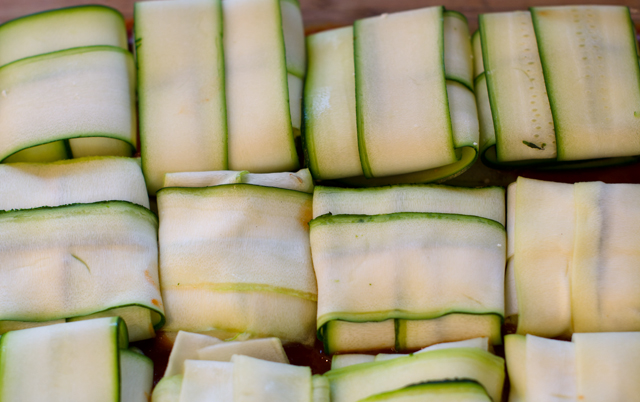
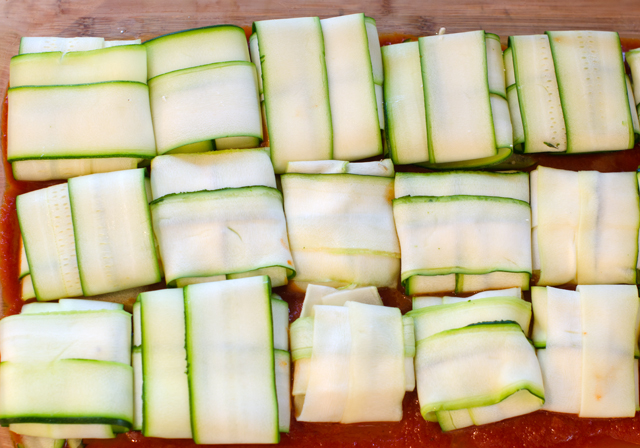
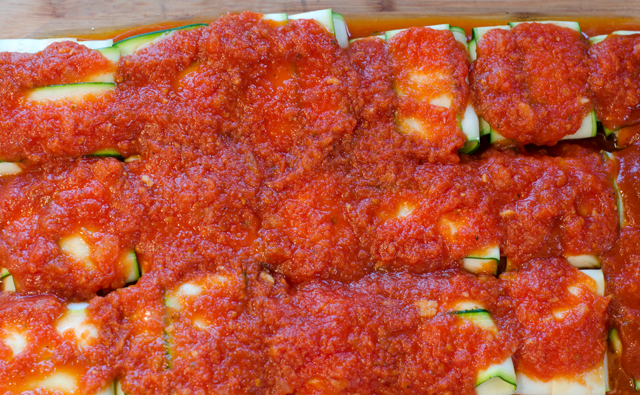
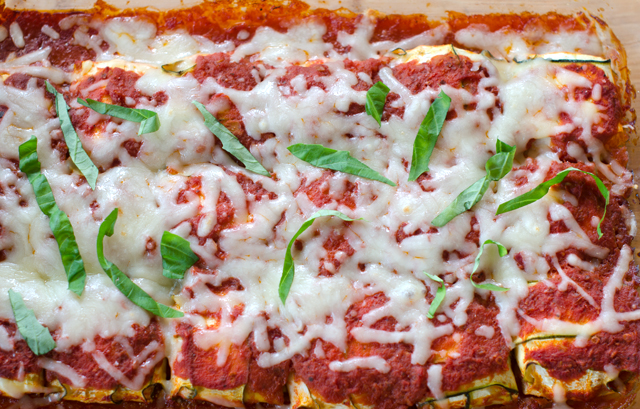
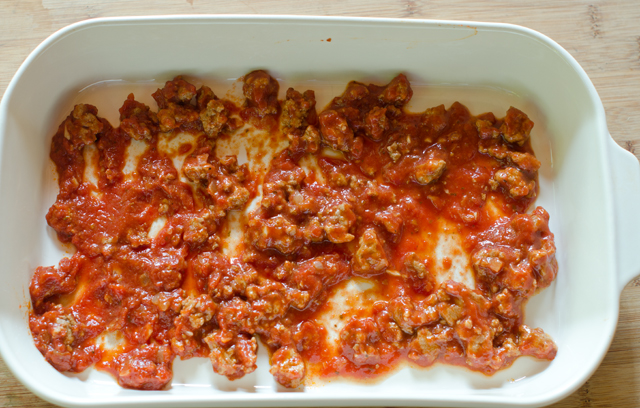
Now it’s time to make the bundles. Put enough tomato sauce on the bottom of your prepared pan to lightly coat it. Blot any excess liquid from the zucchini. On a clean work surface, lay two strips of zucchini so that they slightly overlap lengthwise. Lay two more noodles on top perpendicular to the first two strips, it should look like a plus sign. Place a generous tablespoon at the intersection where the strips meet. Starting with the bottom strips, fold them over the center, repeat with the second set of strips. Place the ravioli seam side down in the prepared baking dish and repeat with remaining zucchini strips until you fill the baking dish. Top with sauce and sprinkle with shredded mozzarella cheese. Bake for about 25 minutes, take out of the oven and sprinkle on the remaining Parmesan.
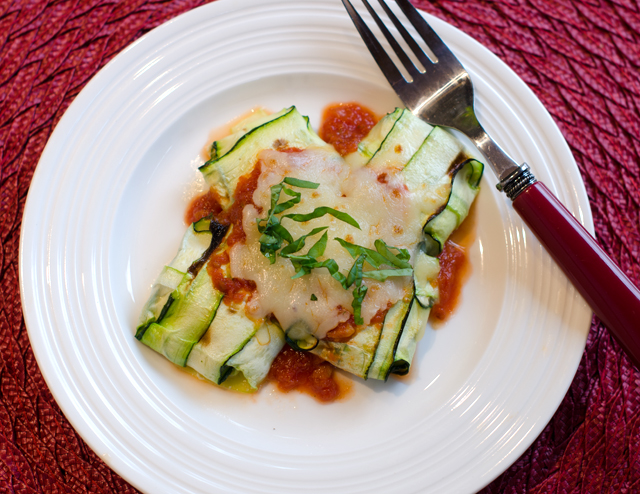
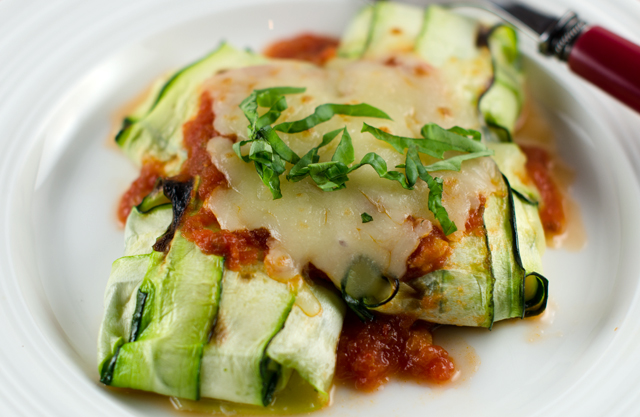
The verdict? Joe and I both thought they were delicious and didn’t feel cheated with the zucchini wrapper. As Chew co host Clinton Kelly said,” this is an amazing alternative to pasta.” The calorie savings are pretty amazing too with regular ravioli coming in at 785 calories while the zucchini ravioli is 260 calories! The portion size wasn’t mentioned though. This is not the best dish for the freezer. Zucchini is 95% water so I think this dish would best be served fresh. This is a great meatless dish whether for lunch, dinner or as a side. Pesto would be a good addition to the ricotta filling and a cheesy Alfredo sauce could take the place of the tomato sauce. Can’t wait until summer to try these with zucchini from the garden and my own variations.
Drain the ricotta in a fine mesh sieve for a half hour.
Wrap the ricotta in cheesecloth and squeeze out any excess moisture.
Using a Y peeler, slice the zucchini into long thin strips.Combine the ricotta, beaten egg, herbs, spices and cheese.Slightly overlap 2 strips of zucchini and overlap two more strips, forming a plus sign.Place a generous tablespoon of filling where the strips intersect.Fold the bottom strips over the filling.Fold in the other 2 strips to the center to completely enclose the filling.
Add the ravioli, seam side down to a baking dish lightly coated with tomato sauce.Top with additional sauce.Top with mozzarella cheese and bake .
Herby Ricotta Zucchini Ravioli
Serves 4
Ingredients
Olive oil for greasing the baking dish
2 c ricotta – whole milk or part skim
4-5 medium zucchini
1/3 c plus 2 T grated Parmesan (divided)
1 large egg
¼ c fresh herbs, finely chopped (parsley, thyme, chives etc.)
¼ t freshly grated nutmeg
2 cloves garlic, peeled and finely minced
2 ½ c tomato sauce-homemade or your favorite store brand
1 c shredded mozzarella
Basil chiffonade for garnish
Kosher salt and freshly ground pepper to taste
Cheesecloth – that will be used with the ricotta
Directions
Preheat the oven to 375°F. Lightly grease a 8×12 baking dish with olive oil.
Place a fine mesh sieve over a medium bowl and add the ricotta. Set aside and allow to sit for 30 minutes.
Using a Y vegetable peeler, slice the zucchini lengthwise into thin strips, avoiding the seedy core. Place strips on a paper towel lined baking sheet, lightly sprinkle with salt and set aside.
In a medium bowl, add ricotta, 1/3 c Parmesan, egg, chopped herbs, nutmeg and garlic. Season with salt and pepper and stir until fully combined. Set aside for 10 minutes to let the flavors combine.
Blot excess moisture off zucchini slices. On a work space, overlap 2 strips of zucchini and then overlap 2 additional strips on top and across the first 2 strips, forming a cross shape.
Using a spoon or cookie scoop, place a generous tablespoon of the ricotta mixture into the center of the zucchini formation.
Fold the bottom layer of the zucchini strips over the filling and into the center so that they are overlapping. Fold in the other two strips to the center so that the filling is completely enclosed. Repeat process with remaining filling and zucchini.
In prepared baking dish, spread ½ cup sauce evenly over the bottom. Place zucchini seam-side down. Pour remaining sauce over zucchini. Top with remaining Parmesan and mozzarella. Transfer to oven and bake for 20 to 25 minutes, until zucchini is al dente.
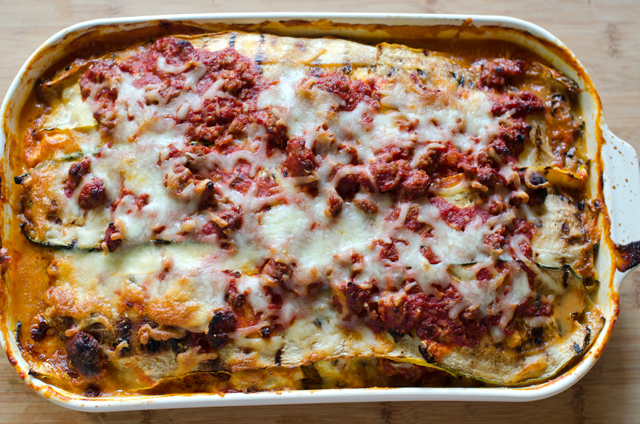
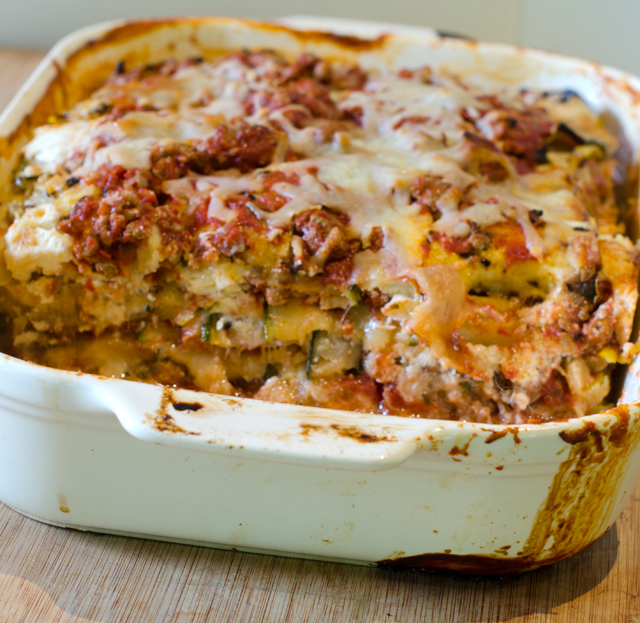
Gardeners, let’s face it, we’ve all done it. You watch that cute little zucchini you’ve been nurturing along for several days, waiting for the moment when it’s about eight to ten inches long, bright green with mottled white striping and the blossom still attached, ready for picking. But life isn’t perfect, it rains for several days and you didn’t make it out to the garden and now that cute little zucchini is the size of a miniature baseball bat. Don’t despair, there are ways to still use them, zucchini lasagna is one of my favorites.
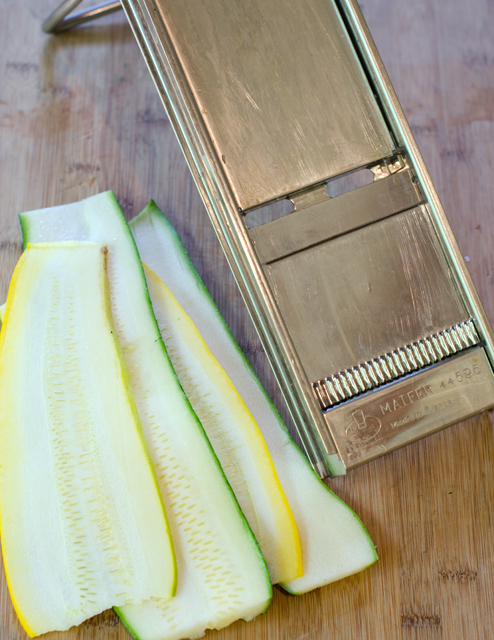
Zucchini lasagna “noodles” replace regular pasta for this delicious dish. I first cut the zucchini in half lengthwise so that I have a flat surface to cut my noodles. A mandolin is always my first choice for even uniform slices. If you weren’t aware, a mandolin, isn’t just a music instrument. It is a hand-operated kitchen tool with adjustable blades that in addition to making julienne and waffle cuts, makes uniform slices. Whatever model you choose, use the hand/finger guard, I speak from personal experience. You can also go low tech and use a very sharp knife with a cutting board to stabilize your slices. I make my slices to fit the baking dish lengthwise, if you are using shorter zucchini, it’s fine to cut them the other way, making sure they fit your dish.
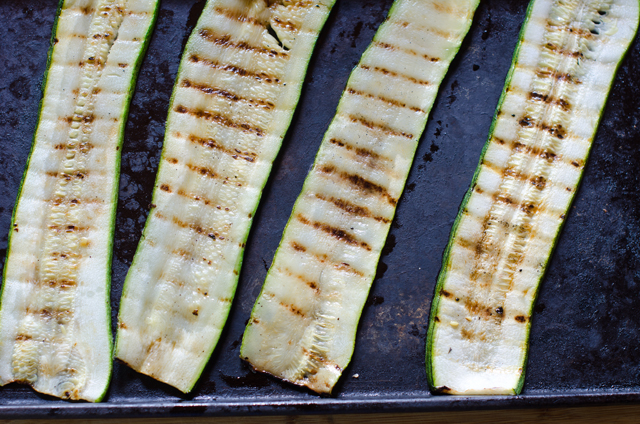
Zucchini is 95% water so before you assemble the lasagna it is important to precook it so less moisture ends up in your finished dish. Suggested methods I’ve seen include broiling, sauteing and parboiling. I like cooking them in the grill pan, it gives added flavor to the zucchini and the slices have a nice finished look. Cooking the slices on an outdoor grill would make the process even faster. Cook more slices than you think you may need to allow for breakage.
This dish can be made in stages, make the meat sauce one day, slice and cook the zucchini the next, then assemble. Just like regular lasagna, it tastes even better the next day, if it lasts that long!
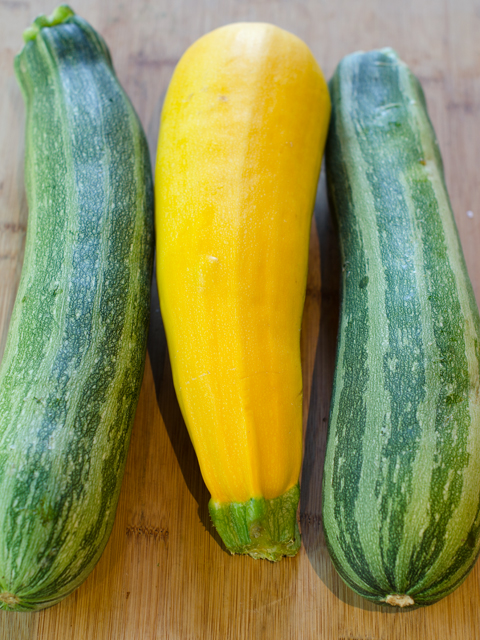
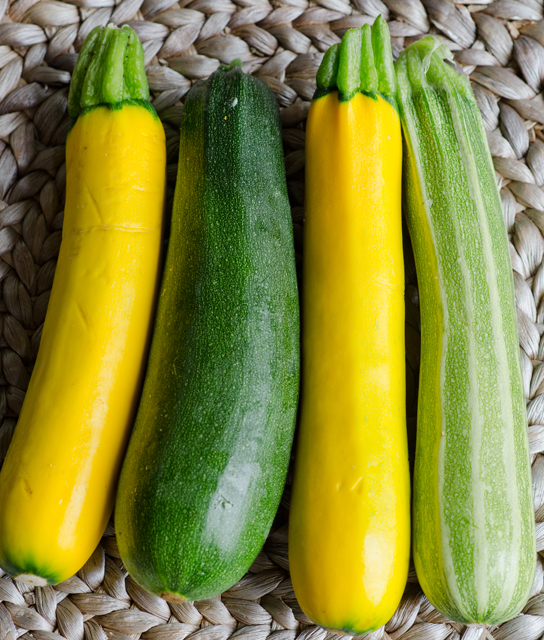
Don’t forget the yellow squash , they work in this recipe too.
Zucchini Lasagna with Meat Sauce
Serves 6-8
Ingredients
Ingredients
3-4 or more large zucchini, sliced 1/8″ thick
Extra virgin olive oil for brushing zucchini
1 lb lean ground turkey or beef
1 ½ t kosher salt
1 T olive oil
1 c finely chopped onion
2 cloves minced garlic
1 quart plain tomato sauce ( I used homemade)
2 T tomato paste
2 t dried oregano
¾ t freshly ground black pepper
1 ½ c part skim ricotta cheese
½ c finely grated Parmesan
1 large egg
4 c shredded mozzarella cheese
Directions
Preheat oven to 375°F and place baking rack in the lower position.
Make zucchini lasagna “noodles”. Cut squash into 1/8″ thick slices using a sharp knife or mandolin. If your squash is long they should fit the pan lengthwise, if you have shorter squash, orient the slices in the opposite direction. You should have enough slices to do four to five layers with a few extra pieces for good measure.
Heat a grill pan or an outdoor grill to medium high heat. Brush both side of the slices lightly with olive oil.
Grill the zucchini slices on both sides so they have grill marks, 3-5 minutes for the first side, a little less for the second side. Squash should be cooked but not falling apart. Line up the grilled zucchini slices on a paper towel lined baking sheet to absorb excess moisture.
Heat a large saute pan over medium high heat and add 1 tablespoon olive oil. When the pan is hot add the onion and cook until onion is softened but not browned, 4-5 minutes. Lower the temperature if necessary. Add the garlic and cook another minute. Add the ground meat and season to taste with salt. Brown the meat, breaking it up as you cook it.
Slowly pour in the tomato sauce and stir it into the meat. Bring to a boil and immediately reduce heat to medium. Add tomato paste, oregano, salt and pepper. Simmer on low, stirring occasionally for about 40 minutes. Cover and set aside.
In a medium bowl combine ricotta, Parmesan and egg. Mix well.
Assemble the lasagna. Lightly oil or spray a 9 x 12 glass or ceramic baking dish.
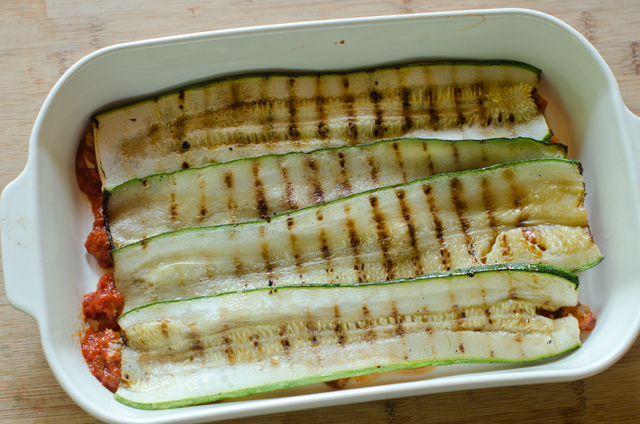
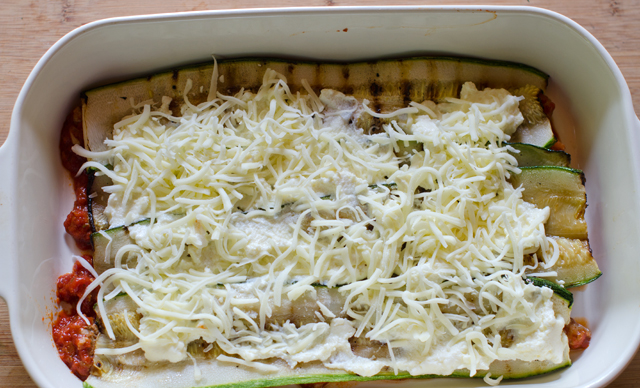
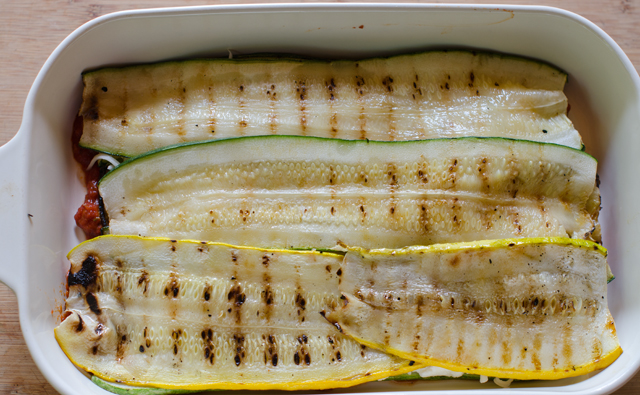
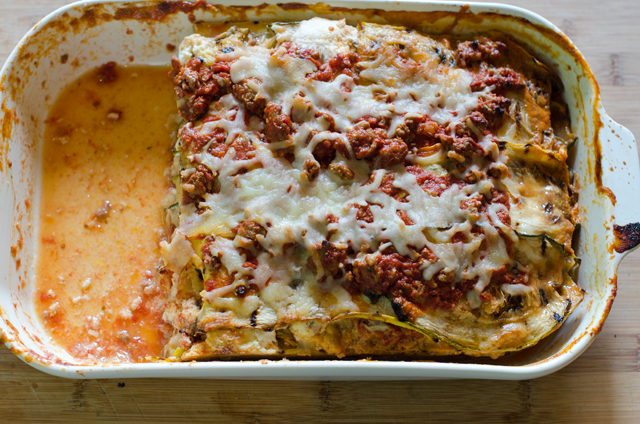
Spread a light layer of the tomato sauce on the bottom of the pan. Layer zucchini slices over to cover. Spread one-third of the ricotta mixture over the zucchini and top with a cup of the mozzarella. Repeat the layers two more times, sauce, “noodles”, ricotta mixture topped with mozzarella. Top with noodles and the remainder of the sauce. Cover the baking dish tightly with foil and bake for 30 minutes. Uncover the foil and bake for an additional 20 minutes to dry up excess liquid. Sprinkle the last cup of mozzarella over the top and bake until melted, about 15 minutes. Let lasagna rest for a half hour to allow it to firm up and make for easier slicing.
Slices made with my stainless steel mandolin, a gift from many years ago, I have other inexpensive ones too.
Zucchini slices cooked in the grill pan.
Meat sauce to cover the bottom of the baking dish.
Grilled zucchini slices to cover.
A layer of cheese.Another layer of zucchini noodles. Repeat the process with the sauce.The finished product.
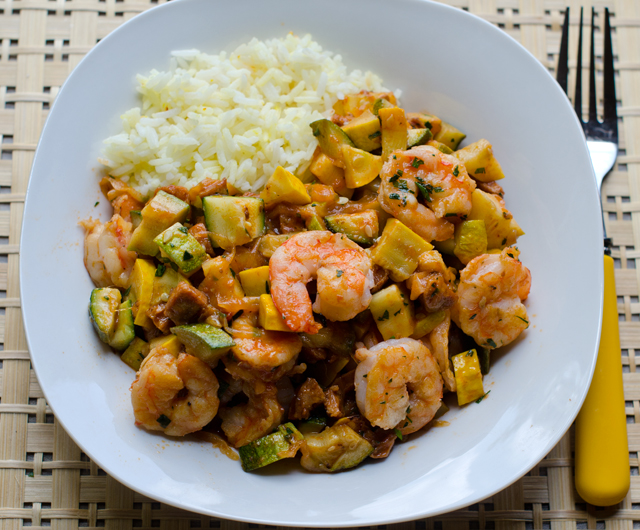
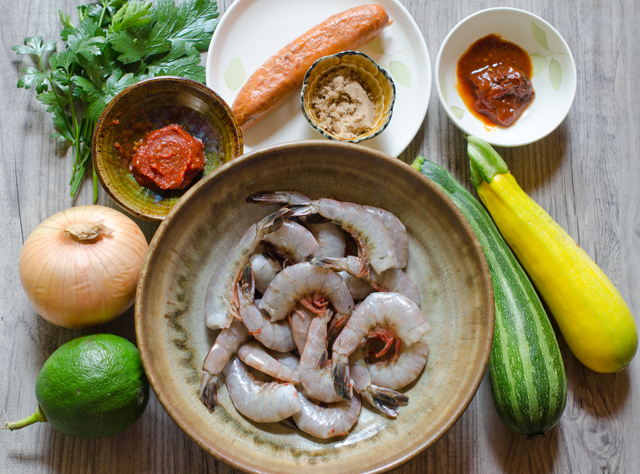
Spicy chipotle shrimp with chorizo and zucchini is an entrée that is flavorful, easy to prepare and uses only one pan. If that isn’t enough, it’s a great way to use that July abundance of zucchini and yellow squash from your garden or farmers market.
I always have some frozen shrimp on hand for a quick dinner. Though my local seafood market on occasion has fresh (never frozen) Florida shrimp, in my area of the country (mid-Atlantic) frozen shrimp is not a bad thing. The shrimp you see sitting on ice at the supermarket seafood counter have been thawed out. Convenient yes, but you can’t be certain how long they have been sitting there. I prefer to buy individually quick frozen (IQF) shrimp in 1 or 2 pound plastic bags, then I can just defrost what I need in 15-20 minutes. I prefer larger shrimp because there is less of a chance to overcook them. Look for the count of shrimp per pound, in this case 21-25 count, rather than a size designation like extra-large or jumbo.
Easy peel, meaning the shell is split down the back and deveined is the easiest way to make this or any recipe calling for shrimp. Always devein shrimp before cooking, many an eliminated Chopped contestant rues the day they didn’t. It’s not hard to do, either use a small pairing knife or the tool specifically made for that purpose. It’s not actually a vein but the shrimp’s digestive tract and when it is dark in color, it is filled with grit. Removal is not essential, nor will it make you ill, deveining just makes for a more attractive presentation.
Pat the shrimp completely dry with paper towels before cooking. Any extra moisture on the surface of the shrimp prevents them from searing and browning. Preheat your skillet for a few minutes before adding the oil. Wait a minute until the oil is shimmering before adding the shrimp. Place the shrimp in a single layer, leaving a little space between each. Don’t be tempted to flip the shrimp too soon, give them time to brown on the first side, a little pink will start to show, now flip. You want the shrimp to be slightly underdone since they will be added back to the pan later.
Transfer the shrimp to a plate, add the second 2 tablespoons of oil to the pan along with the diced chorizo. Spanish chorizo is a dried and cured (fully cooked) pork sausage seasoned with smoked paprika, garlic and other herbs. There is also Mexican chorizo that comes in casings and must be cooked before eating. It is used in tacos, tortillas and often served at breakfast with eggs. I would definitely say that the Spanish chorizo is the best choice here.
Add the cubed zucchini, onion and yellow squash, cook until the zucchini starts to brown, 3-4 minutes. Now it’s time to add the broth mixture. A chipotle chili and adobo sauce give it a real kick and the tomato paste and brown sugar mellow out the heat. Chipotles are small jalapeños that are dried by a smoking process that gives them a dark color and a distinct smoky flavor. They are canned in a red sauce, adobo, that has a smoky flavor as well. Start with the quantity given in the recipe and if you really like it hot, add a little more. Just remember it’s easier to add heat than take it away. Since you will not be using the entire can, store the remaining chilis in adobo in a well labeled plastic container or zip-loc bag in the freezer. I wasted too many opened cans of chilis before I got in this habit.
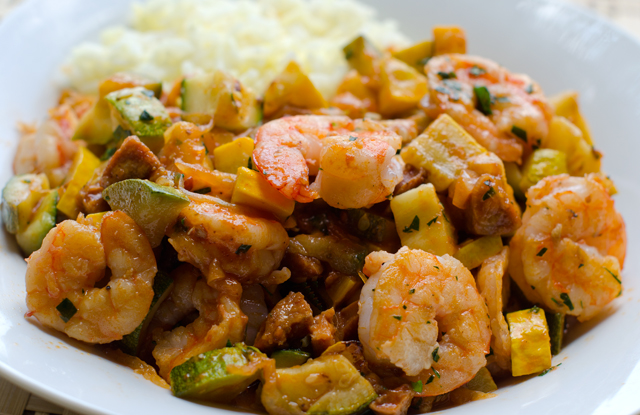
Bring the sauce to a boil, then reduce it to medium low and add the shrimp back in along with the lime juice and parsley. Cook for an additional 2-3 minutes, the zucchini should be tender and the shrimp opaque throughout. You can check for doneness by cutting a shrimp in half at its thickest point. It should be creamy white, firm and springy but still moist. You can add some strips of red pepper to the recipe and swap out cilantro for the parsley. Give a final seasoning with salt, pepper and more lime juice. Serve immediately garnished with the rest of the parsley on a bed of rice.
Spicy Chipotle Shrimp with Zucchini and Chorizo
Serves 2-3
Ingredients
½ c low-salt chicken broth
½ small chipotle, seeded and minced, plus 2 T adobo sauce (from a can of chipotles in adobo
1 T tomato paste
1 t brown sugar
1 lb shrimp (21-25 per lb), peeled, deveined, rinsed and patted dry
1 t kosher salt; more as needed
Freshly ground black pepper
¼ c olive oil, divided
¼ lb chorizo, cut into ¼ inch dice, a little less than a cup
3 c combination of zucchini and yellow squash, cut into ½ inch dice
1 cup thinly sliced yellow onion
¼ c chopped parsley or cilantro
2 T fresh lime juice; more as needed
Directions
In a one cup measure, whisk together chicken broth, chipotle, adobo sauce, tomato sauce and brown sugar.
Sprinkle the shrimp with a ¼ t salt and a few generous grinds of black pepper. Put a skillet (not non-stick) over medium high heat, when the skillet is hot, add 2 tablespoons oil. When it starts to shimmer, add the shrimp in a single layer. Cook the shrimp undisturbed until it browns nicely, a little less than 2 minutes. Flip and brown the shrimp on the other side, about 1 ½ minutes. Transfer the shrimp to a plate, it should be slightly under cooked.
Add the remaining 2 tablespoons oil and the chorizo to the pan and cook, tossing occasionally, until it starts to brown, about 1 minute. Add the zucchini, yellow squash and onion, sprinkle with a little salt. Cook, tossing frequently, until the zucchini starts to brown and is tender, about 4 minutes.
Add the broth mixture to the skillet and bring to a boil. Reduce the heat to medium low. Stir in the shrimp, half of the parsley and the lime juice.
Cook, stirring often, until the zucchini and squash are tender and the shrimp are opaque, 2-3 minutes. Cut one in half to check if necessary. Season to taste with salt, pepper and more lime juice. Serve immediately, sprinkled with the remaining parsley.
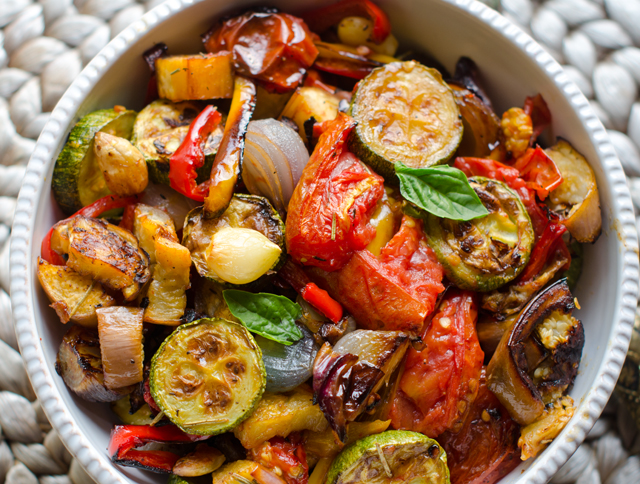
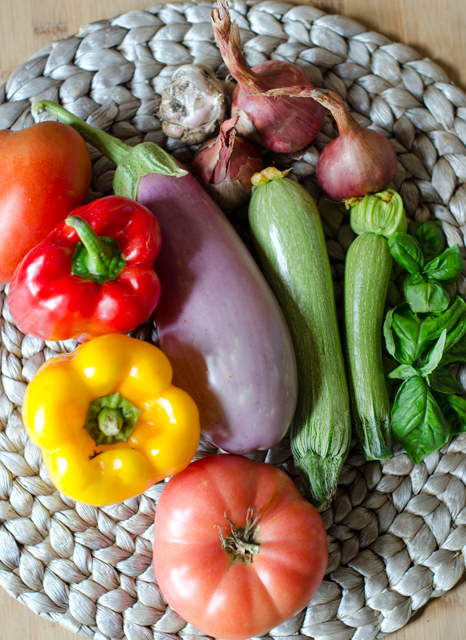
I love recipes that use the bounty of the garden in a single dish and ratatouille accomplishes that in a very delicious way. In case you didn’t know, ratatouille (rat-uh–too-ee), is a summer vegetable stew that had it’s origins in the Provencal city of Nice in southern France. Traditionally, each ingredient, eggplant, zucchini, peppers, onion, garlic and tomatoes, is cooked separately on the stove top and tossed together at the very end. So it’s really a sauté that is presented as a stew.
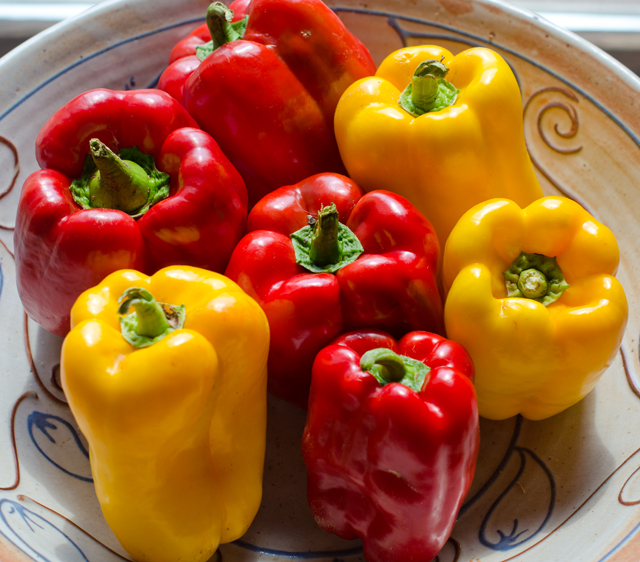
In this version the vegetables are tossed in olive oil and roasted in the oven, eliminating the time cooking over a hot stove. Our red and yellow bell pepper harvest is the earliest I can remember. They must like the hot temperatures and abundant rainfall this year. The orange Valencia peppers are not far behind. I prefer using Chinese or Japanese eggplants for their thin skin and milder flavor. I substituted shallots for onions since our harvest was so plentiful this year. The garlic was also from the garden, a first for us.
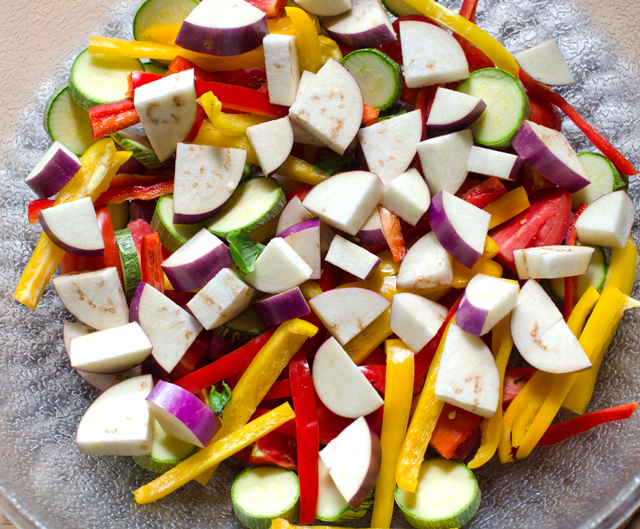
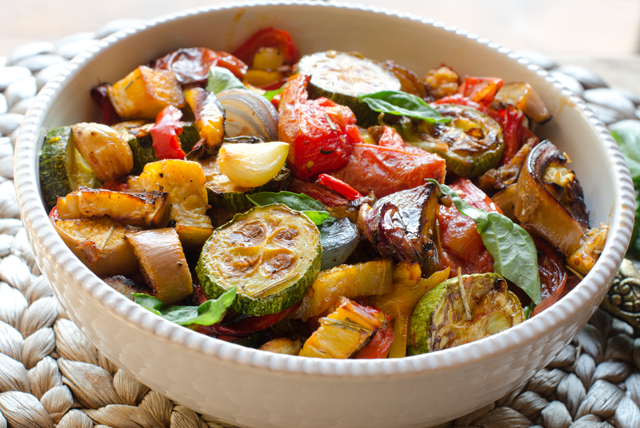
Cut the vegetables in similar size so they will get done at the same time. The smaller the cut, the less time it will take to cook. Lightly toss the vegetables with about a half cup of a good quality olive oil. Spread them out evenly over two large baking sheets. Rotate the baking sheets top to bottom and front to back half way through the cooking time. Roasting allows the vegetables to retain their shape and they take on a delicious toasted flavor. Move the cooked vegetables to a large serving bowl and tossed with a basil chiffonade. Chiffonade, translates “made of rags” from the French (of course!). It is a technique for cutting herbs and vegetables into long thin strips, in this case, basil.
Ratatouille can be used in many ways, a side dish, a topping for bruschetta, chicken or fish. We used it as the topping for an impromptu flatbread pizza. It can be served hot or cold and is even better the next day, if it lasts that long.
This season is the earliest we have had ripe bell peppers. I guess they really like the hot and rainy weather.Ingredients for the ratatouille, I substituted shallots for onions since Joe just harvested his crop.
Oven Roasted Ratatouille
Serves four (or two very generously)
Ingredients
2 small onions (about 5 oz. each), cut into ¼-inch-thick half-moons
2 bell peppers, red, yellow or orange, cored, seeded and cut into ¼-inch lengthwise strips
Japanese eggplant, about 1 lb, cut crosswise ½ inch thick rounds, then sliced in quarters
1 lb small to medium zucchini, trimmed and cut into ½ inch thick rounds
10 whole cloves garlic, peeled
½ c extra virgin olive oil, and more as needed
1 t chopped fresh rosemary
Kosher salt and freshly ground pepper
1½ lbs medium tomatoes (about 4), cored, and cut into 1/2-inch chunks
¼ c basil cut into a chiffonade
Toss the ingredients in a large bowl with olive oil, salt and pepper.Transfer the vegetables to two large baking sheets.
Directions
Place racks in the top and bottom thirds of the oven. Heat to 400°F. If using convection heat, 375°F.
In a large bowl, toss the onions, peppers, eggplant, zucchini, tomatoes, garlic, olive oil, rosemary, and 1-1/2 tsp. kosher salt and a grind of pepper. Spread the vegetables evenly over two large 12 x 16 sheet pans. Don’t spread the vegetables too thin or they may burn (they shrink a lot as they cook).
Roast, stirring the vegetables a few times and swapping the positions of the pans once, until the vegetables are slightly collapsed or shriveled, starting to brown, and very tender, about 35 minutes for my oven. It could take 10 minutes longer if you are not using convection heat.
Scrape all the vegetables and any juices into a serving bowl. Toss with the basil, taste for seasoning, and serve.
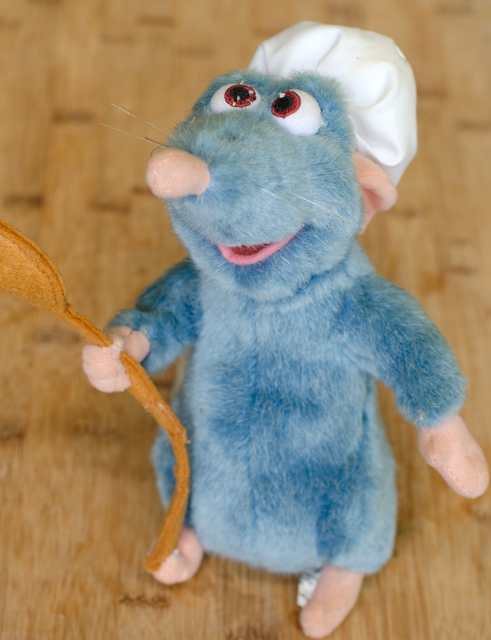
Ratatouille makes a great pizza topping.How could I resist posting a picture of Remy, the star of the movie Ratatouille who presides over my kitchen from his perch above.
My very thoughtful husband gave me two very special gifts for Christmas last year. The first, tickets for the South Beach Food and Wine festival that we attended in February, the second, tickets to the Food and Wine Classic. Held over a mid June weekend in Aspen Colorado for 35 years, the Classic is the nation’s premiere culinary event.
The Classic brings together the world’s foremost authorities on wine and food at over 80 cooking demonstrations and wine seminars. In between the classes and seminars we had time to sample gourmet bites, wines and other libations in the large white tents that made up the grand tasting pavilion. One of our favorite places to stop was to taste the creative offerings of Food and Wine magazine’s “Best New Chefs”. For the past 28 years the best new chefs have showcased the next culinary superstars. At each Grand Tasting, two of the chefs offered up their best bites to a hungry crowd. While pressing through the line to receive their offerings, I made a point to congratulate each one on this significant accomplishment. The July issue of Food and Wine magazine concurrently features an article about the best new chefs and a recipe or two from each one. Occasionally I will try some of these recipes, this year several caught my attention.
Chef Brad Kilgore serves up his “playfully brilliant” dishes at his restaurant,Alterin Miami’s Wynwood neighborhood. Chef Kilgore stated in the article that squash and zucchini are not his favorites, so his goal was to make something great from them. His recipe for Summer Squash with Lemon Curd and Citron Vinaigrette, despite having many steps looked like something I could do and make use of produce from the garden.
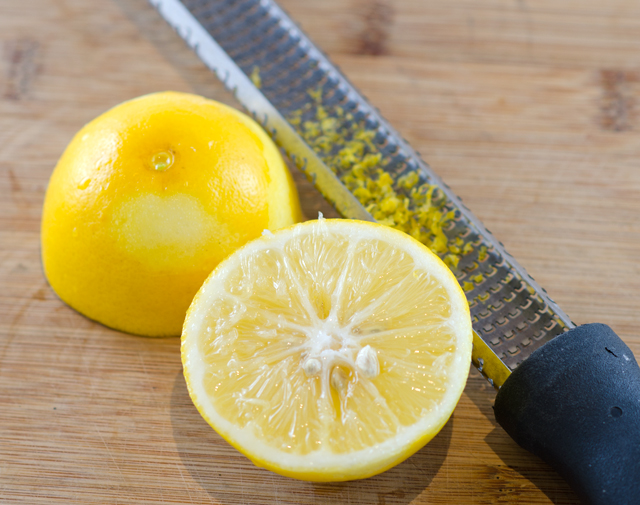
Since it can be made three days ahead, my first step was to make the lemon curd. Lemon and lime curd tarts were a regular on the dessert buffets in my catering business. I admit I was a little dubious about lemon curd in a savory preparation. The addition of lemongrass and ginger made this curd unique and the lemon juice was courtesy of our Meyer lemon tree. There is a lemongrass plant in the garden but it was easier to use a few stalks from my supply in the freezer. They come back to room temperature fairly quickly and they are easier to slice when cold. The curd ingredients are put in the blender and blended until smooth. Strain the curd over a fine sieve and press down on the solids to extract as much flavor as possible from the ginger and lemongrass. Put a medium saucepan of water on to simmer and put the curd in a heatproof bowl that is large enough to sit on top of but not in the pan. The bowl shouldn’t be too big but large enough that you can comfortably whisk the curd without sloshing it on the counter top
Whisk constantly for about five minutes until it thickens, the curd should coat the back of a spoon. Remove the pan from the heat and whisk in the butter 1 tablespoon at a time and finish by adding the extra virgin olive oil. Cover the surface of the curd directly with plastic wrap, this will prevent the curd from forming a skin and refrigerate until cold about three hours.
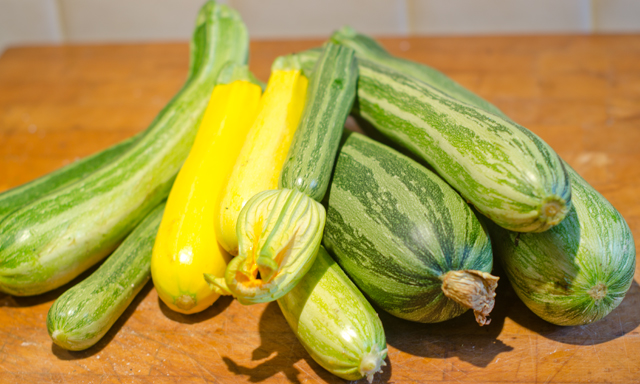
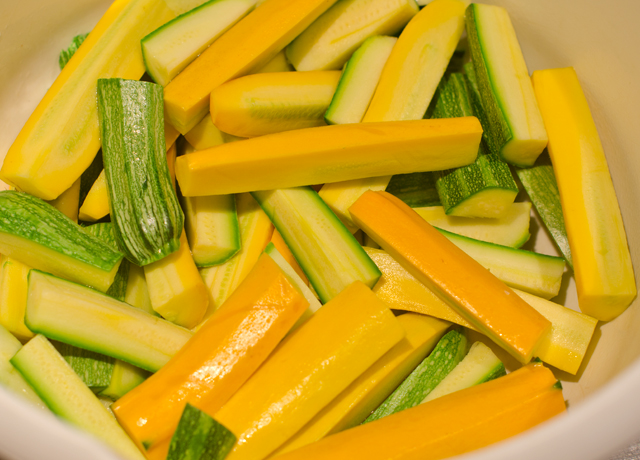
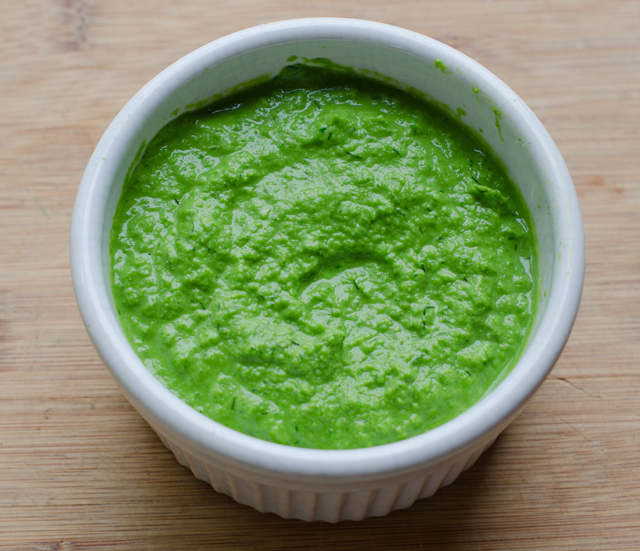
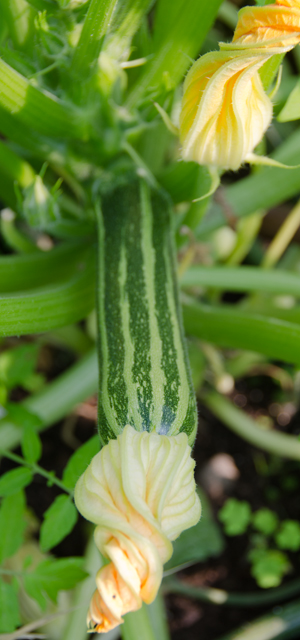
The zucchini herb puree can also be prepared before the salad is assembled. Our source for yellow squash and several varieties of zucchini is from a company called Seeds of Italy. Every summer my intention is to pick them small before they get to the size of a baseball bat but there are always a few that get away from me. Just picked little zucchini actually have a delicate nutty flavor.
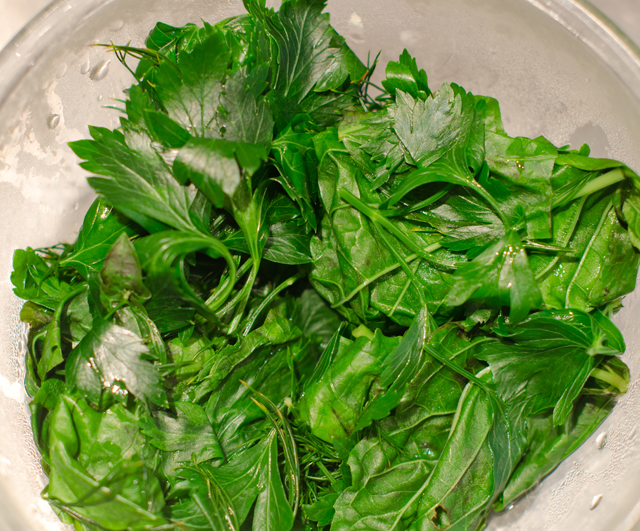
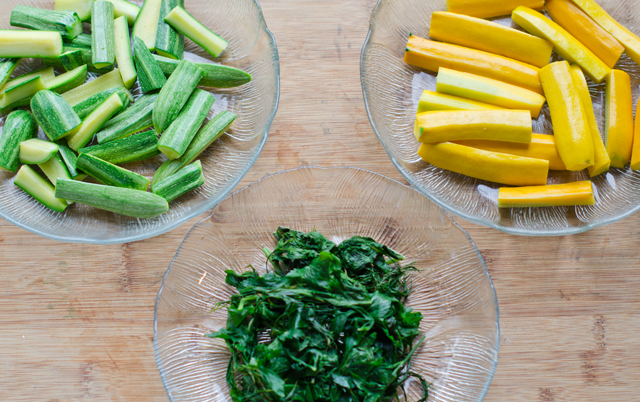
The original recipe called for the squash and zucchini to be seeded which is a good idea if you are buying medium to large sized squash. Since the seed pods in the zucchini and yellow squash that I picked were not fully developed yet I didn’t feel the need to remove the seeds. I picked basil, parsley and dill from the garden for the purée. Blanch the zucchini and squash and the herbs in boiling water for only 30 seconds. Blanching brightens the color of both the squash and the herbs. Immediately transfer them to an ice bath to stop the cooking. Drain them well. Pat the zucchini and squash dry with paper towels. Squeeze all the excess moisture out of the herbs. Set The yellow squash aside and purée the zucchini and the herbs in the blender. Add olive oil and salt to taste.
The vinaigrette is very simple, the acids, lemon juice and white wine vinegar are combined with chopped tarragon and honey, canola and extra virgin olive oil. I love the anisey flavor tarragon brings to any dish.
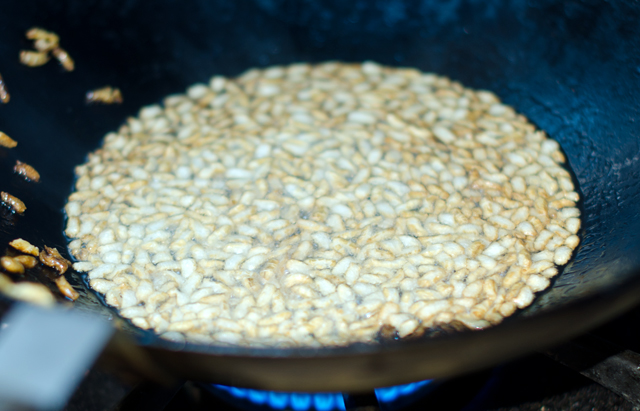
I read the recipe again to be certain I had all the components to plate it. Dill and tarragon sprigs, check. I added some red shiso leaves too. They grow like mad in the garden and seem to be a chef favorite. Thinly sliced chilies, were also a check. The last garnish had me initially stumped, puffed rice. Did they mean like the cereal? Probably not was my guess.
I found a slightly time consuming but easy way to make it. I cooked a cup of brown basmati rice until it was done, about 40 minutes and let it cool. I preheated my convection oven to 250°F, spread the rice out in a thin layer on a baking sheet and let it dry out for about an hour. I turned the oven off and let the rice dry out overnight. Line several baking sheets with paper towels. The next step is to heat about an inch of cooking oil in a wide pan , I used my wok for this. When the oil reaches 375°F add a kernel of rice, if it puffs up they are ready to go. Add the rice in batches, when it hits the hot oil the rice puffs up in seconds. You should be prepared with a fine mesh strainer to scoop out the puffed kernels before they get too brown. Puffed rice smells great, all toasty, it’s good as a salad garnish or just for munching.
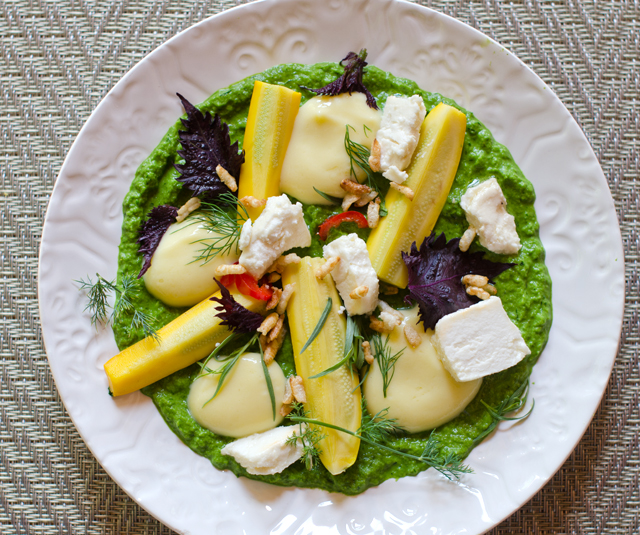
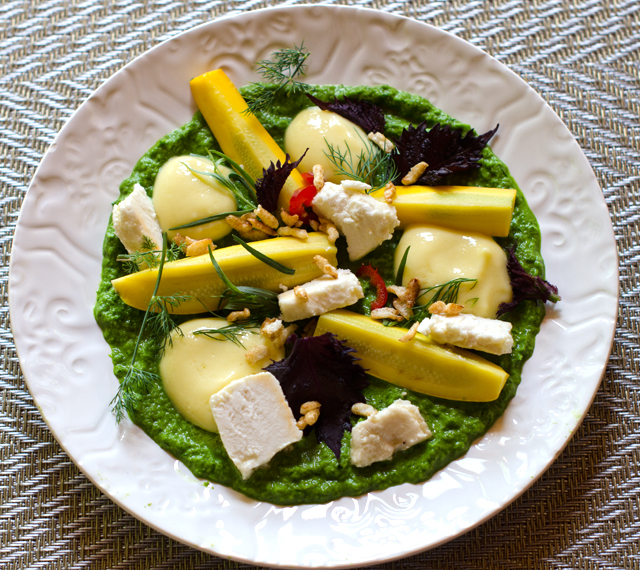
With all components ready, I was ready to assemble the salad. Spread a thin layer of the zucchini herb purée on each plate. Dollop a little of the curd on the purée. Toss the yellow squash with some of the vinaigrette and season with salt. Arrange a few pieces of squash on the plates along with the marinated cheese. Garnish with herbs, chilies and puffed rice.
Joe declared the salad delicious and over the top, a unique combination of flavors and textures. On first glance this recipe looks very “cheffy” Lots of special steps and components, usually enough to scare the average home cook away. Obviously it’s not something you would whip up after work on a week night. But the steps are manageable, the curd, puree and vinaigrette can all be done ahead. It was a wonderful salad, beautiful, very unique, a wonderful combination of flavors and textures. Hmm, guess that’s why he’s a best new chef.
I was also interested to read that Chef Kilgore makes all of the desserts at his restaurant, that’s not typical of most head chefs. The lemon curd infused with lemongrass and ginger was very good. I have some left over from the salad and will serve it with some of our fresh blueberries that should be ready to harvest this weekend. The zucchini herb puree I had leftover made a good sauce for salmon and would work for poached chicken too. I’m certain I will be making it again this summer. The puffed rice was a bit of a revelation and fun to do. It makes an interesting addition to a salad and just for munching too.
Summer Squash Salad with Lemon Curd and Citron Vinaigrette
Serves four
Ingredients for the lemon curd
1/3 c fresh lemon juice
3 large eggs
2½ T sugar
1 T thinly sliced lemongrass, tender inner bulb only
2 t minced peeled fresh ginger
4 T unsalted butter, cut into tablespoons and at room temperature
½ T extra virgin olive oil
Ingredients for the lemon curd.
Directions for the lemon curd
In a blender, combine lemon juice, eggs, sugar, lemongrass and ginger and blend until smooth. Strain the mixture through a fine sieve into a medium heatproof bowl, pressing on the solids.
Place the bowl over, not in, a saucepan of barely simmering water. Cook the curd, whisking constantly until the curd is thick enough to coat the back of a spoon, 5-7 minutes.
Remove the bowl from the heat and whisk the butter in until incorporated, then whisk in the olive oil. Press a sheet of plastic wrap on the surface of the curd and refrigerate until cold.
Ingredients for the zucchini-herb purée
8 oz yellow squash, quartered lengthwise, seeded if necessary and cut into 3″ pieces
5 oz zucchini, quartered lengthwise, seeded if necessary and cut into 3″ pieces
½ c each, basil, parsley and dill
2 T extra virgin olive oil
Kosher salt
Ingredients for the zucchini herb puree.
Directions for the zucchini herb purée
In a medium saucepan of salted boiling water, blanch the squash and zucchini for 30 seconds; using a slotted spoon, transfer to an ice bath to cool completely. Blanch the herbs until wilted, about 30 seconds. Drain and transfer to an ice bath to cool. Drain the squash, zucchini and herbs; pat the squash and zucchini dry and squeeze excess water out of the herbs.
Reserve the yellow squash in a small bowl. In a blender, purée the zucchini with the herbs and a half a cup of water until smooth. With the machine on, add the half cup of olive oil. Season to taste with salt.
Didn’t need to seed these zucchini and yellow squash.Plunge into ice water after blanching for thirty seconds.It brightens their color.Squeeze the herbs dry .Ready to blend.The final product.
Ingredients for the vinaigrette
2 T fresh lemon juice
2 t white wine vinegar
1 T chopped tarragon
¼ t honey
¼ c canola or grapeseed oil
2 T extra-virgin olive oil
Kosher salt
Tarragon in the garden after the rain.Ingredients for the vinaigrette.
Directions for the vinaigrette
In a small bowl combine the lemon juice, vinegar, tarragon and honey. Gradually whisk in both of the oils until emulsified. Season the vinaigrette with salt.
Final assembly of the salad
4 oz marinated sheep or goat’s milk cheese, cut into small chunks for serving
Small tarragon, dill, shiso, or other herb sprigs
Thinly sliced chilies
Puffed rice
Spread a thin layer of the zucchini purée on 4 small plates. Dollop a few small teaspoons of the lemon curd on the puree. Toss the squash with 2 tablespoons of the vinaigrette and season with salt. Reserve remaining vinaigrette for another use. Arrange three pieces of squash on each plate along with some of the marinated cheese. Garnish the salads with the herb sprigs, chilies and puffed rice.
I loved making puffed rice!
Probably the most unique salad I’ve ever made/tried. 2 thumbs up!
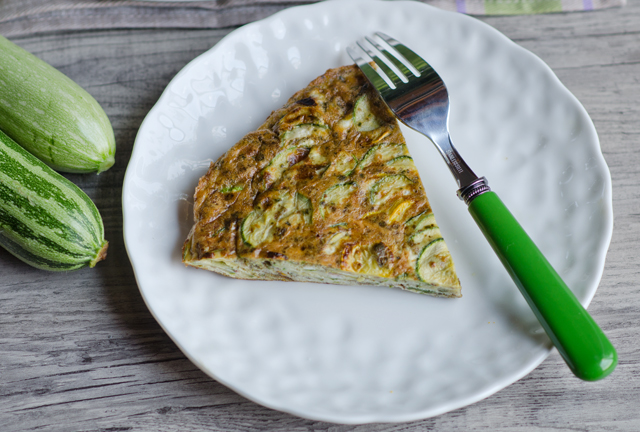
If you’re like me and not always in the mood to cook something when you get up in the morning for breakfast, but still want a little something to eat, a frittata is a great choice. Made the day before, they warm up quickly and also taste good at room temperature. But frittatas aren’t just for breakfast, they make a nice lunch, light supper, sliced thin as an hors d’oeurve or anytime you just want a little nibble. This time of year they are a great way to showcase farm fresh eggs and produce.
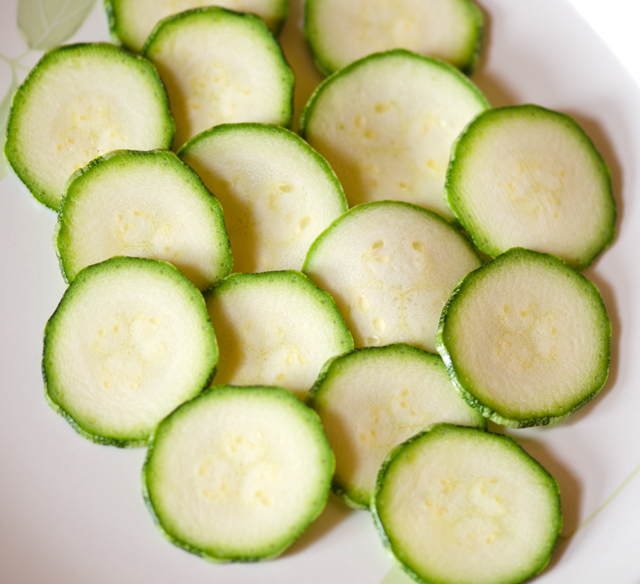
For this recipe I chose the smallest zucchini I could find in the garden. Since their seed pods are still underdeveloped, they have a sweet nutty quality to them. I wanted very thin slices rather than shreds which is the usual method of preparation. Slice by hand, or for real uniformity, I used the 2mm slicing disk on the food processor. Larger zucchini should be shredded and salted then squeezed dry before adding to the frittata. If you skip that step, when you cook the zucchini you essentially will be steaming, not sauteing it. A couple of tablespoons of a chopped fresh herb is a welcome addition to a frittata, but since I had just made some, I opted for pesto, a delcious addition to this dish.
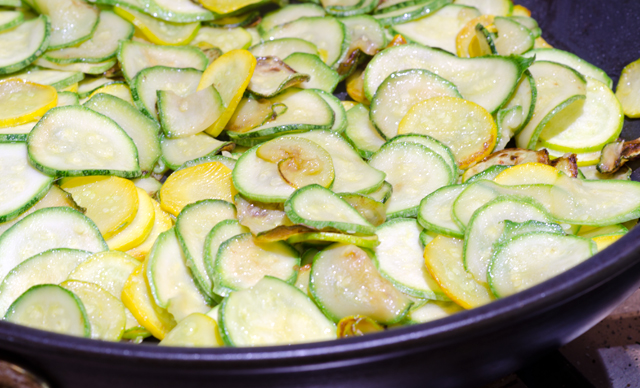
A 10″ non stick skillet with an oven safe handle is essential for this recipe. Begin by cooking the zucchini until it releases some liquid and the slices start to brown and become tender, this should take about 5-6 minutes. Set the pan aside.
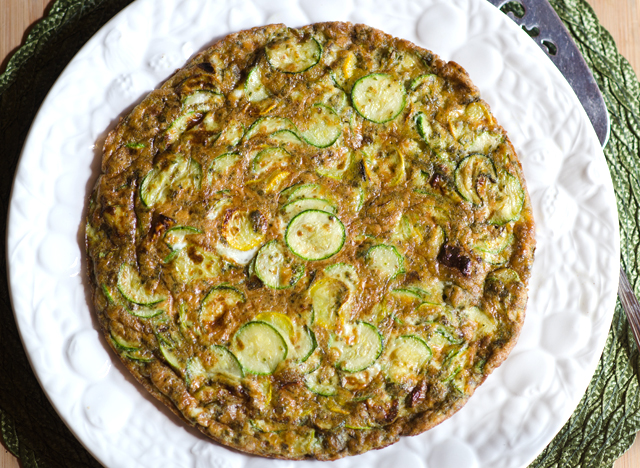
Preheat your oven’s broiler and place a rack in the upper middle position. Beat the eggs and Parmesan cheese in a medium bowl. Stir in pesto and the cooked zucchini. Add the rest of the oil to the empty skillet and heat to medium. Add zucchini-egg mixture and cook for 4-5 minutes, frittata will look set around the edges. Move the skillet to the broiler and leave a potholder on the oven door, that handle will get hot. I set a timer now for 90 second intervals. It took about 2 intervals for the frittata to get brown, which translates to about 4 minutes.
Using the potholder, remove frittata from the oven and allow to rest for 5 minutes.Run spatula around the edge of the skillet to loosen the frittata. You can serve the frittata warm right from the skillet, or slide unto a platter for a prettier presentation.
Zucchini Pesto Frittata
Serves 4
Ingredients
2T olive oil
1 1/3 lbs. of very small zucchini, washed and ends trimmed
Slice trimmed zucchini by hand or with the thinnest slicing blade of the food processor.
Heat 2 tablespoons oil in a 10-inch non stick skillet over medium high heat. Add zucchini; cook, stirring occasionally, until zucchini is tender, about 5 minutes. Season with kosher salt and freshly ground pepper.
Beat six large eggs with 3 tablespoons grated Parmesan cheese in medium bowl. Stir in pesto and cooked zucchini into beaten eggs.
Heat additional 2 teaspoons oil in the now empty skillet over medium heat. Add zucchini, pesto and egg mixture; cook until frittata is almost set, 4-5 minutes.
Slide skillet until the broiler and cook until frittata is set and the top is browned.
Serve directly from the skillet or flip unto serving plate. Serve hot or at room temperature.
The seed pods are not developed yet in baby zucchini.
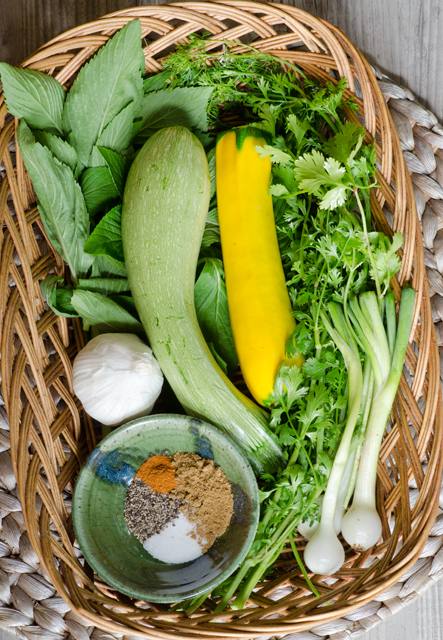
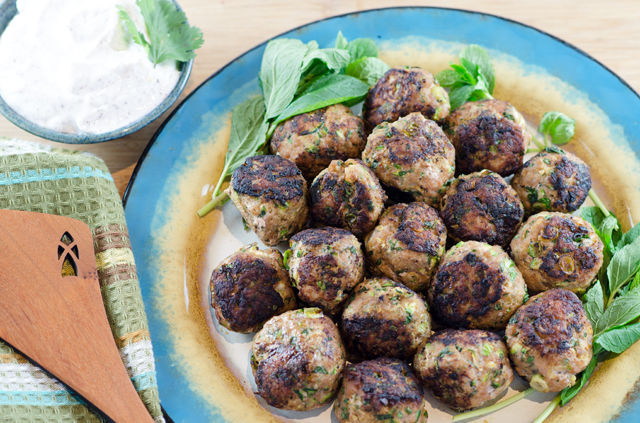
This year, after the holidays I was on the hunt for interesting healthy, flavorful recipes. I found just what I was looking for in turkey zucchini meatballs. The original recipe was for turkey and zucchini burgers from chef, restaurateur, and cookbook author Yotam Ottolenghi’s beautiful book, Jerusalem. Just like all the other recipes I have tried of his, the results were delicious.. It was easy enough to adjust the size of the original slider sized burgers to make into meatballs instead. Grated zucchini gives the typical ground turkey meatball the additional moisture that it needs. Since zucchini is 95% water, it is very important to squeeze all of the excess moisture out of the shredded zucchini so the mixture holds together well. The turkey and zucchini are combined with fresh cilantro and mint, along with garlic, cumin and spicy cayenne pepper to give them a little kick. I served them as suggested with a sauce of Greek yogurt, lemon and sumac. At that time in the middle of a cold snowy January I was bemoaning the fact that I had to buy the zucchini and the herbs and if it were July, well, those ingredients would be from our garden.
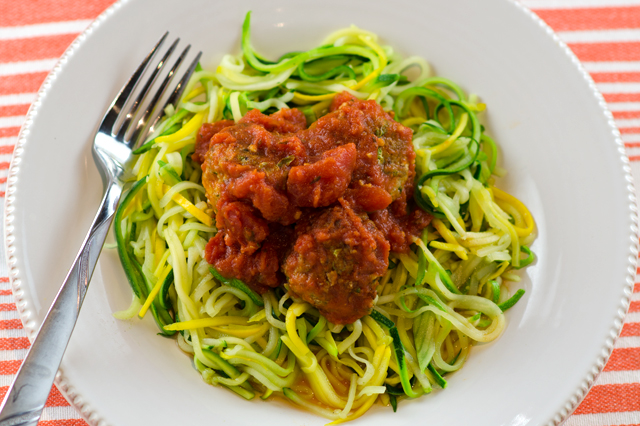
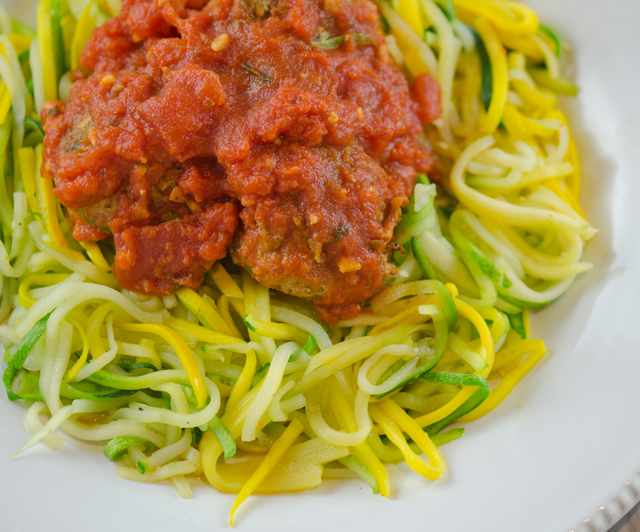
It’s July now and I remembered to make the turkey zucchini meatballs again, this time with our fresh picked zucchini and herbs from the garden. Back in January I also thought it would be a good summertime variation on the recipe to serve the meatballs with tomato sauce and zucchini “noodles”. Our zucchini vines are producing like mad, I am picking four to six zucchini and yellow squash a day. That doesn’t count the ones that hide under the large leaves and turn into baseball bats!
To make the “pasta” choose straight sided zucchini or yellow squash, preferably of a medium size in diameter, the longer the better. My tool of choice for making the strands is the Kuhn Rikon stainless steel julienne peeler. Steady the zucchini with one hand, start at the top, press the teeth of the peeler into the flesh and pull down. Keep shredding on all sides until you reach the seedy interior. Place the strands in a bowl and separate the strands that stick together with your fingers. I lightly salt my pile of “pasta” to extrude any excess liquid. I cook the strands in a saute pan, just long enough to warm them up a little and evaporate any additional excess liquid. I still want my zucchini to have a little crunch. If you prefer you can serve the meatballs with the pasta of your choice.
Our tomatoes are just starting to come in now, not quite enough to start making sauce. Until then I will use a good quality store brand. I like to warm the sauce and add the meatballs that I have kept warm after cooking them. Next time I will adjust the herbs in the meatballs for this dish, I think basil and a little oregano would complement the sauce and zucchini noodles nicely.
I love the different varieties of zucchini and squash we grow.This time I had our own zucchini and herbs for the meatballs. I substituted baby shallots for the green onions.
Turkey and Zucchini Meatballs
Serves 4-6
Makes 18-20 meatballs
Ingredients for Meatballs
1lb ground turkey, I used a 93/7 lean to fat ratio
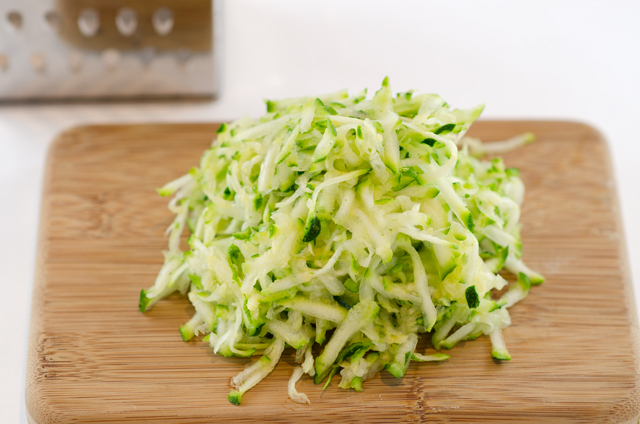
2c grated zucchini-wrung out in a clean tea towel to remove excess moisture
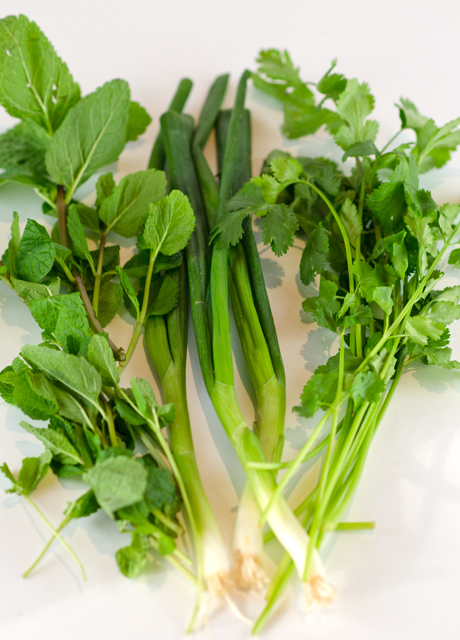
3 scallions, white and green, thinly sliced
1 large egg
2T chopped mint
2T chopped cilantro
2 cloves garlic, crushed or finely chopped
1t ground cumin
1t table salt
1/2t freshly ground pepper
1/2t cayenne pepper
about 1/8c of a neutral cooking oil, canola, safflower
3-4 cups of your favorite tomato sauce, warmed
Directions
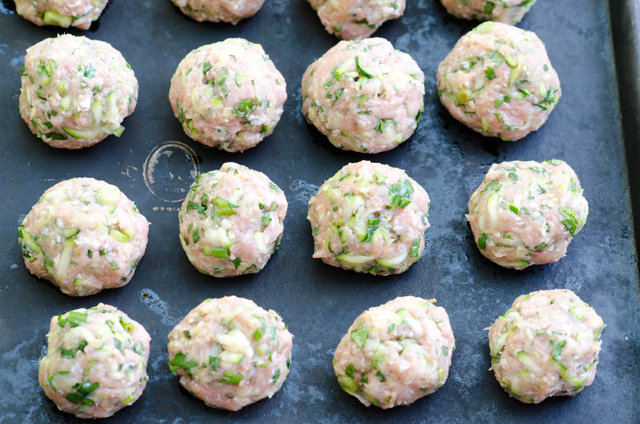
Preheat the oven to 425°F. In a large bowl combine all the ingredients for the meatballs, except the cooking oil. Mix well with your hands. Shape into 2″ balls. Place meatballs on a well greased baking sheet to ready for cooking. Pour enough oil into a large heavy frying pan to form a layer about 1/16 inch thick on the bottom of the pan. Heat over medium heat until oil is shimmering, sear the meatballs in batches on all sides. Cook each batch for about 4 minutes adding oil as needed, until browned.
Transfer the seared meatballs to a baking sheet and place in the oven for 5-7 minutes, or until just cooked through. Serve warm with tomato sauce
Ingredients for Zucchini “Noodles”
3-4 large straight sided zucchini and/or yellow squash
Kosher salt
I like making shreds with the julienne peeler, you could make them in a food processor with the shredding disk or a spiralizer tool I have seen in supermarkets.
Directions
Wash and trim zucchini and/or squash. Cut stem and root end off. On a cutting board, steady your squash with one hand and shred with a julienne peeler. Start at the top, press the teeth of the peeler into the squash and pull all the way down.
Shred on all sides of the squash until you reach the seeds. Repeat with the rest of the squash. Place the strands in a very large bowl, separate the strands that stick together and salt evenly. Let sit for 10 minutes to extrude any excess water.
Over medium heat cook the strands in a large sauté pan to warm up the squash and remove any excess water.
It’s a new year and it’s time to put the emphasis back on healthy meals. But healthy doesn’t have to equal boring. Meatballs are lightened up with ground turkey and fresh herbs in this recipe from Yotam Ottolenghi’s cookbook, Jerusalem. Originally from Jerusalem, Ottolenghi is a London based chef restaurant owner, food writer and cookbook author known for his vibrant, fresh, multi cultural cuisine. His recipe takes ground turkey and zucchini, two ingredients with not much flavor going for them on their own and combines them with fresh herbs, cilantro and mint, along with garlic, cumin and spicy cayenne pepper to make a delicious meatball.
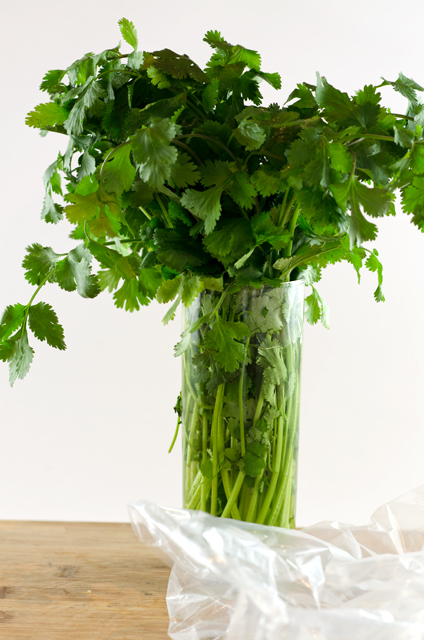
In July, I would be making this recipe with herbs and zucchini fresh from the garden. But it’s a bitter cold day in January, so like everyone else I have to bite the bullet and plunk down several dollars for a small bunch of herbs I would have buckets of in the summer. Don’t get me started with the zucchini… When I purchase herbs at the supermarket I try to treat them as a precious commodity. How many times have you (or I) brought home a bunch of herbs, used the tablespoon or teaspoon we needed and the rest was sentenced to the crisper drawer. The next time you notice it, you’re not even sure what it is. My favorite method of preserving fresh herbs as long as possible in the fridge, is to trim the stem ends and place the bunch in a glass with several inches of water. I place a loose plastic storage bag over the herbs and not only can I successfully store them for a week or more, I am more likely to use them since they are not tucked away in a drawer.
This is a wet meat mixture to work with so use a minimally processed product, the extra water added in some brands of ground turkey is not your friend. Check the label, the turkey I purchased was 93/7, lean to fat with no water added. I used a hand grater for the zucchini and lightly wrung it out in a cloth towel to eliminate extra liquid. I like to taste the leaf of the herbs I am using to see how pungent (or not) they are to see what adjustments I might need to make for the recipe.
Put all the ingredients in a large enough bowl so that you can combine your ingredients thoroughly. Take off your rings and roll up your sleeves to do some serious mixing. Put some non stick spray on the sheet that you will place the meatballs when formed and also on your hands to minimize the herbs from sticking to your fingers (some will). Ottolenghi’s original recipe called for these to be made as small burgers, but I thought meatballs were better suited for this January night.
Cook the meatballs in a large (12inch) heavy skillet. I used a Le Creuset cast iron type skillet. Just a thin film of a neutral oil, canola, safflower, is all you need to coat the bottom of the pan. Be sure not to overcrowd the pan, I cooked 18 meatballs in two batches. I shake the pan halfway through to make sure they don’t stick. Finish your browned meatballs in the oven for 5 to 7 minutes to finish cooking them.
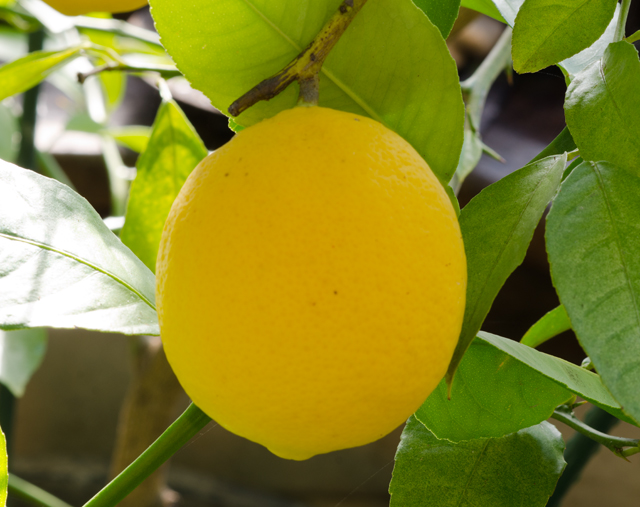
The accompanying sauce is very simple, Greek yogurt, sour cream, lemon peel and juice and an interesting middle eastern ingredient, sumac. I discuss sumac at greater lengths here. Sumac is extracted from the berries of the sumac bush and it adds an astringent, fruity taste to dishes. I purchased mine from Penzeys. I am over my Meyer Lemon envy of 2013 now that Joe is growing several trees that are producing fruit. They are inside now for the winter. This is the season for harvest and I was able to pick a fresh lemon from one of our trees. More information about Meyer lemons is in this post. Meyer lemons are not as acidic as regular lemons but the sumac added another layer of flavor complexity to the sauce.
Herb substitutions could be made, parsley for the cilantro, finely snipped chives for the green onions. A tzatziki sauce would also be a good accompaniment. Serve with a tomato sauce and zucchini “noodles” for a family-friendly spaghetti and meatballs substitution. This one definitely goes in the “I would make this one again” column.
Turkey and Zucchini Meatballs
Makes about 18
Ingredients for Meatballs
1lb ground turkey
2c grated zucchini
3 scallions, white and green, thinly sliced
1 large egg
2T chopped mint
2T chopped cilantro
2 cloves garlic, crushed or finely chopped
1t ground cumin
1t table salt
1/2t freshly ground pepper
1/2t cayenne pepper
about 1/8c of a neutral cooking oil, canola, safflower
Ingredients for the Sour Cream and Sumac Sauce
1/2c sour cream (regular or low fat)
2/3c plain Greek yogurt (regular or low fat)
1t grated lemon zest
1T freshly squeezed lemon juice
1 small clove garlic, crushed
1T sumac
1/2t salt
1/4t freshly ground pepper
Directions
Make the sour cream sauce by placing all the ingredients in a small bowl. Stir well and set aside or chill until needed.
Preheat the oven to 425°F. In a large bowl combine all the ingredients for the meatballs, except the cooking oil. Mix well with your hands. Shape into 2″ balls. Place meatballs on a well greased baking sheet to ready for cooking.
Pour enough oil into a large heavy frying pan to form a layer about 1/16 inch thick on the bottom of the pan. Heat over medium heat until oil is shimmering, sear the meatballs in batches on all sides. Cook each batch for about 4 minutes adding oil as needed, until browned.
Transfer the seared meatballs to a baking sheet and place in the oven for 5-7 minutes, or until just cooked through. Serve warm or at room temperature with the sauce on the side.
Mint, scallions and cilantro bring a lot of flavor to the meatballs.
I grated zucchini on a box grater and wrung out the extra moisture with a tea towel.Why yes, I pick my lemons fresh from the tree.Meyer lemons have thinner skin and are sweeter than the usual lemon.Ready to go into the frying pan.Cilantro in a half filled glass of water, ready to put the bag on top and store in the fridge.