Whether you spell it zhoug, zhug, zhoog, or schug, they all describe the fiery Middle Eastern answer to pesto that has become the favorite accompaniment to Israeli street food. Zhoug didn’t have its origins in Israel. It was a staple of Yemeni cuisine and first brought to the newly created state of Israel (1948) during operation “On Wings of Eagles” that airlifted 49,000 Yemeni Jews to Israel.
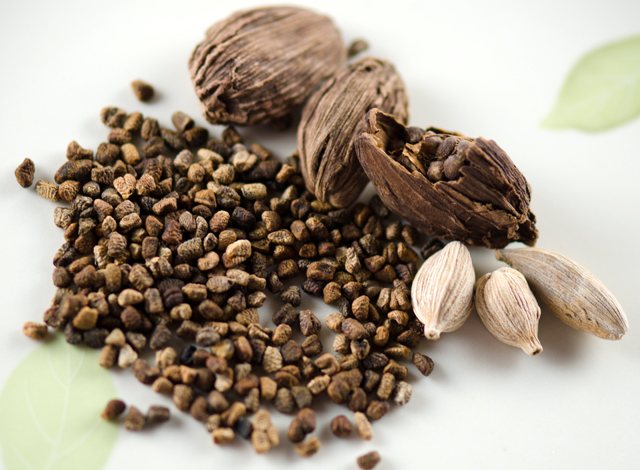
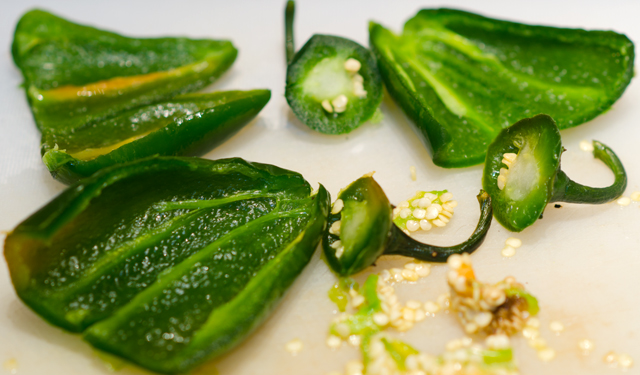
Traditionally zhoug is made in a mortar and pestle, but you can make it in a food processor in minutes. The word is zhoug is translated “ground” so use a light touch with the processor. The result should be a thick, slightly chunky paste. The basic ingredients are cilantro, garlic, hot peppers, green jalapeno or serrano, olive oil, salt and pepper. You can make it with half parsley half cilantro, or all parsley if you dislike cilantro. The addition of dried spices makes the sauce unique, cumin, coriander, cloves and an unexpected one, cardamom.
As with all hot pepper preparations, wear gloves and keep your hands away from your face. Use as many peppers as your taste buds allow, it is a hot sauce and the flavors blend and mellow out after the sauce is refrigerated. Place all of the dry ingredients into a food processor. Pulse the mixture, scraping the sides down periodically until it resembles a pesto-like consistency. Taste a bit of the mixture and adjust seasonings accordingly.
Zhoug is good with so many things, grilled lamb chops, roasted potatoes, stirred into yogurt for a delicious sauce, in your pita with falafel, any time you want to add a spicy kick.
Cardamom in its different forms.I used whole frozen jalapenos from last summer’s harvest and yes they are just as hot!!
Zhoug
Makes about a cup
Ingredients
2 ½ cups cilantro leaves
3-4 jalapeno peppers, stemmed, seeded
½ tsp cumin seeds
½ tsp cardamom seeds
½ tsp coriander seeds
¼ tsp salt
2 cloves garlic, peeled
½ c extra virgin olive oil
Fresh lemon juice to taste
Directions
Add cumin, cardamom and coriander seeds to a small dry skillet over medium heat. Toast the seeds, stirring frequently until they smell fragrant and toasty.
Grind spices either with a mortar and pestle or a mini processor/grinder.
Place the cilantro, jalapeno, garlic, toasted spices and salt into the food processor. Pulse the mixture, scraping the sides down as needed until a chunky texture is reached.
With the machine running, slowly pour in the olive oil and lemon. Taste and adjust with salt and lemon as desired. Store in fridge for a week.
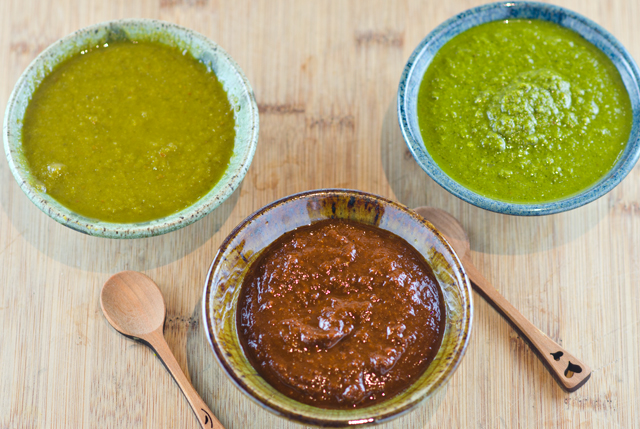
Green zhoug is zhoug yarok, the red variety is zhoug adom.
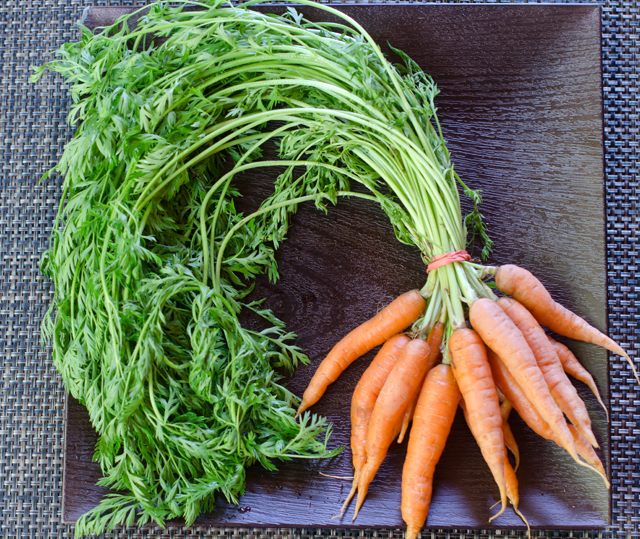
When I exercise on our elliptical machine I catch up on my version of “must-see t.v.”. Right now I am watching the current season of Iron Chef America. For those not familiar with the show, two chefs, a world-class “Iron Chef” competes against an up and coming chef. The chefs create a menu in one hour from appetizer to dessert that prominently features that week’s secret ingredient. Two weeks ago it was ” Battle Kobe Beef”. This weekend I tuned into “Battle Carrot”. The show is fun to watch and also stimulates my own creativity in the kitchen. I’m pretty sure when I went to the farmers market after my workout I had carrots on the brain. So along with all the other goodies I found, a lovely bunch of recently harvested carrots went into my bag.
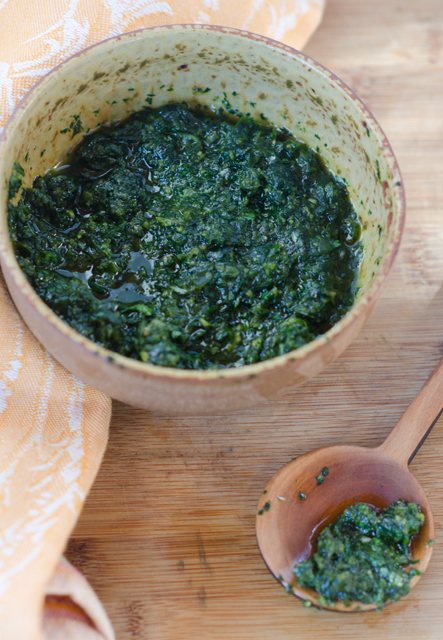
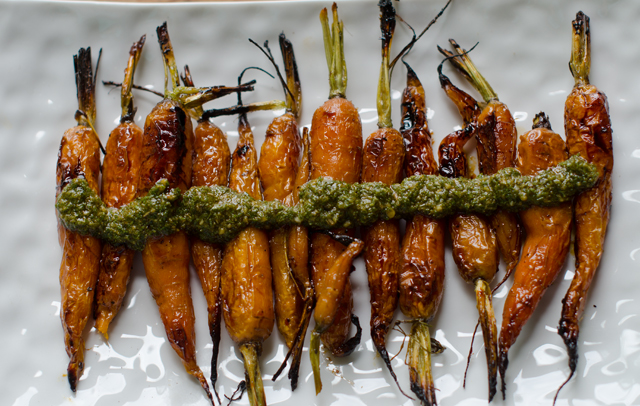
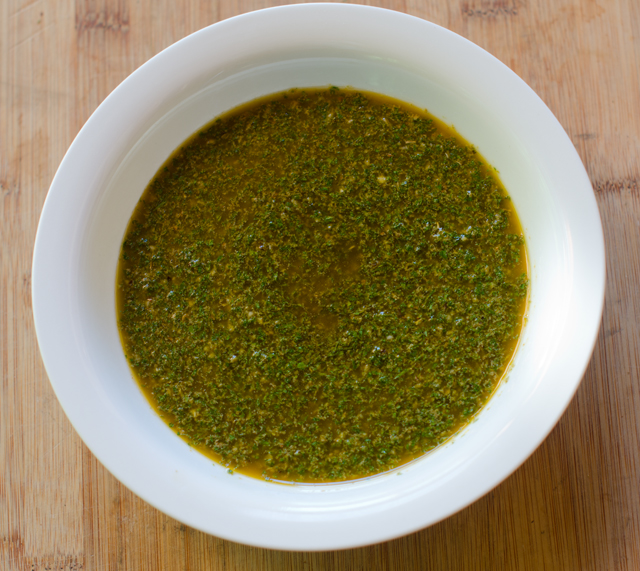
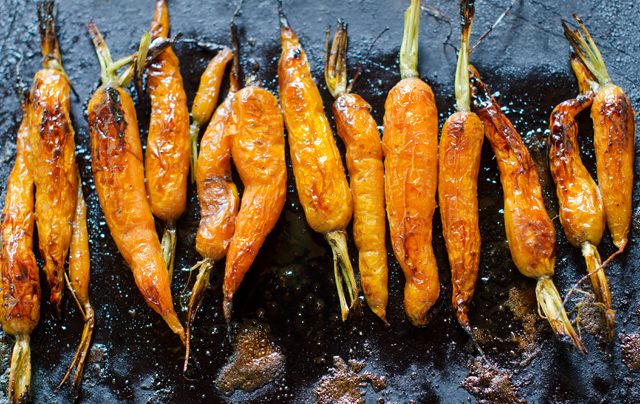
My plan was to roast the carrots and in the spirit of “root to stem” cooking, use the greens as well. Carrot tops are edible and rich in vitamins A,C, calcium, iron and dietary fiber. They have an earthy, herbal, slightly bitter taste. Carrot top pesto was a success last year, this time I was looking for something a little bit different. Chimichurri sauce was a natural for this dish. This rich herby sauce from Argentina was already a favorite of ours. I have served as an appetizer at parties, spooned over rare beef tenderloin on crostini. It was easy enough to swap out the parsley in the original recipe for carrot tops. After all they are both members of the same plant family, along with fennel, dill and coriander.
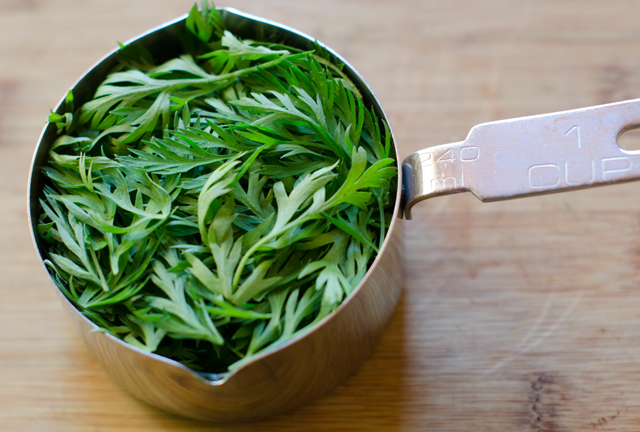
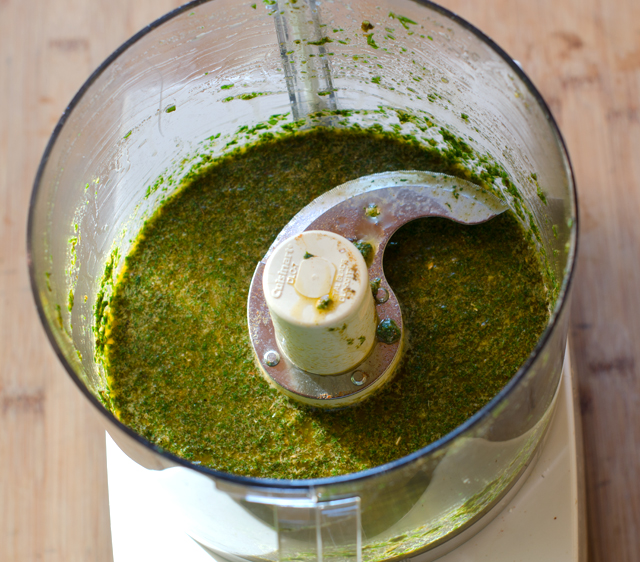
Wash the greens well and pat dry with paper towels. The most time-consuming part of this recipe is separating the leaves from the slightly harder stems. Aim for a lightly packed cup, if you want this thicker to use as a dip, either cut back on the olive oil or add a quarter cup more of leaves. Blend all of the ingredients until smooth in a food processor. Taste and adjust the seasonings. Give the chimichurri at least an hour to fully combine the flavors, over night is even better. If you don’t have carrot tops, substitute the traditional parsley or a combination of parsley and cilantro.
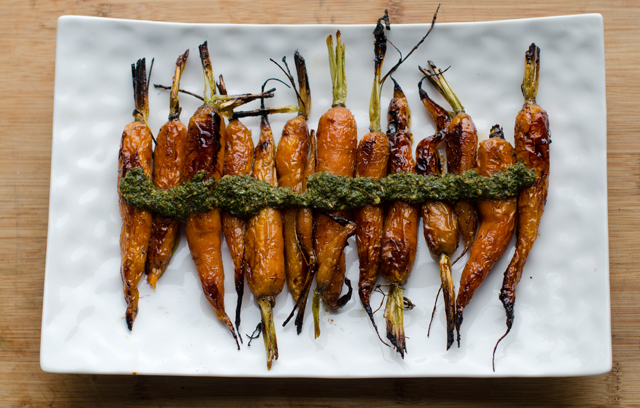
I served my chimichurri over roasted carrots. Traditionally this is served with steak but I think it would be just as good as a sauce with grilled chicken or lamb chops. Store in the refrigerator in an airtight container for up to a week.
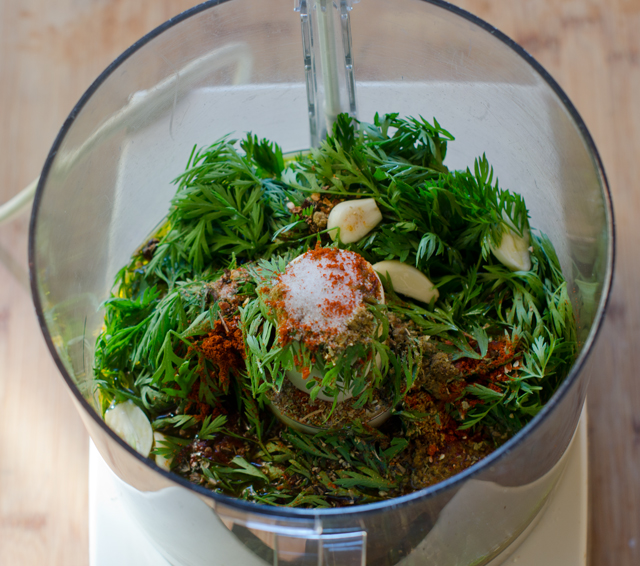
A cup of lightly packed carrot leaves.Everything goes in the food processor.
Carrot Top Chimichurri Sauce with Roasted Carrots
Makes about a cup
Ingredients for Chimichurri Sauce
1 c lightly packed fresh carrot top leaves
¾ c extra virgin olive oil
3 T red wine vinegar
1 T dried oregano
2 t ground cumin
1 t salt
3 cloves garlic, peeled and roughly chopped
½ t smoked paprika
½ t dried crushed red pepper
Directions
Combine all of the ingredients in a food processor and blend until smooth.
Refrigerate for at least one hour but tastes even better the next day. Store in an airtight container. Use within a week.
A friend recently texted me some pictures from the meal he had at a new local restaurant. One photo piqued my curiosity, chicken Marsala meatballs. When I had my catering business, chicken Marsala was a client favorite. Tender pieces of chicken in a luxurious, creamy sauce loaded with umami rich mushrooms, what’s not to love? This was a recipe I wanted to try.
I buy ground turkey quite frequently, ground chicken I have shied away from. I thought that a lean meat like ground chicken would too easily result in a dry dish. But there are ways to ensure that won’t happen. Adding ricotta to meatballs is a tip I learned from chef Michael Symon on The Chew. The mild and creamy consistency of ricotta gives the meatballs a light texture. I prefer a natural ricotta, made with just milk, vinegar and salt. Place ricotta into a sieve and allow it to drain for at least a half hour to ensure a moist, but not watery meatball. I added finely chopped shiitake to the meat mixture to amp up the mushroom flavor and some panko breadcrumbs to lighten the texture of the meatballs.
Take off your rings and roll up your sleeves because it is best to use your hands for the next step. Combine the ingredients until they just come together, don’t over work. It’s easier to feel when everything is well mixed. Use oiled hands or a small cookie scoop to portion out the meat.Be gentle when forming meatballs. If they are packed too tightly and compactly, they will turn out tough, rubbery and chewy.
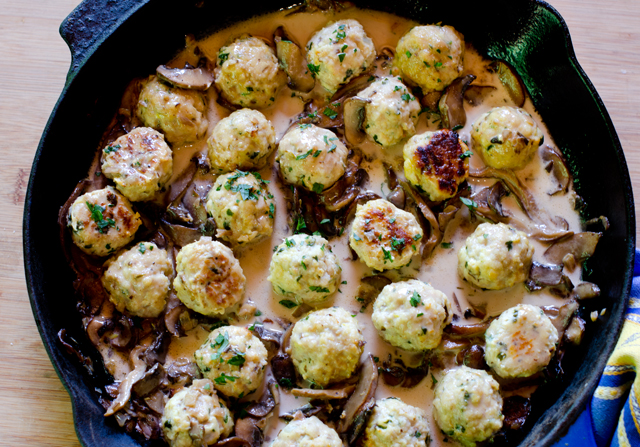
Place the meatballs on a parchment lined baking sheet and lightly coat it with non stick spray. I chose to roast the meatballs in the oven but they could also be fried in oil on the stove top. While the meatballs are cooking, you will have time to make the sauce. The star of the sauce, of course is Marsala wine. Marsala is a fortified wine produced in the region surrounding the Italian city of Marsala in Sicily. Dry Marsala is used in savory preparations like this dish while sweet Marsala is used in desserts. Tiramisu anyone?
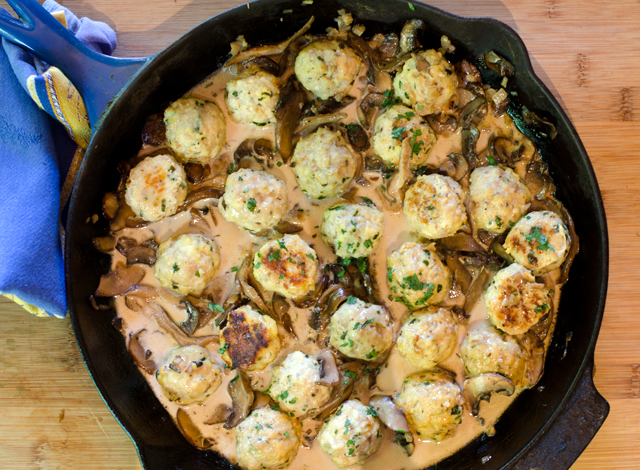
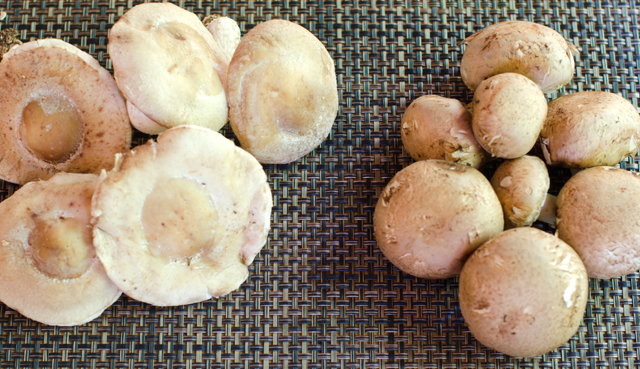
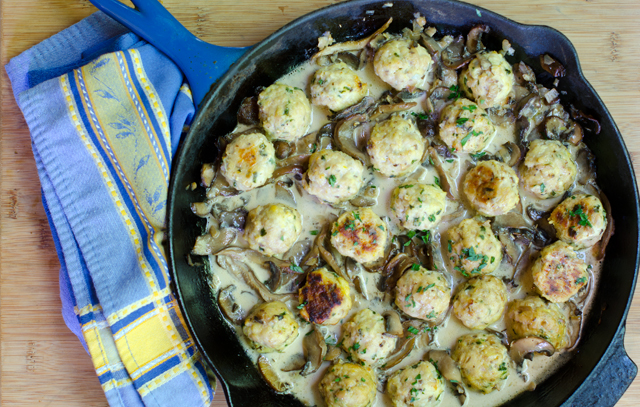
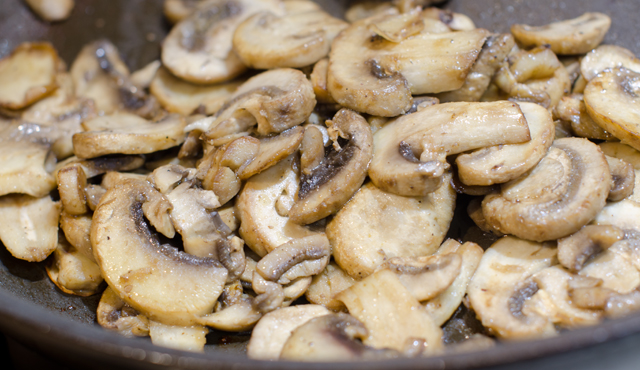
Melt butter in a saute pan large enough to hold the meatballs. Saute shallot, then add mushrooms and garlic to the pan, I used a combination of shiitake and cremini, white button mushrooms are fine as well. Cook, stirring frequently until the mushrooms begin to brown, 3 to 4 minutes. Add Marsala wine to the pan and cook until slightly reduced. Add cream and wine and reduce heat to a simmer. Add meatballs back to the pan tossing gently. Sprinkle with fresh parsley and serve.
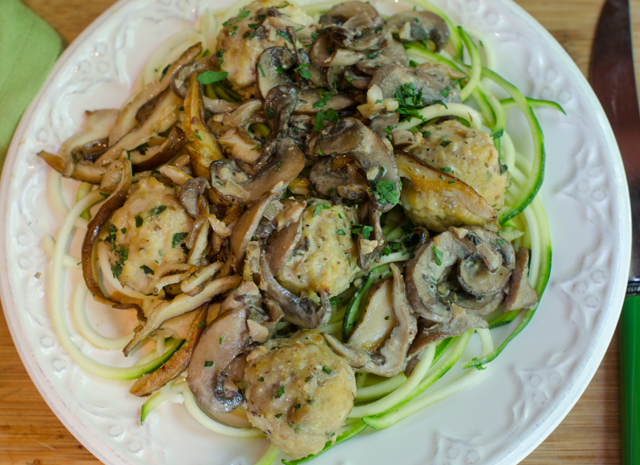
This dish could be prepped ahead of time, make the meatballs and sauce and hold separately in the refrigerator until you are ready to cook dinner. Chicken Marsala meatballs make a great hors d’oeuvre, sandwich filling on a crusty roll or served over wide pasta noodles or like we did, over zucchini “noodles”.
I used cremini and shiitake mushrooms in my preparation, button mushrooms are fine to use as well.Place meatballs evenly spaced on a prepared baking sheet.
Chicken Marsala Meatballs
Makes 24-27 meatballs
Ingredients for the meatballs
1 lb ground chicken
¾ well-drained ricotta cheese
3 T finely chopped shallot
2 t finely chopped garlic
1 egg, lightly beaten
1 c finely chopped mushrooms
½ c freshly grated pecorino romano cheese
½ c panko breadcrumbs
Kosher salt and freshly ground black pepper
Directions for the meatballs
Preheat oven to 375°F. Line a large baking sheet with parchment or foil. Spray the baking sheet with non stick spray, set aside.
In a large bowl combine chicken, ricotta, shallot, garlic, egg, mushroom, cheese, panko, salt and pepper to taste. Be careful not to over mix.
Using your hands or a small cookie scoop, scoop out the meat mixture and roll into balls. Evenly place the meatballs on the prepared baking sheet.
Bake for about 15 minutes, until light golden, rotating the tray halfway through the baking time. Keep the meatballs warm while you make the sauce.
Ingredients for sauce
1 T unsalted butter
1 T extra virgin olive oil
1 small shallot, finely diced
8 oz thinly sliced mushrooms-more if you like.
1 clove garlic, finely diced
1 c dry Marsala wine
¼ t dried thyme
2 T chopped parsley
Kosher salt and fresh ground pepper
Directions for sauce
Melt butter in a large saute pan over medium high heat, add olive oil.
Add shallot to the pan, season with a pinch of salt and pepper. Cook until softened, 1-2 minutes.
Add mushrooms and garlic to the pan. Saute until mushrooms are cooked through, 3-4 minutes, add Marsala wine to the pan, cook until slightly reduced, 4-5 minutes.
Add cream and thyme and bring to a simmer. Add meatballs to the pan, toss gently until well coated. Reduce the heat to medium-low and cover; let them simmer in the sauce for 10 minutes. Add chopped parsley, taste and adjust for seasoning with salt and pepper.
I served Chicken Marsala meatballs over zucchini noodles.
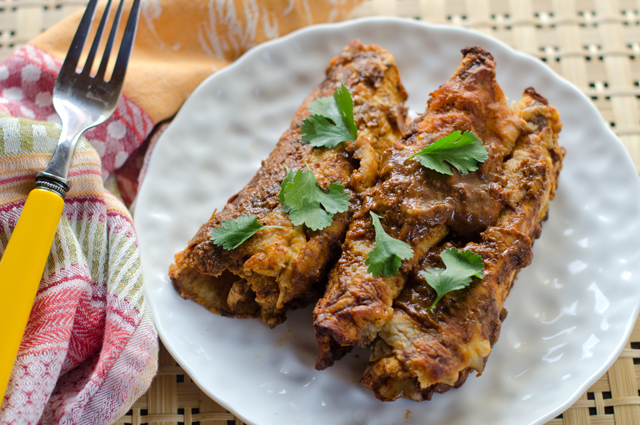
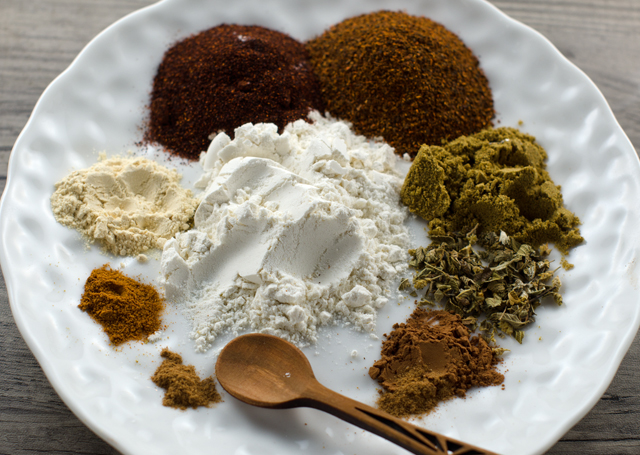
Now that I’ve mastered the cauliflower tortilla I thought it would be fun to try them in a chicken enchilada recipe. The “caulitillas” are just about the same size as a corn tortilla and not delicate as I was originally concerned, but very pliable and sturdy. Of course corn tortillas are what you would typically use and would be fine in this recipe. You can buy enchilada sauce in the supermarket but it’s quick and quite simple to make your own. You also can control the heat to your own taste. My advice would be to start out on the safe side with the amount of chili powder you add, you can always add more, it’s harder to tame the heat. I used a combination of regular and chipotle chili powder for its smoky quality. Measure out your ingredients before you start the recipe because you will be busy whisking to ensure a smooth sauce.
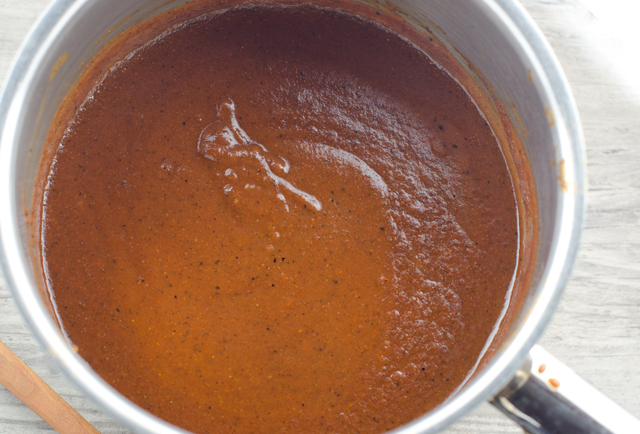
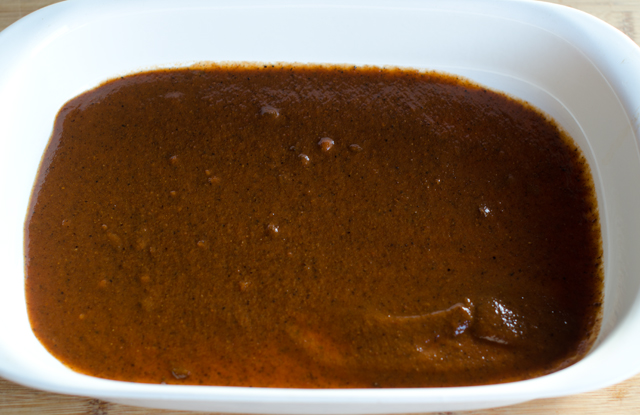
Heat the oil in a medium saucepan until it begins to sizzle. Add the flour and spices, whisking constantly until the spices become fragrant and deepen in color. Add tomato paste, tomato sauce and chicken stock and continue to whisk constantly to remove any lumps. Allow the sauce to come to a simmer, it will begin to thicken slightly. Taste sauce and adjust seasonings to your liking.
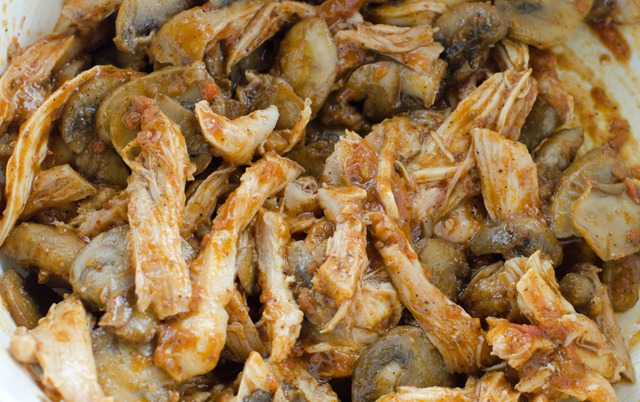
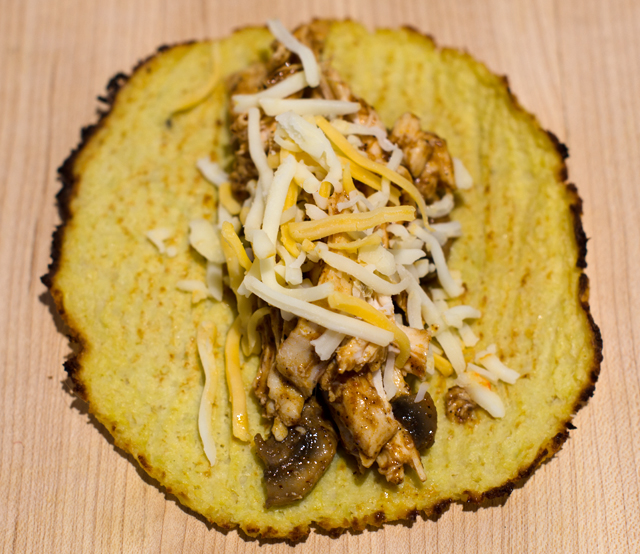
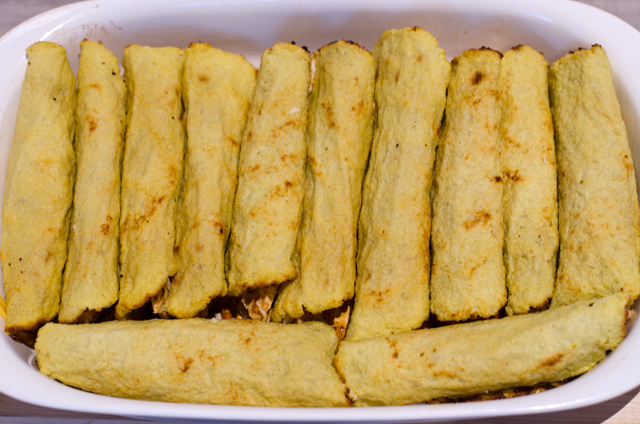
Now it’s time to assemble, you should have ready, a 9 x 13 inch baking dish, the tortillas, the warmed filling, the warmed sauce and shredded cheese. I chose to make a filling of shredded chicken and sautéed mushrooms but this sauce would be good with many filling combinations. Many recipes call for dipping the tortilla in the chili sauce. I thought that was too messy so I just put a thin layer of sauce in the bottom of my casserole dish.
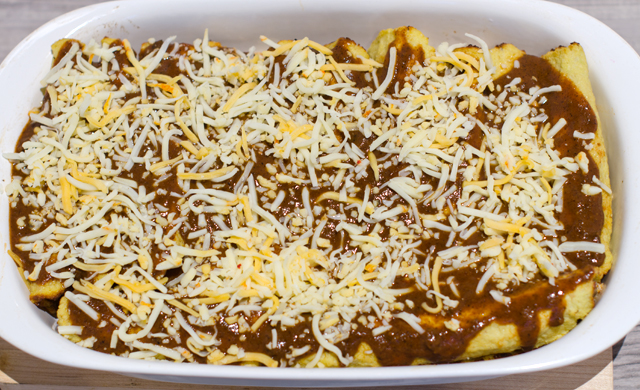
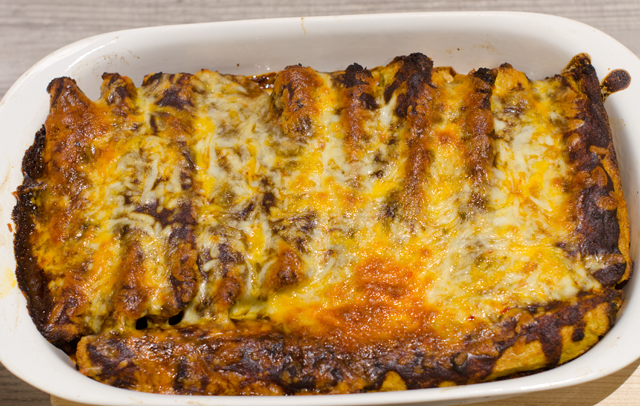
Lay out your tortilla and spread about two tablespoons of the filling down the center. Roll up the tortilla and place seam side down in the baking dish. Repeat with the remaining filling and tortillas. Top with additional sauce and shredded cheese and bake until the cheese is melted. Not the prettiest dish for certain, but definitely delicious. Leftovers heat up nicely.
Spices and flour for the chili sauce.Takes only ten minutes to make a delicious complex sauce.
Chicken and mushroom enchilada filling.Filling the “caulitilla”.A thin layer of sauce on the bottom of the baking dish.Rolled and filled tortillas ready to be topped with sauce.Next the sauce and cheese.Ready to dig into!
Chicken Enchiladas
Makes 10-12
Red Enchilada Sauce
Makes about 2½ cups
Ingredients
2 T vegetable oil (I used avocado)
2 T all-purpose flour
3 T chili powder-I used 2 T regular and 1 chipotle (Penzey brand)
1 ½ t ground cumin
½ t dried oregano (Mexican is best)
½ t kosher salt
1/8 t cayenne pepper
¼ t cocoa powder
pinch of cinnamon
3 oz tomato paste
2 c chicken or vegetable broth
½ to ¾ c tomato sauce
Directions
Measure out the flour and the spices into a small bowl. Whisk to combine.
In a medium saucepan over medium high heat, warm the oil until it begins to sizzle.
Add the flour/spice mixture and whisk constantly. Cook until fragrant and darkened in color.
Whisk in the tomato paste and sauce until thoroughly combined with the flour/herb mixture. In a steady stream, whisk in chicken broth.
Reduce heat to medium and let sauce come to a simmer. Cook 8 to 10 minutes, sauce will thicken slightly. If not using immediately you may need to thin it out with a little stock or water.
Remove the sauce from the heat and let cool slightly. Add salt and freshly ground pepper to taste.
Coat the bottom of the baking dish with a thin layer of the sauce.
Set up an assembly line to make the tortillas: corn or cauliflower tortillas, chicken mushroom filling, cheese and sauce.
Lay out a tortilla and place about 2 generous tablespoons of the filling down the center of the tortilla. Sprinkle a little cheese on top. Roll it up with your fingertips and place in the baking dish, seam side down. Continue rolling and filling the rest of the tortillas.
Pour the remaining sauce over the enchiladas and sprinkle with the remaining cheese. Bake for 20 minutes and serve immediately.
When is a tomato not a tomato? When it’s a tomatillo. Yes, their aliases include Mexican husk tomato and “tomato verde” and both tomatillos and tomatoes are members of the nightshade family, but that’s where the similarities end.
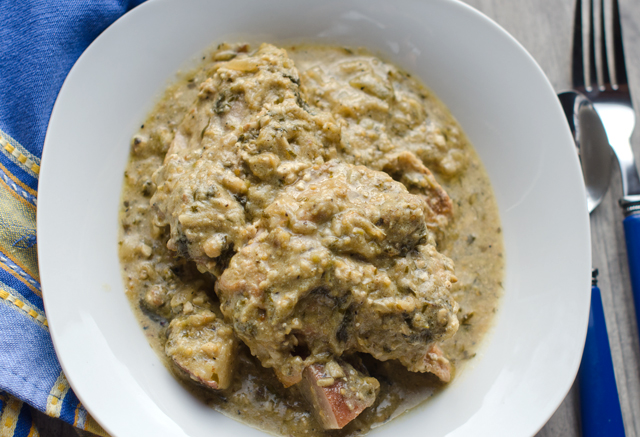
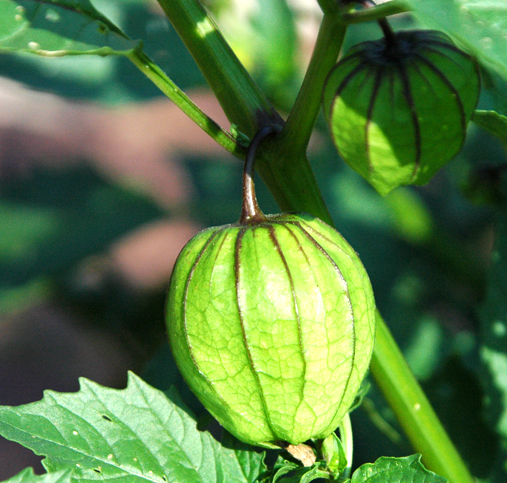
Years ago tomatillos were one of those “let’s try this and see” additions to the garden. I certainly wasn’t familiar with the sprawling bushy plants that first produce lots of leaves and little yellow flowers. These flowers eventually turn into bright green papery Chinese lanterns. The tomatillo grows inside this husk and when the fruit is mature, the husk dries out and turns a tan color and the tomatillo splits the husk open. Under that husk they look like hard little green tomatoes. They have a bright fresh flavor, a little citrusy and herbal. I have used them for salsa verde and a chicken tomatillo soup. This time I wanted to use tomatillos in a sauce for braised chicken thighs. I found my inspiration from Mexican cooking authority, Rick Bayless. His recipe for a braised pork loin in tomatillo sauce could be adapted for chicken so I knew I would be getting the direction I needed.
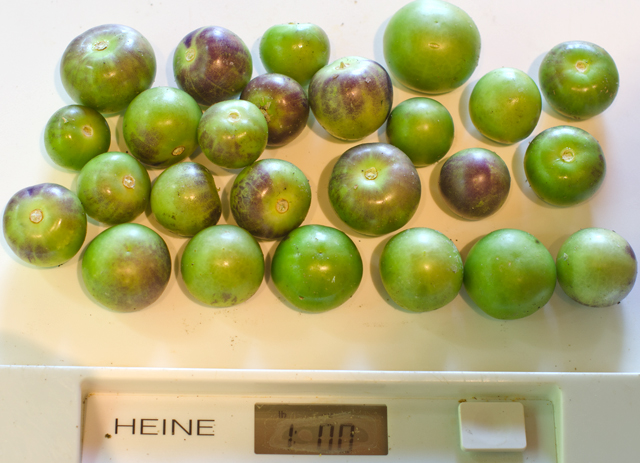
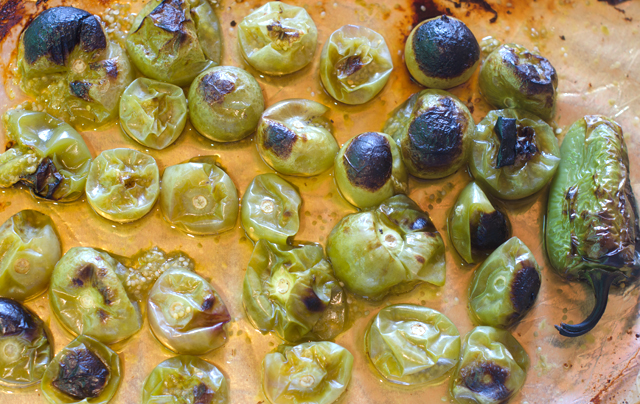
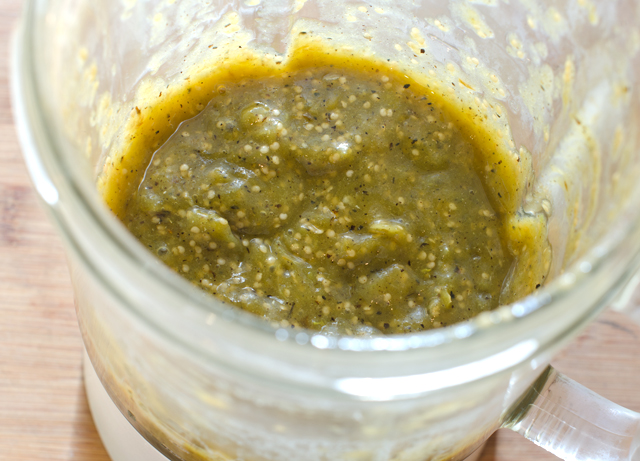
Start the dish by making the tomatillo sauce or salsa, remember, salsa is the Spanish word for sauce. Turn the broiler to high and move the oven rack to the highest position.Remove the papery husks from the tomatillos and rinse off the sticky residue, that residue is a natural deterrent to insects. In this case it took 28 tomatillos to make a pound. Put them on a foil lined baking sheet, stem side down so they won’t roll around as much. It is a good idea to double up on the baking sheets so they won’t buckle under the broiler from the heat. Add one green jalapeno to the sheet and broil until the tomatillos are roasted, even blackened in spots and very soft. Transfer everything, including the juices to a blender and process until smooth. Set the sauce aside while you brown the chicken.
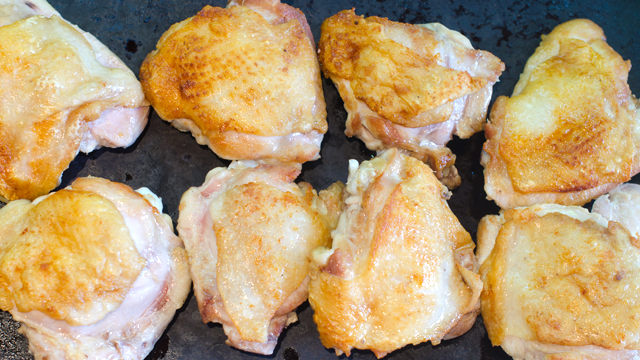
In a 4-5 quart Dutch oven, brown the chicken pieces. You will need to do this in batches, the chicken should be golden brown, not stewed. Rick instructs that you use either all white meat (breast) or all dark (thighs) because the cooking times will be different, I find that dark meat holds up better to the braising process. After the meat is browned it is removed to a plate. No need to rinse the pot, now it’s time to finish off the sauce.
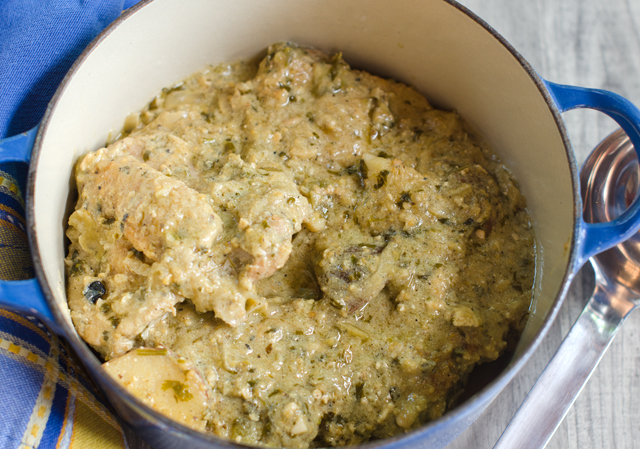
Return the Dutch oven to medium heat and cook the onion and garlic. Raise the temperature to medium high and add the tomatillo puree. Cook until it is dark green and thickened, this concentrates the flavors of the sauce. A little water thins out the sauce, Rick feels the addition of stock would make the sauce too rich. Now is the time to add some heavy or sour cream if desired. It lightens up the sauce and I liked it with the chicken. Add some fresh cilantro or the more traditional purslane also known as verdolagas in Mexico. I will definitely try that when purslane makes an appearance in the garden again. Nestle the chicken pieces in the sauce, put the lid on and cook in the oven for thirty minutes.
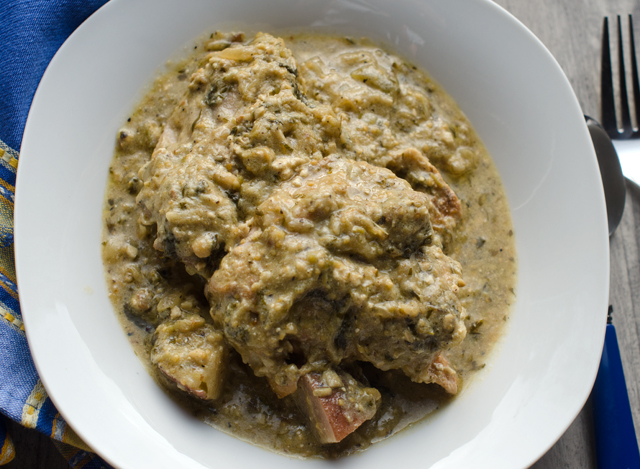
Potatoes add an earthy element to the dish. Parboil some red potatoes while the chicken is cooking, close to the end of the cooking they are nestled in the sauce between the chicken pieces. Serve the chicken topped with sauce with some potatoes on the side. The end result is a rich, warm satisfying dish and the perfect transition from summer to fall cooking.
Tomatillo on the vine, not ready for picking yet.
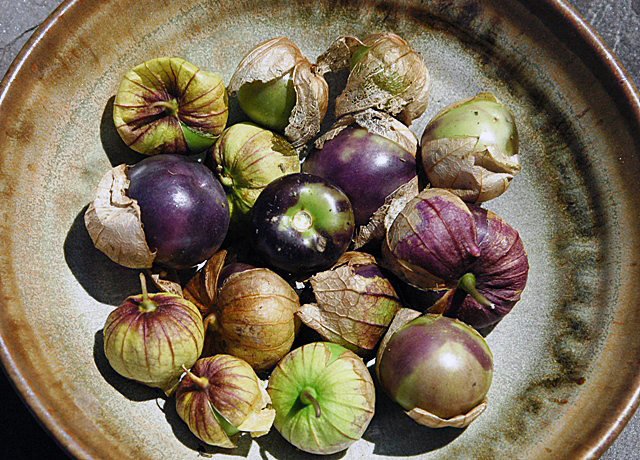
Ripe green and purple tomatillos.
It took 28 tomatillos to make a pound.Roast tomatillos until soft and blackened in spots. Make sure the juices go in the blender too.Blended tomatillos.Chicken thighs are browned, then nestled in the tomatillo sauce.
Braised Chicken Thighs in Tomatillo Sauce
Serves 4-6
Ingredients
1 lb fresh tomatillos
1 medium jalapeno pepper
Kosher salt and fresh ground pepper
8 medium skin on, bone in chicken thighs, 2½ to 3 lbs
1½ T olive oil
1 medium onion, finely sliced
3 cloves of garlic, peeled and finely chopped’
1/3 c chopped cilantro
A little crema or heavy cream if desired
1¼ lbs red skinned potatoes, scrubbed and quartered
Directions
Roast the tomatillos and chile on a baking sheet four inches below a very hot broiler until darkly roasted, even blackened in spots, about 5 minutes. Flip them over and roast on the other side for another 4-5 minutes. Tomatillos should be splotchy black and the chile soft and cooked through.
Cool a bit then transfer everything, including the juices that have accumulated on the tray to a blender. Process until smoothly pureed.
Set a 4-5 quart Dutch oven over medium heat, when the oil is hot add chicken pieces skin side down. It is best to do this in batches, you want the chicken to brown, not stew. Brown the chicken on the first side for 5 minutes, then turn over and brown on the other side. Remove the chicken pieces to a plate and keep warm.
In the same Dutch oven over medium heat, add the onion and cook, stirring regularly, until golden, about 7 minutes. Stir in the garlic and cook a minute longer. Raise the heat to medium heat and when the oil is sizzling, add the tomatillo puree all at once. Stir until it is darker and noticeably thicker. Add 1 ½ cups of water and the cilantro. If you desire a mellower sauce add about a ½ cup cream or sour cream to the sauce. Taste and season with a little salt. Stir the sauce well to combine.
Heat oven to 325°F. Nestle the chicken pieces in the warm sauce, cover the pot and set in the oven. Cook for 30 minutes.
While the chicken is cooking, simmer the potatoes in a pan of salted water to cover until tender, about 10 minutes. Drain and set aside.
When the chicken has cooked for thirty minutes, nestle the cooked potatoes into the sauce around the meat. Recover and cook for another 5-10 minutes.
Serve the chicken and potatoes with the sauce over it.
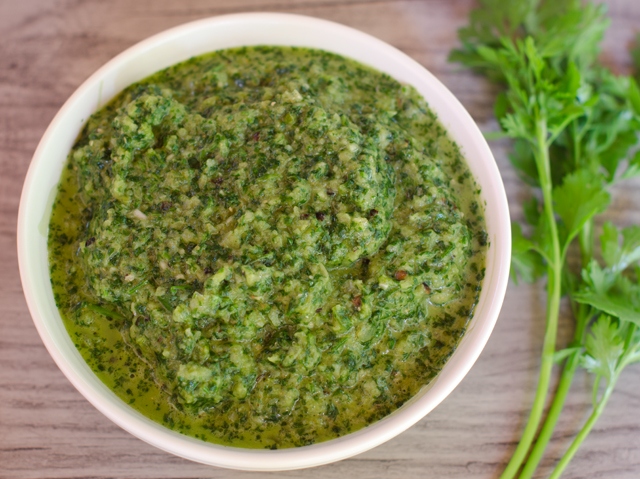
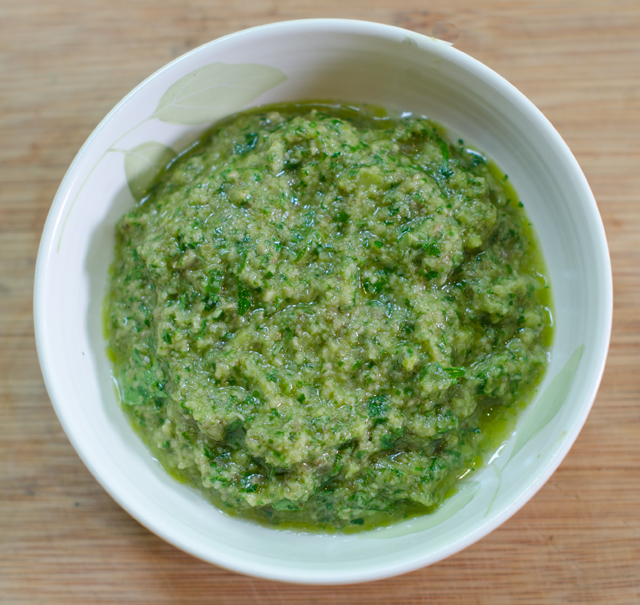
Harissa is a spicy and aromatic chili sauce, commonly found in the cooking of the North African countries of Tunisia, Morocco and Algeria. The basic recipe calls for hot peppers, garlic, salt, olive oil and spices. This version from Vedge , a vegetarian restaurant in Philadelphia, uses green jalapenos, onions, garlic, a generous amount of fresh cilantro, along with dried coriander and cumin. Cilantro haters can substitute parsley or half parsley and half fresh spinach. Some mint might be interesting in the mix.
The original recipe called for 2 jalapenos, one was enough for my palate, remember you can always add more heat, it’s harder to take it away. It’s a good idea to wear gloves when handling chilies. Chili oil on sensitive parts of your body (hands, lips, eyes etc.) will burn for a long time. Chili oil is not water soluble, it’s fat soluble. So if you get some on your hands, rub some cooking oil into your hands before washing with soap and water.
Serve green harissa as a sauce for grilled vegetables and fish, lamb burgers, an unconventional taco topping, the possibilities are endless.
Green Harissa
Makes 1 cup
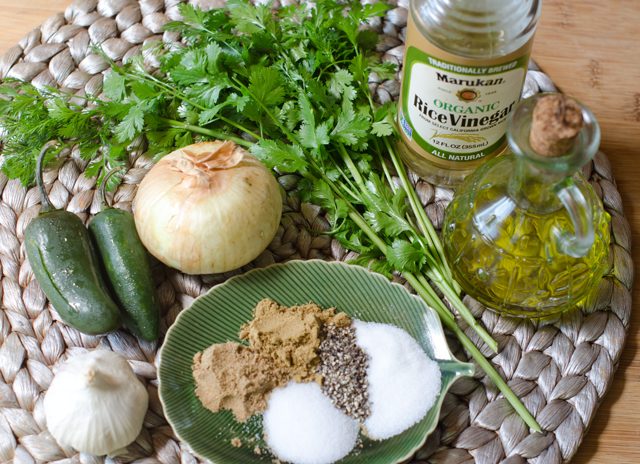
Ingredients
2 c loosely packed cilantro leaves
1 c finely chopped onion
2 garlic cloves
2 jalapeno peppers, stems and seeds removed
2 T or more olive oil
2 T rice wine vinegar
1 t ground coriander
1 t ground cumin
1 t salt
1 t freshly ground black pepper
1 t sugar
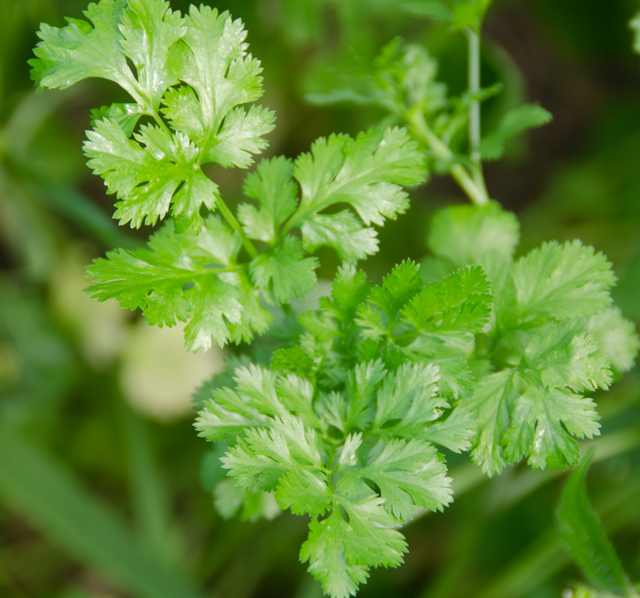
Cilantro in the greenhouse.
Directions
Combine all of the ingredients in a blender and blend until smooth
Spring is an ideal time for planting root vegetables like turnips, beets and carrots. They especially love the cooler temperatures that we have been blessed with this spring. We try to be frugal with seeds, so the ones that aren’t planted are saved from season to season. I catalog them alphabetically like a card file in clamshell plastic containers that in a previous life held spinach or lettuce from a big box store. I use 3×5 cards to separate them into specific categories, beets, cucumbers, fennel etc. This year I even did a little clean up, getting rid of all packets before 2013.
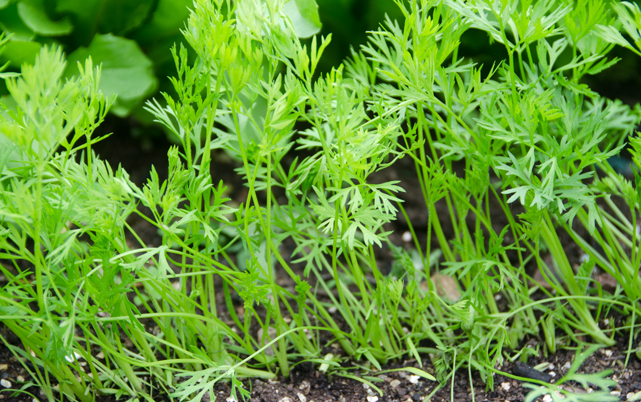
Last year a friend gave Joe quite a few packets of carrot seeds he purchased on sale. Some were planted but most went into storage in the fridge over the winter. He wasn’t certain how many of them would germinate this season so he planted them very densely. As luck would have it, every carrot seed germinated. Now it was time for some serious thinning.
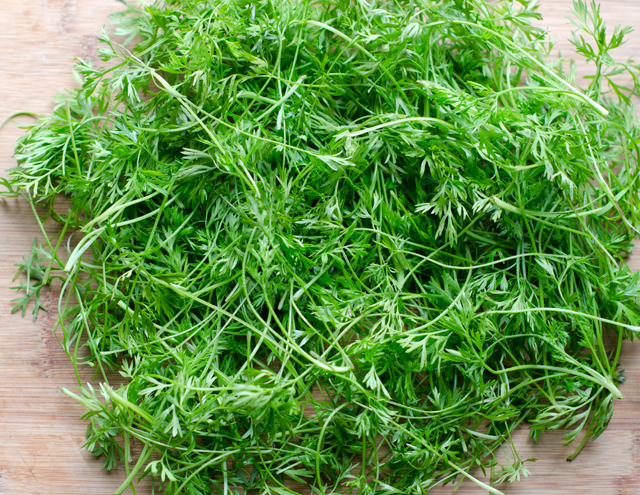
Thinning is a necessary step in vegetable gardening if you want to have mature healthy plants. This can be done in stages. Armed with my Cutco scissors, I did the first thinning when the plants were about four inches tall. Pulling out the unwanted seedlings can often pull out the ones you wanted to leave growing. I snipped the plants at the soil line. With a colander full of the lacy feathery tops I thought about how I could use them. I remembered that parsley and carrots are related so I tasted a few of them. They have an herbaceous flavor, that to me was reminiscent of parsley.
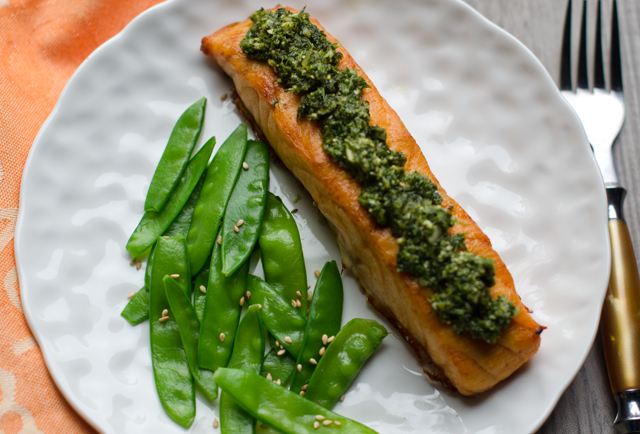
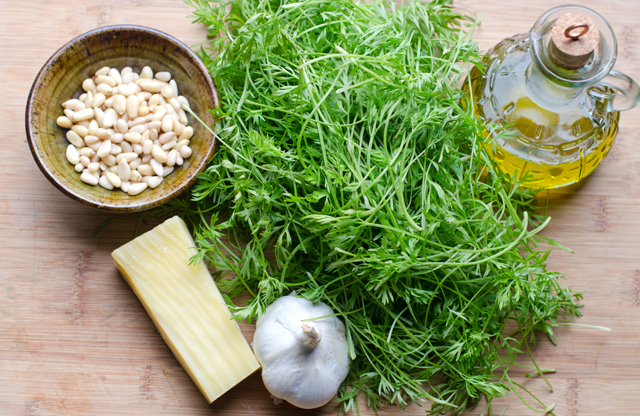
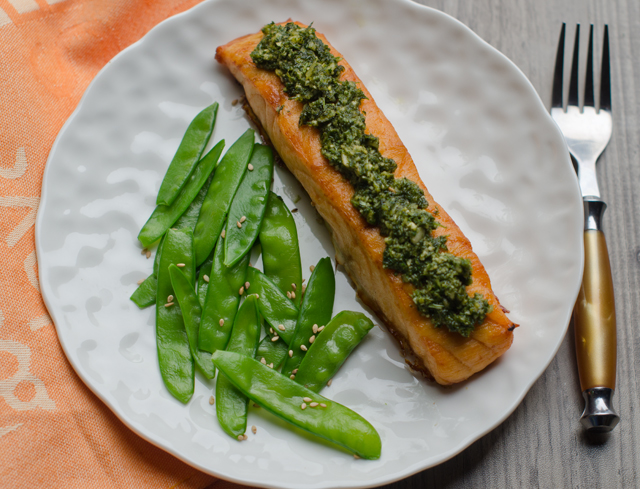
I have made pesto with basil and arugula, why not carrot tops? I used a basic formula that I have used to make other types of pesto, herbs or a green, in this case carrot tops, garlic, nuts, a hard cheese and olive oil. Baby carrot greens are more delicate in flavor and are a special reward for the gardener. Organically grown full-sized carrot greens can be used too, eliminating any thick stems. I used my pesto as a topping for roasted salmon. It would work with chicken breasts and of course, roasted carrots.
Time to thin the carrots.The first thinning of carrot greens.
Carrot Top Pesto
Makes about a cup
Ingredients
3 cups lightly packed carrot tops
1 clove of garlic
3 T pine nuts
¼ c extra virgin olive oil, more if needed to make a paste
¼ c grated Parmesan cheese
Kosher salt and pepper to taste
Directions
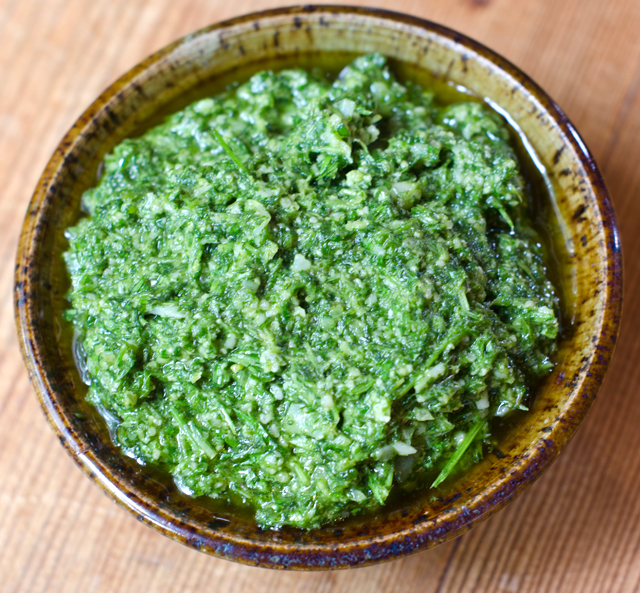
Place the carrot tops, garlic and pine nuts in the bowl of a food processor.
Pulse until coarsely chopped. With the motor running, slowly add olive oil until a paste forms. Add cheese and pulse several times to combine.
Season with salt and pepper to taste. Use immediately or cover tightly with plastic wrap and refrigerate for up to 2 days.
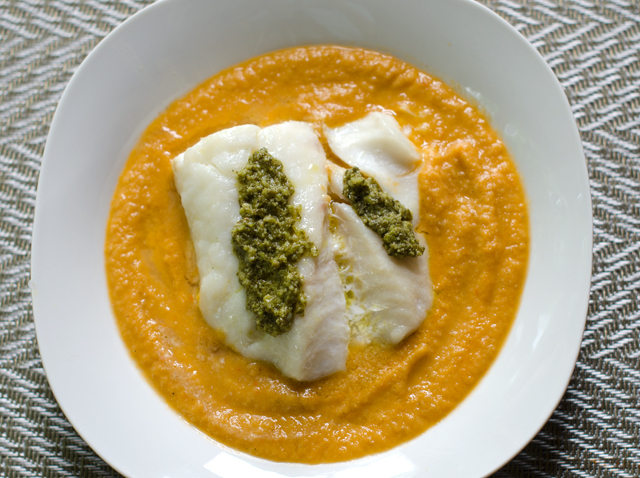
Fish is on the menu at our house three nights a week and though the method of cooking is usually the same, I am always looking for new ways to complement it. This recipe, Baked Cod Fillet with Bouillabaisse Sauce with Green Olive Tapenade from the April issue of Food and Wine seemed to fit that bill. It combines the classic flavors of bouillabaisse: fennel, garlic, saffron and tomatoes, to make a delicious sauce along with a quick briny olive tapenade.
The origins of bouillabaisse can be traced as far back as the ancient Greeks and was the humble fare of fishermen in Provence, specifically from the port city of Marseille. The best of the catch would be sold to restaurants while the less desirable bony rockfish and shellfish would become part of the fisherman’s dinner, a stew cooked with sea water and simmered over an open fire. Bouillabaisse has come a long way since then to become one of the most iconic French dishes.
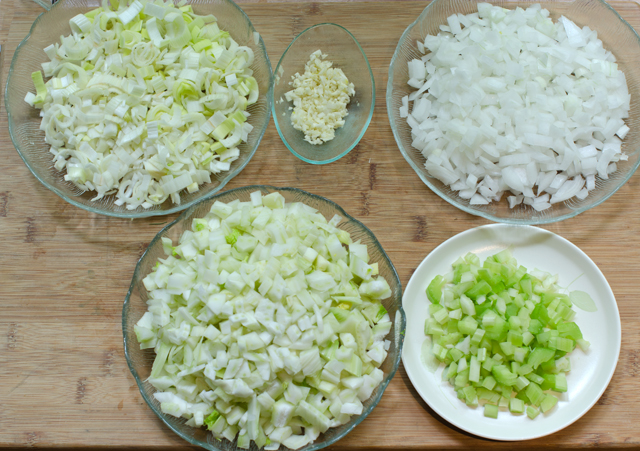
The first step of the recipe is to chop the fennel, leek, onion and celery. This can be done by hand or a food processor makes quick work of this step. Just be certain that all pieces are relatively the same size to ensure even cooking. Sauté the vegetables over medium heat until softened then add the garlic and saffron. Saffron adds a subtle flavor and aroma and its beautiful golden color. At about forty dollars a bottle, Pernod is an ingredient I could not justify buying since I was only using a few tablespoons. It adds a subtle anise flavor so if you have some on hand, by all means use it. Add dry white wine and vermouth to the pot and reduce the liquid by half. Next into the pot are halved and smashed cherry tomatoes, grape tomatoes are an acceptable substitute here.
The next step is to make fish stock. I am fortunate to have an outstanding fish market that supplies me with fish bones and heads needed for stock making. If making fish stock would stop you from making this recipe, substitute clam broth or fish bouillon. Always taste products like this first, since they can be salty. After the sauce cooks, cool slightly and carefully discard the fish bones if using. Use an immersion blender to puree the sauce then pass it through a food mill into a sauce pan. Keep the sauce warm over low heat.
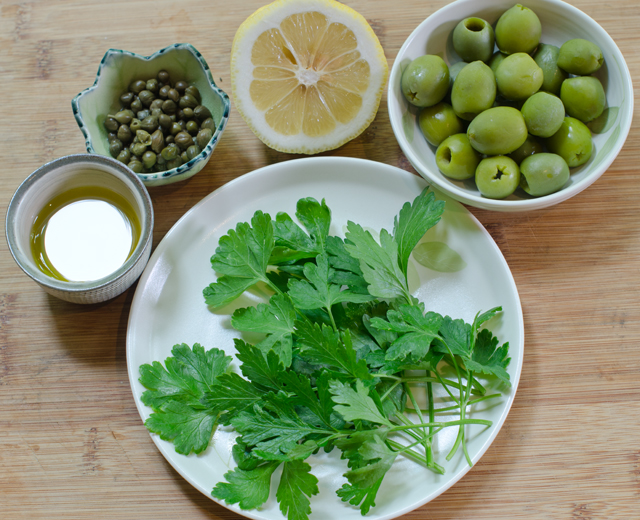
The green olive tapenade is very easy to do and adds a briny contrast to the rich sauce. Cook the fish according to your favorite method, we use the Canadian fisheries method with consistent results. The sauce and the tapenade can be made several days ahead making this an impressive recipe for entertaining.
Baked Halibut with Bouillabaisse Sauce and Green Olive Tapenade
Serves four
Ingredients for the sauce
4 T extra virgin olive oil, divided
1-1 lb fennel bulb, trimmed and finely chopped
1 large leek, trimmed and finely chopped, white and light green parts only
1 medium white onion, finely chopped
2 celery ribs, finely chopped
2 garlic cloves, finely chopped
¼ t saffron threads
2 T Pernod or pastis (optional)
¾ c dry white wine
¾ c dry vermouth
1 pint cherry tomatoes, halved and smashed
½ t smoked paprika
2 lbs white fish bones, rinsed and dried
2 t fresh lemon juice (plus more for drizzling)
Kosher salt
Four 6-oz. white fish fillets like cod, halibut, grouper
Directions for the sauce
In a large enameled cast-iron casserole, heat 2 tablespoons of the olive oil. Add the fennel, leek, onion and celery and cook over moderate heat, stirring occasionally until the vegetables are softened, about 8 minutes.
Stir in the garlic and the saffron and cook until fragrant, about 2 minutes
Add the Pernod (if using) and cook until the liquid has evaporated, about 2 minutes. Add the wine and vermouth and cook until the liquid is reduced by about half, about 8 minutes. Add the tomatoes and paprika and simmer over medium heat until the liquid is reduced by half, about 5 minutes.
In a large skillet, heat 2 tablespoons of the olive oil. Add the fish bones and cook over medium high heat, turning once, about 5 minutes.
Transfer the bones to the casserole and add two cups of water. Cover partially and simmer over moderately low heat for 30 minutes. Let the sauce cool slightly then discard the fish bones.
Using an immersion blender puree the sauce, then strain through the fine mesh of a food mill into a medium saucepan. Add 2 teaspoons lemon juice, season with salt and keep warm.
Ingredients for the Green Olive Tapenade
¼ c green pitted olives
2 T rinsed and drained capers
2 T flat leaved parsley
2 T extra virgin olive oil
1 ½ T fresh lemon juice
kosher salt and freshly ground pepper
Directions for the Green Olive Tapenade
Place the first five ingredients in the bowl of a mini food processor and pulse until combined and roughly chopped. Season to taste with salt and pepper.
Cooking the Fish
Preheat oven to 450°F.
Coat a shallow baking dish with non stick spray. Season the fish fillets with salt.
Measure your fish fillets at the thickest point. Bake the fish for 10 minutes for every inch of thickness.
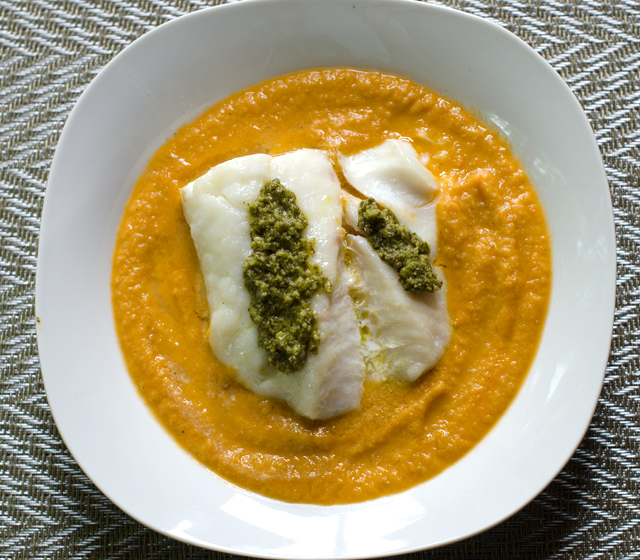
Finishing the Dish
Ladle the sauce into 4 shallow bowls and top each one with a cod fillet Spoon the tapenade over the fish. Drizzle with more olive oil and lemon juice. Serve immediately.
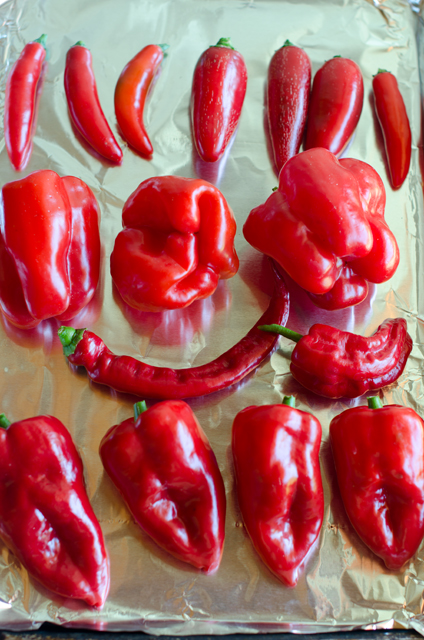
The challenge facing us in late summer/early fall is preserving the harvest. A prime example is hot peppers. In tropical climates they thrive as perennials and can grow for many years. It would be great if I could just walk down to the garden in January to pick a few fresh jalapenos. But given the fact that January temperatures where we live are below freezing and pepper plants prefer a daytime temperature of 65-80°F, it won’t be happening anytime soon . So it is necessary to find methods of preservation now to enjoy them later while the peppers are at their peak. Every year I freeze whole peppers, dry them, make chili flakes, pickle jalapenos, I’m even making sriracha now, but a new method is always welcome.
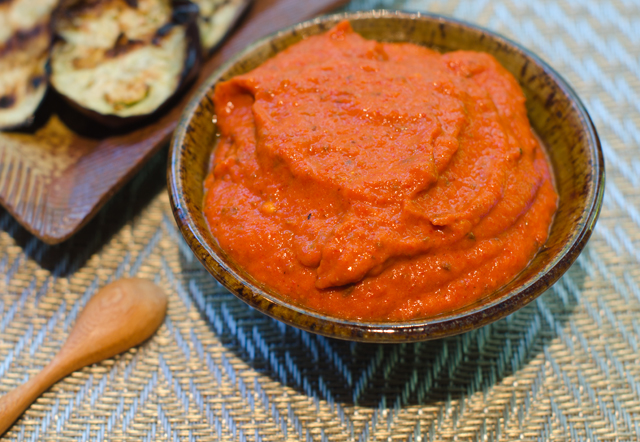
A very simple recipe I found for eggplant, another garden stalwart, suggested topping grilled slices with prepared harissa and yogurt. In the past I purchased harissa in a jar or a tube at the middle eastern stand at the local farmers market. This time I decided to see if this was something I could make myself. Harissa, is a garlicky spicy condiment found in the Northwest African countries of Algeria, Morocco and Tunisia. It can be used as a condiment for meat or fish, roasted vegetables, stirred into soups and stews and served alongside couscous. Think sriracha with more complexity. It’s ingredients can include roasted peppers, garlic, chile peppers of all varieties, fragrant spices such as coriander, cumin and caraway, dried mint, lemon and olive oil. There is no one master recipe for harissa. The ingredients in harissa vary by country, ethnicity, even neighborhood. You can adjust the heat by the number and type of chilies you use, just remember, harissa is supposed to be hot.
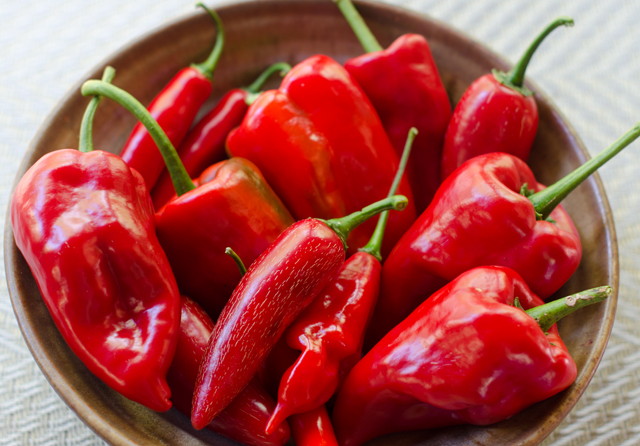
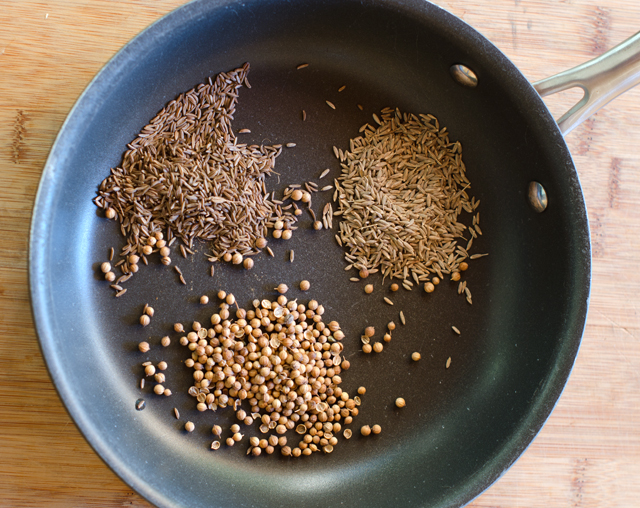
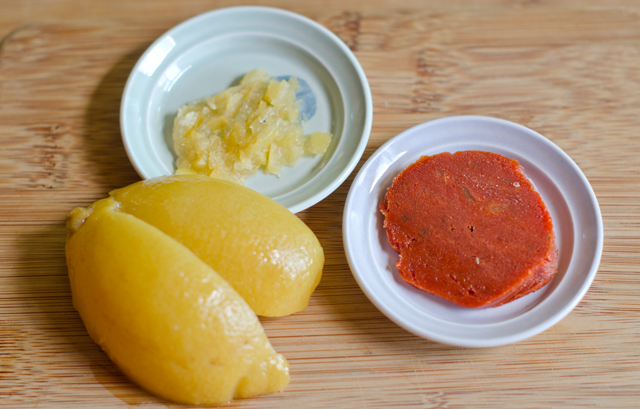
My recipe is a little different from most since I used fresh hot peppers, not dried ones that need to be reconstituted. This meant using double the amount of peppers. I used one red bell pepper, four mild poblano peppers and a mix of jalapeno, cayenne and ancho. I added a little tomato paste for sweetness, preserved lemon peel with just a little juice, chopped garlic, smoked paprika and an aromatic spice blend. I think the spice blend is what really gives this dish its unique flavor. Whole spices, coriander, cumin and caraway are toasted in a small skillet until the fragrance fills your kitchen. I find it easiest to grind them in a mortar and pestle, a mini food processor doesn’t quite give the consistency you are looking for.
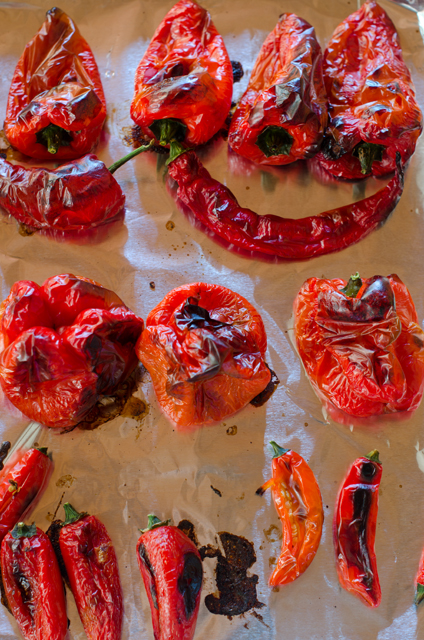
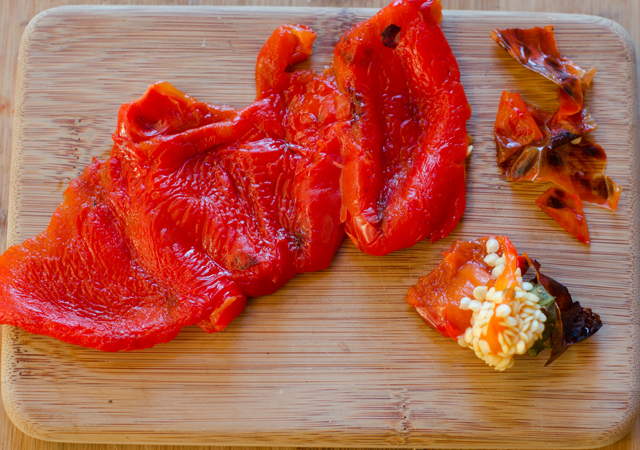
All the peppers need to be charred to remove the skin. I did this in a hot oven, turning occasionally to blacken all the sides. I put the charred peppers in a bowl and covered it tightly with plastic wrap to steam the peppers. It is important for to wear rubber gloves when removing the skin, seeds and stem from the hot peppers. Conventional wisdom for years has said that the hottest part of the pepper is the seeds. A recent study however has shown that even though the seeds pack some heat, it’s actually the placenta, the white tissue that holds the seeds that is the source of the most heat. As you peel the peppers put them into piles, no heat, some heat and hottest. That way you can hold back on some of the hottest peppers until you are certain the sauce will be palatable for you.
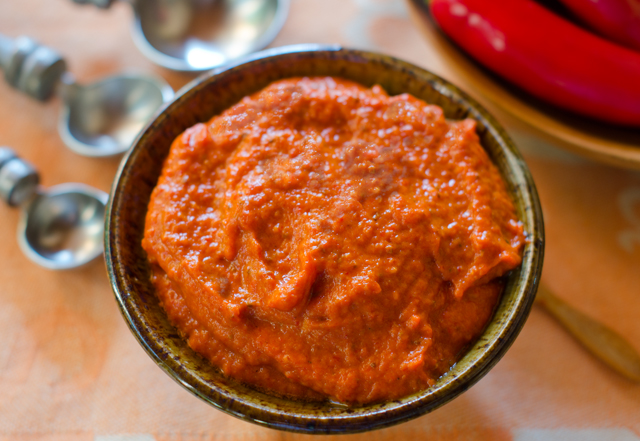
Combine the chilies, toasted spices, garlic, salt and other optional ingredients in a food processor. With the food processor running, slowly drizzle in the olive oil until you have a smooth, thick paste. Scrape down the sides occasionally. Taste, now is the time to add that extra pepper if desired. As I said before, harissa is supposed to be hot. Season to taste with salt and pepper. Transfer harissa to clean jars, top with a thin layer of olive oil and store in the refrigerator for several weeks. Since I freeze pesto I may try to see if harissa can be frozen too.
As a postscript, the harissa received immediate approval from Joe who topped cucumber slices with harissa as an after work snack.
A harvest of both bell and hot peppers.
Harissa
Makes 2 cups
Ingredients
1 medium bell pepper
8 to 10 ounces fresh chili peppers of varying heat, poblano, ancho, jalapeno, cayenne
2 t cumin seed
2 t coriander seed
2 t caraway seed
3 to 4 cloves of peeled garlic
1 T tomato paste
1 t preserved lemon peel
1 t juice from preserved lemon
1 t smoked paprika
Kosher salt and fresh ground black pepper to taste
3-4 T extra virgin olive oil
Directions
Preheat oven to 425°F.Line a baking sheet with foil. Place all the peppers on the baking sheet and roast for 10 minutes.
Turn the smaller peppers over and roast for another 10 minutes, until the skins are blackened. Remove them to a bowl. Turn the bell and poblano peppers over and roast for another 10-15 minutes, until the skins are blackened.
Remove all the peppers to the bowl and tightly cover with plastic wrap to steam the skin.
Place the cumin, coriander and caraway seed into a dry skillet over medium heat. Toast until seeds have darkened a bit and have become fragrant.
Pour toasted seeds into the bowl of a mortar and pestle. Crush seeds to a powder.
Using rubber gloves to protect your hands, stem, skin and seed the peppers.
Place the peppers (hold back a few hot ones if you are concerned), toasted seeds, garlic, tomato paste, preserved lemon peel and juice, smoked paprika into the bowl of a food processor. Pulse to combine the ingredients, scraping down the sides.
With the food processor running, add the olive oil in a steady stream until you have a smooth, thick paste. Taste, add salt and pepper to your liking and pulse in the extra peppers if desired.
Transfer harissa to clean jars and top with a thin layer of olive oil. Store in the refrigerator for several months.
Place the peppers on a foil lined baking sheet for easy clean up.
Cumin, coriander and caraway seeds are toasted in a dry pan.
Pulverize the seeds in a mortar and pestle or spice grinder. Smells great.Stem, seed and skin the peppers. Be sure to wear gloves to protect your hands from the hot peppers.
I added some preserved lemon peel and tomato paste.Everything is combined in the food processor. Add olive oil to make a thick paste.
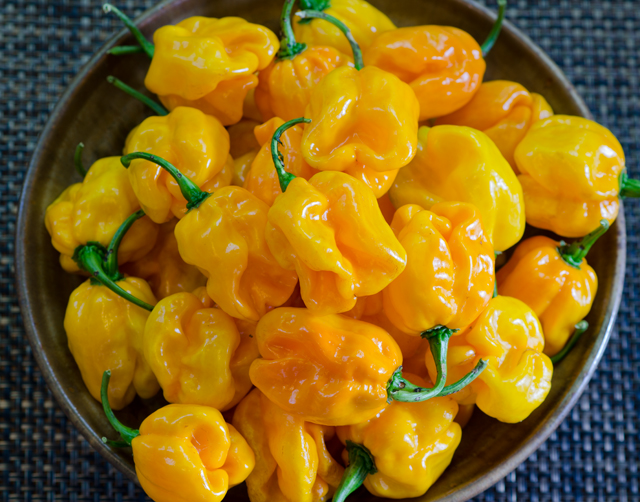
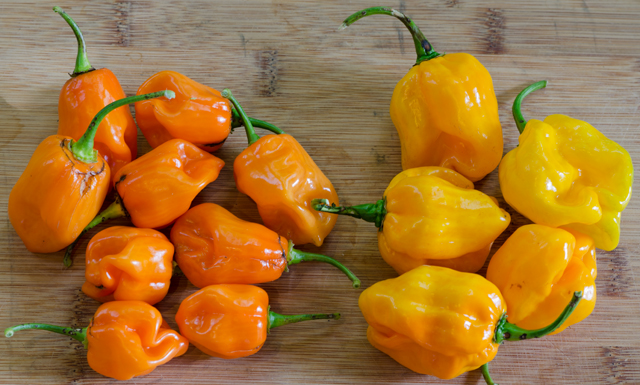
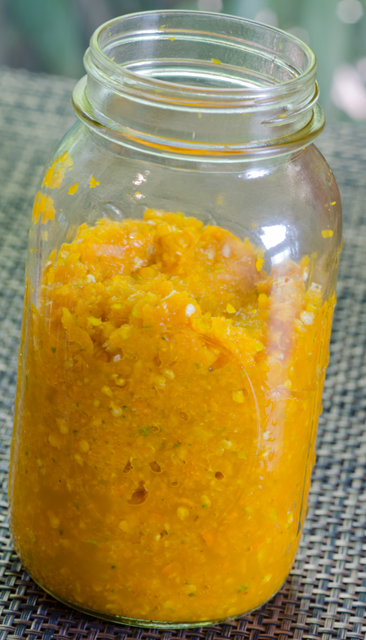
Last weeks plunge into the deep freeze meant it was time for one final harvest of hot peppers. With a formula that worked and an abundant source of peppers the challenge was to make a few hot sauces using the same method as the sriracha sauce from a few weeks ago. I first tried the NuMex Suave Orange peppers and several days later using green and red pasilla peppers and green poblano peppers. The jars fermented on the back kitchen countertop for about a week. I wasn’t sure what the results would be so my expectations weren’t very high.
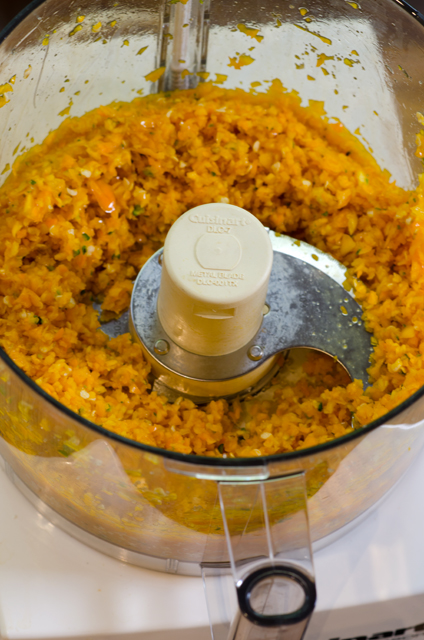
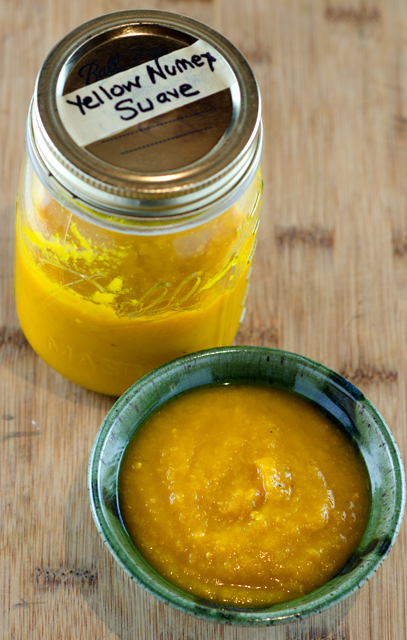
To finish, I followed the same procedure for each variety, transferring the chopped chilis to the food processor, adding enough (1/3 to 1/2cup) white vinegar to puree until smooth. I carefully washed out the processor between peppers to keep each type as pure as possible. I strained the mixture through the medium disc of the food mill to eliminate any seeds. I think it’s easier than the mesh strainer and gives the finished product a little texture.
Now for some taste testing. The Numex Suave Orange has the flavor nuances of the habanero that are usually missed because the heat dominates. The sauce has a citrusy flavor with hints of orange and lemon and finishes with a little heat. The green pasilla flavor reminds me of green bell pepper and has a touch of moderate heat. The green poblano has an initial hint of sweetness and finishes with more heat than the green pasilla. I especially like the red pasilla sauce. The color is a deep dark red and the flavor is rich and full but not too hot. I think it would be the perfect addition to a chili recipe.
Numex Suave Orange PeppersThe habanero peppers on the left measure a tongue burning 100,000 to 300,000 on the Scoville scale while the Numex Suave Orange on the right are a very mild 800!Adding peppers and garlic to the food processor.Chop the peppers as finely as possible.The peppers ferment for about a week.The finished product