August 28, 2018 Roasted Green Beans with Parmesan

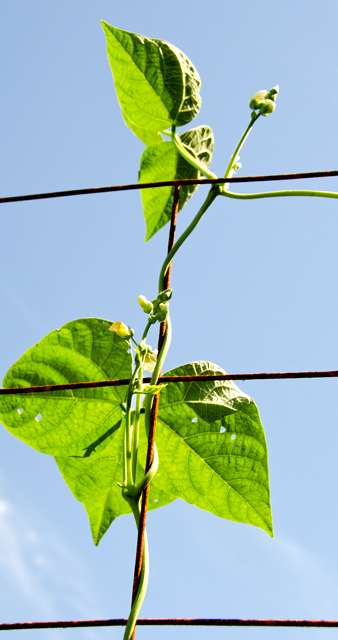
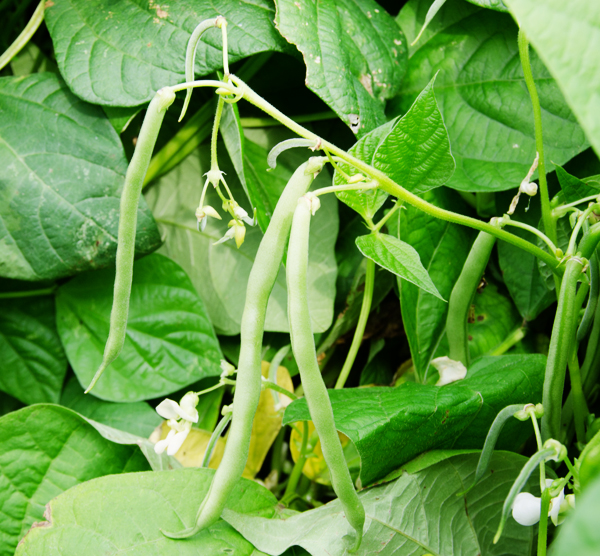
Rain happens. And when it does day after day I am less likely to make my way out to the garden. Unfortunately that doesn’t stop the veggies from growing. A prime example of this is the bush and pole beans Back in the early spring it’s easy to dream of vines loaded down with beautiful slim beans. Haricot Verts, as the French call them, only need a quick steaming, finished with butter, garlic, thyme and squeeze of lemon.

The beans I picked that first day without rain were well beyond their haricot verts stage but still usable. Since we love just about every other vegetable roasted, why not green beans? Using the method I use for other vegetables, I was certain they would turn out great.

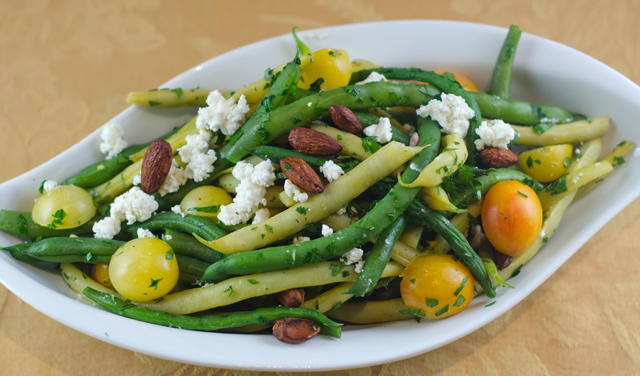
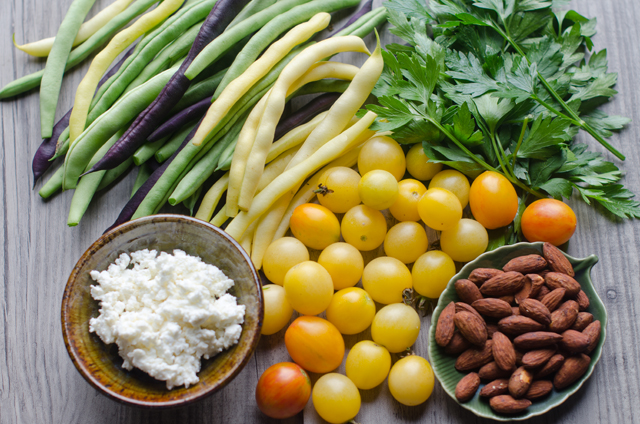
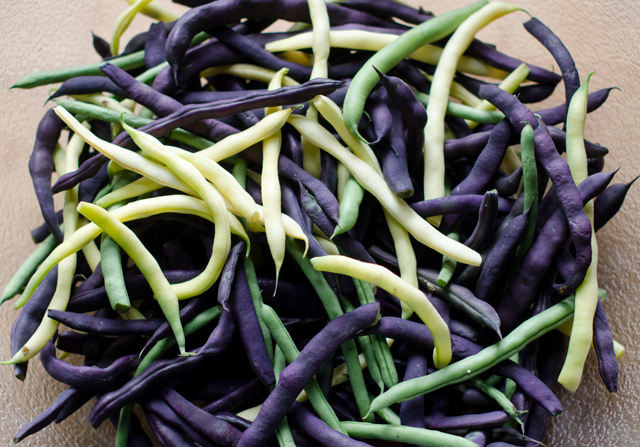
Start with about a pound of beans, we have green, yellow and purple beans this year. Purple beans are pretty on the vine but when you cook them they do not stay purple, they become a very dark green color.

After you have rinsed the beans lay them out on paper towels and pat them dry as possible. This will allow for the beans to be thoroughly coated with the olive oil. Place the beans in a bowl large enough to toss them in. Add a few tablespoons of olive oil and toss the beans well.Then add kosher salt and fresh ground pepper and toss again. Place the beans on a lined baking sheet spread out as evenly as possible.

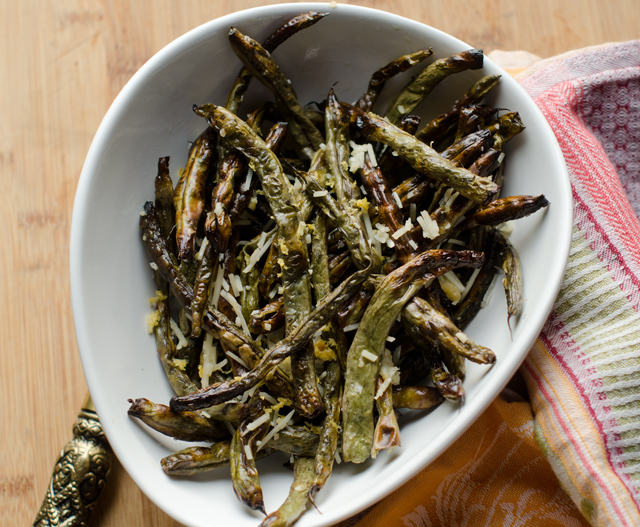
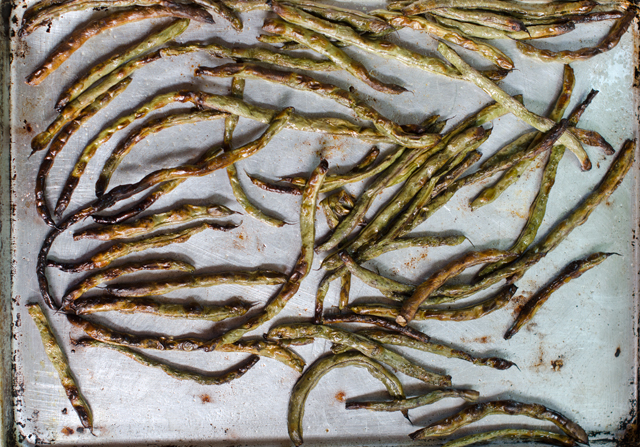
Roasting time is a function of how old your beans are. Slimmer beans may only ten to fifteen minutes, larger ones fifteen or more. When I made the first batch I timed them for ten minutes and rotated the pan, then every five minutes so they wouldn’t burn. As soon as the beans are close to being done, take them out the oven and sprinkle with cheese. Return the pan to the oven to melt the cheese. Serve warm.

Joe is growing both bush and pole beans.
One days pick.

Roasted Green Beans with Parmesan

Ingredients

  • 1 lb green beans, medium to large in size
  • Extra virgin olive oil
  • Kosher salt and fresh ground pepper to taste
  • ½ c freshly grated Parmesan cheese

Directions

  1. Preheat oven to 425°F
  2. Rinse beans in a colander with cool water. Removing all stems and blemishes, then blot with paper towels to remove off excess moisture.
  3. Transfer beans to a bowl large enough to toss them in. Use enough oil to lightly coat all the beans.  Sprinkle with kosher salt and freshly ground pepper and toss them again to coat.
  4. Put beans on a parchment lined baking sheet. Spread the beans evenly on the sheet.
  5. Roast for ten minutes, then pull out the oven and toss the beans in the pan again.
  6. Return the beans to the baking sheet and continue to roast until the beans are browned in spots.
  7. Remove pan from the oven and immediately sprinkle with Parmesan as evenly as possible. Return pan to the oven for a few minutes to melt the cheese.  Serve warm.


December 10, 2017 Chicken with Shallots

In the beginning it was Martha for me. Sure there was Julia, James, Jacques and the Silver Palate ladies, but Martha was my main inspiration as someone who was a novice at cooking, entertaining, and in a few years, a budding caterer. As the Martha Stewart empire expanded, so did the number of magazines published under the Martha Stewart brand. Among those titles was Everyday Food, a pocket-sized digest with recipes that were “fast and easy”. The recipes centered around ingredients that could easily be purchased at the grocery store and usually cooked in less than an hour. Quite a departure from many of the recipes in her many of her earlier cookbooks.

Though there are many good recipes from the magazine and accompanying PBS series, there is one that stands out from the rest, braised chicken with shallots. Over the years this recipe has been modified, updated and tweaked, this is my version.

Braised chicken with shallots is a one pot no fuss dish where the sum is definitely greater than the  basic parts. The original recipe used bone in skinless chicken thighs, you could equally substitute bone-in skin on chicken thighs or boneless skinless chicken thighs. I would definitely say choose thighs or chicken quarters (leg and thigh combination) rather than chicken breasts, dark meat holds up much better to braising.

Several versions of the recipe start with a definite no-no, rinse the chicken thighs in water. Washing raw poultry before cooking is not recommended by the USDA. Bacteria in raw chicken (in all meat actually) can be spread to other foods, utensils and surfaces, also known as cross contamination. Cooking chicken to the proper temperature kills the bacteria. So just pat the chicken very dry with paper towels and proceed with the recipe.

Coat the chicken pieces very lightly with flour and sprinkle with salt and pepper. Martha recommends (and I heartily agree) using Wondra flour for this step. If you haven’t noticed, it’s that bright blue canister tucked in next to all those alternative flours like coconut and almond. Wondra is an instant flour, precooked and dried. It dissolves quickly in liquids and makes lump free gravies. In this recipe it gives the chicken an extra light and crispy crust.

Melt butter in a large heavy bottomed skillet or Dutch oven. Cook the chicken three to four minutes per side, in batches if necessary. You want to develop a golden crust and leave behind brown bits that you will cook the shallots in. Remove the chicken from the pan and keep warm.

Shallots, usually a minor player in most recipes takes a starring role here. If you aren’t familiar with shallots, their flavor is sweet and mild, somewhere between an onion and garlic. This recipes uses about a pound, 12-15 medium to large shallots. Peeling shallots can be a tedious task. You can make this easier by soaking the shallots in boiling water for a few minutes and then putting them in an ice water bath so they won’t continue to cook. Make a shallow cut in the top layer and peel the skin and top layer away.

Sauté the shallots in the butter and rendered chicken fat until softened and caramelized. Return the chicken pieces to the pan and add a cup of white wine to bring some acid to the dish and to deglaze the brown bits in the bottom of the pan. I used vermouth, a fortified white wine that is flavored with herbs and spices. If you are going to use vermouth, look for a dry (not sweet) variety.

Stir in the Dijon mustard and add the fresh rosemary sprigs. Put a lid on the pan and simmer for thirty minutes. At the end of the cooking time add two cups of halved cherry tomatoes. Although I am not a fan of out of season tomatoes, there are some I will use as “supporting players” when they are necessary to the dish. With seed sourced from the south of France, Sunset Flavor Bombs are a good choice and available at big box stores.

This is a great dish for the busy cook, cook on a Sunday afternoon, reheat and serve several days later. Serve with noodles or rice to sop up the juices.

Shallots are a member of the onion family, their flavor is milder and reminiscent of garlic.
Chilling off blanched shallots before peeling them.

Chicken with Shallots

Serves 4-6

Ingredients

  • 2½ to 3 lbs chicken thighs (6-8 pieces)
  • 2 T flour (I used Wondra)
  • Kosher salt and freshly ground pepper
  • 2 T unsalted butter
  • 12 medium to large shallots, peeled
  • 1 c vermouth
  • 1½ T Dijon mustard
  • 2 large sprigs rosemary
  • 2 c small tomatoes cut in half or quarters

Directions

  1. Pat the chicken thighs dry with paper towels. Sprinkle them with salt, pepper and flour.
  2. Melt the butter over medium high in a heavy bottomed skillet large enough to fit the chicken pieces comfortably. When the butter begins to foam, cook the chicken, in batches if needed, 6-7 minutes per side. It should be brown and crisp on both sides. Set the chicken aside on a plate and keep warm.
  3. Sauté the peeled shallots in the butter and the chicken fat until they begin to soften and caramelize, 10-12 minutes. Stir in the vermouth with a large wooden spoon to deglaze the pan. Add in the mustard and the rosemary sprigs. Return the chicken thighs to the pan and cover. Turn the heat to low and simmer for 30 minutes.
  4. Add the tomatoes to the pan and stir them in to combine. Serve immediately or cool and refrigerate. Reheat and serve in the next two days.

September 17, 2017 Salmon with Heirloom Tomato Scampi Sauce

It’s still officially summer for another week or so but it’s easy to see that fall is in the air. We haven’t experienced a ninety degree day in several weeks and the days are sadly growing shorter. The tomatoes are making their last gasp, maybe not quite tomato salad worthy but still so much more flavorful than anything a supermarket might have to offer.

This recipe, courtesy of Top Chef season two semi-finalist, Sam Talbot uses a combination of heirloom tomatoes, garlic, shallots, capers and fresh basil. The original recipe used sea bass but I substituted salmon with excellent results.

Scampi is the Italian word for a hard shell prawn or langoustine. Prized in the Mediterranean, they are pink in color and more closely related to lobsters. The traditional method of scampi preparation in Italy is to saute them with garlic, onion, olive oil and white wine. Italian American chefs adapted the preparation using more readily available shrimp. The dish was called shrimp scampi, as in “shrimp prepared in the style of scampi” and the name stuck.

This is a scampi sauce in the broadest sense of the term, it does have garlic, onion, in this case shallots, olive oil and white wine. It also includes celery, which gives some textural difference, briny capers and fennel seed that adds just a hint of anise.

Heirloom tomatoes aren’t necessarily part of a scampi preparation either but they are a nice addition to this dish. Some of the varieties Joe grew this year included Garden Peach, Marvel Stripe, Cherokee Purple and both Red and Green Zebra, just to name a few. Heirloom tomatoes are open pollinated; pollen is carried by natural mechanisms like bees or wind. Heirlooms are varieties that are capable of producing seed that produce seedlings like the parent plant. In agriculture, the word “heirloom” doesn’t have a precise definition but usually refers to varieties that are at least 50 years old.

As always, we cook our fish according to the Canadian fisheries method. Popularized by legendary chef, James Beard, it is very simple and quite foolproof. Measure your fillet at the thickest part, one inch of thickness equals ten minutes of cooking time at 450°F. If you prefer your fish a bit translucent, deduct a minute or so off the cooking time.


An assortment of late season heirloom tomatoes.

Salmon with Heirloom Tomato Scampi Sauce

 Ingredients

  • 3 T extra virgin olive oil
  • 6 cloves of garlic, finely chopped
  • 2 shallots, finely diced
  • 1 T fennel seeds, toasted in a dry skillet
  • 4 celery ribs, sliced ¼ inch thick
  • 1 T drained, chopped capers
  • ¼ c dry white wine
  • 1 T red wine vinegar
  • Grated zest and juice of 1 medium lemon
  • 3 lbs mixed heirloom tomatoes, cut in wedges
  • 1 cup tightly packed hand-torn fresh basil leaves
  • 1½ lbs salmon filet, cut into 4 six ounces portions

Directions for the Sauce

  1. In a large skillet, heat the oil over medium high heat. Add the garlic, shallots, and fennel seeds and cook, stirring frequently, until the shallots are translucent about 2 minutes.
  2. Add the celery and capers and cook until the celery has softened, about 2 minutes.
  3. Add the wine to the pan and cook until it is reduced by half, about 1 minute. Add the vinegar, lemon zest and juice, tomatoes and basil and cook for 1 to 2 minutes to incorporate the flavors and heat the tomatoes through.

Directions for the fish

  1. A half hour before cooking bring the fish out to bring it to room temperature. Adjust oven rack to the middle position and preheat to 450°F.
  2. Measure fish at the thickest part of the fillet with a ruler, one inch of thickness equals about 10 minutes of cooking time. Evenly space fish fillets in a lightly oiled baking pan and transfer pan to the preheated oven. Bake for the designated time.
  3. Serve the salmon fillets topped with tomato scampi.

September 7, 2017 Green Bean Salad with Cherry Tomatoes, Feta and Parsley

Whether you call them snap beans, green beans or string beans, our garden has produced a steady stream since early July. Joe plants both bush and pole beans and not just green beans. We grow purple beans that look pretty on the vine but as soon as you plunk them in a pot of boiling water, they turn a dark green color. This is due to a plant pigment, anthocyanin, that deteriorates in high temperatures. If you want to preserve the bean’s  purple color, choose a crisp young bean that doesn’t require cooking.

Yellow or wax beans also add color to the garden. According to Cook’s Illustrated, yellow beans are just green beans bred to have none of the chlorophyll pigment that gives the green bean its color.

Snap beans are low in calories, a good source of fiber and vitamins A and C. Their grassy, nutty flavor is appealing to just about everyone. In the cooler months we are most likely to do a warm preparation of beans with garlic and thyme. In the summer I like to blanch them and make a green bean salad. This combination is a creation of my own and a dish I have made countless times this summer.

I start with approximately a pound of beans. I wash and stem the beans and sort out any that are significantly fatter and or older. Bring a large pot of water that has been well salted to the boil and add the large beans first. I give them an extra minute or two to cook. Then I add the rest of the beans and start my timer at a generous four minutes. I taste (careful, it will be hot) one bean, and if I can bite through with no resistance, they are done. If not, set the timer for another minute, then taste again. Drain the beans in a colander and rinse with cool water. Spread the beans out on dish towels to let the excess moisture evaporate.

In a large bowl combine the beans, chopped parsley and tomatoes. A bite-sized cherry tomato works best here, cutting them in half makes them easier to eat. I have used different varieties over the summer. On this particular day I used a white cherry tomato. They aren’t really white but a very pale yellow. Toss the ingredients with the vinegar and oil. Next add the feta and tamari almonds. My preference is French feta, it is milder (less salty) in flavor and creamier in texture. Tamari almonds bring a umami flavor and a pleasant crunch. Season to taste with salt and pepper. Serve immediately, leftovers taste great the next day.

Green Bean Salad with Cherry Tomatoes, Feta and Parsley

Serves four

Ingredients

  • 1 lb green beans, washed, stemmed and trimmed into 2-3 inch pieces, can be wax or purple beans also
  • 15-20 small tomatoes, halved
  • 1/3 c finely chopped parsley
  • 1/3 c crumbled feta (I prefer French feta in this salad)
  • 1/3 c tamari almonds
  • 3 T grapefruit or another light balsamic vinegar
  • 6 T olive oil
  • Kosher salt and freshly ground pepper

Directions

  1. Bring a large pot of lightly salted water to a boil. Add the beans, bring back to the boil and turn back the heat to a simmer and cook beans for 4 ½ minutes. Test one bean to be sure they are tender. Drain in a colander and rinse with cool water.
  2. In a bowl large enough to toss the ingredients comfortably, add the beans, tomatoes and chopped parsley. Toss with the oil and vinegar. Add feta and tamari almonds and toss again.  Season well with salt and pepper and serve immediately.

Aug 1, 2017 Zucchini Lasagna with Meat Sauce

Gardeners, let’s face it, we’ve all done it. You watch that cute little zucchini you’ve been nurturing along for several days, waiting for the moment when it’s about eight to ten inches long, bright green with mottled white striping and the blossom still attached, ready for picking. But life isn’t perfect, it rains for several days and you didn’t make it out to the garden and now that cute little zucchini is the size of a miniature baseball bat. Don’t despair, there are ways to still use them, zucchini lasagna is one of my favorites.

Zucchini lasagna “noodles” replace regular pasta for this delicious dish. I first cut the zucchini in half lengthwise so that I have a flat surface to cut my noodles. A mandolin is always my first choice for even uniform slices. If you weren’t aware, a mandolin, isn’t just a music instrument. It is a hand-operated kitchen tool with adjustable blades that in addition to making julienne and waffle cuts, makes uniform slices. Whatever model you choose, use the hand/finger guard, I speak from personal experience.  You can also go low tech and use a very sharp knife with a cutting board to stabilize your slices. I make my slices to fit the baking dish lengthwise, if you are using shorter zucchini, it’s fine to cut them the other way, making sure they fit your dish.

Zucchini is 95% water so before you assemble the lasagna it is important to precook it so less moisture ends up in your finished dish. Suggested methods I’ve seen include broiling, sauteing and parboiling. I like cooking them in the grill pan, it gives added flavor to the zucchini and the slices have a nice finished look. Cooking the slices on an outdoor grill would make the process even faster. Cook more slices than you think you may need to allow for breakage.

This dish can be made in stages, make the meat sauce one day, slice and cook the zucchini the next, then assemble. Just like regular lasagna, it tastes even better the next day, if it lasts that long!

Don’t forget the yellow squash , they work in this recipe too.

Zucchini Lasagna with Meat Sauce

Serves 6-8

Ingredients

Ingredients

  • 3-4 or more large zucchini, sliced 1/8″ thick
  • Extra virgin olive oil for brushing zucchini
  • 1 lb lean ground turkey or beef
  • 1 ½ t kosher salt
  • 1 T olive oil
  • 1 c finely chopped onion
  • 2 cloves minced garlic
  • 1 quart plain tomato sauce ( I used homemade)
  • 2 T tomato paste
  • 2 t dried oregano
  • ¾ t freshly ground black pepper
  • 1 ½ c part skim ricotta cheese
  • ½ c finely grated Parmesan
  • 1 large egg
  • 4 c shredded mozzarella cheese

Directions

  1. Preheat oven to 375°F and place baking rack in the lower position.
  2. Make zucchini lasagna “noodles”. Cut squash into 1/8″ thick slices using a sharp knife or mandolin.  If your squash is long they should fit the pan lengthwise, if you have shorter squash, orient the slices in the opposite direction. You should have enough slices to do four to five layers with a few extra pieces for good measure.
  3. Heat a grill pan or an outdoor grill to medium high heat. Brush both side of the slices lightly with olive oil.
  4. Grill the zucchini slices on both sides so they have grill marks, 3-5 minutes for the first side, a little less for the second side. Squash should be cooked but not falling apart. Line up the grilled zucchini slices on a paper towel lined baking sheet to absorb excess moisture.
  5. Heat a large saute pan over medium high heat and add 1 tablespoon olive oil. When the pan is hot add the onion and cook until onion is softened but not browned, 4-5 minutes. Lower the temperature if necessary. Add the garlic and cook another minute. Add the ground meat and season to taste with salt. Brown the meat, breaking it up as you cook it.
  6. Slowly pour in the tomato sauce and stir it into the meat. Bring to a boil and immediately reduce heat to medium. Add tomato paste, oregano, salt and pepper. Simmer on low, stirring occasionally for about 40 minutes. Cover and set aside.
  7. In a medium bowl combine ricotta, Parmesan and egg. Mix well.
  8. Assemble the lasagna. Lightly oil or spray a 9 x 12 glass or ceramic baking dish.
  9. Spread a light layer of the tomato sauce on the bottom of the pan. Layer zucchini slices over to cover. Spread one-third of the ricotta mixture over the zucchini and top with a cup of the mozzarella. Repeat the layers two more times, sauce, “noodles”, ricotta mixture topped with mozzarella. Top with noodles and the remainder of the sauce. Cover the baking dish tightly with foil and bake for 30 minutes. Uncover the foil and bake for an additional 20 minutes to dry up excess liquid. Sprinkle the last cup of mozzarella over the top and bake until melted, about 15 minutes. Let lasagna rest for a half hour to allow it to firm up and make for easier slicing.
Slices made with my stainless steel mandolin, a gift from many years ago, I have other inexpensive ones too.

Zucchini slices cooked in the grill pan.

Meat sauce to cover the bottom of the baking dish.

Grilled zucchini slices to cover.

A layer of cheese.
Another layer of zucchini noodles. Repeat the process with the sauce.
The finished product.

Delicious!

July 15, 2017 Tomato Salads

This is a space to record Joe’s creative tomato salads throughout the summer. The pictures won’t always be the best since they are taken in the kitchen. Just a way to commemorate these wonderful salads.

July 10 salad – Sun Gold, Gold Nugget and Super Sweet tomatoes, raspberries, purple basil, mozzarella with peach vinegar and blood orange olive oil.

July 12 – Sun Gold tomatoes, ricotta and purple basil with peach vinegar and blood orange olive oil.

July 15 – Super Sweet 100’s, Sun Gold, Gold Nugget, Snow Cherry, Chocolate Cherry, Fourth of July, mozzarella, purple basil, raspberries, blueberries, Cascadian raspberry vinegar, Persian lime oil.

July 16 – Brandywine, Sun Gold, Super Sweet, Gold Nugget, Snow Cherry, Chocolate Cherry, purple basil, mozzarella, ricotta, Parmesan, purple basil, Cascadian raspberry vinegar, Persian lime oil.

July 17 – Fourth of July, Gold Nugget, Snow Cherry, Super Sweet, burrata, Persian cucumbers, purple basil, Cascadian raspberry vinegar, Persian lime oil.

August 14

August 16

August 17

January 19, 2016 Tomato Lentil Soup

Inspiration for the recipes I post originate from many different sources and this qualifies as the most unusual, my new car. In the first week of driving my 2015 Volvo I received this warning, AWD (all wheel drive) disabled, please schedule service. This was accompanied on the dashboard with the picture of the frame of a car with two wheels out of line. That was enough to get my attention. I had it in for service in less than a week of driving off the lot, only to have the same message reappear the day after the first service. So I needed to take it back in again. Nothing seemed wrong with the steering, and the warning would be on one day, and off the next. Of course the day I took it in the service light was out.

I am occasionally offered a loaner so I don’t have to wait on the car but that can also be a pain too, driving to the dealership, driving home, driving back and so on. So this time I thought I would just wait. I came prepared with a large stack of food magazines. The lounge is large and on this day, pretty full. The television was on and several of the men who were there seemed to be enjoying the banter on Live with Kelly. So I settled into my spot, pulled out my magazines and started reading as much as one can when the only available chair is right next to the television.

After Kelly comes Rachael, as in the Rachael Ray show. I don’t watch much daytime television but Rachael’s show isn’t too bad. After a very interesting segment on cutting edge skin care, celebrity cooking with folks I’ve never heard of (too many channels, too many “celebrities”) and how to get your house ready for a Super Bowl party, it was time for Rachael to cook. Her recipe grabbed my attention since Joe and I were both fighting the good fight against pretty nasty colds. We blamed each other for giving it but I think I know which one of us spends a lot more time around sick people! The night before per Joe’s request I made a chicken soup with veggies and ditalini pasta. Rachael’s recipe for tomato lentil soup looked fairly quick and just the thing for my Cold-Eze numbed taste buds.

This time of year there is nothing more comforting than a bowl of soup. Rachael calls this soup cheap, cheerful and filled with great nutrition. This recipe makes a lot of soup for two people, but as she points out, soup freezes beautifully. Perfect for a cold winter’s night or just the right thing when a cold is coming on.

Start the recipe by cooking the lentils. Unlike other beans that need to soaked overnight, lentils just need to be picked through to remove stones and rinsed well in a colander. Put the lentils in a pan with water to cover by at least two inches, they will at least double in size. Add a clove of crushed garlic and salt and bring them to a boil. Reduce the heat to a gentle simmer and cook for thirty to forty minutes. You want tender, not crunchy or mushy lentils. I used the French Puy variety available from Bob’s Red Mill.  If I used the lentils di Norcia referenced in  recipe I would need to mail order them through Amazon, but at almost thirty dollars a pound, I will stick with French lentils. Lentils di Norcia are grown in the high plains (4500 ft) of the Apennine mountains of Central Italy. They are said to have thin skins and a soft consistency. I will never know….

In a soup pot over medium high heat, add olive oil, she calls it “two turns of the pan”, which translates to approximately two tablespoons. The vegetables and herbs are added and partially cooked to soften. Add stock, she used vegetable to keep this a vegetarian dish, but chicken stock is fine with me. Next into the pot are the San Marzano tomatoes that we both like for their natural sweetness. Rachael pointed out that some canned tomatoes have the word San Marzano in the title but not in the can! Spin the can around and make sure it contains San Marzano tomatoes in the ingredients. Break the tomatoes up with a spoon, kitchen scissors or for the tactile inclined, with your hands. Rachael and her mom do it that way. Tomato passata, a new one on me, is next into the pot. Passata is uncooked tomato puree that has been strained of seeds and skins. It is very common in Europe. I found a product from Pomi brand tomatoes in an aseptic container referred to as strained tomatoes. Substitute tomato puree with no sugar added if you can’t find it, but I think it is worth searching out.

Add the cooled lentils to the pot and simmer to combine flavors and the thickness you desire. Remove the herb bundle and bay leaf before serving. This is a vegetarian dish but my husband is not. To make this more to his taste I added a few turkey meatballs at the end of cooking time. Rachael serves this soup with bruschetta, which really is, as she points out, just charred bread. She took a chunk of ciabatta and charred it over an open flame, then seasoned it with cut garlic, a good quality olive oil, flaky sea salt and chili flakes. This bread is ripped up in pieces to wipe the bottom of the bowl, in Italian that is called the scarpetta. Rachael tops the bowls of soup with grated Parmesan. Delicious!

Saute the vegetables to soften.
An herb bundle of parsley, thyme and rosemary.
Add the herb bundle and a bay leaf to sauteing the vegetables.

Tomato Lentil Soup

Serves 6 or more

Ingredients

  • 1 pound lentils, I used small French lentils
  • 4 cloves garlic, 1 crushed and 3 chopped, divided
  • Salt
  • 2 tablespoons olive oil
  • 1 small bulb fennel, cut into small dice
  • 1 leek, quartered lengthwise then chopped
  • 2 to 3 ribs celery with leafy tops, chopped
  • 1 onion, chopped
  • 1 large bay leaf
  • Herb bundle of parsley, thyme and rosemary (a few sprigs of each)
  • Pepper
  • 6 cups vegetable or chicken stock
  • 2 cups passata or tomato purée
  • 1 28-ounce can San Marzano tomatoes
  • Chili flakes and EVOO – Extra Virgin Olive Oil, to serve

Directions

  1. Rinse lentils well and add them to a large pot with enough water to cover by about 2 1/2 inches. Add crushed garlic clove and bring to a boil. Add salt, reduce heat and simmer 30-40 minutes. Turn off heat and let lentils cool in any remaining liquid.
  2. Heat a soup pot over medium-high heat with olive oil, 2 turns of the pan. Add chopped garlic, fennel, leeks, celery, onions, bay, herb bundle, some salt and pepper, and cook partially covered for 7-8 minutes to soften, stirring frequently.
  3. Add stock, passata or purée, and tomatoes, breaking them up with a spoon or crushing them with your hands when you add them to the pot. Stir in cooled lentils; combine and simmer to combine flavors and until soup reaches desired thickness.
  4. Remove bay and herb bundle, and serve in shallow bowls garnished with chili flakes and a swirl of extra virgin olive oil.
I had a personal assistant on this shoot.


August 20, 2016 Orange Tomato Soup

DSC_7773-copyaThis recipe could also be titled Orange, orange tomato soup. All the recipes I found on line for orange tomato soup included orange juice, but not orange tomatoes. My recipe uses both. Orange tomatoes come in all sizes, from the cherry sized Sun Gold, that you can eat out of hand like candy to the Valencia, an heirloom variety that we are growing this year. Orange tomatoes are less acidic and fruity while still providing a true tomato flavor. Orange tomatoes inspired me to add a little orange juice to the soup to highlight the sweetness of the tomatoes.

This is a very quick recipe to prepare, begin by melting some butter and olive oil in a large saute pan. Add chopped shallot and carrot and cook until softened. Shallots provide a milder flavor, but a white onion could be substituted. Add cored chopped tomatoes, roughly torn basil leaves, chicken stock and just a touch of maple syrup. Bring to a boil and simmer for 15 minutes.

Allow the mixture to cool a bit before transferring to a blender. Blend the soup in two batches. Very hot liquids expand as you blend them so place a kitchen towel over the lid to protect your hands from any soup that might escape the blender. For the finest texture you could put this soup through a food mill. Next, stir in the orange juice, fresh squeezed of course. Cool the soup to room temperature before placing in a covered container in the refrigerator. Chill for at least four hours or overnight to allow the flavors to blend.

This soup is great for entertaining, it can be made well in advance. It could be dressed up with a seared scallop or a poached shrimp. Serve the soup garnished with some basil leaves and some quartered Sun Gold tomatoes. We enjoyed ours along with a BLT.

DSC_7755a


Orange Tomato Soup

Serves 4

Ingredients

  • 1/3 c chopped shallots
  • 1/3 c chopped carrot
  • 4 c cored and quartered orange tomatoes
  • 1 T unsalted butter
  • 1 T olive oil
  • ½ c shredded basil leaves
  • 2 c chicken stock
  • 1 T maple syrup
  • ¾ c orange juice

DSC_7763a

DSC_7769a

Directions

  1. In a large saute pan melt the butter and olive oil over medium high heat.
  2. Add the shallots and carrot and saute until softened, five to six minutes.
  3. Add chopped orange tomatoes, basil leaves, chicken stock and maple syrup. Bring to a boil, reduce to a simmer and cook for 15 minutes. Allow the soup to cool for at least five minutes before proceeding to the next step.
  4. Working in batches, puree the soup in a blender until smooth. If desired you can also put the soup through a food mill.  Put the soup in a bowl and stir in the orange juice. Cool the soup to room temperature. Put the soup in the refrigerator in a covered container and chill for at least four hours or overnight.
  5. Serve garnished with orange cherry tomatoes and a few basil leaves.

DSC_7772a

August 13, 2016 Oven Roasted Ratatouille

DSC_7741aI love recipes that use the bounty of the garden in a single dish and ratatouille accomplishes that in a very delicious way.  In case you didn’t know, ratatouille (rat-uhtoo-ee), is a summer vegetable stew that had it’s origins in the Provencal city of Nice in southern France. Traditionally, each ingredient, eggplant, zucchini, peppers, onion, garlic and tomatoes, is cooked separately on the stove top and tossed together at the very end. So it’s really a sauté that is presented as a stew.

In this version the vegetables are tossed in olive oil and roasted in the oven, eliminating the time cooking over a hot stove. Our red and yellow bell pepper harvest is the earliest I can remember. They must like the hot temperatures and abundant rainfall this year. The orange Valencia peppers are not far behind. I prefer using Chinese or Japanese eggplants for their thin skin and milder flavor. I substituted shallots for onions since our harvest was so plentiful this year. The garlic was also from the garden, a first for us.

Cut the vegetables in similar size so they will get done at the same time. The smaller the cut, the less time it will take to cook.  Lightly toss the vegetables with about a half cup of a good quality olive oil.  Spread them out evenly over two large baking sheets. Rotate the baking sheets top to bottom and front to back half way through the cooking time. Roasting allows the vegetables to retain their shape and they take on a delicious toasted flavor. Move the cooked vegetables to a large serving bowl and tossed with a basil chiffonade. Chiffonade, translates “made of rags” from the French (of course!).  It is a technique for cutting herbs and vegetables into long thin strips, in this case, basil.

Ratatouille can be used in many ways, a side dish, a topping for bruschetta, chicken or fish.  We used it as the topping for an impromptu flatbread pizza. It can be served hot or cold and is even better the next day, if it lasts that long.

DSC_7726a
This season is the earliest we have had ripe bell peppers. I guess they really like the hot and rainy weather.
DSC_7733a
Ingredients for the ratatouille, I substituted shallots for onions since Joe just harvested his crop.


Oven Roasted Ratatouille

Serves four (or two very generously)

Ingredients

  • 2 small onions (about 5 oz. each), cut into ¼-inch-thick half-moons
  • 2 bell peppers, red, yellow or orange, cored, seeded and cut into ¼-inch lengthwise strips
  • Japanese eggplant, about 1 lb, cut crosswise ½ inch thick rounds, then sliced in quarters
  • 1 lb small to medium zucchini, trimmed and cut into ½ inch thick rounds
  • 10 whole cloves garlic, peeled
  • ½ c extra virgin olive oil, and more as needed
  • 1 t chopped fresh rosemary
  • Kosher salt and freshly ground pepper
  • 1½ lbs medium tomatoes (about 4), cored, and cut into 1/2-inch chunks
  • ¼ c basil cut into a chiffonade
DSC_7737a
Toss the ingredients in a large bowl with olive oil, salt and pepper.
DSC_7739a
Transfer the vegetables to two large baking sheets.


Directions

  1. Place racks in the top and bottom thirds of the oven. Heat to 400°F. If using convection heat, 375°F.
  2.  In a large bowl, toss the onions, peppers, eggplant, zucchini, tomatoes, garlic, olive oil, rosemary, and 1-1/2 tsp. kosher salt and a grind of pepper. Spread the vegetables evenly over two large 12 x 16 sheet pans. Don’t spread the vegetables too thin or they may burn (they shrink a lot as they cook).
  3. Roast, stirring the vegetables a few times and swapping the positions of the pans once, until the vegetables are slightly collapsed or shriveled, starting to brown, and very tender, about 35 minutes for my oven. It could take 10 minutes longer if you are not using convection heat.
  4. Scrape all the vegetables and any juices into a serving bowl. Toss with the basil, taste for seasoning, and serve.

DSC_7746a

DSC_7749a
Ratatouille makes a great pizza topping.
DSC_7784a
How could I resist posting a picture of Remy, the star of the movie Ratatouille  who presides over my kitchen from his perch above.

May 27, 2016 Sauteed Chicken Breasts with Tomato Basil Sauce with Capers

DSC_6957aBoneless skinless chicken breasts, the little black dress of dinnertime. A sautéed chicken breast with a simple sauce can make a delicious quick dinner or has the potential to turn into a dried out disaster. So it is very important to learn how to cook them properly. I’d like to share the method I’ve learned via Cooks Illustrated magazine that will provide excellent results every time.

The most important ingredient and foundation of the dish is the chicken. I use a chicken that is antibiotic and hormone free and not injected with water or other additives. My favorite brand is Bell and Evans, a little more expensive but definitely makes for a much better finished product.

The original recipe, written in 1993 called for the chicken to be rinsed under cool water. Research now shows that washing poultry can increase the risk of cross contaminating something else in your kitchen, the sink, countertops, utensils etc. So it’s best just to pat the chicken dry. The flour will adhere better and any bacteria on the surface of the chicken will be killed when you cook it.

Remove any fat, gristle or small pieces of bone from the chicken breasts. If the tenderloin is still attached, remove for another use. The chicken breast needs to be dried thoroughly on all surfaces with paper towels. Salt and pepper then lightly flour both sides of the breast before cooking. The flour produces a moisture barrier so the fat spits less and the chicken develops a browned crispy crust.

When you are ready to make the recipe, the whole procedure takes less than 10 minutes. It’s important to have all the ingredients, including the components for the sauce ready to go. The French have a phrase for it, mise en place. I have all the ingredients measured out in small bowls in the fridge until it’s time to cook. The only thing I would wait to do until the last minute would be to dry the chicken breasts. There is only a quarter cup of flour to coat four pieces of chicken and have found I use less than half of it. If you are gluten-free you could substitute a combination of rice flour and cornstarch or a nut flour. Working with one cutlet at a time dip it into the flour and evenly coat.

Turn your oven to the lowest setting or turn on the heat lamp above your stove. I have a commercial style cook top and have found I need to use a little more oil and butter to cook the chicken breasts than the original recipe. Place the chicken breasts tenderloin side down in the sizzling oil and butter combination. Set your timer for four minutes. Flip them over and cook on the second side for about three minutes, move to a plate and keep warm.

Add shallots to the pan, and sauté until soft, next add the garlic and tomatoes and cook until the tomatoes are juicy. When I am not using tomatoes from our garden I like Campari tomatoes. They have an excellent texture (read not mealy) with the right balance of acid and sweetness. They are considered a cocktail tomato, a little bigger than a cherry tomato but smaller and rounder than a plum.  The original recipe called for seeding the tomatoes, I chose to skip that time consuming step. Add the wine or vermouth and the capers and boil until the sauce is thickened. Stir in chopped basil and salt and pepper to taste. The result? A chicken breast that is nicely browned on the outside with a tender and juicy interior with a delicious and easy sauce to accompany it.

DSC_6936a
Sauce ingredients ready.
Lightly flour each cutlet.
Add chicken to pan.
Add chicken to pan.
DSC_6943a
Flip chicken after four minutes.
Sauce ingredients come together quickly


Sauteed Chicken Breasts with Tomato Basil Sauce with Capers

Serves Four

Ingredients

  • 4 boneless skinless chicken breasts (about 1½ to 1¾ lbs)
  • Kosher salt and freshly ground pepper
  • ¼ c all purpose flour
  • 2 T unsalted butter
  • 2 T vegetable oil

Directions for cooking the chicken

  1. Dry the chicken thoroughly with paper towels and sprinkle 1 teaspoon salt and ½ teaspoon pepper on both sides of the cutlet.
  2. Measure flour into a pie plate or similar container. Working with one cutlet at a time, press both sides into flour.
  3. Heat butter and oil in a 9 inch or larger heavy skillet until the butter has foamed and has just started to take on color.  Place the cutlets in the skillet, tenderloin side down.
  4. Keep the skillet on medium high heat, reducing heat if it starts to smoke. Saute the cutlets for 4 minutes on the first side,  using tongs, turn to the other side.  Cook for 3 minutes then remove cutlets to a plate and keep warm in an oven on the lowest setting or under a heat lamp.

Ingredients for the tomato basil sauce

  • 1/3 c shallots
  • 2 T chopped garlic
  • 2 c chopped tomatoes
  • ¼ c dry white wine or vermouth
  • 2 T capers, drained
  • 2 T shredded basil leaves

Directions for the tomato basil sauce

  1. Without discarding the fat, place skillet over medium heat. Add shallots and saute until softened, about 1 minute. Stir in garlic and then the tomatoes. Increase heat and cook, stirring frequently until the tomatoes have broken down and become juicy, about 2 minutes.
  2. Add wine, capers and any chicken juices from the plate. Boil sauce until it thickens, stir in herbs and season to taste with salt and pepper. Serve immediately.

DSC_6950a

DSC_6957a