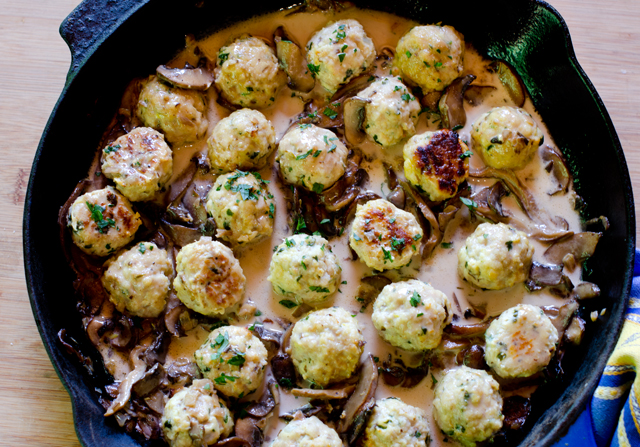
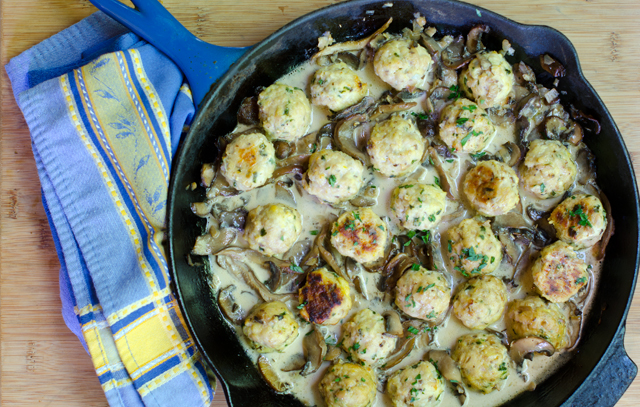
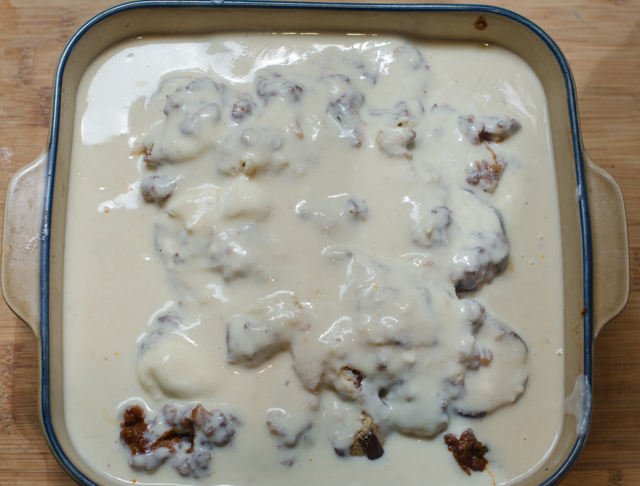
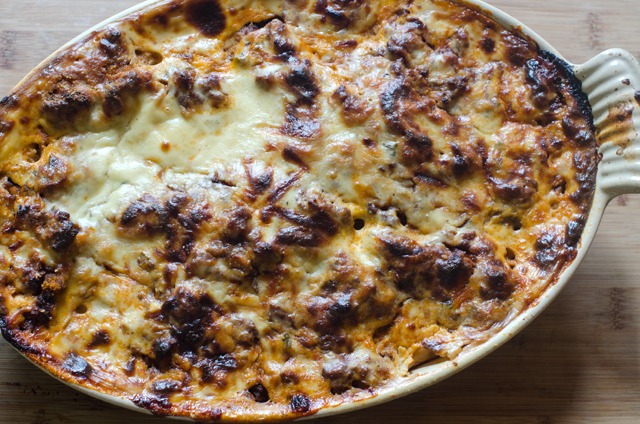
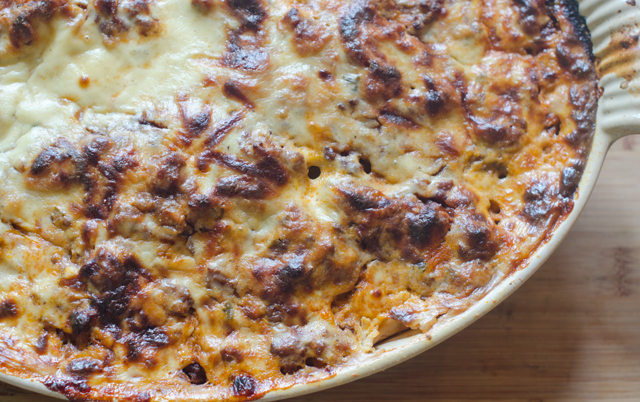
June 2, 2018 Chicken Marsala Meatballs

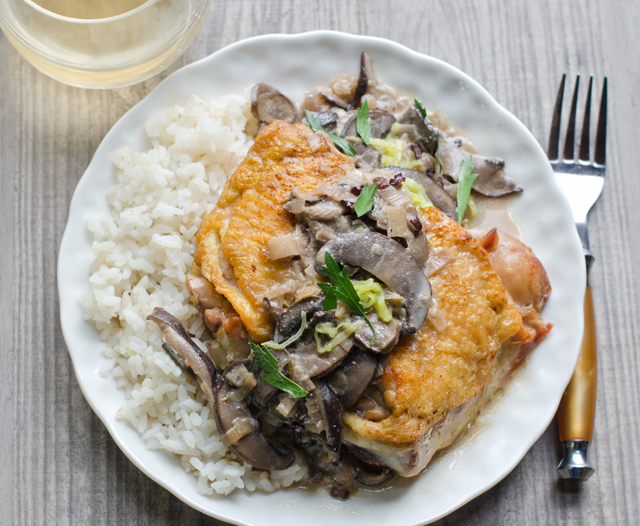
A friend recently texted me some pictures from the meal he had at a new local restaurant. One photo piqued my curiosity, chicken Marsala meatballs. When I had my catering business, chicken Marsala was a client favorite. Tender pieces of chicken in a luxurious, creamy sauce loaded with umami rich mushrooms, what’s not to love? This was a recipe I wanted to try.

I buy ground turkey quite frequently, ground chicken I have shied away from. I thought that a lean meat like ground chicken would too easily result in a dry dish. But there are ways to ensure that won’t happen. Adding ricotta to meatballs is a tip I learned from chef Michael Symon on The Chew. The mild and creamy consistency of ricotta gives the meatballs a light texture. I prefer a natural ricotta, made with just milk, vinegar and salt. Place ricotta into a sieve and allow it to drain for at least a half hour to ensure a moist, but not watery meatball. I added finely chopped shiitake to the meat mixture to amp up the mushroom flavor and some panko breadcrumbs to lighten the texture of the meatballs.

Take off your rings and roll up your sleeves because it is best to use your hands for the next step. Combine the ingredients until they just come together, don’t over work. It’s easier to feel when everything is well mixed. Use oiled hands or a small cookie scoop to portion out the meat.Be gentle when forming meatballs. If they are packed too tightly and compactly, they will turn out tough, rubbery and chewy.

Place the meatballs on a parchment lined baking sheet and lightly coat it with non stick spray. I chose to roast the meatballs in the oven but they could also be fried in oil on the stove top. While the meatballs are cooking, you will have time to make the sauce. The star of the sauce, of course is Marsala wine. Marsala is a fortified wine produced in the region surrounding the Italian city of Marsala in Sicily. Dry Marsala is used in savory preparations like this dish while sweet Marsala is used in desserts. Tiramisu anyone?

Melt butter in a saute pan large enough to hold the meatballs. Saute shallot, then add mushrooms and garlic to the pan, I used a combination of shiitake and cremini, white button mushrooms are fine as well. Cook, stirring frequently until the mushrooms begin to brown, 3 to 4 minutes. Add Marsala wine to the pan and cook until slightly reduced. Add cream and wine and reduce heat to a simmer. Add meatballs back to the pan tossing gently. Sprinkle with fresh parsley and serve.

This dish could be prepped ahead of time, make the meatballs and sauce and hold separately in the refrigerator until you are ready to cook dinner. Chicken Marsala meatballs make a great hors d’oeuvre, sandwich filling on a crusty roll or served over wide pasta noodles or like we did, over zucchini “noodles”.
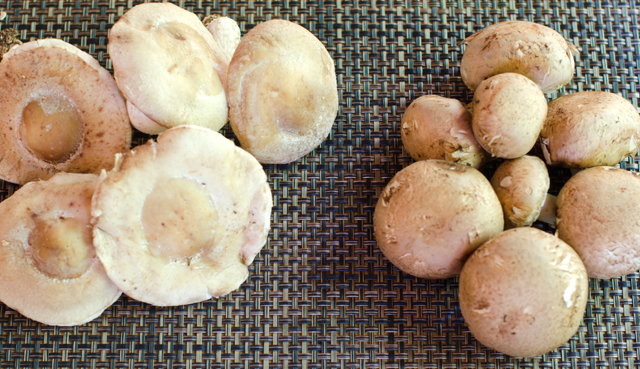
I used cremini and shiitake mushrooms in my preparation, button mushrooms are fine to use as well.
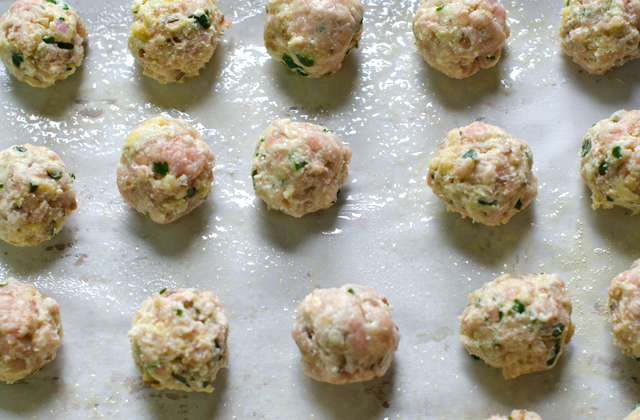
Place meatballs evenly spaced on a prepared baking sheet.

Chicken Marsala Meatballs

Makes 24-27 meatballs

Ingredients for the meatballs

  • 1 lb ground chicken
  • ¾ well-drained ricotta cheese
  • 3 T finely chopped shallot
  • 2 t finely chopped garlic
  • 1 egg, lightly beaten
  • 1 c finely chopped mushrooms
  • ½ c freshly grated pecorino romano cheese
  • ½ c panko breadcrumbs
  • Kosher salt and freshly ground black pepper

Directions for the meatballs

  1. Preheat oven to 375°F. Line a large baking sheet with parchment or foil. Spray the baking sheet with non stick spray, set aside.
  2. In a large bowl combine chicken, ricotta, shallot, garlic, egg, mushroom, cheese, panko, salt and pepper to taste. Be careful not to over mix.
  3. Using your hands or a small cookie scoop, scoop out the meat mixture and roll into balls. Evenly place the meatballs on the prepared baking sheet.
  4. Bake for about 15 minutes, until light golden, rotating the tray halfway through the baking time.  Keep the meatballs warm while you make the sauce.

Ingredients for sauce

  • 1 T unsalted butter
  • 1 T extra virgin olive oil
  • 1 small shallot, finely diced
  • 8 oz thinly sliced mushrooms-more if you like.
  • 1 clove garlic, finely diced
  • 1 c dry Marsala wine
  • ¼ t dried thyme
  • 2 T chopped parsley
  • Kosher salt and fresh ground pepper

Directions for sauce

  1. Melt butter in a large saute pan over medium high heat, add olive oil.
  2. Add shallot to the pan, season with a pinch of salt and pepper. Cook until softened, 1-2 minutes.
  3. Add mushrooms and garlic to the pan. Saute until mushrooms are cooked through, 3-4 minutes, add Marsala wine to the pan, cook until slightly reduced, 4-5 minutes.
  4. Add cream and thyme and bring to a simmer. Add meatballs to the pan, toss gently until well coated.  Reduce the heat to medium-low and cover; let them simmer in the sauce for 10 minutes. Add chopped parsley, taste and adjust for seasoning with salt and pepper.
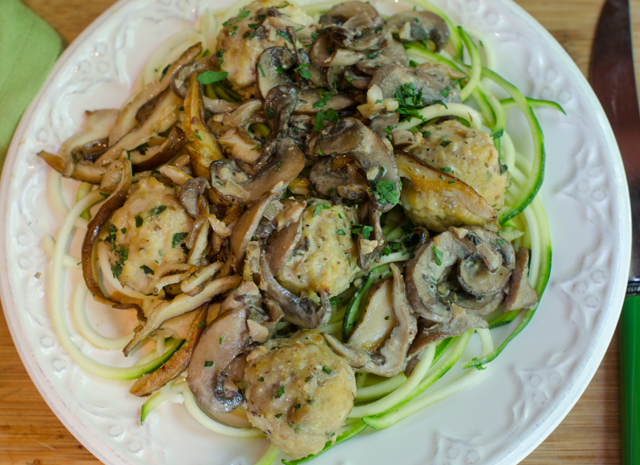
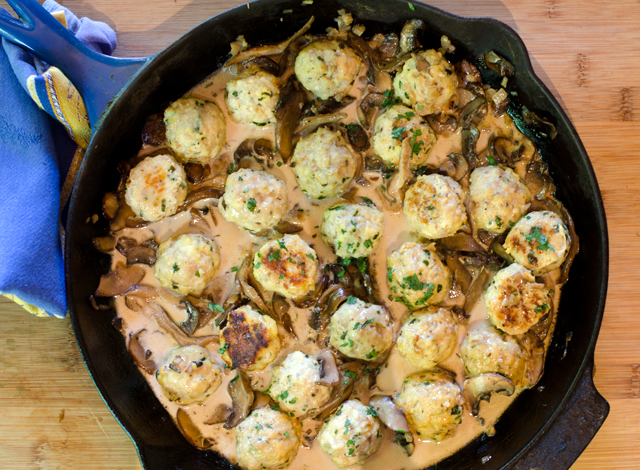
I served Chicken Marsala meatballs over zucchini noodles.

April 19, 2018 Halibut with Avocado, Tomatillo and Fennel Relish

Weekends at our house, fish is always on the menu and most likely it was purchased at Heller’s Seafood in Warrington Pa. Not the closest location to us, but worth the trip because I can always be assured of the quality and freshness of the seafood I purchase. How we cook the fish depends on the weather. In the warmer seasons we often cook whole fish on the grill stuffed with lemon and herbs or a fillet cooked on a fragrant cedar plank.

This time of year with temperatures still in the forties most days, the fish is baked according to Canadian fisheries method. Just measure your fillet, steak or whole fish at the thickest part and follow the rule of 10 minutes per inch or 5 minutes per side per inch. So often the real question is, how am I going to season and accent the flavors of the fish I am cooking.  Meaty swordfish pairs nicely with a rich olive tapenade, sometimes I make my own but occasionally I will just pick up a container at the local supermarket for a quick meal. We top red snapper with a south of the border style Veracruzana sauce, especially good in summer with garden fresh tomatoes.

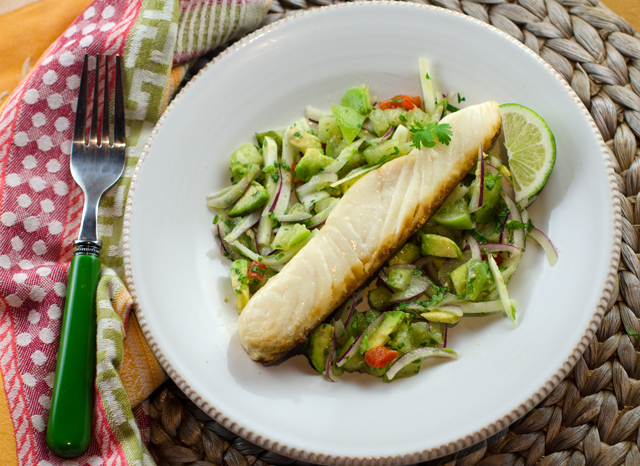
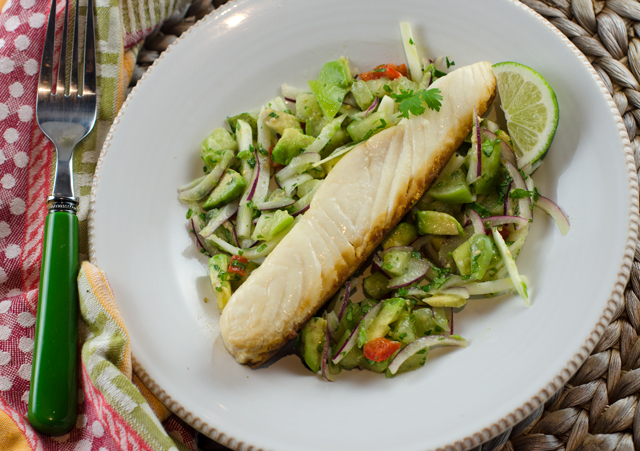
Recently while searching for a recipe for crispy skinned fish I came across a relish that is an excellent accompaniment to many fish preparations. Avocado, tomatillo and fennel relish originates from a television program on Food Network, “Worst Cooks in America,” not necessarily a place where I would look to find a recipe. Worst Cooks is a program on Food Network that takes contestants, as known as “recruits” with poor cooking skills and puts them through a culinary boot camp to earn cash prizes. This recipe was contributed by chef, restaurateur, cookbook author and Emmy award-winning reality television host, Bobby Flay. Bobby was one of the two mentors for seasons 3 to 5 and this episode is titled straight edge skills. In the clip I saw from the episode Bobby told the recruits he was looking for uniformity and good technique. I didn’t hold out much hope for the recruits I saw, one declared his fear of knives and mistook fennel for an onion and another was cutting the avocado without using the cutting board and only succeeded in cutting himself.

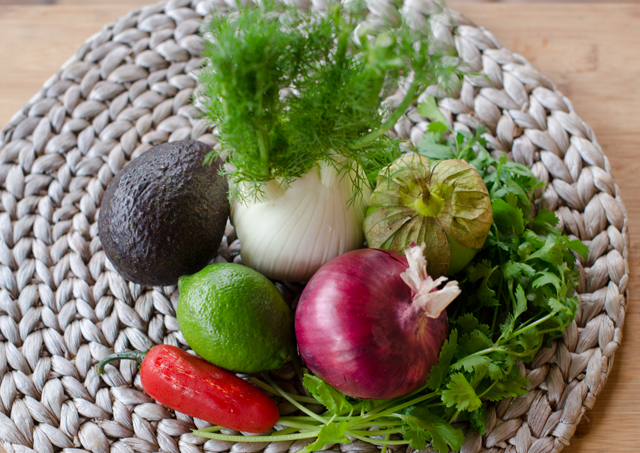
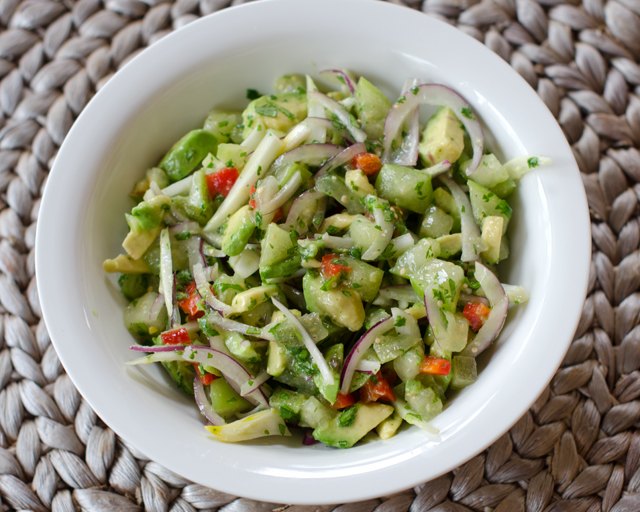
The relish relies on precise knife technique, small dice, fine dice, julienne and a little slicing.With a sharp knife it should go fairly quickly. What I really love about this dish is the contrast in textures and flavor. Tomatillos give a little citrus bite, avocado brings a creamy nuttiness and the fennel is crisp and licoricey sweet. Add pepper to your taste, the original recipe called for a serrano, I opted for a jalapeno, that’s not quite as hot. The original recipe called for red wine vinegar with a touch of honey I substituted grapefruit balsamic from The Tubby Olive.

Halibut with Avocado, Tomatillo and Fennel Relish

Serves two

Ingredients

  • 1 medium fresh tomatillo, husk removed, rinsed well and cut into small dice
  • ½ medium avocado, peeled, pitted and cut into small dice
  • ½ jalapeno, seeded and cut into small dice
  • ¼ small head fennel, cut into julienne
  • ¼ small red onion, thinly sliced against the grain
  • 1 T neutral oil (canola, grape seed)
  • Juice of ½ fresh lime
  • Touch of red wine vinegar and honey or 1 T fruit vinegar
  • Kosher salt and freshly ground black pepper
  • 2 T chopped fresh cilantro.
  • Two 6-oz. firm white fish fillets like halibut, grouper or cod

Directions for the relish

  1. Combine the tomatillo, avocado, jalapeno, fennel and onion in a medium bowl.
  2. Drizzle with the oil, lime juice, vinegar and honey. Season with salt and pepper and fold in the cilantro.

Cooking the Fish

  1. Preheat oven to 450°F.
  2. Coat a shallow baking dish with non stick spray. Season the fish fillets with salt.
  3. Measure your fish fillets at the thickest point. Bake the fish for 10 minutes for every inch of thickness.
  4. Serve halibut with the relish and a wedge of lime.

March 19, 2018 Butternut Squash, Golden Beet. Carrot and Apple Salad

With three nor’easters bringing snow, rain and high winds over the last week or so and two more anticipated this week, it’s hard to believe that the first day of spring is tomorrow. We are months away from the heart of the summer produce season but that doesn’t mean you can’t enjoy a delicious fresh salad. Using this formula for a roasted vegetable salad from Fine Cooking magazine is just what you need to stimulate your cooking creativity and beat the winter blahs.

Hearty greens like spinach, arugula and radicchio form the base of this salad. Other choices could include baby greens like kale, collards and chard. I must emphasize baby (immature), because the mature greens are quite toothsome and should be used in recipes where they are cooked. This is a good time to experiment with bitter greens like escarole, endive and radicchio. They contrast nicely with sweetness of the roasted vegetables.

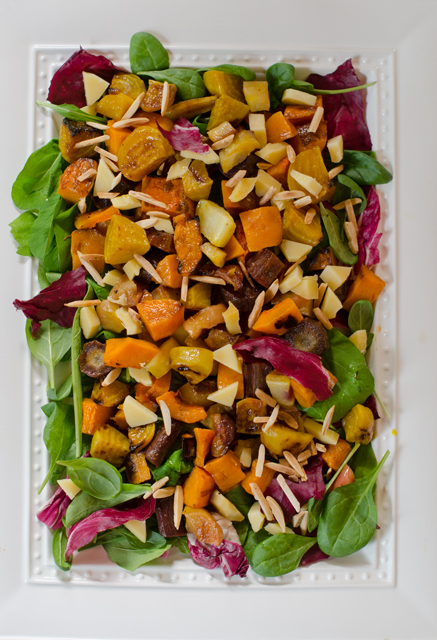
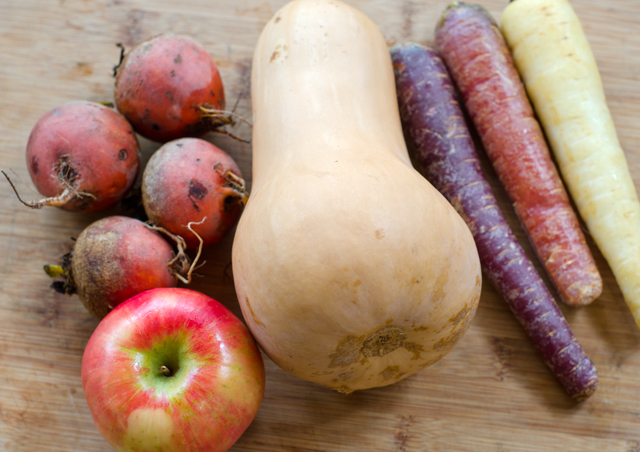
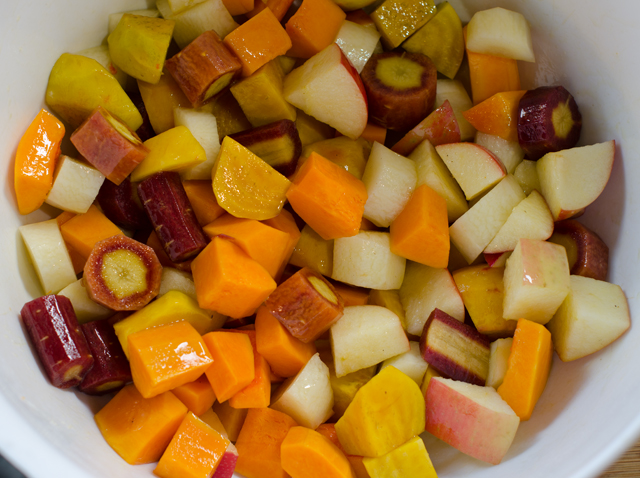
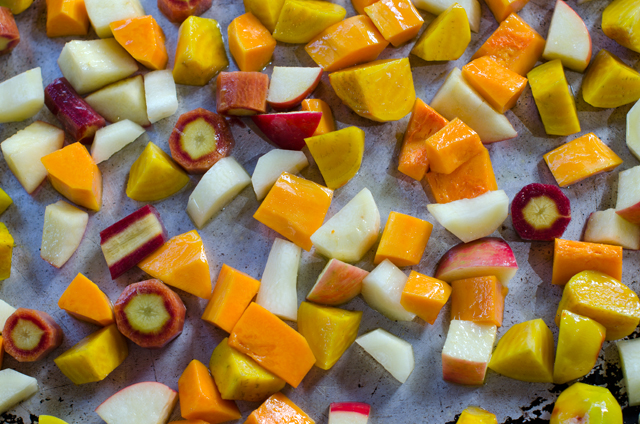
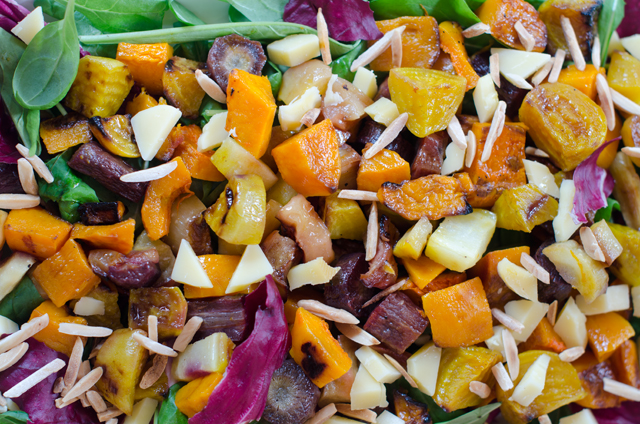
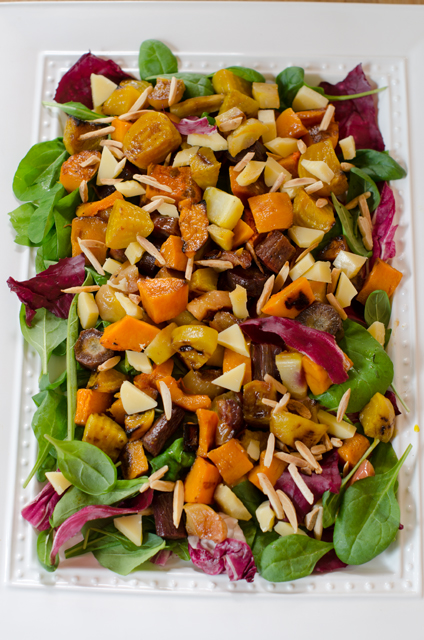
Roasted vegetables give the salad substance and a lot of deep rich flavor. Root vegetables, potatoes and winter squash are great for roasting, you can even add apple and pear wedges. Cut the vegetables into fairly even sized pieces so they cook evenly. Toss the vegetables with olive oil and some kosher salt. If you are using red beets, toss and roast on a separate pan. Otherwise the beets will discolor the other vegetables on the baking sheet. Roast about 20 minutes, tossing veggies halfway and rotating the baking sheet. The amount of vegetables may seem like a lot but roasting condenses them in size and concentrates their sweet flavor. I used golden beets, rainbow carrots, butternut squash and apple, all items I had in my pantry. So for me it was a “clean out your fridge” recipe.

The salad is accented with cheese and nuts that add contrasting flavors and textures. Aged Gouda brings a sharp, sweet flavor reminiscent of butterscotch and toasted slivered almonds add a wonderful aroma and crunch. An optional sprinkling of dried fruit, raisins, dried cranberries, figs give a nice touch as well.

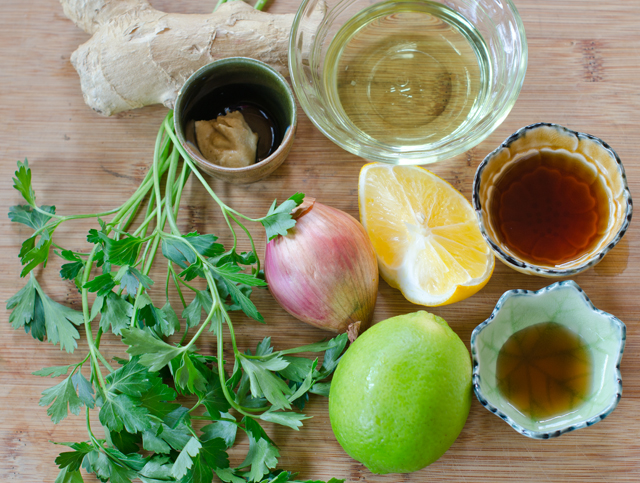
A slightly tart white balsamic lime vinaigrette is a pleasing contrast to the sweetness of the roasted vegetables. I chose this recipe because Joe picked a large yellow, very fragrant lime from our Persian lime tree. This vinaigrette calls for an oil you may not be familiar with. High in polyunsaturated fats and vitamin E, grape seed oil is extracted from the seeds of grapes. Its flavor is neutral allowing the infused flavors of shallots and ginger to shine through.

White balsamic vinegar is made from the same variety of white grapes as dark balsamic . While the dark balsamic is simmered for hours and aged in barrels for years, white balsamic is slow cooked to avoid caramelization and is not aged. White balsamic vinegar is a good choice when you don’t want to darken the appearance of your final dish.

Toss the greens in a large bowl with a drizzle of the warm vinaigrette. Distribute the greens on two plates. Next, gently toss the roasted vegetables with some of the remaining vinaigrette. Distribute the vegetables over the plates, along with the nuts, cheese and optional fruit.

This would be a nice vegetarian lunch or dinner. Add chicken or thinly sliced flank steak if you need to include meat. The formula gives you the chance to be creative and make your own unique and delicious salad.

Butternut Squash, Golden Beet, Carrot and Apple Salad

Serves 2

Ingredients for the roasted vegetables

  • 6-7  c mixed vegetables and fruit, I used butternut squash, rainbow carrots, golden beets and apple, trimmed and peeled.
  • 2 T extra virgin olive oil
  • Kosher salt

Directions for the roasted vegetables

  1. Position oven rack in the center and preheat oven to 450°F.
  2. Trim vegetables into 1-inch dice or wedges.
  3. In a large bowl, combine the vegetables and fruits with the oil and 1 t salt.
  4. Toss well and transfer to a large rimmed heavy-duty baking sheet.
  5. Spread the vegetables evenly on the baking sheet.
  6. Roast. flipping the vegetables halfway through the baking time and rotating the baking sheet.
  7. Cook until the vegetables are browned and tender, 20-25 minutes.
  8. Let cool and transfer to a large bowl.
Toss the vegetables with olive oil and salt.
Spread out evenly on a baking sheet.

Ingredients for the white balsamic lime vinaigrette

  • ¼ c grape seed oil
  • 1/3 c thinly sliced shallots
  • kosher salt
  • 1 t chopped fresh ginger
  • 2 T white balsamic vinegar
  • 1 T maple syrup or honey
  • 1 T fresh lime juice (more to taste)
  • 1 t grated lime zest
  • 1 t fine minced parsley
  • 1 t Dijon mustard
  • Freshly ground black pepper

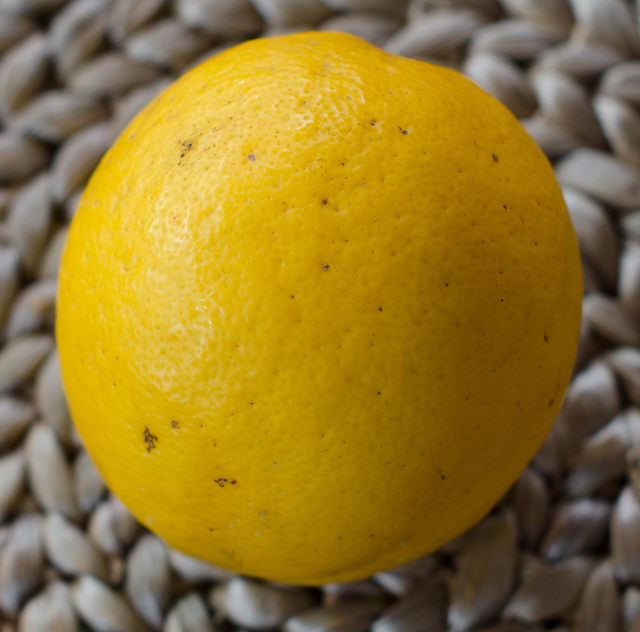
Despite the color, this is a lime, very fragrant and juicy from Joe’s citrus trees.
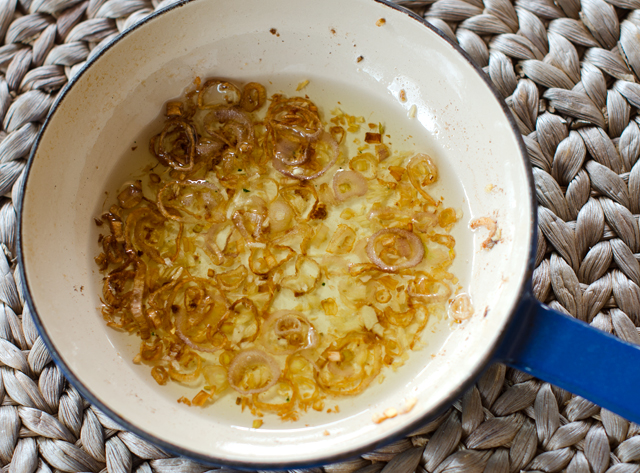
Infusing grape seed oil with shallots and ginger.

Directions for the white balsamic lime vinaigrette

  1. Heat the oil in an 8-inch skillet, over medium heat. Add the shallots and a pinch of salt and cook for 2-4 minutes, shallots should be softened and slightly browned.
  2. Add chopped ginger and cook until fragrant until softened and fragrant, 15 seconds. Take infused oil off the heat and let cool for about 5 minutes.
  3. While the oil is cooling, to a heat proof metal bowl add the vinegar, maple syrup, juice, zest, mustard, ¼ t salt and a few grinds of pepper.
  4. Whisk the warm oil into the vinegar mixture until emulsified. Taste vinaigrette and season to taste with additional salt, pepper or citrus juice.

Ingredients for assembling the salad

  • 5-6 cups of sturdy greens, torn into bite sized pieces if needed
  • Kosher salt
  • Roasted vegetables from step one
  • ¼ c toasted slivered almonds
  • ½ c cubed aged Gouda


Directions for assembling the salad

  1. In a large bowl, lightly salt greens and toss with a drizzle of the warm vinaigrette. Taste a green and add a little more dressing if necessary. Arrange the greens on a platter or two plates.
  2. Season the vegetables with a pinch of salt and dress them lightly with 1-2 T of the remaining vinaigrette.
  3. Spread the vegetables evenly over the greens, then top with the almonds and Gouda. Serve immediately, passing the remaining dressing at the table.

February 17, 2018 Chicken Mushroom Enchiladas

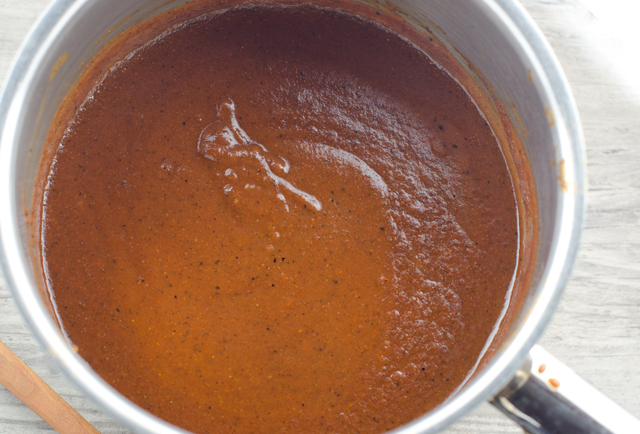
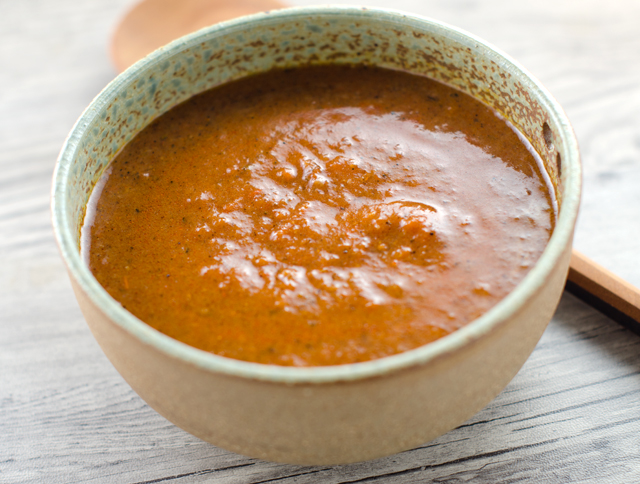
Now that I’ve mastered the cauliflower tortilla I thought it would be fun to try them in a chicken enchilada recipe. The “caulitillas” are just about the same size as a corn tortilla and not delicate as I was originally concerned, but very pliable and sturdy. Of course corn tortillas are what you would typically use and would be fine in this recipe. You can buy enchilada sauce in the supermarket but it’s quick and quite simple to make your own. You also can control the heat to your own taste. My advice would be to start out on the safe side with the amount of chili powder you add, you can always add more, it’s harder to tame the heat. I used a combination of regular and chipotle chili powder for its smoky quality. Measure out your ingredients before you start the recipe because you will be busy whisking to ensure a smooth sauce.

Heat the oil in a medium saucepan until it begins to sizzle. Add the flour and spices, whisking constantly until the spices become fragrant and deepen in color. Add tomato paste, tomato sauce and chicken stock and continue to whisk constantly to remove any lumps. Allow the sauce to come to a simmer, it will begin to thicken slightly. Taste sauce and adjust seasonings to your liking.

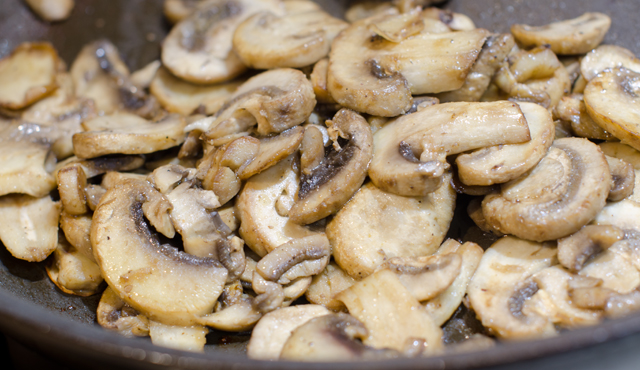
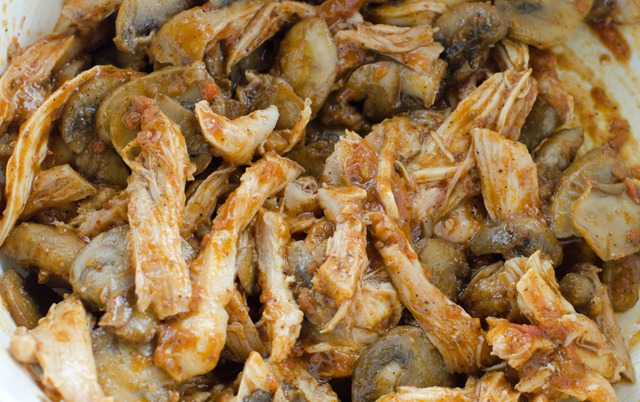
Now it’s time to assemble, you should have ready, a 9 x 13  inch baking dish, the tortillas, the warmed filling, the warmed sauce and shredded cheese.   I chose to make a filling of shredded chicken and sautéed mushrooms but this sauce would be good with many filling combinations. Many recipes call for dipping the tortilla in the chili sauce. I thought that was too messy so I just put a thin layer of sauce in the bottom of my casserole dish.

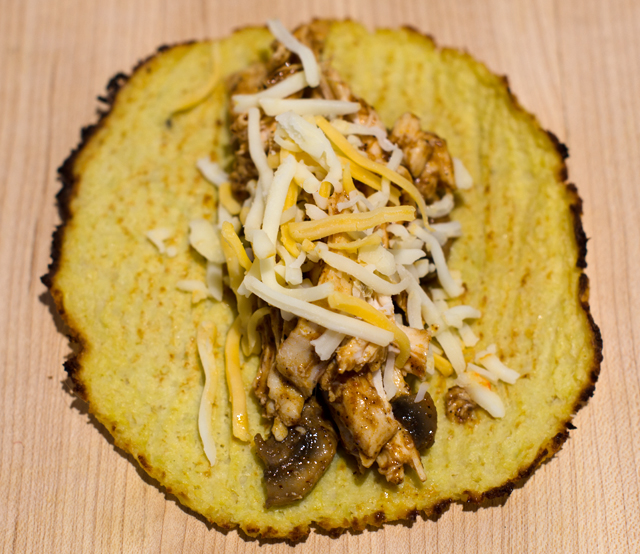
Lay out your tortilla and spread about two tablespoons of the filling down the center. Roll up the tortilla and place seam side down in the baking dish. Repeat with the remaining filling and tortillas. Top with additional sauce and shredded cheese and bake until the cheese is melted. Not the prettiest dish for certain, but definitely delicious. Leftovers heat up nicely.

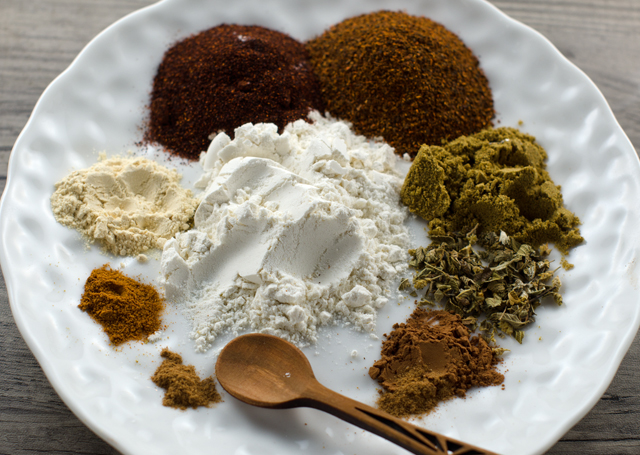
Spices and flour for the chili sauce.
Takes only ten minutes to make a delicious complex sauce.


Chicken and mushroom enchilada filling.
Filling the “caulitilla”.
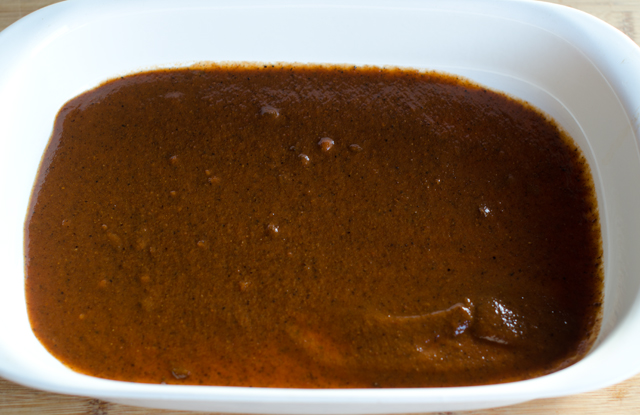
A thin layer of sauce on the bottom of the baking dish.
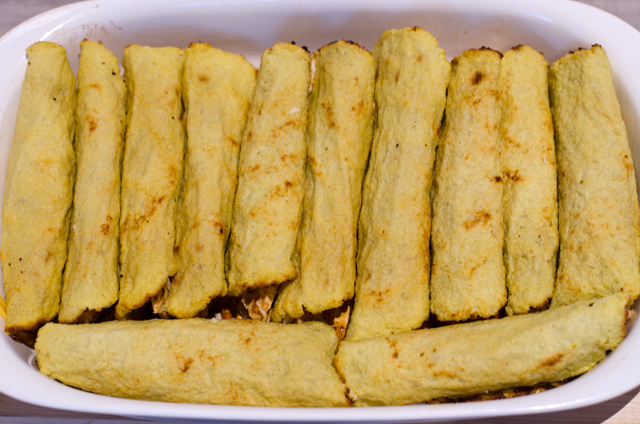
Rolled and filled tortillas ready to be topped with sauce.
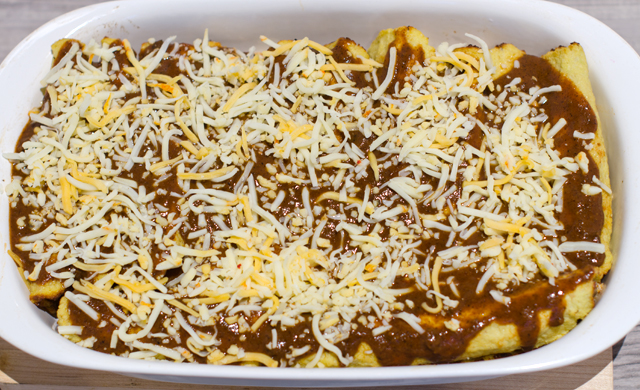
Next the sauce and cheese.
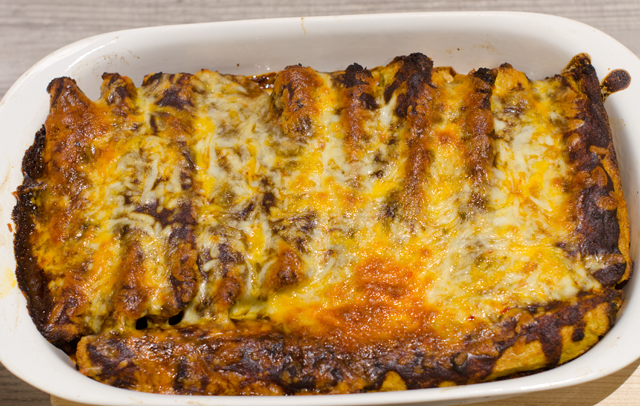
Ready to dig into!


Chicken Enchiladas

Makes 10-12

Red Enchilada Sauce

Makes about 2½ cups

Ingredients

  • 2 T vegetable oil (I used avocado)
  • 2 T all-purpose flour
  • 3 T chili powder-I used 2 T regular and 1 chipotle (Penzey brand)
  • 1 ½ t ground cumin
  • ½ t dried oregano (Mexican is best)
  • ½ t kosher salt
  • 1/8 t cayenne pepper
  • ¼ t cocoa powder
  • pinch of cinnamon
  • 3 oz tomato paste
  • 2 c chicken or vegetable broth
  • ½ to ¾ c tomato sauce

Directions

  1. Measure out the flour and the spices into a small bowl.  Whisk to combine.
  2. In a medium saucepan over medium high heat, warm the oil until it begins to sizzle.
  3. Add the flour/spice mixture and whisk constantly. Cook until fragrant and darkened in color.
  4. Whisk in the tomato paste and sauce until thoroughly combined with the flour/herb mixture. In a steady stream, whisk in chicken broth.
  5. Reduce heat to medium and let sauce come to a simmer. Cook 8 to 10 minutes, sauce will thicken slightly. If not using immediately you may need to thin it out with a little stock or water.
  6. Remove the sauce from the heat and let cool slightly. Add salt and freshly ground pepper to taste.

Shredded Chicken and Mushroom Filling

Ingredients

Directions

  1. In a medium saute pan cook the mushrooms over medium high heat until they release their juices and are softened, 6 to 8 minutes.
  2. In a medium bowl add chicken and slightly cooled mushrooms.
  3. Stir in about a half cup of sauce to moisten the ingredients.

Assembly

  • 9 x 13″ baking dish
  • 10-12 corn tortillas or “caulitillas
  • Chili sauce
  • 2 c shredded Mexican blend cheese
  1. Preheat oven to 375°F
  2. Coat the bottom of the baking dish with a thin layer of the sauce.
  3. Set up an assembly line to make the tortillas: corn or cauliflower tortillas, chicken mushroom filling, cheese and sauce.
  4. Lay out a tortilla and place about 2 generous tablespoons of the filling down the center of the tortilla. Sprinkle a little cheese on top. Roll it up with your fingertips and place in the baking dish, seam side down. Continue rolling and filling the rest of the tortillas.
  5. Pour the remaining sauce over the enchiladas and sprinkle with the remaining cheese. Bake for 20 minutes and serve immediately.


January 13, 2018 Herbed Ricotta Zucchini Ravioli


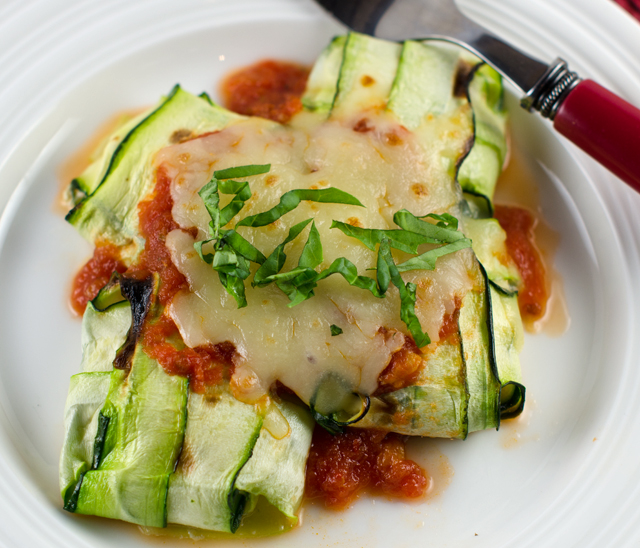
Normally I wouldn’t share a recipe for zucchini in the middle of January, but this time I had to make an exception. I am always looking for new ways to prepare for the buckets of zucchini that our garden produces every summer, so I had to try out this recipe I saw on The Chew, “Herby” Ricotta Zucchini Ravioli. In this recipe, very thinly shaved zucchini slices take the place of pasta and are filled with a herbed ricotta filling.

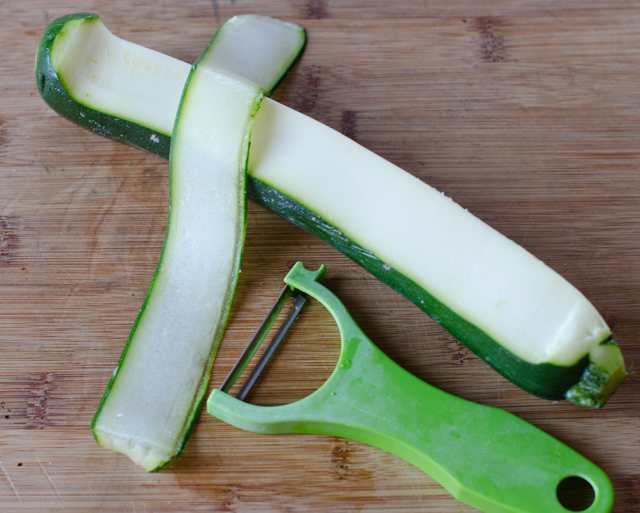
The zucchini could be sliced on a mandoline, but to simplify things, a Y peeler works just as well. Remove the first strip of skin, then a few more slices until you have a flat surface. Make slices down the length of the zucchini until you reach the seedy core. Look for medium length zucchini. I found that strips 5-6 inches long and 1½ inches wide were the right size to accommodate a generous tablespoon of the filling. Place the slices on baking trays lined with paper towels and lightly salt to draw out any excess liquid.

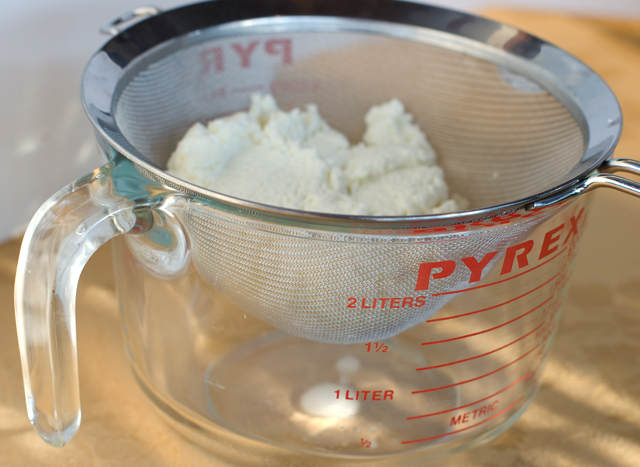
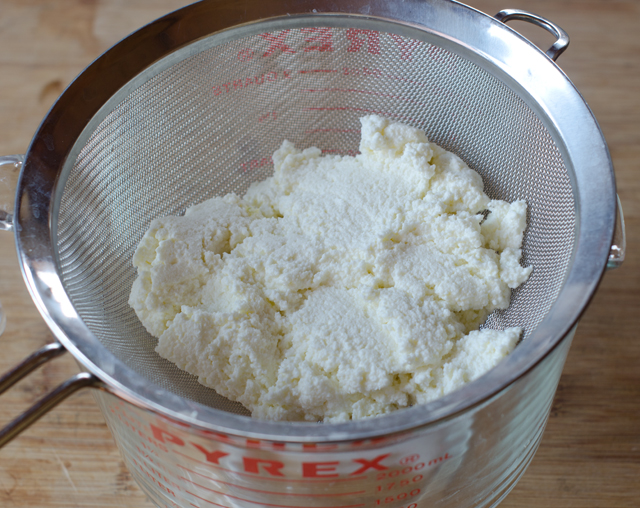
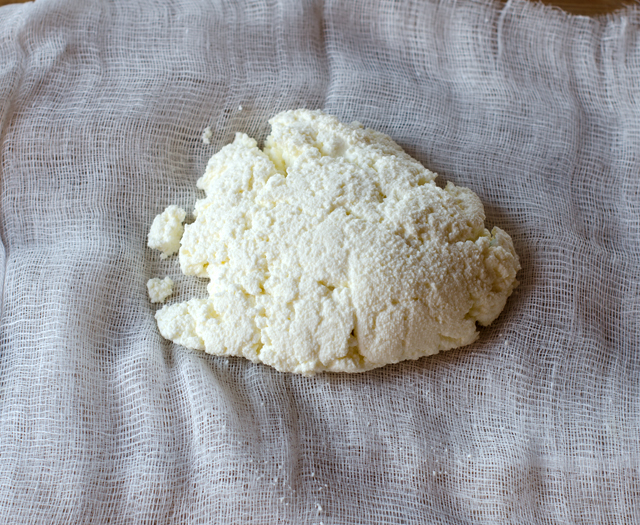
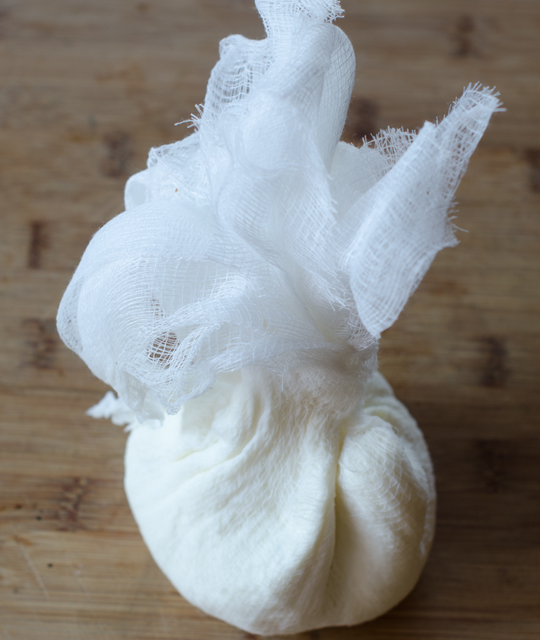
The filling is very simple, ricotta cheese with an egg, grated Parmesan and seasonal herbs. Fresh ricotta is always best but one without preservatives is a good second choice. Drain the ricotta in a fine strainer to draw out excess liquid then squeeze it out in cheesecloth to make it as dry as possible. There aren’t any fresh herbs in the garden on this very cold January day, but Joe has brought some into the conservatory. For this recipe I used parsley, thyme and a little dried oregano. Let the ricotta herb mixture sit for 10 to 15 minutes to allow the flavors to blend.

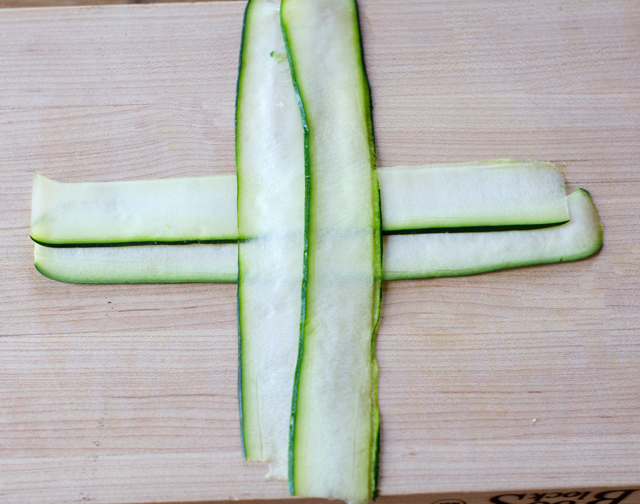
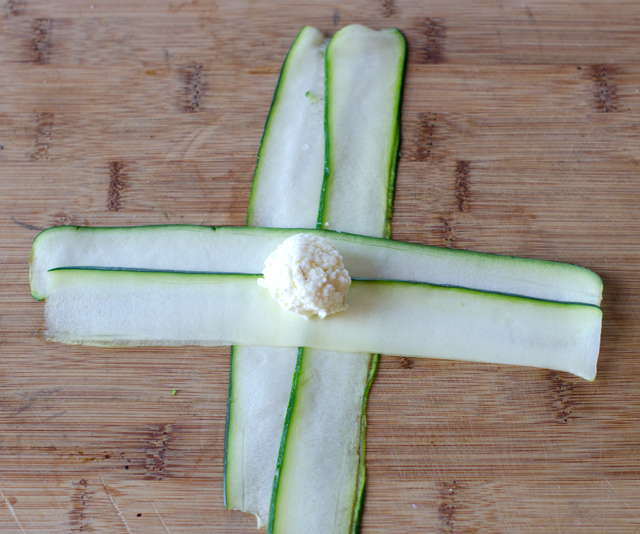
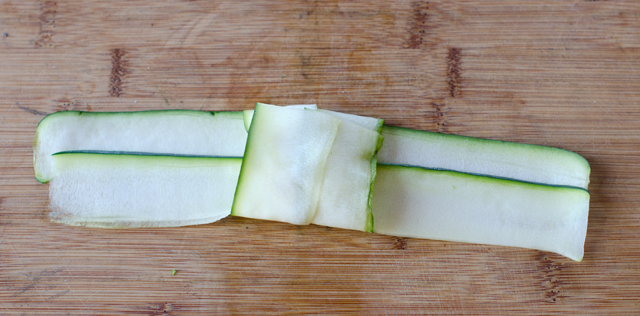
Now it’s time to make the bundles. Put enough tomato sauce on the bottom of your prepared pan to lightly coat it. Blot any excess liquid from the zucchini. On a clean work surface, lay two strips of zucchini so that they slightly overlap lengthwise. Lay two more noodles on top perpendicular to the first two strips, it should look like a plus sign. Place a generous tablespoon at the intersection where the strips meet. Starting with the bottom strips, fold them over the center, repeat with the second set of strips. Place the ravioli seam side down in the prepared baking dish and repeat with remaining zucchini strips until you fill the baking dish. Top with sauce and sprinkle with shredded mozzarella cheese. Bake for about 25 minutes, take out of the oven and sprinkle on the remaining Parmesan.

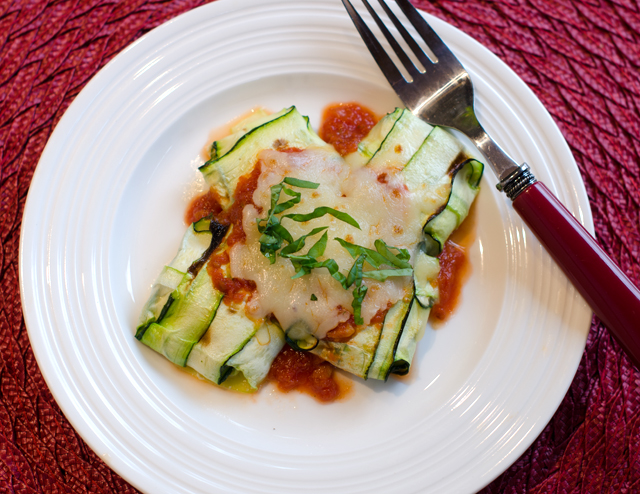
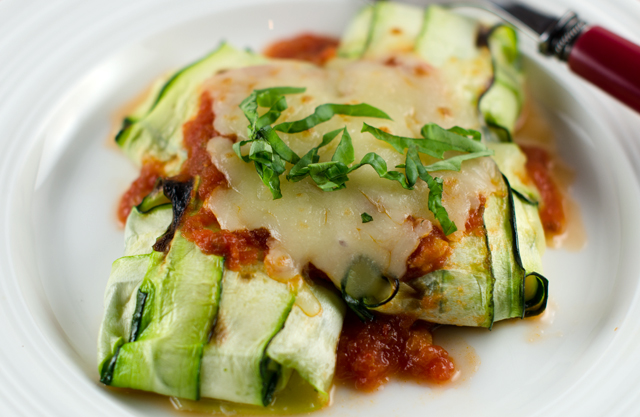
The verdict? Joe and I both thought they were delicious and didn’t feel cheated with the zucchini wrapper. As Chew co host Clinton Kelly said,” this is an amazing alternative to pasta.” The calorie savings are pretty amazing too with regular ravioli coming in at 785 calories while the zucchini ravioli is 260 calories! The portion size wasn’t mentioned though. This is not the best dish for the freezer. Zucchini is 95% water so I think this dish would best be served fresh. This is a great meatless dish whether for lunch, dinner or as a side. Pesto would be a good addition to the ricotta filling and a cheesy Alfredo sauce could take the place of the tomato sauce. Can’t wait until summer to try these with zucchini from the garden and my own variations.

Drain the ricotta in a fine mesh sieve for a half hour.


Wrap the ricotta in cheesecloth and squeeze out any excess moisture.

Using a Y peeler, slice the zucchini into long thin strips.
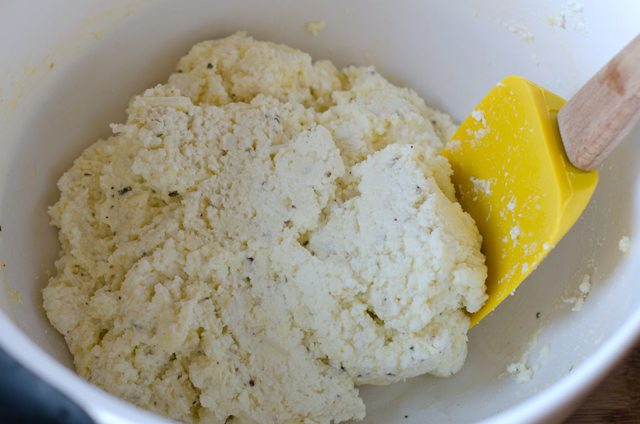
Combine the ricotta, beaten egg, herbs, spices and cheese.
Slightly overlap 2 strips of zucchini and overlap two more strips, forming a plus sign.
Place a generous tablespoon of filling where the strips intersect.
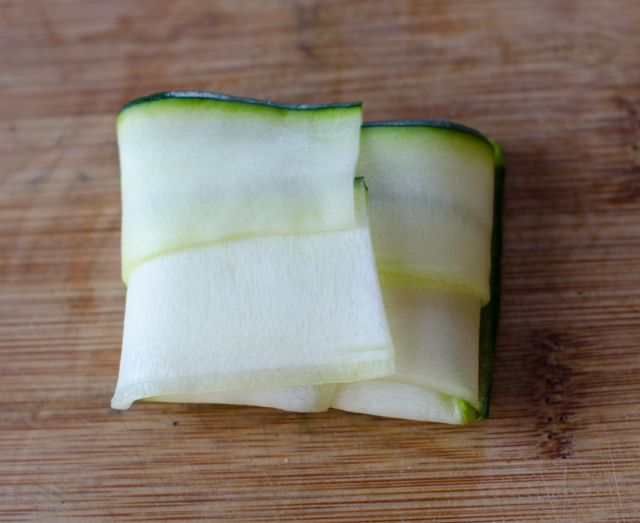
Fold the bottom strips over the filling.
Fold in the other 2 strips to the center to completely enclose the filling.

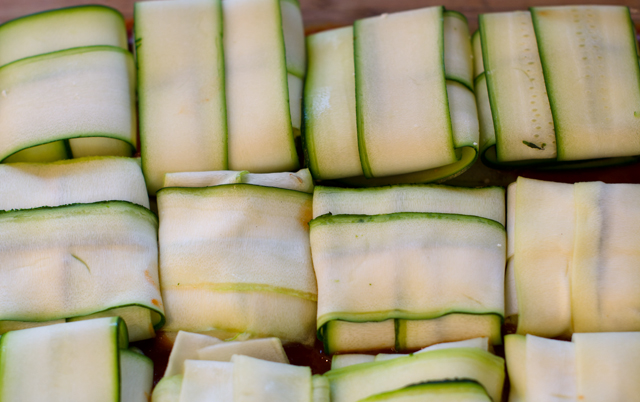
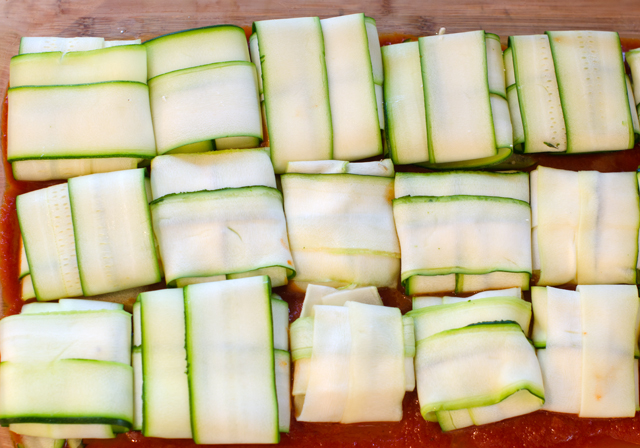
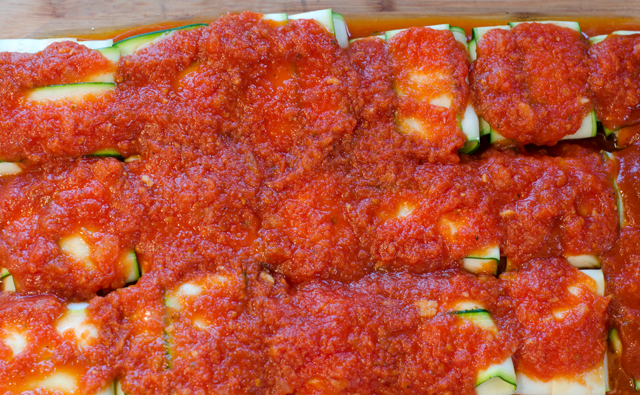
Add the ravioli, seam side down to a baking dish lightly coated with tomato sauce.
Top with additional sauce.
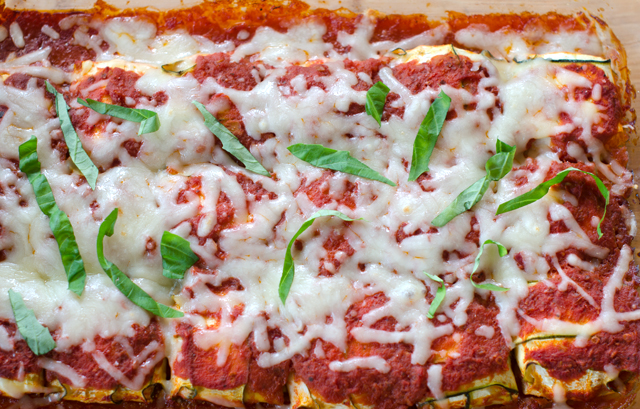
Top with mozzarella cheese and bake .


Herby Ricotta Zucchini Ravioli

Serves 4

Ingredients

  • Olive oil for greasing the baking dish
  • 2 c ricotta – whole milk or part skim
  • 4-5 medium zucchini
  • 1/3 c plus 2 T grated Parmesan (divided)
  • 1 large egg
  • ¼ c fresh herbs, finely chopped (parsley, thyme, chives etc.)
  • ¼ t freshly grated nutmeg
  • 2 cloves garlic, peeled and finely minced
  • 2 ½ c tomato sauce-homemade or your favorite store brand
  • 1 c shredded mozzarella
  • Basil chiffonade for garnish
  • Kosher salt and freshly ground pepper to taste
  • Cheesecloth – that will be used with the ricotta

Directions

  1. Preheat the oven to 375°F.  Lightly grease a 8×12 baking dish with olive oil.
  2. Place a fine mesh sieve over a medium bowl and add the ricotta. Set aside and allow to sit for 30 minutes.
  3. Using a Y vegetable peeler, slice the zucchini lengthwise into thin strips, avoiding the seedy core. Place strips on a paper towel lined baking sheet, lightly sprinkle with salt and set aside.
  4.  In a medium bowl, add ricotta, 1/3 c Parmesan, egg, chopped herbs, nutmeg and garlic. Season with salt and pepper and stir until fully combined. Set aside for 10 minutes to let the flavors combine.
  5. Blot excess moisture off zucchini slices. On a work space, overlap 2 strips of zucchini and then overlap 2 additional strips on top and across the first 2 strips, forming a cross shape.
  6. Using a spoon or cookie scoop, place a generous tablespoon of the ricotta mixture into the center of the zucchini formation.
  7. Fold the bottom layer of the zucchini strips over the filling and into the center so that they are overlapping. Fold in the other two strips to the center so that the filling is completely enclosed. Repeat process with remaining filling and zucchini.
  8. In prepared baking dish, spread ½ cup sauce evenly over the bottom. Place zucchini seam-side down. Pour remaining sauce over zucchini. Top with remaining Parmesan and mozzarella. Transfer to oven and bake for 20 to 25 minutes, until zucchini is al dente.
  9. Garnish  with basil and serve.

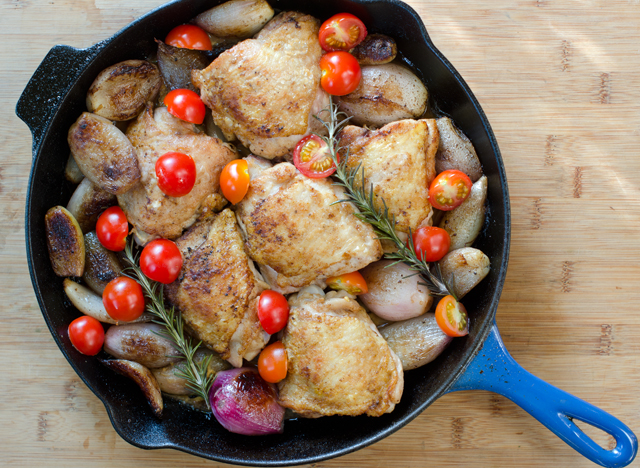
December 10, 2017 Chicken with Shallots

In the beginning it was Martha for me. Sure there was Julia, James, Jacques and the Silver Palate ladies, but Martha was my main inspiration as someone who was a novice at cooking, entertaining, and in a few years, a budding caterer. As the Martha Stewart empire expanded, so did the number of magazines published under the Martha Stewart brand. Among those titles was Everyday Food, a pocket-sized digest with recipes that were “fast and easy”. The recipes centered around ingredients that could easily be purchased at the grocery store and usually cooked in less than an hour. Quite a departure from many of the recipes in her many of her earlier cookbooks.

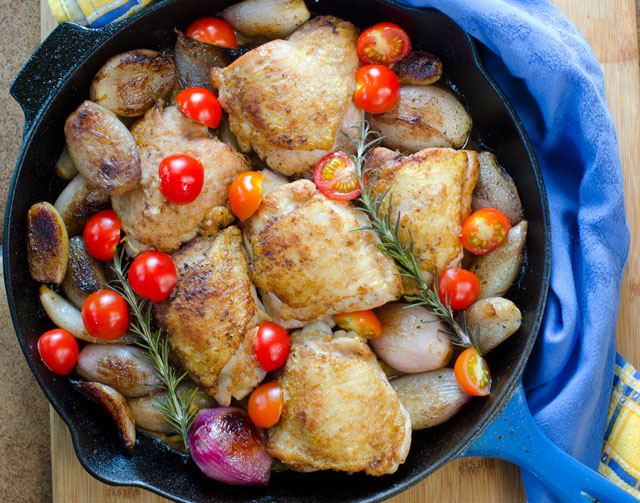
Though there are many good recipes from the magazine and accompanying PBS series, there is one that stands out from the rest, braised chicken with shallots. Over the years this recipe has been modified, updated and tweaked, this is my version.

Braised chicken with shallots is a one pot no fuss dish where the sum is definitely greater than the  basic parts. The original recipe used bone in skinless chicken thighs, you could equally substitute bone-in skin on chicken thighs or boneless skinless chicken thighs. I would definitely say choose thighs or chicken quarters (leg and thigh combination) rather than chicken breasts, dark meat holds up much better to braising.

Several versions of the recipe start with a definite no-no, rinse the chicken thighs in water. Washing raw poultry before cooking is not recommended by the USDA. Bacteria in raw chicken (in all meat actually) can be spread to other foods, utensils and surfaces, also known as cross contamination. Cooking chicken to the proper temperature kills the bacteria. So just pat the chicken very dry with paper towels and proceed with the recipe.

Coat the chicken pieces very lightly with flour and sprinkle with salt and pepper. Martha recommends (and I heartily agree) using Wondra flour for this step. If you haven’t noticed, it’s that bright blue canister tucked in next to all those alternative flours like coconut and almond. Wondra is an instant flour, precooked and dried. It dissolves quickly in liquids and makes lump free gravies. In this recipe it gives the chicken an extra light and crispy crust.
Melt butter in a large heavy bottomed skillet or Dutch oven. Cook the chicken three to four minutes per side, in batches if necessary. You want to develop a golden crust and leave behind brown bits that you will cook the shallots in. Remove the chicken from the pan and keep warm.

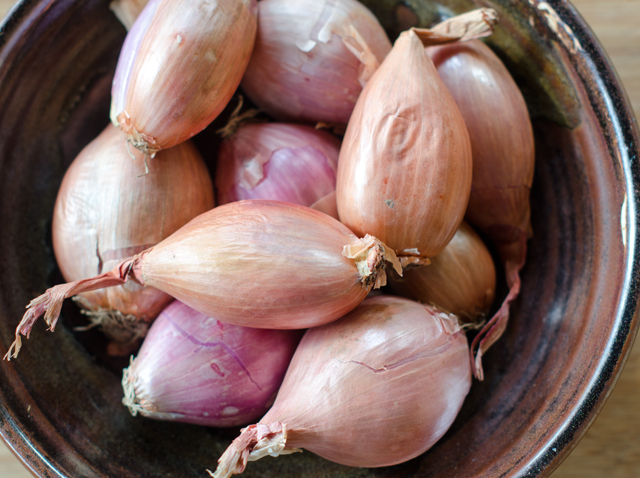
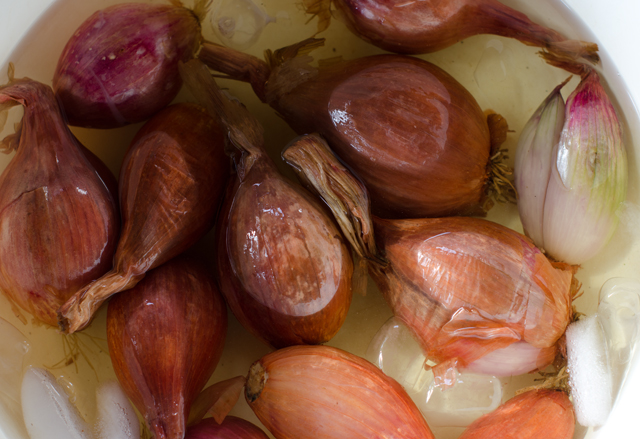
Shallots, usually a minor player in most recipes takes a starring role here. If you aren’t familiar with shallots, their flavor is sweet and mild, somewhere between an onion and garlic. This recipes uses about a pound, 12-15 medium to large shallots. Peeling shallots can be a tedious task. You can make this easier by soaking the shallots in boiling water for a few minutes and then putting them in an ice water bath so they won’t continue to cook. Make a shallow cut in the top layer and peel the skin and top layer away.

Sauté the shallots in the butter and rendered chicken fat until softened and caramelized. Return the chicken pieces to the pan and add a cup of white wine to bring some acid to the dish and to deglaze the brown bits in the bottom of the pan. I used vermouth, a fortified white wine that is flavored with herbs and spices. If you are going to use vermouth, look for a dry (not sweet) variety.

Stir in the Dijon mustard and add the fresh rosemary sprigs. Put a lid on the pan and simmer for thirty minutes. At the end of the cooking time add two cups of halved cherry tomatoes. Although I am not a fan of out of season tomatoes, there are some I will use as “supporting players” when they are necessary to the dish. With seed sourced from the south of France, Sunset Flavor Bombs are a good choice and available at big box stores.

This is a great dish for the busy cook, cook on a Sunday afternoon, reheat and serve several days later. Serve with noodles or rice to sop up the juices.

Shallots are a member of the onion family, their flavor is milder and reminiscent of garlic.
Chilling off blanched shallots before peeling them.

Chicken with Shallots

Serves 4-6

Ingredients

  • 2½ to 3 lbs chicken thighs (6-8 pieces)
  • 2 T flour (I used Wondra)
  • Kosher salt and freshly ground pepper
  • 2 T unsalted butter
  • 12 medium to large shallots, peeled
  • 1 c vermouth
  • 1½ T Dijon mustard
  • 2 large sprigs rosemary
  • 2 c small tomatoes cut in half or quarters

Directions

  1. Pat the chicken thighs dry with paper towels. Sprinkle them with salt, pepper and flour.
  2. Melt the butter over medium high in a heavy bottomed skillet large enough to fit the chicken pieces comfortably. When the butter begins to foam, cook the chicken, in batches if needed, 6-7 minutes per side. It should be brown and crisp on both sides. Set the chicken aside on a plate and keep warm.
  3. Sauté the peeled shallots in the butter and the chicken fat until they begin to soften and caramelize, 10-12 minutes. Stir in the vermouth with a large wooden spoon to deglaze the pan. Add in the mustard and the rosemary sprigs. Return the chicken thighs to the pan and cover. Turn the heat to low and simmer for 30 minutes.
  4. Add the tomatoes to the pan and stir them in to combine. Serve immediately or cool and refrigerate. Reheat and serve in the next two days.

October 17, 2016 Slow Cooker Chicken Thighs with Leeks and Mushrooms

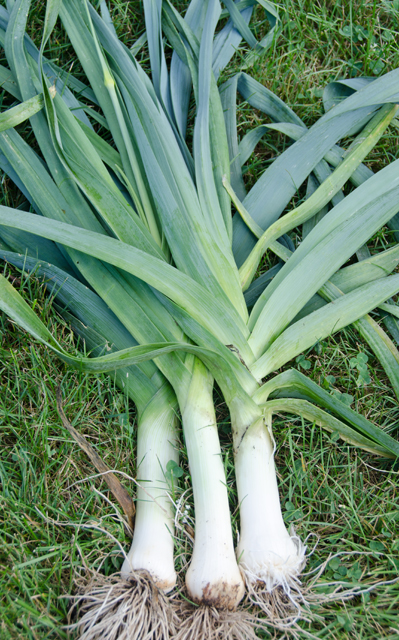
Several rows in our garden are always reserved for leeks. It all started years ago with the classic book, Crockett’s Victory Garden, a month by month guide to all things (well most) gardening. It was in those pages Joe set his eyes on them for the first time, leeks that looked like they could almost double as baseball bats, actually they were Crockett’s exact words. It inspired him to give leeks a try. In addition, as cooking enthusiasts in the eighties, finding leeks in the supermarket was often futile, or if they had them, very expensive and not that good.. So growing leeks was a logical conclusion.

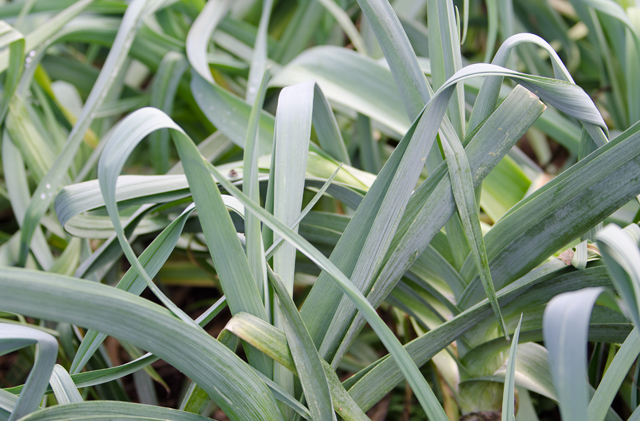
Leeks are a cool season vegetable that require 120 to 170 days to harvest. Joe starts them indoors and transplants them in the garden anytime after the last frost. At that point the leeks look like skinny blades of grass. He plants them closer together than they should be, so that we have thinnings that can be used like scallions before the mature leeks are ready. We will harvest most of them in the fall but some will winter over until early spring.

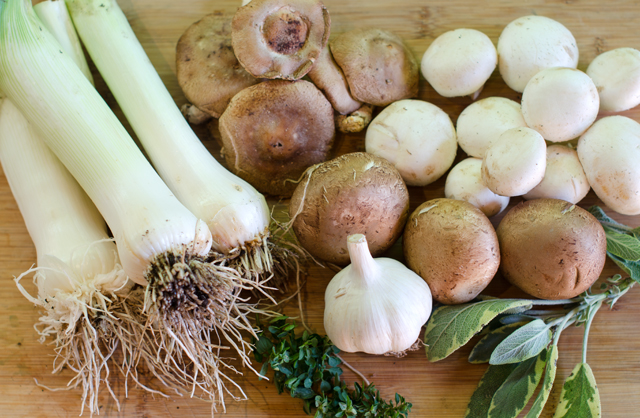
Even though we haven’t had much of a stretch of fall weather and it may get up to 80°F today, I am craving the stews and braises that are a natural in the cooler weather. In this dish versatile chicken thighs are slow cooked on top of a bed of leeks and mushrooms. The mild onion flavor of leeks pairs nicely with the savory earthy flavor of the mushrooms.

If you choose to brown the chicken first as I did, pat the chicken pieces dry with paper towels. This helps keep the chicken from steaming instead of searing. You can also substitute chicken leg quarters for the thighs, that’s the thigh and the leg in one portion. Boneless skinless thighs are another option, add those directly to the slow cooker without browning. I chose bone in and skin on for better flavor. I like the skin on and browned, it protects the chicken during the cooking process and makes for a more attractive presentation. You don’t even have to eat the skin if you don’t want to.

It has been stated countless times but is worth repeating. Do not rinse chicken, it just splashes bacteria all over you, your countertops and any other food that is nearby. The heat from cooking is enough to kill any bacteria that are present on the chicken.

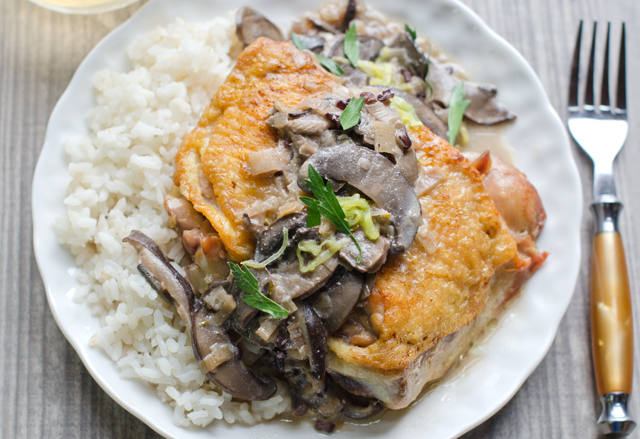
The recipe is very simple, you can serve the chicken with the leeks and mushrooms as-is or after removing the chicken, thicken up the sauce a bit. I ladled out some of the broth and stirred in a little flour to thicken it up and added a little sour cream and half and half to make a more substantial sauce. Serve with white basmati rice to absorb all the juices.

A row of leeks.
Not quite baseball bat size but still fine.

Slow Cooker Chicken Thighs with Leeks and Mushrooms

Serves 4-6

Ingredients

  • 3 lbs skin on and bone in chicken thighs
  • 1 T olive oil
  • 4 c assorted sliced mushrooms, white, shiitake, cremini
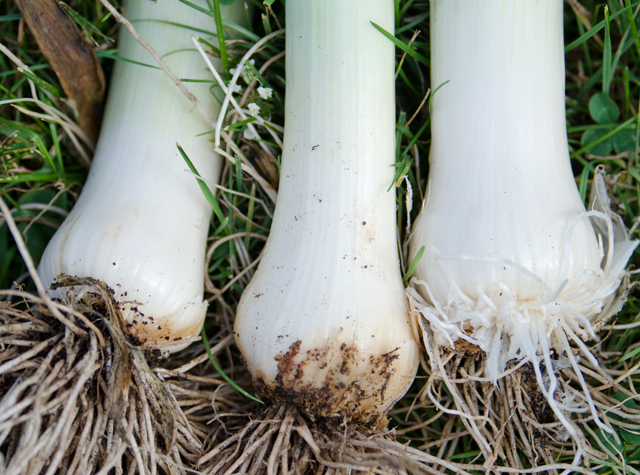
  • 3 c leeks white and pale green parts only, halved lengthwise, washed well to remove any dirt and sliced thinly
  • 1½ T fresh thyme leaves
  • 1½  T minced fresh sage leaves
  • Kosher salt and fresh ground pepper to taste
  • 2/3 c dry white wine (Chardonnay or Burgundy)
  • 2/3 c chicken broth (homemade or low sodium canned)
  • 1 T all-purpose flour
  • 1/3 c sour cream
  • 1-2 T half and half or heavy cream

Directions

  1. Heat a large non stick skillet over medium high heat.
  2. Pat dry the chicken thighs well with paper towels. Season with kosher salt.
  3. Add olive oil to skillet and add chicken thighs skin side down. Do not crowd, this  should be done in batches. Cook skin side down for three minutes then flip to other side and cook for an additional two minutes. Remove to a plate.
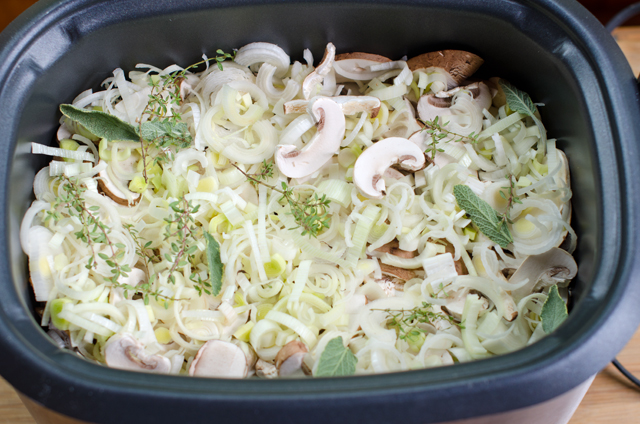
  4. Place the mushrooms, leeks, thyme and sage to the slow cooker. Season with a  little salt and some fresh ground pepper.
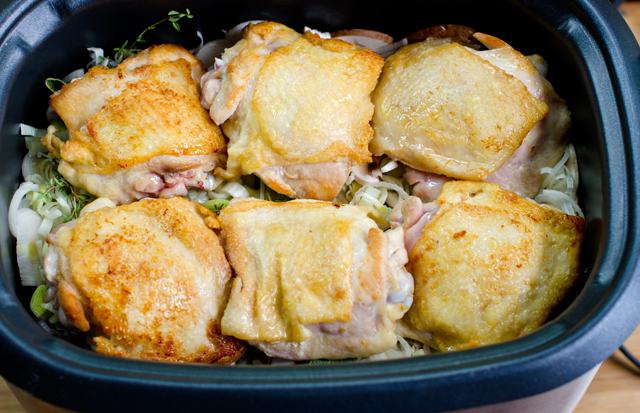
  5. Nestle the chicken pieces on top of the vegetables and pour the wine and broth  around them.
  6. Cover and cook on low for six hours. If desired, at the end of cooking remove the chicken pieces to a platter and keep warm. Ladle out about a cup of the broth into a glass measuring cup. Whisk in a tablespoon of flour to thicken and stir in sour cream and half and half or heavy cream. Stir this back into the slow cooker taste and add more salt and pepper as desired. Serve chicken and sauce over rice.
Leeks, mushrooms and herbs into the slow cooker first.
Place chicken on top.
Serve with rice to sop up the juices.

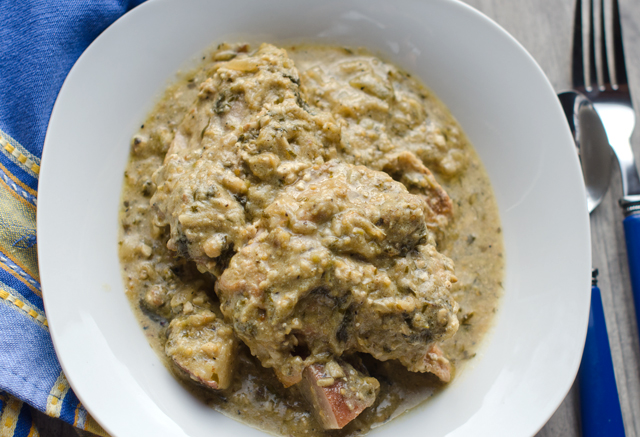
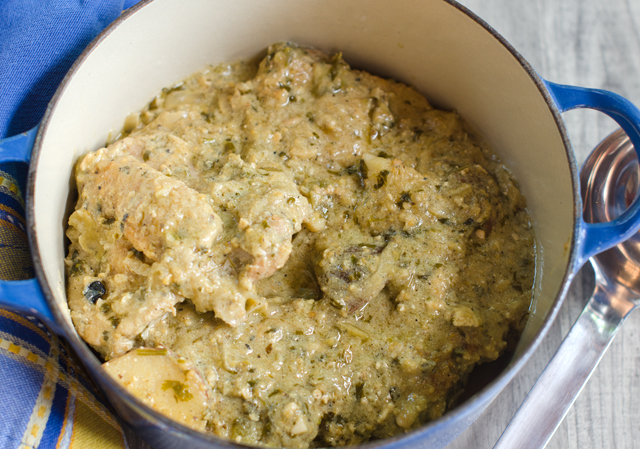
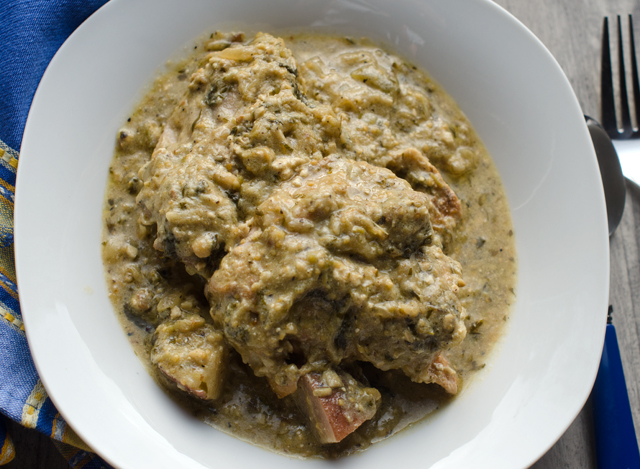
September 24, 2017 Braised Chicken Thighs with Tomatillo Sauce

When is a tomato not a tomato? When it’s a tomatillo. Yes, their aliases include Mexican husk tomato and “tomato verde” and both tomatillos and tomatoes are members of the nightshade family, but that’s where the similarities end.

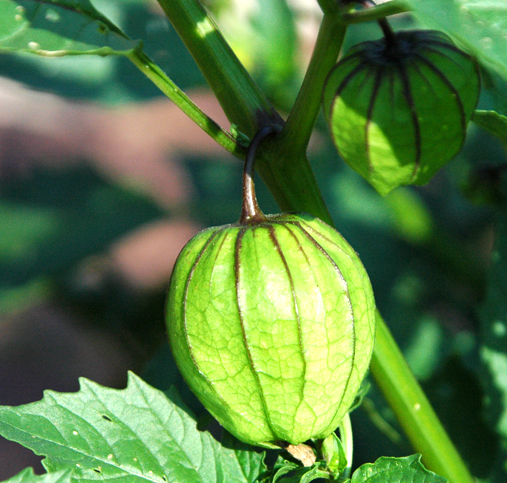
Years ago tomatillos were one of those “let’s try this and see” additions to the garden. I certainly wasn’t familiar with the sprawling bushy plants that first produce lots of leaves and little yellow flowers. These flowers eventually turn into bright green papery Chinese lanterns. The tomatillo grows inside this husk and when the fruit is mature, the husk dries out and turns a tan color and the tomatillo splits the husk open. Under that husk they look like hard little green tomatoes. They have a bright fresh flavor, a little citrusy and herbal. I have used them for salsa verde and a  chicken tomatillo soup. This time I wanted to use tomatillos in a sauce for braised chicken thighs. I found my inspiration from Mexican cooking authority, Rick Bayless. His recipe for a braised pork loin in tomatillo sauce could be adapted for chicken so I knew I would be getting the direction I needed.

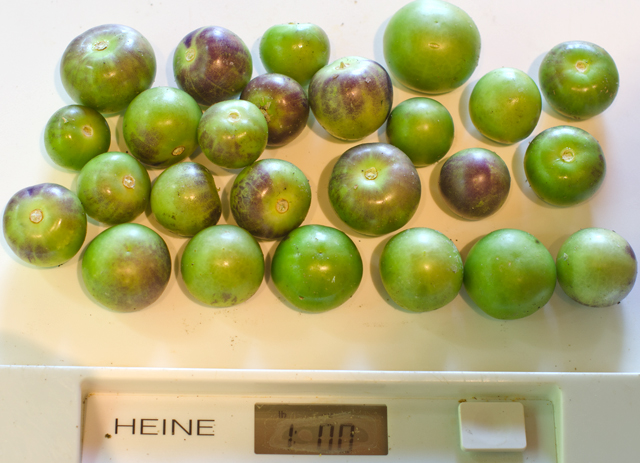
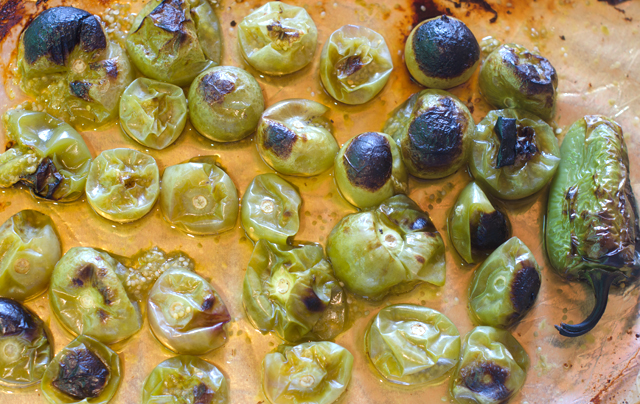
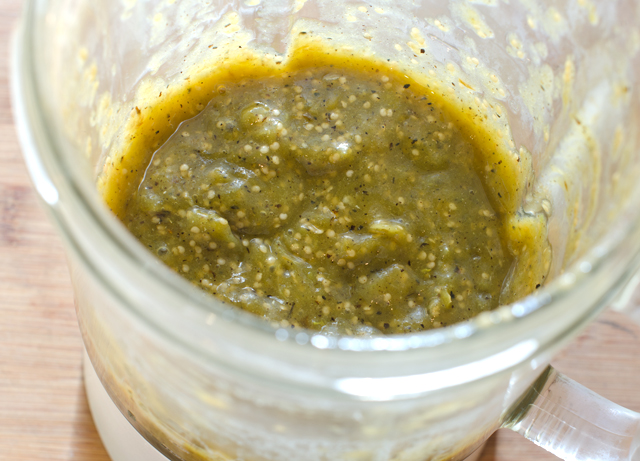
Start the dish by making the tomatillo sauce or salsa, remember, salsa is the Spanish word for sauce. Turn the broiler to high and move the oven rack to the highest position.Remove the papery husks from the tomatillos and rinse off the sticky residue, that residue is a natural deterrent to insects. In this case it took 28 tomatillos to make a pound. Put them on a foil lined baking sheet, stem side down so they won’t roll around as much. It is a good idea to double up on the baking sheets so they won’t buckle under the broiler from the heat. Add one green jalapeno to the sheet and broil until the tomatillos are roasted, even blackened in spots and very soft. Transfer everything, including the juices to a blender and process until smooth. Set the sauce aside while you brown the chicken.

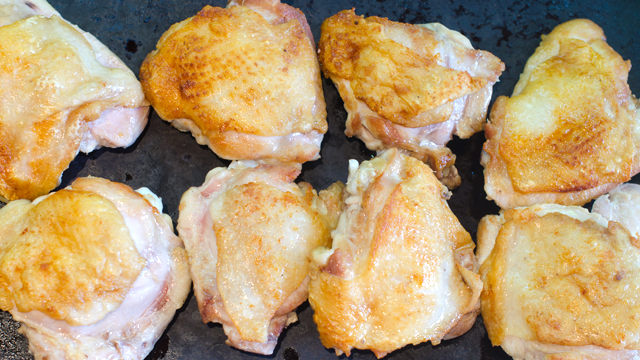
In a 4-5 quart Dutch oven, brown the chicken pieces. You will need to do this in batches, the chicken should be golden brown, not stewed. Rick instructs that you use either all white meat (breast) or all dark (thighs) because the cooking times will be different, I find that dark meat holds up better to the braising process. After the meat is browned it is removed to a plate. No need to rinse the pot, now it’s time to finish off the sauce.

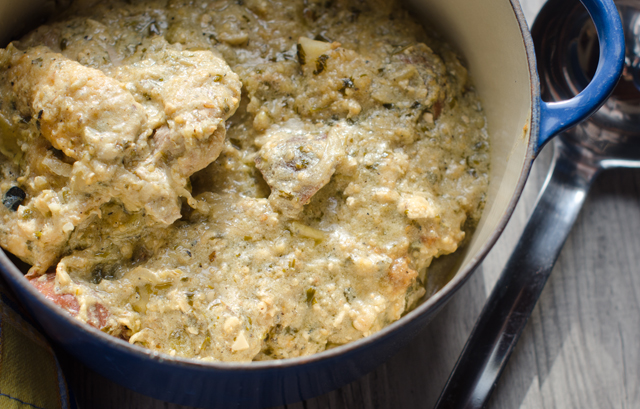
Return the Dutch oven to medium heat and cook the onion and garlic. Raise the temperature to medium high and add the tomatillo puree. Cook until it is dark green and thickened, this concentrates the flavors of the sauce.  A little water thins out the sauce, Rick feels the addition of stock would make the sauce too rich. Now is the time to add some heavy or sour cream if desired. It lightens up the sauce and I liked it with the chicken. Add some fresh cilantro or the more traditional purslane also known as verdolagas in Mexico. I will definitely try that when purslane makes an appearance in the garden again. Nestle the chicken pieces in the sauce, put the lid on and cook in the oven for thirty minutes.

Potatoes add an earthy element to the dish. Parboil some red potatoes while the chicken is cooking, close to the end of the cooking they are nestled in the sauce between the chicken pieces. Serve the chicken topped with sauce with some potatoes on the side. The end result is a rich, warm satisfying dish and the perfect transition from summer to fall cooking.

Tomatillo on the vine, not ready for picking yet.

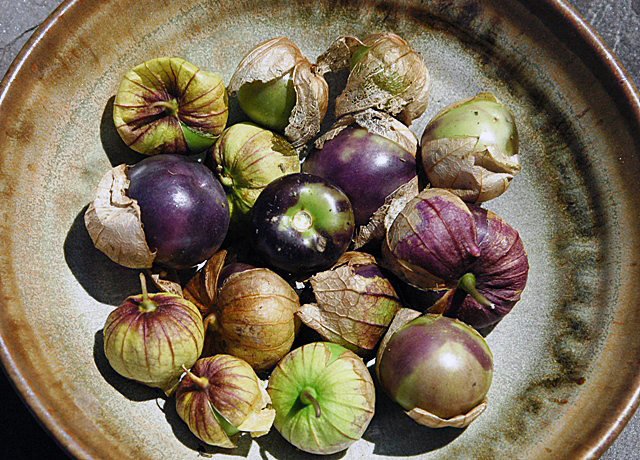
Ripe green and purple tomatillos.

It took 28 tomatillos to make a pound.
Roast tomatillos until soft and blackened in spots. Make sure the juices go in the blender too.
Blended tomatillos.
Chicken thighs are browned, then nestled in the tomatillo sauce.

Braised Chicken Thighs in Tomatillo Sauce

Serves 4-6

Ingredients

  • 1 lb fresh tomatillos
  • 1 medium jalapeno pepper
  • Kosher salt and fresh ground pepper
  • 8 medium skin on, bone in chicken thighs, 2½ to 3 lbs
  • 1½ T olive oil
  • 1 medium onion, finely sliced
  • 3 cloves of garlic, peeled and finely chopped’
  • 1/3 c chopped cilantro
  • A little crema or heavy cream if desired
  • 1¼ lbs red skinned potatoes, scrubbed and quartered

Directions

  1. Roast the tomatillos and chile on a baking sheet four inches below a very hot broiler until darkly roasted, even blackened in spots, about 5 minutes. Flip them over and roast on the other side for another 4-5 minutes. Tomatillos should be splotchy black and the chile soft and cooked through.
  2. Cool a bit then transfer everything, including the juices that have accumulated on the tray to a blender. Process until smoothly pureed.
  3. Set a 4-5 quart Dutch oven over medium heat, when the oil is hot add chicken pieces skin side down. It is best to do this in batches, you want the chicken to brown, not stew. Brown the chicken on the first side for 5 minutes, then turn over and brown on the other side. Remove the chicken pieces to a plate and keep warm.
  4. In the same Dutch oven over medium heat, add the onion and cook, stirring regularly, until golden, about 7 minutes. Stir in the garlic and cook a minute longer. Raise the heat to medium heat and when the oil is sizzling, add the tomatillo puree all at once. Stir until it is darker and noticeably thicker. Add 1 ½ cups of water and the cilantro. If you desire a mellower sauce add about a ½ cup cream or sour cream to the sauce. Taste and season with a little salt. Stir the sauce well to combine.
  5. Heat oven to 325°F. Nestle the chicken pieces in the warm sauce, cover the pot and set in the oven. Cook for 30 minutes.
  6. While the chicken is cooking, simmer the potatoes in a pan of salted water to cover until tender, about 10 minutes. Drain and set aside.
  7. When the chicken has cooked for thirty minutes, nestle the cooked potatoes into the sauce around the meat. Recover and cook for another 5-10 minutes.
  8. Serve the chicken and potatoes with the sauce over it.

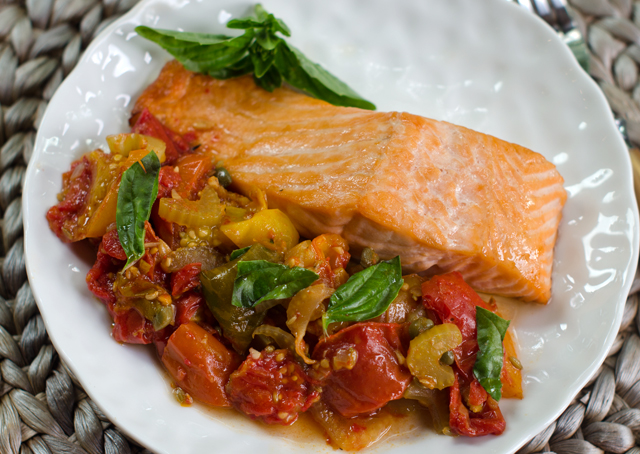
September 17, 2017 Salmon with Heirloom Tomato Scampi Sauce

It’s still officially summer for another week or so but it’s easy to see that fall is in the air. We haven’t experienced a ninety degree day in several weeks and the days are sadly growing shorter. The tomatoes are making their last gasp, maybe not quite tomato salad worthy but still so much more flavorful than anything a supermarket might have to offer.

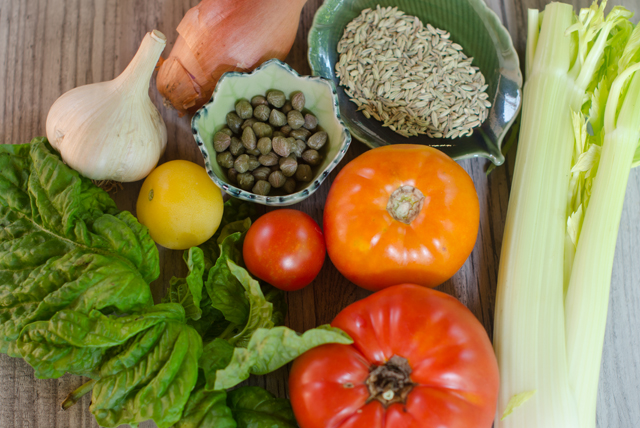
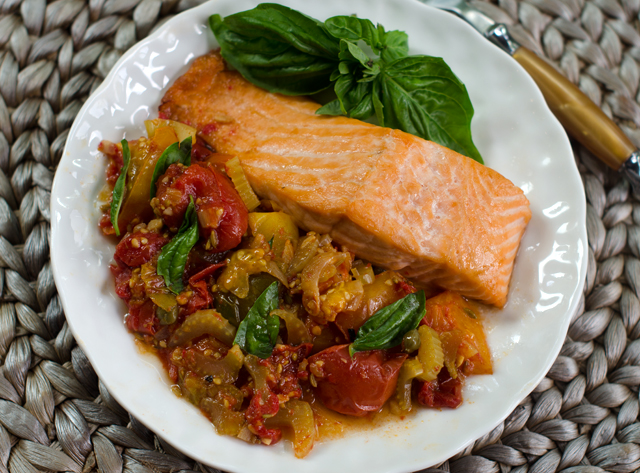
This recipe, courtesy of Top Chef season two semi-finalist, Sam Talbot uses a combination of heirloom tomatoes, garlic, shallots, capers and fresh basil. The original recipe used sea bass but I substituted salmon with excellent results.

Scampi is the Italian word for a hard shell prawn or langoustine. Prized in the Mediterranean, they are pink in color and more closely related to lobsters. The traditional method of scampi preparation in Italy is to saute them with garlic, onion, olive oil and white wine. Italian American chefs adapted the preparation using more readily available shrimp. The dish was called shrimp scampi, as in “shrimp prepared in the style of scampi” and the name stuck.

This is a scampi sauce in the broadest sense of the term, it does have garlic, onion, in this case shallots, olive oil and white wine. It also includes celery, which gives some textural difference, briny capers and fennel seed that adds just a hint of anise.

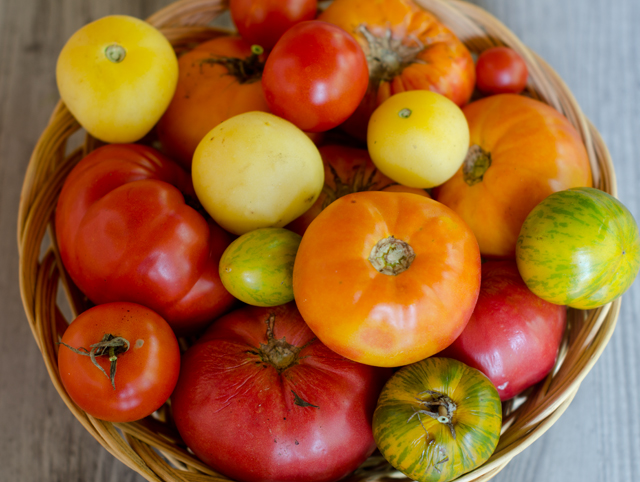
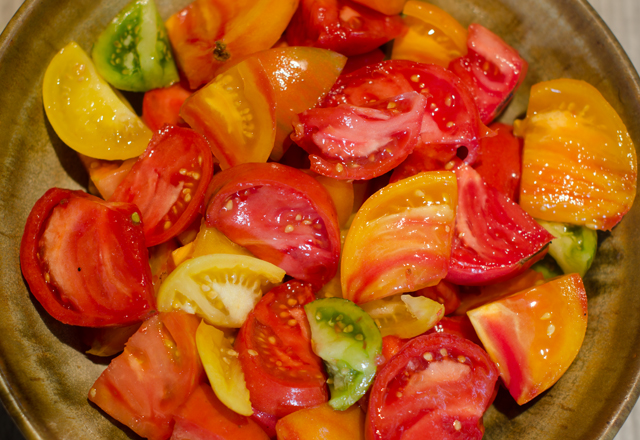
Heirloom tomatoes aren’t necessarily part of a scampi preparation either but they are a nice addition to this dish. Some of the varieties Joe grew this year included Garden Peach, Marvel Stripe, Cherokee Purple and both Red and Green Zebra, just to name a few. Heirloom tomatoes are open pollinated; pollen is carried by natural mechanisms like bees or wind. Heirlooms are varieties that are capable of producing seed that produce seedlings like the parent plant. In agriculture, the word “heirloom” doesn’t have a precise definition but usually refers to varieties that are at least 50 years old.

As always, we cook our fish according to the Canadian fisheries method. Popularized by legendary chef, James Beard, it is very simple and quite foolproof. Measure your fillet at the thickest part, one inch of thickness equals ten minutes of cooking time at 450°F. If you prefer your fish a bit translucent, deduct a minute or so off the cooking time.


An assortment of late season heirloom tomatoes.

Salmon with Heirloom Tomato Scampi Sauce

 Ingredients

  • 3 T extra virgin olive oil
  • 6 cloves of garlic, finely chopped
  • 2 shallots, finely diced
  • 1 T fennel seeds, toasted in a dry skillet
  • 4 celery ribs, sliced ¼ inch thick
  • 1 T drained, chopped capers
  • ¼ c dry white wine
  • 1 T red wine vinegar
  • Grated zest and juice of 1 medium lemon
  • 3 lbs mixed heirloom tomatoes, cut in wedges
  • 1 cup tightly packed hand-torn fresh basil leaves
  • 1½ lbs salmon filet, cut into 4 six ounces portions

Directions for the Sauce

  1. In a large skillet, heat the oil over medium high heat. Add the garlic, shallots, and fennel seeds and cook, stirring frequently, until the shallots are translucent about 2 minutes.
  2. Add the celery and capers and cook until the celery has softened, about 2 minutes.
  3. Add the wine to the pan and cook until it is reduced by half, about 1 minute. Add the vinegar, lemon zest and juice, tomatoes and basil and cook for 1 to 2 minutes to incorporate the flavors and heat the tomatoes through.

Directions for the fish

  1. A half hour before cooking bring the fish out to bring it to room temperature. Adjust oven rack to the middle position and preheat to 450°F.
  2. Measure fish at the thickest part of the fillet with a ruler, one inch of thickness equals about 10 minutes of cooking time. Evenly space fish fillets in a lightly oiled baking pan and transfer pan to the preheated oven. Bake for the designated time.
  3. Serve the salmon fillets topped with tomato scampi.

August 31, 2017 Moussaka for a Crowd

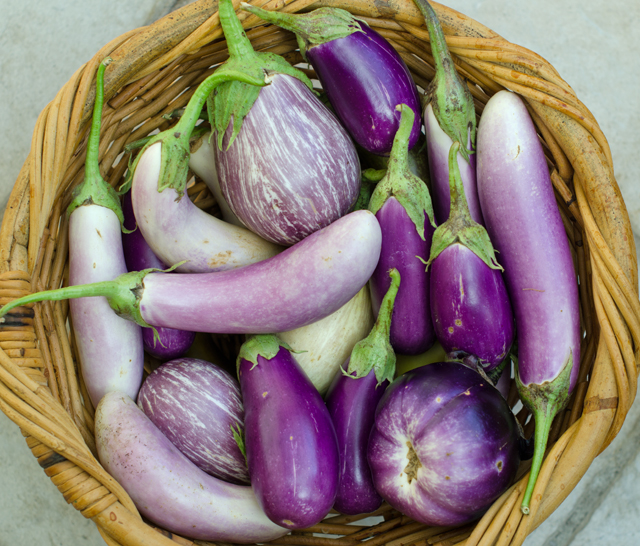
For the past 20+ years I have made this version of moussaka every summer when we have an abundance of eggplants. It can be made in one large (very large) dish to serve a crowd. I spread it out into three casserole dishes, one for now, two for the freezer. It doesn’t fit the category of quick and easy but it can be done in steps over the course of two days. First, slice the eggplant and while you are baking it, make the meat sauce. Refrigerate these two components overnight. The next day, prepare the bechamel sauce, grate the Parmesan, assemble the casseroles and bake. A traditional moussaka is made with ground lamb, but if you don’t like lamb, or your supermarket doesn’t carry it, substitute lean ground beef or turkey. Like many hearty casseroles, it tastes even better the next day. Serve it with, you guessed it, a Greek salad.

Eggplants in all shapes and sizes.
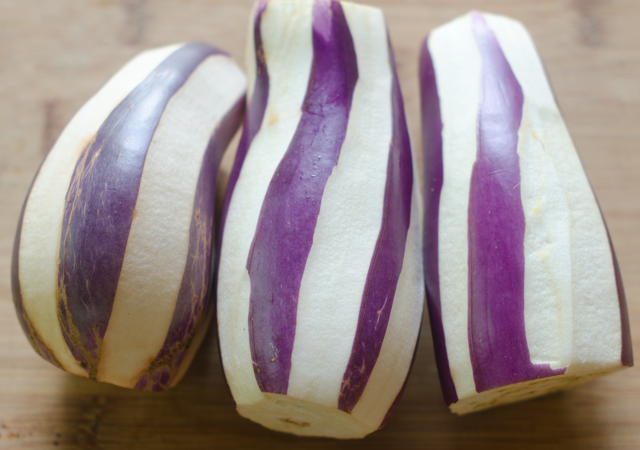
I take most of the skin off the eggplant , leaving narrow strips.
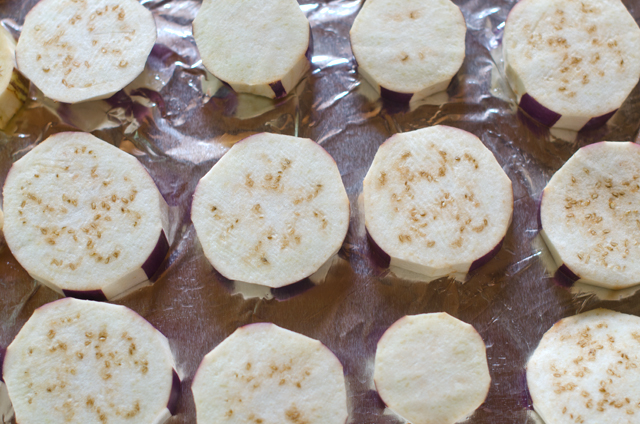
Line up slices on a foil lined baking sheet for baking.
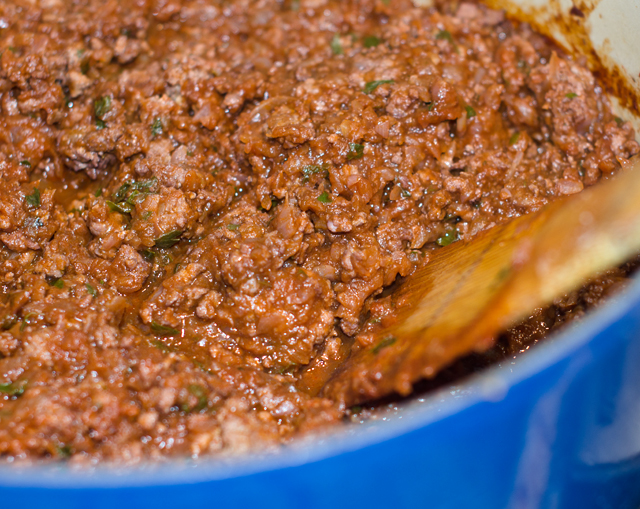
The rich meat sauce with red wine and fragrant cinnamon.


Eggplant Moussaka

Serves 15 to 18

Ingredients

  • 5 lb eggplant, strips of skin removed, cut crosswise into ½” slices
  • 6 T olive oil, divided
  • 2 ½ lb ground lamb, turkey or beef
  • 5 large onions, chopped fine
  • ½ cup minced fresh parsley leaves
  • 2-6 ounce cans tomato paste
  • 3 c dry red wine
  • 1 ½ T cinnamon
  • 1 T salt
  • Freshly ground black pepper to taste
  • 1 ½ c dry bread crumbs
  • 1 ½ c freshly grated Parmesan

For the topping

  • 1 stick (½ cup) unsalted butter
  • ½ c all-purpose flour
  • 6 c milk (low-fat is fine)
  • 2 T freshly grated nutmeg
  • 5 large eggs, lightly beaten
  • 1-15 oz container ricotta cheese
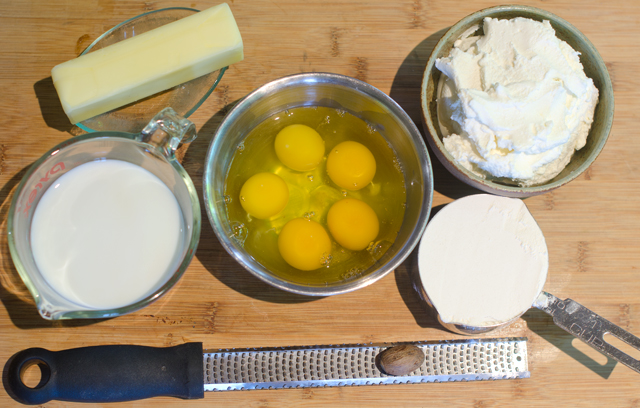
The components for the creamy bechamel sauce.


Directions

  1. Preheat oven to 425°F. On baking sheets covered with oiled aluminum foil arrange the eggplant slices in one layer, brush them lightly with 4 T of the oil and bake them, covered with foil in batches in the middle of the oven for 30 minutes.
  2. While the eggplant is baking, in a large heavy skillet cook the ground meat over medium heat , stirring and breaking up the lumps, until it is no longer pink. With a slotted spoon transfer it to paper towels to drain, discard the fat remaining in the skillet.
  3. In the skillet cook the onions in the remaining 2 T oil over medium high heat, stirring until softened, stir in the meat, the parsley, the tomato paste, the wine, the cinnamon, salt and pepper. Simmer the mixture, stirring occasionally, for about twenty minutes or until thickened slightly.
  4. Sprinkle 2 T of the bread crumbs over the bottom of an oiled roasting pan, 16 by 10 by 2 ½ inches, arrange one layer of the eggplant slices next. Spread one third of the meat mixture on top of the eggplant and sprinkle it with one third of the Parmesan and one third of the remaining bread crumbs.
  5. Layer the remaining eggplant slices, meat mixture, Parmesan, and bread crumbs in the same manner, starting with the eggplant and ending with the bread crumbs.
  6. For the topping: In a heavy saucepan melt the butter over moderately low heat, and the flour, and cook the roux, whisking for 3 minutes. Add the milk in a stream, whisking, and whisk in the nutmeg, salt and pepper to taste.  Bring the mixture to a boil, whisking, and simmer it, stirring until it is thickened, 3 to 5 minutes. Let the mixture cool slightly and whisk in the eggs and ricotta.
  7. Pour the topping evenly over the moussaka and bake in the middle of the oven for 45 minutes, or until the top is golden. Let it stand for 10 minutes before serving.
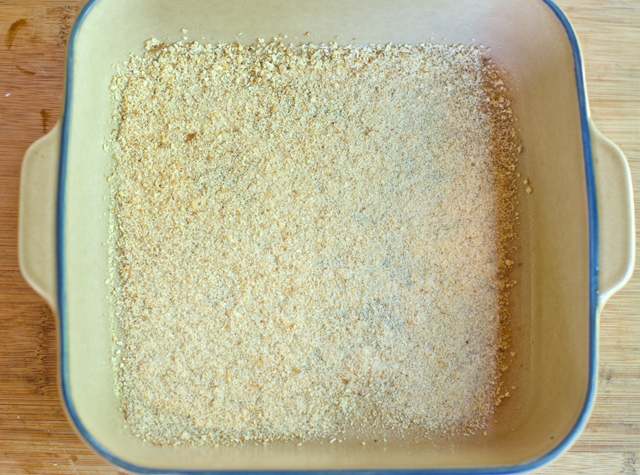
First a layer of fine bread crumbs.
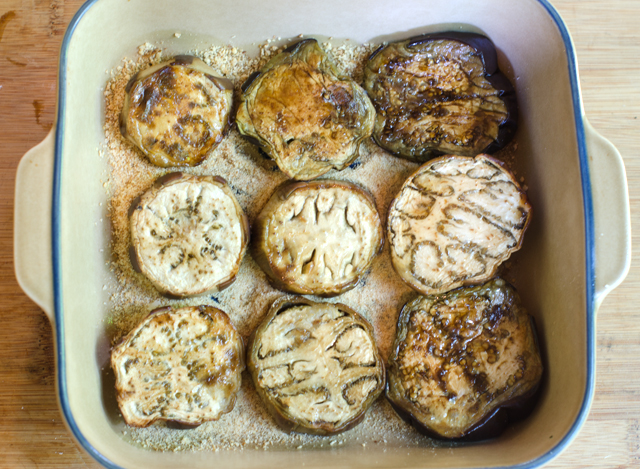
Then a layer of cooked eggplant.
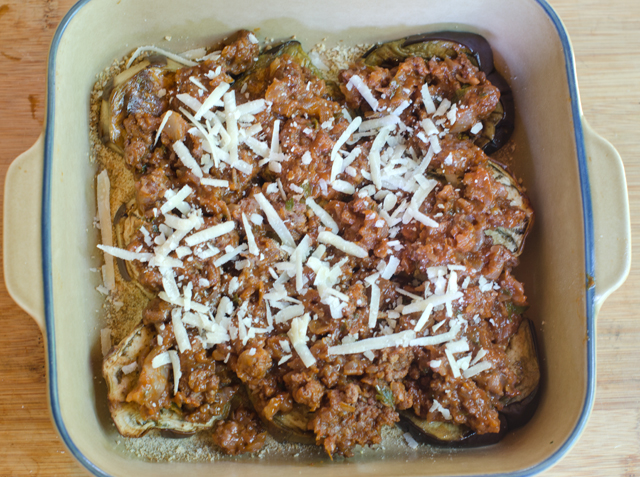
Meat sauce and a sprinkling of Parmesan cheese.
Repeat layers and top with the creamy bechamel.
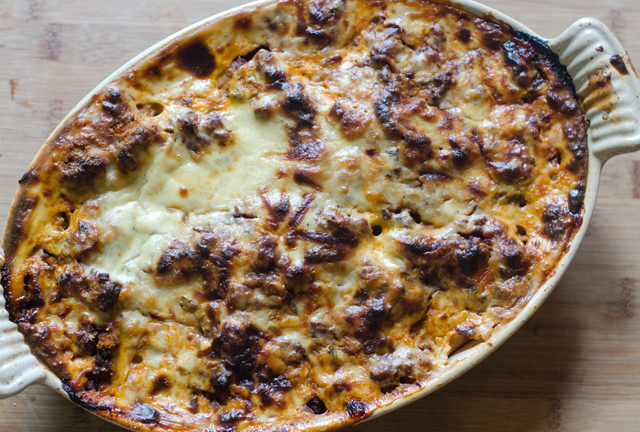
And it comes out like this.
Delicious!