April 27, 2012 Baked Crepes Cacciatore with Parmesan Cream Sauce

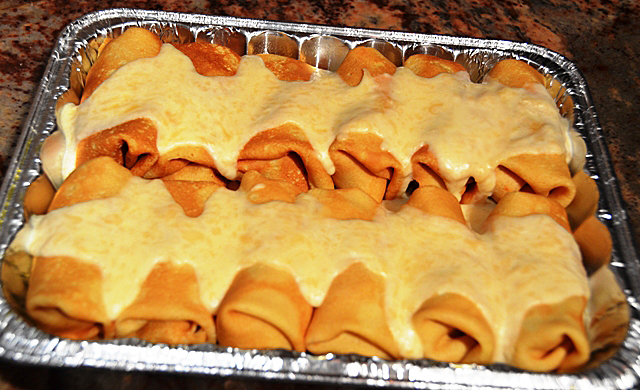
Not the prettiest presentation, but these crepes were destined for take-out.

As a caterer I have made countless crepes. For large events,  they would be made ahead of time, stacked and reheated as each guest made their request. My standard fillings, kept warm in a chafing dish were very “Martha”; spicy cinnamon apple, creamy spinach Florentine and a curried chicken salad with raisins and almonds.  Some people were purists and only chose one, others would come back multiple times to try different combinations. It had been a while since I made crepes but have always felt comfortable making them, So I was interested in revisiting crepes when I saw a recipe for them in the latest issue of Fine Cooking.The recipe for crepes is pretty basic, all purpose flour, eggs, milk, butter, a pinch of salt and butter. What makes this recipe unique is the butter is melted and the solids turn brown to give the crepes a nutty taste.  I used them first for dessert for Sunday dinner, a recipe for clementine crepes Suzette.  The following week the call went out for meals for one of the ladies in my Bible study group who just had surgery. I thought that Baked Crepes Cacciatore would be a great make-ahead dish that could be reheated. Cacciatore is the Italian word for “hunter” and in this instance, in the style of a hunter which traditionally means a meat dish prepared with mushrooms, onions and tomatoes. A success all around as Tracy said her family enjoyed them very much. A dish I will definitely revisit soon.

Brown Butter Crepes

From Fine Cooking Magazine

Ingredients

  • 7T unsalted butter
  • 1 3/4 c whole milk
  • 4 large eggs
  • 1/2 tsp kosher salt
  • 1 1/2 c all purpose flour

Directions

  1. Cook butter over medium heat in a small saucepan, swirl it every few seconds, until butter is melted and the milk solids at the bottom of the pan turn golden brown. Pour the brown butter into a bowl and cool to room temperature.
  2. Combine milk, eggs and salt into a blender. Blend for a few seconds to combine. Add the flour and combine until the mixture is smooth, add brown butter and blend for another 10 seconds.
  3. Pour mixture into a bowl and allow to rest for 3 hours, or up to 24 if refrigerated.
  4. Check the batter when you are ready to cook the crepes, it should have the consistency of light cream. Whisk in more milk if necessary.
  5. Heat a crepe pan with an 8″ base or a 10″ non stick skillet with an 8″ base over medium high heat until it is hot enough to make a drop of water sizzle. Then with a folded paper towel, coat the bottom of the pan with a small amount of butter. The butter should sizzle, not turn brown, if it does, cut back the heat a little.
  6. Using a 1/4c measuring cup or 2 ounce ladle, pour batter into the center of the hot pan, lift and tilt pan in all directions so that the batter spreads out evenly in a thin circle.
  7. Cook until the edges of the crepe begin to dry and lift from the sides of the pan. Use a rubber spatula to lift up the edge to see if the bottom is browned, this takes about one minute. Using your fingers or a spatula, flip the crepe over. Cook for another 20 seconds to brown the bottom of the crepe.
  8. Slide the crepe onto a plate or cooling rack. Repeat with remaining batter, adjusting the heat as needed and using more butter for the pan if necessary. Stacking the crepes is not a problem, they will not stick to each other.
  9. Crepes can be stored in the refrigerator for three days or frozen for up to three months.

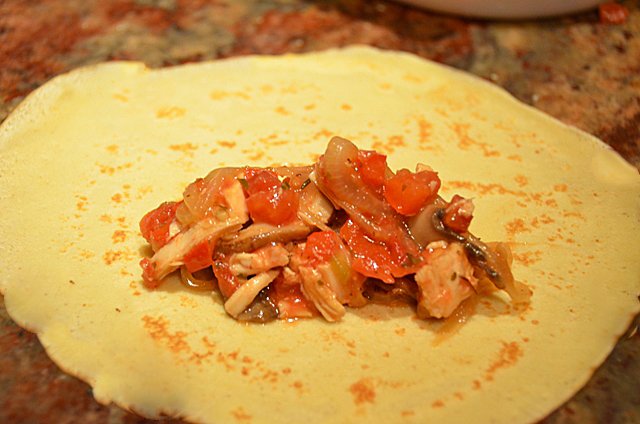
    A crepe ready for folding and rolling.


Baked Crepes Cacciatore with Parmesan Cream Sauce

adapted from Fine Cooking Magazine

  • 3T olive oil
  • 1T unsalted butter
  • 2 1/2 c cleaned, trimmed and sliced button mushrooms
  • Kosher salt and freshly ground black pepper
  • 1 medium bell pepper, red, yellow or orange, cored, seeded and cut into small dice
  • 1T chopped green chile
  • 1/2 large sweet onion, thinly sliced
  • 1t chopped fresh rosemary
  • 1T all purpose unbleached flour
  • 1 14.5-oz. can diced tomatoes with basil, drained
  • 1/2-1t lemon juice
  • 1/4t green Tabasco sauce
  • 2c chopped cooked chicken

For the cheese sauce

  • 1c heavy cream
  • 1 1/2c finely grated Parmigiano-Reggiano
  • Freshly ground black pepper

For assembly

  • 12 8-inch crepes-warmed or at room temperature if made ahead
  • 1t sweet paprika
  1. In a large skillet, heat 1T oil and butter over medium-high heat until sizzling. Add the mushrooms, season with 1/2t salt and a few grinds of pepper, cook stirring frequently, until the mushrooms release most of their liquid and begin to brown, 7-9 minutes. Transfer to a medium bowl and return skillet to the heat.
  2. Add the remaining 2T oil, bell pepper, chile, onion, rosemary and 1t salt. Reduce heat to medium and cook stirring occasionally, until the vegetables are very soft and fragrant but not brown, 8 to 10 minutes.
  3. Sprinkle the flour over the vegetables and cook for a minute or so, stirring and scraping so the flour gets mixed with the fat and starts to toast a bit. Add broth and let it come to a simmer, stirring and scraping up any browned bits. Add the tomatoes, lemon juice to taste and hot sauce; bring to a simmer again and cook a few minutes to thicken the sauce.
  4. Add the chicken and mushrooms and simmer for a few minutes to heat everything through. Remove from heat and season to taste with more salt, pepper, hot sauce, or lemon juice. Cover the filling and keep warm.

Directions for the cheese sauce

  1. In a heavy-duty 1 quart saucepan, bring the cream to a boil over medium high heat. Reduce heat to maintain a simmer and cook the cream until it is reduced by half. Reduce the heat to low and add the cheese, stirring until melted. Season with pepper and remove from heat.

Directions for assembly and baking

  1. Position a rack in the center of the oven and preheat to 400F. Butter the sides of a 9×13-inch baking dish.
  2. Lay a crepe, presentation side down on a clean work surface. Spoon 3 heaping tablespoons on the bottom third of the crepe. Fold the bottom edge of the crepe up and over the filling, fold the sides toward the center, and finish rolling up from the bottom. Repeat with remaining crepes. Arrange crepes seam side down in a single layer in the baking dish.
  3. Spread the cheese sauce evenly over the crepes and sprinkle with paprika. Bake until the sauce is golden and bubbling slightly, about 15 minutes.
  4. The filling can be made up to three days ahead. Store it in an airtight container in the refrigerator and reheat over medium-low heat before using it.
April 22, 2012 Lamb-Two Ways


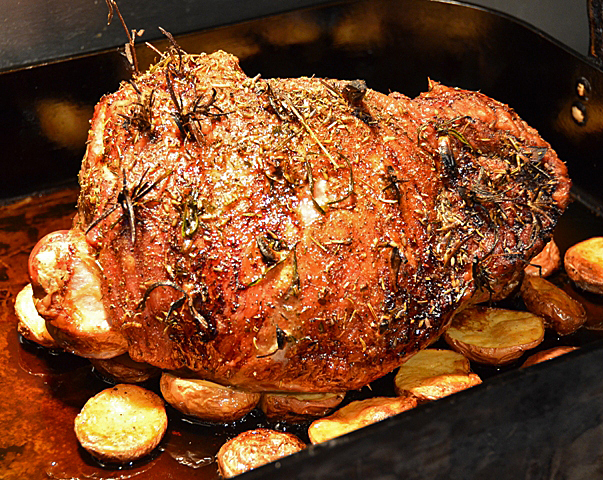
Easter Sunday’s roast lamb provided us with two meals, Provencal style leg of lamb and moussaka several days later. The leg of lamb we served was half of the leg, the shank end cut, which is the thigh from the hind leg. It is leaner and easier to carve than the butt end and makes for a more attractive presentation. The recipe, from the current issue of Fine Cooking magazine called for the lamb to be prepped the night before with a Provencal style rub and studded with garlic slivers. Herbes de Provence is a blend of dried herbs, common to the south of France. I found that no two herb combinations were in total concurrence, some had five herbs, others as many as nine. The one thing they all have in common is dried lavender. It is important to note that you should look for culinary lavender, there are many on-line sources, be certain not to use lavender from a garden center or florist that might be treated with pesticides. I had dried lavender from plants we grew from seed so I knew the quality would be better than something I might purchase.
Our approximately five and a half pound roast left me with a pound of leftover meat, we did have roast chicken and salmon on the menu as well. So the next challenge was to find an interesting recipe to use it in. A search for “leftover lamb” took me to a recipe for Moussaka Gratinee. I make moussaka quite often in the summer when we have an abundance of eggplants in the garden. Moussaka, a dish of Middle Eastern origins, is most often associated with Greek cuisine. It is usually a layered casserole of eggplant, beef or lamb, potatoes, tomatoes and topped with a Bechamel sauce. The recipe I chose baked the moussaka in individual ramekins, but I chose to make it in one casserole dish. A great way to use lamb leftovers with enough for lunch the next day.
.
Herbes de Provence Roast Leg of Lamb with Roasted Potatoes

adapted  slightly from the Fine Cooking Website

Ingredients

  • 1 5 1/2-lb bone-in shank half of a leg of lamb
  • 3 cloves garlic sliced into 1/8 inch slivers
  • 1 T herbes de Provence (I use the Penzey blend)
  • 1 T crushed dried lavender
  • 1 T coarse ground black pepper
  • 3 lbs small red potatoes, cut in half
  • 2 T olive oil
  • Kosher salt and freshly ground black pepper

Directions

  1. The night before-pat lamb dry with paper towels. With a sharp paring knife, make 2 inch deep slits all over the fat layer of the roast. Insert a sliver of garlic in each slit. Sprinkle roast with herbes de Provence, lavender and cracked black pepper. Cover and refrigerate.
  2. The next day-remove roast from refrigerator let sit at room temperature for at least one hour before cooking.  Position rack in the center of the oven and heat oven to 375F.
  3. Toss potatoes with olive oil, salt and pepper and spread in the bottom of a roasting pan.
  4. Sprinkle the lamb with salt and place on top of potatoes in the roasting pan. Roast until an instant-read thermometer inserted in the thickest part of the leg, away from the bone, reads 135°F to 140°F for medium rare, about 1 1/2 hours.
  5. Transfer roast to a serving platter, tent loosely with foil and rest for 20 minutes. Keep potatoes warm in the turned-off oven. Carve roast and serve with potatoes around it.

Personal Notes: Additional vegetables could be added to the roasting pan such as carrots, fennel, sweet onion, just cut the same size as the potatoes.

Moussaka Gratinee

adapted from the Fine Cooking website

Ingredients

  • 8 cups peeled trimmed eggplant, cut into 1/2 inch dice
  • Kosher salt
  • 1/4 c olive oil
  • 2 c finely chopped onion
  • l lb trimmed lamb cut into 1/2 inch dice
  • 2 cloves finely minced garlic
  • 1 T tomato paste
  • 1 T freshly grated nutmeg
  • Sea salt
  • 1/2 c beef stock
  • 3 T chopped fresh flat leaf parsley
  • 1 1/2 c milk or cream
  • 1 fresh bay leaf
  • pinch of ground mace
  • 2T unsalted butter
  • 2 T All-purpose flour
  • 1 large egg separated
  • 1 1/2 c cheese such as Pecorino Romano

Directions

  1. Put eggplant cubes in a colander set over a bowl, sprinkle with Kosher salt and set aside to drain for about 30 minutes.
  2. In a large skillet, heat 2 T olive oil over medium-low heat.  Add onion and cook until softened, about 10 minutes.
  3. Raise heat to medium high and add the lamb until it browns slightly, 5 minutes.  Lower the heat and add garlic, tomato paste, nutmeg, and 1 t sea salt. Add beef broth and stir to deglaze the pan, 5 minutes. Cook until liquid is slightly reduced, 2 minutes. Stir in parsley and season with fresh ground pepper. Transfer to a bowl and set aside.
  4. Dry the eggplant on paper towels. Heat remaining olive oil over medium high heat. Add eggplant, stirring frequently until lightly browned, about 2 minutes. Reduce heat to medium low and cook until soft, about 10 minutes.
  5. Preheat oven to 400°F and position the rack in the center.
  6. Stir the eggplant into the lamb mixture, scraping up the browned bits from the bottom of the pan.  Transfer the mixture to a large gratin dish.
  7. Put the milk or cream into a 2 quart saucepan with the bay leaf and mace. Bring to a boil, remove from heat, cover, and infuse for about 10 minutes. Strain into a liquid measuring cup and set aside.
  8. Melt the butter in a saucepan over medium heat. Add flour and stir occasionally, cook until lightly colored. Whisk in the milk and cook, whisking constantly until thickened, 3 to 4 minutes. Put egg yolk in a small bowl and whisk in about 1/4c of the warm sauce. Add yolk and sauce back into the saucepan and whisk until combined. Whisk in the cheese. Remove from heat and allow to cool.
  9. Whisk egg white until stiff peaks form and fold into the cooled sauce. Evenly spoon the sauce over the lamb-eggplant mixture.
  10. Place gratin dish inside a slightly larger dish. I used a disposable foil baking pan for this purpose. Add warm water to the foil container to come about 1/2 way up the dish. Cover the outer dish with foil and bake for 15 minutes. Uncover and continue to bake until browned and bubbling, about 30 minutes. Cool for 10 minutes and serve.

Personal Notes: ground lamb, beef or turkey could be substituted for the cooked cubed lamb, just adjust cooking time to properly brown the ground meat.

April 18, 2012 Italian Easter Cheese Bread

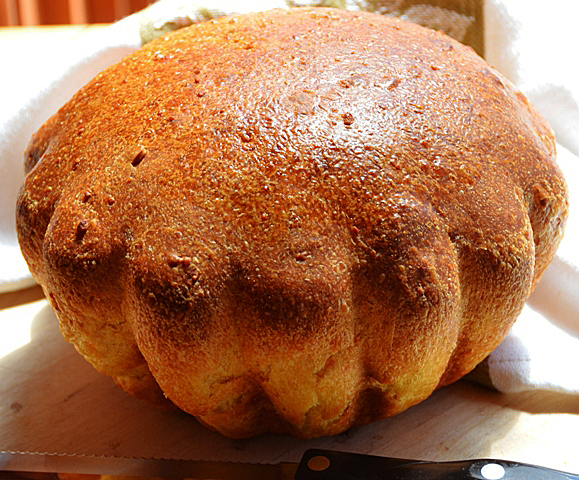
Italian cheese bread-crescia al formaggio


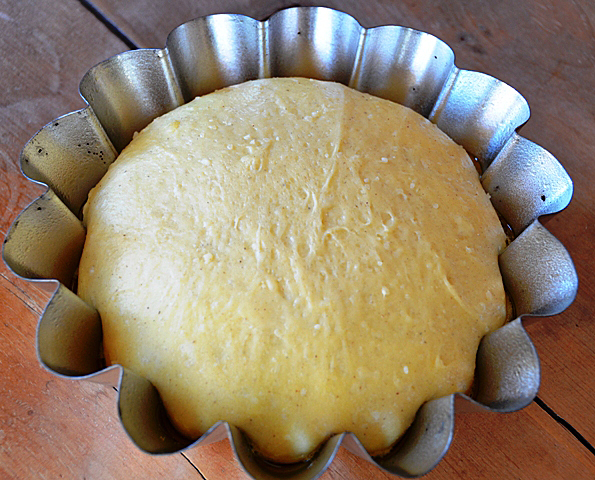
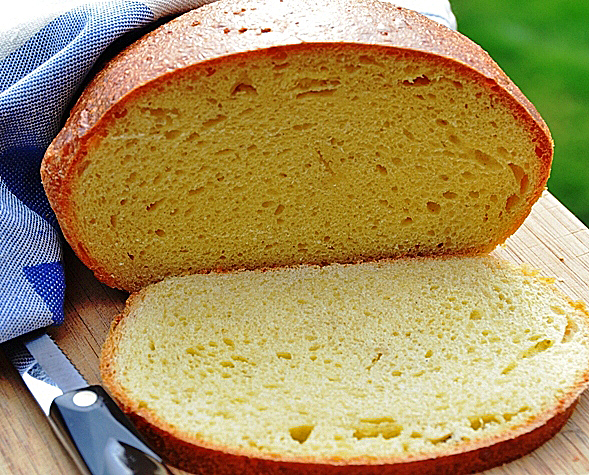
A good soup deserves a good bread and so it was with the Italian Wedding Soup. Staying with the Italian theme I found a recipe for Italian Easter Cheese Bread. Crescia al Formaggio, is a crusty bread that is fragrantly cheesy but dry in texture.  The bread originates from Umbria in the central part of Italy where it is often baked in outdoor stone ovens as part of the Easter Sunday lunch. It is a golden brioche-like dough  enriched with eggs.  If you want to be authentic it should be baked in a terra cotta pot, previously unused of course, with the drainage hole plugged up.  I chose the also traditional pandoro or star pan, but any deep round pan will do . “Crescia” refers to the way the dough domes or crests over the pan it is baked in. Leftover bread (if there is any) would make excellent grilled cheese sandwiches or even croutons. I plan on making it again in the summer for tomato sandwiches.

The bread after the second rise.

Italian Easter Cheese Bread

from the King Arthur Flour Website

Dough:

  • 2 1/2 cups unbleached all purpose flour
  • 1 1/4 t instant yeast (SAF is my favorite)
  • 3 large eggs at room temperature
  • 1 large egg, separated, reserve the white for the glaze
  • 1/4 or more lukewarm water
  • 1/4 cup (4 tablespoons) softened unsalted butter
  • 1 t salt
  • 1t freshly ground pepper
  • 1 1/4 cups freshly grated cheese, Parmesan, Romano, Asiago, use one, two or a combination of all three

Glaze:

  • reserved egg white (from above)
  • 2t cold water

Directions:

  1. Combine all ingredients except  cheese in the bowl of an electric stand mixer, beat on medium speed for 10 minutes, until the dough becomes satiny and shiny. This dough is very sticky so you will need to stop the mixer to scrape the sides and bottom of the bowl several times during the mixing process.
  2. Add the cheese, beat until well incorporated.
  3. Scrape the dough into a lightly greased bowl, cover the bowl, and set it aside to rise for 1 hour; it doesn’t rise much. Gently deflate the dough, turn it over, return it to the bowl and allow it to rise for another hour, again it does not rise very much.
  4. Oil your hands. To make the traditional round loaf, form the dough into a ball, and place it in a greased deep round pan like a souffle dish, panettone pan or the pandoro pan. The dough could also be braided and baked in a 9 x 5 loaf pan.
  5. Cover the bread lightly, plastic wrap or a clean cloth dishtowel is what I choose. Allow the loaf to rise for at least 2 hours or longer. The dough should be noticeably puffy, but not doubled in size.
  6. To bake the bread: Put your oven rack in it’s lowest position and preheat oven to 425°F
  7. Whisk reserved egg white with the water and brush the top of the loaf.
  8. Place the bread in the oven and bake for 15 minutes.
  9. Reduce the temperature to 350°F, tent with aluminum foil and bake for an additional 30-35 minutes until it is a deep golden brown and an instant read thermometer registers 190°F. The braided loaf will take less time.
  10. Remove the bread from the oven, let cool in the pan for 5 minutes. Then turn the loaf onto a cooling rack to cool completely before slicing.
  11. Store airtight at room temperature for several days. Freeze tightly wrapped for longer storage.

Makes one loaf

My personal notes: I made this bread on a day with very low humidity and I found I needed more water than the original recipe called for to achieve the sticky consistency. I also did the second rise overnight in the refrigerator before forming the bread and that worked fine.

April 14, 2012 Italian Wedding Soup

 As a former caterer I am well acquainted with Italian weddings. Lots and lots of good food and  copious amounts of  homemade treats for the very important cookie table. However,  Italian Wedding Soup was only just a good taste memory from many Easters ago. Of course, I didn’t have the old recipe (was it from Cuisine?) so I had some work to do.

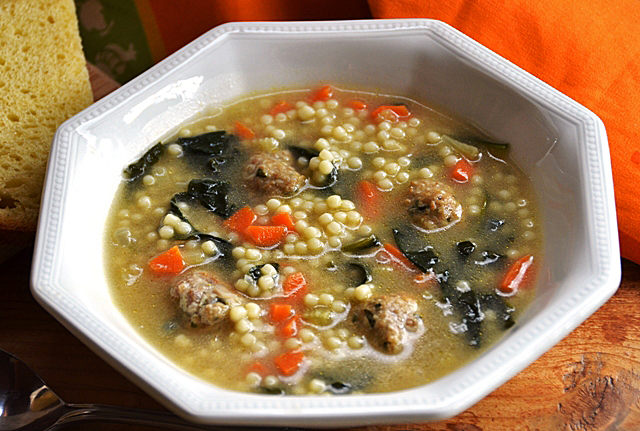
My research took me to a soup that may have originated in Spain. Minestra Maritata, a Neapolitan soup of meat and greens got its name from the way the ingredients in this soup “si sposono bene” or marry well together. Just like the feast of the seven fishes, it’s debated whether the current recipe originated in Italy, or with the Italian American community, possibly in Pittsburgh Pa. The ingredients traditionally include chicken stock, meatballs or sausage, a green leafy vegetable and a small pasta. After much comparing of recipes, I chose to use and slightly adapt the one from the Barefoot Contessa using ground turkey and turkey sausage along with a touch of lemon peel in the meatballs. Homemade stock will always make the best soup but low sodium chicken broth is a reasonable substitution. My pasta of choice was acini de pepe, translated peppercorns in English.

Italian Wedding Soup

adapted from Barefoot Contessa Back to Basics

For the meatballs

  • 3/4 lb ground turkey
  • 1/2 lb uncooked turkey sausage casings removed
  • 1/2c fresh white bread crumbs
  • 2 t minced garlic
  • it grated lemon peel
  • 3T chopped parsley leaves
  • 1/4c freshly grated Pecorino Romano
  • 1/4c freshly grated Parmesan, plus more for serving
  • 3 T heavy cream
  • 1 large egg lightly beaten
  • Kosher salt and freshly ground pepper

For the soup

  • 2T olive oil
  • 1c minced onion
  • 1c  finely diced carrots
  • 3/4c finely diced celery
  • 10c  homemade chicken stock
  • 1/2c dry white wine
  • 1c small pasta, I used acini de pepe
  • 12oz washed and trimmed baby spinach

Directions

  1. Preheat oven to 350F.
  2. For the meatballs, combine ground turkey, sausage, bread crumbs, garlic, parsley Pecorino, Parmesan, cream, egg, 1t salt, and 1/2 t pepper in a bowl and mix gently with a fork.  Drop 1 to 1 1/4 inch meatballs on a parchment lined baking sheet. I used a small scoop for this, but a teaspoon would work as well. You should get about 40 meatballs. Bake for 25 minutes, or until cooked through and browned. Mine exuded a bit of cheese but that will be taken care of when added back to the soup.  Set aside.
  3. While the meatballs are baking, heat the olive oil over medium-low heat in a large heavy-bottomed soup pot.  Add the onion, celery, and carrots and saute until softened, 5-6 minutes stirring occasionally. Add the chicken stock and wine and bring to a boil. Bring the broth back to a simmer and add the pasta. Cook pasta according to package directions. Add meatballs to the soup and simmer for 1 minute. Stir in the spinach and cook until wilted, probably less than a minute. Taste soup for salt and pepper. Ladle into soup bowls and sprinkle each serving with extra grated Parmesan.

Additional notes: My Le Creuset 5 1/2 quart French oven was perfect for making this soup.I stressed  raw uncooked turkey sausage because there are quite a few sausages that are already pre cooked.  I made the  soup  ahead to the point of adding the chicken stock and wine.Store the meatballs in a separate container. Before serving, bring the soup back to the boil, return to a simmer, then add the pasta, and cook according to package directions. Add the meatballs, simmer for 1 minute, then the spinach for another minute. Serve with additional Parmesan.

April 10, 2012 Thinnings

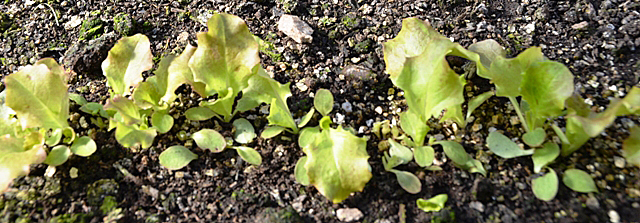
It’s time to thin these lettuce plants!

We have been vegetable gardening for over thirty years now and it has been only in the last few years that I have truly gained an appreciation for the thinning process. Tiny seeds we just planted would emerge from the ground only for me to pluck them out. I wondered, was I just wasting plants? Armed with scissors and a knife I halfheartedly would go about my task. I felt guilty that I was killing off  some of our potential yield  when in fact I was preparing for stronger  plants. I got over my fear of thinning when I saw it’s real benefits. Vegetables are healthier when they are thinned out, they need room for their roots to expand. When you sow seed in the garden you may plant it  a little heavier than the eventual five, six or more inches you need between each plant. Not every seed will germinate and some, like beet and chard seeds are actually a clump of seeds. Root crops, like beets and carrots, need room to expand or you will have misshapen, undeveloped vegetables.  It’s better to have 30 well formed carrots, rather than 60 scraggly ones that have no use at all.

Now these lettuce plants have more breathing room.

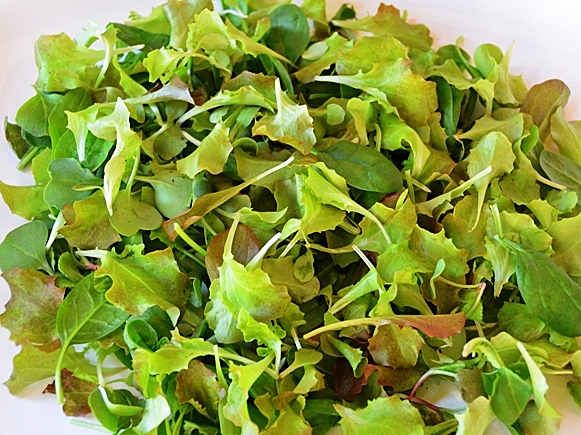
The process is quite simple, just check your seed packet to see how close the plants should eventually be and with a pair of scissors, snip away the little plants in between, leaving the healthiest plants alive. I prefer to thin periodically, getting closer to the exact spacing over a series of thinnings. For plants that should eventually be six inches apart, you may want to start with two inches, then in a week or so, four inches.  With baby greens such as arugula, turnip, radicchio and spinach,you will have a micro green salad, worthy of a fine restaurant. Here’s a flavorful dressing for your greens.

Orange Vinaigrette

  • 1/2 cup fresh orange juice
  • 2 T balsamic blood orange vinegar
  • 1T champagne vinegar
  • 2T hazelnut oil
  • 3T extra virgin olive oil
  1. Bring the orange juice to a boil in a small saucepan over medium high heat. Reduce the heat to medium and simmer until juice is reduced by one-half. Transfer syrup to a small bowl and let cool  to room temperature.
  2. Transfer cooled juice to salad dressing shaker and add vinegars and oils. Season to taste with salt and pepper.  Shake mixture until emulsified, about 20 seconds.
  3. The dressing can be stored in the refrigerator for one week. Bring to room temperature before using, shake vigorously to recombine before using.
  4. Place cleaned salad greens in a large bowl. Drizzle dressing over green and toss. Add more dressing to taste.

April 8, 2012 Leek and Fontina Focaccia

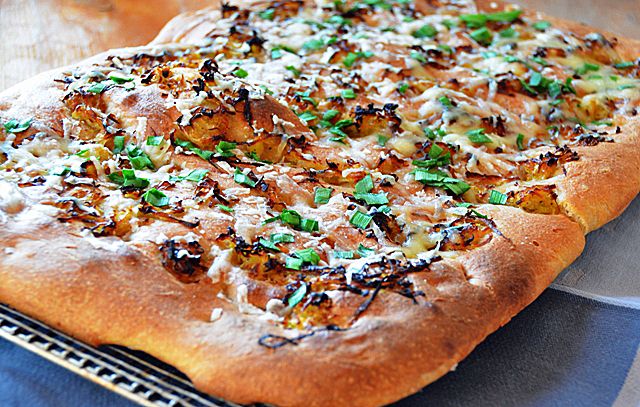
Friday night’s supper of a mussel, tomato and kale stew needed something to mop up all the delicious juices.  I decided on a focaccia with some fresh seasonal touches. Focaccia, an Italian bread can be traced back to the ancient Etruscans, who settled in northern Italy. The word focaccia derives it’s name from the word focus, which in Latin means hearth. In a time when ovens were uncommon, flat rounds of dough were cooked directly on the hearth. What makes pizza different from focaccia? Pizza is Neapolitan from southern Italy  and has a thinner crust while focaccia is thicker and from the north of Italy, Liguira.

The Bread Baker’s Apprentice was an excellent choice for my recipe. Author Peter Reinhart is a baking instructor at Johnson and Wales. Mr. Reinhart’s abilities as a teacher shine through in his books. His recipe doesn’t rely just on the toppings to make the finished product, but on a flavorful crust with “open translucent holes” as he calls them, like a ciabatta. This requires a fermented dough and I went with the quicker method (not using a starter which would have added an extra day to the process) because of time constraints. I chose a topping of sauteed leeks from the garden, fontina cheese and a sprinkling of garlic chives to make a very tasteful accompaniment to our stew.


Focaccia

Adapted from The Bread Baker’s Apprentice
Makes one 17 by 12 focaccia

  • 4 cups unbleached high gluten or bread flour
  • 1 cup  King Arthur white whole wheat flour
  • 2 t salt
  • 2 t instant yeast
  • 6T olive oil
  • 2c room temperature water
  • 1/4 to 1/2c herbed olive oil (recipe to follow)
  • 3-4 leeks, thinly sliced and sauteed until soft, not brown, to make 1 1/2 cups
  • 1 cup grated fontina cheese.
  • 1/2 c finely snipped garlic chives
  1. Stir together the flours, salt and yeast in the bowl of a stand mixer. Add oil and water mixing on low speed with the paddle attachment for 3-5 minutes, until the dough is smooth and ingredients are thoroughly mixed. Switch over to the dough hook attachment and mix on medium speed until you make a smooth sticky dough,  5-7 minutes. The dough will clear the sides of the bowl but stick to the bottom of the bowl.
  2. Sprinkle flour on your countertop in a 6″ square. Using a spatula dipped in water, transfer the sticky dough to the bed of flour. Dust liberally with flour and pat dough into a rectangle. Cover loosely with a kitchen towel and wait five minutes for the dough to relax. This is a good time to clean your very sticky mixer bowl and beaters before they are coated with hard, gluey flour.
  3. Coat your hands with flour and stretch the dough from end to end until it is twice it’s size. Fold it letter style over itself to return it to it’s rectangular shape. Lightly brush the dough with olive oil, dust with flour, and loosely cover with kitchen towel.
  4. Let rest for 30 minutes. Repeat the stretching and folding procedure in step three. After another 30 minutes, repeat the step again.
  5. Ferment the covered dough on the counter for about an hour. It will puff up but not necessarily double in size.
  6. Line a 17 by 12 baking sheet with parchment paper. Drizzle with olive oil and spread with a brush to cover the surface. With lightly oiled hands, transfer the dough from the counter to the baking sheet, maintaining the shape as much as possible. Spoon herbed oil (see accompanying recipe) to cover over the dough.
  7. Now for the fun part, with your fingertips, dimple the dough as you spread it out to cover the baking sheet. If it doesn’t reach the edges, don’t worry, the dough will expand as it proofs. Use more herbed oil as needed to coat the dough.
  8. Cover the pan with plastic wrap and refrigerate overnight.
  9. Remove the baking pan from the refrigerator several hours before baking. Drizzle additional herbed oil over the surface, it will be absorbed by the dough.
  10. At this point the sauteed leeks can be scattered over the surface of the dough. Cover the dough again with plastic wrap and proof at room temperature for several hours, until the dough doubles in size, about 1 inch in thickness.
  11. While your dough is proofing, preheat oven to 500F with the rack on the middle shelf.
  12. Place the pan in the oven. Lower oven setting to 450F and bake for 10 minutes. Rotate the pan 180 degrees and continue baking the focaccia for another 5-10 minutes, until it turns a light golden brown. At this time sprinkle the fontina on the focaccia and bake for a few more minutes, watch closely, until the cheese is melted, not burnt! At this point I scattered the garlic chives on, the melted cheese helps them to stick.
  13. Remove pan from the oven and immediately transfer the focaccia out of the pan and onto a cooling rack, I did this with two flat spatulas. If the parchment is stuck on the bottom, carefully remove it by lifting the corner of the focaccia and gently peel off.
  14. Resist temptation and allow the focaccia to cool for 20 minutes. Now you are ready to slice and serve.

Herbed Oil

While your dough is fermenting warm 1 cup olive oil to about 100F. Add 1/2 cup chopped garlic chives. Cover and allow to sit for an hour before using. I strained the oil into a clean canning jar before using. This recipe could be done with other herbs such as basil, rosemary, or a combination of herbs. Store remaining oil in the refrigerator and use within two weeks.