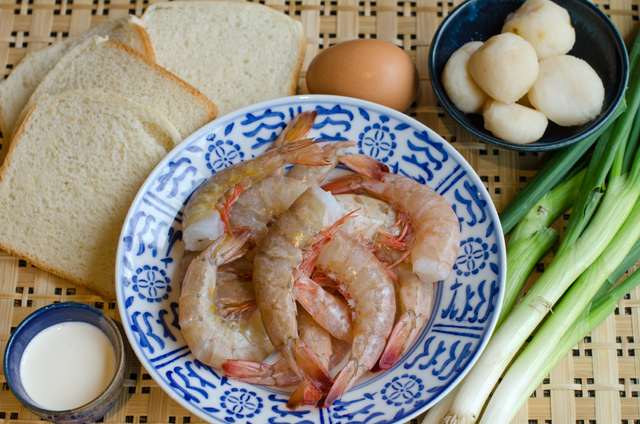
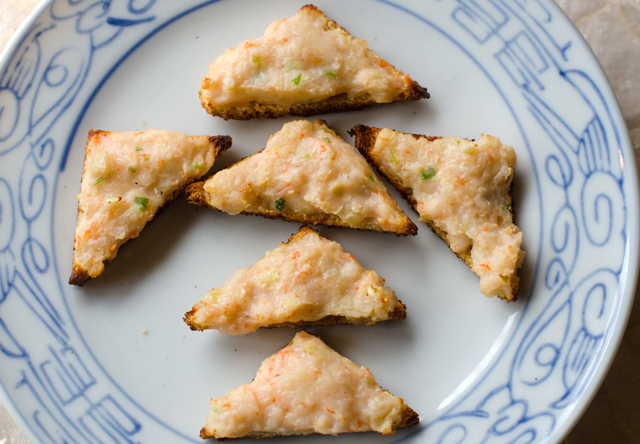
Shrimp toasts, bite-sized triangles of bread topped with shrimp paste are a popular dim sum item and a new addition to our Chinese New Year celebration. It is said the dish originated in Guangzhou (Canton) in China nearly a hundred years ago. There are others who claim it is a hybrid of a traditional Chinese shrimp recipe and bread, not native to China but introduced by foreign travelers to Hong Kong. I chose to use a recipe from Susannah Foo, a popular and highly acclaimed Philadelphia chef who eponymous restaurant closed in 2009. Shrimp toasts are often fried, this version is baked and can be made ahead and frozen, a big plus when you are serving an extensive menu. This year we celebrate the year of the rooster, which comes after a monkey year and before a dog year. Roosters are said to honest, bright, communicative and ambitious.
Baked Shrimp Toasts
Makes 3 dozen or more
Ingredients
10 to 12 slices thinly sliced white bread, crusts removed
1 large egg white
1 lb medium or large shrimp, peeled and deveined
2 T heavy cream
1 T vodka
1 t kosher salt
½ c chopped water chestnuts
2 scallions, minced
Directions
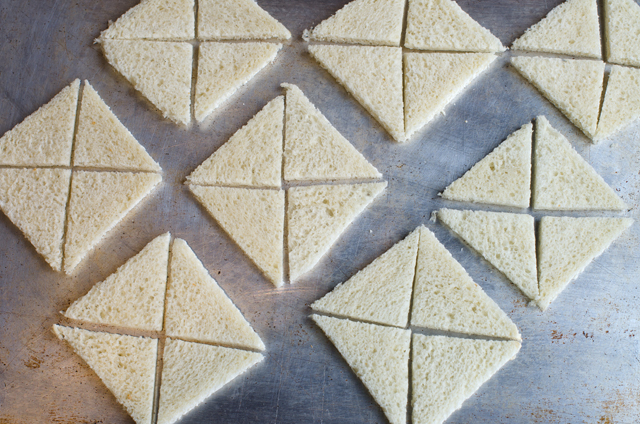
Preheat oven to 250° Cut each piece of bread into 4 triangular pieces. Place on a baking sheet and bake for about twenty minutes, until the bread is dry but not browned; leave oven on.
While the toast is drying, beat the egg white lightly. Dry the shrimp well with a paper towel and place in a food processor; puree.
Add the egg white, cream, vodka and salt. Process until just pureed. Transfer to a bowl.
Add the water chestnuts and scallions to the shrimp mixture and mix just until all the ingredients are combined.
If you are baking the shrimp toasts immediately, increase the oven temperature to 375°F and coat a baking sheet lightly with non stick spray.
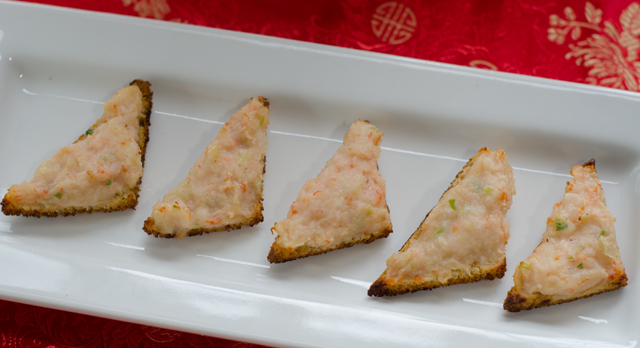
Spread 2 heaping teaspoons of the shrimp mixture on each piece of bread. Repeat with the remaining triangles.
At this point, the shrimp toast can be frozen for later use. Place the triangles on baking sheets and freeze. Once frozen, remove from the baking sheets, place in freezer bags and return to the freezer.
Bake frozen shrimp toasts directly from the freezer, about 10 minutes, the shrimp will be cooked through, all the ingredients hot and the toast is golden brown on the bottom. Triangles that were not frozen will take a little less time.
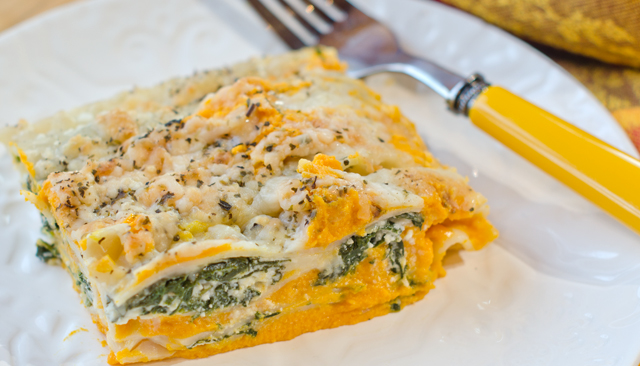
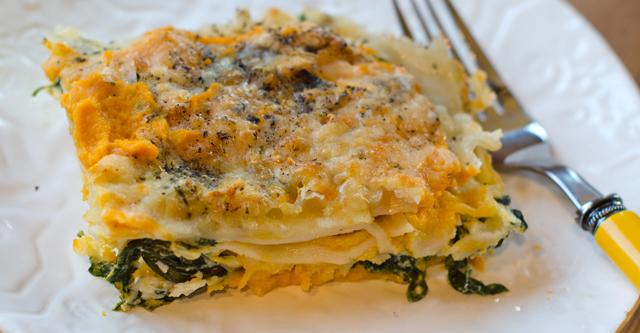
In this unique lasagna, perfect for the fall and winter months, a ricotta enriched butternut squash purée takes the place of a marinara sauce. A cheesy spinach filling complements the creamy squash for this satisfying and healthy vegetarian main dish.
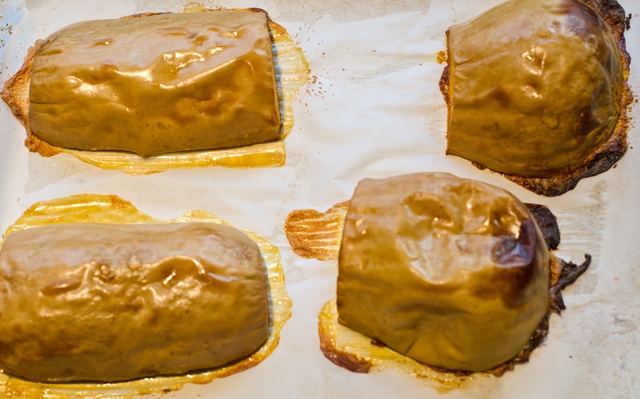
You will need a medium size butternut squash, weighing two and a half to three pounds. Cut the stem end off the butternut squash then cut the squash in half where the bulb end meets the neck. Cut both pieces in half lengthwise. scoop the seeds and fiber out of the bulb end, save seeds for later use. I rinse the seeds off and dry them between layers of paper towels. Toss with a little bit of olive oil and sprinkle with salt. Bake in a 375°F oven until they pop and become toasty brown. They are great for topping salads and for snacking.
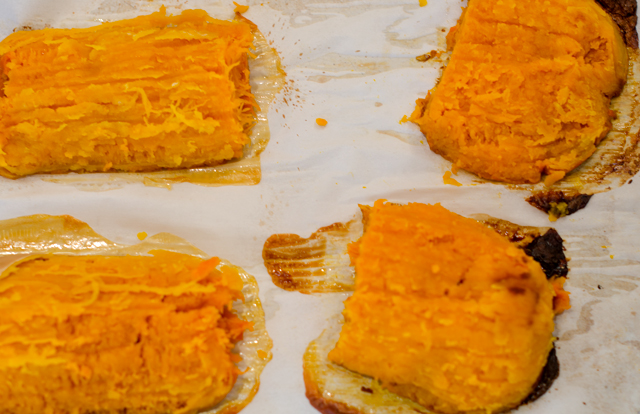
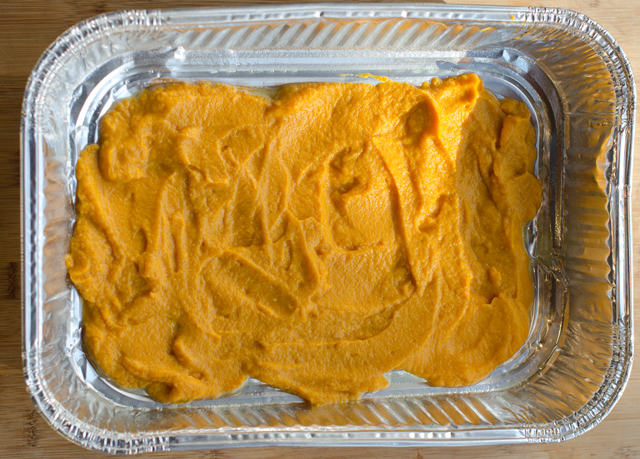
Cover a large baking tray with parchment paper. Brush the squash pieces lightly with olive oil and place the four sections of squash cut side down on the baking sheet. Bake in a 375° oven for about 50 to 55 minutes, until the squash pierces easily with the tip of the knife. Let cool for 10 minutes, the skin should come off easily. Place the squash pieces in the bowl of a food processor fitted with the metal blade. If necessary, add a little additional liquid, purée until smooth, you will have about 2½ cups. Add 1 cup of ricotta cheese and purée again, season to taste with salt and pepper and a little freshly grated nutmeg.
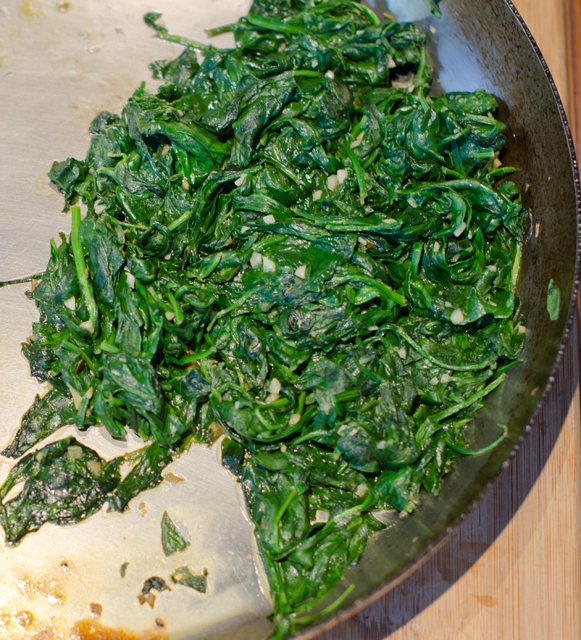
Place the spinach in a large bowl. Lightly rinse the spinach and toss in the bowl. The moisture will help wilt the spinach quickly. I used a 1 pound container of organic triple washed spinach. Finely chop two garlic cloves. Heat a large sauté pan over high heat and add the olive oil and swirl it around. Saute the garlic for a few minutes then add the spinach by the handfuls, adding more each time as it wilts down. After squeezing out any additional liquid, the end result will be one generous cup of spinach.
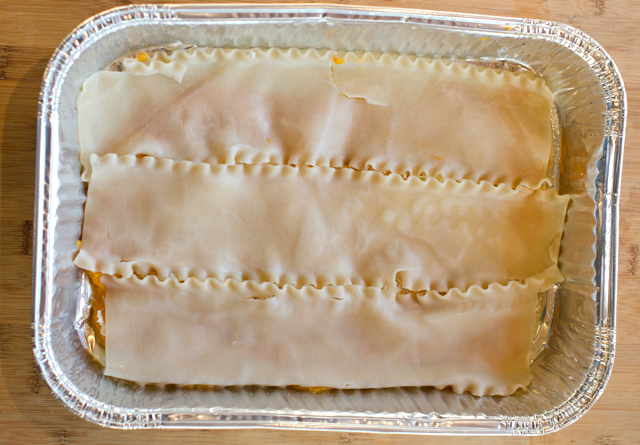
You can make this version with regular lasagna noodles or if you are following a gluten-free diet, I would recommend brown rice pasta noodles from Tinkyada, easily found in large grocery stores. They are actually good and have a nutty brown rice flavor. Follow package instructions with regular noodles, I would suggest cooking brown rice noodles for about 10 minutes, no longer. Drain them in a colander, rinse with cold water and dry on parchment lined baking sheets. I haven’t tried this recipe with no bake noodles, my suggestion would be just be certain that the ingredients in your lasagna are moist enough to cook the noodles properly. There are 14 noodles in the package of brown rice noodles, I cook them all in case of breakage. You can always make a lasagna roll up with any leftover purée and cheese.
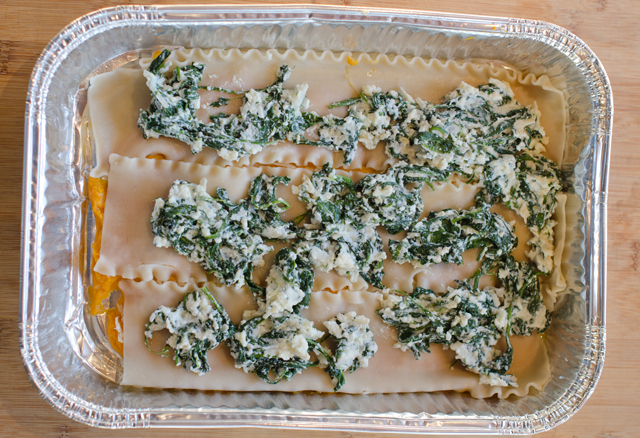
In a medium bowl mix the well-drained garlic spinach with one and a quarter cups of ricotta cheese and a cup of mozzarella cheese or a cheese blend that you prefer. Season to taste with salt and freshly ground pepper.
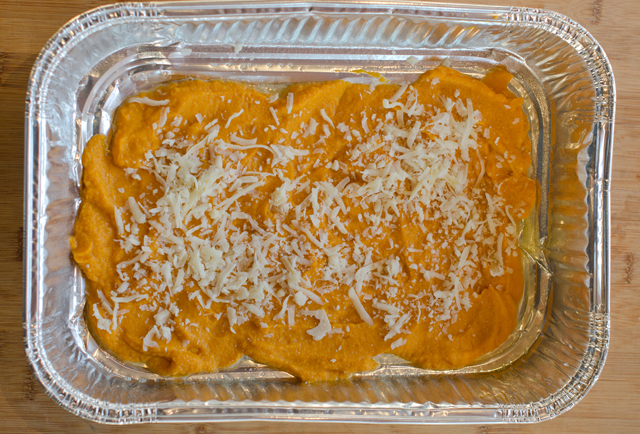
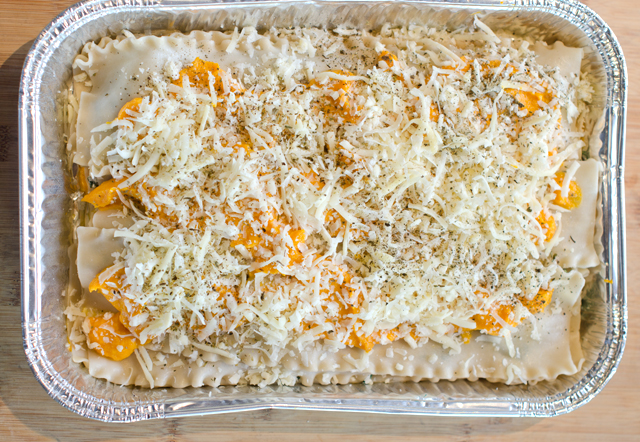
To assemble the lasagna, spray the bottom of your baking tray with nonstick spray.I used a disposable pan with dimensions of 11 x 8 x 2 . Spread one-third of the butternut squash mixture over the bottom of the tray. Top with three lasagna noodles. Dollop one half of the spinach cheese mixture over the noodles. Continue to layer and finish with the remaining butternut squash, sprinkle with a generous amount of cheese, and a sprinkle of dried basil and oregano. Cover with aluminum foil and bake for a half hour. After the half hour take off the foil reattach any cheese that has attached to the foil and bake uncovered for another 10 to 15 minutes.
Since lasagna is a time-consuming dish you could do this in stages, make the butternut squash puree one day, the spinach filling the next and assemble and cook on the third day. You could substitute frozen spinach rather than cooking down your own. Possible additions to the dish include sautéed onions, sage leaves, even toasted walnuts. Serve with a crisp salad of arugula, fennel and apples. As it is with all lasagna, it’s even better the next day.
One of our very own butternut squash.After baking, the skin pops off easily.Skin off, ready to puree.A large container of spinach cooks down to about a cup.First layer of butternut squash ricotta puree .Just a sprinkling of mozzarella cheese on top.Lasagna noodles next, these are the brown rice noodles.Next is the spinach and ricotta filling.Repeat layers and finish with squash puree, a generous sprinkling of cheese, dried basil and oregano.Out of the oven..
Delicious!!
Butternut Squash and Spinach Lasagna
Serves 6-8
Ingredients for butternut squash filling
1-3 lb butternut squash
Olive oil
1¼ c regular or low-fat ricotta cheese
½ t salt
¼ t freshly ground nutmeg
Ingredients for spinach layer
1 lb fresh spinach
1 t olive oil
2 t minced garlic
1 c regular or low-fat ricotta cheese
1¼ c mozzarella cheese
Kosher salt and freshly ground pepper to taste
To assemble the lasagna
1 lb lasagna noodles (regular or gluten-free)
Shredded mozzarella cheese
Shredded Parmesan cheese
Dried basil and oregano
Directions for making the squash puree
Preheat oven to 375°F.
Line a large baking sheet with parchment paper and spray lightly with nonstick spray.
With a sharp knife cut the squash in half where the neck meets the bulbous end. Cut both of these pieces in half lengthwise. Scoop out the seeds and reserve for toasting if desired.
Brush the cut sides lightly with olive oil and place the four squash pieces on a baking sheet cut side down. Bake in preheated oven 25 minutes, rotate and bake another 25 minutes. The squash should be easily pierced with the tip of a knife.
Cool the squash for about ten minutes, until it can be handled. Scoop out the flesh and place in the bowl of a food processor fitted with the metal blade. Puree squash until smooth. Add the ricotta cheese, nutmeg and salt and puree again. Taste and adjust seasonings. Add a little more ricotta if necessary, the puree should have the consistency of a thick marinara sauce. Set puree aside for the assembly. Leave oven on at 375° if you will be finishing the lasagna.
Directions for the spinach filling
Place the fresh spinach in a large colander that is set inside a large bowl. Sprinkle the spinach lightly with water and toss spinach lightly.
Heat olive oil in a 12″ saute pan. Add garlic and saute until light golden brown. Add the spinach by the handful, adding more as it wilts down. After draining the spinach of excess liquid, you will have a generous cup.
In a medium bowl combine spinach and garlic along with ricotta, mozzarella, salt and freshly ground pepper. Taste and adjust seasonings.
Directions for assembling the lasagna
Bring a large pot of lightly salted water to a boil over high heat. Add lasagna noodles and cook according to package directions. Stir noodles occasionally to prevent them from sticking. Drain well and rinse with cool water.
To assemble the lasagna, spray the bottom of the baking dish with nonstick spray. I used a disposable tray with dimensions of 8″ x 11″ x 2″.
Spread one-third of the butternut squash puree over the bottom of the pan. Sprinkle lightly with mozzarella cheese. Top with three lasagna noodles. Dollop one half of the spinach cheese mixture over the noodles, sprinkle lightly with mozzarella cheese. Top this layer with the second layer of noodles.
Spread your second layer of butternut squash over the noodles. Sprinkle with mozzarella cheese, then top with the third layer of lasagna noodles.
Top this with the remaining spinach cheese mixture and sprinkle with mozzarella cheese.
Top with the remaining butternut squash puree and spread evenly over the noodles. Sprinkle this layer generously with shredded mozzarella and Parmesan cheese. Sprinkle lightly with dried basil and oregano.
Cover the baking dish tightly with foil and bake for 30 minutes. After 30 minutes remove the foil, reattach any cheese clinging to the foil and continue to bake uncover for another 10 to 15 minutes. You can turn the broiler on for a few minutes if you want to brown the cheese.
One of the highlights of last summer was our trip to the Food and Wine Classic in Aspen Colorado. It is touted as America’s premier culinary event, and certainly lived up to those expectations. We enjoyed three days of cooking demonstrations, wine tastings and best of all, the grand tasting pavilion. It was there that we, and 5000 other fanatical foodies sipped, savored and sampled our way around the massive white tents. One area we were certain to stop at during each grand tasting was to sample the offerings of Food and Wine magazines best new chefs. Everything we tried was imaginative and delicious as well. Not coincidentally, the July issue of Food and Wine magazine offered recipes from each of these up and coming chefs.
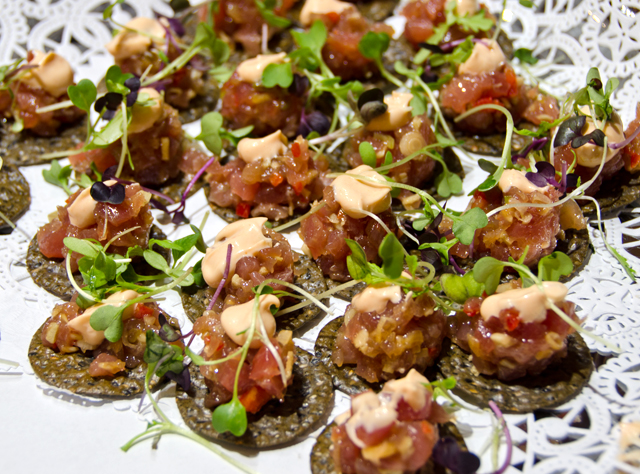
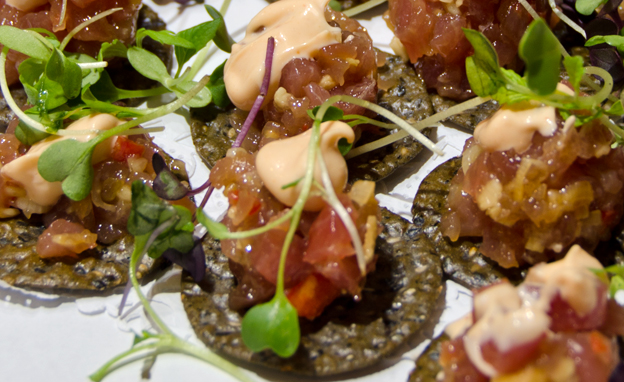
With memories of the wonderful small plates we enjoyed at the classic, it was time to try some of their dishes for ourselves. This summer I tried the rather ambitious, summer squash with lemon curd and citrus vinaigrette from chef Brad Kilgore. Joe was more interested in the Tuna Poke on Nori Crackers. This very simple version is from Ravi Kapur, chef at Liholiho Yacht Club, a San Francisco restaurant with Hawaiian, Indian and Chinese influences.
If you are not familiar with it, poke, pronounced POH-keh is a raw fish salad. Poke, means chop or chunk, which refers to the bite sized pieces the fish is cut into. It is commonplace in Hawaii, found everywhere from the deli departments of grocery stores to fine dining establishments.
The first time we tried it just for ourselves and the poke passed our taste test with flying colors. The nori crackers are a nice “cheffy” touch but speaking on behalf of the cleanup crew, messy and not necessary for the home cook. For this recipe, make the poke with sushi grade ahi tuna from the most reputable vendor you can find. The spicy mayo has only three ingredients, tamari, sriracha and mayo. So it’s very simple, finely chopped tuna, scallion, ginger, jalapeno, tamari and dark sesame oil combined in a bowl and seasoned with salt. Spoon the poke on black sesame crackers, I like the ones from Edward and Sons, easily found in large supermarkets. Dollop or pipe some of the spicy mayo on top. Garnish with some Asian microgreens and a few toasted sesame seeds. We have served it at two parties so far this year, both to rave reviews.
Tuna Poke
Serves 6-8
Ingredients for the Spicy Mayo
¼ c good quality mayonnaise
¼ t tamari
1 t sriracha (or to taste)
Ingredients for the Poke
12-oz sushi grade tuna cut into ¼-inch dice
4 t minced scallions
2 t minced peeled fresh ginger
2 t seeded and minced jalapeno
1 t tamari
½ t toasted sesame oil
Kosher salt
Black sesame crackers
Asian microgreens and toasted sesame seeds for garnish
Directions for the Spicy Mayo
In a small bowl whisk all the ingredients together until smooth.
Directions for the Poke
In a large bowl, fold all the ingredients except the garnishes together; season with salt.
Spoon the poke on the black sesame crackers and dollop with some of the spicy mayo. Garnish with sprouts and sesame seeds.
There’s a cracker I love that I have to buy whenever I stop in at Whole Foods, Raincoast Crisps. Created by Parisian trained chef Lesley Stowe, she started her own cooking school and catering company in Canada’s raincoast, Vancouver, over 25 years ago. The crisps originated from a bran bread that she served in her catering business with smoked salmon. Always looking for new and original ideas, on one occasion she sliced the bread and dried it out. It was met with approval from her kitchen staff so she decided to “pump it up” with additional ingredients. That was the beginning of the Raincoast Crisp.
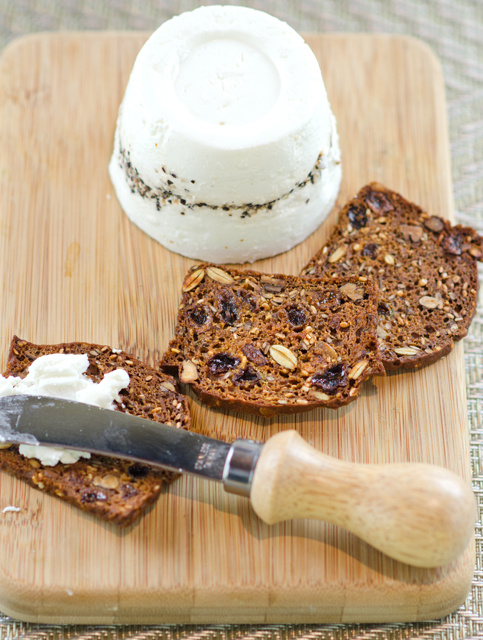
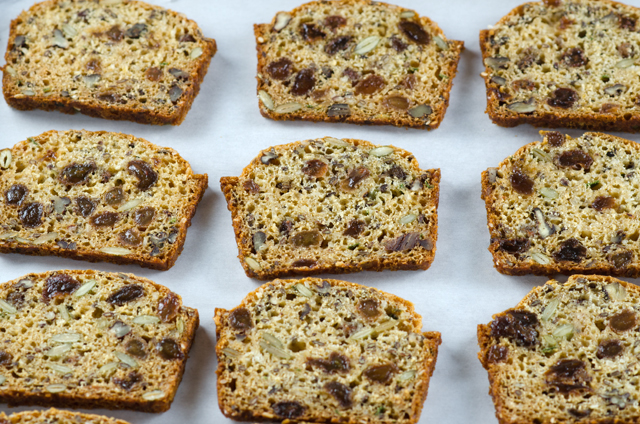
The crisps are toasty and nutty, loaded with ingredients like pumpkin seeds, raisins, and pecans. They are delicious to nibble on their own or maybe just a spread of soft cheese or your favorite preserve. One never tastes like enough and it’s easy to justify munching a box full because they are so good. So what’s the problem? At 7.99 and up per 6 ounce box they are a pricey indulgence. So some intrepid bloggers came along and cracked the code and a rather similar recipe is available to any one who is able to whip up a quick bread.
The DIY recipe is very simple to make. Stir together the ingredients and bake in mini loaf pans. Alternately you could bake them in two square cake pans for longer skinny slices. Be sure to thoroughly cool the loaves after baking before proceeding to slice. You could give them a short stay in the freezer to firm them up or just wait till the next day to proceed with the recipe.
The next step is to slice the crackers as thinly as possible. Most of recipes I read said that it makes about 8 dozen crackers. That meant I needed to make 24 slices from each of the 4 loaves. I came fairly close, or maybe that had something to do with slices I had to “test” before baking! I used my thin blade serrated Cutco knife to make the thinnest and most even slices. I experimented with a food slicer which was ok, it’s important to maintain even pressure to keep the slices neat.
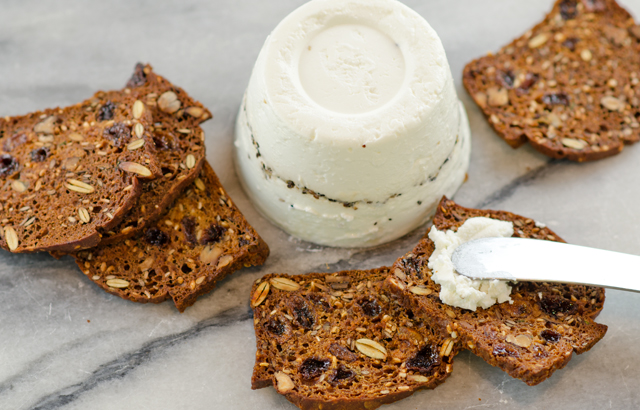
Bake the slices like super thin biscotti until they are crisp and golden. Now that I know the proportions of the recipe I am looking forward to customizing it. Different flours, dried fruits, spices and nuts, the possibilities are endless. I served mine with a delicious soft goat cheese from Giggling Goat Dairy, a new vendor at my local farmers market in Wrightstown. The goat dairy is located in Dublin Pa and they make and sell fresh French-style goat cheese known as chèvre, a traditional style Feta as well as spreads and dips. I’m certain I will be frequenting their stand quite often this summer.
Raincoast Crisps with Raisins and Rosemary
Makes about 8 dozen
Ingredients
2 c flour
2t baking soda
1t sea salt
2c buttermilk
1/4c brown sugar
1/4c honey or maple syrup
1c raisins
1/2c lightly chopped pecans
1/2c roasted unsalted pumpkin seeds
1/4c sesame seeds
1/4c flax seeds
1T chopped fresh rosemary
Directions
Preheat oven to 350°F.
Stir together flour, salt and baking powder in a large bowl. Add the buttermilk, brown sugar and honey and stir to combine. Add the raisins, nuts, pumpkin seeds, sesame seeds. flax seed and rosemary and stir until all the ingredients are thoroughly combined.
Pour the batter into 4 mini loaf pans that have been sprayed with nonstick spray. Bake loaves for 30 to 35 minutes, rotating halfway during baking time. The loaves should be golden and springy to the touch. Remove loaves from the pans and cool on a wire rack.
Allow the loaves to cool completely, then freeze for about an hour. This will allow you to slice the loaves as thinly as possible. I used a serrated edge knife for the neatest cut.
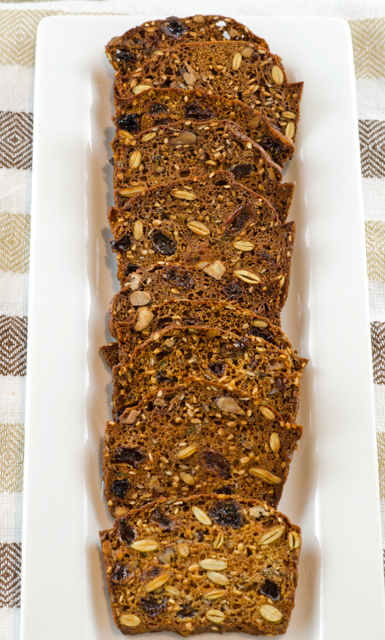
Place the slices on baking sheets that have been lined with parchment paper. Bake the slices at 300°F for about 15 minutes, then flip them over and bake for another 10 minutes until crisp. Cool completely and store in an airtight container.
Slices on a parchment lined sheet ready for their second bake.Delicious on their own or with a spread of goat cheese, this is the fresh garlic peppercorn from Giggling Goat Dairy.
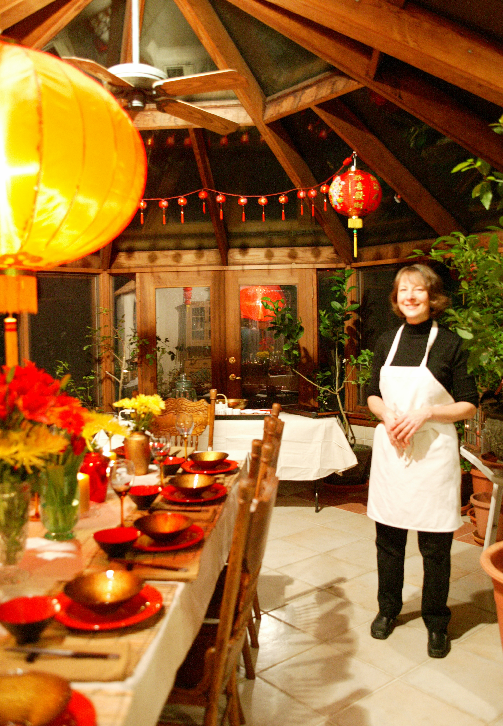
I shouldn’t be home, I should be landing in sunny Florida about now but a snowstorm changed our plans. Since Chinese New Year was this past week, I thought I would share some pictures from our celebrations of previous years.
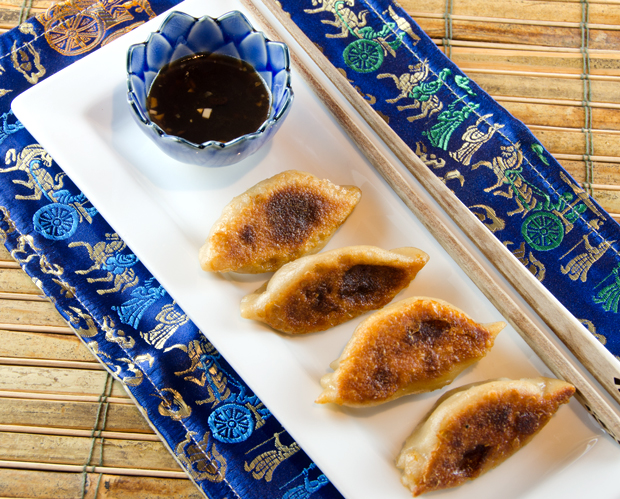
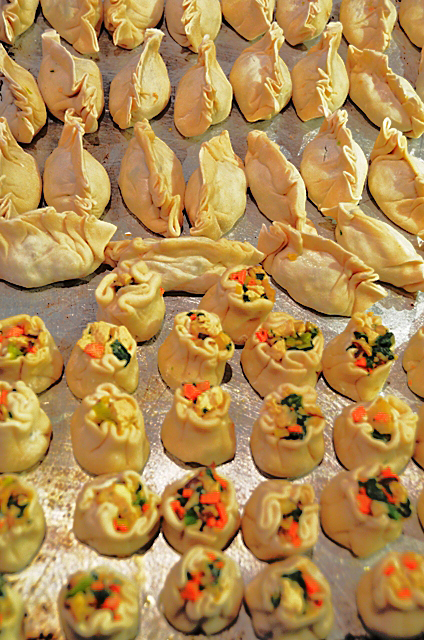
I make spicy gingerbread cookies with the appropriate cutter for each year. The dragon (2012) is said to be vital, confident and gifted.A Chinese soup dumpling. Making and sharing dumplings is a New Year’s tradition that fosters family togetherness and cooperation of spirit. Since dumplings are shaped like gold ingots, eating these “golden nuggets” confers prosperity for the New Year.Potstickers and dipping sauce.
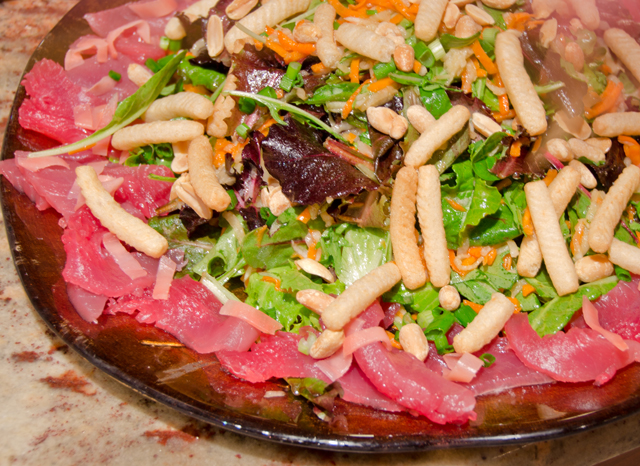
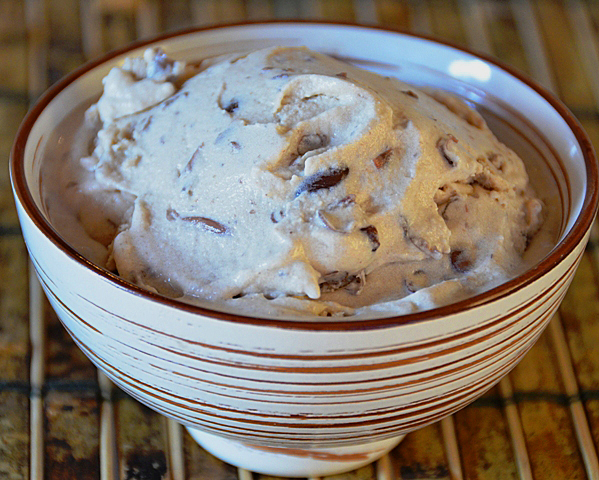
Yu Sheng, the New Year’s salad that probably originated in Singapore. It is served on the seventh day of the celebration and brings diners prosperity and good fortune.Combining the East with the West, adzuki bean ice cream.
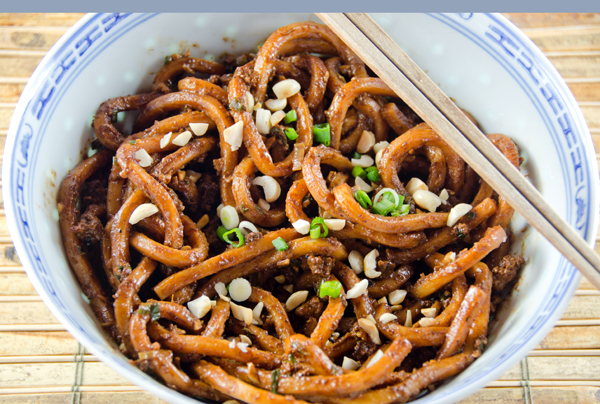
Noodles symbolize longevity. Spicy Sichuan Noodles feature the unique flavor of Sichuan peppercorns, banned in the United States until a few years ago.Ingredients ready for the Chinese Hot Pot, everyone gets in on the cooking with this one.
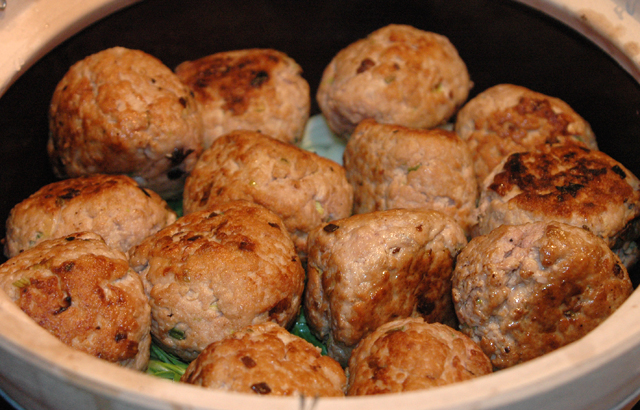
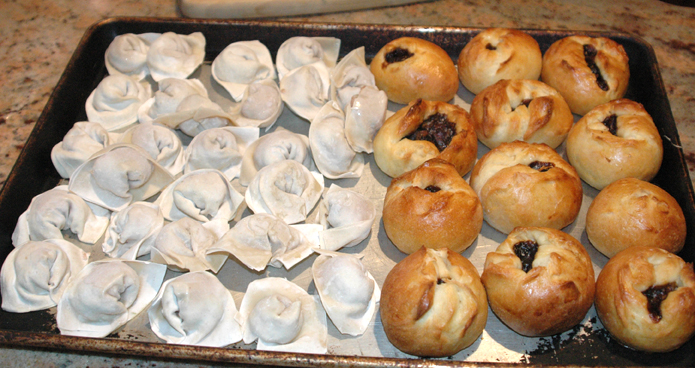
Lion’s Head meatballs in a clay pot cooker.Wontons and pork buns.
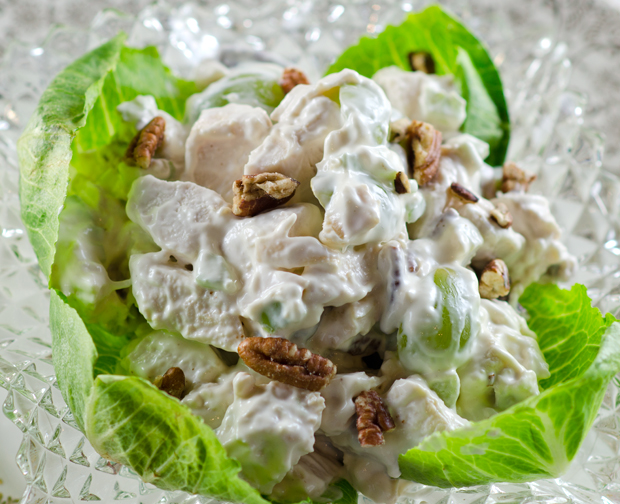
In almost 25 years as a caterer, Chicken salad with grapes and pecans was a perennial favorite. Whether served in pate a choux puffs on a buffet, on a croissant as a luncheon favorite or in daintily cut tea sandwiches this salad has always been a taste combination that everyone enjoys.
I have no claims for inventing this version of chicken salad, though I have never used a recipe and tweaked it over the years to make it my own. The most important part of the recipe is making sure that the cooked chicken is still moist and juicy. All the mayonnaise in the world won’t cover up dried out chicken breasts. Since I prefer using all white meat, split, bone-in chicken breasts from Bell and Evans are my usual choice but have on occasion used boneless skinless chicken breasts. Just remember the boneless breasts will take less time to cook.
An instant read thermometer is essential here, you are looking for an internal temperature of 160°F in the thickest part of the breast. I like to cook my chicken in convection mode on a wire rack above a parchment or foil lined baking sheet to allow air to circulate so the chicken cooks evenly. Allow the chicken to fully cool before shredding, remembering to shred with the grain. Pressed for time? Use the meat from an already cooked supermarket rotisserie chicken.
About a cup of finely diced celery has always seemed to be the right proportion to the 5 to 6 cups of chicken. Cutting grapes in half makes for easier eating. It’s like finding a whole cherry tomato in your salad. Do you risk having it burst all over you and the people seated near by when you bite into it or do you stab it with your steely (or plastic) knife to avoid embarrassment? Red or green grapes? Whatever variety looks better the day you are making the salad. Taste a grape before you buy,( trust me, no one is watching), to be sure they are sweet enough.Homemade mayonnaise is always a nice touch but Hellmann’s has always been fine with me. I use just enough mayonnaise to lightly coat all ingredients. If I have the luxury of time, I refrigerate the salad overnight and add any additional mayonnnaise and the pecans at the last minute to maximize crunch.
Chopped nuts are a less expensive way to buy them, usually in a medium chop which is perfect for the salad. If you choose to toast the nuts, preheat oven to 350°F and spread nuts evenly on a shallow baking sheet. Toast 5-7 minutes, checking halfway through cooking time to give the sheet a little shake and rotate. Walnuts, almonds and cashews are all good substitutes for the pecans. You could also add thinly sliced apple but that would be something I would add right before serving the salad.
I enjoy serving this chicken salad, as I did at a friend’s daughter’s wedding shower, on a bed of bibb lettuce. A basket of freshly baked rolls accompanied the salad for those who wanted to make a sandwich. I love the combination of flavors in this salad, tender juicy chicken, sweet-tart grapes, crunchy pecan and creamy mayonnaise. They make a chicken salad that is hard to beat.
Chicken Salad with Grapes and Pecans
Makes 6 cups
Ingredients
3-4 Split chicken breasts, bone in and skin on
Olive oil
Salt and pepper
1c celery in small dice
1c pecan pieces
1c seedless grapes (red or green) sliced in half
1 to 1 1/4c homemade or Hellmann’s mayonnaise
Directions
Preheat oven to 350°F. Line a baking sheet with parchment paper or foil and place a wire rack on the sheet. Place chicken on the wire rack, spacing evenly to allow air to circulate. Brush chicken breasts lightly with olive oil and season with salt and pepper.
Roast chicken until an instant read thermometer inserted into the thickest part of the breast registers 160°F. If the breasts you are cooking are different in size, start checking the smallest at about the half hour mark.
Remove chicken from oven and let sit until cool enough to handle. Remove the skin and pick the chicken off the bones. Tear or chop chicken into 3/4 inch pieces. You will have 4-5 cups of chicken.
In a large bowl, combine chicken, chopped celery and grapes. Add mayonnaise, starting with about 2/3 cup and toss lightly. There should be enough mayonnaise to coat everything lightly.
Add pecans and toss ingredients again, adding more mayonnaise as needed. Taste and adjust seasonings with salt and pepper.
With the ingredients needed for the Korean barbecue now in hand it was time to start prepping for Sunday’s feast. One of the most important things I learned from my catering days is that it is good to have as much ready ahead of time as possible. This allows adequate time for dishes that require last minute preparation and eliminates a last minute rush.
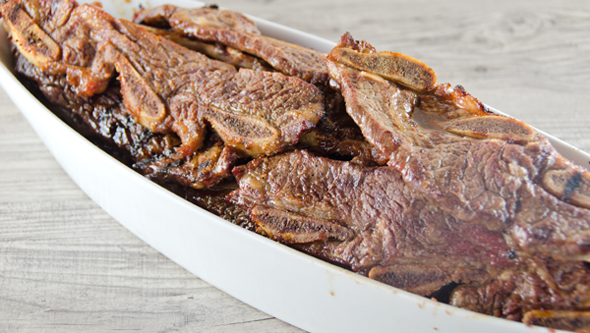
First on my list was to make the marinades for the beef and the chicken. Kalbi or Galbi means rib in Korean and is one of the most popular Korean dishes in America. Kalbi are beef short ribs that are cut flanken style. Flanken means the ribs are not cut along the bone, but across the bone leaving 2-3 rib cross sections in each piece. The marinade of soy, sugar, apple juice, sesame oil, ginger and garlic gives the traditional sweetness with just a hint of spice to the meat. Korean barbecued chicken or dak gogi called for boneless skinless chicken thighs cut into strips. Since Joe prefers to cook chicken on the bone we used bone-in chicken thighs. In this recipe I needed to substitute the mul yut (malt syrup) with corn syrup which was acceptable. The chicken recipe called for an essential Korean ingredient, gochugaru, which are red chili flakes. I was only able to find powdered red pepper so I turned to my pantry and made flakes from my own dried Kung Pao peppers. Now if I would only remember not to inhale the fumes when I open the food processor bowl. Wicked stuff! The marinade ingredients for the chicken were similar to the beef, the big difference were the chili flakes. Both the beef and the chicken would be served with ssamjang, translated “wrapped sauce”. Pieces of chicken or beef with a little plain white rice and the ssamjang are wrapped in lettuce leaves for a delicious bite also known as ssams. Ssamjang is made with dwenjang, a fermented bean paste and gochujang, the red chile paste I mentioned in the previous post. Roasted sesame seeds and sesame oil add texture and an inviting aroma to this sauce.
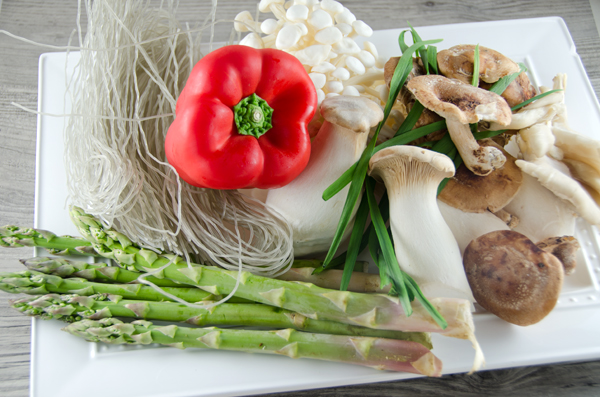
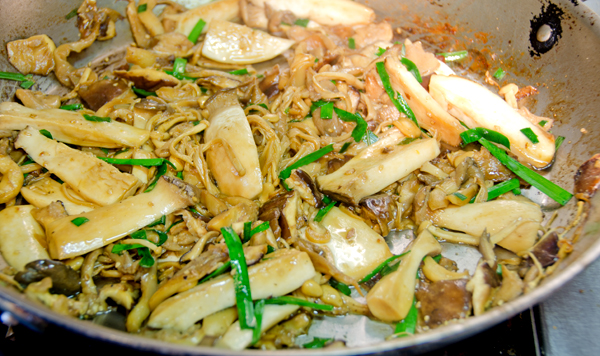
The banchan are the side dishes served with a Korean meal. For the lightly pickled radish dish I substituted Japanese Hakurei turnips from our garden for daikon used in the original recipe. The turnips were pickled with rice vinegar, sugar and garlic with a little bit of chili flakes for some heat. Korean spinach is a room temperature dish seasoned with soy, garlic and both toasted sesame oil and white sesame seeds. I’m seeing a pattern here. I added japchae, a noodle salad to the banchan that was not part of the original menu. Japchae is made with sweet potato noodles or dangmyeon. I expected the noodles would be orange or yellow in color but the dangmyeon were a translucent gray. The noodles were rehydrated in hot water then stir fried with soy, sugar, garlic and sesame oil and tossed with asparagus and a variety of mushrooms.
The dish that surprised me the most was the kimchi (alternately spelled kimchee). I read that the average Korean consumes 40 pounds of kimchi a year and it is eaten with just about every meal. I never thought that I would make kimchi, I have always found the pungent aroma of fermented cabbage and garlic to be a bit off putting. I learned there are countless variations of kimchi, not everyone using cabbage. This version uses cool, crisp Kirby cucumbers and takes only one day, not the 3 plus days traditional kimchi takes to make. The cucumbers are salted to bring out excess liquid and seasoned with garlic, chiles and scallions. The cucumber kimchi sits at room temperature overnight to ferment. Very pungent salted shrimp, saeujeot, bring umami to the finished dish. I am pleased to say that we had no left over kimchi at the end of our meal. Our meal finished with Kathy’s delicious sweet potato doughnuts. The Korean experience was enjoyed by all.
I used Kung Pao hot pepper flakes to make my own version of gochugaru.
Ingredients for the mushroom asparagus japchae.
Ingredients for the cucumber kimchi.
Adding mushrooms and asparagus to the sweet potato noodles.
Mushroom asparagus japchae garnished with white sesame seeds.
An article in Fine Cooking on Korean barbecue inspired our most recent Sunday cookout. I admit I knew practically nothing about Korean food in spite of the fact that the two Asian markets I frequent are both Korean. When I shop at them I am usually buying ingredients to cook other Asian cuisines. When I am cooking Thai I am looking for my favorite brand of coconut milk, authentic curry pastes, fish sauce and green papayas. If it’s Japanese I’m looking for, then I head to the yuzu juice, kombu and nori. Our Chinese new year feast is the most challenging. Then I will be looking for sweet and spicy Chinese sausages, preserved vegetable, dried cole (that was a tough one..) and different varieties of soy sauces and pastes.
The Assi market is in North Wales. It is the larger of the two with an extensive produce section, seafood, meat (your pork is always ground fresh…) , rice cookers, pots, pans and a full food court. Until recently, I found it difficult to find help due to language barriers but this year an enterprising assistant manager actually helped me find an unusual ingredient. If you go there on the weekend, entire families from grandparents to toddlers shop together. It’s always an adventure and we usually buy twice as much as what we set out to purchase. There’s still a basil seed with honey flavored beverage in the fridge that caught Joe’s eye on our last trip.
H Mart is a bit closer and quite a bit smaller. It occupies space in a Levittown strip mall that also houses the Italian Peoples Bakery. The music is always interesting, I always seem to pay attention to supermarket music. Some weeks at the H Mart it’s obscure fifties pop, other weeks, Christian praise music in Korean and English. On my most recent trip, I enjoyed tunes from diverse artists ranging from U2 to Taylor Swift.There is also a large selection of Hispanic ingredients to service the growing population in this area. I can also count on it being cold, I am always sorry if I didn’t bring a sweater even on the hottest day in the summer. It’s a store where squid balls (frozen for your convenience) are just an aisle away from Happy Boy margarine.
For my first expedition to purchase Korean ingredients for our barbecue I wrote out a very detailed list. When I got to the store I thought it best just to take the magazine in the store with me in case I needed to refer to the pictures. I knew they had the flanken style beef ribs I needed for the kalbi. A bit more costly than most of the meat they sell, the ribs looked very red and pristine, well worth the price. Roasted sesame seed, another ingredient in a few of the recipes, is a staple in our house. I was not familiar with the Korean pastes. Dwenjang is a paste made from boiled and stone ground soybeans. It’s a stronger version of Japanese miso. I got a small container of that. Gochujang, a favorite of the “Chopped” basket, was an ingredient I have wanted to try for awhile. It’s made of glutinous rice powder, fermented soybeans and red peppers. It’s spicy, but not too spicy, a bit sweet and pungent from the fermented soybeans. I picked up the same size tub the dwenjang came in. Mul yut or malt syrup was a no-show. There was a space on the shelf for it, but it was empty. The light corn syrup would have to fill in. Now for the hard part, looking for the saeujeot or salted shrimp. I knew that fish sauce would be acceptable but I was going for authenticity. I think I went down some aisles twice with no luck. So I took a small detour to the back of the produce section to find the soy sprouts where I spotted the salted shrimp near the refrigerated kimchi. Another ingredient procured!!
I took my bounty to the checkout register, that was manned (womanned) by two Korean ladies. The one approvingly nodded to the other. She picked up the sauejeot and said “for Kimchi”. I showed her the magazine article and they both smiled. The next part of this adventure would be going home and cooking with these new ingredients.
Pictured starting from top left, Korean spinach, Korean barbecued chicken (dak gogi), bok choy, lettuce for wrapping, onions, mushroom asparagus japchae, cucumber kimchee, white rice.
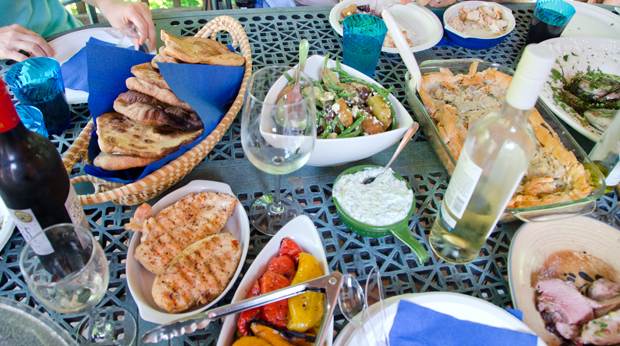
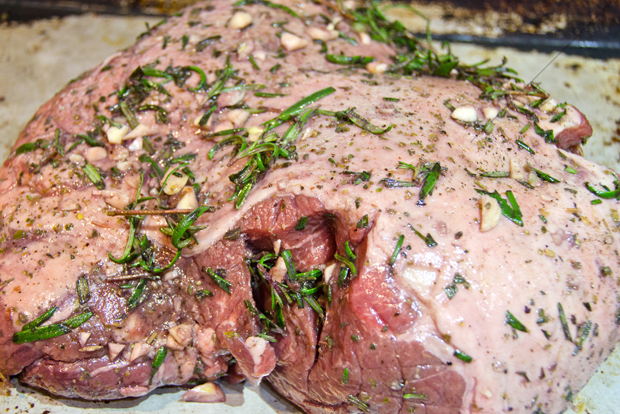
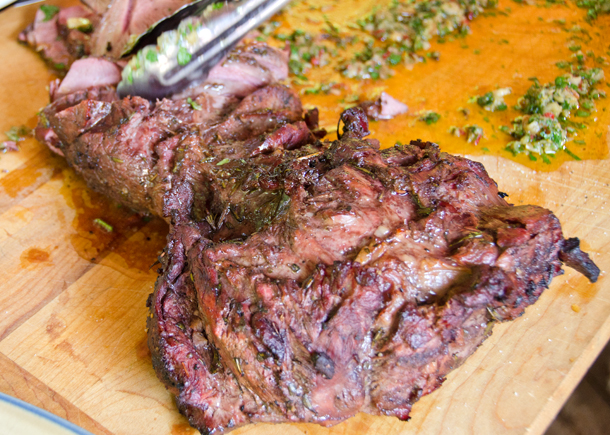
To make our Sunday cookouts more interesting this summer we have decided to go in an international direction. Since we wanted to serve boneless leg of lamb, Greek cuisine seemed like a natural. Joe applied the “charred and scruffed” approach to the lamb, making a board dressing with roasted garlic, Greek olive oil and fresh Italian (oops) parsley, salt and pepper.
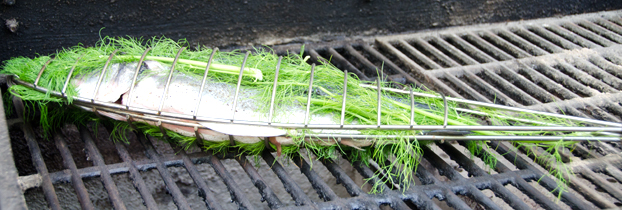
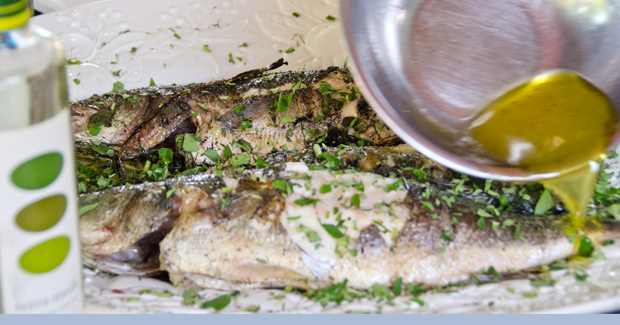
We like to serve two entrees and at first were thinking chicken but a recipe in Bon Appetit and the unanimous positive user reviews convinced me otherwise. Whole bronzino, a Mediterranean sea bass, already a favorite of ours, seasoned simply with a little olive oil, kosher salt and fresh ground pepper. The light and flaky cooked fish is drizzled with ladolemono, a classic Greek vinaigrette. What makes this vinaigrette unique is the one-to-one ratio of acid to oil as opposed to the traditional one-to-three, found in most vinaigrettes. Fresh squeezed lemon juice is combined with Greek extra virgin olive oil and dried (we used fresh since we had it ) Greek oregano is crumbled over the top. Very simple and delicious, I know we will repeat this again.
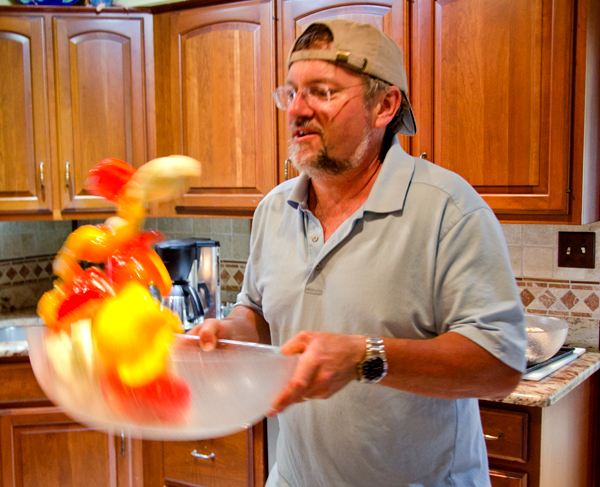
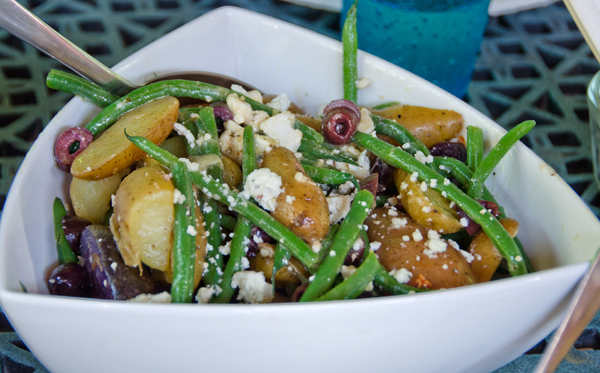
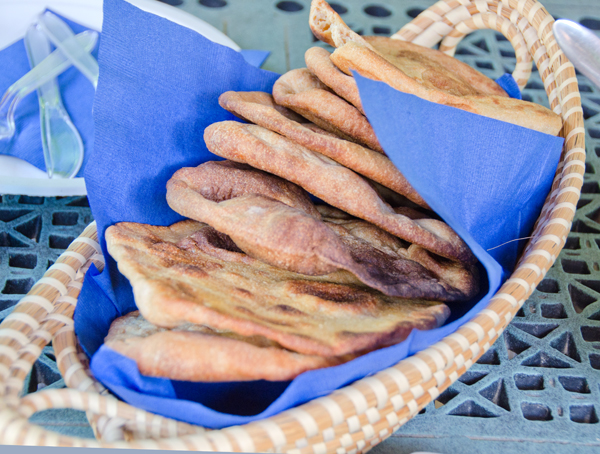
Grilled vegetables, though not exclusively Greek, are an important part of Mediterranean cuisine and complimented both entrees very nicely. A Greek potato salad of fingerling potatoes, haricots verts, crumbled feta and black olives was a Bobby Flay contribution. Since we love green salads I made a classic Greek salad of tomatoes, cucumbers, feta and Kalamata olives. I like to combine those ingredients with some crunchy Romaine lettuce and top it with a simple vinaigrette of red wine vinegar, oregano, garlic and Greek extra virgin olive oil. Spanakopita or spinach pie was a natural addition, a dish that I often make when our crop of spring spinach is plentiful. Sometimes I make this dish with puff pastry but since the theme was Greek I used phyllo. I made whole wheat pita breads to wrap up the lamb and vegetables, just wished they had puffed up more. Next time I will bake them on the Kamado.
I made tzatziki, the Greek cucumber yogurt sauce that is accented with lemon, garlic and fresh dill. It went perfectly with the lamb and grilled vegetables. When I made this as a caterer I would need to strain the yogurt to give it a thicker texture. The ready availability of Greek yogurt has eliminated that step.
Dessert was Kathy’s delicious and flaky baklava and cheesecake topped with my homemade strawberry frozen yogurt. Greek wines and licoricey iced tea were the beverages. A delectable feast that was enjoyed by all.
Prepare a grill to medium high heat. Brush fish with oil and season skin and cavity with salt and pepper
Grill fish, turning once, until cooked through, about 10 minutes. Transfer to a platter, drizzle with ladolemono, crumble oregano over, and serve
Ladolemono
Make 1/2 cup
Ingredients
1/4c fresh lemon juice
1/4c extra virgin olive oil, Greek preferably
Kosher salt and freshly ground pepper
Directions
Whisk together lemon juice and oil. Whisk in kosher salt and freshly ground pepper to taste.
The boneless leg of lamb was marinated in garlic, rosemary and olive oil.
The fish “cage” makes it easier to flip. A few fennel fronds for extra flavor.Opa! Joe likes to toss the vegetables with a little flourish.Bobby Flay’s Greek potato saladSpanakopita, Greek spinach pieSucculent lamb, enhanced by a flavorful board dressing.Whole wheat pita breads for wrapping up lamb, tzatziki and veggies.Pouring some of the ladolemono over the cooked branzino
 Shrimp toasts, bite-sized triangles of bread topped with shrimp paste are a popular dim sum item and a new addition to our Chinese New Year celebration. It is said the dish originated in Guangzhou (Canton) in China nearly a hundred years ago. There are others who claim it is a hybrid of a traditional Chinese shrimp recipe and bread, not native to China but introduced by foreign travelers to Hong Kong. I chose to use a recipe from Susannah Foo, a popular and highly acclaimed Philadelphia chef who eponymous restaurant closed in 2009. Shrimp toasts are often fried, this version is baked and can be made ahead and frozen, a big plus when you are serving an extensive menu. This year we celebrate the year of the rooster, which comes after a monkey year and before a dog year. Roosters are said to honest, bright, communicative and ambitious.