June 2, 2015 Spinach, Sun Dried Tomato and Feta Frittata

DSC_2848a
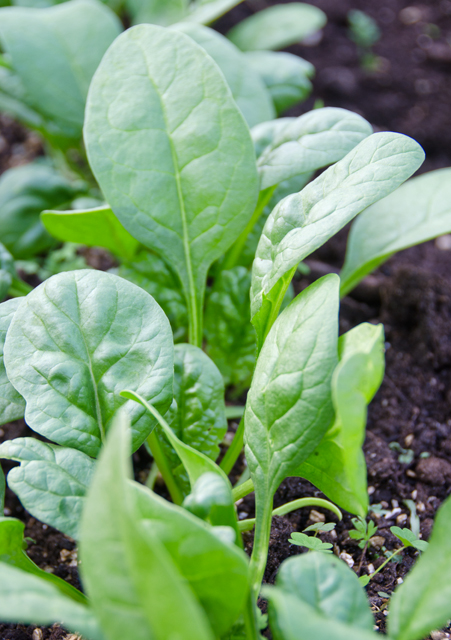
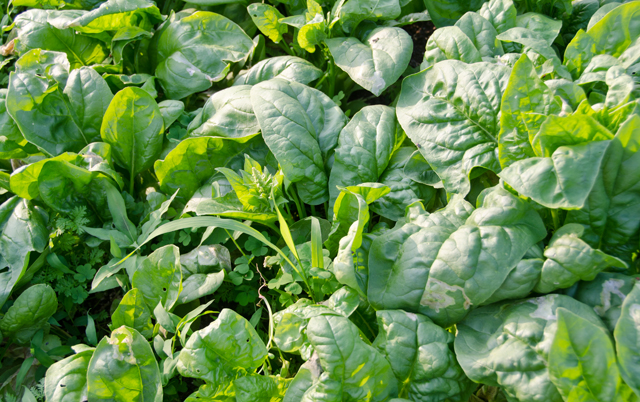
I was looking for a different way to use some of our abundance of spinach and decided a frittata would be a good choice. Frittata is the Italian name for a flat open faced omelet. They are quick to make and can be enjoyed warm or at room temperature, not only just for breakfast, but at lunch and dinner as well.  In the late Marcella Hazan’s The Classic Italian Cookbook, she delineates three distinctions between the omelet and the frittata.

  • An omelet is cooked briefly over high heat, a frittata is cooked slowly over low heat.
  • An omelet is creamy and moist, just short of runny. A frittata is formed and set, although by no means, stiff and dry.
  • An omelet is rolled or folded over into an oval tapered shape. Frittatas are flat and perfectly round.

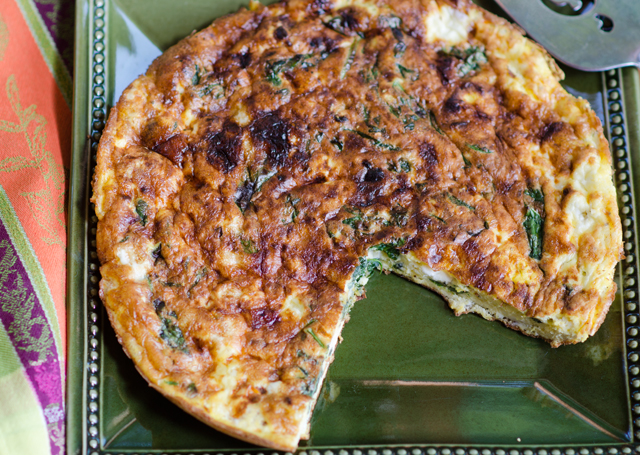
This recipe’s framework came from a recipe on the Cooks Illustrated website. It called for a dozen eggs and just a few tablespoons of half and half to add some creaminess. The original recipe was for a frittata with broccoli rabe, sun dried tomatoes and fontina cheese. I substituted four cups of lightly packed spinach with the large stems and ribs removed for the rabe. The spinach was just picked and washed so I was able to cook it down quickly with just the water that clung to the leaves, so very little oil was needed in the pan. I substituted my favorite French feta for the fontina, since spinach and feta are such a good combination. The sun dried tomatoes called for in the original recipe were oil packed. The sun dried tomatoes I used were ones I made last summer with Sun Gold tomatoes from the garden. They just needed to be reconstituted in some warm water for about ten minutes to bring them back to life. I was surprised (and pleased) that the skin came off in the process. I chopped them roughly before adding them to the frittata.

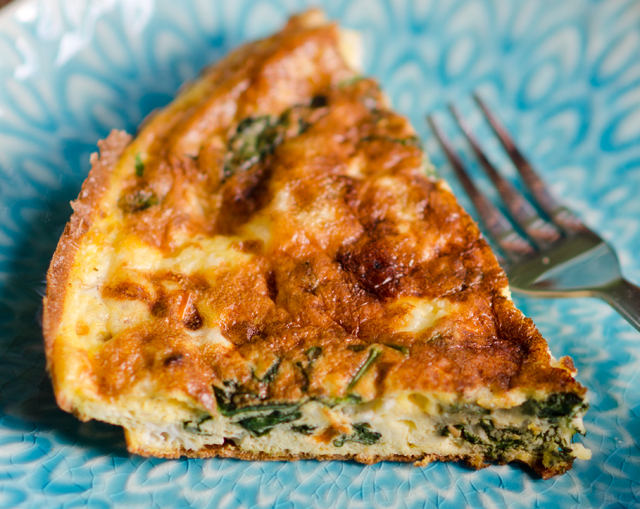
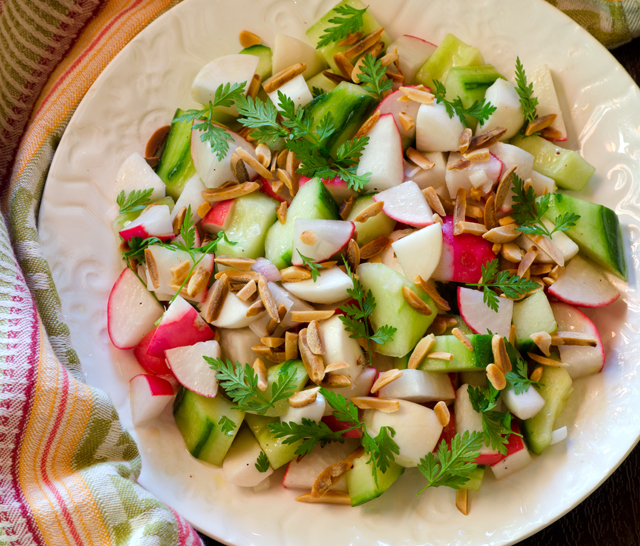
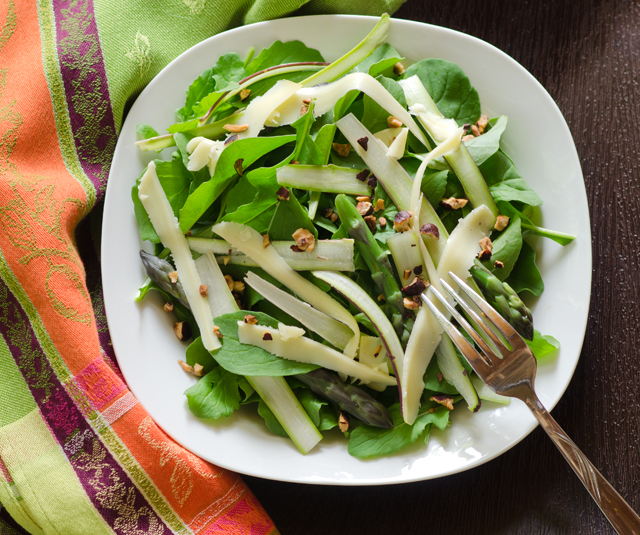
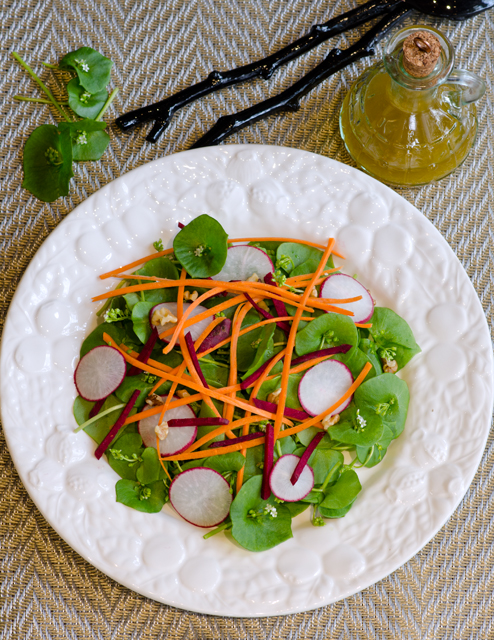
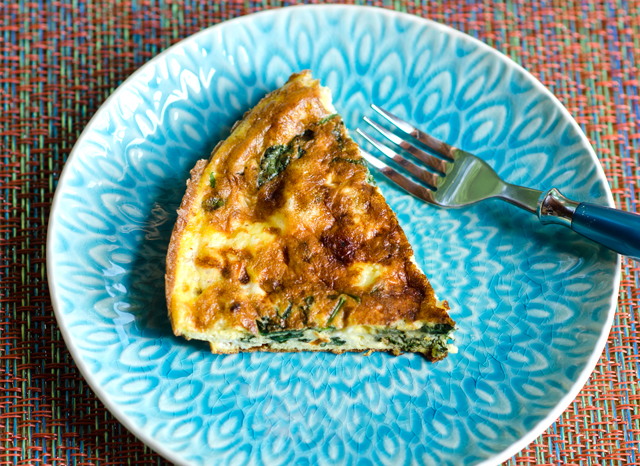
A  heavy bottomed oven safe non stick skillet is absolutely necessary to make the frittata. Before you proceed with the recipe be sure the skillet fits comfortably under the broiler without a great deal of maneuvering. The handle on my skillet was a bit high and made getting it in and out of the oven quite challenging. Have thick potholders at the ready so you don’t burn your fingers pulling the pan out of the oven. Once out, leave the potholder over the handle to remind yourself the pan is still hot. Use a spatula to loosen the frittata from the pan and transfer to a platter or cutting board. Of course, there are countless variations of the frittata and as the season moves on my add-ins will change.  Whatever you put in yours, it’s a great quick weeknight supper to serve alongside a simple green salad.

DSC_2601a
Spinach, just a few weeks ago.
DSC_2902a
That same spinach a few days ago.

DSC_2901a

Spinach, Sun Dried Tomato and Feta Frittata

Makes one 12″ frittata

Ingredients

  • 12 large eggs
  • 3 T half and half
  • 1 teaspoon olive oil
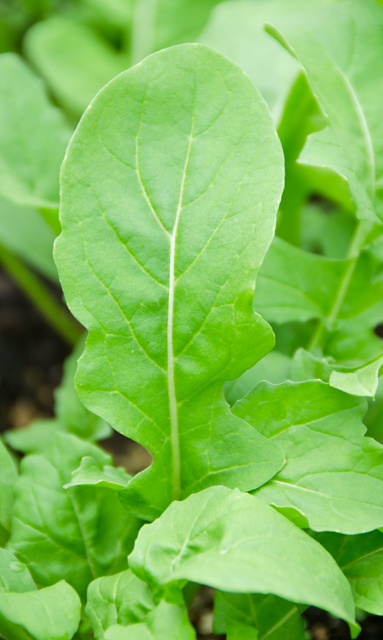
  • 4 c loosely packed spinach, large ribs and stems removed, cut into 1 inch pieces
  • 1 clove garlic, finely minced
  • 1/8t red pepper flakes
  • 3/4c lightly crumbled feta cheese
  • 1/4c coarsely chopped sun dried tomatoes

DSC_2850a

Directions

  1. Adjust oven rack to upper middle position, about 5 inches away from the heating element. Heat broiler.
  2. Whisk eggs, half and half, ½t salt and ¼t freshly ground pepper in a medium bowl until well combined, about 30 seconds. Set eggs aside.
  3. Heat oil in a 12-inch non stick skillet over medium heat until shimmering; add spinach and cook until it wilts, about 1 minute. Add garlic and red pepper flakes and cook until fragrant, about 30 seconds. Stir crumbled Feta and sun dried tomatoes into eggs; add egg mixture to skillet and cook, using spatula to stir and scrape bottom of skillet, until large curds form and spatula begins to leave wake but eggs are still very wet, about 2 minutes. Shake skillet to distribute eggs evenly, cook without stirring for 30 seconds to allow the bottom to set.
  4. Slide skillet under broiler and broil until frittata has risen and surface is puffed and spotty brown, 3 to 4 minutes; when cut into with a paring knife the eggs should still be slightly wet. Remove skillet from oven and let stand 5 minutes to finish cooking; using spatula, loosen frittata from skillet and slide onto platter or cutting board. Cut into wedges and serve.


DSC_2855a

May 30, 2015 Cucumber, Radish and Turnip Salad

DSC_2759a

Cucumbers and radishes will never co-exist in our garden. Radishes need the cooler temperatures of spring while cucumbers didn’t make an appearance in our garden last year until August. This salad, loosely adapted from one in Bon Appetit, also utilizes another spring offering, sweet mild Hakurei turnips. Hakurei turnips are harvested at about the same size as a radish. They are pure white and their flavor lends nicely to salads.

In this salad, small chunks of cucumber, radish and turnip are combined with toasted almond slivers and tossed with a vinaigrette.

I made a vinaigrette accented with spring’s most etherial and delicate herb, chervil.  A cousin to parsley, it’s leaves look like delicate lacy ferns. Our chervil was originally planted in the garden but a new larger healthy patch has seeded itself in the back of the house, nowhere close to it’s orginal location. It is a plant that also prefers cooler temperatures and partial shade. The flavor is subtle, mildly anise with just a touch of parsley. Because of it’s delicate nature, it’s rare that you would find chervil in any market, farmers or otherwise. However it is easy to grow and fortunately often seeds itself.

Toasted almonds lend a nice crunch to this dish. Rather than the oven you could alternately toast these in a dry skillet on the stove top. Whatever choice you make, watch nuts carefully, one minute they’re a pale tan, the next they are too dark. Toss the nuts occasionally, and as soon as they turn uniformly golden in color, remove from the baking sheet because they will continue to cook and darken in the pan.

I cut all the vegetables into small uniform chunks, slicing all of them would make for a different texture and would make an interesting salad as well. I like a touch of sweetness in most of my vinaigrettes, I used honey from a new vendor at my local farmers market in Wrightstown. Truly Pure and Natural carries a whole line of natural products, including local honey. They have an entire line of delicious flavored honeys, everything from lavender, to coffee to one they call “hottie honey”. I availed myself to quite a few “tastings” and came home with a three pack.  I added just a touch of the hibiscus honey to my vinaigrette. I’m sure I will be back for more!

As with many salads, this one needs to be assembled right before serving.  If you don’t have chervil, flat leaved parsley can substitute.

This large patch of chervil surprised us at the back of the house.
We use both the turnip greens and the sweet  Hakurei turnips.
We use both the turnip greens and the sweet Hakurei turnips.
The first cucumber flowers didn't appear until later in the season last year.
The first cucumber flowers didn’t appear until later in the season last year.

DSC_2752a

Cucumber, Radish and Turnip Salad

Makes four servings

Ingredients

  • 1/2c slivered almonds
  • 1 or 2 spring onions, finely chopped
  • 1/4c raspberry champagne vinegar or your vinegar of choice
  • 1t honey (I used Hibiscus infused honey)
  • 1/4c extra virgin olive oil (more to taste)
  • Kosher salt and freshly ground pepper
  • 1c English hothouse cucumber chunks, peeled, seeded and cut into ½inch chunks
  • 1c radishes, trimmed and cut into ½inch chunks
  • 1c Hakurei turnips, trimmed and cut into ½inch chunks
  • 1c chervil leaves and more for garnishing the salad

Directions

  1. Preheat oven to 350°F. Spread almonds out evenly on a rimmed baking sheet. Toast, tossing occasionally, until golden brown, 8 to 10 minutes; let cool.
  2. Whisk onion, vinegar, honey and olive oil in a large bowl; season with salt and pepper. Add cucumbers, radishes and turnips, chervil and almonds; toss to coat.
  3. Season to taste with salt and pepper.

DSC_2757a


May 27, 2015 Radish Raita

DSC_2740aRaita is a yogurt based condiment or salad, Originating in India, it is served as a cooling counterpoint to spicy stews and curries. It is most commonly made with cucumbers, but I have seen recipes with beets, tomatoes, carrots and even pumpkins! In this recipe from Bon Appetit, crispy and slightly spicy radishes are combined with yogurt, herbs, red onion and a serrano chili.

Joe has already put in three separate plantings of radishes and with temperatures anticipated to reach 90 this week, it’s time to pick them before they get very hot and go to seed. Like all root crops, wash radishes well from any dirt that clings to them. This year we started saving the radish tops and use them in our cooked greens. I grated the radishes on a box grater, leave a little of the stem on to spare your fingers from hitting the sharp edge. Alternately you could use a food processor with the shredding disc in place. The recipe calls for a combination of mint and cilantro or just whatever one you prefer. This is good news for cilantro haters.

Joe isn’t the biggest fan of mint, most of the mint we grow gets fairly intense and can often overwhelm the other flavors in a dish.  He has given the thumbs up to Vietnamese mint, at least that’s what Well Sweep Herb Farm calls it. It’s botanical name is mentha x gracilis, but when I looked that up it gave the common name of ginger mint, another mint in our garden and one that certainly looks different than the Vietnamese. The mild flavor works well in this recipe.

This recipe comes together very quickly.I used standard garden radishes, daikon radishes would make this spicier. If you want to make this just a little bit ahead of the time you are going to use it, combine all the ingredients except the grated radishes.  They should be added at the last minute because if the radishes sit too long in the dish they will make it watery.  I served the radish raita as a topping for salmon. I am sure it work well with other types of fish, or even as a dip for vegetables.

The radishes are literally popping out of the ground.

DSC_2661a

DSC_2717a

Grated radishes remind me of chopped candy canes!
DSC_2744a
Ginger mint or menthe gentilis
DSC_2605a
Vietnamese mint or mentha gracilis


Radish Raita

Makes 1½ cups

Ingredients

  • 1c plain whole milk or low fat Greek yogurt
  • ½c chopped mint and/or cilantro
  • 1 serrano chile, seeded and finely chopped
  • 2T finely chopped red onion
  • 1T fresh lime juice
  • 1c coarsely grated red radishes
  • Kosher salt and freshly ground black pepper

Directions

  1. Mix together yogurt, mint, chile, onion and lime juice. Gently fold in radishes, season to taste with salt and pepper.

DSC_2726a

May 17, 2015 Shaved Asparagus Salad with Aged Gouda and Hazelnuts

DSC_2646a

Long before the term “Farm to Table” entered our vocabulary, chef, cookbook author and food and wine educator, John Ash authored the cookbook, From the Earth to the Table. His restaurant, John Ash and Company in the wine country of Santa Rosa, California, was one of the first to focus on local seasonal ingredients in his dishes. We have had the pleasure of dining in Mr. Ash’s restaurant on several occasions when visiting Sonoma County. It was for this reason I knew his recipe for Shaved Asparagus Salad with Aged Gouda and Hazelnuts in Fine Cooking magazine would be one worth trying.

Asparagus celebrates the arrival of spring and is one of the first local offerings of produce at our farmers market. The season is fleeting so I try to use it as often as possible.  When you bring asparagus home it’s important to store it properly. I store it the same way I store fresh herbs. Stand the stalks upright in a wide mouth glass or jar with an inch or two of water in it. Be sure that all the cut ends are in the water. Cover loosely with a  clear plastic gallon storage bag. The green in this salad is arugula and the timing couldn’t be more perfect. The temperatures here this past week have been far from spring like. The heat made it feel like it was mid July rather than May. That meant it was time to pick the arugula while it is still in it’s prime. Days of warmer temperatures make arugula’s peppery flavor even hotter and causes the plant to bolt or go to seed.

Begin the recipe by making a simple vinaigrette. Rice vinegar, lemon juice, honey, extra virgin olive oil  and shallot complement and allow the flavors of the salad to shine through. The only change to the original recipe I made here was to use a plain rice vinegar rather than a seasoned one. Seasoned rice vinegar contains sugar, corn syrup, salt and MSG. I knew the honey would bring enough sweetness to the dressing, and I prefer not to add the extra salt and MSG.

Remove the tips from the asparagus and set aside. The original recipe calls for thick asparagus but the vendor I buy asparagus from at the farmers market already has them bundled; purple, green, thick, thin, all in the same bunch. I found that medium stems are just as easy to peel as long as they are firm. A vegetable peeler does double duty in this recipe, use it to shave the asparagus stalks and the Gouda. Discard the first shaving of the asparagus, that will contain the more fibrous outer skin. The inner stalk is crisp and tender and is delicious raw. Marinade the tips and the shaved stalks for 15 minutes, long enough to blend the flavors and soften the asparagus a little.

How aged should your Gouda be for this salad? The complex caramel flavor of a five year Gouda is best on it’s own as a wine and cheese pairing. The Gouda at Wegmans that is aged for three months has a buttery flavor with a tangy finish and is just right for this recipe.  You may want to pop the Gouda in the freezer for about 10 minutes for easier shaving. The cheese will quickly come up to temperature.  The rich toasty flavor of hazelnuts is an excellent contrast to the Gouda.  If you are not a fan of hazelnuts, walnuts or pine nuts would be a good substitute.

Shaved Asparagus Salad with Aged Gouda and Hazelnuts

Serves 6

Ingredients

For the vinaigrette

  • 3T rice vinegar
  • 2T lemon juice
  • 2T extra virgin olive oil
  • 1T fragrant honey such as wild flower or orange blossom
  • 1T finely chopped shallot
  • Kosher salt and freshly ground black pepper to taste

DSC_2648a

DSC_2630a
Our first crop of arugula this season.

DSC_2631a

For the asparagus

  • 3/4 lb. medium to thick asparagus
  • 3c baby arugula
  • ½c toasted and chopped hazelnuts
  • 2½oz. thinly shaved aged Gouda

Directions

  1. Make the vinaigrette. Whisk all the ingredients together, cover. Can be refrigerated up to 3 days.
  2. Make the salad. Remove the tips of the asparagus and put them in a large bowl. Using a vegetable peeler, shave a stalk, discarding the first shaving. If shaving the first side becomes awkward, turn stalk over and repeat. Add shavings to the tips. Repeat with the remaining stalks.
  3. Toss the asparagus with 1/3 cup of the vinaigrette and let sit 10 to 5 minutes, this helps the asparagus to soften a bit and blends the flavors.
  4. Add the arugula and hazelnuts and toss, adding more dressing as needed to lightly coat the arugula. Arrange on plates and top with the shaved cheese. Serve immediately.

DSC_2642a

May 10, 2015 Raincoast Crisps with Raisins and Rosemary

DSC_2581aThere’s a cracker I love that I have to buy whenever I stop in at Whole Foods, Raincoast Crisps. Created by Parisian trained chef Lesley Stowe, she started her own cooking school and catering company in Canada’s raincoast, Vancouver, over 25 years ago. The crisps originated from a bran bread that she served in her catering business with smoked salmon. Always looking for new and original ideas, on one occasion she sliced the bread and dried it out. It was met with approval from her kitchen staff so she decided to “pump it up” with additional ingredients.  That was the beginning of the Raincoast Crisp.

The crisps are toasty and nutty, loaded with ingredients like pumpkin seeds, raisins, and pecans.  They are delicious to nibble on their own or maybe just a spread of soft cheese or your favorite preserve. One never tastes like enough and it’s easy to justify munching a box full because they are so good.  So what’s the problem? At 7.99 and up per 6 ounce box they are a pricey indulgence. So some intrepid bloggers came along and cracked the code and a rather similar recipe is available to any one who is able to whip up a quick bread.

The DIY recipe is very simple to make. Stir together the ingredients and bake in mini loaf pans. Alternately you could bake them in two square cake pans for longer skinny slices. Be sure to thoroughly cool the loaves after baking before proceeding to slice. You could give them a short stay in the freezer to firm them up or just wait till the next day to proceed with the recipe.

The next step is to slice the crackers as thinly as possible. Most of recipes I read said that it makes about 8 dozen crackers. That meant I needed to make 24 slices from each of the 4 loaves. I came fairly close, or maybe that had something to do with slices I had to “test” before baking! I used my thin blade serrated Cutco knife to make the thinnest and most even slices. I experimented with a food slicer which was ok, it’s important to maintain even pressure to keep the slices neat.

Bake the slices like super thin biscotti until they are crisp and golden. Now that I know the proportions of the recipe I am looking forward to customizing it.  Different flours,  dried fruits, spices and nuts, the possibilities are endless.  I served mine with a delicious soft goat cheese from Giggling Goat Dairy, a new vendor at my local farmers market in Wrightstown. The goat dairy is located in Dublin Pa and they make and sell fresh French-style goat cheese known as chèvre, a traditional style Feta as well as spreads and dips. I’m certain I will be frequenting their stand quite often this summer.

Raincoast Crisps with Raisins and Rosemary

Makes about 8 dozen

Ingredients

  • 2 c flour
  • 2t baking soda
  • 1t sea salt
  • 2c buttermilk
  • 1/4c brown sugar
  • 1/4c honey or maple syrup
  • 1c raisins
  • 1/2c lightly chopped pecans
  • 1/2c roasted unsalted pumpkin seeds
  • 1/4c sesame seeds
  • 1/4c flax seeds
  • 1T chopped fresh rosemary

Directions

  1. Preheat oven to 350°F.
  2. Stir together flour, salt and baking powder in a large bowl. Add the buttermilk, brown sugar and honey and stir to combine. Add the raisins, nuts, pumpkin seeds, sesame seeds. flax seed and rosemary and stir until all the ingredients are thoroughly combined.
  3. Pour the batter into 4 mini loaf pans that have been sprayed with nonstick spray. Bake loaves for 30 to 35 minutes, rotating halfway during baking time. The loaves should be golden and springy to the touch. Remove loaves from the pans and cool on a wire rack.
  4. Allow the loaves to cool completely, then freeze for about an hour. This will allow you to slice the loaves as thinly as possible. I used a serrated edge knife for the neatest cut.
  5. Place the slices on baking sheets that have been lined with parchment paper. Bake the slices at 300°F for about 15 minutes, then flip them over and bake for another 10 minutes until crisp. Cool completely and store in an airtight container.
DSC_2566a
Slices on a parchment lined sheet ready for their second bake.
Delicious on their own or with a spread of goat cheese, this is the fresh garlic peppercorn from Giggling Goat Dairy.

DSC_2584a


May 4, 2015 Claytonia Salad

DSC_2521a

Claytonia is not a small nation tucked away in the Alps, nor is it the latest addition to the periodic table of elements. Claytonia perfoliata, it’s full name, is a cold hardy salad green that grows wild up and down the west coast of the United States.  The plant grows up from thin, succulent stems. The leaves are delicate and small, shaped almost like a spade. Eventually tiny white flowers will grow out from the center of the leaf. The entire plant is edible from stem to flower with a texture reminiscent of spinach with a very mild flavor that is slightly sweet when first picked.

During the California gold rush, miners learned about claytonia from local Indians. It became an important part of their diet because it was plentiful and it’s vitamin C content helped to ward off scurvy, hence it’s other name, miner’s lettuce. It was because of it’s nutritional value, British settlers brought claytonia from America to Europe, and later to settlements in Australia and Cuba.

Joe first learned about claytonia from his readings in the books of his gardening hero, Eliot Coleman. Joe planted claytonia in the greenhouse and under a cold frame late last fall.  This time the plantings were successful but when the cold weather came on with a vengeance, the plants stopped growing. Since the plants can survive the freeze/thaw cycle, they were the first to start growing in the spring. Claytonia is supposedly an easy self-seeder but if not, Joe will plant it earlier in the fall to give it a better head start for winter salads.

I like to use it alone in a salad or with other similar greens with a delicate texture.  In this salad I paired the claytonia with other spring vegetables, carrots, beets and radishes. Since it bruises easily, I prefer to toss the greens first with the vinaigrette, then layer the other ingredients on top. The sweet tartness of apricot vinaigrette pairs nicely with the greens.

Claytonia or miner's lettuce thriving in the spring garden.
Claytonia or miner’s lettuce thriving in the spring garden.


Claytonia Salad

Serves two, the salad components are all approximations

Ingredients

  • Enough claytonia to fill the bowl of your choice
  • Shredded carrots
  • Finely julienned raw beets
  • Thinly sliced radishes
  • Chopped walnuts
  • Freshly ground black pepper
  • Apricot vinaigrette (recipe follows)  or the vinaigrette of your choice

Directions

  1. In a large bowl lightly dressing the claytonia with the vinaigrette. With tongs transfer the greens to salad plates. Top the dressed greens with the carrots, beets, radishes and walnuts. Add freshly ground pepper to taste.

Apricot Vinaigrette

Ingredients

  • ¼c apricot balsamic vinegar
  • 1t honey
  • 1 small clove garlic, finely chopped
  • ¼t Dijon mustard
  • 1/3 to ½c extra virgin olive oil
  • Kosher salt and freshly ground pepper

Directions

  1. In a small bowl whisk all ingredients together. Season to taste with kosher salt and freshly ground pepper.

DSC_2315a

DSC_2511a

DSC_2524a


April 28, 2015 Salmon Piperade

DSC_2394aMy local big box store always has one bargain that I can never pass up, sweet peppers. Six in a bag, two each of red, yellow and orange, they usually cost about 6.49. Supermarket sweet red peppers occasionally are on sale at a 1.99 per pound but can go as high as 4.99 a pound in the off season. Orange and yellow ones never seem to go on sale. Since we only have access to local and peppers from our garden only two months out of the year, I don’t mind buying them.

The peppers are grown in greenhouses in Canada and have consistent good flavor and texture. I like using them in salads, stuffing them with chili and cooking them on the grill. We had a few left over recently that weren’t grilled and was looking for a way to use them in the next several days. Then I remembered piperade.

Classic piperade originates from the Basque country in the southwest region of France. It is a versatile preparation that compliments everything from eggs to chicken to fish dishes.  A simple saute of bell peppers, onion and tomato, piperade is enlivened by the addition of piment d’espelette. Piment d’espelette is a pepper native to France in the Basque country. The flavor is fresh and fruity with just a hint of smoky heat.

Piment d’Espelette has AOC (appellation d’origine contrôlée) status. This is a protective designation of origin and means the pepper only comes from a 22 square kilometer region around the town of Espelette. The peppers are harvest by hand, air dried and finished in a kiln. They are sold dried, whole or pulverized into a flaky powder. Since we are not in tomato season I used diced canned tomatoes for this recipe. The once 16 ounce can has shrunk to 14.5 ounces, when will this madness stop? I used Hunts because Cooks Illustrated put them on top of their most recent testing. Their flavor was reported to be fresh, bright and sweet-tart. Sounds good to me.

Espelette pepper is sold by specialty grocers and can easily be found on line if you are an intrepid spice hunter like me. If not, substitute smoky paprika or Aleppo pepper with a dash of cayenne pepper. The piperade comes together easily. Saute an onion until translucent, add garlic, peppers and piment d’Espelette. Cook another minute until fragrant then add the tomatoes and their juice. Bring the mixture to a boil, season well and cook slowly for about 45 minutes or until the juices have thickened. Keep piperade warm while you cook the fish. Serve salmon on a bed of piperade and garnish with parsley. Serve leftover piperade with poached or scrambled eggs the next day.

DSC_2386a
I used finely chopped peppers and onion in my preparation.
DSC_2471a
Piment d’Espelette is a protected designation meaning the peppers can only be grown in a specific location.

DSC_2389a

Salmon Piperade

Serves two

Ingredients

  • 1T olive oil, plus 2t for cooking salmon
  • 1 medium onion, diced small
  • 1T finely chopped garlic
  • 1 yellow pepper, diced (about ¾cup)
  • 1 red pepper, diced (about ¾cup)
  • 1 orange pepper, diced (about ¾cup)
  • 1t or to taste, piment d’Espelette, substitute smoky paprika and a dash of cayenne if necessary, additional to sprinkle on fish before baking
  • 1 14.5 ounce can of diced tomatoes
  • Kosher salt and freshly ground black pepper
  • 2 6-ounce boneless skinless salmon fillets
  • 1-2T chopped parsley

Directions

  1. Heat 1 tablespoon of olive oil in a medium sauté pan over medium high heat. When the oil begins to shimmer, add the onion. Cook, stirring frequently until the onion is translucent, about 4-5 minutes.
  2. Add the garlic, peppers and piment d’Espelette. Cook, stirring frequently until fragrant, about 1 minute. Add the tomatoes and their juices, season well with salt and pepper. Bring the mixture to a boil, lower to a simmer, cover and cook slowly for about 45 minutes, stirring every now and then.
  3. Brush salmon fillets with olive oil, season with salt, freshly ground pepper and piment d’Espelette. Cook fish according to your favorite method, this is how we bake our fish. Spoon warm piperade on serving dish, nestle cooked fish on the piperade. Sprinkle with chopped parsley.

DSC_2393a

April 21, 2015 Shrimp Scampi

DSC_2352a

It’s not every day that fresh Florida shrimp are available at my local fish market, that was reason enough for me to prepare a dish that showcases their pristine sweet flavor, shrimp scampi.

Most “fresh” shrimp  sold in supermarkets are shipped frozen and thawed for the seafood counter. That means the shrimp you will find with the frozen seafood is exactly the same and maybe even a little cheaper than what is being presented as fresh, it just hasn’t been sitting on a bed of ice all day. Thawed shrimp are a convenience to use only when you need them immediately.  The shelf life of thawed shrimp is only a day or so at best, while frozen shrimp retain their quality for several weeks in the freezer.

Most shrimp sold today are IQF or individually quick frozen, so it is easy to remove the amount of shrimp you need for a recipe. The best way to thaw shrimp is to put it in the fridge overnight or for a quicker thaw, put it in a colander of cold water and let some cold water trickle into the bowl while the excess goes down the drain. The shrimp should be ready to cook in about 15 minutes.

Shrimp are sold by the count, the number of shrimp to make a pound, so the lower the count, the bigger the shrimp.  The names that correspond with the sizes range from extra colossal, under 10 per pound to extra small, 61 to 70 shrimp per pound. The descriptions are not standardized however so one vendor’s extra large could be another’s jumbo. So it is always best to stick with looking at the count when buying shrimp.

According to Italian cookbook author Lidia Bastianich, shrimp scampi is one of the those creations in which immigrant cooks adapted Italian techniques to American ingredients. Scampi is the Italian word for a prawn or langoustine, more closely related to lobsters.   One traditional way of preparing them in Italy was to sauté them with garlic, onion, olive oil and white wine.  When Italians immigrated to America they adapted the preparation, substituting  the more readily available shrimp. The dish was called shrimp scampi and the name stuck, meaning shrimp prepared in the scampi style.

This recipe is from Melissa Pellegrino, cookbook author and contributing editor to Fine Cooking magazine,. What makes this interpretation of shrimp scampi unique is the addition of shrimp stock which further enhances the flavors in this dish.

Begin by peeling the shrimp, you can leave the tails on for presentation if you choose. The next step is to devein the shrimp, which isn’t a vein at all but the digestive tract. It is not absolutely necessary and you can eat shrimp with the vein still in, but one thing I know for certain, it will always get you Chopped. To devein, make a shallow slit down the middle of the back which exposes the intestine. Lift the vein out with the tip of a paring knife and wipe the blade with a clean paper towel. You can also do this under cold running water. There are also inexpensive tools that allow you to devein in one fell swoop.

The shrimp stock is made with the shrimp shells along with the usual ingredients used in stock making, onion, celery, carrot and a bay leaf. The ingredients are brought to a boil, simmered and strained. Only ¼ cup of the stock is needed so the rest can be frozen for future use.

Aromatic garlic, parsley and lemon peel are added to melted butter in the skillet. The shrimp are cooked in this mixture until they turn pink. Wine and shrimp stock are reduced to make a sauce with a final additon of pepper flakes, lemon peel and, of course, more butter. Served over pasta, rice or just accompanied with some crusty bread, shrimp scampi is a quick delicious entree easy enough for weeknights and elegant enough for special occasions.

DSC_2338a
Shrimp shells are used to make a flavorful stock.
Shrimp shells are combined with onion, celery, carrot and a bay leaf.
I used the juice and peel from our Ponderosa lemon.


Shrimp Scampi

Serves four

Ingredients

  • 1½ lb. 16-20 count shrimp (these may be called jumbo or extra jumbo) peeled and deveined (shells reserved) tails may be left on if you choose
  • 1 medium carrot, chopped
  • 1 medium rib celery, chopped
  • 1 small yellow onion, halved
  • 1 bay leaf
  • Kosher salt and freshly ground pepper
  • 4T unsalted butter
  • ¼c finely chopped Italian parsley
  • 2T minced garlic
  • 1T finely grated lemon zest
  • ¼c dry white wine
  • 1t fresh lemon juice
  • Crushed red pepper flakes
  • Lemon wedges for serving

Directions

  1. In a 4-quart saucepan , combine the reserved shrimp shells, carrot, celery, onion and bay leaf. Add four cups of water. Bring to a boil over medium-high heat, reduce to a simmer and cook for 30 minutes.
  2. Strain the stock through a fine-mesh sieve and reserve ¼cup for the scampi. The rest of the shrimp stock can be frozen for future use.
  3. Pat the shrimp dry and season with ½teaspoon salt and a grind of pepper.
  4. In a 12-inch heavy skillet, melt 3Tof the butter over medium heat. Add the parsley, garlic and lemon zest and cook, stirring occasionally until the garlic is lightly golden, 1-2 minutes. Raise the heat to high, add the shrimp and cook until they start to turn pink, about 1 minute. Add the wine and cook until reduced by half, 1 to 2 minutes. Add the lemon juice and crushed red pepper flakes and stir to coat.
  5. Transfer the shrimp to a serving plate using a slotted spoon. Whisk the remaining 1T butter into the sauce. If the sauce seems too thin, simmer for a minute or so to thicken. Season to taste with salt and pepper, pour over the shrimp and serve with lemon wedges on the side.

DSC_2350a

DSC_2354a


April 14, 2015 Beet Chutney

DSC_2334a

The good thing about cooking a ton of food for a holiday is that chances are, you will have lots of leftovers.  The challenging part is finding ways to repurpose those leftovers into something different and delicious. Smoked turkey was good on a salad, leftover roasted vegetables topped our homemade thin crust pizzas. In previous years I made moussaka with leftover lamb, this year we decided on lamb wraps. In addition to the usual tzatziki sauce that I would serve with lamb, Joe suggested  “something spicy.” I had some ideas but after googling it, found an interesting recipe for beet chutney.

As a beet lover, I enjoy their earthy quality and thought the sweet and sour quality of a chutney would be a nice contrast to the creamy coolness of tzatziki. The chutney comes together quickly and benefits from being made ahead, allowing the flavors to blend together. The recipes calls for a two inch diameter beet, which turned out to be just a little bit less than a cup. Tweak the sweet and sour elements to your own liking. I used golden raisins because that’s what I had on hand, dried cranberries might be nice as well. Dried cranberries would fit the color scheme and would fit right in with a Thanksgiving menu. The chutney would also be good  as a appetizer on top of a cracker spread with goat cheese or Brie.

DSC_2321a

Beet Chutney

Makes about a cup

Ingredients

  • 1/4c olive oil
  • 1 ½c red onion
  • 1 2-inch diameter red beet, peeled, cut into ¼ inch cubes
  • ½c water
  • ½c red wine vinegar
  • 3T raisins (I used golden raisins)
  • 3T sugar
  • 2t chopped peeled fresh ginger
  • 1t yellow mustard seeds
  • Pinch of cumin seeds

DSC_2323a

Directions

  1. Heat olive oil in a heavy medium saucepan  over medium heat. Add chopped red onion and beet cubes. Cook until onion is tender but not brown, stirring frequently, about 8 minutes
  2. Add ½c water. Increase heat to high and boil until mixture is thick, about 5 minutes. Add vinegar, raisins, sugar, ginger, mustard seeds, and a pinch of cumin seeds. Reduce heat to medium-low and simmer until beet cubes are tender and the chutney is thick, stirring often, about 10 minutes. Adjust seasonings as needed and season to taste with salt and pepper. Cool.
  3. Can be made 1 week ahead. Cover and chill.

DSC_2327aDSC_2336a


April 10, 2015 Cheddar Pepper Bread

DSC_2288a

Back in the seventies, my early forays into bread baking were less than successful. Armed with my Betty Crocker and Good Housekeeping cookbooks I made multiple attempts at white, wheat and whole grain breads. My biggest problem then was yeast and my lack of success in proofing it.  My loaves would turn out dense and leadened, thrown outside as crumbs for the birds. My dad used to say, the birds wouldn’t even eat my bread, it was too heavy for them to  fly away with!

But I was determined to find success and stuck with it. The early eighties introduced a new bread making tool, the food processor. The processor was capable of kneading the dough in a fraction of the time needed to do it by hand.  Many of the recipes I found back then were from a magazine called The Pleasures of Cooking. Published by Cuisinart founder Carl Sontheimer, it inspired and fed all aspects of my love of cooking.

Pleasures has been out of circulation for years but I still have all of my well used issues.  Many of the recipes became part of my catering repertoire, including several bread recipes. Although I use the stand mixer now for most of my bread recipes, I still pull out the food processor for classics like this. Cheddar pepper bread is still one of my favorites.  It is key to use an assertive “extra sharp” cheddar so that it’s flavor will shine through in the final product.  I served this along side the creamy leek and potato soup we had for Easter dinner. The recipe calls for the bread to baked in a loaf pan but it could be baked as a round loaf or even as rolls.

DSC_2278a

Cheddar Pepper Bread

Makes 1 1½ lb. loaf

Ingredients

  • 3oz extra sharp cheddar cheese
  • 1t instant dry yeast
  • 3 ½c all purpose flour
  • 2T unsalted butter
  • 1 ¼t cracked black pepper
  • 2t fine sea salt
  • ¼t hot pepper sauce
  • 1c warm water and a little more as needed

Directions

  1. Process the cheese with the medium disc of the food processor. Set aside.
  2. Place the yeast, flour, butter, black pepper, sea salt and hot pepper sauce in the bowl of a food processor fitted with the metal blade. Process the ingredients for about 20 seconds.With the food processor running, pour the water through the feed tube in a steady stream as fast as the flour absorbs it.
  3. After the dough cleans the sides of the bowl, add the shredded cheese, and process for  about 45 seconds more to knead the dough.
  4. Remove the dough from the processor, shape it into a ball and place it in a large ungreased bowl. Cover the bowl with plastic wrap and let the dough proof in a warm place for 1½ to 2 hours.
  5. Turn the dough onto a lightly floured surface and pat it down to deflate. Shape the dough into a loaf and place in a greased 8 by 4-inch loaf pan. Cover the pan with plastic wrap and let rise in a warm place until the center of the loaf rises up 1½ inches above the rim of the pan, 1 to 1½ hours.
  6. Preheat oven to 375°F. Bake in the center of the preheated oven for 30 to 35 minutes, rotating pan half way through the baking time. The loaf should be well browned and sound hollow when tapped.
  7. Remove the bread from the loaf pan and place on a wire rack to cool completely before storing.

DSC_2291a