August 6, 2015 Smoked Tomato Soup

DSC_3892aSituated just 30 miles north of New York City on the former Rockefeller estate in rural Potantico Hills, New York is Blue Hill at Stone Barns. It is a restaurant that exists within the Stone Barns Center for Food and Agriculture and a four season working farm. The mission of James Beard award winning chef Dan Barber is to “create a consciousness about the effects of everyday food choices”.

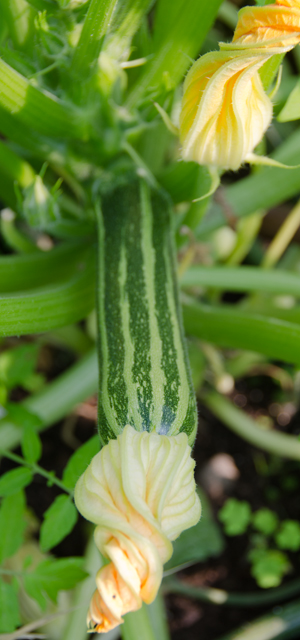
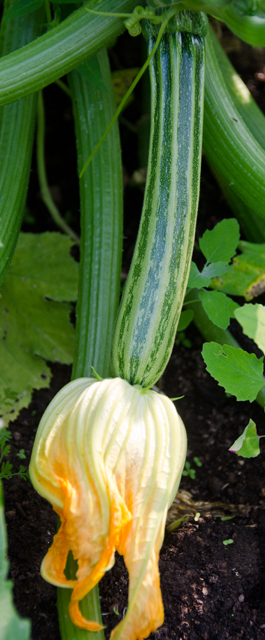
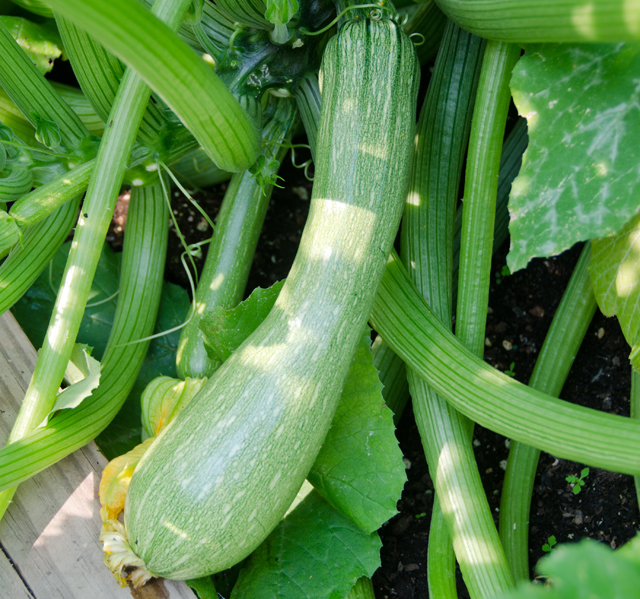
One of the first true “farm to table” restaurants, the menu at Blue Hill is based on what the farm has harvested that day, not on the diner’s whim. I can relate, that’s how we eat from spring to fall, especially now when the harvest from our garden is so abundant.  I am freezing buckets of string and wax beans, the zucchini harvest is plentiful and I have just started roasting tomatoes to freeze for winter soups, stews and chilis. Needless to say, I am always on the hunt for new takes on familiar recipes. One that recently caught my eye was a recipe that has been published in both Food and Wine magazine and Bon Appetit, chef Barber’s Smoked Tomato Soup.

The idea of smoking tomatoes intrigued me, I have smoked salmon, every variety of poultry, and even cheese. In this recipe, some of the tomatoes in the soup are skillet-smoked, a chef’s trick that is easily achieved by the home chef. Before you begin this recipe, turn the kitchen exhaust fan on.  Fragrant wood chips are scattered in a cast iron skillet and heated until they begin to smoke. Tomato halves, cut side up of course, so none of the juices are lost, are placed on a thick foil square. The skillet is taken off the heat, covered tightly and the tomatoes are allowed to sit until they are smoky, 5-8 minutes. Alternately, as I did, start with a stovetop smoker and spread the wood smoking dust on the bottom of the base pan.The drip tray and rack are placed on top. I placed the tomato halves on the rack, closed the lid and smoked the tomatoes for 10 minutes. It is important to only use wood chips or dust that are specifically made for smoking, and not sprayed with chemicals.

On the stovetop, an onion, a leek, (the first harvested from the garden), garlic, bay leaves and coriander seed are sauteed over medium heat. The recipe also calls for 2 teaspoons of fresh or prepared horseradish, an interesting addition that didn’t make the soup hotter but added another flavor dimension. The rest of the tomatoes are chopped and added to the soup along with chicken broth. To make this recipe vegetarian, substitute vegetable broth for the chicken. Let the pot simmer for about 45 minutes, remove the bay leaves and blend the mixture. Butter adds to the richness of the soup, but you can eliminate it if you are watching your calories. Top the soup with a chiffonade of basil.  Served warm or cold, smoked tomato soup is a refreshing summer treat.

DSC_3871a

Smoked Tomato Soup

Serves four

Ingredients

  • 4lb. plum tomatoes, halved and divided
  • ¼c olive oil
  • 1 large onion, chopped
  • 1 large leek, white and pale green parts only, halved lengthwise
  • 3 garlic cloves, crushed
  • 2 bay leaves
  • 2tsp coriander seeds
  • 2tsp finely grated fresh horseradish or prepared horseradish
  • 1½c low sodium chicken broth
  • 4T unsalted butter at room temperature
  • Kosher salt, freshly ground pepper
  • Thinly sliced basil leaves (for serving)

Special equipment

  • ½c hickory, pecan or apple wood chips
  • 2T finely ground oak chips

Directions

  1. Scatter wood chips in a medium cast-iron skillet and heat over high until chips begin to smoke, about 5 minutes. Cut a 24″ sheet of heavy duty foil and fold in half twice more to make a large square. Fold in half twice more to make a small, thick square. Place the square carefully over the chips and set 5 tomato halves, cut side up on top, remove skillet from heat. Cover with foil and top with a lid or another medium skillet. Let tomatoes sit until barely softened and smoky, 5-8 minutes. Transfer tomatoes to a plate and let cool slightly.
  2. If you have a stovetop smoker:  Place 2 tablespoons of finely ground oak chips in the bottom of the base pan of a stovetop smoker. Set the drip tray on top of the chips, and place the rack on the drip tray. Place 5 tomato halves, cut side up on the rack, and slide the lid closed. Place the smoker on the stovetop. Set the heat to medium, and smoke the vegetables for 10 minutes.
  3. Meanwhile, chop remaining tomatoes. Heat oil in a large pot over medium heat and cook onion and leek, stirring occasionally, until tender but not taking on any color, 8 to 10 minutes.
  4. Stir in garlic, bay leaves, coriander seeds and horseradish and cook, stirring occasionally, until fragrant, about 2 minutes.
  5. Add chopped tomatoes and broth, increase heat to medium high and bring to a boil. Reduce heat, cover pot and simmer until the tomatoes are soft, 35-45 minutes. Let cool slightly, discard bay leaves.
  6. Working in batches if needed, blend tomato mixture, smoked tomatoes and butter in a blender until smooth. Strain soup through a food mill with the medium disc in place into a large bowl; season with salt and pepper. Serve warm or at room temperature topped with chopped basil.
Tomatoes after smoking, softened and smoky!

DSC_3911a


July 26, 2015 Cauliflower “Alfredo” Sauce

DSC_3786aCauliflower is the vegetable master of disguise. We love it cut into florets or “steaks”  roasted with olive oil, salt and pepper and chow down on it like popcorn. It makes a satisfying substitute for mashed potatoes, and chopped finely it can replace couscous or other grains in some recipes. So my ears perked up the other day when I heard yet another way to use cauliflower.

If I am at home in the early afternoon I will turn on “The Chew”, a television program that has been described as “The View” for foodies. A recipe that caught my attention recently was a side by side comparison of traditional  Alfredo sauce, prepared by Iron Chef and restauranteur Michael Symon, with a “lightened up” version of the sauce, made by natural foods chef and author, Daphne Oz.

Michael and Daphne’s sauces start out with same five ingredients, shallots, parmesan cheese, extra virgin olive oil, parsley and butter. As Michael pointed out, he learned from fellow chef Mario Batali, traditional Alfredo sauce in Italy is butter, a little bit of the pasta water and Parmesan cheese.  It does not include heavy cream, an American addition to the dish. Michael and Daphne both added shallots to their sauce, also not traditional but adding an additional smoky sweet note to the sauce.

Here is where the recipes diverge. Michael’s traditional version of the sauce used one whole stick of butter and a cup of Parmesan cheese. Although Daphne’s recipe did include a quarter of the amount of the butter and cheese in Michael’s recipe, most of the velvety texture came from, you guessed it, cauliflower. She boiled cauliflower in milk and pureed it to make the base for the sauce. Cauliflower acted as a binder and gave the sauce it’s smoothness.

This was a recipe I had to try for myself. The recipe starts with four cups of cauliflower florets and a cup of milk added to a saucepan. Bring to a boil, reduce to a simmer and cook until fork tender, about 10-12 minutes. Strain out the cauliflower pieces and add to a blender, then add milk and butter. To make this a non-dairy preparation use almond milk and a butter substitute like Earth Balance.  Puree the ingredients until smooth and season with salt and pepper.

Shallots are sauteed in olive oil until softened and the pan is deglazed with a little white wine. Add the cauliflower puree to the pan and loosen the sauce with a little water or milk. Freshly grated Parmesan, nutmeg and a little chopped parsley are the finishing touches to the sauce. Both Daphne and Michael used fettucine noodles for their finished dish. Since we have eating our share of zucchini “noodles” this summer, I thought this would be another way to use them. I took zucchini noodles, added them to a saute pan to reduce as much liquid as possible and warm them up a bit.  I only cook them for a few minutes  since I still want them to retain a litttle crunch.

The sauce holds well and if you are going to make it, double up, use the whole head of cauliflower and freeze some for later use. I’m also thinking of using this as a substitute for bechamel sauce in my moussaka once the eggplants start rolling in.  As Daphne said, this is a sauce that will let you indulge without the guilt.

DSC_3845a

DSC_3779a

Cauliflower Alfredo Sauce

Serves six

Ingredients

  • 4c cauliflower, cut into chunks
  • 1 c milk
  • Kosher salt and freshly ground pepper
  • 2T butter
  • 1-2T olive oil
  • 1 large shallot, finely minced (about ¼c)
  • ½c white wine
  • ¼c finely grated Parmigiano-Reggiano cheese
  • ¼t freshly grated nutmeg

Directions

  1. Put the cauliflower and the milk in a large saucepan and season with salt and pepper. Note:milk will not cover the cauliflower.
  2. Bring to a boil, reduce heat to a simmer , cover and cook until fork tender, about 10-12 minutes.
  3. Using a slotted utensil, transfer the cauliflower to a blender. Add the milk and butter and puree until smooth. Season with salt and pepper.
  4. Place a large sauté pan over medium heat and add 1-2 tablespoons of olive oil. Add the shallot and cook for 2-3 minutes, or until slightly tender.
  5. Deglaze with the white wine and reduce liquid by half, 1-2 minutes.
  6. Add the cauliflower puree to the pan, if sauce is too thick, add a little water or milk.
  7. Add freshly ground nutmeg and stir in the Parmesan.

DSC_3802a

July 23, 2015 Zucchini Pesto Frittata

DSC_3760aIf you’re like me and not always in the mood to cook something when you get up in the morning for breakfast, but still want a little something to eat, a frittata is a great choice. Made the day before, they warm up quickly and also taste good at room temperature.  But frittatas aren’t just for breakfast, they make a nice lunch, light supper, sliced thin as an hors d’oeurve or anytime you just want a little nibble. This time of year they are a great way to showcase farm fresh eggs and produce.

For this recipe I chose the smallest zucchini I could find in the garden. Since their seed pods are still underdeveloped, they have a sweet nutty quality to them. I wanted very thin slices rather than shreds which is the usual method of preparation. Slice by hand, or for real uniformity, I used the 2mm slicing disk on the food processor. Larger zucchini should be shredded and salted then squeezed dry before adding to the frittata. If you skip that step, when you cook the zucchini you essentially will be steaming, not sauteing it. A couple of tablespoons of a chopped fresh herb is a welcome addition to a frittata, but since I had just made some, I opted for pesto, a delcious addition to this dish.

A 10″ non stick skillet with an oven safe handle is essential for this recipe. Begin by cooking the zucchini until it releases some liquid and the slices start to brown and become tender, this should take about 5-6 minutes. Set the pan aside.

Preheat your oven’s broiler and place a rack in the upper middle position. Beat the eggs and Parmesan cheese in a medium bowl.  Stir in pesto and the cooked zucchini. Add the rest of the oil to the empty skillet and heat to medium. Add zucchini-egg mixture and cook for 4-5 minutes, frittata will look set around the edges. Move the skillet to the broiler and leave a potholder on the oven door, that handle will get hot. I set a timer now for 90 second intervals. It took about 2 intervals for the frittata to get brown, which translates to about 4 minutes.

Using the potholder, remove frittata from the oven and allow to rest for 5 minutes.Run spatula around the edge of the skillet to loosen the frittata. You can serve the frittata warm right from the skillet, or slide unto a platter for a prettier presentation.

DSC_3460a

Zucchini Pesto Frittata

Serves 4

Ingredients

  • 2T olive oil
  • 1 1/3 lbs. of very small zucchini, washed and ends trimmed
  • Kosher salt and freshly ground pepper
  • 1-2T pesto or freezer pesto, thawed with cheese added
  • 6 large eggs
  • 3T grated Parmesan cheese
  • 2t olive oil

DSC_3719a

Directions

  1. Heat broiler.
  2. Slice trimmed zucchini by hand or with the thinnest slicing blade of the food processor.
  3. Heat 2 tablespoons oil in a 10-inch non stick skillet over medium high heat. Add zucchini; cook, stirring occasionally, until zucchini is tender, about 5 minutes. Season with kosher salt and freshly ground pepper.
  4. Beat six large eggs with 3 tablespoons grated Parmesan cheese in medium bowl. Stir in pesto and cooked zucchini into beaten eggs.
  5. Heat additional 2 teaspoons oil in the now empty skillet over medium heat. Add zucchini, pesto and egg mixture; cook until frittata is almost set, 4-5 minutes.
  6. Slide skillet until the broiler and cook until frittata is set and the top is browned.
  7. Serve directly from the skillet or flip unto serving plate. Serve hot or at room temperature.
The seed pods are not developed yet in baby zucchini.

DSC_3724a

DSC_3726a

DSC_3731a

DSC_3767a

July 17, 2015 Pesto for Seasons Without Basil

DSC_3686aWhether you’ve grown it from seed or purchased your plants at the local home improvement store, those basil plants in your garden are loving the warm temperatures and rain we have been receiving recently. It’s about now that your basil plants have probably sent out spikes of tiny white flowers. Since basil is a true annual, when allowed to flower the plant will go to seed, the leaves will become bitter and your plant will eventually die off.  Now is the time to begin harvesting basil leaves.

As soon as you see that your basil is flowering, pinch them off so the energy in the plant stays diverted to foliage growth. Cutting back your basil plants regularly  encourages full, bushy plants. To harvest, cut leaves from the top of the plant, pinch out the top of the stem. This should include small new leaves or a flower stalk and a pair of full sized leaves growing below the tip.

My favorite thing to do with the basil harvest is to make pesto. We have pesto with pasta, as a sauce for vegetables or chicken, as a dip, on pizza, the possibilities are limitless. But, at least in our climate, as soon as the first frost comes, basil  is the first victim, the leaves of the plant will turn black and wither. It’s now that you should start preserving that classic taste of summer with freezer pesto.

I have been making this recipe for years now from a classic cookbook of the eighties, Fancy Pantry. Written by former food editor and a three time winner of the Tastemaker award, Helen Witty, Fancy Pantry is a collection of recipes subtitled, “Well preserved, prettily pickled, candied, brandied, potted, bottled, sun dried and otherwise put-by elegant edibles”. My well worn copy attests to it’s usefulness and I recommend it highly.

Mrs Witty attributes this recipe to the late Marcella Hazan. Long before there was Lidia and Mario, there was Marcella.  Marcella Hazan was a cookbook author and authority on Italian cooking. My introduction to Italian cooking came through her classic volume, The Classic Italian Cook Book: The Art of Italian Cooking and the Italian Art of Eating and it’s subsequent follow up, More Classic Italian Cooking. My cookbooks written by Mrs. Hazan fall open naturally now to recipes I used countless times. I appreciated her clear and concise recipes written in a voice that was both warm and encouraging.

Her pesto recipe is quite straightforward; mix all the ingredients, basil, pinenuts, garlic, olive oil and a pinch of salt in a blender. Seal tightly and freeze pesto in one cup jars. The cheese or butter as she suggests, should be added right before using it. Most modern recipes call for just Parmesan cheese in pesto. Marcella points out that in Genoa, where pesto originated, they use equal quantities of Parmesan and a special, mildly tangy sheep’s milk Pecorino cheese from Sardinia .  That cheese was not available to American cooks when the book was written, back in the seventies. I found several online sources that sell it now.  Her solution to the problem then was to use 3 parts Parmesan to 1 part Romano and suggests to adjust this to taste. She states, “a well rounded pesto is never made with all Parmesan or all pecorino”. Point taken.

I make my pesto in 2 cup batches and freeze in one cup glass canning jars with the amount of cheese needed to finish the recipe written on the lid. Plastic freezer containers are fine as well. When I purchase any nuts, I buy from bulk containers and store them in the freezer until I am ready to use them. They thaw quickly and freezing nuts prevents them from going rancid quickly. I often substitute walnuts for the pine nuts, since the more delicately flavored Mediterrannean variety are sold at one local market for 12.99 for four ounces! When Marcella was writing her book, the food processor was still years away from being a commonplace kitchen item.  The question for her was whether to make pesto in a blender or with the classic mortar and pestle. She recommends and I concur that everyone should try to make pesto at least once with the mortar and pestle “because of the greater character of the texture and its indubitably richer flavor.”

But Marcella was a practical cook and felt blender pesto was so good that it could be enjoyed “with a clear conscience” whenever there wasn’t time or patience to make pesto in a mortar and pestle. Of course, fresh pesto is always the best but as Marcella said, “since fresh basil has a brief season and pesto keeps quite well in the freezer”, I am going to make enough pesto now to satisfy all those out of season cravings.

DSC_3689a

DSC_3678a

Basil Pesto for the Freezer

Makes about 2 cups

Ingredients

  • Freshly picked basil, rinsed, leaves stripped off and blotted dry, gently packed down to measure 3 cups
  • ¾ to 1 cup of a good quality olive oil
  • 3 large cloves of garlic, or more to taste, peeled and chopped
  • 3T pine nuts or coarsely chopped toasted walnuts
  • ½ to 1 t salt, or to taste
  • At the time of use: Parmesan and Romano cheese

Directions

  1. Combine everything except the cheese in the bowl of a food processor or blender. Turn the motor on and off rapidly, scraping down the sides of the container once or twice, to process the pesto to the texture you like, some prefer smooth, others, a fine chopped mixture.
  2. Pack the pesto into small freezer containers such as straight sided half pint canning jars, leaving ½ inch of headroom to permit expansion. Seal the containers and store in the freezer.
  3. To use the pesto: Thaw the amount you’ll need in the refrigerator, if time permits. A cupful is enough for 4-5 servings of pasta. Blend your cheese into the thawed pesto, adding 3-4 tablespoons freshly grated cheese to each cup of sauce. Check the seasoning of the mixture, you may want more salt, depending on the saltiness of the cheese. Use in the recipe of your choice.

DSC_3690a

DSC_8399a

DSC_8366a

DSC_8406a


July 11, 2015 Turkey Zucchini Meatballs in Tomato Sauce with Zucchini Noodles

DSC_3563aThis year, after the holidays I was on the hunt for interesting healthy, flavorful recipes. I found just what I was looking for in turkey zucchini meatballs. The original recipe was for turkey and zucchini burgers from chef, restaurateur, and cookbook author Yotam Ottolenghi’s beautiful book, Jerusalem. Just like all the other recipes I have tried of his, the results were delicious.. It was easy enough to adjust the size of the original slider sized burgers to make into meatballs instead. Grated zucchini gives the typical ground turkey meatball the additional moisture that it needs.  Since zucchini is 95% water, it is very important to squeeze all of the excess moisture out of the shredded zucchini so the mixture holds together well.  The turkey and zucchini are combined with fresh cilantro and mint, along with garlic, cumin and spicy cayenne pepper to give them a little kick.  I served them as suggested with a sauce of Greek yogurt, lemon and sumac. At that time in the middle of a cold snowy January I was bemoaning the fact that I had to buy the zucchini and the herbs and if it were July, well, those ingredients would be from our garden.

It’s July now and I remembered to make the turkey zucchini meatballs again, this time with our fresh picked zucchini and herbs from the garden. Back in January  I also thought it would be a good summertime variation on the recipe to serve the meatballs with tomato sauce and zucchini “noodles”. Our zucchini vines are producing like mad, I am picking four to six zucchini and yellow squash a day. That doesn’t count the ones that hide under the large leaves and turn into baseball bats!

To make the “pasta” choose straight sided zucchini or yellow squash, preferably of a medium size in diameter, the longer the better. My tool of choice for making the strands is the Kuhn Rikon stainless steel julienne peeler. Steady the zucchini with one hand, start at the top, press the teeth of the peeler into the flesh and pull down. Keep shredding on all sides until you reach the seedy interior. Place the strands in a bowl and separate the strands that stick together with your fingers. I lightly salt my pile of “pasta” to extrude any excess liquid.  I cook the strands in a saute pan, just long enough to warm them up a little and evaporate any additional excess liquid. I still want my zucchini to have a little crunch. If you prefer you can serve the meatballs with the pasta of your choice.

Our tomatoes are just starting to come in now, not quite enough to start making sauce. Until then I will use a good quality store brand. I like to warm the sauce and add the meatballs that I have kept warm after cooking them. Next time I will adjust the herbs in the meatballs for this dish, I think basil and a little oregano would complement the sauce and zucchini noodles nicely.

DSC_3458a

DSC_3465a

DSC_3554a
I love the different varieties of zucchini and squash we grow.
This time I had our own zucchini and herbs for the meatballs. I substituted baby shallots for the green onions.


Turkey and Zucchini Meatballs

Serves 4-6

Makes 18-20 meatballs

Ingredients for Meatballs

  • 1lb ground turkey, I used a 93/7 lean to fat ratio
  • 2c grated zucchini-wrung out in a clean tea towel to remove excess moisture
  • 3 scallions, white and green, thinly sliced
  • 1 large egg
  • 2T chopped mint
  • 2T chopped cilantro
  • 2 cloves garlic, crushed or finely chopped
  • 1t ground cumin
  • 1t table salt
  • 1/2t freshly ground pepper
  • 1/2t cayenne pepper
  • about 1/8c of a neutral cooking oil, canola, safflower
  • 3-4 cups of your favorite tomato sauce, warmed

Directions

  1. Preheat the oven to 425°F. In a large bowl combine all the ingredients for the meatballs, except the cooking oil. Mix well with your hands. Shape into 2″ balls. Place meatballs on a well greased baking sheet to ready for cooking. Pour enough oil into a large heavy frying pan to form a layer about 1/16 inch thick on the bottom of the pan. Heat over medium heat until oil is shimmering, sear the meatballs in batches on all sides. Cook each batch for about 4 minutes adding oil as needed, until browned.
  2. Transfer the seared meatballs to a baking sheet and place in the oven for 5-7 minutes, or until just cooked through. Serve warm with tomato sauce

Ingredients for Zucchini “Noodles”

  • 3-4 large straight sided zucchini and/or yellow squash
  • Kosher salt
I like making shreds with the julienne peeler, you could make them in a food processor with the shredding disk or a spiralizer tool I have seen in supermarkets.

Directions

  1. Wash and trim zucchini and/or squash. Cut stem and root end off. On a cutting board, steady your squash with one hand and shred with a julienne peeler. Start at the top, press the teeth of the peeler into the squash and pull all the way down.
  2. Shred on all sides of the squash until you reach the seeds. Repeat with the rest of the squash. Place the strands in a very large bowl, separate the strands that stick together and salt evenly. Let sit for 10 minutes to extrude any excess water.
  3. Over medium heat cook the strands in a large sauté pan to warm up the squash and remove any excess water.

DSC_3571a


July 7, 2015 Buttermilk Broccoli Basil Soup

DSC_3383a

When I first started cooking in the eighties, supermarkets sold broccoli with both the crown and stem, usually two pieces joined together with a thick rubber band. Back then I would whack off the stems and use the florets for stir fries and rich broccoli cheddar soup. The stems were sentenced to the compost heap or the garbage pail. Like most home cooks, I didn’t realize the stems were edible and had no idea how to cook them.

Because of my interest in Chinese cooking I discovered a recipe that changed the way I looked at using broccoli.  It was a recipe for jasmine fried rice that called for peeled and diced broccoli stems.  I admit I was dubious at first, but the delicate texture and sweet flavor the stems brought to the dish won me over. Now the problem became finding broccoli with the stem. Over the course of time the crown and stem combination was replaced with just broccoli crowns, sold at a higher price.  Like me, consumers wanted just the crowns, so the supermarkets responded in kind.  Broccoli crowns became the norm, coming at a premium price per pound.

Fast forward to the last several years, with the advent of farmers markets, food co-ops and the rising popularity of home gardens, the broccoli stem has reappeared. In the spirit of nose to tail cooking, using virtually the entirety of an animal,  chefs are now embracing root to stem cooking, using as much of the vegetable as possible. Why not use broccoli stems? The main stem is entirely edible.  They have the same nutritional value as the crowns or florets with even more fiber.  I have found recipes using the stem for everything from salads to stir fries to roasted chips.

The original recipe for this soup called for broccoli florets only.  I used the florets in another dish and in the spirit of root to stem cooking, thought the stems would work well in a soup. I sliced the stem into bite sized pieces to yield 5 cups. The sliced broccoli stems and shallots are sauteed in butter or oil. A little sherry boosts the flavors and the vegetables are simmered in either chicken or vegetable broth. Since they are more fibrous, broccoli stems should be cooked a little longer than the florets.  You can either peel the stems first or put the mixture through a food mill after pureeing to obtain the smoothest texture.  Thin the soup with buttermilk and garnish with mini basil leaves. Our warm temperatures called for a cold soup but this would be good warm as well.

I used five cups of bite sized broccoli stem pieces.

DSC_3407a

Broccoli Basil Soup

Serves four

Ingredients

  • 2T unsalted butter or olive oil
  • 1 medium onion or 3 medium shallots
  • 2T dry sherry
  • 5c broccoli stems or flowerets or a combination of both, cut into bite sized pieces
  • 2½c chicken or vegetable stock
  • Kosher salt and freshly ground pepper
  • 1c low fat buttermilk
  • 2T fresh finely minced basil leaves

Directions

  1. Heat butter or oil in a large saucepan over medium high heat. Add onion or shallot and sauté until golden, about five minutes.
  2. Add sherry and broccoli, stir cook until sherry evaporates, about 30 seconds.
  3. Add stock, salt and pepper to taste to saucepan; bring to a boil. Reduce heat to simmer; cover and cook until broccoli is tender, flowerets will take about 10 minutes, stems only, 20 minutes.
  4. Ladle broccoli mixture into blender. Blend until very smooth, using a little of the buttermilk if needed. If using stems, place mixture through a food mill for the finest texture. Stir in the rest of the buttermilk.
  5. If serving hot, return soup to saucepan; cook over low heat until warmed through. If soup is too thick, stir in additional buttermilk to thin consistency. Adjust seasonings. If serving cold, refrigerate soup for several hours, taste and adjust seasonings.
  6. Soup can be refrigerated for three days and either served cold or reheated just before serving. Ladle soup into individual bowls. Garnish with minced basil or whole mini basil leaves and serve immediately.

DSC_3380a

July 3, 2015 Oven Roasted Broccoli and Carrots

DSC_3357aMy original idea for this post was to make a salad, but sometimes the simplest things are the best. Freshly harvested broccoli and carrots are tossed with a good quality extra virgin olive oil, salt, freshly ground black pepper and my favorite ingredient to add to the roasting mix, aleppo pepper. Aleppo pepper, as I have mentioned before in a previous post is one of my favorite new ingredients of the past several years. It is dark red in color, flaky and somewhat oily in texture. It’s flavor profile is rich, sweet and fruity with hints of cumin.  Aleppo’s heat profile is moderate, only just a little hotter than paprika.

Begin by cutting your vegetables in relatively uniform pieces; in this case; the broccoli in individual florets and carrots in one inch lengths so they will roast in the same time as the broccoli.  Remember that vegetables shrink when roasting so always cook more than what you might if you were steaming or sautéing.

Although some recipes have you do it right in the pan, vegetables are more evenly oiled and seasoned in a bowl . Use just enough oil to give an even coating, about two tablespoons for this quantity should be enough. Season generously with salt, freshly ground pepper and whatever herb you might choose. In addition to Aleppo pepper, I have used paprika, chipotle pepper, cumin, thyme, it all depends on what compliments your vegetables best.

Roasting should always be done on a large shallow sided sheet pan. The ones I use are called “half size” and have a 18″x13″ dimension. They are relatively inexpensive and available in most big box stores. I consider them indispensible and have about a dozen from my catering days. Using a pan or baking dish with high sides will cause them to steam rather that roast because of the high water content of vegetables.

Give the vegetables room for roasting, everything should be in a single layer on the pan with a little room between each piece. I like to roast on a relatively high heat, 425°F to 450°F to insure they will caramelize on the outside and be nice and tender on the inside.  I like to stir or shake the pan every five minutes or so to roast every surface.  Time may vary for desired doneness, that’s why I check them frequently. The larger your pieces are, the longer it will take them to cook.

For a finishing touch to my roasted vegetables I added some cashews and a little fresh cilantro. In this case, simple was the best.

DSC_3324a

DSC_8441a

DSC_3352a
Cut vegetables into uniform pieces and spread out evenly on a sheet pan.

Oven Roasted Broccoli and Carrots

Serves 2-3

Ingredients

  • 1 large head of broccoli, florets chopped off the stalk, about 6-7 cups
  • 3 medium carrots, cut in half and into 1″ lengths
  • 2-3T extra virgin olive oil
  • 2-3t kosher salt
  • 2t freshly ground black pepper
  • 1t Aleppo pepper
  • 1/4c unsalted cashews
  • 1/4c cilantro leaves

Directions

  1. Preheat oven to 425°F.In a large bowl, toss the vegetables together with the olive oil, salt and pepper.
  2. Transfer vegetables to a large sheet pan, spreading them out evenly.
  3. Roast vegetables, shaking the pan every five minutes or so to be certain all surfaces are roasted. My vegetables were very fresh and took about 15 minutes total to cook. Your time may vary.
  4. Transfer vegetables to a serving bowl. Garnish with cashews and cilantro.

June 14, 2015 Crustless Spinach, Mushroom and Canadian Bacon Quiche

DSC_3155aConsider a humble little package of frozen chopped spinach, a convenience and a staple in many kitchens, including mine. You might be quite surprised how many cups of fresh spinach it takes to make that 10 ounce brick of frozen. That was the information I was looking for this week.

Our spinach plants are going to seed and it was time to do one last serious pick before pulling them out and getting the space ready for another planting. When picking spinach, especially in the extreme hot weather (95°F) it is important to not use a metal bowl or colander, they will put your freshly picked leaves into immediate wilt that will be hard to revive from.  I prefer using a clear plastic “pebble” bowl, sturdy hard plastic bowls I used in my catering business. I snip off the best leaves with scissors, leaving the plant and damaged leaves behind for the mulch pile. Next, I soak the spinach in a clean sink of cold water. I start the process by swishing the leaves around in the sink. I let them sit for a few minutes, the spinach will float to the top, and the dirt and debris will sink to the bottom.  Then I gently lift out the leaves and transfer them to a colander. I will repeat the process again to be sure all the dirt is removed. I refrigerated the spinach in the large bowls with some plastic wrap draped over the top.

Now it was time to find ways to use up this bounty.  Spinach is a powerhouse of nutrition, low in calories, a rich source of iron, vitamins A, C, and K, potassium, calcium and magnesium. End of the season spinach is still very good, but not necessarily something you would want to use in a salad. So I was on the hunt for recipes with cooked spinach. Frittata, quiche, spanakopita, all good choices but many recipes just call for that ubiquitous ten ounce package of frozen spinach. I needed to find the conversions to take that very large bowl to the amount of cooked spinach I needed.

Spinach is 90% water in composition and when cooked, 1 pound of fresh spinach is equivalent to 10 to 12 cups and will cook down to 1 cup. One 10-ounce package of frozen spinach is the equivalent of 1 1/2 pounds of fresh spinach or about 15-18 cups of spinach. In my pictures you will see a before and after of the spinach. To reduce it, I cooked the spinach in a 10″ sauté pan using just the water that clung to the leaves. Then I drained it thoroughly in a fine mesh colander, squeezed it dry and chopped it roughly.

My efforts paid off. With the spinach I picked, I was able to make all three, frittata, quiche and spanakopita. This quiche can be put together in minutes since the most time consuming part is eliminated, making the crust.  I added some sauteed sliced mushrooms and Canadian bacon. In case you didn’t know, American bacon comes from the fatty belly of the pig and Canadian bacon is cut from the loin.  Of course a 10 ounce package of frozen spinach can be substituted in this recipe. It makes a nice breakfast or light lunch and reheats well the next day.

DSC_3115a
Fifteen to eighteen cups of fresh spinach.
Cooks down to this!
Cooks down to this!

DSC_3148a

Crustless Spinach and Canadian Bacon Quiche

Makes 6-8 servings

Ingredients

  • 1c finely chopped onion
  • 1c sliced fresh mushrooms
  • 1T vegetable oil
  • 1 package (10 ounces) frozen chopped spinach or 1½c cooked and chopped fresh spinach
  • 2/3c finely chopped Canadian bacon
  • 5 large eggs
  • 3c shredded swiss cheese (other cheeses will work too like cheddar or Monterey Jack)
  • 1/8t freshly ground pepper

Directions

  1. In a large skillet, sauté onion and mushrooms in oil until tender.
  2. Add spinach and ham, cook and stir until the excess moisture is evaporated.  Cool slightly.
  3. Beat eggs, add cheese and mix well. Stir in spinach mixture and season with pepper; blend well.
  4. Spread evenly into a greased 9-inch pie plate or quiche dish.
  5. Bake at 350°F for 40 to 45 minutes or until a knife inserted near the center comes out clean.

DSC_3145aDSC_3162a


June 10, 2015 Arugula, Strawberry, Snow Pea and Radish Salad

DSC_2927aJune’s warm temperatures are making an appearance again this week, but technically it’s still spring until the 21st. This end of spring salad brings together four elements that are a part of the early June gardens in our area. All salad greens love the cooler temperatures of spring and arugula is no exception. We have been enjoying pea shoots for several weeks now and the peas started making their appearance last week. They  will probably only last to the end of this month when warmer temperatures will cause the vines to die off.

I just harvested our most currant crop of radishes, another vegetable that doesn’t like mid summer heat.  At my request, Joe planted a strawberry bed this spring.  In fact, some of the plants are already flowering. He has removed the flowers from these ambitious plants to give them time to establish themselves before producing fruit.  So there is a good chance that the plants that bear two times in a season will produce their first strawberries late in the summer.

A strawberry vinaigrette is the perfect accompaniment for this salad. I chose a strawberry balsamic vinegar from The Tubby Olive, a store that is always inspiring new salad combinations for me. For the dressing I combined garlic, shallot, Dijon mustard, strawberry balsamic, just a touch of honey and a good extra virgin olive oil. When making a salad be sure to use a bowl that gives you plenty of room to combine the ingredients.  I start by tossing the greens first with dressing to coat them lightly and then add some of the other components and toss again. I leave the rest to top the salad with, this ensures the last person who is served doesn’t get all the heavier ingredients that end up in the bottom of the bowl.

DSC_2940a

Arugula Strawberry Snow Pea and Radish Salad

Serves two

Ingredients

For the dressing

  • 1t finely minced garlic
  • 3T minced shallot
  • 1t Dijon mustard
  • 3T Strawberry balsamic vinegar
  • 1/4t honey
  • 1/4c extra virgin olive oil
  • Kosher salt and freshly ground pepper

For the salad

  • 4-5 cups of arugula, washed and trimmed
  • 1c strawberries, stemmed and sliced in half
  • 1c snow peas, strings removed, lightly steamed
  • 1c radishes, thinly sliced
  • 1/4c slivered almonds, lightly toasted
  • 2-3 slices of prosciutto, crisped in a non stick pan
  • 1/4c creamy feta, crumbled
  • Freshly ground pepper

Directions

  1. To make the dressing, combine all the ingredients in a small bowl and whisk together until evenly combined. Taste and adjust if necessary. Season to taste with kosher salt and pepper.
  2. Place the salad greens in a large bowl and toss with some of the vinaigrette and taste. Add about half of the other ingredients, toss again, adding more of the dressing if necessary. Top the salad with the remaining ingredients. Season each portion to taste with freshly ground black pepper. Reserve remaining vinaigrette for a later use.

DSC_7727a

DSC_3016a
Our new strawberry patch. They need to be “nipped in the bud” to produce stronger plants.
Joe will plant more arugula in the fall.

DSC_2933a

June 6, 2015 Spinach and Chickpea Curry

DSC_2863aStill on the hunt for spinach themed dishes, I found this recipe for Spinach and Chickpea Curry in Fine Cooking. It is similar to a northern Indian dish called palak  chole, palak being the Punjabi word for spinach and chole the word for chickpea. The dish can be made in no time at all with some basic pantry ingredients.

Curry powder, a staple in many kitchens, is not a single spice like basil or oregano but a combination of ingredients and will vary by region and country. Most curry powder recipes include coriander, turmeric, cumin, cayenne, ground ginger and mustard seed. To add to the confusion, there is also a curry plant that is supposed to smell like curry and a curry leaf plant. The leaves of the curry leaf plant are used mostly in the cooking of southern India.  The leaves look like small bay leaves but are edible and have a lime-lemony taste.

Garam masala is the other spice blend in this dish. Garam is the Indian word for warm or hot and masala is a mixture of spices. Garam masala is a blend of dry roasted ground spices from northern India. Dry roasting adds to the complexity of garam masala and it is not as hot and spicy as other blends. It may contain up to 12 spices including black pepper, cinnamon, cloves, coriander, cumin, cardamom, dried chilis, mace, nutmeg and other spices.  As with all spice blends they should be kept in a cool dark cabinet and have a shelf life of about six months.

Saute onion, ginger, spice blends and cayenne over medium high heat. The fragrance is absolutely intoxicating. Stir in drained and rinsed chickpeas, canned diced tomatoes and a little kosher salt. Next, add handfuls of spinach, stirring to wilt as you go. The recipe calls for baby spinach but I used garden spinach that I cut down to size and removed large ribs and stems from. This was a dish that came together in less than an hour, and that including picking, washing and trimming the spinach. Serve garnished with cilantro and some plain yogurt to stir in if you choose. Next time I think I will make some naan to sop up the juices. Leftovers are fabulous, that is, if you have them.  This dish was so good, it was requested two days in a row.

DSC_2860a

Spinach and Chickpea Curry

Ingredients

  • 3T canola oil
  • 1/4c chopped red onion
  • 2T finely chopped fresh ginger
  • 1T curry powder
  • 1t garam masala
  • 1/8t cayenne pepper
  • 1 15oz can chickpeas, drained and rinsed
  • 1 14½oz can diced tomatoes
  • 1¼t kosher salt plus additional for final seasoning
  • 7-8c fresh spinach, torn into 1″ pieces
  • ¼c chopped cilantro
  • Plain Greek style yogurt for serving

Directions

  1. Heat canola oil in a 12″ sauté pan over medium high heat. Add onion, ginger, curry powder, garam masala and cayenne pepper. Cook, stirring often until the onion is softened, 2-3 minutes.
  2. Stir in one can of drained and rinsed chickpeas, one can of diced tomatoes and 1¼t salt.
  3. Add spinach by the handful, stirring to wilt as you go. Continue to cook, stirring often, until the spinach is completely wilted and the flavors have melded, 4 to 5 minutes more. Season to taste with more salt. Remove the pan from the heat and stir in ¼c cilantro.
  4. Spoon onto a platter and serve with Greek yogurt for dolloping on top.
The curry leaf plant.

DSC_2866a