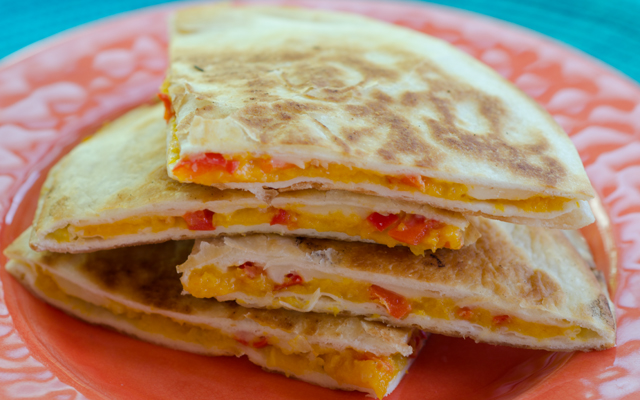
Aug 1, 2017 Zucchini Lasagna with Meat Sauce

Gardeners, let’s face it, we’ve all done it. You watch that cute little zucchini you’ve been nurturing along for several days, waiting for the moment when it’s about eight to ten inches long, bright green with mottled white striping and the blossom still attached, ready for picking. But life isn’t perfect, it rains for several days and you didn’t make it out to the garden and now that cute little zucchini is the size of a miniature baseball bat. Don’t despair, there are ways to still use them, zucchini lasagna is one of my favorites.

Zucchini lasagna “noodles” replace regular pasta for this delicious dish. I first cut the zucchini in half lengthwise so that I have a flat surface to cut my noodles. A mandolin is always my first choice for even uniform slices. If you weren’t aware, a mandolin, isn’t just a music instrument. It is a hand-operated kitchen tool with adjustable blades that in addition to making julienne and waffle cuts, makes uniform slices. Whatever model you choose, use the hand/finger guard, I speak from personal experience.  You can also go low tech and use a very sharp knife with a cutting board to stabilize your slices. I make my slices to fit the baking dish lengthwise, if you are using shorter zucchini, it’s fine to cut them the other way, making sure they fit your dish.

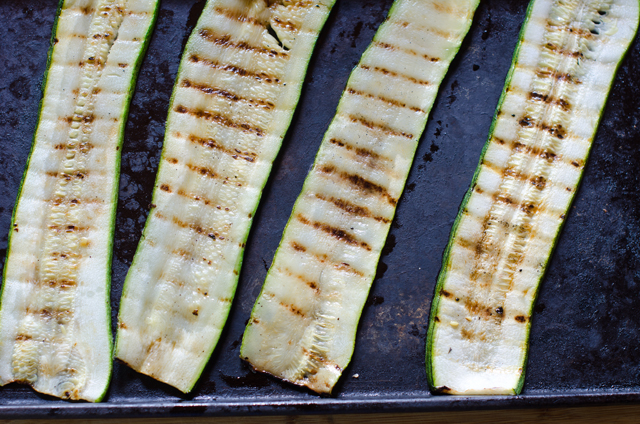
Zucchini is 95% water so before you assemble the lasagna it is important to precook it so less moisture ends up in your finished dish. Suggested methods I’ve seen include broiling, sauteing and parboiling. I like cooking them in the grill pan, it gives added flavor to the zucchini and the slices have a nice finished look. Cooking the slices on an outdoor grill would make the process even faster. Cook more slices than you think you may need to allow for breakage.

This dish can be made in stages, make the meat sauce one day, slice and cook the zucchini the next, then assemble. Just like regular lasagna, it tastes even better the next day, if it lasts that long!
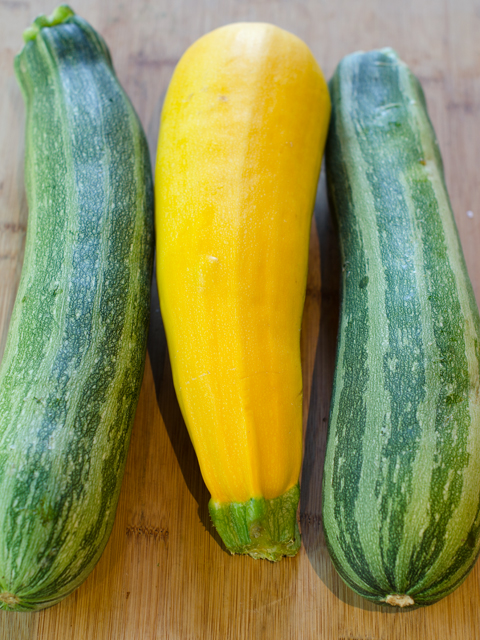
Don’t forget the yellow squash , they work in this recipe too.

Zucchini Lasagna with Meat Sauce

Serves 6-8

Ingredients

Ingredients

  • 3-4 or more large zucchini, sliced 1/8″ thick
  • Extra virgin olive oil for brushing zucchini
  • 1 lb lean ground turkey or beef
  • 1 ½ t kosher salt
  • 1 T olive oil
  • 1 c finely chopped onion
  • 2 cloves minced garlic
  • 1 quart plain tomato sauce ( I used homemade)
  • 2 T tomato paste
  • 2 t dried oregano
  • ¾ t freshly ground black pepper
  • 1 ½ c part skim ricotta cheese
  • ½ c finely grated Parmesan
  • 1 large egg
  • 4 c shredded mozzarella cheese

Directions

  1. Preheat oven to 375°F and place baking rack in the lower position.
  2. Make zucchini lasagna “noodles”. Cut squash into 1/8″ thick slices using a sharp knife or mandolin.  If your squash is long they should fit the pan lengthwise, if you have shorter squash, orient the slices in the opposite direction. You should have enough slices to do four to five layers with a few extra pieces for good measure.
  3. Heat a grill pan or an outdoor grill to medium high heat. Brush both side of the slices lightly with olive oil.
  4. Grill the zucchini slices on both sides so they have grill marks, 3-5 minutes for the first side, a little less for the second side. Squash should be cooked but not falling apart. Line up the grilled zucchini slices on a paper towel lined baking sheet to absorb excess moisture.
  5. Heat a large saute pan over medium high heat and add 1 tablespoon olive oil. When the pan is hot add the onion and cook until onion is softened but not browned, 4-5 minutes. Lower the temperature if necessary. Add the garlic and cook another minute. Add the ground meat and season to taste with salt. Brown the meat, breaking it up as you cook it.
  6. Slowly pour in the tomato sauce and stir it into the meat. Bring to a boil and immediately reduce heat to medium. Add tomato paste, oregano, salt and pepper. Simmer on low, stirring occasionally for about 40 minutes. Cover and set aside.
  7. In a medium bowl combine ricotta, Parmesan and egg. Mix well.
  8. Assemble the lasagna. Lightly oil or spray a 9 x 12 glass or ceramic baking dish.
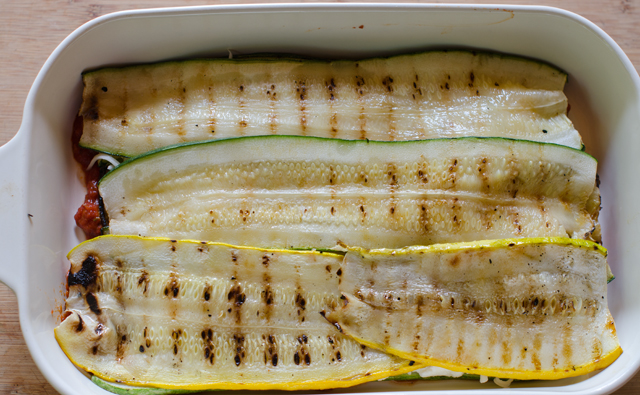
  9. Spread a light layer of the tomato sauce on the bottom of the pan. Layer zucchini slices over to cover. Spread one-third of the ricotta mixture over the zucchini and top with a cup of the mozzarella. Repeat the layers two more times, sauce, “noodles”, ricotta mixture topped with mozzarella. Top with noodles and the remainder of the sauce. Cover the baking dish tightly with foil and bake for 30 minutes. Uncover the foil and bake for an additional 20 minutes to dry up excess liquid. Sprinkle the last cup of mozzarella over the top and bake until melted, about 15 minutes. Let lasagna rest for a half hour to allow it to firm up and make for easier slicing.
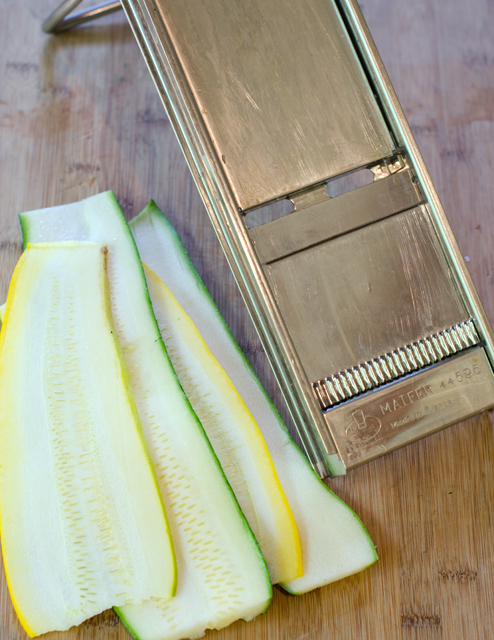
Slices made with my stainless steel mandolin, a gift from many years ago, I have other inexpensive ones too.

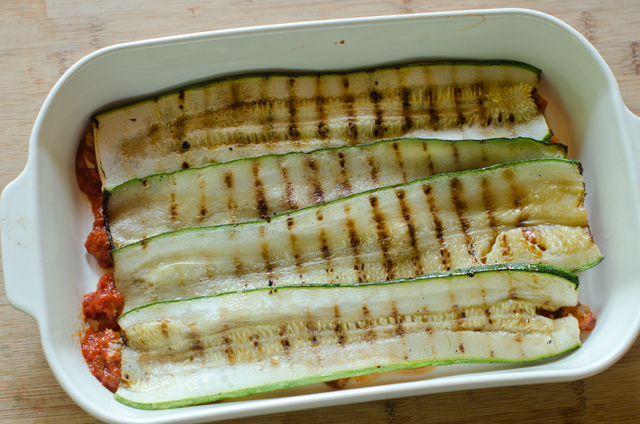
Zucchini slices cooked in the grill pan.

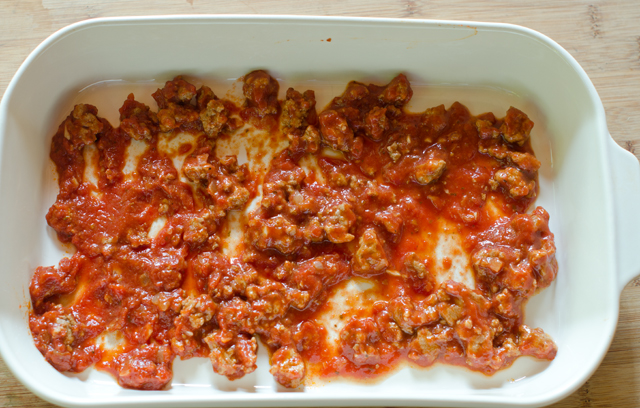
Meat sauce to cover the bottom of the baking dish.

Grilled zucchini slices to cover.
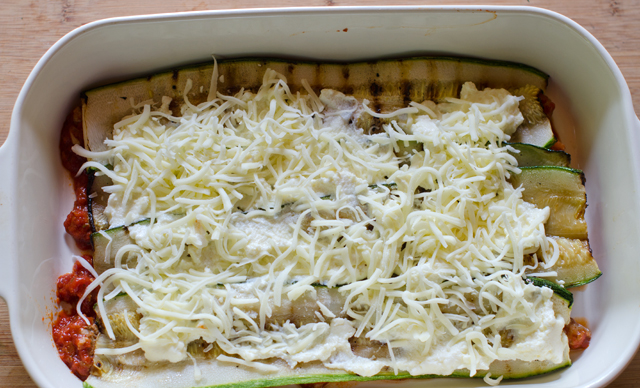
A layer of cheese.
Another layer of zucchini noodles. Repeat the process with the sauce.
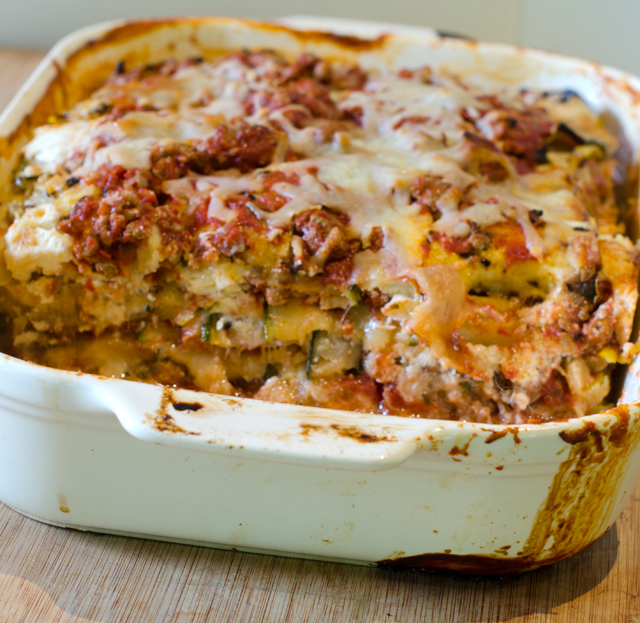
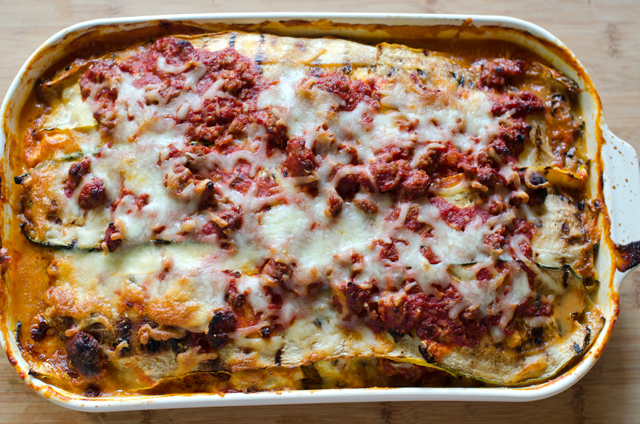
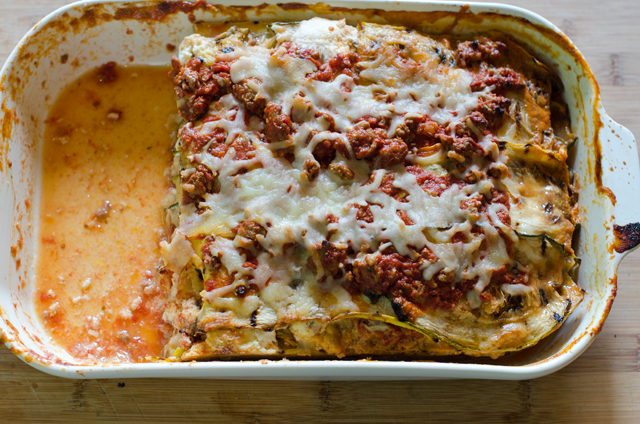
The finished product.

Delicious!
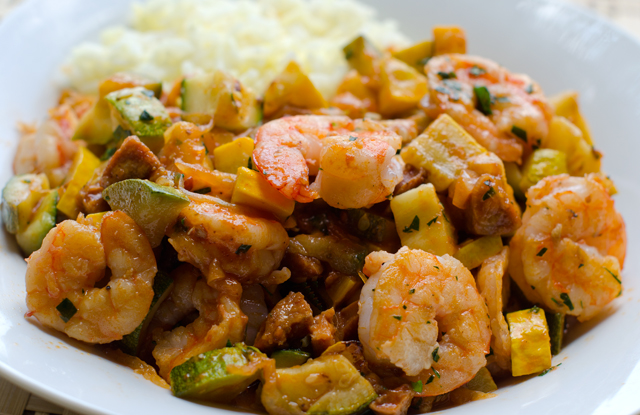
July 21, 2017 Spicy Chipotle Shrimp with Zucchini and Chorizo


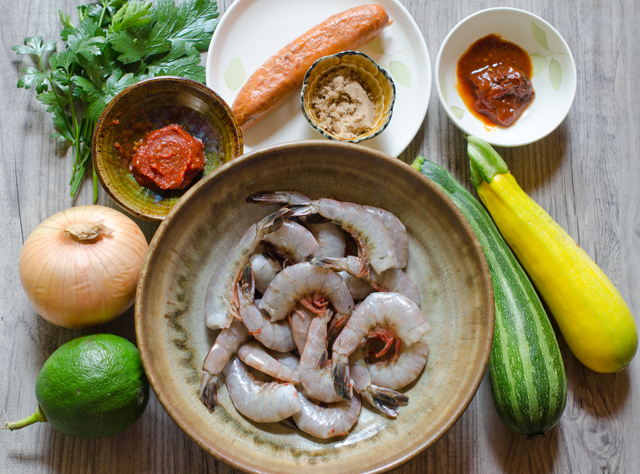
Spicy chipotle shrimp with chorizo and zucchini is an entrée that is flavorful, easy to prepare and uses only one pan. If that isn’t enough, it’s a great way to use that July abundance of zucchini and yellow squash from your garden or farmers market.

I always have some frozen shrimp on hand for a quick dinner. Though my local seafood market on occasion has fresh (never frozen) Florida shrimp, in my area of the country (mid-Atlantic) frozen shrimp is not a bad thing. The shrimp you see sitting on ice at the supermarket seafood counter have been thawed out. Convenient yes, but you can’t be certain how long they have been sitting there. I prefer to buy individually quick frozen (IQF) shrimp in 1 or 2 pound plastic bags, then I can just defrost what I need in 15-20 minutes. I prefer larger shrimp because there is less of a chance to overcook them. Look for the count of shrimp per pound, in this case 21-25 count, rather than a size designation like extra-large or jumbo.

Easy peel, meaning the shell is split down the back and deveined is the easiest way to make this or any recipe calling for shrimp. Always devein shrimp before cooking, many an eliminated Chopped contestant rues the day they didn’t. It’s not hard to do, either use a small pairing knife or the tool specifically made for that purpose. It’s not actually a vein but the shrimp’s digestive tract and when it is dark in color,  it is filled with grit. Removal is not essential, nor will it make you ill, deveining just makes for a more attractive presentation.

Pat the shrimp completely dry with paper towels before cooking. Any extra moisture on the surface of the shrimp prevents them from searing and browning. Preheat your skillet for a few minutes before adding the oil. Wait a minute until the oil is shimmering before adding the shrimp. Place the shrimp in a single layer, leaving a little space between each. Don’t be tempted to flip the shrimp too soon, give them time to brown on the first side, a little pink will start to show, now flip. You want the shrimp to be slightly underdone since they will be added back to the pan later.

Transfer the shrimp to a plate, add the second 2 tablespoons of oil to the pan along with the diced chorizo. Spanish chorizo is a dried and cured (fully cooked) pork sausage seasoned with smoked paprika, garlic and other herbs. There is also Mexican chorizo that comes in casings and must be cooked before eating. It is used in tacos, tortillas and often served at breakfast with eggs. I would definitely say that the Spanish chorizo is the best choice here.

Add the cubed zucchini, onion and yellow squash, cook until the zucchini starts to brown, 3-4 minutes. Now it’s time to add the broth mixture. A chipotle chili and adobo sauce give it a real kick and the tomato paste and brown sugar mellow out the heat. Chipotles are small jalapeños that are dried by a smoking process that gives them a dark color and a distinct smoky flavor. They are canned in a red sauce, adobo, that has a smoky flavor as well. Start with the quantity given in the recipe and if you really like it hot, add a little more. Just remember it’s easier to add heat than take it away. Since you will not be using the entire can, store the remaining chilis in adobo in a well labeled plastic container or zip-loc bag in the freezer. I wasted too many opened cans of chilis before I got in this habit.

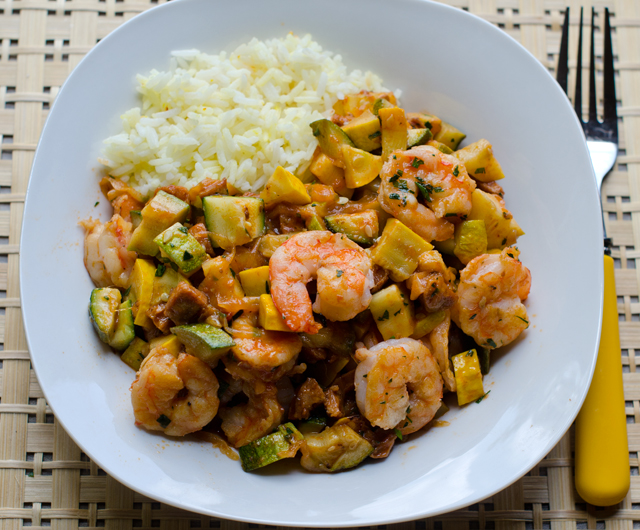
Bring the sauce to a boil, then reduce it to medium low and add the shrimp back in along with the lime juice and parsley. Cook for an additional 2-3 minutes, the zucchini should be tender and the shrimp opaque throughout. You can check for doneness by cutting a shrimp in half at its thickest point. It should be creamy white, firm and springy but still moist. You can add some strips of red pepper to the recipe and swap out cilantro for the parsley. Give a final seasoning with salt, pepper and more lime juice. Serve immediately garnished with the rest of the parsley on a bed of rice.


Spicy Chipotle Shrimp with Zucchini and Chorizo

Serves 2-3

Ingredients

  • ½ c low-salt chicken broth
  • ½ small chipotle, seeded and minced, plus 2 T adobo sauce (from a can of chipotles in adobo
  • 1 T tomato paste
  • 1 t brown sugar
  • 1 lb shrimp (21-25 per lb), peeled, deveined, rinsed and patted dry
  • 1 t kosher salt; more as needed
  • Freshly ground black pepper
  • ¼ c olive oil, divided
  • ¼ lb chorizo, cut into ¼ inch dice, a little less than a cup
  • 3 c combination of zucchini and yellow squash, cut into ½ inch dice
  • 1 cup thinly sliced yellow onion
  • ¼ c chopped parsley or cilantro
  • 2 T fresh lime juice; more as needed

Directions

  1. In a one cup measure, whisk together chicken broth, chipotle, adobo sauce, tomato sauce and brown sugar.
  2. Sprinkle the shrimp with a ¼ t salt and a few generous grinds of black pepper. Put a skillet (not non-stick) over medium high heat, when the skillet is hot, add 2 tablespoons oil. When it starts to shimmer, add the shrimp in a single layer. Cook the shrimp undisturbed until it browns nicely, a little less than 2 minutes. Flip and brown the shrimp on the other side, about 1 ½ minutes. Transfer the shrimp to a plate, it should be slightly under cooked.
  3. Add the remaining 2 tablespoons oil and the chorizo to the pan and cook, tossing occasionally, until it starts to brown, about 1 minute. Add the zucchini, yellow squash and onion, sprinkle with a little salt. Cook, tossing frequently, until the zucchini starts to brown and is tender, about 4 minutes.
  4. Add the broth mixture to the skillet and bring to a boil. Reduce the heat to medium low. Stir in the shrimp, half of the parsley and the lime juice.
  5. Cook, stirring often, until the zucchini and squash are tender and the shrimp are opaque, 2-3 minutes. Cut one in half to check if necessary. Season to taste with salt, pepper and more lime juice. Serve immediately, sprinkled with the remaining parsley.
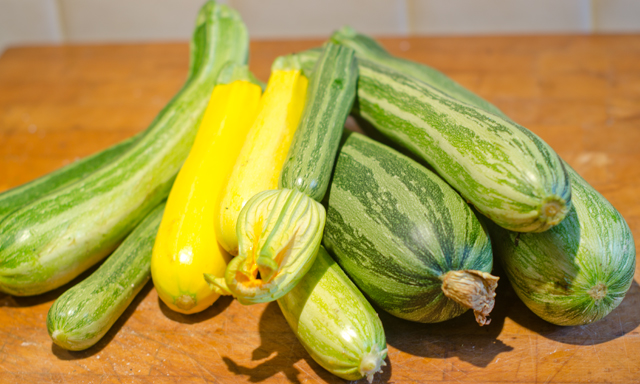
One day’s pick of zucchini and yellow squash.


July 15, 2017 Tomato Salads

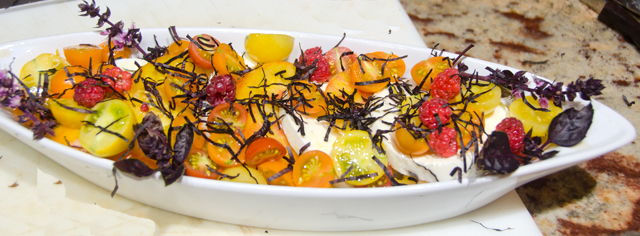
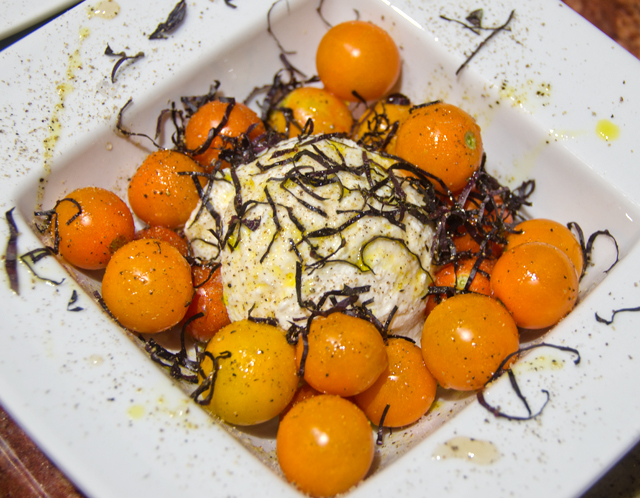
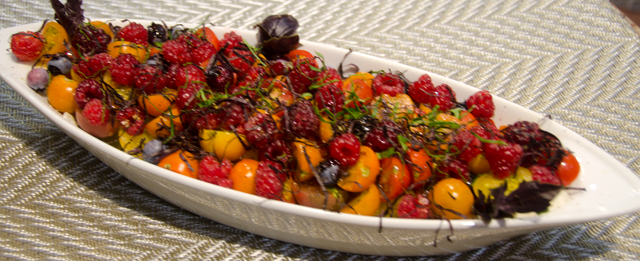
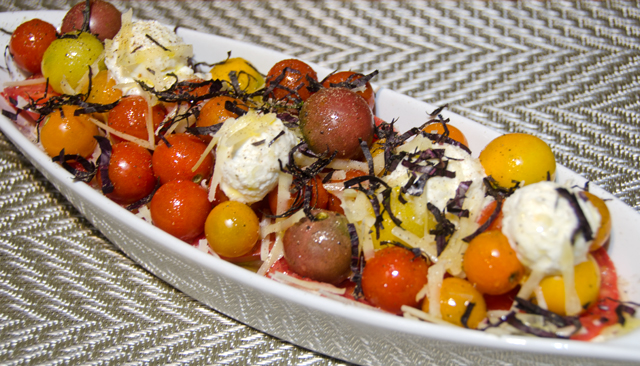
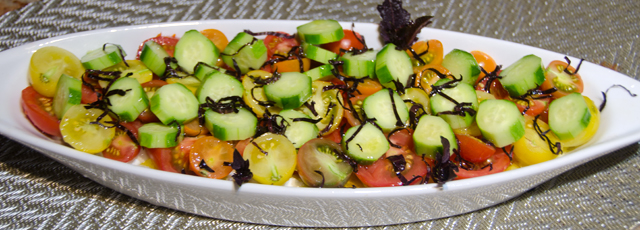
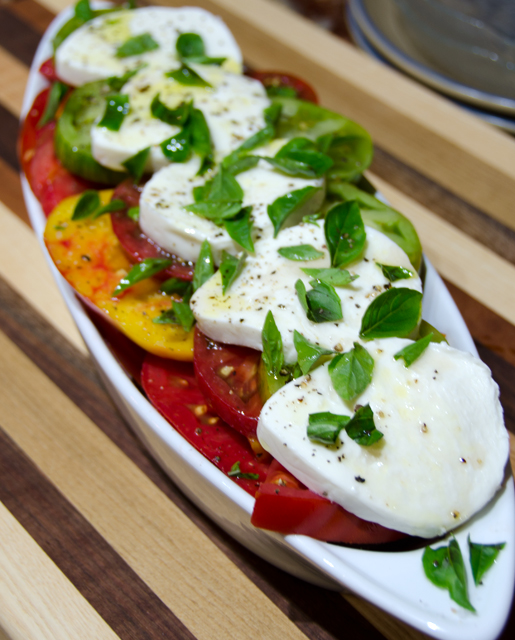
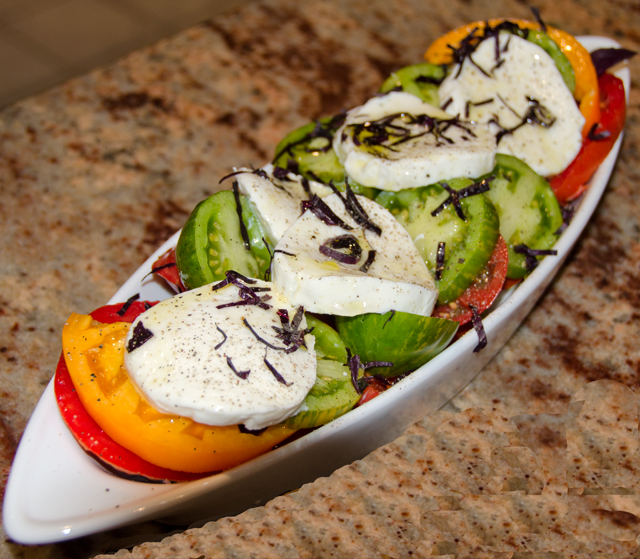
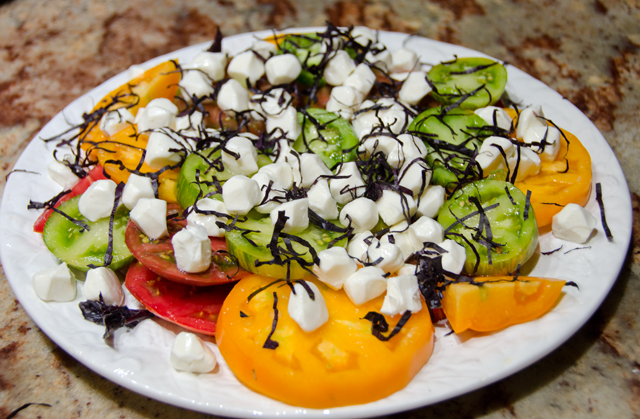
This is a space to record Joe’s creative tomato salads throughout the summer. The pictures won’t always be the best since they are taken in the kitchen. Just a way to commemorate these wonderful salads.

July 10 salad – Sun Gold, Gold Nugget and Super Sweet tomatoes, raspberries, purple basil, mozzarella with peach vinegar and blood orange olive oil.

July 12 – Sun Gold tomatoes, ricotta and purple basil with peach vinegar and blood orange olive oil.

July 15 – Super Sweet 100’s, Sun Gold, Gold Nugget, Snow Cherry, Chocolate Cherry, Fourth of July, mozzarella, purple basil, raspberries, blueberries, Cascadian raspberry vinegar, Persian lime oil.

July 16 – Brandywine, Sun Gold, Super Sweet, Gold Nugget, Snow Cherry, Chocolate Cherry, purple basil, mozzarella, ricotta, Parmesan, purple basil, Cascadian raspberry vinegar, Persian lime oil.

July 17 – Fourth of July, Gold Nugget, Snow Cherry, Super Sweet, burrata, Persian cucumbers, purple basil, Cascadian raspberry vinegar, Persian lime oil.

August 14

August 16

August 17

July 12, 2017 Swiss Chard Quesadillas

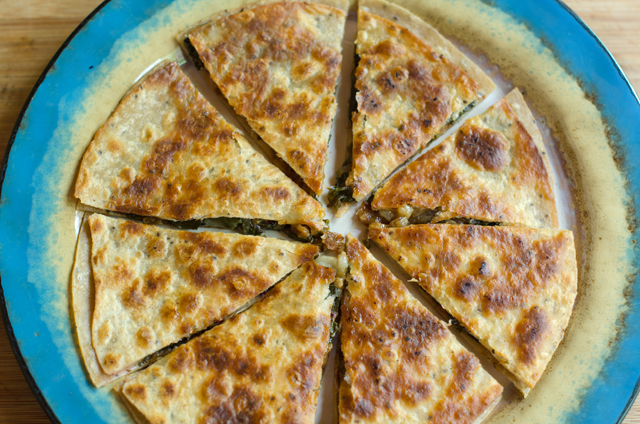
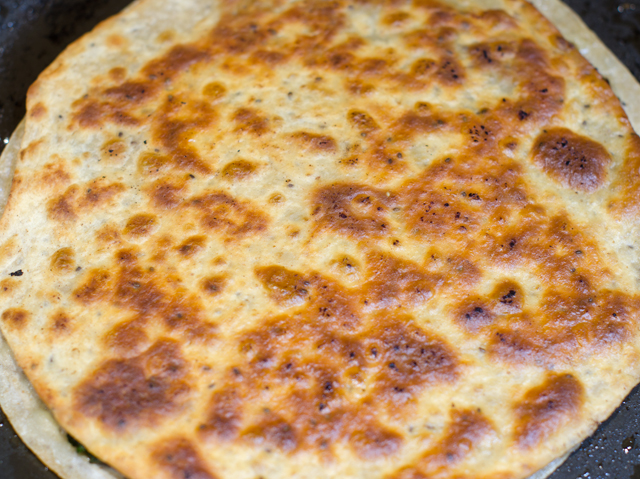
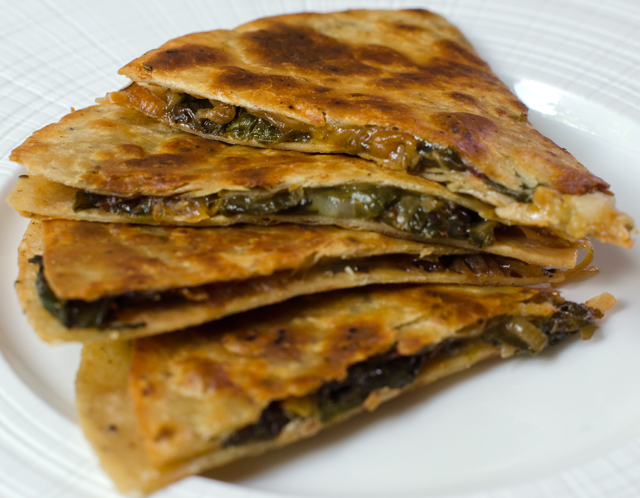
Tuesday evening is Joe’s night to work late and although we don’t sit down for dinner when he comes home, I like to have a little snack ready. We sip a little wine, catch up on the days activities, maybe watch some television in the kitchen. This quesadilla was inspired by what I had in the fridge and the garden that summer evening. I have used spinach in a quesadilla in the past, why not some Swiss chard this time? A little sweet onion, sautéed until caramelized would be a good contrast to the earthy flavor of chard. All I needed now was a wrapper and some queso. I didn’t have tortillas on hand but I did have some sandwich wraps that could fill in. I always have several varieties of cheese in the fridge, the sharp flavor of cheddar worked well here.

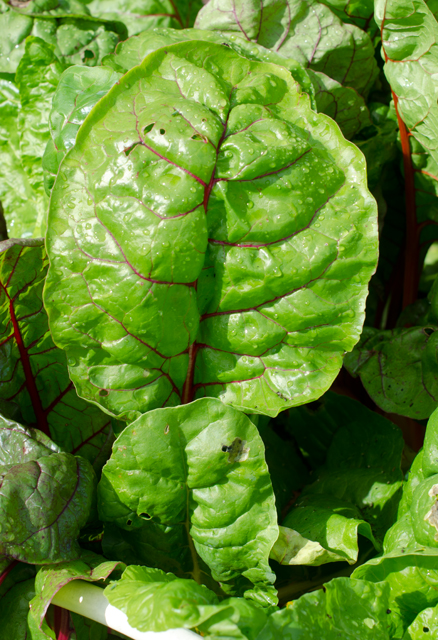
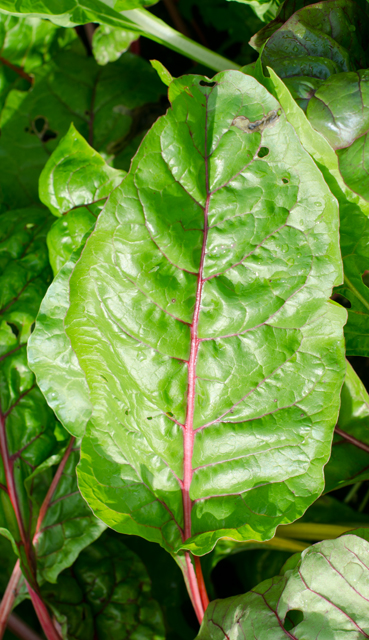
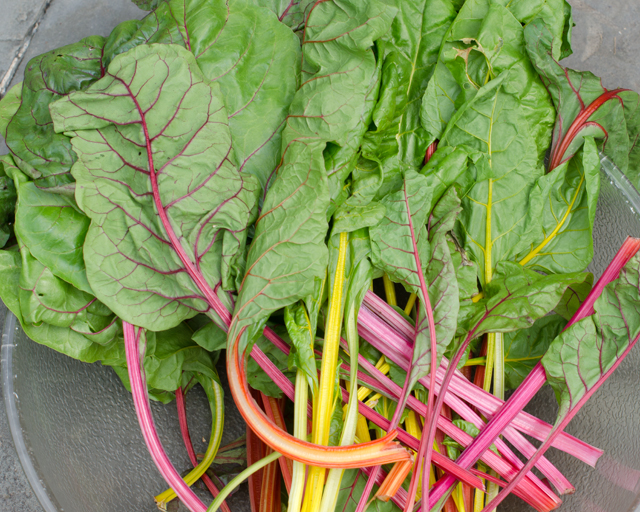
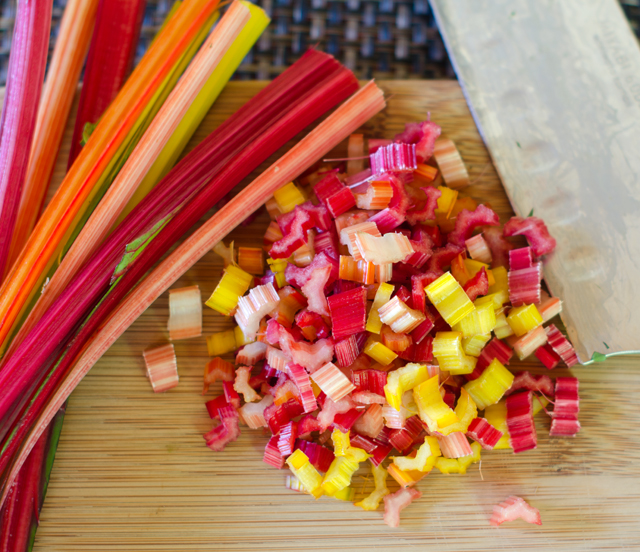
We are still in the process of thinning the chard plants out. They are supposed to be 9-12 inches apart so it didn’t take long to pick what I needed. The chard is still relatively young so it wouldn’t need the long cooking that late summer chard does. I discuss basic chard preparation in this post. I also used some of the finely chopped stems for texture and their brilliant color.

I think a sweet onion works best with this flavor combination. I used a Vidalia, but whatever variety your market is featuring this week is fine. Sweet onions are low in pyruvic acid, the component that makes your eyes tear. I recently read that one of the best ways to store Vidalias is wrapped separately in a paper towel and stored in the refrigerator. I will be trying this method out.

If you are making a quesadilla you can’t forget the queso. If you prefer not to use cheddar, a Jack cheese would be a good choice too. I served the quesadillas plain, sour cream or a tomatillo salsa would be a good accompaniment. Next time I might add a few slivers of pickled jalapeno to the mix. Cooked black beans would be a good addition or some sautéed mushrooms. This recipe is just based on what I had on hand that evening. Golden crisp on the outside with healthy greens, a little sweetness from the onion with the creaminess of cheddar, this is a winning combination for a quick and delicious light meal or snack.


Swiss Chard Quesadillas

Makes two 8″ quesadillas

Ingredients

  • 16-18 medium to small chard leaves
  • 1 medium sweet onion
  • Extra virgin olive oil
  • Butter
  • Tortillas or wraps
  • ½-1 cup shredded cheese, I used cheddar, mozzarella or jack works too

Directions

  1. Wash chard leaves in several changes of water. Separate the chard leaves from the stems. Chop the leaves roughly. You should have 5 cups loosely packed leaves and ½-1 cup finely diced chard stems.
  2. Heat a tablespoon of olive oil in a 10 inch non stick skillet over medium high heat. Add stems and a sprinkle of salt and cook until softened, 3-4 minutes.
  3. Add the chard leaves and the water that still clings to the leaves and cook until wilted. Add a tablespoon more of water if necessary to wilt the leaves. Move stems and leaves to a plate and keep warm.
  4. Slice a medium onion very thinly, a mandolin or food processor is good for this. You should have 3 cups loosely packed thin slices.
  5. Wipe out the pan, add another tablespoon of oil and heat over medium high heat, cook onion until softened and brown. Reduce heat to medium if necessary. This should make about 1 cup of caramelized onion.
  6. Let the skillet cool off a bit and wipe out with a paper towel. Over medium high heat melt a teaspoon or so of butter and a little olive oil. When the butter is melted, add the first wrap or tortilla, spread out one half of the chard over this as evenly as possible.
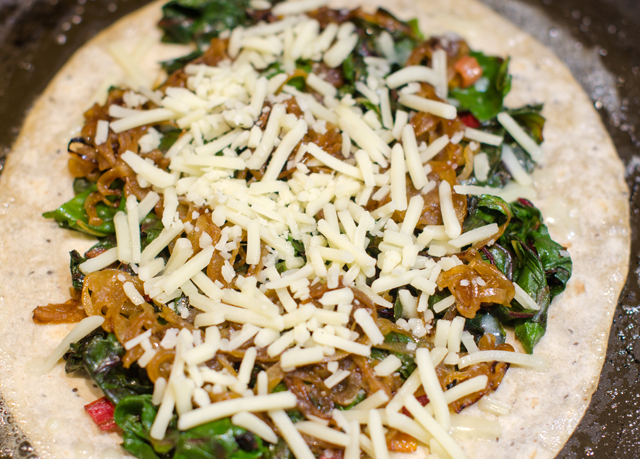
  7. Evenly spread the cooked onions over the chard and then sprinkle the cheese over. Place the second wrap over the cheese and press down with your hand or a spatula to melt the cheese and make it adhere.
  8. Cook for 2-3 minutes on the first side, it’s okay to peek to make sure it isn’t browning too much. With the help of the spatula, flip and cook on the other side, about 2 minutes, adding a little more butter and oil if necessary.
  9. Move the quesadilla to a platter and keep warm, repeat cooking process with the second quesadilla. Cut quesadillas into wedges 4 to 8 pieces as desired.  Serve warm.
Chop the stems.
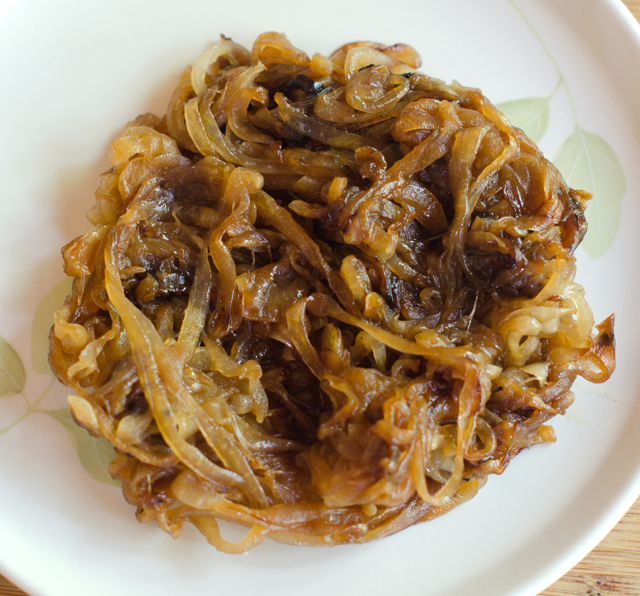
Sweet onion sautéed until golden brown.
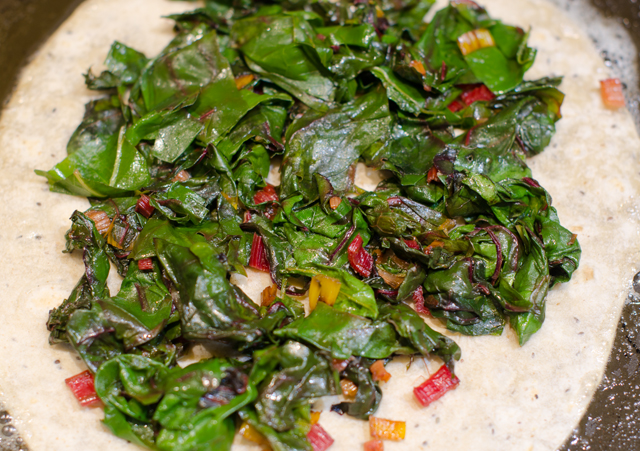
Sautéed chard and stems are first to go on.
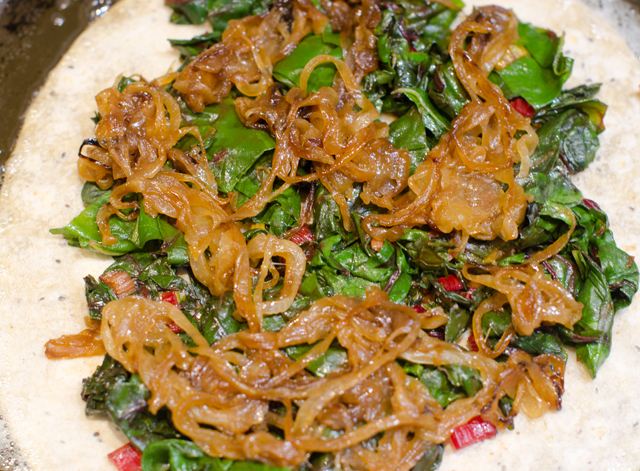
Then the sautéed onion.
Then a sprinkling of cheese.
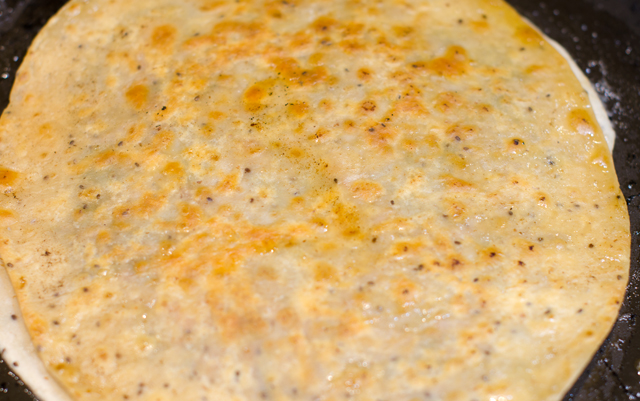
A second tortilla or wrapper in my case, goes on top. Press down to help the cheese adhere. This was taken after this first quick flip.
Let it get golden brown.

June 28, 2017 Sour Cream Ice Cream

When we first moved to our Windy Bush road property thirty years ago, we were always on the lookout for new plantings to add to our new homestead. Joe bought various fruit trees and started a vegetable and herb garden.

Back then we found interesting herbs at a yearly plant sale at the Churchville Nature Center. Gardeners are very generous people and a fellow plant and herb enthusiast offered us some raspberry bushes in exchange for some scented geraniums from Joe’s collection. We took her up on the offer and Joe planted the bushes in the vegetable garden. As the variety of the vegetables and herbs increased in the garden, we needed to find a new location for the raspberry bushes. Joe cleared a new area, not just for raspberries, now also including golden and black varieties, but for strawberries, blueberries, currants and blackberries as well.

Back in the original location where the raspberries were planted, a small piece of one of the bushes was left behind. Surprisingly, or maybe not, this small bush not only grew but thrived over the years. The transplanted bushes were fruitful for a time but eventually died off. Over the years we have put in more bushes but none has been as productive as that original planting that was never moved. For years Joe would cut it back, but it kept coming back stronger each year. We finally gave in and the bush is getting larger and is putting out beautiful plump red berries. I used to look for berries around the fourth of July, this crop started in mid June and will produce another harvest in August.

We enjoy them right off the vine, of course but I was looking for another way to enjoy this special treat. While picking one day my thoughts first went to crème fraîche but decided that a sour cream ice cream would be the perfect foil for these berries. The recipe I found for sour cream ice cream on Epicurious was originally from Gourmet magazine, July 2009 and was contributed by Ian Knauer. I met Ian several years ago at our local farmers market where he was signing copies of his cookbook, The Farm, subtitled, “rustic recipes for a year of incredible food.” The Farm is a cooking school in Stockton New Jersey, about twenty minutes from our home. Making a mental note to check it out sooner rather than later.

This is a very easy recipe, especially if, like me, you have made custard based ice creams in the past. Custard ice cream, although very delicious, requires a watchful eye to carefully temper the eggs with the cream and milk. One false move and you will have sweetened scrambled eggs.

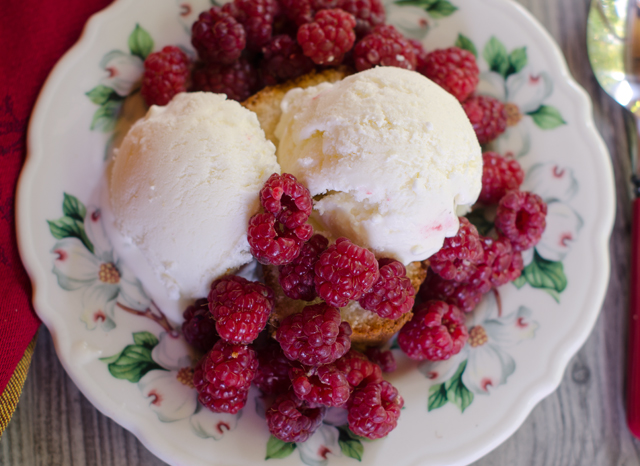
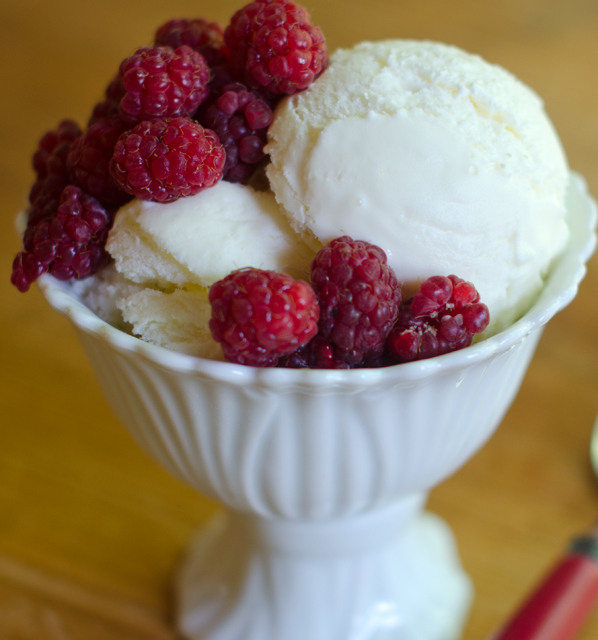
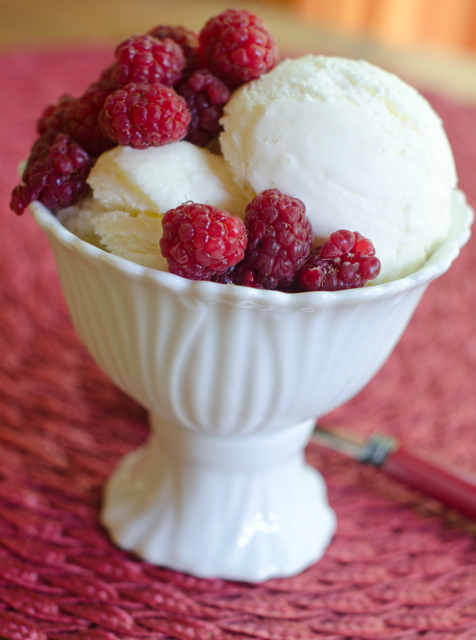
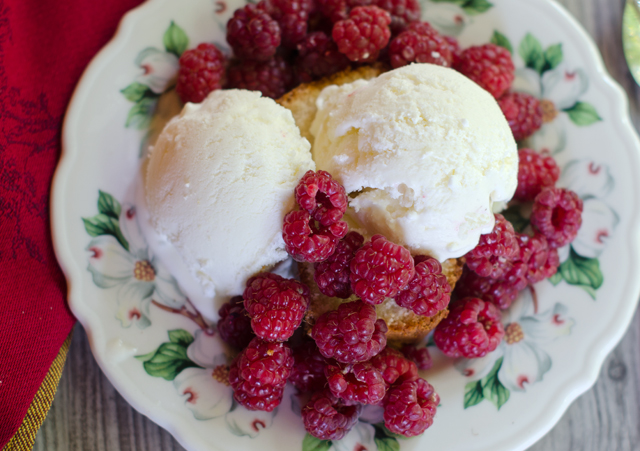
This recipe is a Philadelphia style ice cream, which means it contains cream and/or other dairy products, a flavor base, but no eggs. All of the ingredients are whirled together in a blender, chilled well and churned in the ice cream maker. The sour cream makes it tangy and pairs well with any summer berry. I served it with toasted pound cake.

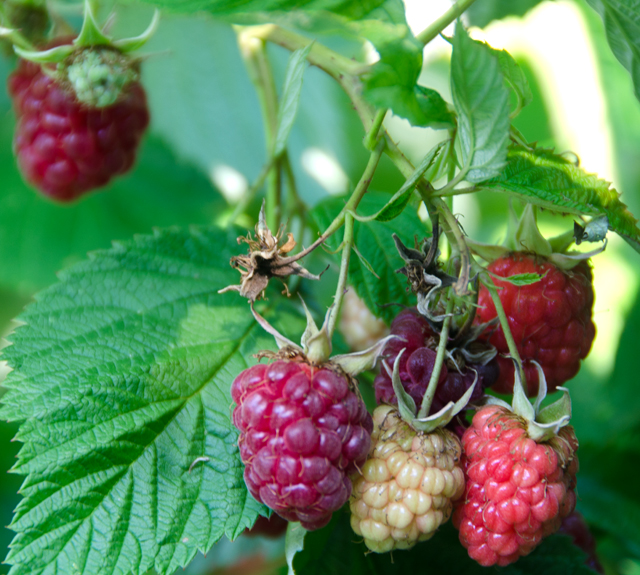
Raspberries in various stages of ripeness on the vine.
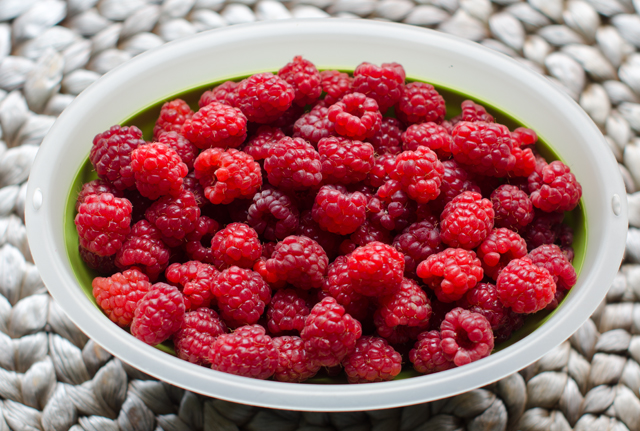
Beautiful raspberries from the garden.

Sour Cream Ice Cream

Makes about 5 cups

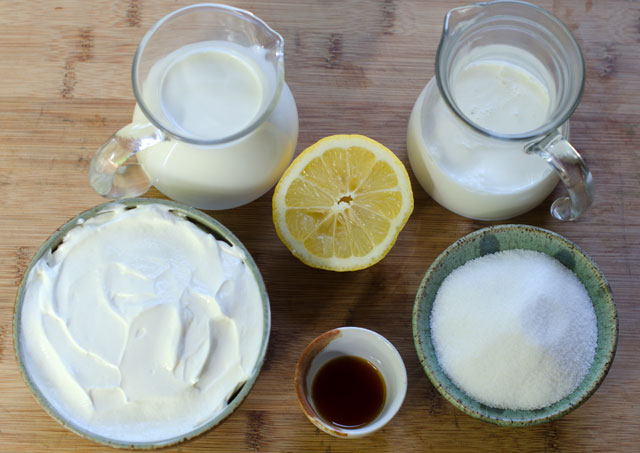
Ingredients

  • 1-16 ounce container sour cream
  • 1 c chilled half and half
  • ¾ c sugar
  • ½ c chilled heavy cream
  • 2 t fresh lemon juice
  • ½ t vanilla extract

Directions

  1. Puree all ingredients with 1/8 teaspoon salt in a blender until mixture is very smooth and sugar is dissolved. Chill until very cold.
  2. Freeze mixture in an ice cream maker. Transfer to an airtight container and put in freezer to firm up, about 6 hours.
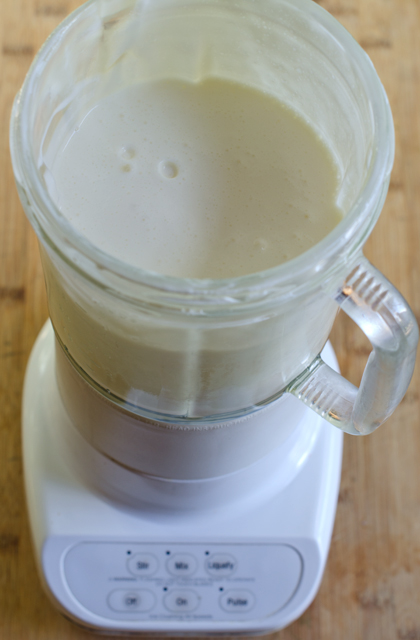
Everything is whirred together in a blender.
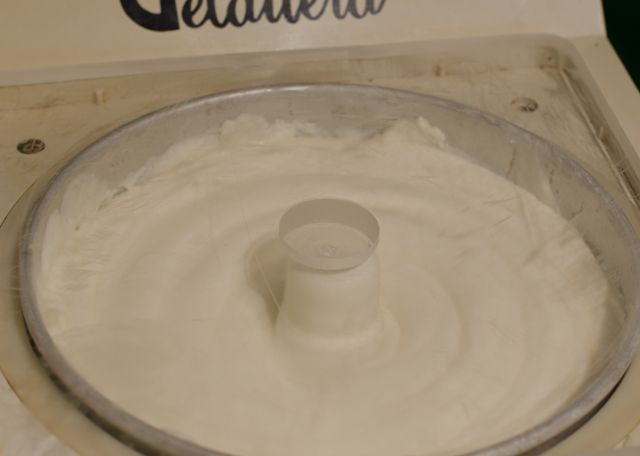
After the mix is well chilled in the refrigerator, it is churned in an ice cream maker.
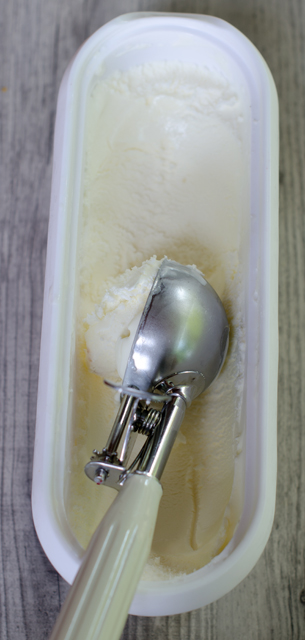
The Tovolo “Glide-A-Scoop ” ice cream storage container makes it easy to make a perfect scoop every time.

June 11, 2017 Carrot Top Pesto

Spring is an ideal time for planting root vegetables like turnips, beets and carrots. They especially love the cooler temperatures that we have been blessed with this spring. We try to be frugal with seeds, so the ones that aren’t planted are saved from season to season. I catalog them alphabetically like a card file in clamshell plastic containers that in a previous life held spinach or lettuce from a big box store. I use 3×5 cards to separate them into specific categories, beets, cucumbers, fennel etc. This year I even did a little clean up, getting rid of all packets before 2013.

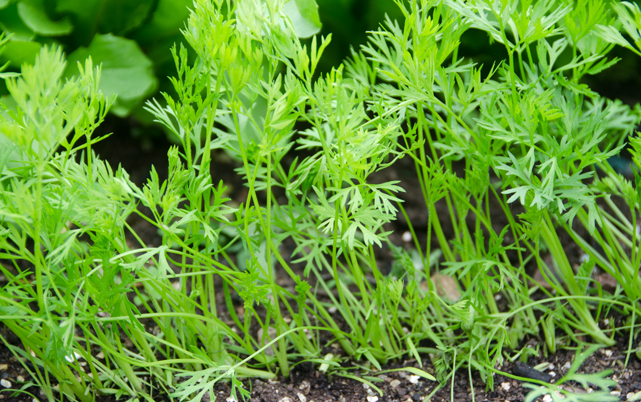
Last year a friend gave Joe quite a few packets of carrot seeds he purchased on sale. Some were planted but most went into storage in the fridge over the winter. He wasn’t certain how many of them would germinate this season so he planted them very densely. As luck would have it, every carrot seed germinated.  Now it was time for some serious thinning.

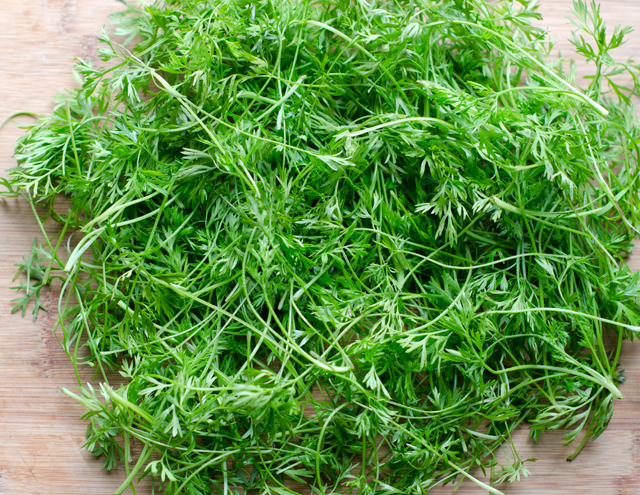
Thinning is a necessary step in vegetable gardening if you want to have mature healthy plants. This can be done in stages. Armed with my Cutco scissors, I did the first thinning when the plants were about four inches tall. Pulling out the unwanted seedlings can often pull out the ones you wanted to leave growing. I snipped the plants at the soil line. With a colander full of the lacy feathery tops I thought about how I could use them. I remembered that parsley and carrots are related so I tasted a few of them. They have an herbaceous flavor, that to me was reminiscent of parsley.

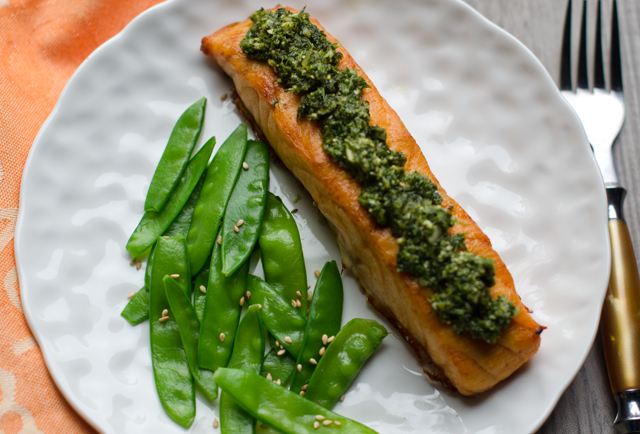
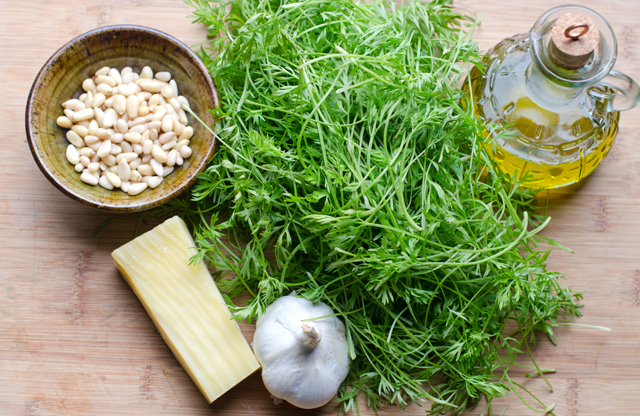
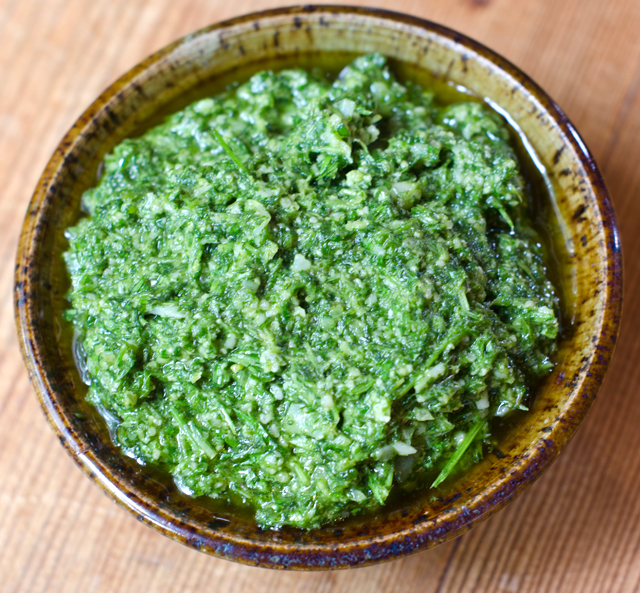
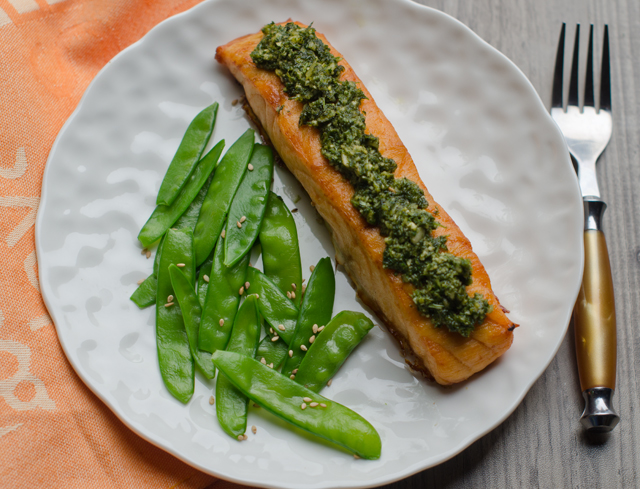
I have made pesto with basil and arugula, why not carrot tops? I used a basic formula that I have used to make other types of pesto, herbs or a green, in this case carrot tops, garlic, nuts, a hard cheese and olive oil. Baby carrot greens are more delicate in flavor and are a special reward for the gardener. Organically grown full-sized carrot greens can be used too, eliminating any thick stems. I used my pesto as a topping for roasted salmon. It would work with chicken breasts and of course, roasted carrots.

Time to thin the carrots.
The first thinning of carrot greens.

Carrot Top Pesto

Makes about a cup

Ingredients

  • 3 cups lightly packed carrot tops
  • 1 clove of garlic
  • 3 T pine nuts
  • ¼ c extra virgin olive oil, more if needed to make a paste
  • ¼ c grated Parmesan cheese
  • Kosher salt and pepper to taste

Directions

  1. Place the carrot tops, garlic and pine nuts in the bowl of a food processor.
  2. Pulse until coarsely chopped. With the motor running, slowly add olive oil until a paste forms. Add cheese and pulse several times to combine.
  3. Season with salt and pepper to taste. Use immediately or cover tightly with plastic wrap and refrigerate for up to 2 days.

May 17, 2017 Spinach and Butternut Squash Salad

Spinach and butternut squash salad certainly isn’t the first thing that comes to mind when you think of a spring dish, but right now it makes perfect sense to me. I still have a few squash to use from last fall’s harvest and spinach plants that still have some nice leaves to offer before they go to seed.

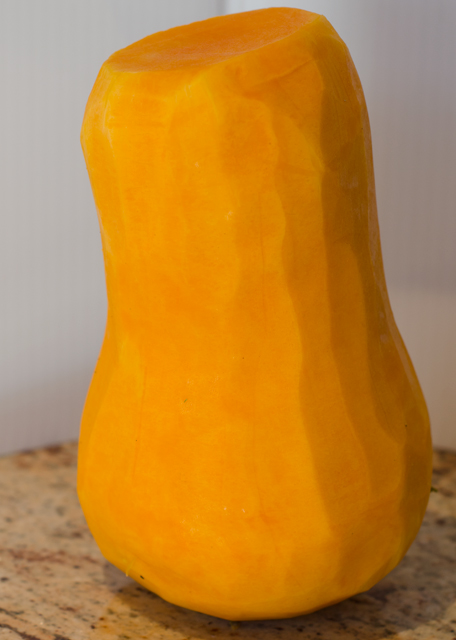
Begin the recipe with a medium-sized squash, 2 to 2 ½ lbs, using a sharp knife, cut off a half-inch piece at the stem and base ends. Cut the squash in half where the neck meets the bulb. I find it easiest to use my Kuhn Rikon peeler to remove not only the skin but also the white flesh and green fibers below the surface, the peeled squash should be completely orange. Scoop out the seeds, I like to toast mine for snacking and can also be used to garnish salads and soups. Cut the squash into 1 inch cubes, they will shrink during the roasting process. Toss the cubes with olive oil and spread them out evenly on a lined baking sheet and season with salt and freshly ground pepper.

While the squash cubes are roasting, make the warm bacon dressing. Fry four slices of bacon in a large skillet until crispy. Place the cooked bacon on a paper towel lined plated to drain. Pour off the bacon fat into a metal bowl, the hot oil might melt a plastic bowl.  In the residual fat that is left in the skillet, saute a medium chopped shallot until soft. Stir in the other dressing ingredients along with some of the warm bacon fat, keep over very low heat.

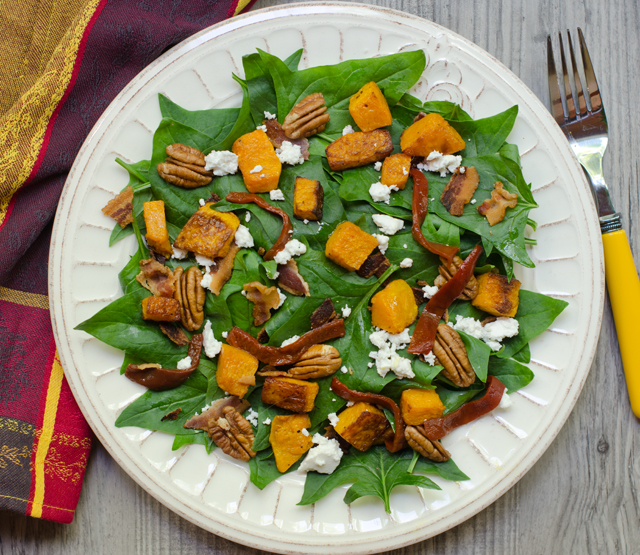
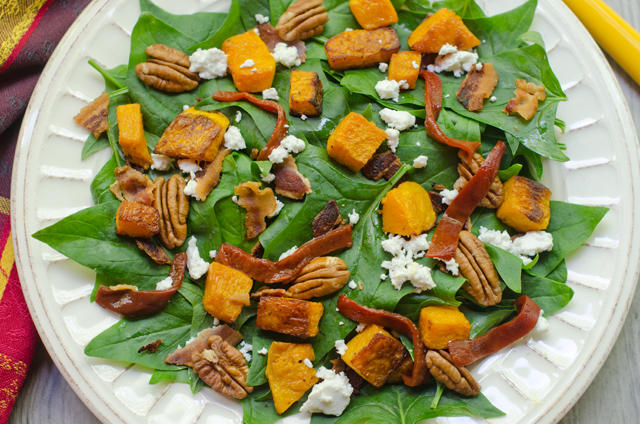
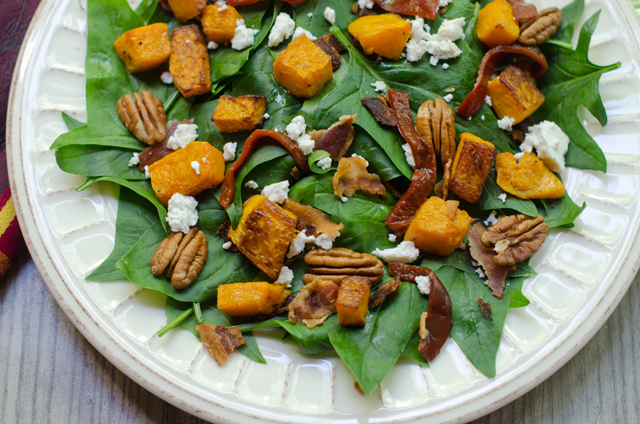
Place the spinach leaves in a large bowl and toss with the warm dressing. I prefer to place the other ingredients on top of the individual salads rather than tossed with the spinach, since they are heavier and inevitably sink to the bottom. Rather than the traditional fall version of this salad that would include dried cranberries or pomegranate arils, I added some thin strips of roasted pepper. I used toasted pecan halves, some creamy feta, and some of the bacon crumbled on top to complete the salad. Make it your own with toasted walnuts or butternut squash seeds and crumbled Roquefort instead of the feta.


Spinach and Butternut Squash Salad

Serves two

Ingredients for the Salad

  • 5-6 cups of spinach
  • 1 medium butternut squash
  • 1 T or more of extra virgin olive oil
  • ½ c toasted pecan halves
  • ¼ c roasted red pepper slivers
  • 1/3 c crumbled feta
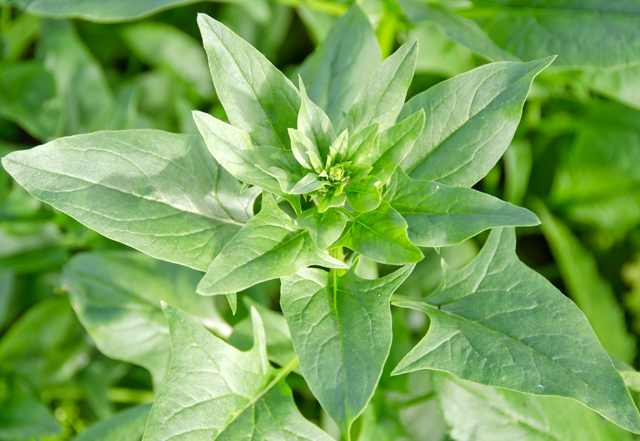
Spinach that is going to seed but perfectly good enough for a salad.
Peeled whole butternut squash.

Ingredients for the Dressing

  • 4 slices of bacon
  • 1 medium shallot
  • ¼ c apple cider vinegar
  • 1 t Dijon mustard
  • 1 T or more honey
  • Kosher salt and freshly ground pepper

Directions for the Salad and Dressing

  1. Preheat oven to 400°F convection or 425°F standard. Line a large baking sheet with parchment or aluminum foil.
  2. Peel and seed the squash, cut it into 1 inch cubes. In a large bowl toss sure even browning. Set cubes aside to cool. You will have enough for several days worth the squash with olive oil and place evenly on the prepared baking sheet. Season with salt and pepper. Roast until golden brown, about 20 minutes, at the halfway point carefully move the cubes around on the sheet to enof salads.
  3. In a large frying pan, cook bacon over medium high heat until crisp, about 5 minutes. Transfer to a paper towel lined plate and pour the bacon fat into a small metal bowl.
  4. Cook the shallot in the same pan until soft, 4 minutes. Stir in vinegar, mustard and honey and mix well. Whisk in two tablespoons of the bacon fat and stir to combine. Season with salt and pepper.
  5. Place the spinach leaves in a large bowl and toss with the warm dressing. Divide the salad onto two plates. Top each with about a half cup of butternut squash cubes, pecan halves, pepper strips, feta and some of the crumbled bacon. Season to taste with freshly ground pepper.

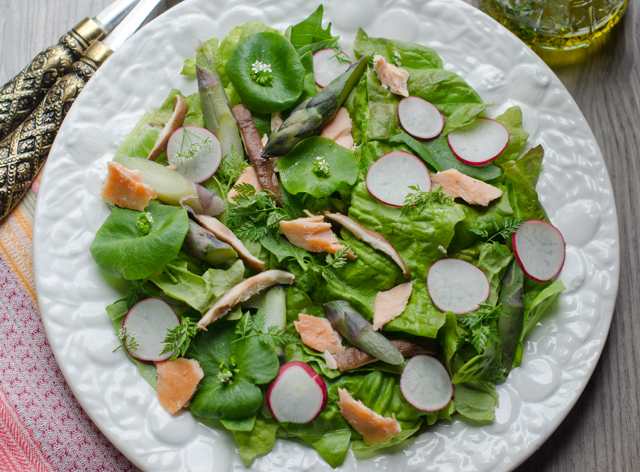
May 11, 2017 Spring Salad

Saturday morning was the first local outdoor farmers market of the season and I was ready to seek out some old favorites, and gain a little inspiration for a salad to accompany that night’s dinner. Local for me is the Wrightstown Farmers Market, about three miles from our house. It is held every Saturday, rain or shine from the first Saturday in May to the Saturday before Thanksgiving. The hours are from 9 to 1 but there was already a sizable crowd when I pulled in at 8:45.
The favorites I was looking for, some drip ground coffee from The Coffee Scoop for Sunday morning, the Guatemalan variety is exceptionally smooth. It wouldn’t be a visit without a stop to visit The Dog Bone Guy. I have to load up on cookies for our furry boys.

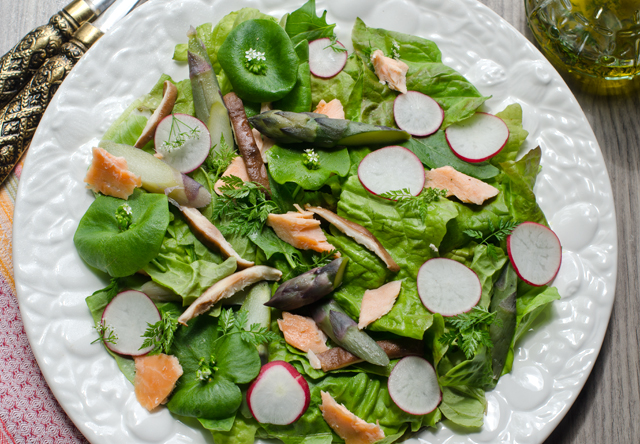
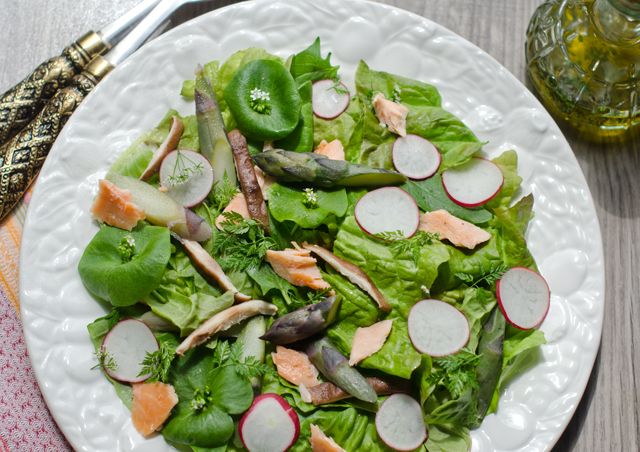
I love to create salads and spring is a great time to take advantage of the garden’s first offerings. I saw signs this week for local asparagus as I was driving around our area. I located several vendors offering asparagus and chose a bunch of fat purple asparagus and a leaner green bunch. The other two purchases I made for the salad were a bunch of plump red radishes and some shiitake mushrooms. Fortified with an orange cranberry scone I was ready to see what I could find in our own garden.

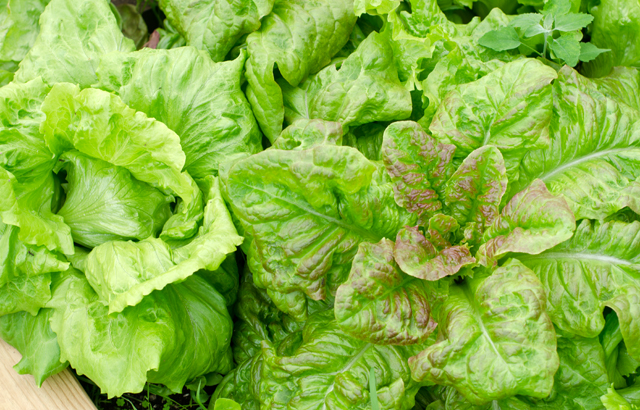
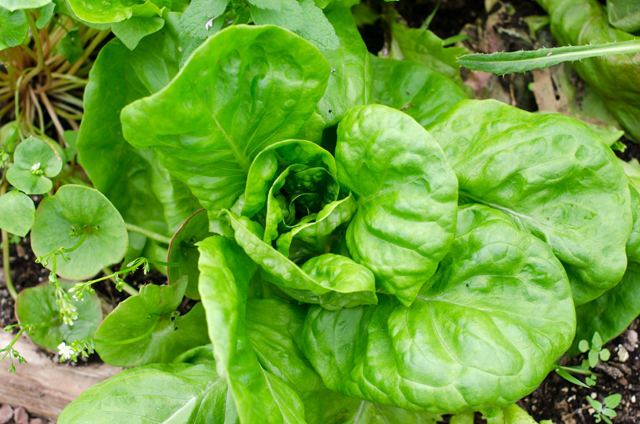
We have a wonderful crop of salad greens, a mesclun mix and Lollo Rosso, thanks to Joe’s hard work. Along with greens, we have spinach and miner’s lettuce, staples of early spring salads. So I picked a combination and went to work.

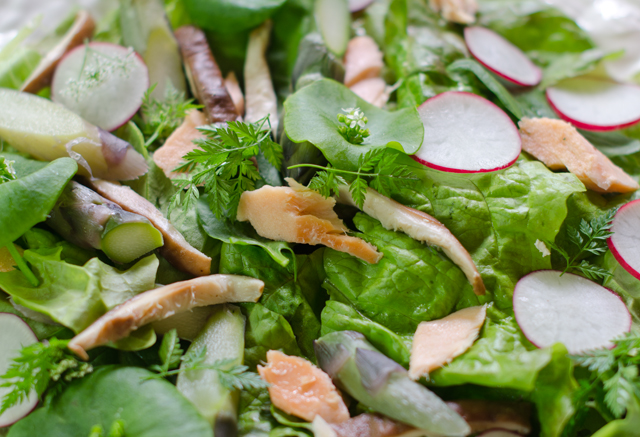
In winter months I usually roast asparagus but I thought that steaming would bring out the sweetness of the newly picked stalks. Next, what to do with the shiitake mushrooms? I use shiitake, both dried and fresh quite often but never raw in a salad. Was it okay to use raw shiitakes in a salad? Some quick research revealed a condition, shiitake dermatitis, that manifests in dark red blistering welts.  A component in shiitakes, lentinan, breaks down with heat so this reaction only occurs when the mushrooms are raw or partially cooked. Not certain if  I wanted to find out if we were one of the nine in five hundred people who react, I chose to add them to my steamer basket. The last addition, a little leftover smoked salmon. The sweetness of the asparagus combines perfectly with the smoky, saltiness of the salmon.

I made a very basic vinaigrette with some fines herbes, the perfect addition to a spring salad and garnished with some chervil flowers.

Spring Salad

Serves two

Ingredients for the Salad

  • Assorted  greens, 5-6 cups I used lettuces, miner’s lettuce and spinach
  • 2 or 3 medium radishes
  • 3 large spears of asparagus
  • Fresh shiitake mushrooms
  • Smoked salmon

Ingredients for Vinaigrette

  • 2 T grapefruit balsamic vinegar or white balsamic vinegar
  • ¼ c extra virgin olive oil
  • 1 T fines herbes (combination of parsley, tarragon, chervil and chives
  • Chervil flowers to garnish the salad
  • Kosher salt and freshly ground pepper

Directions

  1. Tear lettuces into bite sized pieces in a large bowl. Slice radishes thinly and add to the salad bowl.
  2. Cut asparagus into bite sized diagonal pieces. Discard the mushroom stems and cut the caps into thin slices. Steam the asparagus and mushrooms until tender. Mushroom caps will take about 3 minutes, thick asparagus pieces about 5-6 minutes. Pat dry  with paper towels and allow to cool. Add to the salad bowl
  3. Break the smoked salmon into bite sized chunks and add to the salad bowl.
  4. Combine the vinaigrette ingredients in small bowl. Pour over the salad and toss lightly. Divide salad on two plates. Season to taste with salt and pepper.


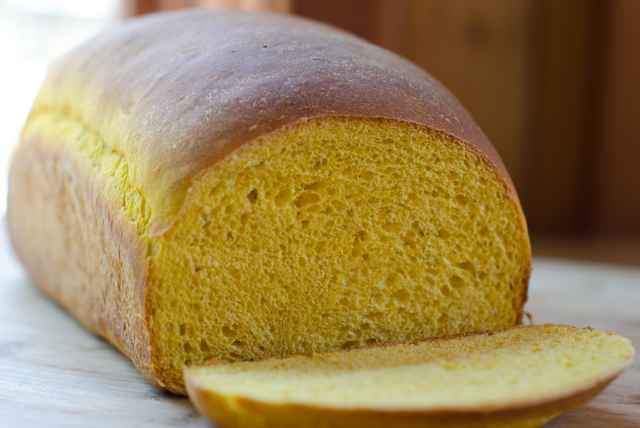
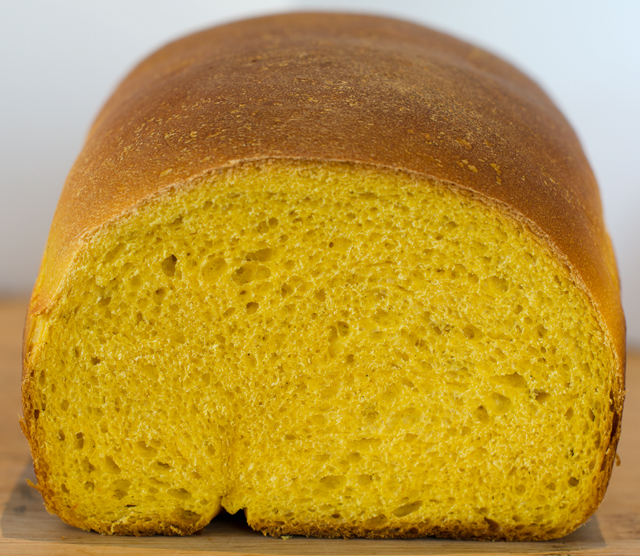
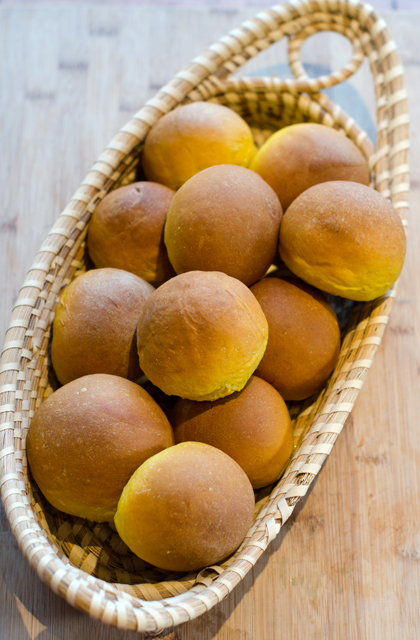
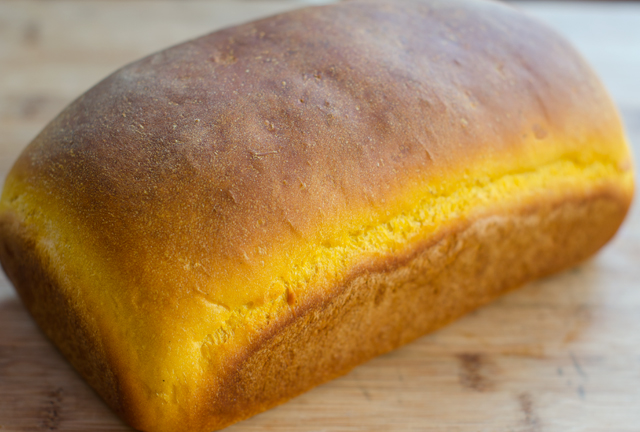
April 22, 2017 Butternut Squash Bread and Rolls

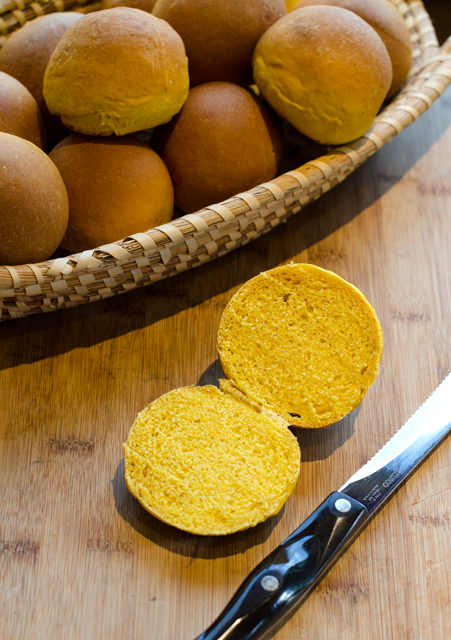
You might expect a recipe like this to be posted around Thanksgiving, but delicious homemade butternut squash rolls were the accompaniment to asparagus soup for Easter dinner. Usually the squash of choice in both sweet and savory breads is pumpkin, since I am still chipping away at my stash of butternut squash, it was an easy substitution.

I cut the squash in half lengthwise and baked it on a parchment lined baking sheet, cut side down at 375°F until it was very soft, about 45 minutes. I scooped out the squash then cooked it down a bit to get rid of any additional moisture to make a nice thick puree.

I slightly adapted a recipe from the King Arthur Flour site, with encouragement from a rating of 4.8 out of 5 stars and 106 positive reviews. The only problem was that the ingredients were a bit too much for my Kitchen Aid mixer. Once the initial ingredients were mixed together I separated them into two smaller pieces so they could be kneaded in the mixer without taxing it too much. I cut back on the sugar called for in the original recipe, since I was not attempting to make a sweet bread recipe and unlike pumpkin, butternut squash puree has some natural sweetness.
The bread and rolls turned out great, I served the rolls with the soup, the bread is well wrapped, well labeled and frozen for future use. I’m thinking bread pudding sometime soon.

Butternut Squash Bread and Rolls

Makes two loaves or 1 loaf and a dozen rolls

Ingredients

  • 2 T active dry yeast
  • ½ c lukewarm milk
  • 2 large eggs
  • 1 ½ c butternut squash puree
  • 2 T vegetable oil
  • 6 ½ c unbleached all-purpose flour (I prefer King Arthur)
  • ¼ c brown sugar
  • 2 ½ t salt
  • ½ t ground ginger
  • ½ t ground cardamom

Directions

  1. Place all the ingredients into a large bowl of a stand mixer and combine ingredients using the flat beater. Alternately, this could be done by hand or in a bread machine.
  2. Once the ingredients are thoroughly combined, replace the flat beater with the dough hook and knead the dough until it is smooth and soft. I needed to do this in two batches.
  3. Put the dough into a lightly greased bowl. Cover and let dough rise until doubled, 60 to 75 minutes.
  4. Gently deflate the dough and turn it out onto a lightly oiled work surface. Divide it in half.
  5. Shape the dough into loaves or rolls. The loaves can be placed into lightly greased 9″ x 5″ loaf pans or rolls placed on parchment lined baking sheets.
  6. Cover the pans/baking sheets and let loaves/rolls rise until doubled, about 45 minutes. Toward the end of the rising time, preheat the oven to 350°F.
  7. Bake the bread for 30 to 35 minutes. The crust will be a deep golden brown and a digital thermometer inserted into the center will register 190°F. Bake rolls for about 20 minutes until golden brown.
  8. Remove bread and rolls from oven and turn out onto a wire rack to cool.  Cool completely and store, well wrapped at room temperature for several days. Freeze for longer storage.

November 23, 2016 Butternut Squash Quesadillas

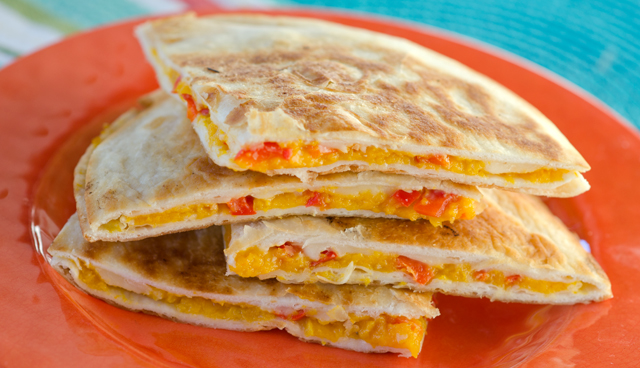
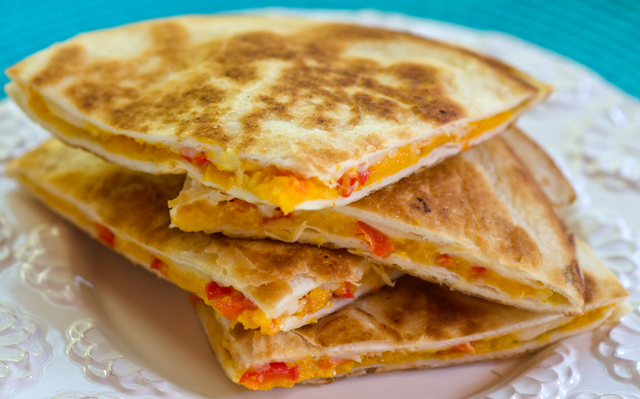
dsc_8327aAn often requested hors d’oeuvre from my catering days were butternut squash quesadillas with chipotle lime dipping sauce. They were a lighter alternative to classics like miniature beef wellingtons or scallops wrapped in bacon. A recipe I originally found in Gourmet magazine and now on the Epicurious website, it seemed to be universally liked by everyone. Crunchy on the outside, sweet roasted butternut squash and melted cheese inside, they disappeared as quickly as wait staff could get them out to hungry guests. The flavors of the roasted squash, onion and garlic are a perfect combination with creamy jack cheese, and sweet red pepper.

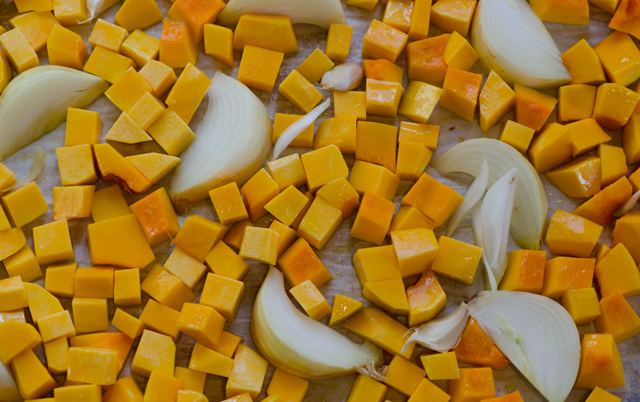
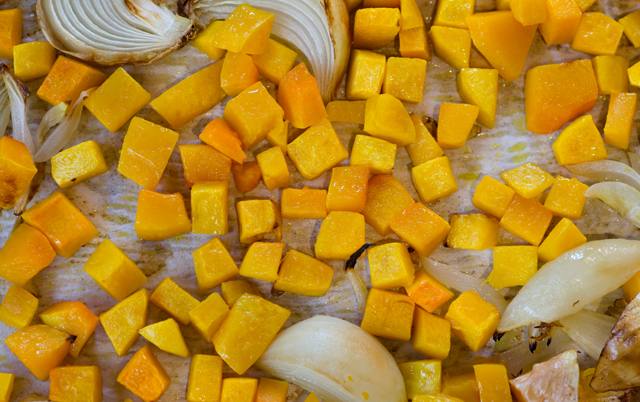
Begin the recipe by roasting squash cubes, an unpeeled onion cut in segments and several cloves of  garlic. Since we had a large butternut squash crop this year, I am getting faster at peeling and chopping my own squash. But if you don’t want to take the time, you can purchase butternut squash that has already been peeled and cubed. It is considerably more expensive for the convenience.  For the best results, roast cubes rather than baking squash halves . Although the roasted squash will be puréed before it is spread on the quesadilla, roasting cubed squash and the onion, allows the natural sugars in the vegetables to caramelize and enhances the flavor.

On a rimmed baking sheet, drizzle the squash cubes, onion and garlic with a neutral oil (vegetable, safflower) and toss lightly. Spread them out as evenly as possible so the squash will roast, not steam. Halfway through the cooking time use a plastic spatula to toss the cubes around a bit to maximize the surface area that gets browned. The garlic will be done first, use tongs to remove it to a work surface. Continue to roast the squash and onion until tender, as much as 15 more minutes, I like to check about every five minutes or so at this point. The squash will be soft and browned in places. Remove the peel from the onion and the garlic.

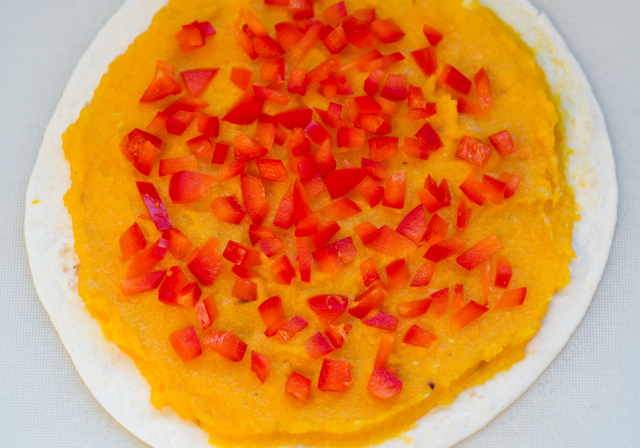
While the squash is cooking you will have time to chop the red pepper. Cut it into small dice, it will make for neater pieces when you cut the quesadillas. Place chopped pepper and jack cheese into separate bowls at your work station.

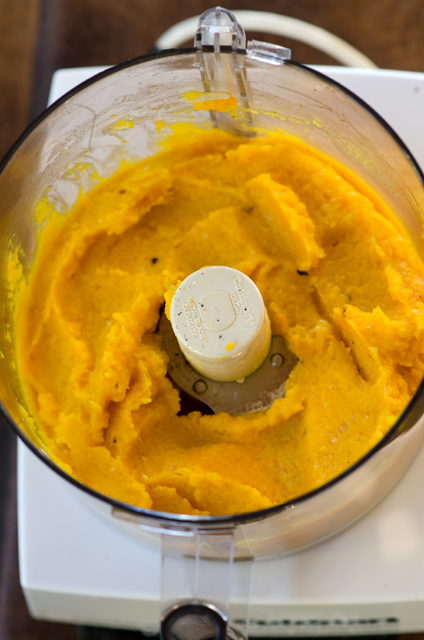
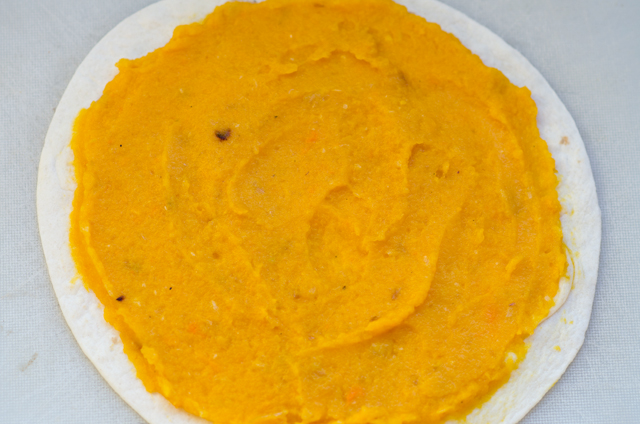
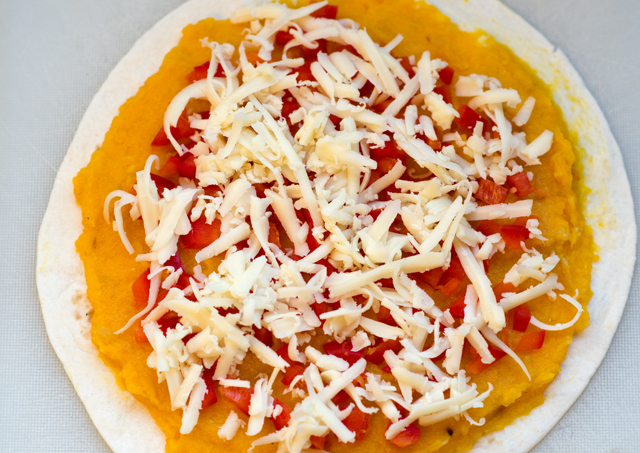
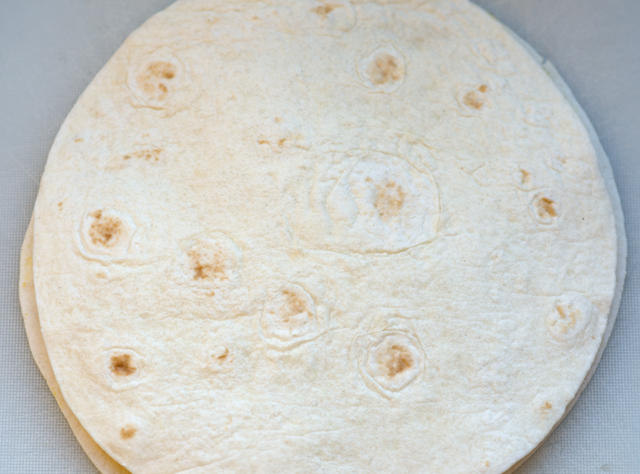
In a food processor or blender, purée the squash, onion and garlic until not quite smooth, leave it just a little chunky and transfer to a bowl. On a work surface spread out four tortillas. Next to the tortillas, place your bowls of squash puree, pepper and onion. Since you will be using one-fourth of each item on the tortillas, it’s relatively easy to “guesstimate” how much to use. Spread the puree first, evenly, almost but not quite to the edges, then sprinkle on the red pepper and then the cheese. Top with a second tortilla and press lightly to adhere. Spread a light coating of softened, not melted butter on either side of each tortilla. This step is little messy, you can put a sheet of waxed paper on two large baking sheet to cut down on the butter getting all over your work surface.

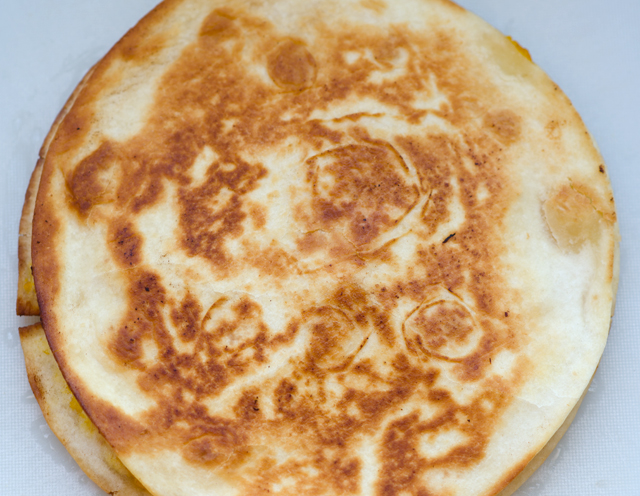
Heat a 7 inch non stick skillet over medium high heat until hot and cook the quesadillas. While the first side is cooking, press down lightly on the quesadilla so that everything sticks together, it will make the flipping easier. Cook the quesadillas about 3 minutes per side, you can lift up a little to see if you have achieved the light toasty brown color. I use a plastic spatula to flip them over, with a little help from my hand. Repeat with the remaining quesadillas and regulate the heat as necessary. Transfer to a warm oven while you are cooking the remaining quesadillas. Cut the quesadillas into 6 to 8 wedges, I have found a pizza wheel makes the neatest cuts.

Serve quesadillas with chipotle lime dipping sauce. Years ago when I first made this recipe it was difficult to obtain chipotles, now they are available at any supermarket. Chipotle peppers are smoked and dried jalapenos that are marinated in a tangy sweet red sauce. A little chipotle goes a long way. It is better to add a little at first to see how it tastes. The sour cream will mellow the chili out and the lime adds a nice contrast.

The dip can be made ahead, and even though the recipe doesn’t say so, the quesadillas can be made ahead. Reheat the quesadillas in a warm oven for about 10 minutes or until they feel hot. The important thing to remember whether fresh or reheated is to let the quesadilla rest for a few minutes before cutting. Too hot and the filling oozes out and is a mess to eat.

I have always used the recommended flour tortillas, I’m sure other varieties would work too. If you like your food spicy, pepper jack cheese could be substituted or any other good melting cheese. They would make a good vegetarian entree or a light lunch along with a green salad.

Butternut Squash Quesadillas

Makes 24 to 32 pieces

Ingredients

  • 5 c butternut squash, peeled and cut into ¾ inch pieces
  • 1 medium onion, unpeeled and cut into eights
  • 1 large garlic clove, unpeeled
  • 1 T vegetable oil
  • 8- 5 to 6-inch flour tortillas
  • 1 c chopped red pepper
  • 1 c coarsely grated jack cheese
  • ½ stick unsalted softened butter

Directions

  1. Preheat oven to 400°F.
  2. Arrange squash cubes, onion and garlic in a single layer on a shallow baking sheet. Drizzle with oil and toss lightly to coat.
  3. Roast vegetables in the oven for about 15 minutes, until the garlic is softened. Transfer garlic to cutting board.
  4. Roast squash and onion for an additional 15 minutes or until tender. Discard peels from the onion and garlic.
  5. Purée the squash, onion and garlic in a food processor. Season to taste with salt and pepper.
  6.  On a work surface, spread out four tortillas. Spread one-fourth of the squash purée on each of the four tortilla. Sprinkle each tortilla with one fourth each of  the red pepper and the cheese. Top each quesadilla with a plain tortilla, pressing gently together. Spread each side of the quesadillas with a thin layer of softened butter.
  7. Heat a medium non stick skillet over medium high heat until hot and cook quesadillas, 1 at a time until golden, about 3 minutes on each side, transferring to a cutting board.
  8. Cut each quesadilla into 6 to 8 wedges and serve with chipotle lime dip.

Chipotle Lime Dip

Makes one cup

Ingredients

  • 1 canned chili in adobo, minced
  • 2 t fresh lime juice
  • 1 c sour cream

Directions

  1. In a small bowl  stir the chili and lime juice into the sour cream until well combined. Can be made ahead,  cover and chill.


dsc_8305a
Spread out squash, onion and garlic on a parchment lined baking sheet.
After roasting
After roasting the vegetables.
Process until not quite smooth, you want the butternut squash to have some texture.
Spread the puree evenly over four tortillas to about a quarter inch from the edges.
Spread the puree evenly over four tortillas to about a half inch from the edges.
Next is the finely diced red pepper.
Top it with an even layer of Jack cheese.
And another tortilla.
And another tortilla. Press down so everything sticks together.
Cook individual tortillas in a non stick pan on both sides until they are golden brown.

 dsc_8333adsc_8331a