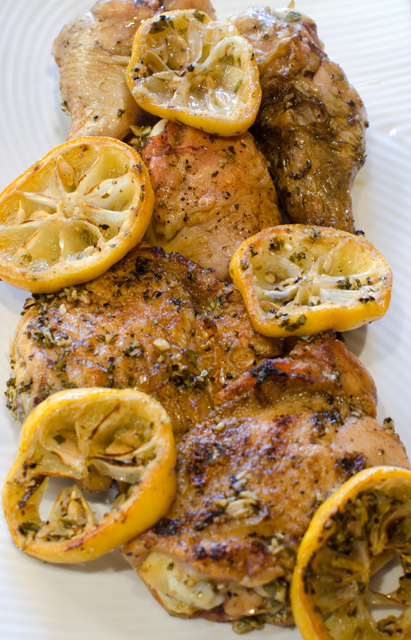
Our summer barbecues often include the combination of ribs and chicken. The ribs are sourced locally from a pork farm less than ten minutes from our home. The rich, succulent meat pairs very well with a sweet hickory barbecue sauce. I didn’t want to duplicate the same flavor profile for the chicken. I was thinking of a nice contrast, lemon, garlic and herbs. My need wasn’t for a method of cooking the chicken, Joe has mastered that quite nicely, I just wanted a different way to finish the chicken.
I found this very well reviewed method from a 2002 issue of Gourmet magazine. What makes this recipe unique is that the chicken is only seasoned with salt and pepper, grilled, and THEN tossed in a dressing of lemon, oregano, salt, pepper and olive oil. My husband was a bit skeptical but was willing to give it a try.
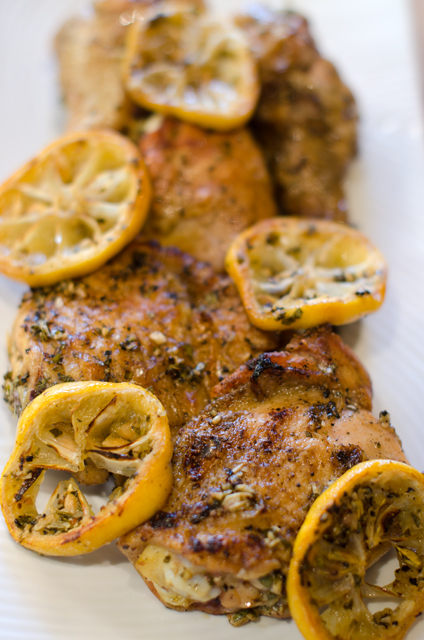
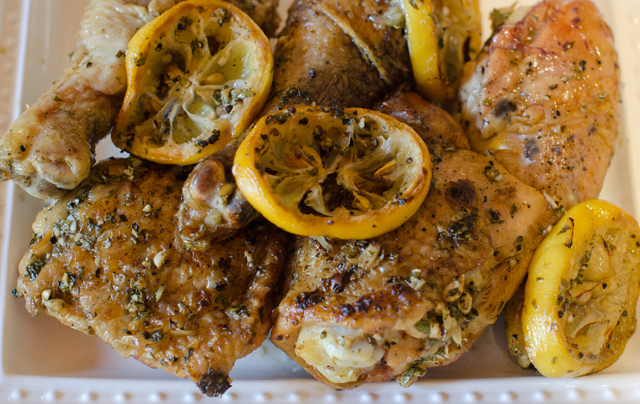
Sounds too simple but resulted in a surprisingly moist and flavorful dish that we will definitely be making again. We had plenty of fresh oregano from the garden for this, I would imagine that fresh rosemary or thyme would work as well. It’s a dish that can be done out of season as well. Put the chicken, skin side up in a shallow baking pans in the upper and lower thirds of a 500°F oven, switch the pans halfway through baking. Bake until the skin is crisp and chicken is cooked through, about 40 minutes. The lemon slices can be grilled in a grill pan. Toss the chicken pieces in the dressing and serve.
Grilled Chicken with Lemon, Garlic and Oregano
Serves 8
Ingredients
2 lemons cut crosswise into 1/3 inch slices
¼ c fresh lemon juice
¼ c finely chopped oregano
2 T minced garlic
½ t kosher salt
½ t coarsely ground black pepper
1/3 c good quality olive oil
6 lbs or more, chicken parts, breasts, thighs and legs
Directions
Whisk together lemon juice, oregano, garlic, salt and pepper in a large bowl. Whisk in the olive oil in a slow stream.
Season chicken parts with salt and pepper. Grill chicken according to your usual method on a gas or charcoal grill. Transfer cooked chicken to a tray and keep warm.
Transfer chicken parts to the bowl and turn to coat the pieces
Grill lemon slices until grill marks appear, about 3 minutes on each side. Transfer to platter with the cooked chicken.
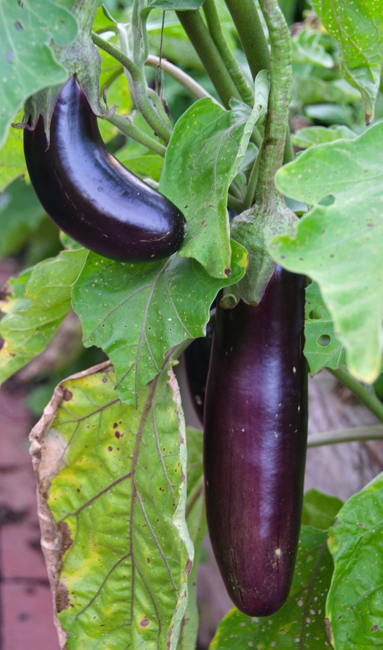
It’s a great time of year to try out some new eggplant recipes. Whether from the farmers market, your local CSA or your own garden, freshly harvested eggplants are at their best. Our garden has produced an amazing array of eggplants this summer. Bright fuchsia Dancer, slender dark violet Orient Express, pure white Clara, beautifully variegated Nubia, all the varieties we have harvested this year have thin skin and minimal seeds.
What we most often consider to be Asian eggplants are the long slim tapered varieties. Actually Asian eggplants, whether Chinese, Japanese, Thai or Indian can be round or pear shaped, pure white or lime green and as small as an egg as well as the dark purple we are most familiar with.
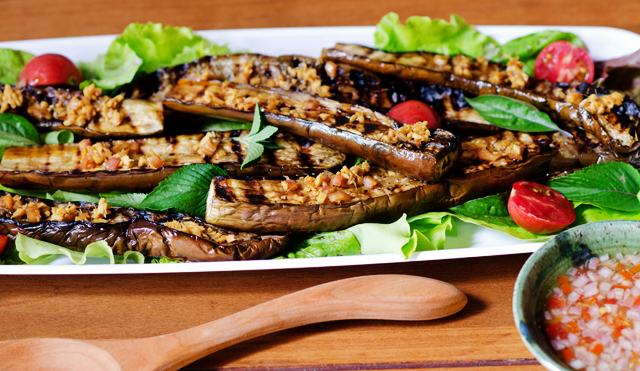
In this Thai-style recipe for a yamor salad, eggplant slices are brushed with oil and grilled. If the weather is inclement or you just don’t have the time to fire up the grill they can be cooked indoors on a ridged grill pan.
Save the seasoning until after the grilling the eggplant. It’s then the creamy flesh will soak up the flavor of the ginger and soy, transforming the once raw bitter slices to something delicious.
Though not necessarily typical of this type of salad, I served the grilled eggplant slices on salad greens. Our lettuces have made their late summer return to the garden and I tossed some assorted greens with a few sweet cherry tomatoes, basil and mint. I used the small spicy leaves of Thai basil and Vietnamese mint that doesn’t overpower the salad. An Asian style vinaigrette combining the traditional combination of hot, sour salty and sweet dresses the greens and enhances the flavor of the grilled eggplant.
Beautiful dark purple Orient Express eggplant.
Grilled Asian Eggplant Salad
Serves four
Ingredients
1/4 c freshly squeezed lime juice
1/4 c peanut or canola oil
3 T finely minced shallot
1 1/2 T fish sauce
2 t granulated sugar
1 to 2 Thai bird chiles, minced, or 1-1/2 to 2 serrano chiles, seeded, minced
Kosher salt and freshly ground black pepper
2 T minced fresh ginger
1-1/2 T soy sauce
1 1/2 lb. long, slender Asian eggplants, trimmed and halved lengthwise
4-5 c baby lettuce leaves
10 to 12 oz. cherry or grape tomatoes, halved (about 2 cups)
1 c packed fresh basil leaves, Thai, if you have it
1/4 c packed fresh mint leaves, I used Vietnamese mint (very mild)
Directions
Prepare a medium-high gas or charcoal grill fire. Alternately heat a grill pan over medium high heat.
In a small bowl, whisk 3 Tbs. of the oil with the lime juice, 2 Tbs. of the shallot, the fish sauce, 1 tsp. of the sugar, and the chiles. Season to taste with salt and pepper.
In another small bowl, combine 2 tsp. water with the ginger, soy sauce, the remaining 1 Tbs. shallot, and 1 tsp. sugar.
Arrange the eggplant halves on a rimmed baking sheet, brush both sides with the remaining 1 Tbs. oil, and sprinkle with salt and pepper. Grill the eggplant, covered, until tender, 3 to 5 minutes per side. Alternately grill the eggplant in a grill pan, 3-5 minutes on each side until tender.
Combine the lettuces, tomatoes, basil, and mint in a large bowl. Re whisk the lime dressing and toss just enough into the salad to lightly coat the greens. Season the salad to taste with salt and pepper. Transfer the salad to a platter and arrange the eggplant over the salad. Spoon the ginger mixture over the eggplant, and serve immediately.
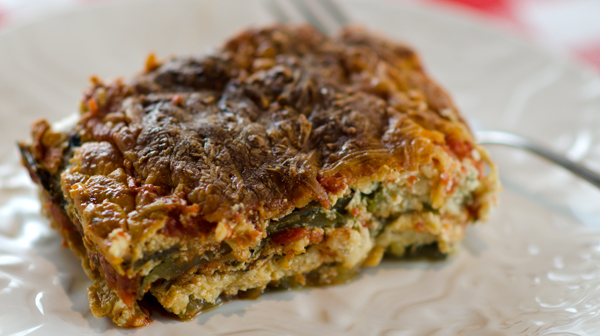
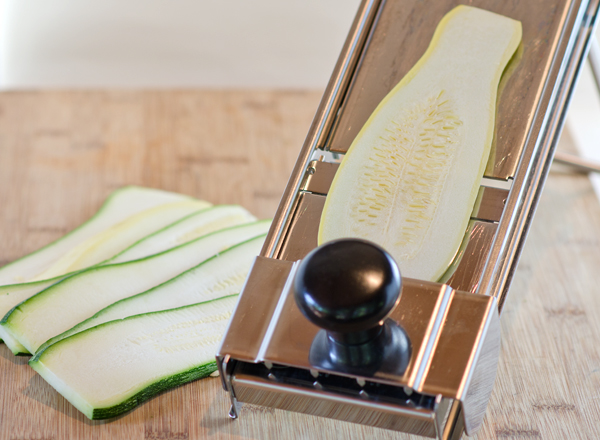
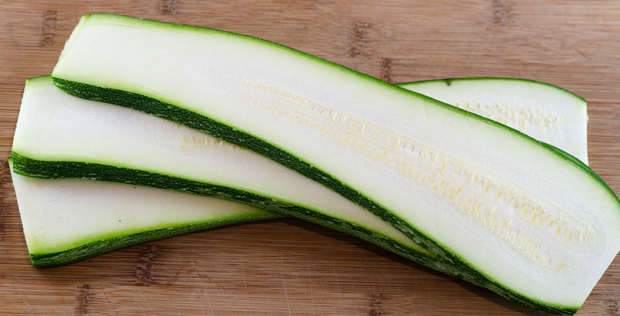
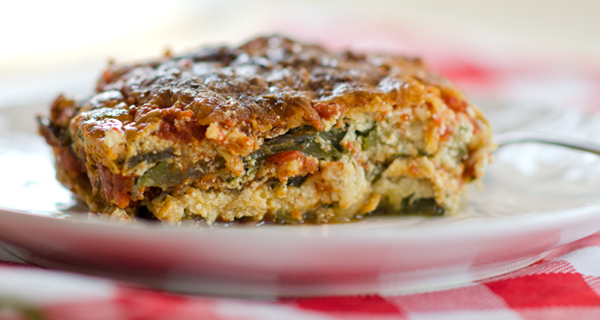
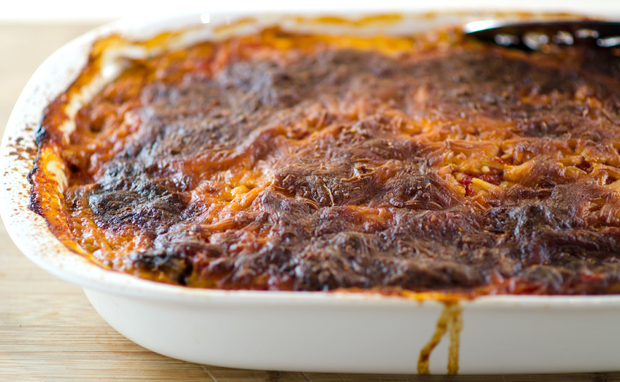
When you grow big zucchini, make zucchini lasagna. In this recipe, zucchini or yellow squash “noodles” replace the usual pasta. I cut the zucchini in half lengthwise first so that I would have a flat surface to work with. A mandoline works best here. In case you didn’t know, a mandoline, also spelled mandolin is a hand operated kitchen tool with adjustable blades that produces uniform slices. They can cost anywhere from about two hundred dollars for a professional stainless steel style model all the way down to less than twenty dollars for a plastic model. The more expensive models will slice, julienne and waffle cut, the less expensive ones just slice. Whatever model you choose, use the hand/finger guard when you run the food against the blade, believe me, I speak from personal experience. If you have steady hands and no slicer, use a sharp knife and be sure to use a cutting board to stabilize the squash to ensure even slices. Since zucchini is 95% water it is best to precook it to reduce excess moisture that will end up in your finished dish. Some of the recipes I saw suggested parboiling, sautéing, but I found that grilling worked well for me. My version is totally vegetarian. If you want something more substantial, add ground beef, turkey or sausage to your sauce. Just like regular lasagna, it tastes even better the next day, if it lasts that long!
Zucchini Lasagna
Serves four to six
Ingredients
3-4 long zucchini/yellow squash
4 c thick tomato sauce
1 15 oz container of regular or low-fat ricotta cheese
3 lightly beaten eggs
2 T fresh chopped basil
2 T fresh chopped flat leaf parsley
1 t dried oregano
Kosher salt and fresh ground pepper to taste
1 ½ c grated Parmesan cheese or other similar grated cheese
1 lb grated mozzarella cheese
Directions
Preheat oven to 350° F. Place baking rack in the lower position.
Cut squash into ¼ inch thick slices, to fit the pan lengthwise, if your squash is shorter, just orient the slices in the opposite direction, just be sure they cover the pan. You should have enough slices to make three layers.
Heat a grill pan or an outdoor grill to medium high heat. Brush both sides of the slices lightly with olive oil.
Grill squash slices on both sides so that they have grill marks, 3-5 minutes each side. Squash should be cooked but not falling apart.
In a medium bowl, combine the ricotta, eggs, parsley, basil, oregano and a cup of the Parmesan cheese. Reserve the rest for the top layer.
In a 9×13 glass or ceramic dish, spoon a thin layer of sauce on the bottom of the pan.
Place the first layer of squash over the sauce. Spoon a third of the ricotta mixture over the squash. Sprinkle with a third of the mozzarella cheese. Repeat the layers two more times, sauce, “noodles” ricotta, ending with the mozzarella cheese and reserved Parmesan from step four.
Bake for one hour, rotating pan half way through cooking time. Let lasagna rest for at least a half hour before serving.
I used my Matfer mandolin slicer, a gift many years ago to get neat uniform slices.Slices should be 1/4″ thickUse the grill or a grill pan to slightly cook the zucchini.Fresh zucchini with tomato sauce, delicious!
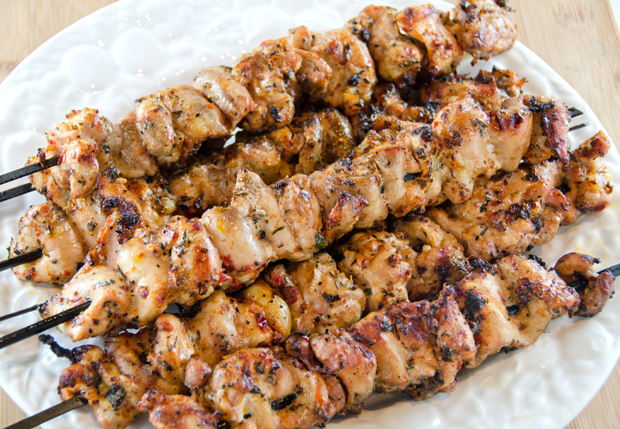
Two entrees were on the menu for our Middle Eastern cookout, one chicken and the other lamb. Both dishes were types of shish (skewered) kebab (cubes of grilled meat).
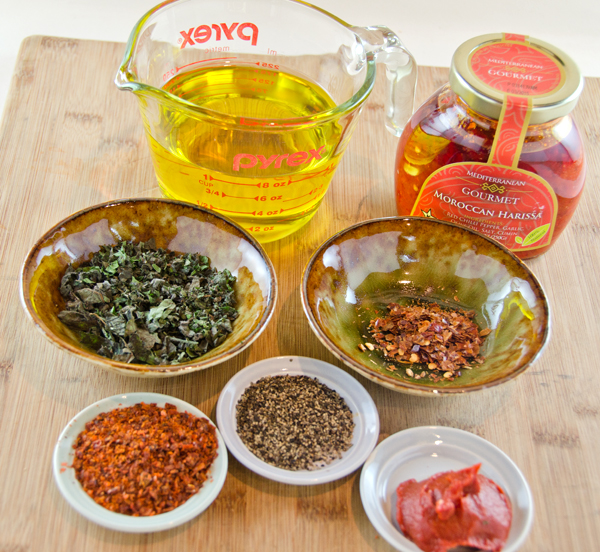
Our Turkish chicken recipe came from Saveur’s June/July issue featuring barbecue from around the world. In Turkey the masters of the kebab are called ustas. Ustas, who are always men, begin their apprenticeship from youth, learning butchery, mastering techniques of the grill and eventually taking over their own business. But it is more than just a business, ustas are the pride of their city, local heroes, revered for carrying on the culinary traditions of the kebab. Tavuk Kebabi is a recipe that translates “chicken cubes of grilled meat”. In this recipe, boneless chicken thighs are marinated in a flavorful blend of mint, thyme, Aleppo pepper and sweet red pepper paste. Time restraints prohibited me from ordering the Turkish sweet pepper paste called for in the recipe. I substituted the more available harissa, a spicy pepper condiment and cut back on the additional hot pepper in the recipe. Aleppo pepper is a worthy addition to your pantry. It is native to the northern Syrian town of Aleppo and also is grown in Turkey. The peppers are sun dried, seeded and crushed into flakes. Aleppo peppers are dark red in color with a high oil content. Their flavor is mildly spicy and fruity with cumin-like undertones.
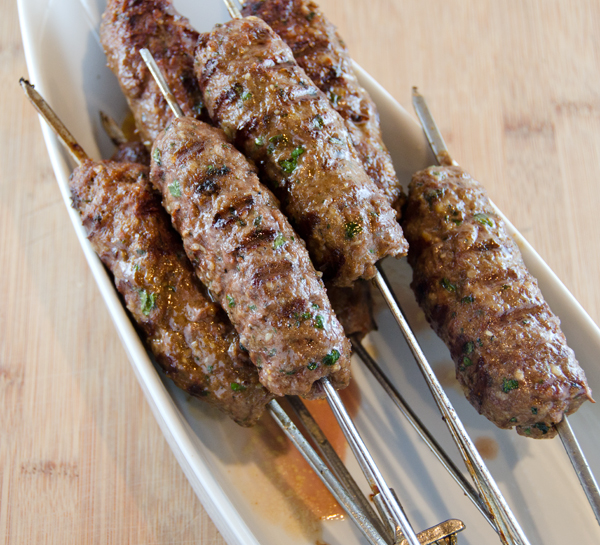
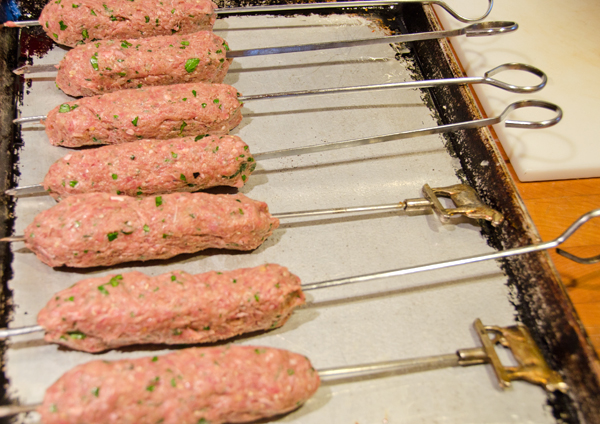
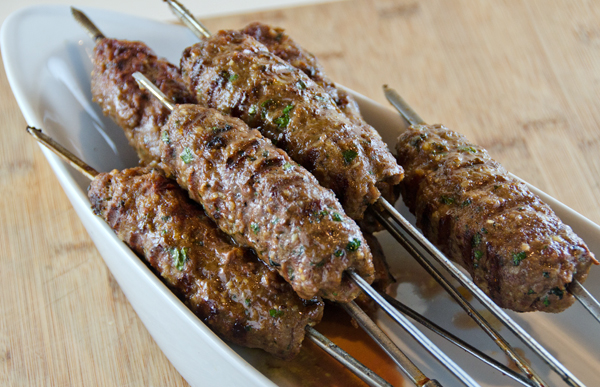
The lamb kebabs were courtesy of a recipe in Cooks Illustrated. Not truly kebabs these were kofte, long cylinders of spiced ground lamb. Popular thorough out the Middle East and southeast Asia, kofte (plural kofta) comes from the Persian word “to grind”. Kofta usually feature some type of ground meat but there are also vegetarian versions based on beans, spinach or grains. As with any meatball they can be sautéed in gravy but these were grilled over a charcoal fire.
This version of kofte uses a Turkish blend of spices called baharat. Baharat translates to “spice” in Arabic and the combination of spices in baharat will vary with the region. It will usually include black pepper, cumin, cinnamon and coriander. Shaping the ground lamb, onion and pine nuts into a cigar shape makes them easier to maneuver over a grill. Wrap the grilled kofta in a flatbread and serve with a yogurt-garlic sauce accented with a little sesame paste.
Ingredients for the marinade
Tavuk Kebabi slightly adapted from Saveur Magazine June/July 2013
Mint and Aleppo Pepper Marinated Chicken Kebabs
Serves 6-8
Ingredients
1 c olive oil
1 T chopped fresh mint
¼ t crushed red chile flakes
1 T dried thyme
1 T Aleppo pepper
1 T tomato paste
1 T harissa
1 t freshly ground black pepper and kosher salt to taste
1½ lbs boneless skinless chicken thighs
6 12″ metal skewers
Marinade for 30 minutes and up to 2 hours.
Directions
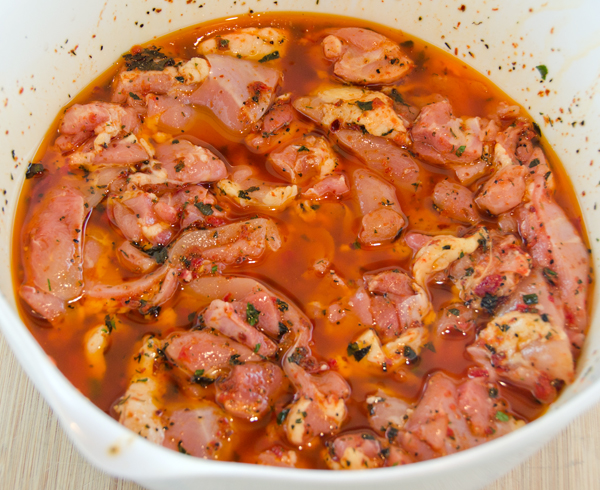
Mix oil, mint, chile flakes, thyme, Aleppo pepper, tomato paste, red pepper paste, black pepper and salt in a large bowl. Add chicken and toss to coat. Cover bowl with plastic wrap and let sit at room temperature for at least 30 minutes or refrigerate for up to two hours.
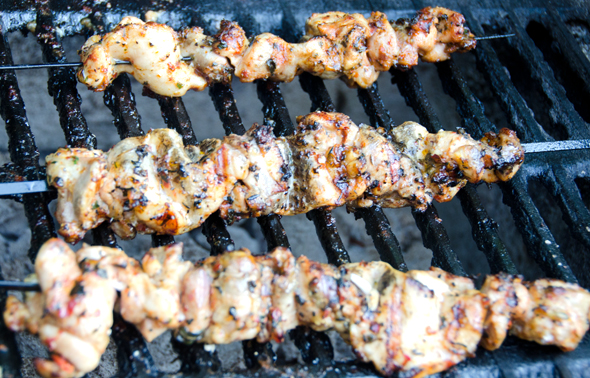
Heat a charcoal grill, bank coals on one side. Remove chicken from marinade and thread onto skewers. Grill on hottest part of grill, turning as needed, until the chicken is slightly charred and cooked through, 12-15 minutes. If the outside starts to burn before the chicken is fully cooked, move to the cooler side of the grill until done.
Getting a nice char on the chicken kebabsKebabs ready to serve.
Grilled Lamb Kofte
Serves 4 to 6
Ingredients for the Yogurt-Garlic Sauce
1 T plain Greek yogurt
2 T fresh lemon juice
2 T tahini
1 garlic clove, minced
½ t salt
Directions for the Yogurt-Garlic Sauce
Whisk all ingredients together in bowl. Set aside.
Ingredients for Kofte
½ c pine nuts
4 cloves of garlic, peeled
1 ½ t smoked paprika
1 t salt
½ t pepper
1 t whole cumin
½ t whole coriander
¼t ground cloves
1/8 t ground nutmeg (ground from whole if possible)
1/8 t ground cinnamon
1 ½ lbs ground lamb
½ c grated onion, drained
1/3 c minced flat-leaved parsley
¼c minced fresh mint
1 ½ t unflavored gelatin
Directions for the Kofte
Process pine nuts, garlic, paprika, salt, cumin, pepper, coriander, cloves, nutmeg and cinnamon in food processor until a smooth paste forms, 30 to 45 seconds. Transfer mixture to large bowl. Add lamb, onion, parsley, mint and gelatin; knead with your hands until thoroughly combined and the mixture feels slightly sticky, about 2 minutes. cylinder about 1 inch in diameter. Using 8 (12 inch) metal skewers, thread 1 cylinder onto each skewer, pressing gently to adhere. Transfer skewers to lightly greased baking sheet, cover with plastic wrap, and refrigerate for at least 1 hour and up to 24 hours.
Remove kebabs from refrigerator 30 minutes before grilling. Prepare a grill for medium high heat. Grill kebabs directly over heat, turning to brown on all sides, until cooked through, about 8 minutes.
Mixture of ground lamb, onion, pine nuts, herbs and spicesKnead with your hands until thoroughly combined.Shape lamb mixture into 5 inch cylinders and thread onto skewers.Ready to fold into flatbreads and top with yogurt-garlic sauce.
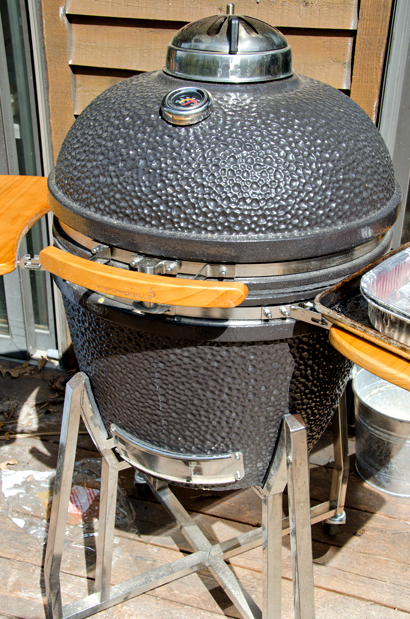
We have been interested in a kamado-style cooker for several years now. The Big Green Egg was the first to catch our eye, but the price plus the accessories had always seemed a bit prohibitive. Last year I spotted a similar cooker at the local Costco but by the time I was able to get Joe to the store, they were all gone. Fortunately this time the grill was in stock and we found assistance to load the 200+ pound grill onto our rolling cart and into the car. Joe was able to get our purchase out of the car in pieces and had it assembled in a relatively short amount of time. With the assistance of a friend, the grill was rolled out on the deck and we were ready to cook.
The mushi (to steam) kamado (cooker, oven or kiln) is based on a Southern Japanese ancient clay cooking vessel. The mushikamado began as a round pot with a domed lid, originally used to steam rice for ceremonial occasions. This versatile cooker was introduced to the United States from Japan after the Second World War by the servicemen who brought them home. An enterprising American pilot began manufacturing the grills in the 1960’s and shortened the name to kamado. A damper and draft-door were added to bring temperature control to the device and the cooking fuel has changed from wood to charcoal. The cookers that once were made of extremely temperature sensitive clay are now constructed with a variety of materials including high-fired ceramics. Ceramic material provides excellent heat retention and more efficient fuel burning. Kamados can achieve consistent temperatures, as low as 225°F and as high as 750°F. and can hold heat for long periods of time. What started as a ceremonial rice cooker has evolved into a multi purpose cooker that smokes, bakes, roasts and slow cooks.
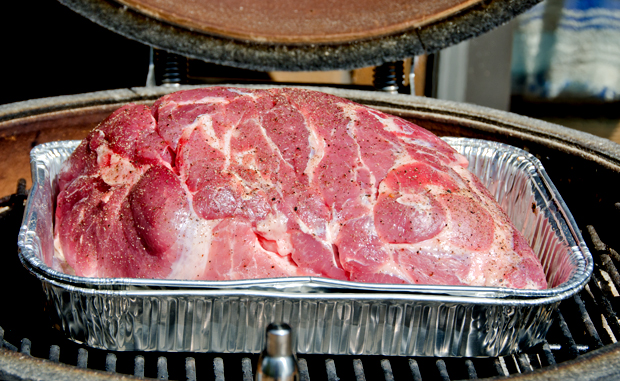
We are still in the process of learning the nuances of the kamado. We revisited a favorite that we usually cook in the oven, a slow roasted pork shoulder. The original post is here.
Our new kamado-style grill.
The pork, seasoned simply with salt and pepper, ready for the grill.
The pork shoulder after several hours of cooking.
Tender, after four hours of cooking
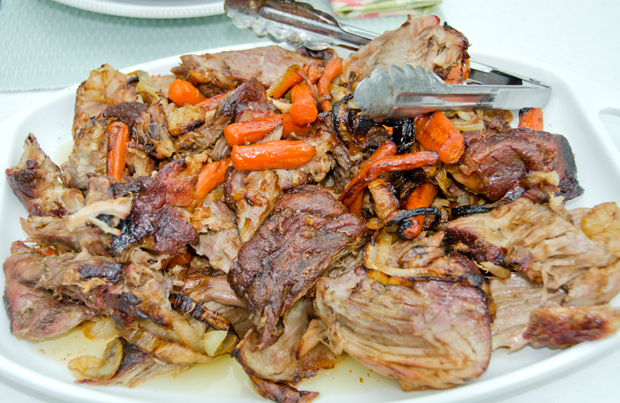
The pork is broken into chunks and onion, garlic and carrots go into the roasting pan. It cooks for one more hour.
The finished dish, we served it with scalloped potatoes, white beans with garlic oil, grilled asparagus and red peppers.
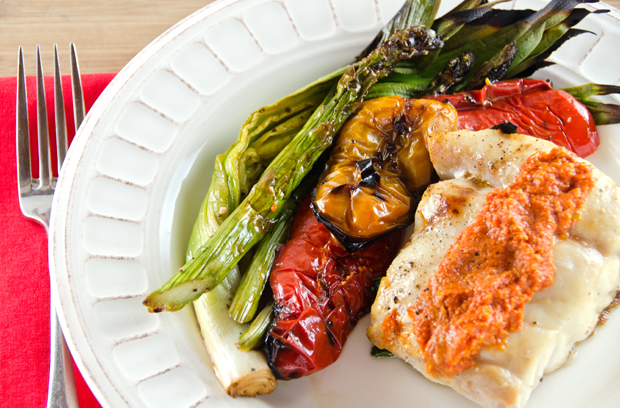
Versatile, that’s a word that accurately describes Romesco sauce. This rich, vibrant condiment is from the coastal town of Tarragona in northeastern Spain. It’s origin is often credited to the local fishermen who added it to seafood dishes. Authentically made with dried Spanish Nora peppers, most of the recipes I consulted used fresh or jarred roasted peppers. As with many traditional sauces, there are many variations on the recipe. My version combines roasted red peppers, almonds, some toasted bread, tomatoes, sherry vinegar and smoked paprika. These traditional Mediterranean ingredients are transformed into a luscious sauce that complements a wide variety of dishes. Romesco sauce can be served as a sauce with chicken, fish or grilled vegetables. It can be tossed with pasta, layered on a sandwich or used as a dip for crudites.
Romesco is a thick sauce, like pesto, and like pesto it is traditionally made with a mortar and pestle but a food processor brings it together in no time at all. If it were late summer I would be using my own roasted peppers, instead I used spicy and sweet piquillo, or bird’s beak peppers that also originate from northern Spain. Be sure to toast the almonds to enhance their nutty flavor, Spanish Marcona almonds would fill in nicely too.
Romesco sauce plays a part in a festival in northern Spain called Calcotada. It is an early spring event that celebrates the harvest of calcots, slender onions similar to baby leeks. After the calcot harvest, community festivals are held where the onions are grilled along with meat and other vegetables on outdoor barbecues. Once charred, the onions are wrapped in newspaper to steam and finish cooking. The not so proper way to eat a calcot is to put on a bib, pull back the blackened exterior, dip it in Romesco sauce, tilt your head back and pop the onion in your mouth, sword-swallower style. We don’t have calcots in our garden, but Joe was able to harvest some of last season’s leeks before they had a chance to go to seed. He grilled the leeks along with some asparagus and peppers to accompany our meal. I topped grouper with this sauce, but other firm fleshed white fish such as monkfish or mahi-mahi would work as well.
My first experience with Vietnamese food was in the late eighties when I accompanied my husband to a conference in Houston Texas. Using what is now an almost extinct method, (the phone book) I was fortunate to contact a dear friend from college, Hue, who was living in the area. In the BF (before Facebook) years it was good to reconnect and catch up in person after almost ten years.
Hue’s parents served in the Peace Corps and part of her childhood and teenage years were spent in Southeast Asia and Africa. That’s where she developed a palate for what were then considered exotic cuisines. Hue had settled in the Houston area and was teaching elementary school with a predominately Spanish speaking population. I don’t even think she spoke Spanish in college, but that’s another story. She knew we appreciated good food and took us to one of her favorite restaurants. They served a cuisine that she thought we were probably not familiar with, Vietnamese. I was only beginning to explore Thai food at that time, I wasn’t familiar with Vietnamese cuisine at all. As it is with our friend from China, you get special attention from the restaurant staff when you can order your meal in their language. Hue spoke Vietnamese (of course) and we enjoyed a wonderful family style meal with dishes and flavors that I had never experienced before.
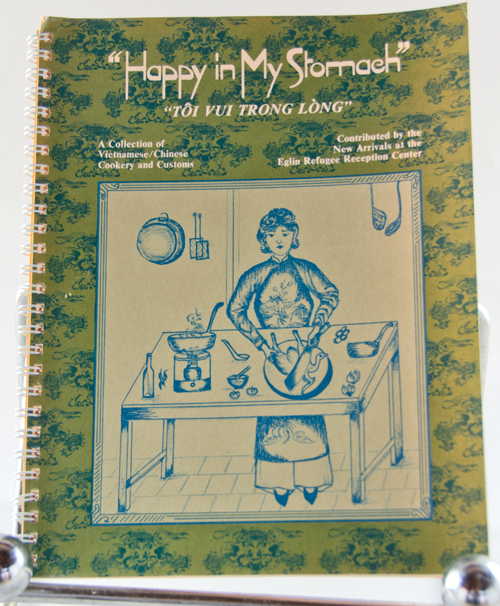
Before we left Houston, Hue gave me a spiral bound cookbook, “Happy in My Stomach”. The phrase “happy in my stomach” is the Vietnamese equivalent of the American expression of a “happy heart”. The book, written in 1975 was a compilation of recipes and customs contributed by Vietnamese emigres and compiled by YMCA refugee services at the Eglin Refugee Reception Center. The intention of the book was to build a bridge through cooking between the Vietnamese and American cultures. I would imagine it was the first English language Vietnamese cookbook. I added it to my growing cookbook collection, but didn’t really use it .
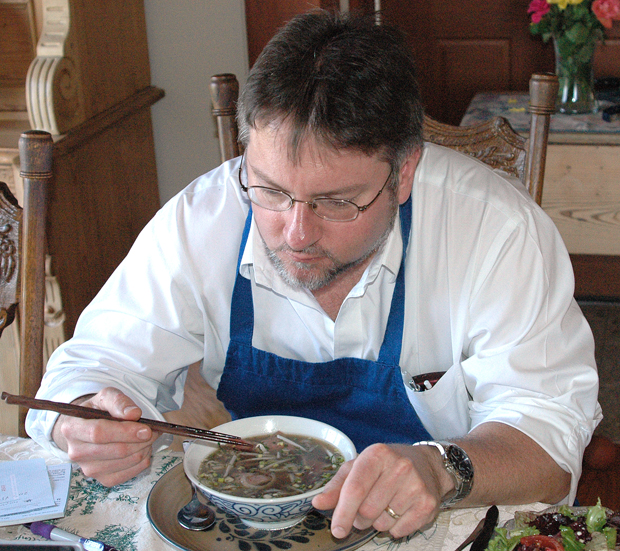
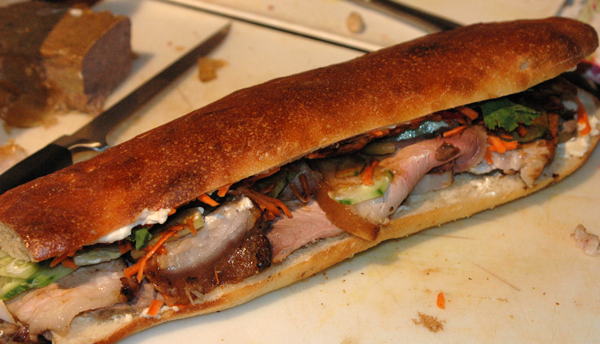
Fast forward ten years and there were now a growing number of Vietnamese restaurants in our area and many new cookbooks written that were devoted to Vietnamese cooking. We were also growing some Vietnamese herbs like rau ram in our garden.To learn more about Vietnamese cooking, I decided to cook my way through some of the more popular Vietnamese recipes I had accumulated. I tried my hand at Pho (phuh to say it correctly), both chicken and beef, rice paper rolls, and the Vietnamese “hoagie” banh mi, making my own roast pork, pate and rolls.
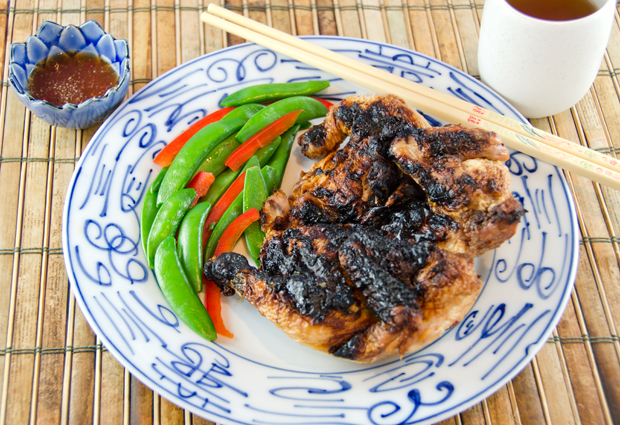
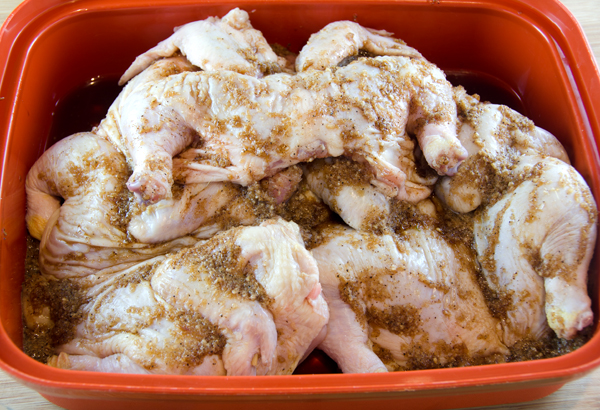
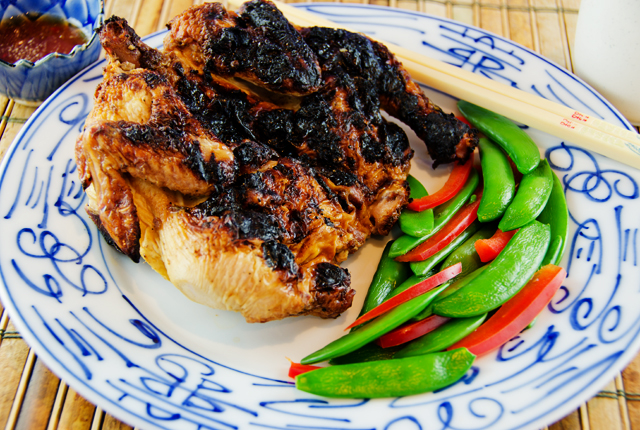
In addition to cookbooks and magazines, I have notebooks with recipes I have collected from other sources. Some I might try once, others become a regular in my cooking repertoire. The recipe for Barbecued Vietnamese five-spice Cornish game hens is a recipe I first tried over five years ago and one we still enjoy to this day. It’s a variation of Ga Roti or Vietnamese rotisserie chicken. The birds marinate overnight in a flavorful mixture of herbs and spices. Grilling the hens gets the skin nice and crispy and the meat stays juicy. The game hen is an individual portion, whether you eat it all, or save half for lunch the next day. Cornish game hens are not actually a game bird but a breed developed in the fifties that produced a larger, more broad breasted chicken at a younger age. They are not very expensive but the cost conscious could substitute chicken thighs. The dipping sauce, nuoc cham really makes the dish special. The flavor combination of sweet, sour, salty and spicy adds another dimension of flavor to this dish. Use your fingers to dig in and appreciate every succulent bite.
Halve the hens through the breast. This is easy to do with kitchen shears or a very sharp knife. Flatten the breast with the palm of your hand.
In a food processor, mince the garlic, shallots (or green onion) and sugar. Add the salt, pepper, five spice powder, fish sauce, soy sauce and sherry. Pulse to combine ingredients thoroughly. Pour the mixture over the hens. Cover and refrigerate for at least 2 hours or overnight.
Prepare a fire in a barbecue. Let the coals burn down to medium-hot. Set the hens skin side down on the rack and grill over medium hot coals for 15 minutes. Turn and grill for 15 minutes longer, or until they are thoroughly cooked and the skin is crisp and browned. Serve with nuoc cham dipping sauce.
Nuoc Cham Dipping Sauce
Makes 3/4 cup
Ingredients
2 garlic cloves
1 or 2 chile peppers, I used serrano
1T sugar
3T fish sauce
2 1/2T fresh lime juice
4T water
Directions
In a food processor, combine garlic, chile pepper and sugar into a paste. Transfer the mixture to a bowl and add the fish sauce, lime juice and water. Stir to blend. Let the mixture sit for at least 15 minutes until ready to serve. Serve in dipping bowls.
The hens benefit from an overnight marinade in soy and other seasonings.Time to dig in!
Enjoying a bowl of pho in 2008.My homemade banh mi, the Vietnamese version of a hoagie.
Getting my husband to try new cooking techniques isn’t always the easiest thing to do. If I can convince him to try something new once and then he embraces it, I know I have found something worthwhile. The convincing was easy with the rib roast cooked like a steak. I just showed him the YouTube video of chef-author Adam Perry Lang cooking it on the Jimmy Kimmel program. What guy (or gal for that matter..) could resist pounding a rib roast with a baseball bat to increase the cooking surface area of the meat? It was a big hit at our house this summer and successfully repeated a few weeks ago.
Last summer I wanted to try cooking salmon on cedar planks. Since we love the flavor that a wood fire brings when we cook turkey or chicken on our outdoor smoker, why not infuse some cedar smoke into some delicious salmon fillets? I bought the planks, introduced him to the concept and recipe and we were cooking.
Cooking on wood planks certainly isn’t new. It is a technique that was pioneered by Native Americans who roasted both fish and game on aromatic cedar planks. Cedar planks are available everywhere these days from supermarkets to specialty cooking stores. Just be certain not to buy planks that have been treated with chemicals, like those from a home improvement store. Your planks will need to be soaked before using for several hours or overnight so they don’t burn on the grill. Some recipes soak the planks in cider, wine or sake, but that could be an expensive proposition considering the amount of liquid needed to submerge the planks. I soak my planks in one of our sinks using heavy marble and ceramic mortars to weigh them down.
We chose Copper river salmon, which is available fresh from May to September. As with all salmon, Copper river is loaded with Omega 3 oils and recommended by the American Heart Association. Omega 3 oils help reduce heart disease and lower cholesterol. I season my fish with a dry rub before grilling to enhance the flavor. Cedar planked salmon is excellent on its own with a squeeze of lemon or served with a sauce. I have served it with both a horseradish sour cream sauce and herbed salsa verde. What is the white stuff that your salmon may exude? Protein, albumin to be exact. It occurs more often in salmon with a high fat content. It is definitely safe to eat but can be wiped off for aesthetic reasons.
Cedar planks can be reused. Wash the used planks with warm water, clean off any debris with a soft bristle brush and allow to air dry. Don’t use soap because the board may absorb it and affect the flavor it gives off. I wrap my used planks in plastic wrap and store them in the freezer. Don’t reuse if the planks are excessively charred, cracked or split.
Salmon prepped and ready for the grill.
Cedar Planked Salmon
Serves four
Ingredients
Salmon Rub
1 Tbs. grated lemon zest, minced
1T dried lemon peel
1 1/2tsp. chopped fresh thyme
1 tsp. granulated or brown sugar
1/8t cayenne pepper
Kosher salt and freshly ground black pepper
About 1/2c lemon basil cut in a chiffonade
1 1/2 to 2lbs salmon filets cut into 6-8oz portions, skin on and pin bones removed
1-2 T olive oil
1 lemon, cut into thin slices
Food safe cedar planks
Soak cedar planks for several hours or overnight.
Directions
Cedar Planks
Soak the cedar planks in water to cover for at least two hours and up to overnight. Drain the planks. Salmon preparation
In a small bowl, with a fork, combine the fresh and dried lemon zest, thyme, sugar, cayenne pepper, 1 1/2 tsp. salt, and 1 Tbs. pepper. Rub the salmon fillets on both sides with olive oil and then set each fillet portion skin side down on the planks.
Sprinkle the fillets with the lemon herb mixture, dividing it evenly. Gently rub the seasoning into the fillets. Sprinkle the chiffonade of lemon basil over the fish. Place the lemon slices around the fish. Let stand at room temperature while the grill heats.
Prepare a gas or charcoal grill fire for indirect cooking with high heat: On a gas grill, heat all burners on high; then turn off all but one burner just before cooking the salmon; on a charcoal grill, bank the coals to two opposite sides of the grill. Arrange the planks over the cooler part of the grill, positioning them so that the thickest part of the fish is closest to the heat source. Allow space between the planks to allow heat and air to flow. Cover the grill and cook until the thickest part of each fillet registers about 135°F on an instant-read thermometer, 20 to 35 minutes depending on the thickness of the fillets. The planks may smoke a bit (this is fine) and will become very aromatic.
Fillets should rest on the planks for 5 to 10 minutes before serving. Serve as is or with the sauce of your choice.
Salmon served with an herbed salsa verde and wax beans from the garden.
Many cold winters ago as we were perusing the seed catalogs, Joe was going over the litany of our seed purchase list. Discovering something different, he asked, “Toe-mah-till-ohs?” “Uh sure, mm, okay.” I had never seen or heard of tomatillos before but was interested in the small green fruit. Were they like tomatoes? How do you know when they are ripe? Not having a large Mexican community in the area at that time my initial knowledge of real Mexican food (think not Chi Chis) came through the cookbooks of Rick Bayless and Diana Kennedy. I learned that it is pronounced, toh MAH tee yo, and tomatillos like tomatoes and eggplants are members of the nightshade family. Tomatillos are a prominent ingredient and bring the citrusy tang to salsa verde. I learned salsa verde was not just an alternate dip for tortilla chips, but a sauce to cook chicken or pork in. This knowledge didn’t bring me initial success as a gardener/harvester. I would examine the papery husks that resembled Chinese lanterns on the vine and not find much inside. So I would give up, some years we even skipped over growing them at all. Last year Joe found a seed source that had both green and purple tomatillos. With renewed determination I was going to harvest tomatillos. I learned that the tomatillo is ripe when the fruit fills out the outer layer and the papery skin starts to dry out.
Preparation is relatively easy, remove the outer husk and rinse off the sticky residue that coats the fruit. The fruit should be bright green, firm and tart. They can be eaten raw or boiled, but I feel they are best when charred or broiled. I like cooking my tomatillos on an asador, a round grate that sits on top of your gas burner or outdoor grill. Most often I use the asador on the gas cook top, moving the tomatillos around to blacken on all sides with tongs. They don’t look very pretty when you are done with them but the flavor is wonderful, smoky, sweet and a little citrusy all at the same time. I used the asador to cook all the elements of my salsa verde, the tomatillos, garlic, red onion and the peppers; Anaheim, Pasilla Bajio and a green Jalapeno for good measure. I put all the ingredients in a blender, pulsed on high for a few minutes and came out with a green chili sauce that I am liking more every day. I have topped pork,chicken and fish with it so far and I’m sure it would be just as good with a steak. This year I plan on freezing some tomatillos as well, a little chicken tomatillo soup in about a month will hit the spot.
Postscript : Once again, as with “Perfect Fish”, I have learned that the asador is no longer available for sale. One version (not mine) was part of a line that Rick Bayless was designing and bringing to market. Copco dropped that line when they sold the company. Bayless is in discussions with several manufacturers to bring back the stove-top roaster.
Salsa Verde
My own interpretation
Yield: about 2 1/2 cups
Ingredients
10-12 small to medium tomatillos, husked and washed
1 1″ thick slice of red onion
3 cloves garlic with the peel on
2-3 Anaheim chilis (mine were red)
1 Pasilla Bajio chili
1 Green Jalapeno chili
1t ground cumin
1t fresh lime juice
1T chopped cilantro (optional)
Kosher salt and freshly ground pepper to taste
Directions
Place stovetop asador over a gas flame, when the grill heats up (3-5 minutes) add as many tomatillos will fit comfortably stem side down. The stem side is flatter and the tomatillos will not roll around. Move tomatillos around the cooking surface to ensure even cooking. Using tongs, turn the tomatillos to the other side and cook until charred and completely softened, 4-5 minutes per side, depending on how intense your flame is. Move the cooked tomatillos to a sheet pan or bowl. Add more tomatillos, onion, garlic and peppers as you have room. The garlic will take only seconds, don’t allow it to burn.
Let everything cool for about 10-15 minutes. Now for the “fun” part, peel, stem and seed the tomatillos, garlic and peppers. I find the best way to do this is in the kitchen sink with a large bowl and cold running water near by to keep the skins and seeds from sticking to your hands. It’s okay if some of the char remains, it adds a little character and flavor to the sauce.
Place tomatillos, onion, garlic and peppers in the blender. I like to add a teaspoon or so of ground cumin and some fresh lime juice. Blend on high, occasionally scraping down the sides of the bowl to incorporate all the ingredients.
Pour sauce into a bowl, season with kosher salt and freshly ground pepper to taste. I add a tablespoon of chopped cilantro at this point, but that is optional.
Alternately the tomatillos, garlic, onion and peppers could be charred under a broiler or over an outdoor grill.
Tomatillos in various stages of charringClose up of tomatillo on asador.Chilis on asadorReady to peelGreen chili sauce (salsa verde) over grilled chicken breast served with a salad of heirloom tomatoes, peppers and avocado.
Grilling pizzas and flatbreads certainly isn’t something new. But what topped this one in an article called “Going Meatless on the Grill” in Fine Cooking was, grilled beet slices and figs. I admit I have gone a little beet crazy this summer, using them in cold soups, in salads, both roasted and raw in a fine julienne. I am still harvesting a few fresh beets from our garden before the fall planting becomes ready. We have a few fig trees, but they are young and not producing fruit yet. Figs are in season now and available in most supermarkets. So I thought I would give this recipe a try. The base of this flatbread is a naan, an Indian flat bread that I have made before but because of time constraints today I used a pre-packaged one (horrors!) that is readily available in many supermarkets. I thinly sliced beets on the very sharp Kyocera mandolin. The beet slices were tossed with olive oil, kosher salt and freshly ground pepper before they were placed on the hot grill. The original recipe called for the beet greens to be used in the topping but my beet greens were way past their prime. I substituted arugula that gave the flatbread a peppery kick. A combination of salty goat cheese and a creamy sharp provolone finished this delicious dish.
Beautiful thinly sliced beets remind me of a tie-dyed shirt!
Beet slices on the grill.
Add the naan to the grill once the beet slices have started to brown.
Naan is topped with softened goat cheese, grilled beets and sliced fresh figs. The provolone is scattered over the top and returned to a closed grill to wilt the greens and melt the cheese.
 Our summer barbecues often include the combination of ribs and chicken. The ribs are sourced locally from a pork farm less than ten minutes from our home. The rich, succulent meat pairs very well with a sweet hickory barbecue sauce. I didn’t want to duplicate the same flavor profile for the chicken. I was thinking of a nice contrast, lemon, garlic and herbs. My need wasn’t for a method of cooking the chicken, Joe has mastered that quite nicely, I just wanted a different way to finish the chicken.