July 4, 2017 Quick Pickled Baby Beets

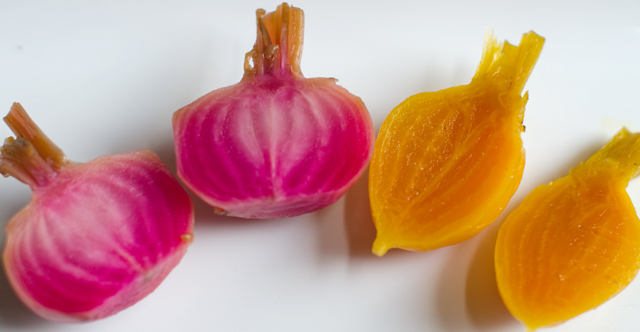
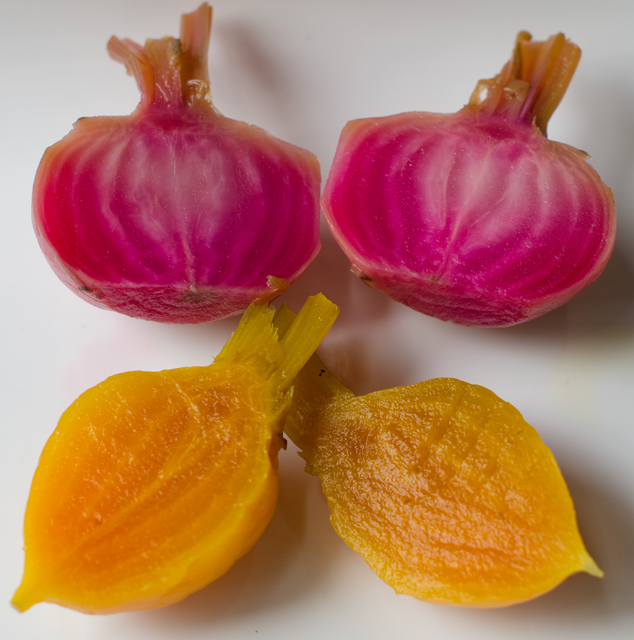
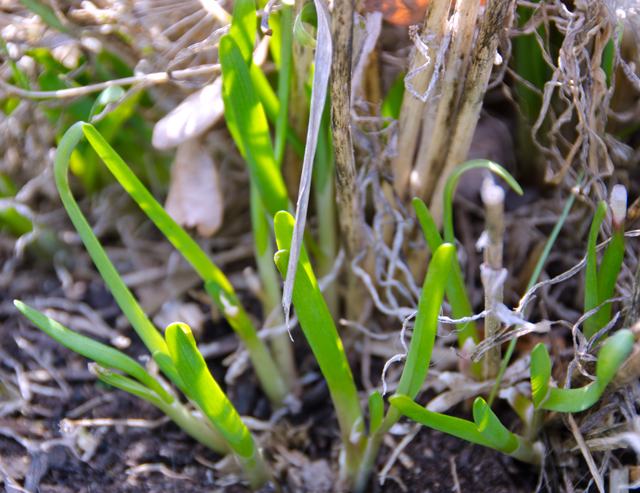
The hot days of July are upon us so it’s time to harvest the root crops planted in early spring. that are still in the ground. We said good-bye to the radishes several weeks ago after the first heat wave of the summer. Warm temperatures cause radishes to bolt and become woody in texture. They will be planted at the end of summer for a fall harvest. The first planting of Japanese turnips have been harvested and now it’s time to harvest the rest of the beets.The”life cycle” of our beet consumption began with very small thinnings we add raw to our salads. The second thinning produces slightly larger leaves the size of spinach that are sautéed in olive oil with a little garlic and red pepper flakes for a wonderful side dish. Baby beets are sliced as thinly as possible or julienned and added to green salads.The Chiogga beets look pretty in salads, a slice looks like a candy cane bulls-eye and the Golden beets bring a pop of bright yellow.

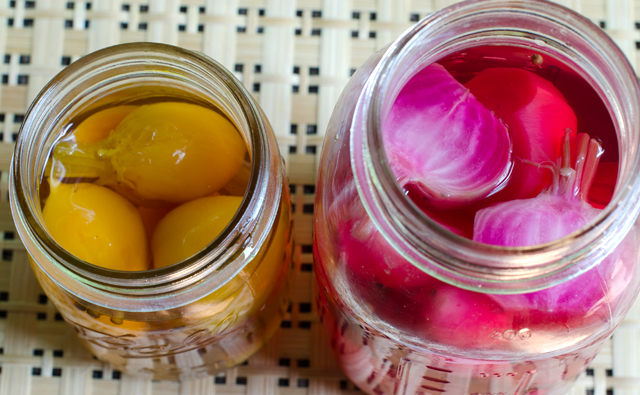
I love beets, especially pickled ones. I have canned pickled beets in past summers for long storage, this year I thought I would make refrigerator pickles. Quick pickled baby beets couldn’t be simpler to make. These refrigerator pickles require very little prep and they are ready to eat after a few hours in the brine. Divide your beets by colors or they will bleed into each other. The brine is a touch sweet with a little spice. These pickles will last for several months in the refrigerator.

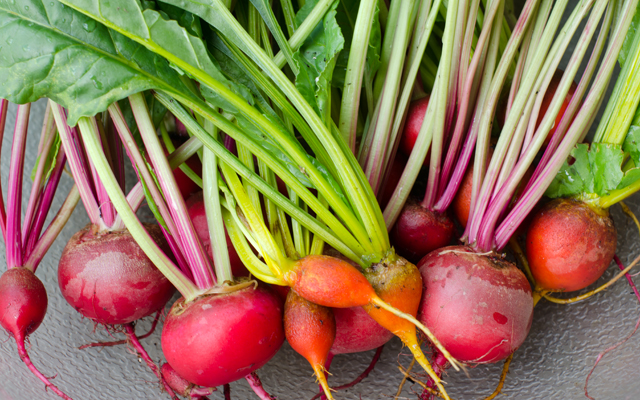
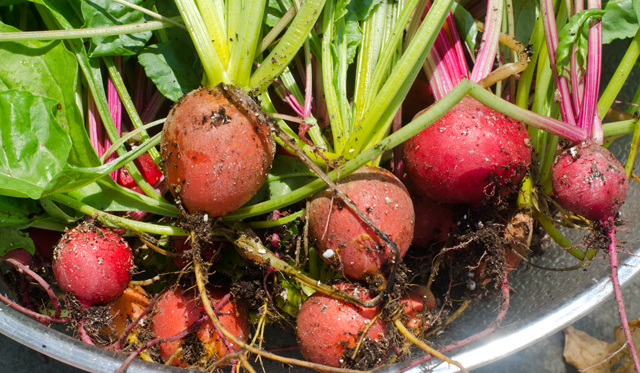
Just picked beets from the garden.
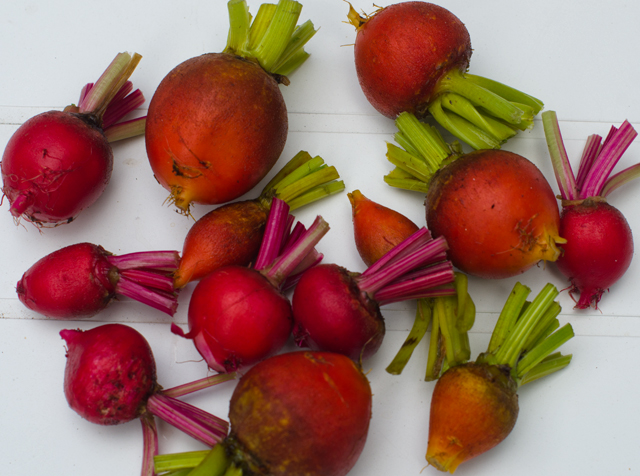
After a good clean up.


Quick Pickled Baby Beets

Makes 2 pint jars

Ingredients

  • 1 lb baby beets,  separated into colors
  • 1 c white wine vinegar
  • 2 t kosher salt
  • ½ c sugar
  • 2 T honey
  • Fresh ginger slices
  • 1 t coriander seed
  • 1 t black peppercorns
Trimmed and ready for pickling.

Directions

  1. Wash beets well, trim off the leaves and leave about an inch of stem on the beets. Separate beets into colors if you don’t want them to bleed into each other.
  2. Bring a medium pan of water to a boil. You can put all the beets of one variety in the pan, start checking the smaller beets at the two minute mark. Beets should be easily pricked with the tip of a knife, larger beets will take a few more minutes.
  3. Drain beets well in a colander. Place in a heat proof container like a canning jar, separating out the varieties.
  4. Combine vinegar, salt, sugar, honey and spices and bring to a boil. Pour the hot canning liquid over the beets and set aside to cool. Once cool, store in the refrigerator.


June 13, 2017 Green Harissa

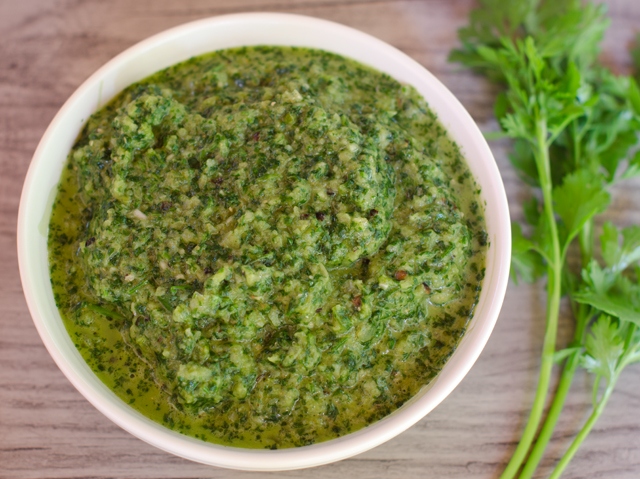
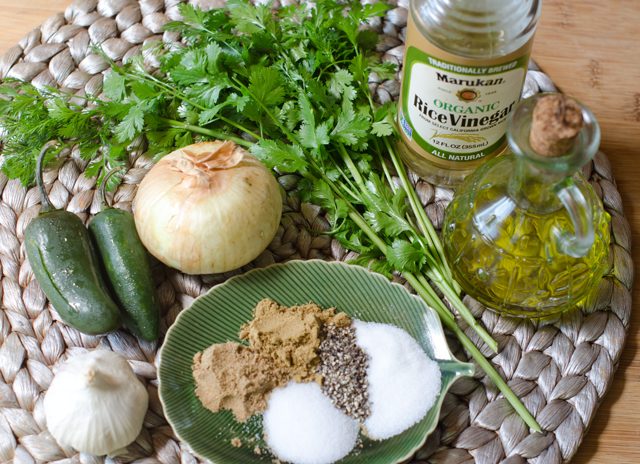
Harissa is a spicy and aromatic chili sauce, commonly found in the cooking of the North African countries of Tunisia, Morocco and Algeria. The basic recipe calls for hot peppers, garlic, salt, olive oil and spices. This version from Vedge , a vegetarian restaurant in Philadelphia, uses green jalapenos, onions, garlic, a generous amount of fresh cilantro, along with dried coriander and cumin. Cilantro haters can substitute parsley or half parsley and half fresh spinach. Some mint might be interesting in the mix.

The original recipe called for 2 jalapenos, one was enough for my palate, remember you can always add more heat, it’s harder to take it away. It’s a good idea to wear gloves when handling chilies. Chili oil on sensitive parts of your body (hands, lips, eyes etc.) will burn for a long time. Chili oil is not water soluble, it’s fat soluble. So if you get some on your hands, rub some cooking oil into your hands before washing with soap and water.

Serve green harissa as a sauce for grilled vegetables and fish, lamb burgers, an unconventional taco topping, the possibilities are endless.

Green Harissa

Makes 1 cup

Ingredients

  • 2 c loosely packed cilantro leaves
  • 1 c finely chopped onion
  • 2 garlic cloves
  • 2 jalapeno peppers, stems and seeds removed
  • 2 T or more olive oil
  • 2 T rice wine vinegar
  • 1 t ground coriander
  • 1 t ground cumin
  • 1 t salt
  • 1 t freshly ground black pepper
  • 1 t sugar
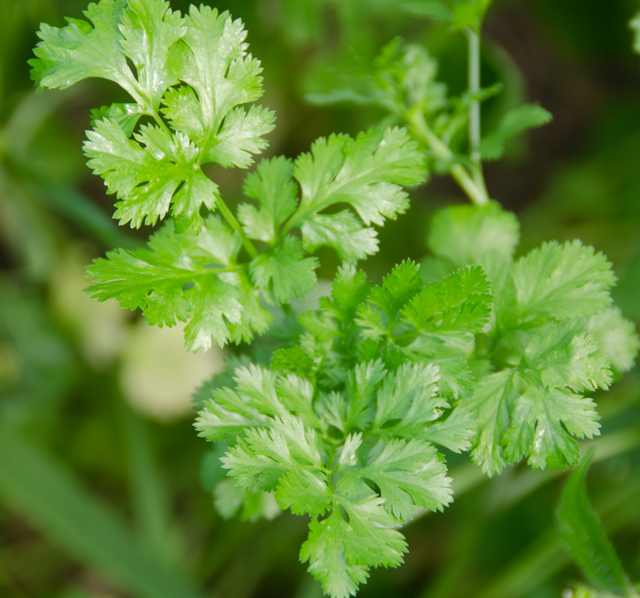
Cilantro in the greenhouse.


Directions

  1. Combine all of the ingredients in a blender and blend until smooth

June 11, 2017 Carrot Top Pesto

Spring is an ideal time for planting root vegetables like turnips, beets and carrots. They especially love the cooler temperatures that we have been blessed with this spring. We try to be frugal with seeds, so the ones that aren’t planted are saved from season to season. I catalog them alphabetically like a card file in clamshell plastic containers that in a previous life held spinach or lettuce from a big box store. I use 3×5 cards to separate them into specific categories, beets, cucumbers, fennel etc. This year I even did a little clean up, getting rid of all packets before 2013.

Last year a friend gave Joe quite a few packets of carrot seeds he purchased on sale. Some were planted but most went into storage in the fridge over the winter. He wasn’t certain how many of them would germinate this season so he planted them very densely. As luck would have it, every carrot seed germinated.  Now it was time for some serious thinning.

Thinning is a necessary step in vegetable gardening if you want to have mature healthy plants. This can be done in stages. Armed with my Cutco scissors, I did the first thinning when the plants were about four inches tall. Pulling out the unwanted seedlings can often pull out the ones you wanted to leave growing. I snipped the plants at the soil line. With a colander full of the lacy feathery tops I thought about how I could use them. I remembered that parsley and carrots are related so I tasted a few of them. They have an herbaceous flavor, that to me was reminiscent of parsley.

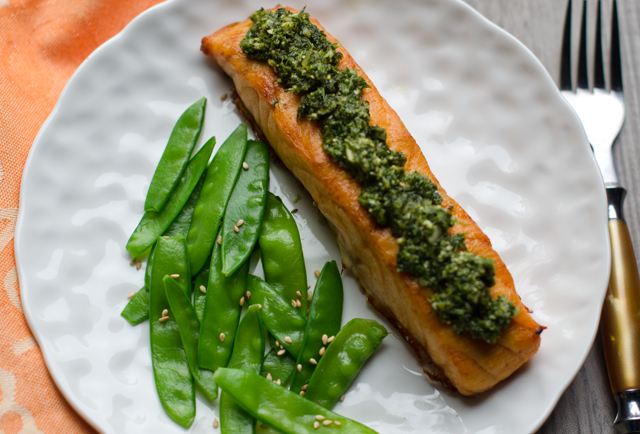
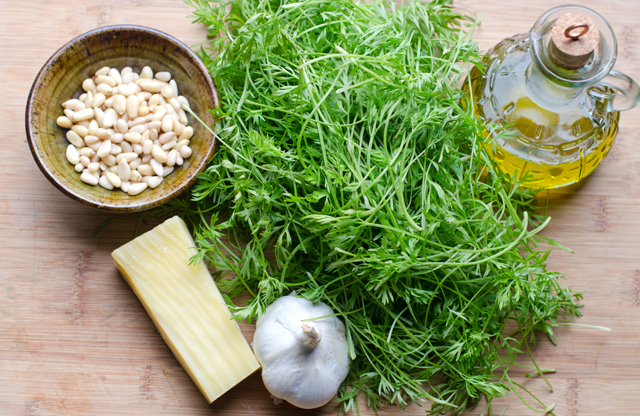
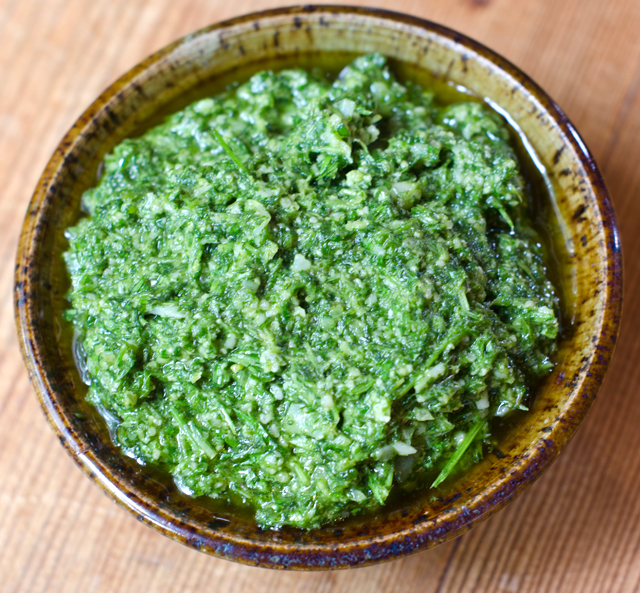
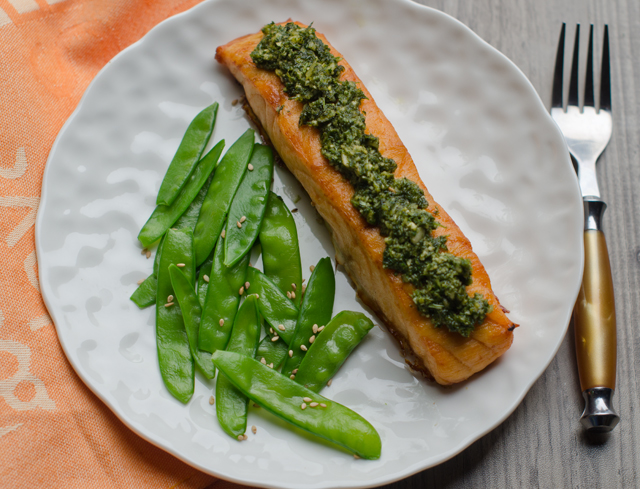
I have made pesto with basil and arugula, why not carrot tops? I used a basic formula that I have used to make other types of pesto, herbs or a green, in this case carrot tops, garlic, nuts, a hard cheese and olive oil. Baby carrot greens are more delicate in flavor and are a special reward for the gardener. Organically grown full-sized carrot greens can be used too, eliminating any thick stems. I used my pesto as a topping for roasted salmon. It would work with chicken breasts and of course, roasted carrots.

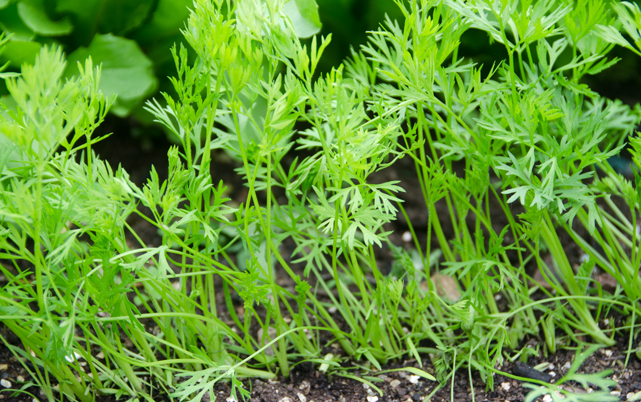
Time to thin the carrots.
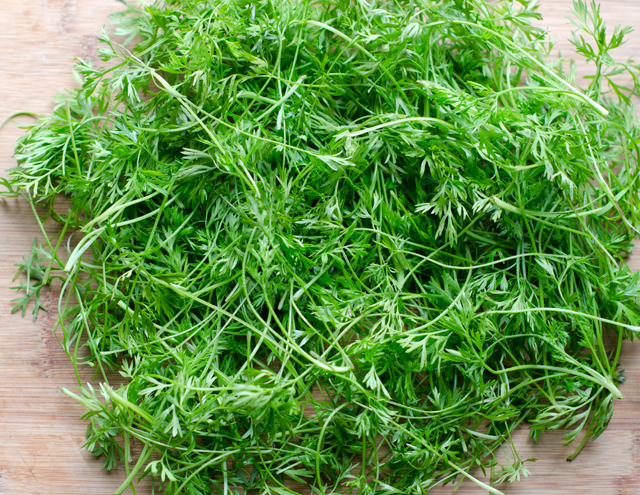
The first thinning of carrot greens.

Carrot Top Pesto

Makes about a cup

Ingredients

  • 3 cups lightly packed carrot tops
  • 1 clove of garlic
  • 3 T pine nuts
  • ¼ c extra virgin olive oil, more if needed to make a paste
  • ¼ c grated Parmesan cheese
  • Kosher salt and pepper to taste

Directions

  1. Place the carrot tops, garlic and pine nuts in the bowl of a food processor.
  2. Pulse until coarsely chopped. With the motor running, slowly add olive oil until a paste forms. Add cheese and pulse several times to combine.
  3. Season with salt and pepper to taste. Use immediately or cover tightly with plastic wrap and refrigerate for up to 2 days.

March 21, 2017 Creamy Poblano Chicken

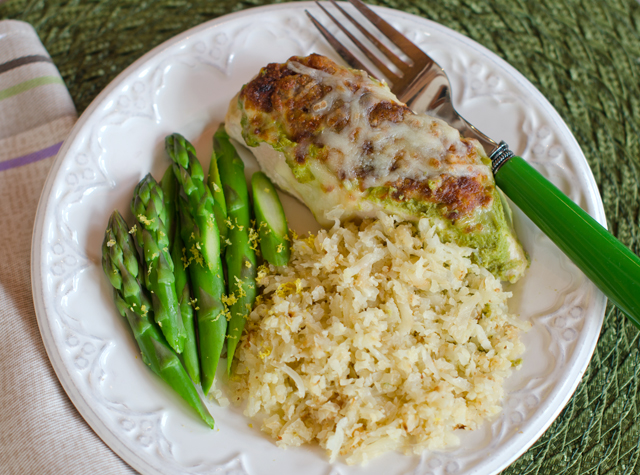
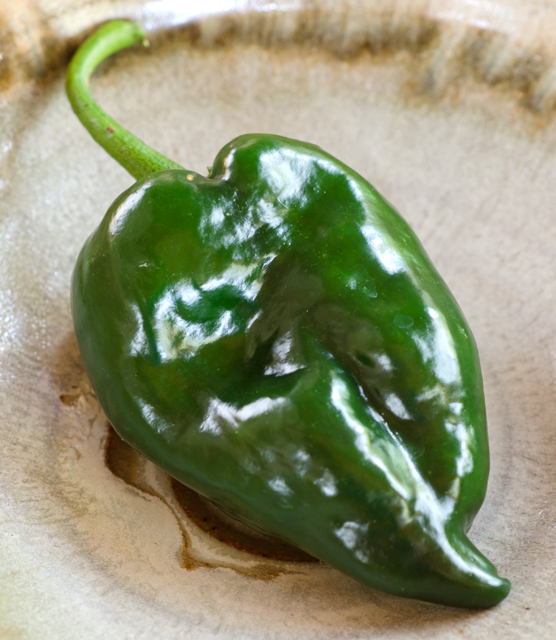
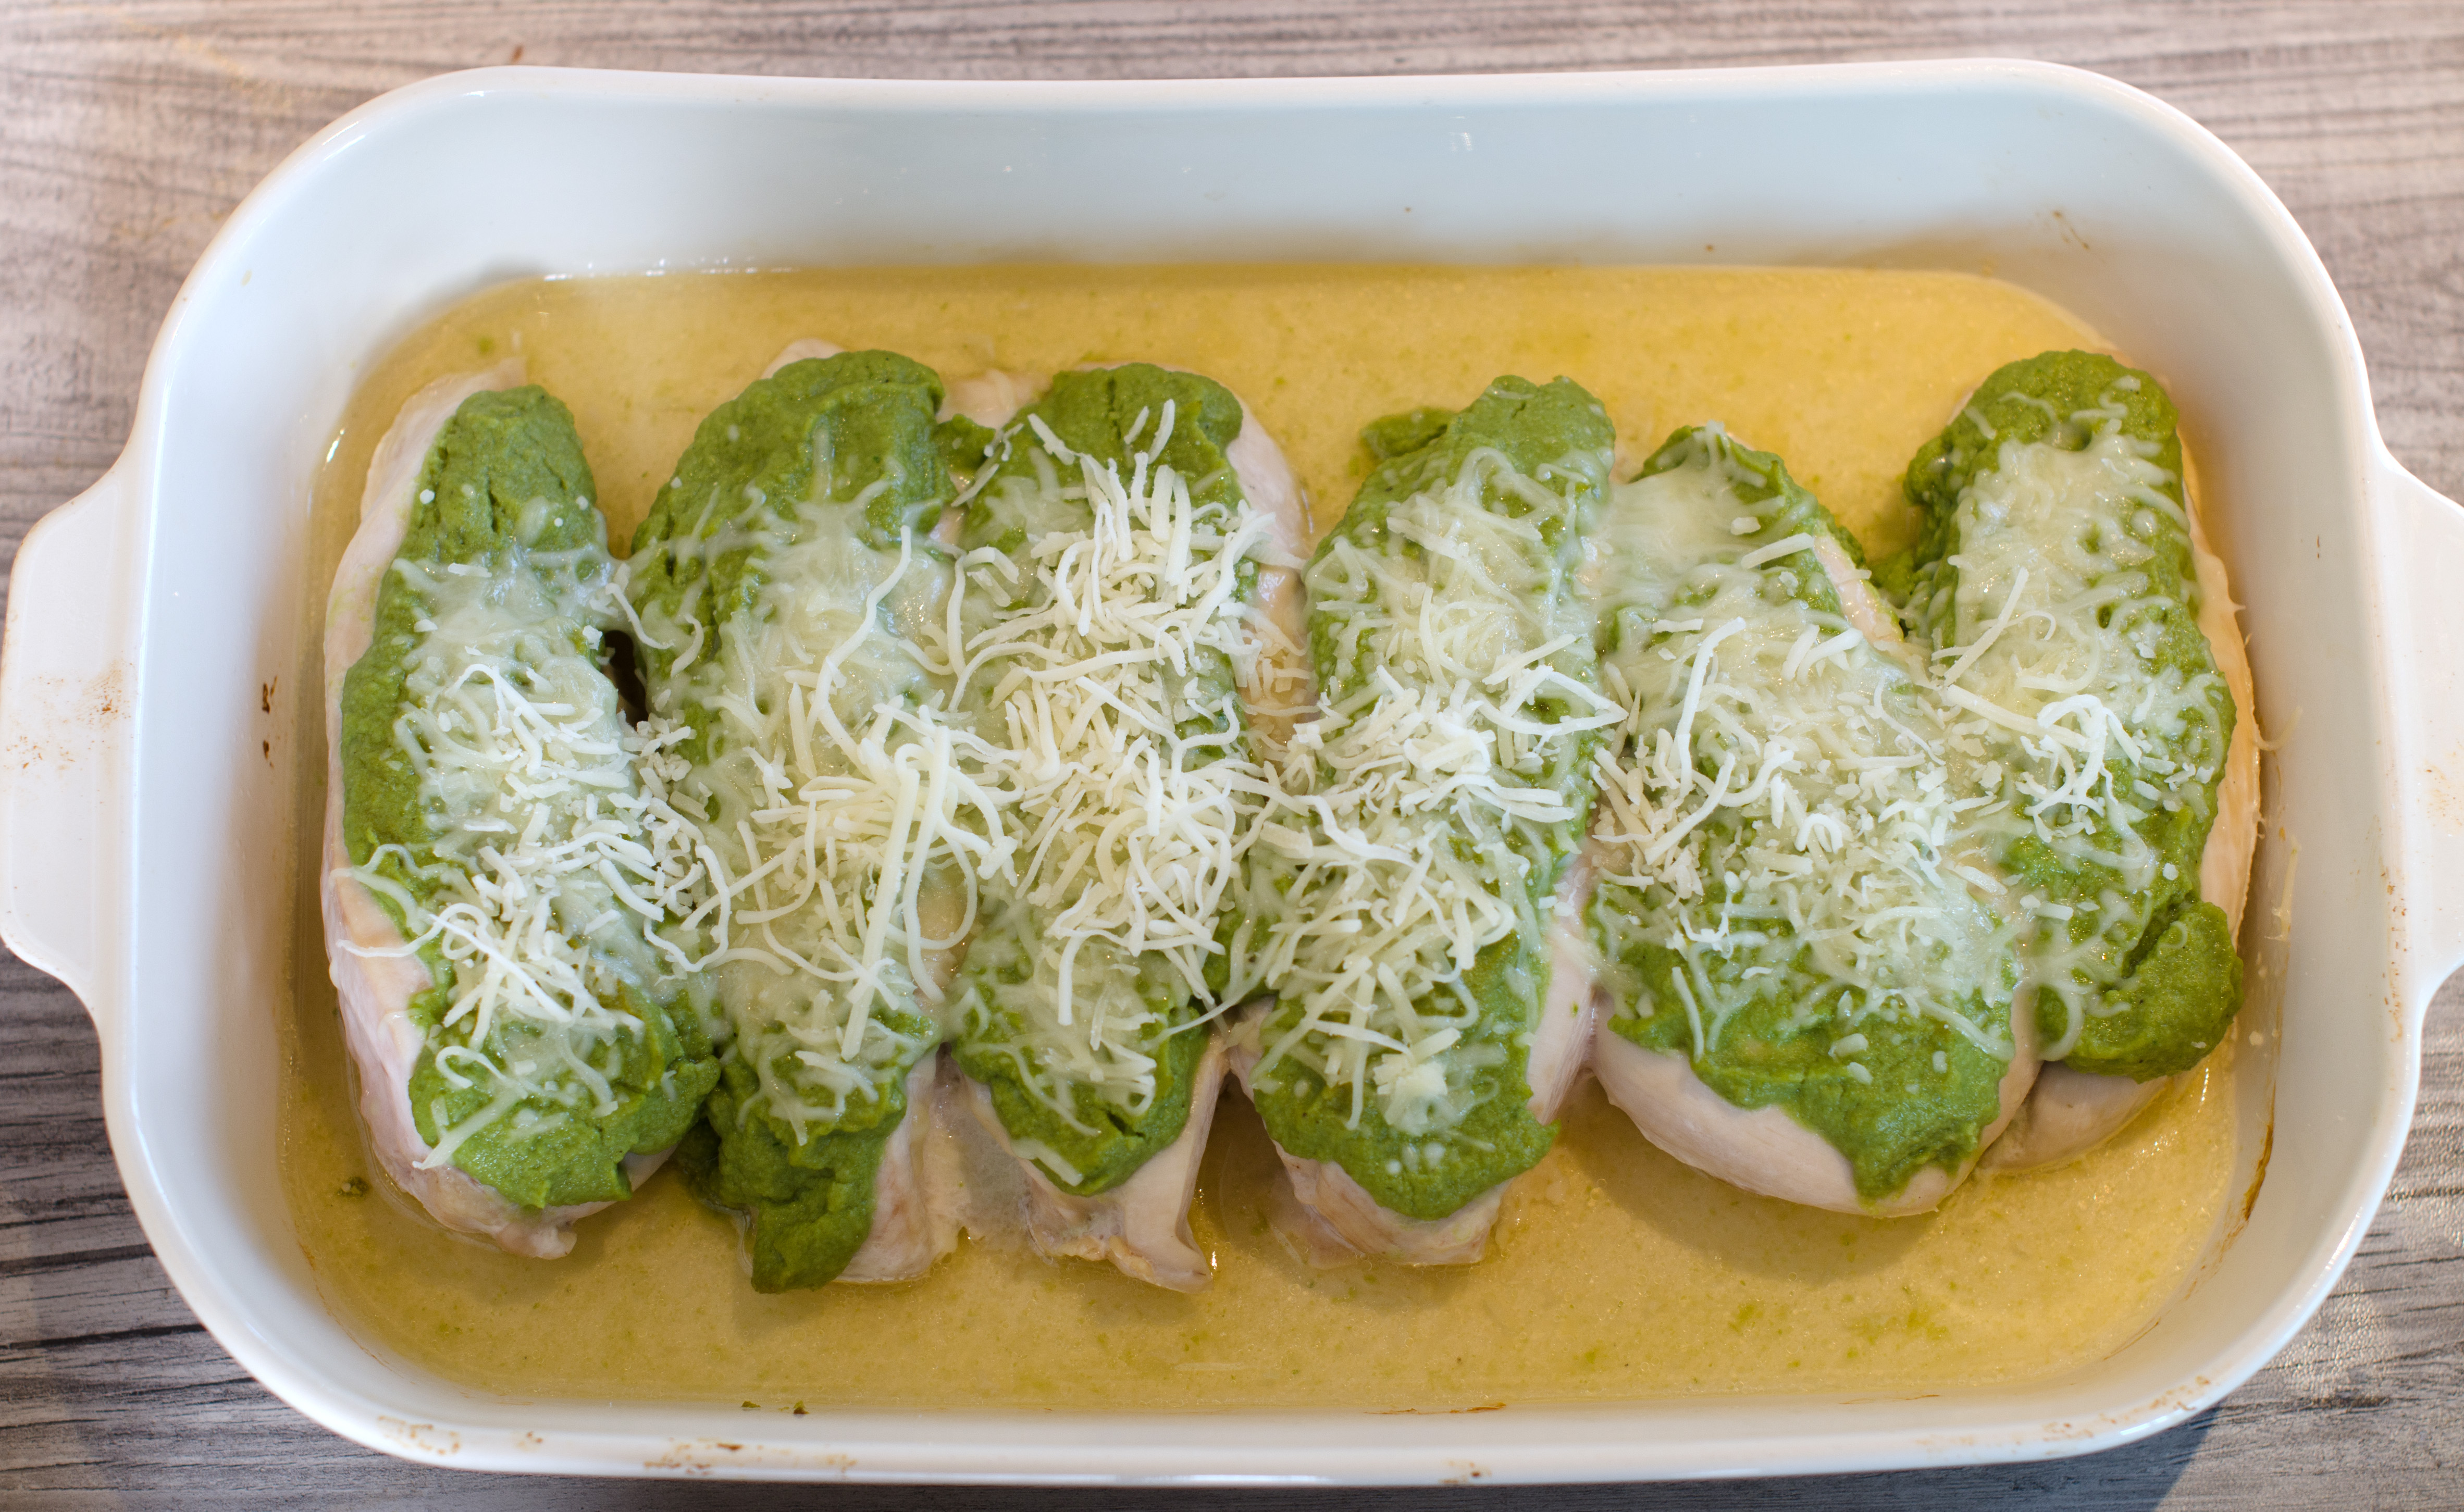
I didn’t think the day would come, but I finally exhausted my supply of freezer pesto. I’ve been using it this winter to top boneless chicken breasts before baking as an easy weeknight supper. A little looking around the freezer and I found the ingredients for this new impromptu sauce. Chicken with poblano cheese sauce is loosely based on a Mexican classic. Poblano peppers have a dark green skin and if left to ripen further on the vine will turn red. They are somewhat heart-shaped, 3-6 inches long and 2-3 inches wide. Poblano peppers are rich and flavorful with a mild to medium heat.

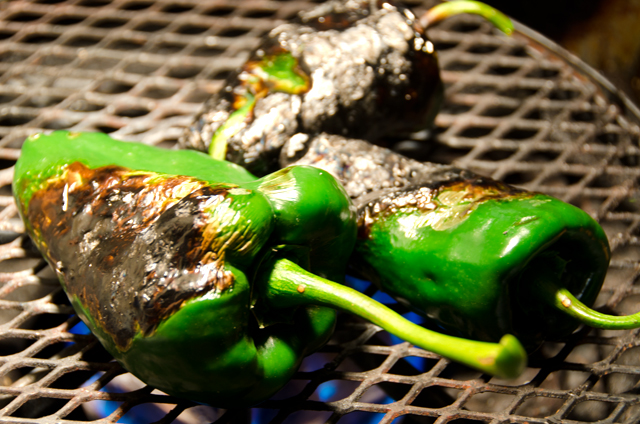
This recipe can be made as mild or as spicy as you like, depending on the number of poblanos added to the sauce. Since most recipes begin with roasted and peeled poblanos, there are several methods for roasting. If you have a gas stove as I do, they can be roasted on an open grated grill known as an asador. If you don’t have a gas stove they can be broiled on a foil lined baking sheet. With either method, turn them often so they char evenly. Put the chilis in a bowl while they are still hot and cover tightly with plastic wrap. Let them rest until they are cool enough to handle, 15-20 minutes. Pull on the stem to remove the seed core and cut the chile open to remove any additional seeds and ribs. Remove the skin by running your hands down the chile, use a damp paper towel to remove any skin that won’t easily come off. Resist rinsing the chiles, you will dilute the flavor.

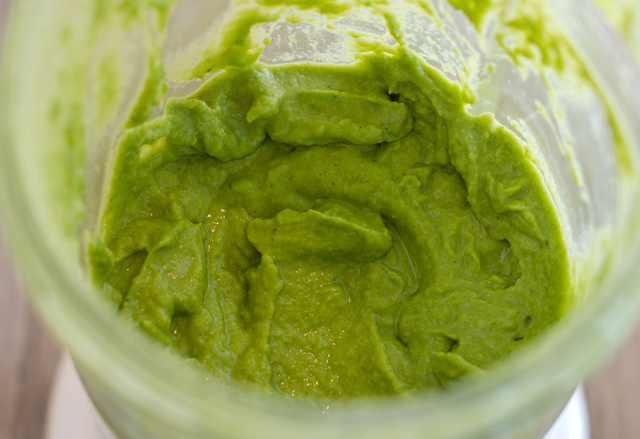
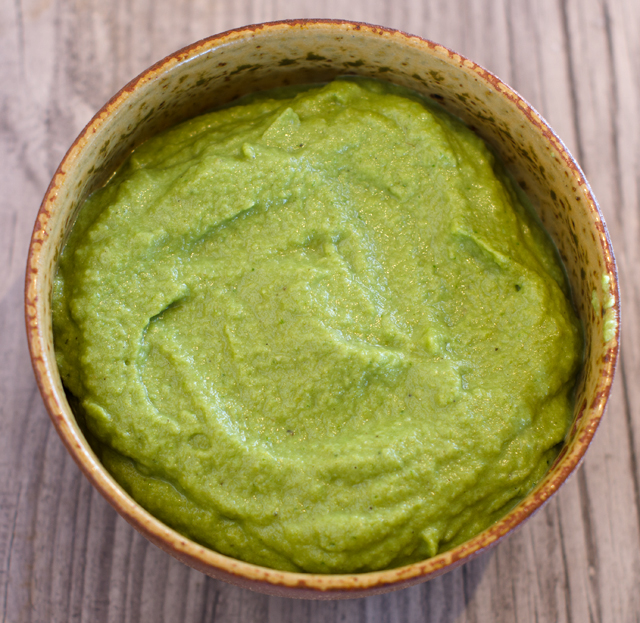
The base is cauliflower Alfredo sauce, a recipe from the blog two summers ago. I wasn’t certain if this would be good to freeze, but I’m pleased to say it reheated well. Since my first step was to see if the sauce held up to freezing, I started with a cup of the cooled down sauce in the food processor. To this I added several roasted poblanos, from the end of last years garden, also from the freezer.

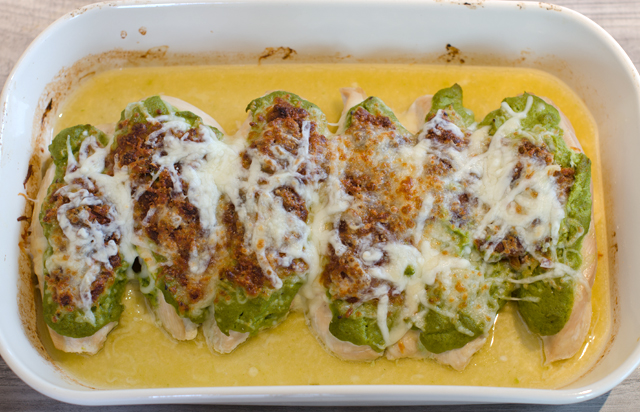
I puréed the sauce, along with a cup of raw spinach leaves, a teaspoon of ground cumin, salt and pepper. Start with one stemmed and seeded poblano, cut into strips and add more as desired just to give a little kick of heat. I topped chicken breasts with this sauce, covered with foil and baked for 23 minutes. After 23 minutes, I took out the chicken, removed the foil and topped with grated cheese and placed under the broiler. Delicious and the chicken is cooked perfectly! Next time I might add some roasted garlic too. This sauce would also be good to top chicken enchiladas or even as a dip for veggies.

Creamy Poblano Chicken

Serves 4

Ingredients

  • 1-1 ½ c cauliflower Alfredo sauce
  • 2-3 roasted poblano peppers
  • 1 c raw spinach leaves
  • 1 t ground cumin
  • kosher salt and freshly ground pepper
  • 2 lbs boneless skinless chicken breasts, remove tenderloin if attached, breasts cut in equal halves
  • ½c or more shredded cheese, a Mexican blend is good here, mozzarella is fine as well
  • Non stick spray or oil to coat baking dish.
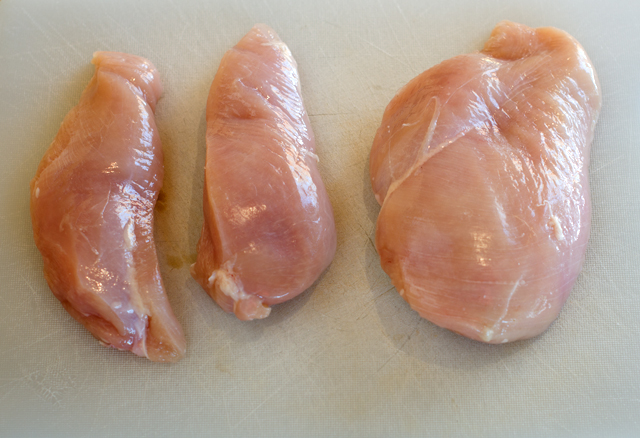
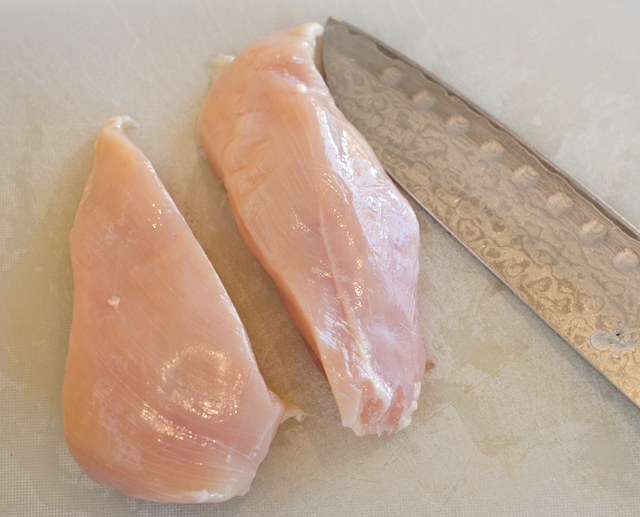
Cut large breast pieces in half.
It’s best to cut on an angle to get even pieces.
Poblano peppers add just the right amount of heat.
I like to cook them on the stovetop on an asador.


The sauce can be made easily in a food processor or blender.

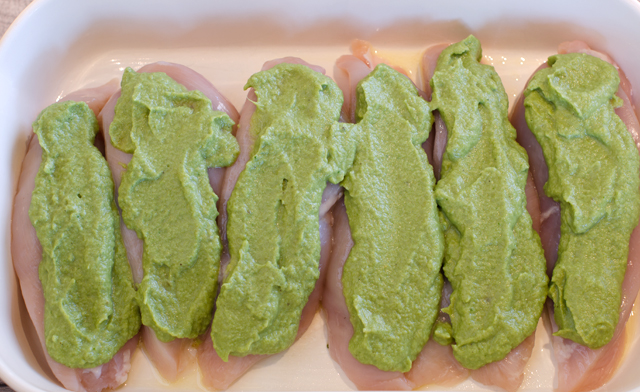
Coat the breast pieces evenly with the sauce.
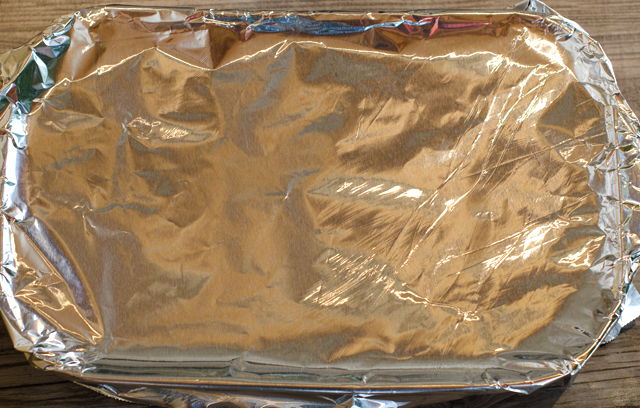
Cover the chicken tightly with foil before cooking. Be careful of the steam that will escape after cooking.
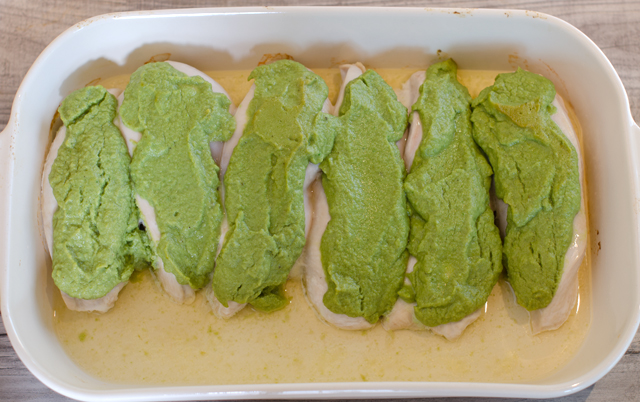
After cooking they will shrink a bit.
Turn the broiler on and sprinkle chicken with cheese.
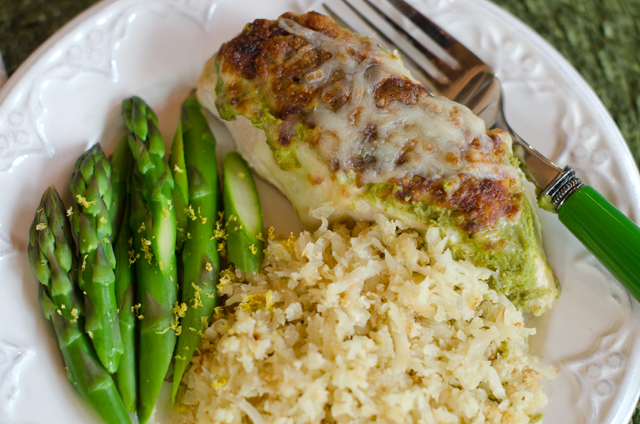
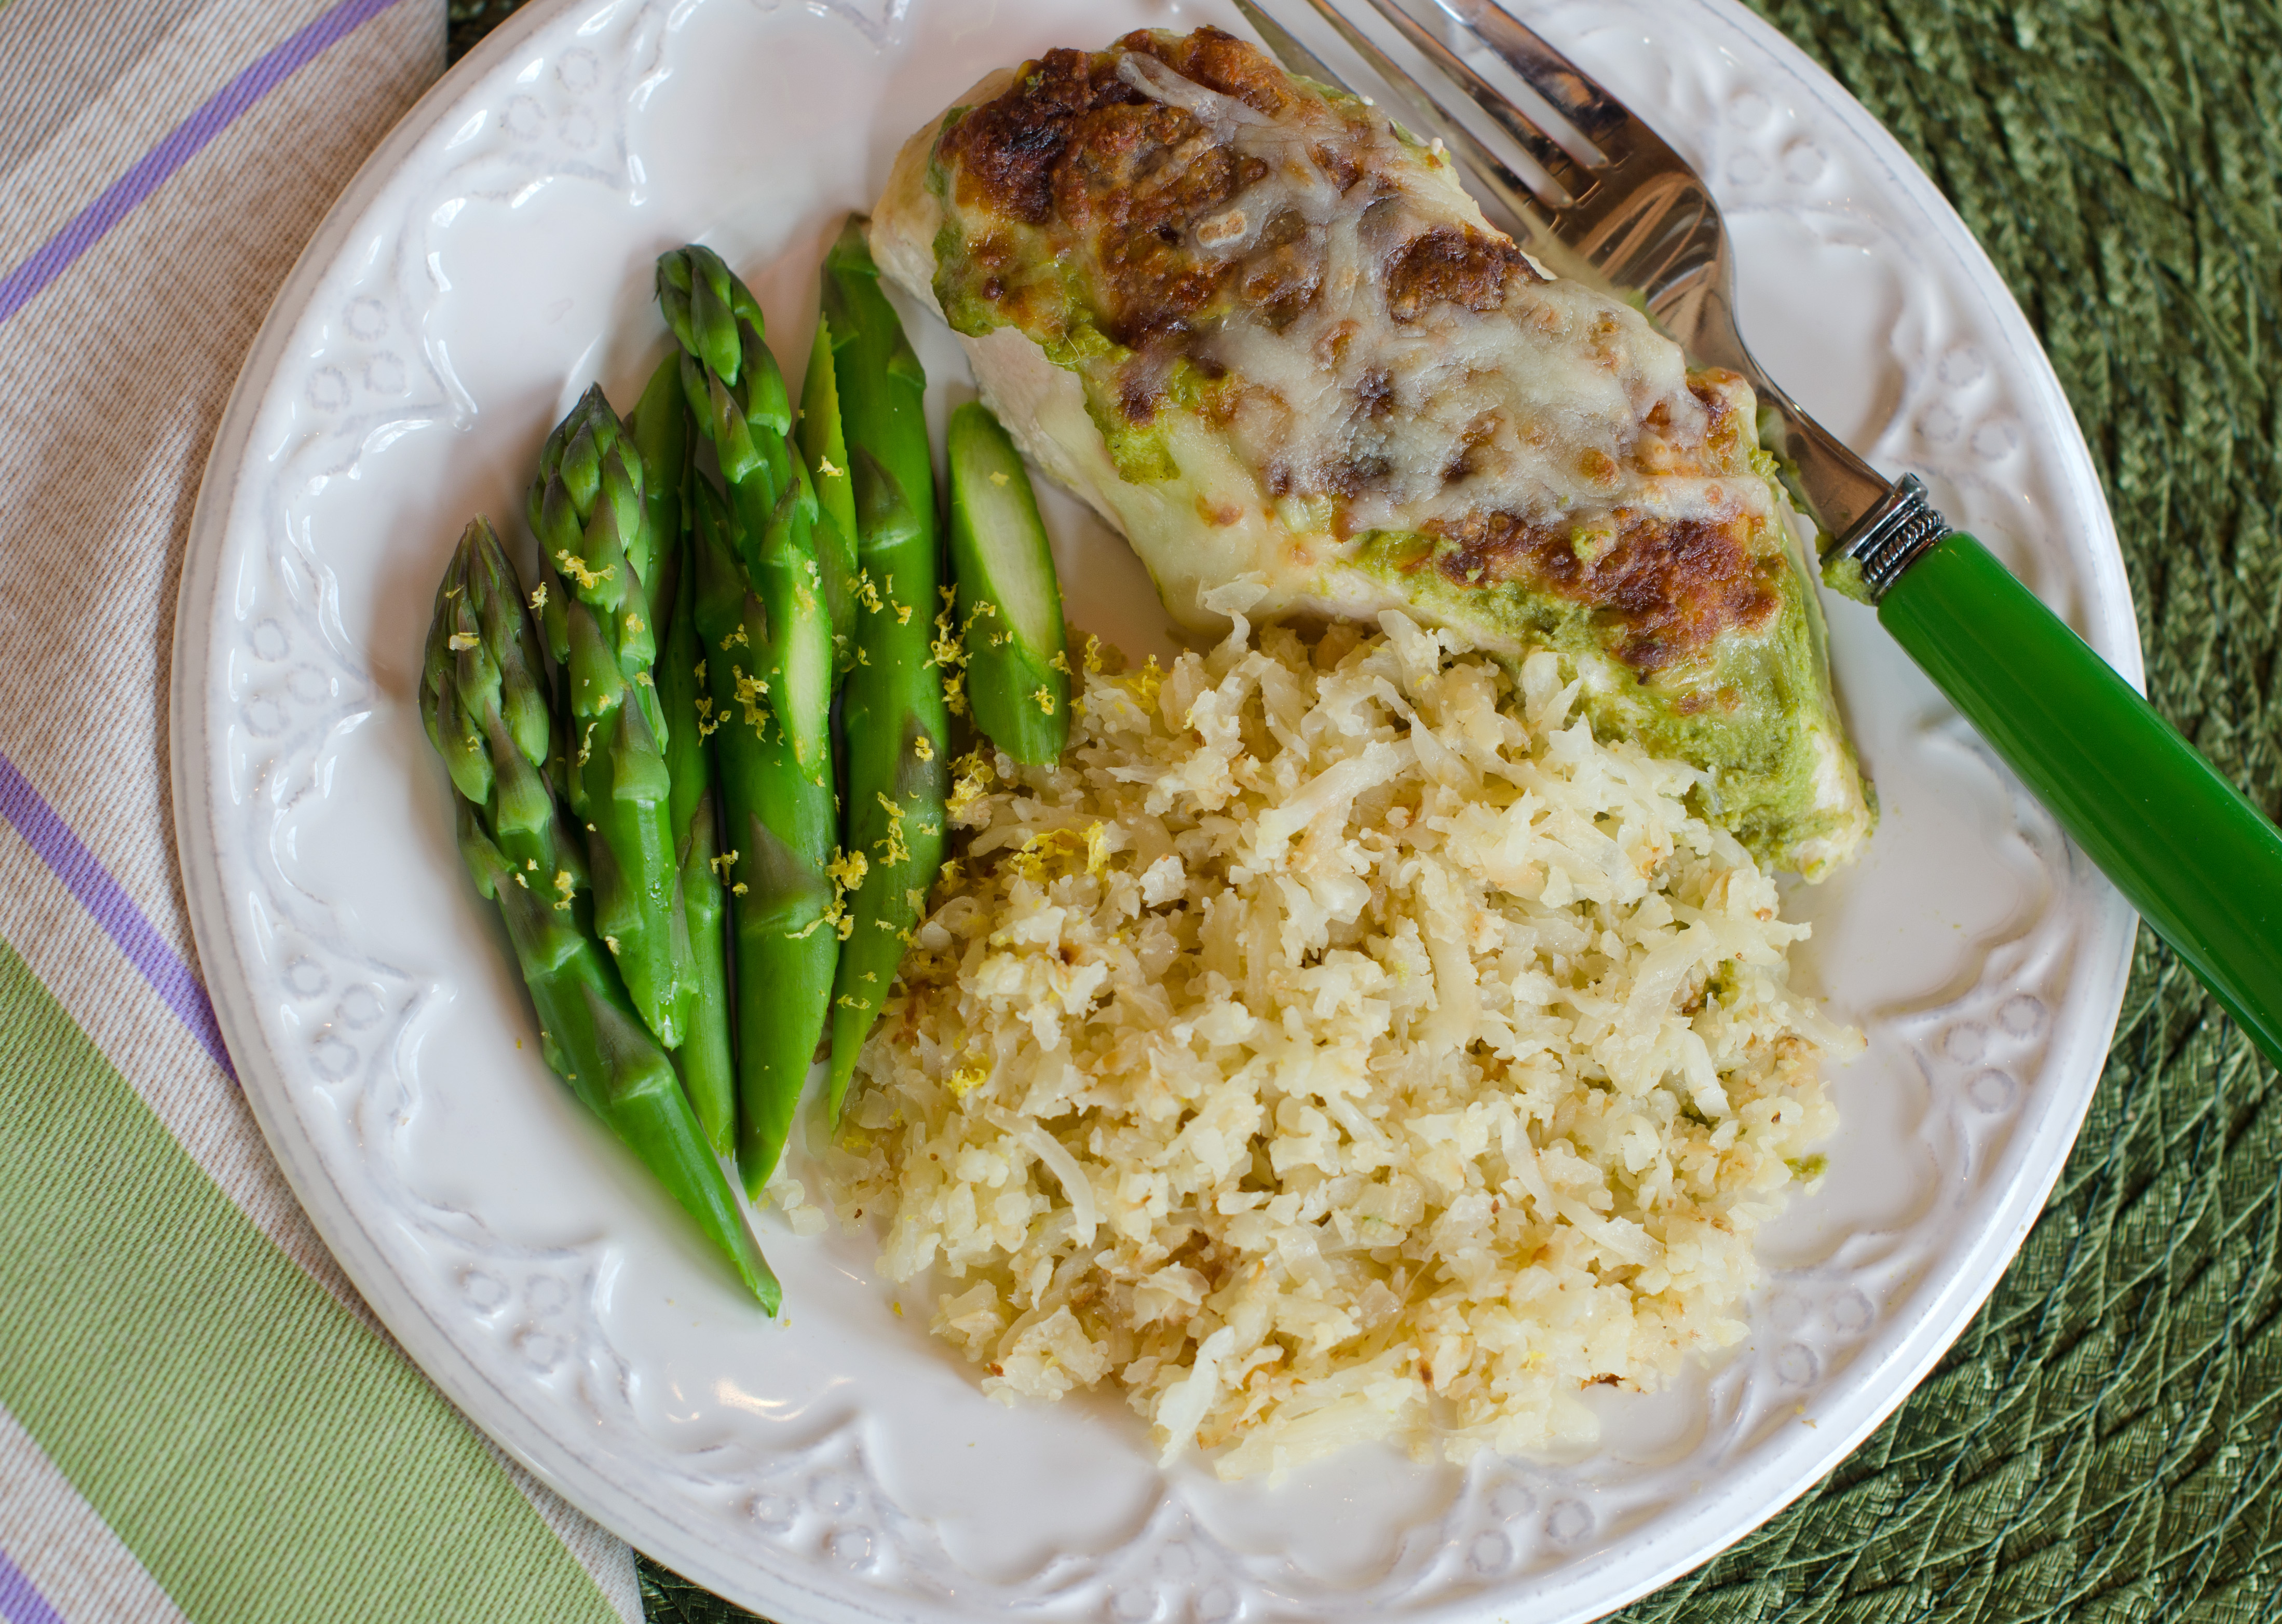
The finished product!

Directions

Preheat oven to 375°F

  1. Put the first four ingredients in the bowl of a food processor or blender and pulse until all ingredients are incorporated. Taste for seasoning and add another poblano if desired. Season with salt and pepper to taste. Scrape sauce from processor into a bowl and set aside.
  2. Spray a 9″ X 11″  baking dish with non stick spray or coat lightly with olive oil.
  3. Remove tenderloins from chicken breasts if still attached. Cut each breast in half to make even (as possible) pieces. Place the chicken breast pieces in the baking dish.
  4. Cover each piece generously with the sauce. Cover the baking dish with foil and bake for 23 minutes. Remove baking dish from oven, take off the foil and set oven to broil. Sprinkle cheese over chicken breasts and return baking dish without the foil to the oven. Broil until the cheese is melted and starts to brown in spots, 3-4 minutes. Watch closely. Serve with cauliflower rice to sop up the juices.

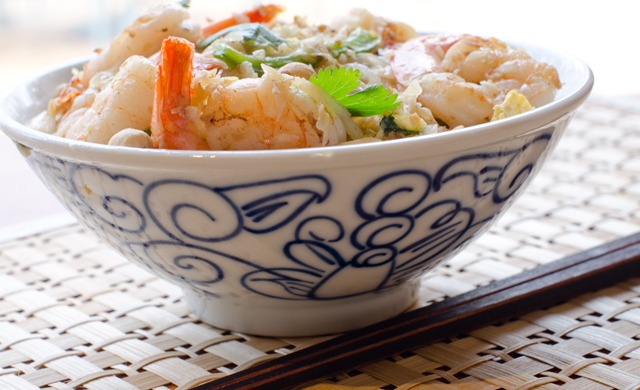
March 7, 2017 Pad Thai, a light version

Since Joe has already lost ten pounds on a South Beach phase 1 diet, I am looking for ways to adapt recipes we already like to fit the plan. My latest “rework” is Pad Thai. Pad Thai is a stir fried noodle dish, typical food cart fare in Thailand that over the last thirty years has gained popularity worldwide.

Most of the Thai cookbooks I own are over thirty years old and I was surprised to see that I rarely found a listing for Pad Thai in the index. What I did find were recipes for “Noodles, stir fried Thai style”. I learned that Pad Thai was made popular in the 1930’s and ’40s as part of an attempt to modernize and revitalize the economy of the country. The full name of the dish is  Kway teow phat Thai. Kway teow means rice noodles in a Chinese dialect and phat Thai means Thai-style, hinting at the possible Chinese origins of the dish.

The dish is a harmonic combination of flavors, umami (fish sauce), sour (lime or tamarind paste), salty (soy sauce or tamari) and sweet (palm sugar). Fish sauce used to require a special trip to the Asian grocer, now it can be found in most large supermarkets. I prefer tamari in recipes over soy. A by product of miso production, it is thicker and less salty than soy sauce. Palm sugar is a sweetener made from the sap of the flowers of the coconut palm tree. The taste is similar to brown sugar with caramel and butterscotch notes. Tamarind comes from the pods of a large tropical tree and adds a pleasant sweet tart note to dishes. . If you look at the list of ingredients on a Worcestershire sauce bottle, tamarind extract is one of the ingredients. Lime juice is usually substituted when tamarind isn’t available. Another recipe I found in my research called for apricot or prune puree if a substitute for tamarind was needed. One well known cookbook author recommended ketchup as a substitute for tamarind, texture yes, taste, not like any ketchup I’ve tried.

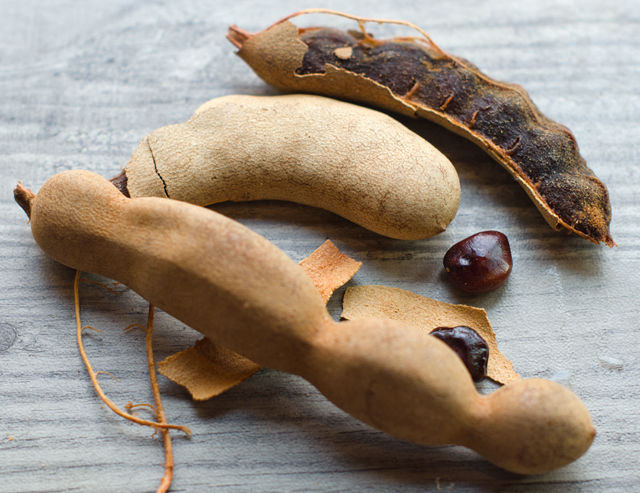
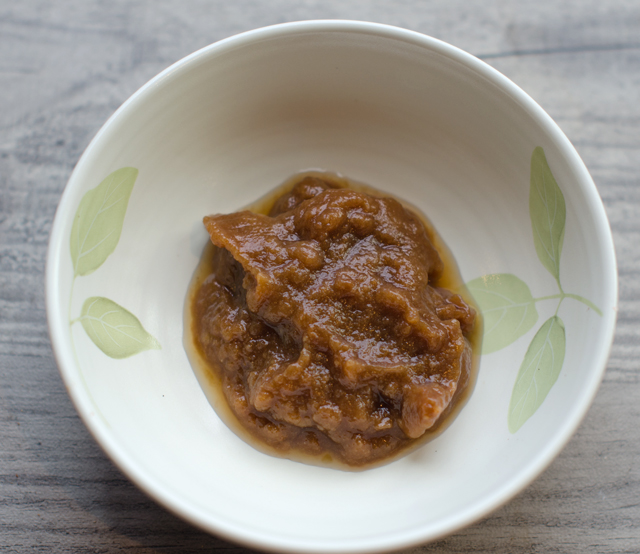
Several months ago I bought a container of tamarind pods with no specific reason other than to possibly use them some day. This recipe presented my opportunity, but I really had no idea how to extract the pulp from the pods. My first step was to remove the dried outer pods. Don’t expect them to come off neatly, they will break off in pieces. When the dried brown pods are removed, the sticky pulp is exposed along with strings that run the length of the pods, remove as many of the strings as possible. In the middle of the pulp are the smooth shiny seeds that almost look like they have been polished. After reading several articles I came up with the approach that worked for me. I put the pulp that still contained the seeds in a bowl. I covered the pulp with warm water for about twenty minutes. Then I put the softened pulp in a sieve and pressed on the solids with a pestle to extract as much pulp as possible. I got a decent amount of pulp and some tamarind water too. Next time I think I will take the easy route and order tamarind paste on line.

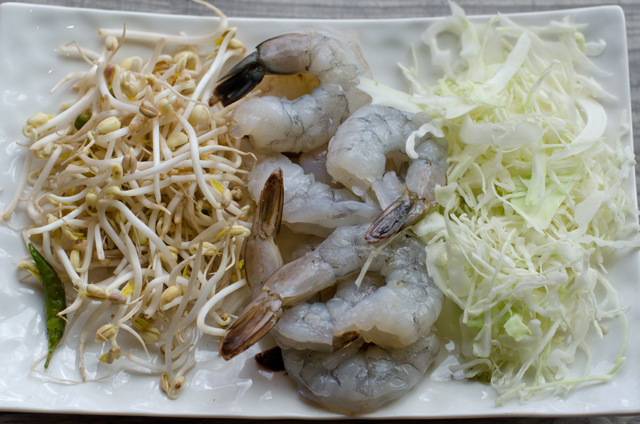
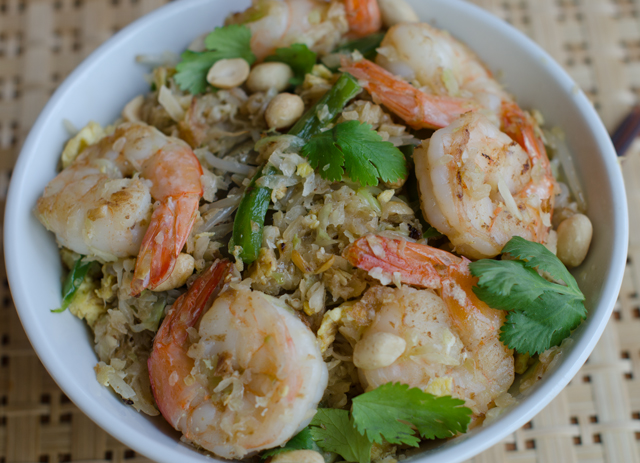
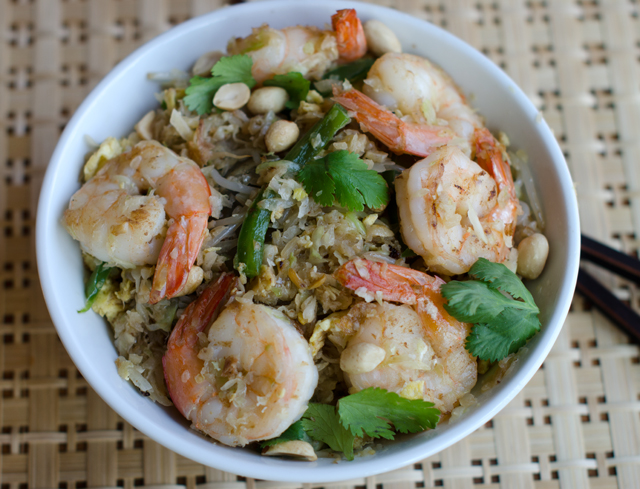
My version substitutes shredded cabbage for the traditional rice noodles since they aren’t part of phase one of the diet. Cabbage provides a good base for the dish and adds sweetness too. Noodles made from zucchini or daikon radish would work here too. I used shrimp as the protein in this dish, but chicken and either of those combined with tofu works as well. The secret to making any stir fry dish is to have all your components ready before you start cooking. It comes together in less than a half hour and I must say we enjoyed it very much.

Tamarind pods
Tamarind puree

Pad Thai

Serves 3-4

Ingredients

  • 6-8 cups finely shredded green cabbage
  • 5 T peanut or neutral oil like grapeseed (divided)
  • 2 eggs, lightly beaten
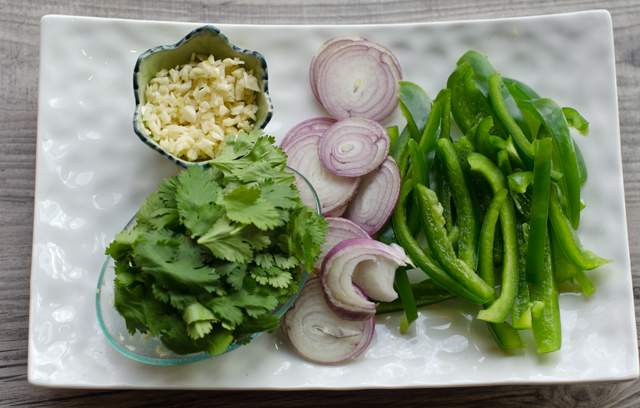
  • 4 garlic cloves, finely minced
  • 12 oz to 1 lb shrimp, peeled and deveined
  • 1 green pepper, stemmed, seeded and finely sliced
  • 1 large shallot, finely sliced
  • 1 cup of mung bean sprouts, rinsed and trimmed
  • 2 t or more of nam pla (Thai fish sauce)
  • 2 t tamarind paste or lime juice
  • 1 T tamari or  soy sauce
  • ¼ c chopped peanuts
  • ¼ c cilantro leaves
  • 1-2 Thai chiles (optional)
  • 1 lime cut into wedges

Directions

  1.  Heat 2 teaspoons cooking oil in a large wok over medium high heat. Swirl the oil around to coat the entire pan, then add the cabbage. Season with some fresh ground pepper and stir fry until barely crisp tender, 3-4 minutes. Remove to a  bowl.
  2. Add a little more oil to the wok and add the eggs, and scramble quickly with a fork. Cook until set and remove to a cutting board and cut into thin strips.
  3. Add oil as necessary and add the garlic and the shrimp and cook, stirring occasionally, until the shrimp lose their grey color, 2-3 minutes. Remove from the pan with a slotted spoon to a plate.
  4. Add the shallot and green pepper to the wok. Season with salt and pepper and stir fry and stir fry until crisp tender, 4-5 minutes.
  5. Raise the heat to high and add a tablespoon or more of oil as needed Add the cabbage, eggs, shrimp and sprouts to the wok. Season to taste with the nam pla, tamari and tamarind or lime juice. Cook until all the ingredients are heated through.
  6. Add the chopped peanuts, cilantro leaves and optional pepper. Toss once or twice and transfer the contents of the pan to a serving platter. Serve with lime wedges.

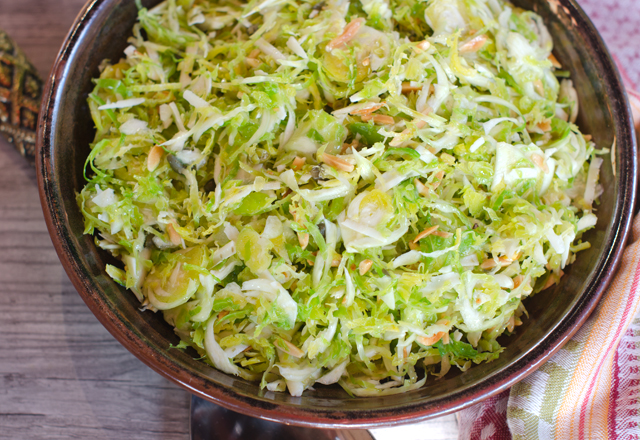
February 26, 2017 Brussels Sprouts Salad with Lemon Caper Dressing and Asiago Cheese

The last two days have brought us very pleasant but unseasonable temperatures in the seventies. While opening a window to let some fresh air in I spotted two pansy “volunteers” that had sprung up close to the house but not in an area where we normally plant anything. On a walk down to the garden I spotted the first dandelion. An early spring? Looks like even though the temperatures are going back into the forties by this evening. A few days of warmth is not enough to show evidence of new life in the garden. There are some beet greens and radicchio under a cold frame and I will take it on Joe’s word that there is miners lettuce and some kale in the greenhouse. I did see a bit of green in the circle garden, the beginning of the rebirth of the Chinese chives. In a month or two we will be pulling them out by the bucketfuls but for now it’s nice to see that first poke of green, letting us know that spring isn’t that far off. Until then my produce is from the local supermarkets and club stores.

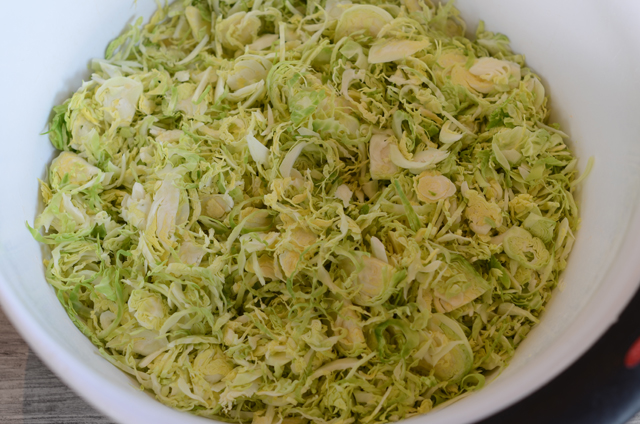
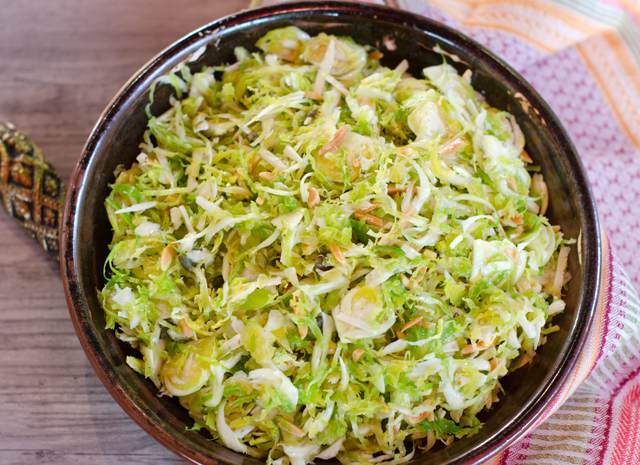
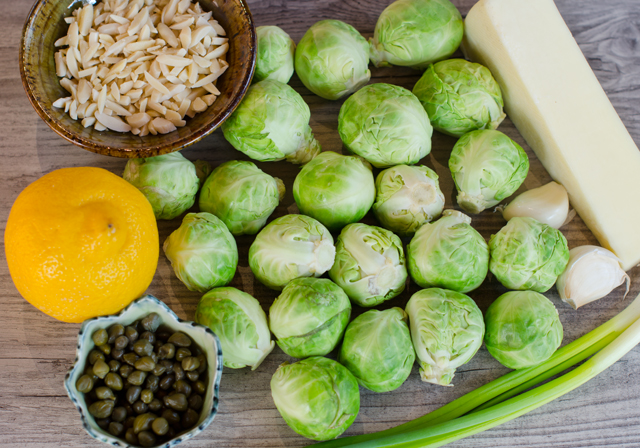
This Brussels sprouts salad is simple and delicious with a satisfying crunchy texture. The sprouts can be sliced in no time in the food processor, I used a 2 mm (thin) slicing disk or with a mandoline; trust me use the guard. If you want to work on your knife skills, slice them by hand. The dressing couldn’t be simpler, extra virgin olive oil, lemon juice, salt, pepper and capers. If you always wondered what those little green things are, capers are the unopened flower buds of Capparis spinosa, a prickly perennial shrub like bush, native to the Mediterranean and some parts of Asia. The buds are harvested, dried in the sun and then pickled in vinegar, brine or salt. The size of a caper can be as small as a green peppercorn, and as large as a small olive. The largest ones are usually served as part of an antipasto platter, the small ones are referred to as non pareils (French for without equal), the size best suited for this recipe. Many recipes call for rinsing them first but I would say taste them and decide for yourself. Rough chop the capers and add them to the dressing. Shredded Asiago cheese compliments the salad with it’s creamy nutty flavor. Finish the salad off with toasted slivered almonds and garnish with thinly sliced scallions. Leftovers are even better the next day.

Brussels Sprouts Salad with Lemon Caper Dressing and Asiago Cheese

Makes 4-6 servings

Ingredients

  • 1 lb Brussels sprouts, core ends trimmed. damaged outer leaves removed
  • ½ c extra-virgin olive oil
  • ¼ c lemon juice
  • 1 t lemon zest
  • ¼ c capers, roughly chopped
  • 1 clove garlic, chopped
  • ¼ t kosher salt or more to taste
  • freshly ground black pepper
  • 2/3 c Asiago cheese
  • ½ c toasted slivered almonds
  • 2-3 scallions, sliced thinly on the diagonal

Directions

  1. Shred the Brussels sprouts using the slicing disc of a food processor.  You can also slice them by hand with a well sharpened knife or a mandoline slicer. Place shredded sprouts in a bowl large enough to toss them in.
  2. In a small bowl whisk together the olive oil, lemon juice and zest, capers, garlic, salt and pepper. Pour about two thirds of the dressing over the sprouts and toss. Add the toasted almonds and Asiago cheese and toss again. Taste and add more salt if needed and additional dressing if needed. Garnish with chopped scallions and serve immediately.
Add shredded Brussels sprouts to a large bowl and toss with dressing and other ingredients.

Pansies that came up in February.
The first new growth of garlic chives. My garnish for the next Brussels sprout salad.

February 20, 2017 Shrimp Fried Cauliflower Rice

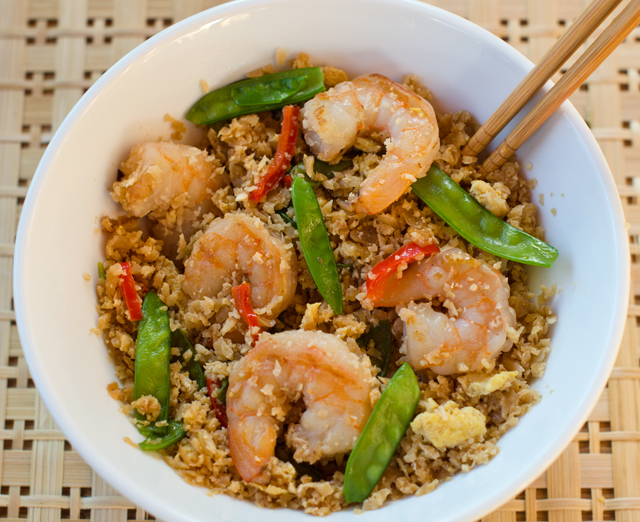
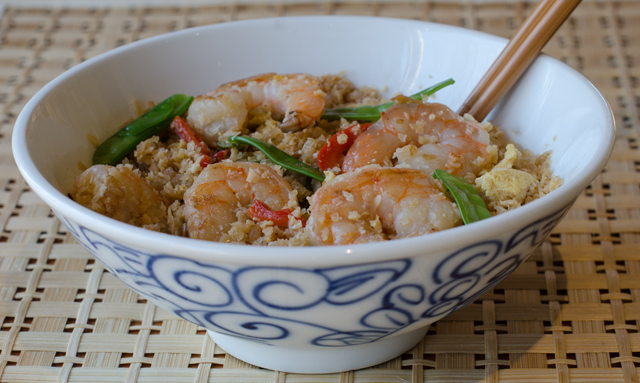
Cauliflower florets are a low carb substitute for white rice in this savory one pot, or should I say one wok, dish. It’s low glycemic, gluten-free and South Beach Diet friendly. Packed with juicy shrimp and colorful vegetables, this recipe is perfect for an easy go-to weeknight meal.

Cauliflower is sold by the head, not by weight. Depending on the time of year a standard head can vary greatly in size. Cauliflower is a cool weather crop in our area and harvested in the fall. When they appear at the farmers markets they can be huge, five pounds or more. In the winter months, imports from the West Coast are fairly small.  The head I used weighed in at 2.13 pounds and half of the head made 5 cups, just what I needed for this recipe.

Stores like Trader Joe’s are now selling prepackaged cauliflower rice, but it’s easy enough to make your own. Cut the cauliflower into florets by quartering the head through the stem end and cut away the piece of core from each quarter. Then cut the cored cauliflower into florets. You can use a box grater with medium-sized holes or the food processor fitted with the grater blade. With both techniques you are aiming for little pieces the size of rice granules. I like to press out any additional moisture from the rice by placing it in a clean cotton tea towel and squeezing to remove remaining water. No excess moisture equals a dish that won’t turn out soggy.

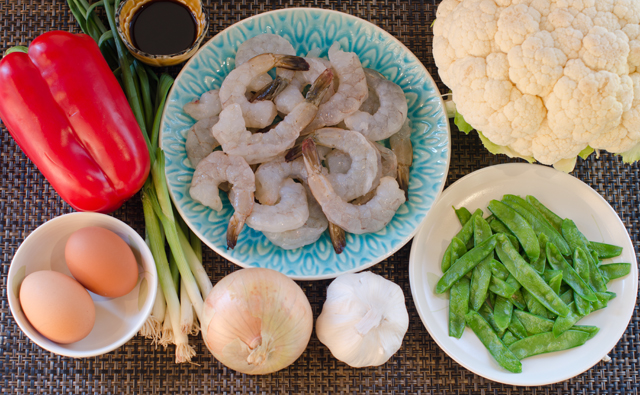
As with all stir fry preparations, all of your ingredients should be ready to go when it’s time to cook. Trying to stay with a South Beach friendly preparation I used red pepper strips and snow peas. The peas were frozen from last year’s garden and perfect for a meal like this. Other possibilities are peas, carrots, and water chestnuts. Heat your wok, the pan is hot enough when a bead of water instantly sizzles and evaporates on contact. Once this happens, add one tablespoon of a neutral oil; peanut or canola are fine here.  Swirl it around to thoroughly coat the pan. Add the shrimp all at once and spread them out over the pan so they are not overlapping. Cook shrimp on first side for one minute then flip and cook for thirty seconds. The shrimp should be almost cooked but not quite, they will finish cooking when you add them back to finish the recipe. Remove shrimp to a plate.

Add the eggs in next, stir and break them apart to get scrambled egg pieces. When the eggs are not quite cooked through, add them to the plate with the shrimp. Keep warm.
Wipe out your pan with a paper towel and return it to high heat. Add the second tablespoon of oil and swirl to coat the pan. The aromatics are in next, onion, garlic and ginger. Cook, stirring often until the onion is translucent, 3-4 minutes. Stir in your choice of vegetables and cook for another 3 minutes. Add the scallions and cook for 15 seconds. Add the cauliflower rice to the pan and sprinkle the tamari and sesame oil over the rice. Warm the cauliflower rice through and finally add in the shrimp and eggs. Let the shrimp and eggs heat back up and finish cooking. Toss to mix the rice evenly with all the ingredients. Taste for seasoning, adding more tamari and sesame oil if desired. Serve hot.

Shrimp Fried Cauliflower Rice

Ingredients

  • 1 medium head of cauliflower
  • ¾ to 1 lb medium uncooked shrimp, shelled and deveined
  • ½ t kosher salt
  • Black pepper
  • 2 tablespoons peanut oil, divided
  • 2 eggs, beaten in a small bowl
  • 1 small onion, finely chopped
  • 2 cloves garlic, minced
  • 4 scallions, minced
  • 1-2 c vegetables, I used a combination of snow peas and red pepper slivers. Peas, carrots, water chestnuts can be used.
  • 1 T tamari and more to taste
  • 1 teaspoon and more toasted sesame oil
 

Directions

    1. For the cauliflower rice, cut the cauliflower in half, cut out the core and discard. Cut the cauliflower into chunks.  Place the cauliflower into a food processor and pulse until it’s the consistency of grains of rice. Alternately you can a small handheld cheese grater or a chef’s knife. Set aside 4-5 cups for this recipe.
    2. Season shrimp with salt and pepper, set aside.
    3. Heat a wok or large sauté pan on high heat. When the pan is hot enough for a bead of water to instantly sizzle and evaporate, add 1 tablespoon of the oil and swirl to coat pan.  Add the shrimp, quickly spreading out around the pan so that they are not overlapping. Cook the shrimp untouched for a minute then flip over and let the other side cook for 30 seconds, or until about almost cooked through. Remove the shrimp from the pan onto a plate, leaving as much oil in the pan as possible.
    4. Turn the heat to medium high and let the pan heat up again. Pour in the eggs, stirring in a quick motion to break up and scramble the eggs. When the eggs are almost cooked through, scoop out of the wok onto the same plate as the cooked shrimp.
    5. Use a paper towel to wipe the pan clean and return to high heat with the remaining 1 tablespoon of cooking oil, swirling to coat. When the oil is very hot, add the garlic, ginger and onion to the skillet, and cook, stirring often, until onions have become translucent, about 3-4 minutes. Stir in red pepper strips and snow peas, and cook, stirring constantly, until vegetables are tender, about 3-4 minutes.
    6. Add green onions and stir fry until fragrant, about 15 seconds. Add in the cauliflower rice and stir well to mix in the green onions throughout.
    7. Drizzle the sauce all around the rice and toss. Add the cooked eggs, shrimp and sesame oil, tossing to mix the rice evenly with all of the ingredients. Finish cooking the shrimp and eggs and let everything heat back up again. Taste for seasoning and add additional tamari and sesame oil if desired. Serve hot.
 

December 2, 2016 Tuna Poke

dsc_8340aOne of the highlights of last summer was our trip to the Food and Wine Classic in Aspen Colorado. It is touted as America’s premier culinary event, and certainly lived up to those expectations. We enjoyed three days of cooking demonstrations, wine tastings and best of all, the grand tasting pavilion. It was there that we, and 5000 other fanatical foodies sipped, savored and sampled our way around the massive white tents. One area we were certain to stop at during each grand tasting was to sample the offerings of Food and Wine magazines best new chefs. Everything we tried was imaginative and delicious as well. Not coincidentally, the July issue of Food and Wine magazine offered recipes from each of these up and coming chefs.

With memories of the wonderful small plates we enjoyed at the classic, it was time to try some of their dishes for ourselves. This summer I tried the rather ambitious, summer squash with lemon curd and citrus vinaigrette from chef Brad Kilgore. Joe was more interested in the Tuna Poke on Nori Crackers. This very simple version is from Ravi Kapur, chef at Liholiho Yacht Club, a San Francisco restaurant with Hawaiian, Indian and Chinese influences.

If you are not familiar with it, poke, pronounced POH-keh is a raw fish salad. Poke, means chop or chunk, which refers to the bite sized pieces the fish is cut into. It is commonplace in Hawaii, found everywhere from the deli departments of grocery stores to fine dining establishments.

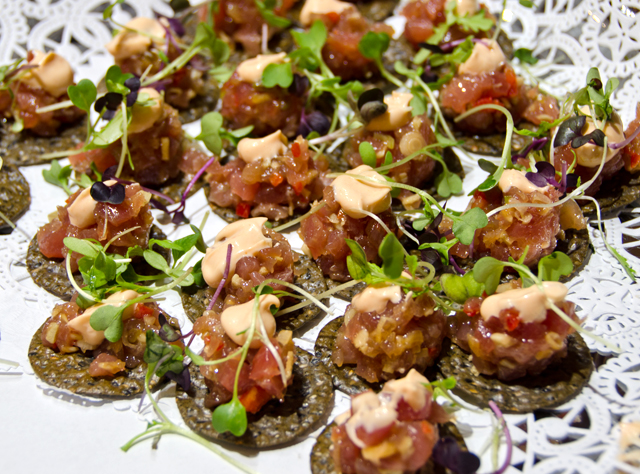
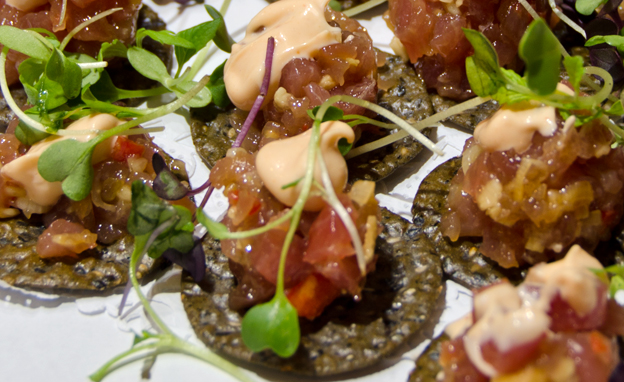
The first time we tried it just for ourselves and the poke passed our taste test with flying colors. The nori crackers are a nice “cheffy” touch but speaking on behalf of the cleanup crew, messy and not necessary for the home cook. For this recipe, make the poke with sushi grade ahi tuna from the most reputable vendor you can find. The spicy mayo has only three ingredients, tamari, sriracha and mayo. So it’s very simple, finely chopped tuna, scallion, ginger, jalapeno, tamari and dark sesame oil combined in a bowl and seasoned with salt. Spoon the poke on black sesame crackers, I like the ones from Edward and Sons, easily found in large supermarkets. Dollop or pipe some of the spicy mayo on top. Garnish with some Asian microgreens and a few toasted sesame seeds. We have served it at two parties so far this year, both to rave reviews.

dsc_8340aa

Tuna Poke

Serves 6-8

Ingredients for the Spicy Mayo

  • ¼ c good quality mayonnaise
  • ¼ t tamari
  • 1 t sriracha (or to taste)

Ingredients for the Poke

  • 12-oz sushi grade tuna cut into ¼-inch dice
  • 4 t minced scallions
  • 2 t minced peeled fresh ginger
  • 2 t seeded and minced jalapeno
  • 1 t tamari
  • ½ t toasted sesame oil
  • Kosher salt
  • Black sesame crackers
  • Asian microgreens and toasted sesame seeds for garnish

Directions for the Spicy Mayo

  1. In a small bowl whisk all the ingredients together until smooth.

Directions for the Poke

  1. In a large bowl, fold all the ingredients except the garnishes together; season with salt.
  2. Spoon the poke on the black sesame crackers and dollop with some of the spicy mayo. Garnish with sprouts and sesame seeds.

October 30, 2016 Sweet Pickled Celery

dsc_8190aAs mentioned in my previous post, from day one, the traditional accompaniments for buffalo wings have been celery sticks and blue cheese dressing. Last week, we were pleasantly surprised with the sweet pickled celery served with the buffalo cauliflower at The Vault. It requires no special canning equipment and you can make it in small batches. No delayed gratification here, you can enjoy it as soon as the canning liquid cools.

This quick and easy recipe is courtesy of celebrity Chef Gordon Ramsay. I have been enjoying the most recent season of Ramsay’s reality cooking competition, MasterChef, while I exercise on the elliptical machine. For some reason our new Xfinity cable box saved several seasons of MasterChef as something we might enjoy. Well I am happy to say “cable box, you get me.” With all of his swearing and in your face style with the contestants, I forgotten what an amazing chef he is.

This recipe is from Ramsay’s Ultimate Home Cooking cookbook and was an accompaniment for buttermilk fried chicken. Interesting, since the episode I watched today featured a fried chicken challenge for the losing team on MasterChef. No chicken here, just pickled celery.

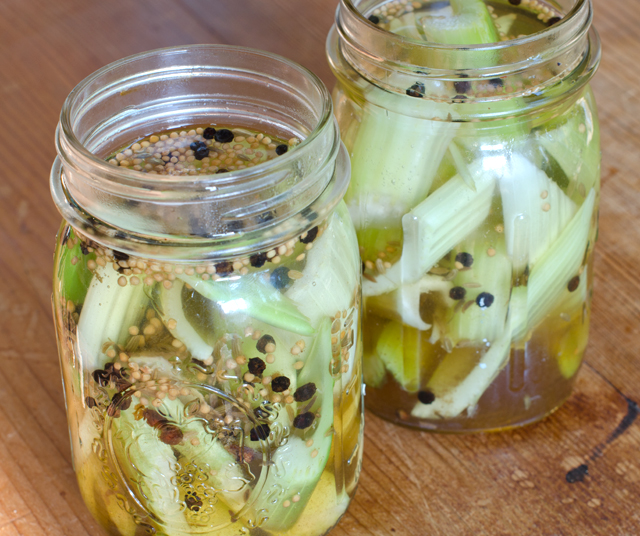
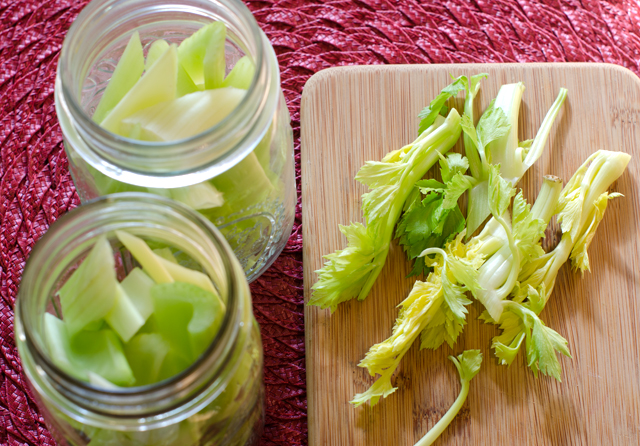
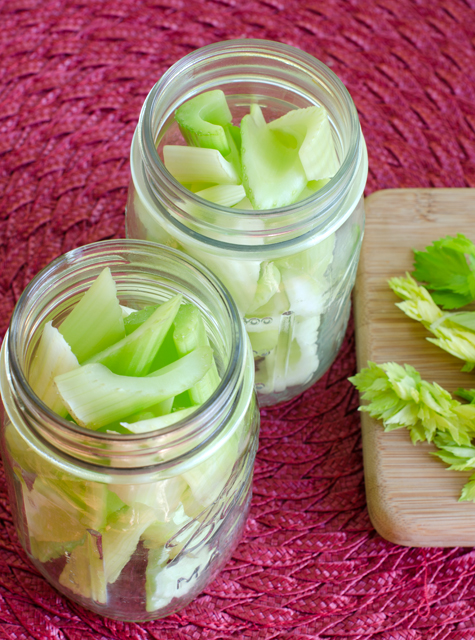
Start with a head of celery, separate into individual ribs or stalks, remove any strings and wash and rinse well. Cut celery on the diagonal into one inch lengths and place in pint jars with lids that have been sterilized with hot soapy water. Over medium high heat make a simple syrup of equal parts 1 cup water to 1 cup sugar. Stir to dissolve the sugar. Add peppercorns, herbs and vinegar and bring mixture to a boil. Carefully pour the hot liquid over the celery filled jars. The celery will cook a bit, shrink and resettle from the hot liquid. You will be able to add more celery when this happens. When the liquid cools, the celery is ready to eat. It will be even better if you have time to refrigerate it overnight.

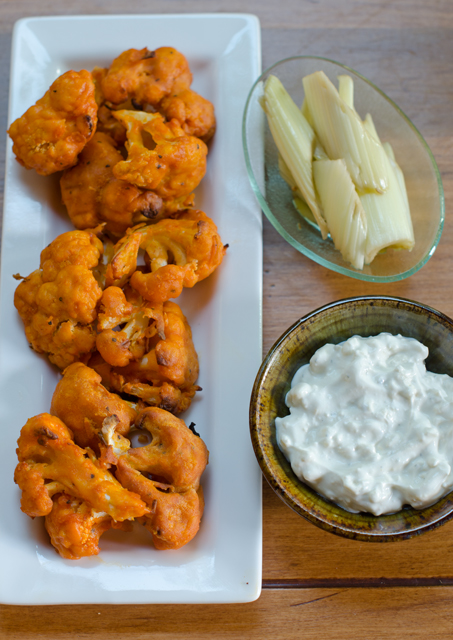
Great as an accompaniment to buffalo cauliflower, an antipasto platter or chopped finely and added to chicken or egg salad.

dsc_8176a

Sweet Pickled Celery

Ingredients

  • 1 medium bunch celery
  • 1 c water
  • 1 c sugar
  • 1 t black peppercorns
  • 1 t mustard seeds
  • 1 t fennel seeds
  • ½ t cloves
  • ½ t salt
  • 6 T white wine vinegar

dsc_8185a

Directions

  1.  Cut celery into individual stalks, wash and cut into one inch long diagonal pieces and place into sterilized pint canning jars. Fill the jars to the top. Keep extra celery aside to add later.
  2. Create a simple syrup of one cup water and one cup sugar. Add to a medium size pot along with the peppercorn, mustard and fennel seeds, cloves, salt and white wine vinegar. Over medium high heat, stir to dissolve sugar and bring to a rolling boil.
  3. Carefully pour the hot liquid into the canning jars. Wait a minute or two, the hot liquid will cook the celery a bit and shrink it, leaving more room for additional celery left over from the first step. Pack the celery in tightly, covered with the pickling liquid.
  4. As soon as the liquid cools, the celery can be eaten.  Even better if you refrigerate it overnight.
The final product served with blue cheese sauce and pickled celery.

August 31, 2016 Miso Glazed Eggplant (Nasu Dengaku)

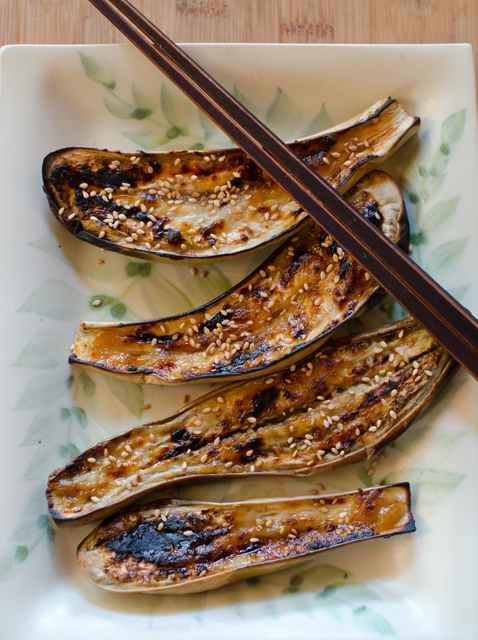
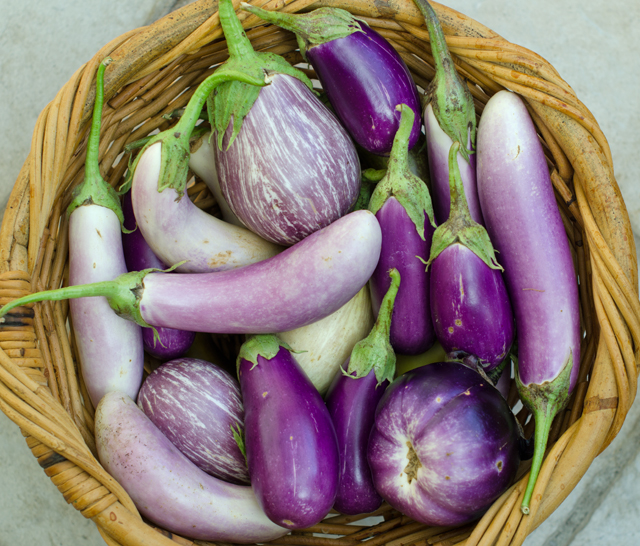
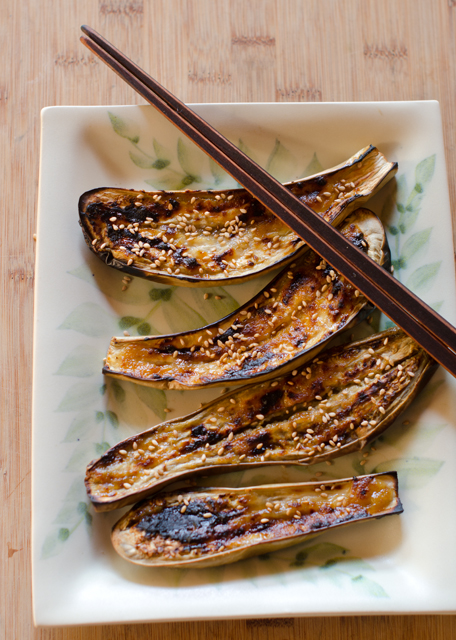
DSC_7877aMiso glazed eggplant or nasu dengaku is a classic Japanese dish and sushi bar favorite. It’s an quick and easy preparation this time of year when eggplants are at their peak. Our garden has produced an amazing array of eggplants this summer. From fuchsia to dark purple, beautifully variegated lavender and white to pure white, they have loved our weeks of 90 degree plus temperatures and abundant rain. What we consider to be Asian eggplants are the long slim tapered varieties. Actually, Asian eggplants whether Chinese, Japanese, Thai or Indian can be round or pear shaped, pure white or lime green and as small as an egg. In this dish the creamy flesh of the eggplant is the blank canvas for the umami rich flavors of a sweet, salty and savory glaze.
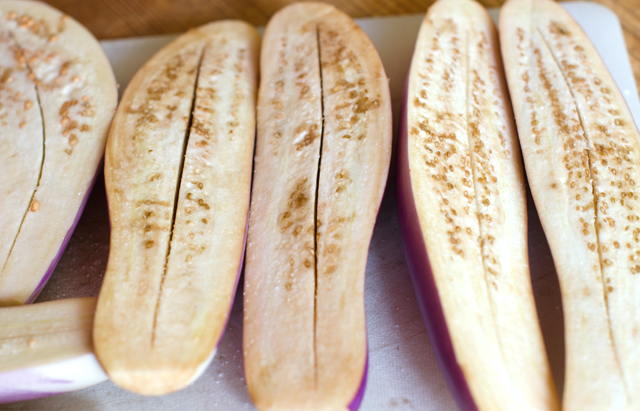
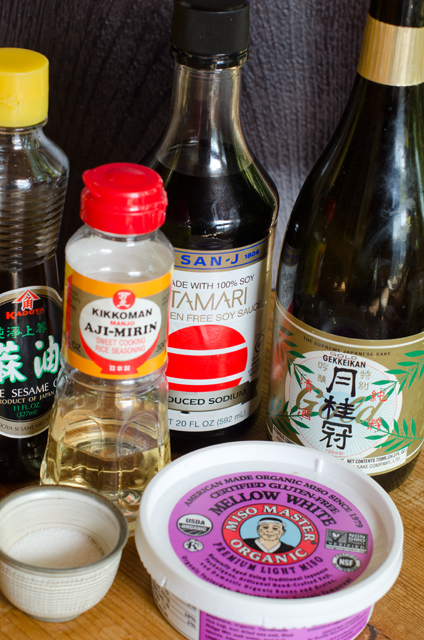
This recipe is quick and easy, but there are a few special ingredients you may not have on hand. Toasted sesame oil, mirin and miso are usually available at most large supermarkets. If you don’t want to buy a bottle of sake just for the two tablespoons in the recipe, substitute dry sherry. The eggplant is sliced down the middle lengthwise and the flesh is salted for a few minutes to draw out any excess moisture. While you are waiting on the eggplants, preheat your oven and line a baking sheet with foil or parchment. Keep the parchment in place with a little non stick spray in the four corners. Lightly brush the baking sheet with toasted sesame oil. This will prevent the eggplant from sticking and adds a rich nutty flavor to the dish.
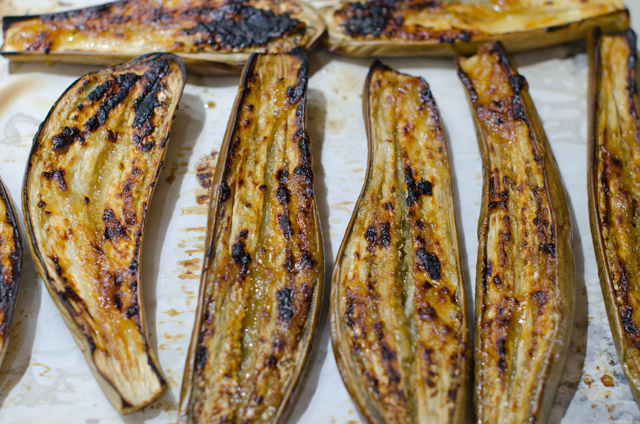
Blot the excess moisture from the eggplants and place cut side down on the baking sheet. While the eggplants are roasting, prepare the glaze. Combine mirin and sake in a very small saucepan, bring to a boil for twenty seconds, then stir in miso and sugar over low heat. Off heat stir in the additional sesame oil. The eggplants are done in about 15 minutes when the skin collapses and the flesh becomes soft Remove the eggplants from the oven and carefully turn them over, cut side up. Adjust the oven rack to it’s highest position and turn on the broiler.Brush the eggplants with the miso glaze and place under the broiler for about 1 minute, be sure to watch carefully! Sprinkle with toasted sesame seeds. Serve hot or at room temperature.

A recent harvest of all the varieties of eggplant we are growing.

Miso Glazed Eggplant

Serves 2-3

Ingredients

  • 1 lb of Japanese eggplants
  • Kosher salt 
  • 1 t sesame oil, plus additional for the baking sheet
  • 1 T mirin
  • 1 T sake
  • 2 T white or yellow miso
  • 1 T sugar or honey
  • Toasted sesame seeds

Directions

  1. Cut the eggplants in half lengthwise and cut off the stem and calyx. Using the tip of a paring knife, cut an incision down the middle of each half, making sure not to cut through the skin, but cutting down to it. Salt the eggplant lightly and let sit for 10 minutes. Meanwhile preheat the oven to 425°F.  Line a baking sheet with foil or parchment and brush it with sesame oil.
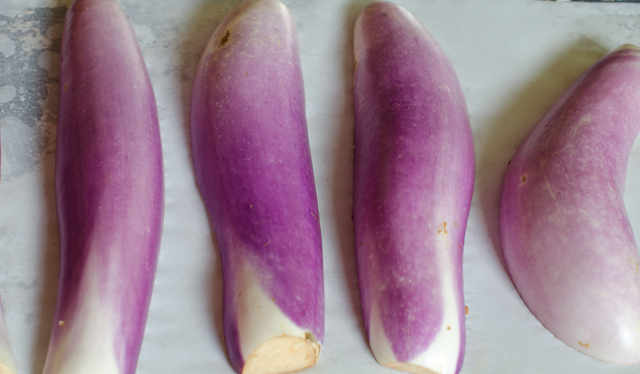
  2. Blot the eggplants with paper towels and place, cut side down, on the baking sheets. Roast for 15 to 20 minutes, until the skin is beginning to shrivel and the flesh is soft. Remove from the oven, carefully turn the eggplants over, and preheat the broiler.
  3. To make the glaze, combine the mirin and sake in the smallest saucepan you have and bring to a boil over high heat. Boil 20 seconds, taking care not to boil off  too much of the liquid, then turn the heat to low and stir in the miso and the sugar. Whisk over medium-low heat without letting the mixture boil, until the sugar has dissolved. Remove from the heat and whisk in the sesame oil.
  4. Brush the eggplants with all of the miso glaze. Place under the broiler, about 2 inches from the heat, and broil for about 1 minute, until the glaze begins to bubble and looks shiny. Remove from the heat. Allow to cool if desired or serve hot. Garnish with toasted sesame seeds.
DSC_7854a
Scoring and salting the eggplants.
DSC_7858a
Ingredients needed for the glaze.


Place the eggplants cut side down on a parchment lined baking sheet.
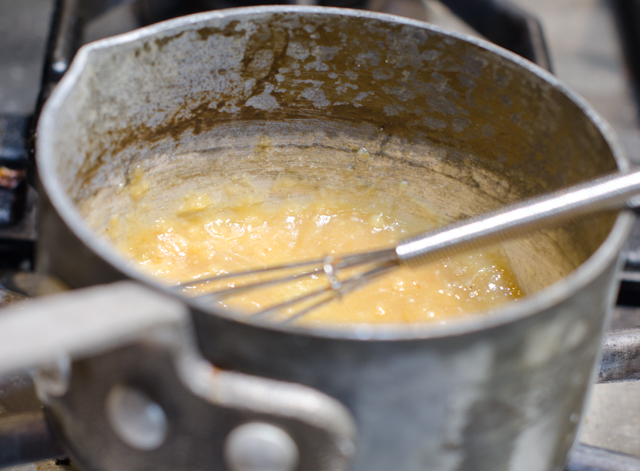
Use your smallest saucepan to make the glaze.
Once the eggplant is soft turn it cut side up. apply the glaze and put the tray under the broiler.
Once the eggplant is soft, turn it cut side up. apply the glaze and put the tray under the broiler.

DSC_7874a