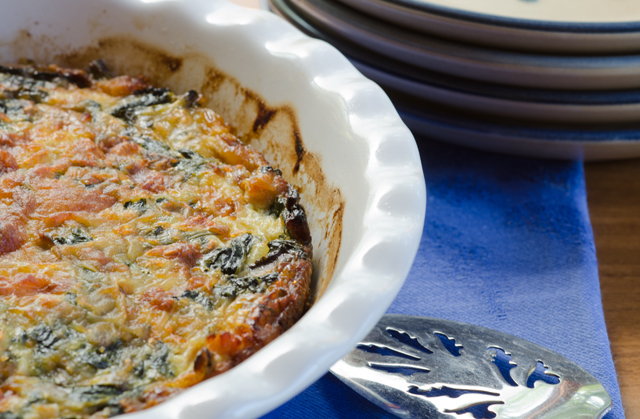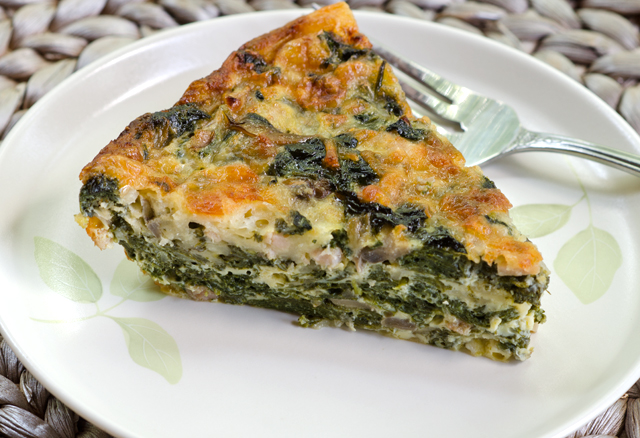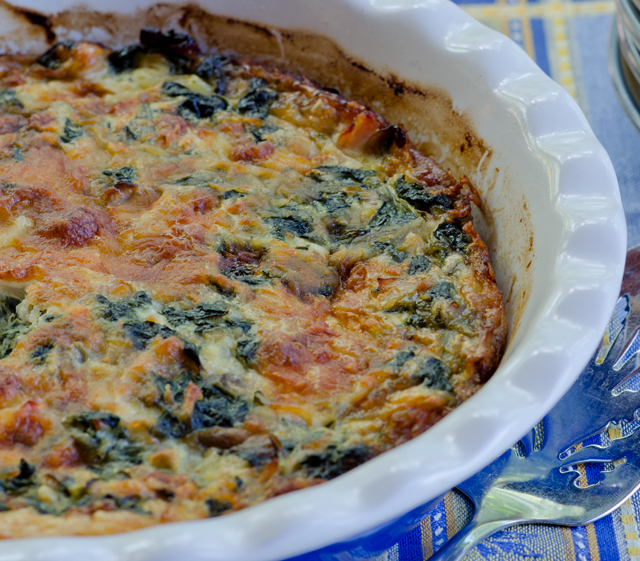
June 14, 2015 Crustless Spinach, Mushroom and Canadian Bacon Quiche

DSC_3155aConsider a humble little package of frozen chopped spinach, a convenience and a staple in many kitchens, including mine. You might be quite surprised how many cups of fresh spinach it takes to make that 10 ounce brick of frozen. That was the information I was looking for this week.

Our spinach plants are going to seed and it was time to do one last serious pick before pulling them out and getting the space ready for another planting. When picking spinach, especially in the extreme hot weather (95°F) it is important to not use a metal bowl or colander, they will put your freshly picked leaves into immediate wilt that will be hard to revive from.  I prefer using a clear plastic “pebble” bowl, sturdy hard plastic bowls I used in my catering business. I snip off the best leaves with scissors, leaving the plant and damaged leaves behind for the mulch pile. Next, I soak the spinach in a clean sink of cold water. I start the process by swishing the leaves around in the sink. I let them sit for a few minutes, the spinach will float to the top, and the dirt and debris will sink to the bottom.  Then I gently lift out the leaves and transfer them to a colander. I will repeat the process again to be sure all the dirt is removed. I refrigerated the spinach in the large bowls with some plastic wrap draped over the top.

Now it was time to find ways to use up this bounty.  Spinach is a powerhouse of nutrition, low in calories, a rich source of iron, vitamins A, C, and K, potassium, calcium and magnesium. End of the season spinach is still very good, but not necessarily something you would want to use in a salad. So I was on the hunt for recipes with cooked spinach. Frittata, quiche, spanakopita, all good choices but many recipes just call for that ubiquitous ten ounce package of frozen spinach. I needed to find the conversions to take that very large bowl to the amount of cooked spinach I needed.

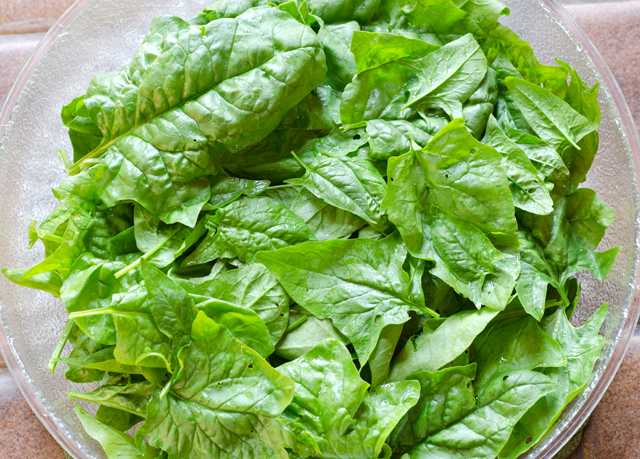
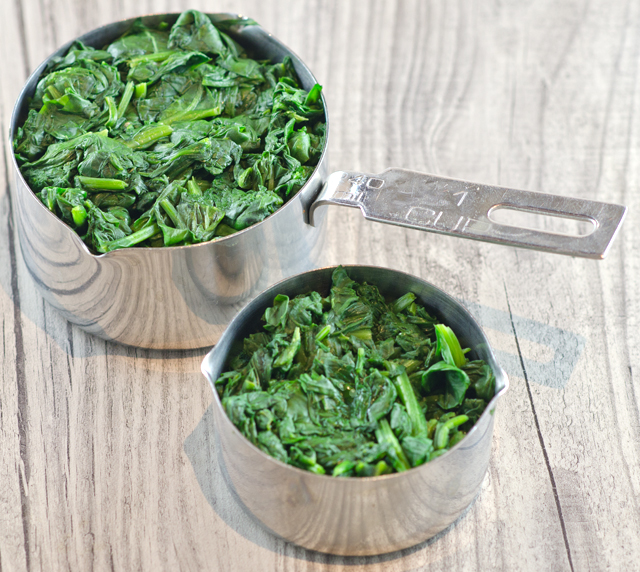
Spinach is 90% water in composition and when cooked, 1 pound of fresh spinach is equivalent to 10 to 12 cups and will cook down to 1 cup. One 10-ounce package of frozen spinach is the equivalent of 1 1/2 pounds of fresh spinach or about 15-18 cups of spinach. In my pictures you will see a before and after of the spinach. To reduce it, I cooked the spinach in a 10″ sauté pan using just the water that clung to the leaves. Then I drained it thoroughly in a fine mesh colander, squeezed it dry and chopped it roughly.

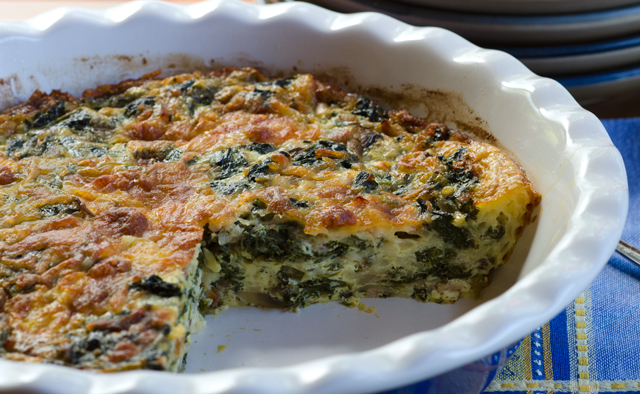
My efforts paid off. With the spinach I picked, I was able to make all three, frittata, quiche and spanakopita. This quiche can be put together in minutes since the most time consuming part is eliminated, making the crust.  I added some sauteed sliced mushrooms and Canadian bacon. In case you didn’t know, American bacon comes from the fatty belly of the pig and Canadian bacon is cut from the loin.  Of course a 10 ounce package of frozen spinach can be substituted in this recipe. It makes a nice breakfast or light lunch and reheats well the next day.
DSC_3115a
Fifteen to eighteen cups of fresh spinach.
Cooks down to this!
Cooks down to this!

DSC_3148a

Crustless Spinach and Canadian Bacon Quiche

Makes 6-8 servings

Ingredients

  • 1c finely chopped onion
  • 1c sliced fresh mushrooms
  • 1T vegetable oil
  • 1 package (10 ounces) frozen chopped spinach or 1½c cooked and chopped fresh spinach
  • 2/3c finely chopped Canadian bacon
  • 5 large eggs
  • 3c shredded swiss cheese (other cheeses will work too like cheddar or Monterey Jack)
  • 1/8t freshly ground pepper

Directions

  1. In a large skillet, sauté onion and mushrooms in oil until tender.
  2. Add spinach and ham, cook and stir until the excess moisture is evaporated.  Cool slightly.
  3. Beat eggs, add cheese and mix well. Stir in spinach mixture and season with pepper; blend well.
  4. Spread evenly into a greased 9-inch pie plate or quiche dish.
  5. Bake at 350°F for 40 to 45 minutes or until a knife inserted near the center comes out clean.
DSC_3145aDSC_3162a


June 6, 2015 Spinach and Chickpea Curry

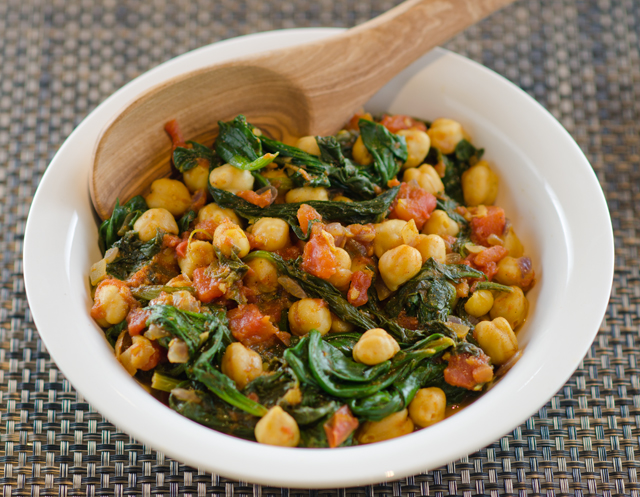
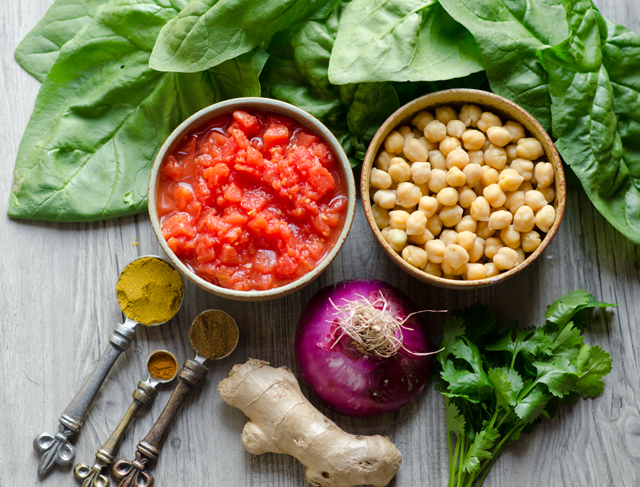
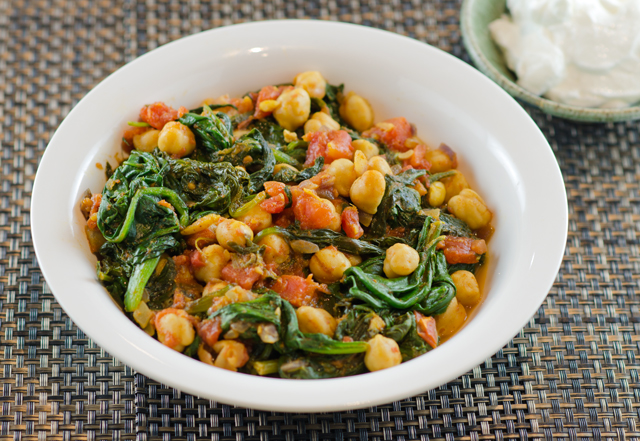
DSC_2863aStill on the hunt for spinach themed dishes, I found this recipe for Spinach and Chickpea Curry in Fine Cooking. It is similar to a northern Indian dish called palak  chole, palak being the Punjabi word for spinach and chole the word for chickpea. The dish can be made in no time at all with some basic pantry ingredients.

Curry powder, a staple in many kitchens, is not a single spice like basil or oregano but a combination of ingredients and will vary by region and country. Most curry powder recipes include coriander, turmeric, cumin, cayenne, ground ginger and mustard seed. To add to the confusion, there is also a curry plant that is supposed to smell like curry and a curry leaf plant. The leaves of the curry leaf plant are used mostly in the cooking of southern India.  The leaves look like small bay leaves but are edible and have a lime-lemony taste.

Garam masala is the other spice blend in this dish. Garam is the Indian word for warm or hot and masala is a mixture of spices. Garam masala is a blend of dry roasted ground spices from northern India. Dry roasting adds to the complexity of garam masala and it is not as hot and spicy as other blends. It may contain up to 12 spices including black pepper, cinnamon, cloves, coriander, cumin, cardamom, dried chilis, mace, nutmeg and other spices.  As with all spice blends they should be kept in a cool dark cabinet and have a shelf life of about six months.

Saute onion, ginger, spice blends and cayenne over medium high heat. The fragrance is absolutely intoxicating. Stir in drained and rinsed chickpeas, canned diced tomatoes and a little kosher salt. Next, add handfuls of spinach, stirring to wilt as you go. The recipe calls for baby spinach but I used garden spinach that I cut down to size and removed large ribs and stems from. This was a dish that came together in less than an hour, and that including picking, washing and trimming the spinach. Serve garnished with cilantro and some plain yogurt to stir in if you choose. Next time I think I will make some naan to sop up the juices. Leftovers are fabulous, that is, if you have them.  This dish was so good, it was requested two days in a row.

DSC_2860a

Spinach and Chickpea Curry

Ingredients

  • 3T canola oil
  • 1/4c chopped red onion
  • 2T finely chopped fresh ginger
  • 1T curry powder
  • 1t garam masala
  • 1/8t cayenne pepper
  • 1 15oz can chickpeas, drained and rinsed
  • 1 14½oz can diced tomatoes
  • 1¼t kosher salt plus additional for final seasoning
  • 7-8c fresh spinach, torn into 1″ pieces
  • ¼c chopped cilantro
  • Plain Greek style yogurt for serving

Directions

  1. Heat canola oil in a 12″ sauté pan over medium high heat. Add onion, ginger, curry powder, garam masala and cayenne pepper. Cook, stirring often until the onion is softened, 2-3 minutes.
  2. Stir in one can of drained and rinsed chickpeas, one can of diced tomatoes and 1¼t salt.
  3. Add spinach by the handful, stirring to wilt as you go. Continue to cook, stirring often, until the spinach is completely wilted and the flavors have melded, 4 to 5 minutes more. Season to taste with more salt. Remove the pan from the heat and stir in ¼c cilantro.
  4. Spoon onto a platter and serve with Greek yogurt for dolloping on top.
The curry leaf plant.

DSC_2866a

April 14, 2015 Beet Chutney

DSC_2334a

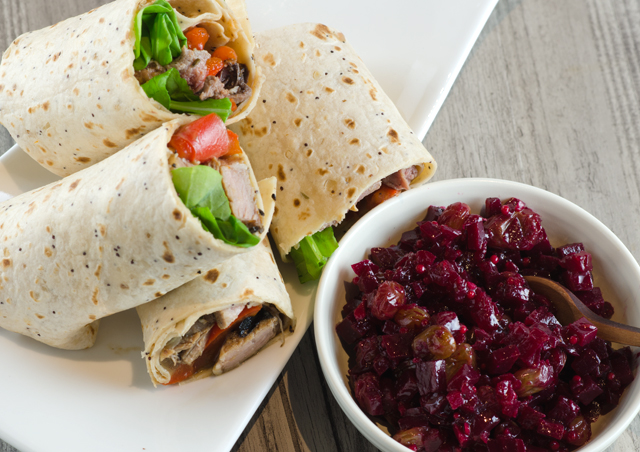
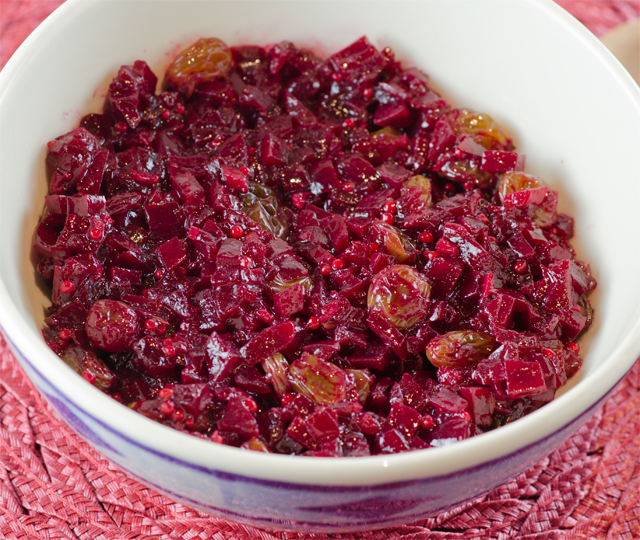
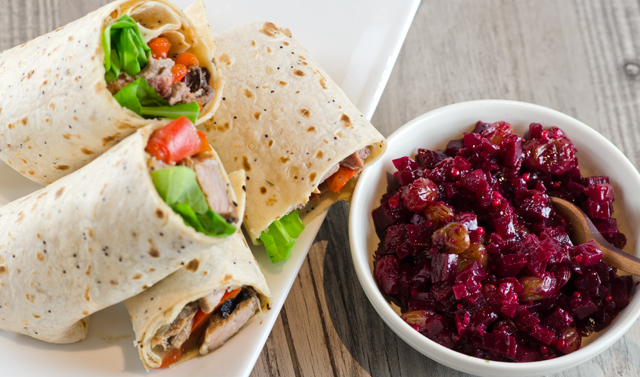
The good thing about cooking a ton of food for a holiday is that chances are, you will have lots of leftovers.  The challenging part is finding ways to repurpose those leftovers into something different and delicious. Smoked turkey was good on a salad, leftover roasted vegetables topped our homemade thin crust pizzas. In previous years I made moussaka with leftover lamb, this year we decided on lamb wraps. In addition to the usual tzatziki sauce that I would serve with lamb, Joe suggested  “something spicy.” I had some ideas but after googling it, found an interesting recipe for beet chutney.

As a beet lover, I enjoy their earthy quality and thought the sweet and sour quality of a chutney would be a nice contrast to the creamy coolness of tzatziki. The chutney comes together quickly and benefits from being made ahead, allowing the flavors to blend together. The recipes calls for a two inch diameter beet, which turned out to be just a little bit less than a cup. Tweak the sweet and sour elements to your own liking. I used golden raisins because that’s what I had on hand, dried cranberries might be nice as well. Dried cranberries would fit the color scheme and would fit right in with a Thanksgiving menu. The chutney would also be good  as a appetizer on top of a cracker spread with goat cheese or Brie.

DSC_2321a

Beet Chutney

Makes about a cup

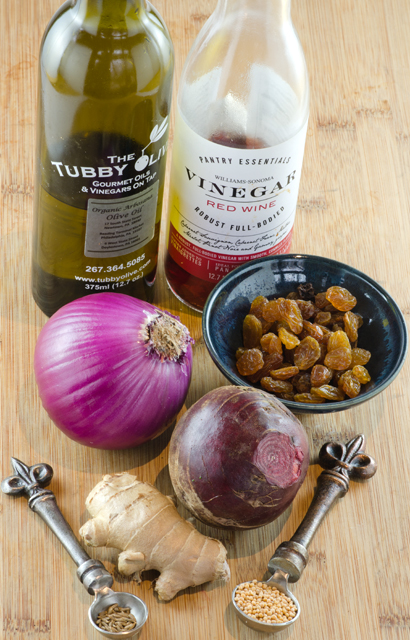
Ingredients

  • 1/4c olive oil
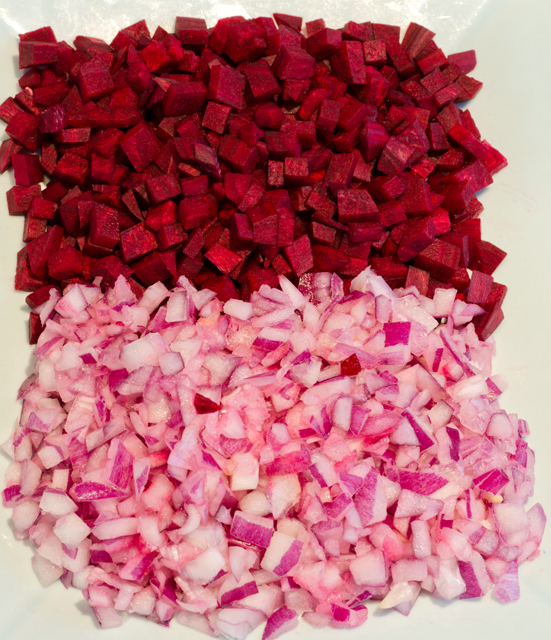
  • 1 ½c red onion
  • 1 2-inch diameter red beet, peeled, cut into ¼ inch cubes
  • ½c water
  • ½c red wine vinegar
  • 3T raisins (I used golden raisins)
  • 3T sugar
  • 2t chopped peeled fresh ginger
  • 1t yellow mustard seeds
  • Pinch of cumin seeds

DSC_2323a

Directions

  1. Heat olive oil in a heavy medium saucepan  over medium heat. Add chopped red onion and beet cubes. Cook until onion is tender but not brown, stirring frequently, about 8 minutes
  2. Add ½c water. Increase heat to high and boil until mixture is thick, about 5 minutes. Add vinegar, raisins, sugar, ginger, mustard seeds, and a pinch of cumin seeds. Reduce heat to medium-low and simmer until beet cubes are tender and the chutney is thick, stirring often, about 10 minutes. Adjust seasonings as needed and season to taste with salt and pepper. Cool.
  3. Can be made 1 week ahead. Cover and chill.

DSC_2327aDSC_2336a


March 10, 2015 Imam Bayildi Revisited

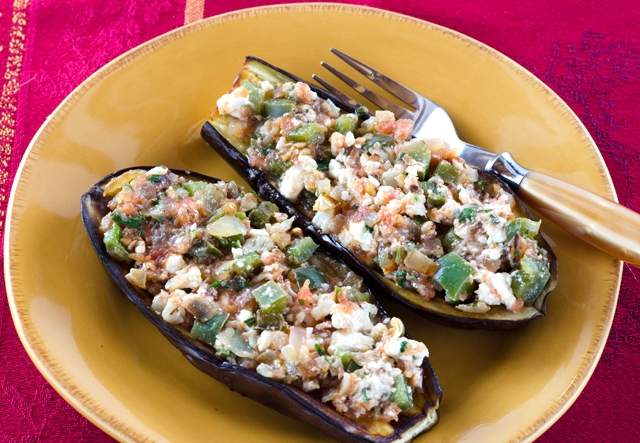
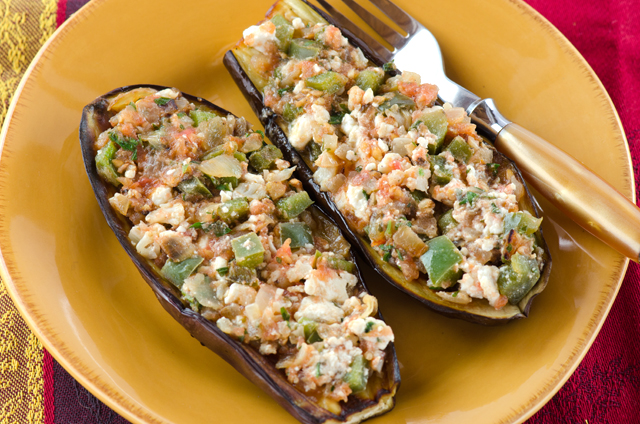
DSC_1861aImam Bayildi translates “the priest fainted”. Was it because the dish was so delicious or was it a reaction of this frugal priest  to the copious amount of expensive olive oil his bride used to make this dish? This is my second interpretation of this popular Turkish dish, one of a group of vegetarian recipes referred to as zeytinyagli or olive oil foods, served cold.  This recipe cuts down considerably in the amount of olive oil traditionally used in the original dish but definitely not on the flavor.

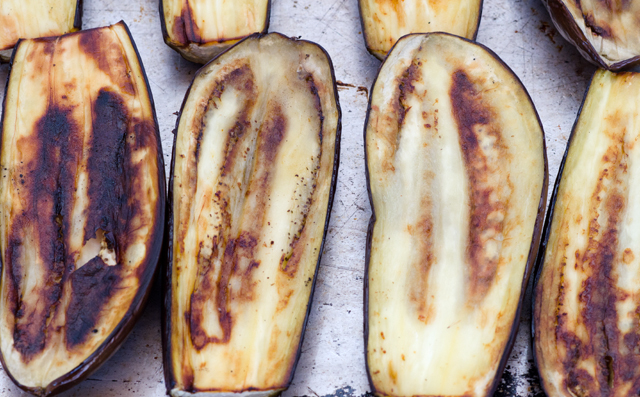
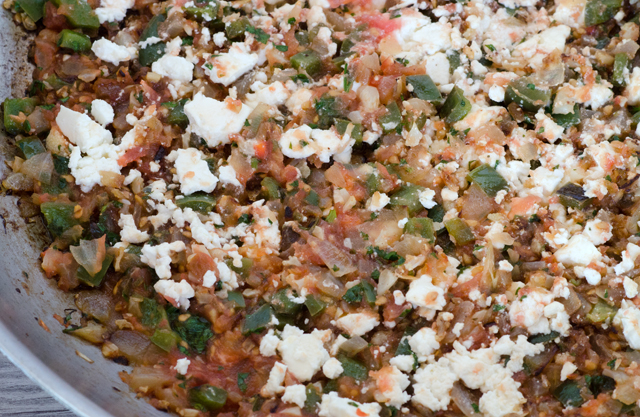
This is another recipe from Ana Sortum, chef at Oleana restaurant in Cambridge Massachusetts.  This recipe is similar to the first one I made in some of the steps.The eggplants are sprinkled with salt and brushed with olive oil and baked until the flesh is soft.  In the first recipe the flesh is scooped out and mixed in with the other ingredients, in the second the other ingredients are combined and pressed into the cooked eggplant, I liked that method. Onions, garlic, tomatoes, oregano and parsley are found in both recipes. Finely diced cauliflower, star ingredient of the moment, is a unique component for Imam Bayildi and adds a different texture and flavor to this dish that I liked. The second recipe also uses green bell pepper, an ingredient that I am not a big fan of. Green peppers are less expensive but not quite as nutritious as their red, yellow and orange counterparts. As a gardener, I have just considered them to be peppers that someone wasn’t patient enough to let ripen.  I am now coming around to seeing green bell peppers as a unique ingredient. In this dish they add an interesting  slightly bitter edge to the sweetness of the onion and the creaminess of the eggplant.

This is the first time I have ever grated tomatoes for a recipe. Choose ripe firm tomatoes and grate them over a shallow bowl with the largest holes of your box grater. Keep your hand flat and grate until the tomato flesh is scraped away from the skin. Discard the skin and you are left with tomato pulp that can be used in a variety of dishes. I am sure this is a technique I will use again.

Aleppo pepper is one of my favorite ingredient discoveries of the last several years. It is dark red, flaky and somewhat oily in texture. It takes it name from the ancient city of Aleppo in northern Syria, just east of the Turkish/Syrian border.  The flavor profile is rich, sweet and fruity with hints of cumin. The heat profile is moderate, just a bit hotter than paprika. As a result of the conflict in Syria, what now is sold as Aleppo is actually an identical pepper plant, Maras, that is grown in Turkey.

DSC_1848a

Imam Bayildi

Serves 8 as a side dish or 4 as an entrée

Ingredients

  •  4 small eggplants, about 1/2lb each
  • 10Tolive oil divided,  4T for brushing eggplants, 3T for sautéing, 3T for drizzling over finished dish.
  • Kosher salt
  • 2 1/2lb tomatoes, halved
  • 2c diced sweet onion
  • 1c diced green bell pepper
  • 1/2c finely diced cauliflower
  • 1T finely chopped garlic
  • 1/2c chopped Italian parsley, more for garnishing the finished dish.
  • 1t finely chopped fresh oregano or 1/2t dried
  • Aleppo pepper or crushed red pepper flakes
  • 3/4c crumbled feta, more for garnish

Directions

  1. Position a rack in the center of the oven and preheat to 375°F.
  2. Halve the eggplants lengthwise and place cut side up on a large rimmed baking sheet. Season the cut sides generously with kosher salt and brush with the first 4T of olive oil. Flip the halves over and bake cut side down until soft, about 30-35 minutes. Set aside until cooled.
  3. While the eggplant bakes, grate the cut sides of the tomato on the large holes of a box grater. It is easiest to put the grater in a bowl. Discard the skins. Drain the pulp in a fine meshed sieve until most of the liquid has drained through, about 20 minutes.
  4. Heat 3T of the oil in a 12-inch skillet over medium heat. Add the onion and cook, stirring occasionally, until soft, about 5 minutes. Add the pepper, cauliflower and garlic, cook, stirring occasionally, until all the vegetables have softened somewhat, about 5 minutes. Remove pan from the heat and stir in the tomato pulp, parsley and oregano. Season to taste with salt and pepper. Stir in the feta.
  5. Use a spatula to flip over the eggplant halves. With a slotted spoon, divide the filling among the eggplant, using the spoon to gently push the filling into the flesh.
  6. Drizzle with the remaining olive oil and bake until hot, about 10 minutes. Sprinkle with more crumbled feta and parsley and serve.

DSC_1856a

DSC_1857a

DSC_1872a

March 4, 2015 Turkish Tarator Sauce

DSC_1788a

What’s in a name? When it comes to food, it may depend on what country you are in. Tarator is a prime example of this. In the Balkans, it is a cold yogurt based soup made with cucumbers and seasoned with dill and lemon, similar to the ingredients in Greek tzatziki. In many Middle Eastern countries, Tarator is a sauce or a dip based on sesame tahini. The tarator of Turkey is a savory sauce, thickened with nuts and used with a wide variety of foods.

This recipe, a Turkish tarator sauce from Fine Cooking magazine is courtesy of  James Beard award winning chef Ana Sortum. Her travels as a young chef exposed her to the exciting, flavorful home cooking of Turkey. When she returned to Cambridge, Massachusetts, she opened her first restaurant, Oleana combinig the bold flavors of the eastern Mediterranean with farm fresh ingredients.

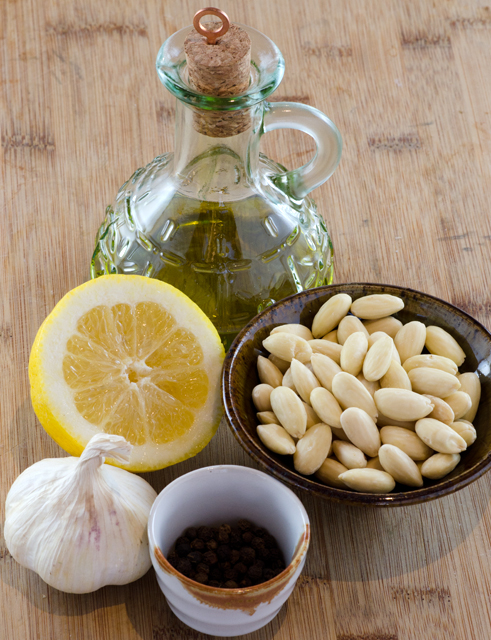
Tarator is very easy to make. As with many traditional sauces, it was first made with a mortar and pestle, but a blender brings this sauce together in less than five minutes. Nuts are the base of the sauce and provide it’s richness. I have seen everything from walnuts, to hazelnuts to pine nuts used in different versions of this recipe, blanched almonds are the chef’s choice in this recipe. Some recipes also include bread as an additional thickener but I found this unnecessary.  Combine nuts, olive oil, lemon juice, water and garlic in the food processor. Blend until smooth and thick, scrape down the sides several times during this process, it takes about 3 minutes.  Season to taste with salt and pepper. When serving, garnish with some toasted almonds.

Use good ingredients, not those nuts that have been sitting in your cabinet for months, fresh lemon juice and a quality extra virgin olive oil. I purchase my best oils from The Tubby Olive. Their oils are sourced from small farm producers and I am able to taste what I buy. Unfortunately not every bottle of olive oil labeled extra virgin, actually is.   If you are interested in some good information regarding the misrepresentation of the origins and quality of some brands of olive oil, check here.

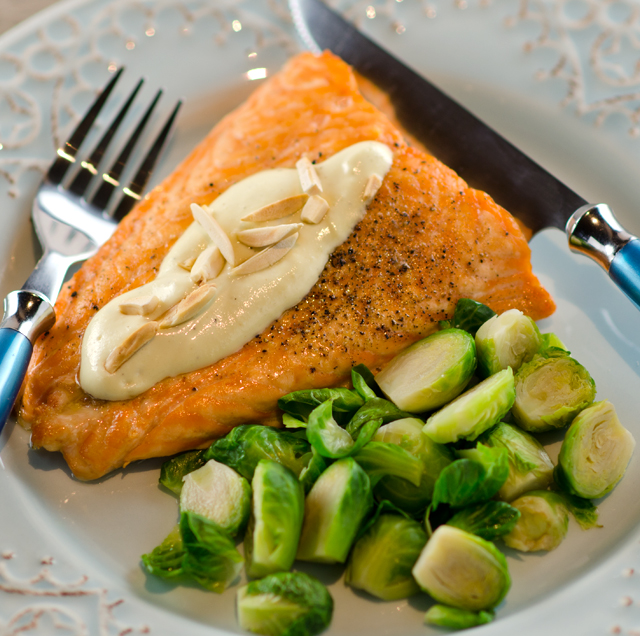
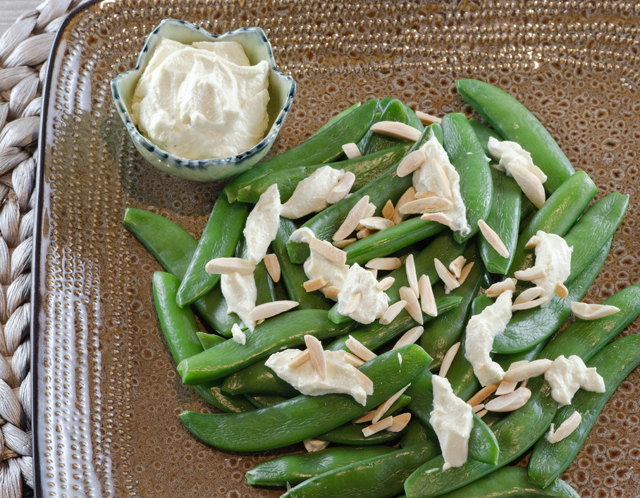
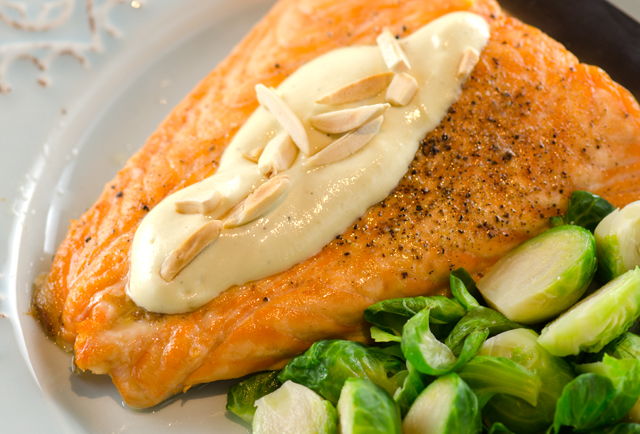
Tarator is traditionally served with a wide variety of dishes, ranging from grilled eggplant, beets and fried seafood. I served it with roasted salmon and lightly blanched sugar snap peas.  It would also be a flavorful dip for crudite or a sauce for fried calamari.

Turkish Tarator Sauce

Makes about a cup

Ingredients

  • 1/2 c blanched whole almonds
  • 2T toasted and chopped almonds for garnish
  • 1/4c extra virgin olive oil
  • 2t fresh lemon juice
  • 1 1/2t chopped garlic
  • Kosher salt and freshly ground pepper

DSC_1779a

Directions

  1. In a blender, puree the whole almonds, olive oil, lemon juice, garlic and 1/2c water until completely smooth and thick, at least 3 minutes.
  2. Season to taste with salt and pepper. Sauce keeps covered and refrigerated up to 3 days.

DSC_1799a

DSC_1790a

February 11, 2015 Kung Pao Brussels Sprouts

DSC_1210a

Magazine features come and go over the years and often reveal the trends of the time. In the first issue of Bon Appetit I purchased back in 1982 (!) readers could find a column featuring recipes created using a relatively new appliance, the food processor, “Bon Vivant”, a “who’s who and what’s new in the world of food, wine and spirits”, columns featuring cooking for two, wine and spirits, travel and “Too Busy to Cook”, time saving reader recipes.

One column that has lasted all these years is “R.S.V.P.”, reader’s requests of restaurant recipes. Back in 1982 you could find a baker’s dozen of recipes, everything from zucchini nut muffins to sole wellington with a recipe for homemade sausage thrown in for good measure.

In 2015, “R.S.V.P.” still graces the opening pages of the magazine in a paired down format. The February issue has just three recipes, one per page with an accompanying illustration. One recipe in particular caught my eye this month, Kung Pao Brussels sprouts. This recipe comes from Kevin Gillespie, Top Chef “cheftestant” season six and fan favorite. Kevin is presently the chef owner of Gunshow in Atlanta and the author of a best selling cookbook, Fire in My Belly.

I liked the idea of using the kung pao technique with a vegetable.  In the elevated role of the vegetable in today’s cuisine, the first real star was kale and recently that title has been handed over to cauliflower, I feel it’s only a matter of time that Brussels sprouts will take over the spotlight. Like it’s counterparts, kale and cauliflower, Brussels sprouts are a member of the brassica family with the same health benefits. They are packed with antioxidants, vitamin C, folic acid and minerals such as potassium, iron and selenium. Their season is from about mid September to March, and as we have learned from other brassicas, those harvested after the first hard frost are the sweetest.

Kung Pao originates from the Szechuan province of China. The classic preparation involves two main ingredients, spicy chiles that contrast with the crunchy, fatty peanuts.  Several sources recount the origins of this dish in similar ways with slight variations. It was either created by or it was the favorite dish of the Gong Bao, a high government official in the nineteenth century. I will leave out the part about the chicken needing to be cut into small pieces because of his dental problems or that the name Kung Pao fell out of favor during the Cultural Revolution. Or maybe you like the alternate explanation, the name Kung Pao loosely translates as “hot firecrackers”. The recipe calls for chile de Arbol  but I thought this would be a perfect opportunity to use dried Kung Pao peppers with similar heat that were harvested from our garden.

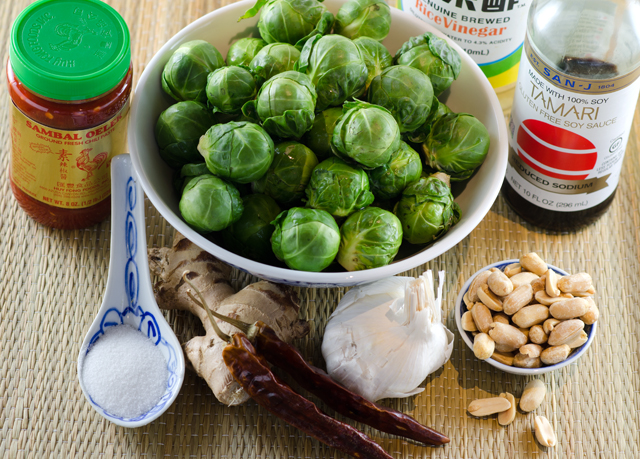
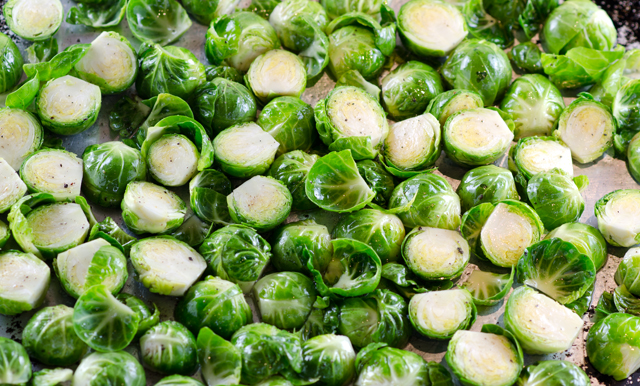
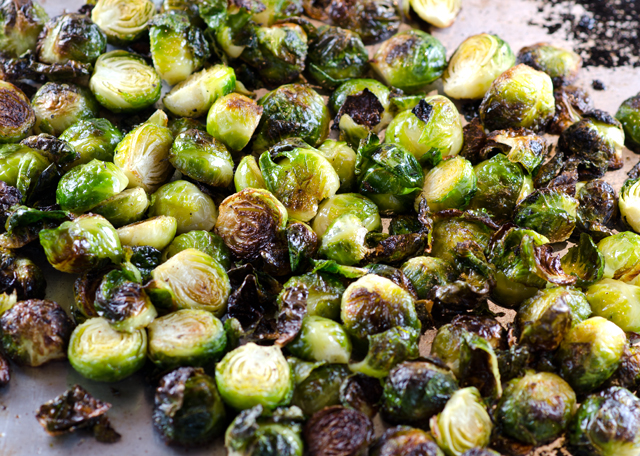
Rinse the sprouts well and trim the bottoms. Slice in half lengthwise and remove any yellowed or damaged leaves. Toss the sprouts with oil, kosher salt and a generous grind of pepper. At the halfway point I take them out, toss them around a bit and flip the baking sheet in the opposite direction. I took my sprouts out about five minutes sooner than the original recipe called for because I was baking in convection mode.  Adjust the heat of the dish to your own comfort level. The dish is supposed to be hot but remember you can always add a little more sambal oelek or another chili pepper, but you can’t take them away.

Assemble the sauce ingredients while the sprouts are baking. Cook the garlic and ginger until deliciously fragrant. Add sambal oelek, chilis and remaining ingredients, thicken with cornstarch and simmer.  I found that using half the amount of sugar, 1 1/2 tablespoons, gave the right amount of hot to sweet balance in the dish.

Would I make this again? Definitely and Joe agrees, this sauce could be used with other vegetables, eggplant, green beans or in a stir fry using several vegetables. And that September 1982 issue of Bon Appetit? There’s a recipe for Red Snapper Szechuan, with surprisingly similar ingredients to the Brussels sprouts  that looks pretty good to me.

DSC_1187aDSC_1190a

DSC_1191a

Kung Pao Brussels Sprouts

Ingredients

Serves 6

  • 2 pounds Brussels sprouts, halved
  • 5 tablespoons vegetable oil, divided
  •  Kosher salt and freshly ground black pepper
  •  1 tablespoon cornstarch
  • 3 garlic cloves, finely chopped
  •  2 tablespoons finely chopped peeled ginger
  •  2 tablespoons hot chili paste (sambal oelek)
  •  6 dried chiles de árbol, lightly crushed (I used Kung Pao chilies)
  •  ½ cup soy sauce
  •  3 tablespoons sugar
  •  2 teaspoons unseasoned rice vinegar
  •  ⅓ cup unsalted, roasted peanuts

Directions

  1. Preheat oven to 425°F. Toss brussels sprouts and 4 Tbsp. oil on a rimmed baking sheet; season with salt and pepper. Roast, tossing once, until softened (but not soft) and browned, 20–25 minutes. Set aside.
  2.  Meanwhile, mix cornstarch and 1 Tbsp. water in a small bowl until smooth.
  3. Heat remaining 1 Tbsp. oil in a medium saucepan over medium-high. Add garlic and ginger and cook, stirring often, until garlic is golden brown, about 2 minutes.
  4. Add chili paste and cook, stirring, until darkened, about 2 minutes. Add chiles, soy sauce, sugar, vinegar, and ½ cup water and bring to a boil; stir in cornstarch slurry. Simmer, stirring, until sauce coats spoon, about 2 minutes. Let cool slightly.
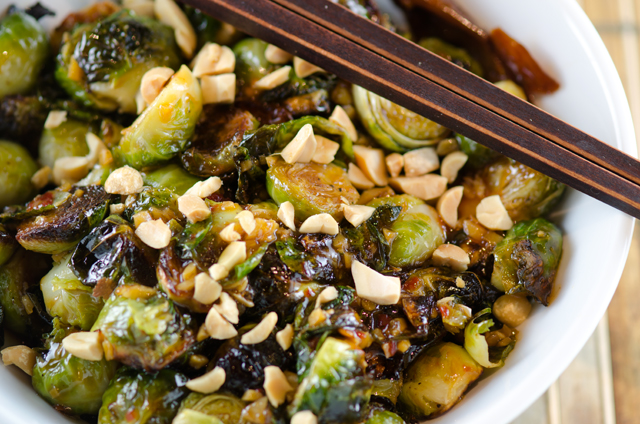
  5. Toss brussels sprouts with sauce and serve topped with peanuts.
DSC_1213a
Dried Kung Pao peppers from our garden.

DSC_1208a


February 6, 2015 Mediterranean Style Pan Seared Chicken Breasts

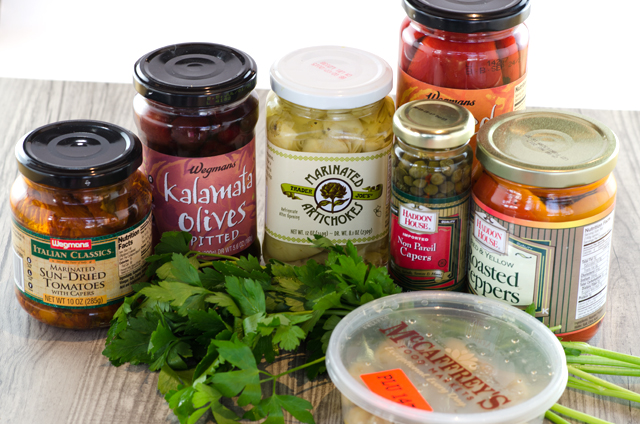
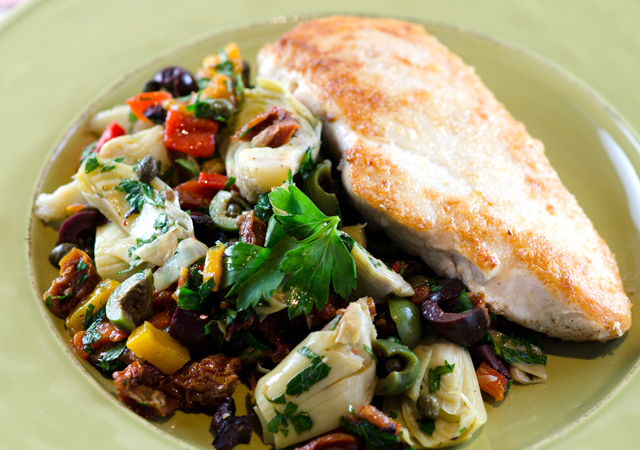
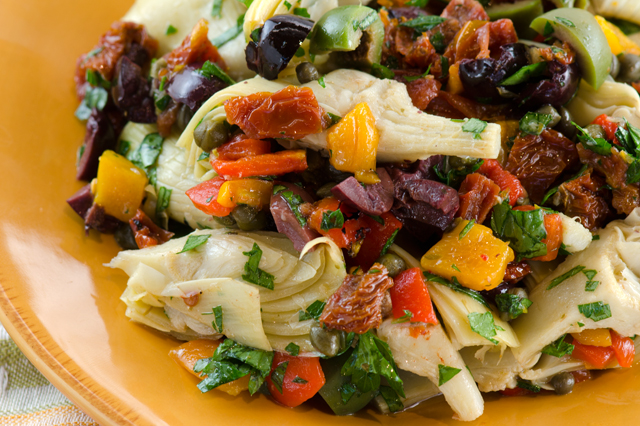
DSC_1136aMy yearly “pantry purge” brought to my attention some items that would expire in the next few months and needed to be used sooner rather than later.  The jar of marinated artichoke hearts I bought at Trader Joe’s last year would reach it’s expiration date in a month.  Not wanting to waste them, I started with the artichoke hearts as a foundation. I looked for other items on the shelf that would add some complimentary Mediterranean flavors.  Also in the pantry I found jarred sun dried tomatoes and roasted peppers. In the refrigerator I found a container of olives, a previously opened  jar of capers and some fresh parsley. I was set to put together an improvised combination that would work well as a topping for the chicken breasts I planned on cooking that evening. I was calling it a “salsa” though Joe pointed out there was nothing sauce-like about it.

To make this dish I started with the marinated artichoke quarters, draining and reserving the marinade in case I needed to add some to the finished dish. The sun dried tomatoes were next, and even though I drained some of the oil off,  they retained enough to give the right balance.  Capers add a salty element to the dish so I made sure to rinse them well before adding them to the dish. I used Kalamata olives and Castelvetrano, an olive with a mild buttery flavor and one of my favorites. The red and yellow roasted peppers,  just needed to be drained and chopped. Combining all of the ingredients in a medium bowl I tasted for seasoning and in this case, a little bit of lemon juice and  a splash of balsamic vinegar was the right addition.

So what should I call this? It’s not quite a sauce, but is a versatile topping for fish, chicken, pasta, it could also be used as an omelet filling or even as a topping for a flatbread pizza.  The ingredients are interchangable as well. Petite diced canned tomatoes could be substituted for the sun dried tomatoes, mushrooms for the artichoke hearts, a little pesto would be a good addition, you can see what I mean. It’s just important to taste as you go to achieve the right balance of flavors.
This would have been great over the poached chicken breasts I made from the last post but I decided to learn another method.  In this recipe, also from Cooks Illustrated, boneless chicken breasts are lightly salted, then parcooked in a covered casserole in the oven. The chicken is then pan seared in a moderately hot skillet and kept moist with a slurry of flour, butter and cornstarch that is brushed on at the end. It gives a nice coating to the chicken and helps it stay moist. As with all meat, poultry and fish recipes, an instant read thermometer takes away the guesswork  and is essential for the best results.
DSC_1107a
The ingredients for the topping.

Mediterranean Topping

Makes about 4 cups

Ingredients

  • 2c marinated, quartered artichoke hearts from a 12oz jar, drained (save liquid)
  • 2T capers, drained and rinsed
  • 1/2c sun dried tomatoes, drained, chopped and lightly patted dry
  • 1/2c olives, combination of green and black, pitted and chopped
  • 1/3c chopped roasted peppers
  • 1/4c chopped fresh parsley
  • Balsamic vinegar and lemon juice to taste
  • Kosher salt and freshly ground pepper

Directions

  1. In a medium bowl combine the artichoke hearts, capers, sun dried tomatoes, olives, roasted peppers and parsley.
  2. Add balsamic vinegar, salt and freshly ground pepper to taste.

DSC_1115a

DSC_1124a

Pan Seared Chicken Breasts

From Cooks Illustrated March 2010

Serves 4

Ingredients

  • 4 boneless skinless chicken breasts, 6-8 ounces each, trimmed of excess fat
  • 2t kosher salt (1t regular salt)
  • 1T canola oil
  • 2T unsalted butter melted
  • 1T all purpose flour
  • 1t cornstarch
  • 1/2t freshly ground black pepper

Directions

  1. Place oven rack in the lowest position and heat to 275°F. Poke the thicker end of the chicken breast with a fork five to six times and sprinkle evenly with the salt. Place the chicken, smooth side down in a 9×13″ baking dish. Cover the dish tightly with foil. Bake until the thickest part of the breast registers 145-150°F on an instant read thermometer, start checking at the 30 minute mark, it could take as long as 40 minutes.
  2. Remove pan from the oven and transfer the chicken with tongs to a towel-lined plate and pat dry. Heat the oil in a 12-inch skillet over medium high heat until smoking. While you are waiting for the pan to heat up, whisk the melted butter, cornstarch and flour together. Brush the top of the chicken with half of the butter mixture. Place the chicken in the skillet, coated side down and cook until browned, 3-4 minutes. While the chicken is browning, coat the other side of the chicken with the remaining mixture. Flip the chicken over with tongs, reduce heat to medium and cook until the second side is browned and the thickest part of the breast registers 160°F, another 3-4 minutes. Transfer chicken to a serving plate.
  3. Serve chicken with Mediterranean topping.

DSC_1120a


December 12, 2014 Creamy Kale Gratin

DSC_0072aWhen it comes to Thanksgiving I’m “all about the sides”. Now don’t get me wrong, we had three turkeys for Thanksgiving, roasted, grilled and smoked, all cooked to perfection by my hubby. No fried turkey this year, we tried it one Thanksgiving and the combination of a deep fryer and a windy day on a wooden deck made for an interesting and potentially dangerous afternoon.

I love fall vegetables, a variety of interesting winter squashes, beautiful brassicas and hearty root vegetables all appear at our table. In previous years I would make myself crazy with last minute preparations for a half dozen complicated side dishes before we sat down to Thanksgiving dinner. Now I like to roast a combination of root vegetables tossed with olive oil, salt and freshly ground pepper and supplement them with some other interesting sides.

If I am at home in the early afternoon I will occasionally turn on “The Chew”, a television program that has been described as “The View” for foodies. The panel includes among others, star chef, restauranteur and cookbook author, Mario Batali, and it was Mario’s recipe this day that caught my attention, Creamy Kale Gratin.
We are not newcomers on the ever expanding kale bandwagon. Joe has been growing it in the fall for quite a few years, before it achieved it’s current celebrity status. This year’s crop was abundant. He grew both the Red Russian variety with it’s reddish purple stems and curly leaves and the Lacinato or dinosaur kale with crinkly long dark green leaves. What most people don’t know is that after the first frost, kale becomes sweeter and could easily convert the most die hard kale hater.

Today’s episode was titled potluck party, focusing on dishes you could bring to a Thanksgiving dinner and I’m sure this dish would be a hit at any potluck meal, Thanksgiving or otherwise. Mario compared this dish to steakhouse creamed spinach, only made with kale. Mario had the assistance of actress Katherine Heigl, best known for her Emmy winning role on Grey’s Anatomy.  Her job, along with promoting her new television series, was to chop some of the kale while Mario made the Bechamel  sauce. I saw that chef Michael Symon was at the ready, most likely in case the task was too much for her to handle. I noticed she did a fine job, Michael said with a bit of surprise that she did a good job and Mario commented on her “mad skills”. She explained that she played a cook in one of her movies (Life As We Know It; I checked)  and they taught her to properly chop. She refered to it as a hidden talent, one of those things you learn as an actor.

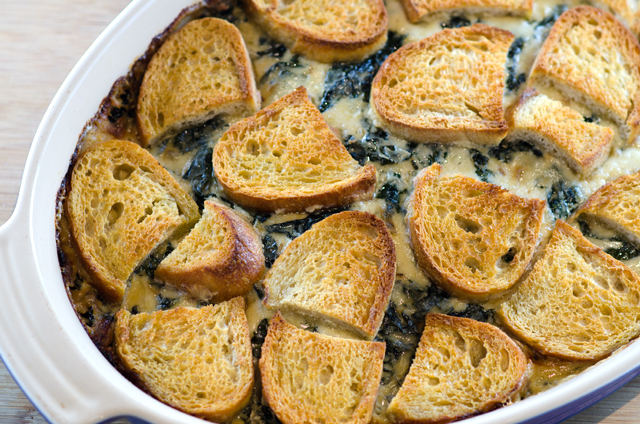
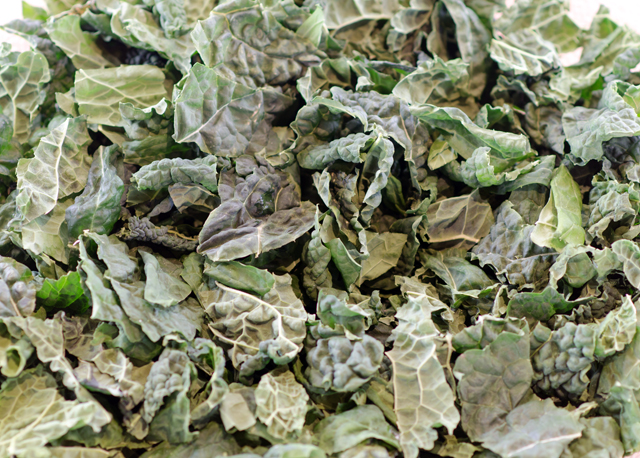
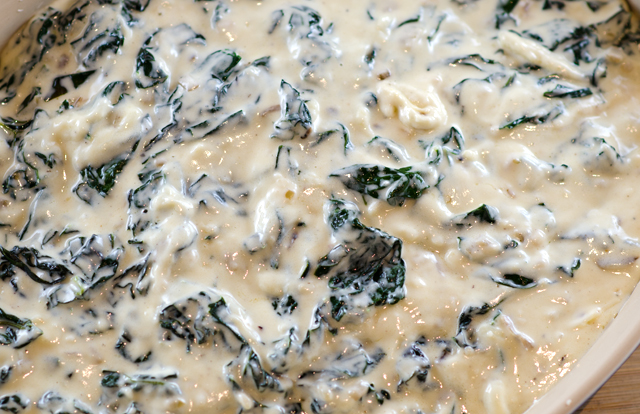
The kale leaves are roughly chopped to the stem. Twenty cups may seem like a large quantity but like all greens, they cook down quickly. Rather than putting the stems in the trash, Mario puts the stems in half full pickle jars and snacks on them the next day. The kale is cooked in a large sautepan until wilted, it will cook fully when it is combined with the cheese sauce and croutons. A layer of croutons is placed on the bottom of a large buttered gratin dish. The next layer is the kale combined with the very cheesy sauce seasoned with freshly ground nutmeg. The remaining croutons are layered on top.

Either variety of  kale is suitable for this recipe. From my observation of the video it looks like they used a curly variety, I used the darker Lacinato with long crinkly leaves. I prepped my dish the day before, stopping before sprinkling the croutons with olive oil, salt and pepper. I brought the dish to room temperature the next day, finished the final steps and baked the gratin. The last dilemma the Chew tackled was how do you eat the bread bit? Fork and knife is fine but if you want to pick it up like a crostini, that’s just fine too.   We all enjoyed the gratin, a delicious way to enjoy one of the final offerings of the fall garden.

DSC_0029_edited-1
Lacinato kale in the fall garden.

Creamy Kale Gratin

Serves 10

Ingredients

  • 20 cups Russian or Lacinato kale, stems removed and roughly chopped
  • 1 loaf sourdough bread, cut into 1/2 inch slices
  • 6 T butter, and additional butter for the baking dish
  • 1/2c shallots, sliced
  • 1t red pepper flakes
  • 1/4c all purpose flour
  • 1 1/2c milk
  • 1 1/2c heavy cream
  • 8oz grated gruyere cheese
  • 8oz grated sharp white cheddar cheese
  • 1/2c crème fraiche
  • 1/2c Parmigiano Reggiano, freshly grated
  • 1/2t freshly grated nutmeg

Directions

  1. Preheat oven to 400°F
  2. Preheat a large sauté pan over medium high heat. Add 2 tablespoons butter and a drizzle of olive oil. When the butter has melted, add the shallots, salt, pepper and red pepper flakes. Sauté until translucent, about 4 minutes. Add the kale and season with salt and pepper. Sauté until wilted about 4 minutes. Set aside.
  3. Meanwhile, in a separate heavy bottomed pot (think Le Creuset) , melt 4 tablespoons butter. Add flour and stir to combine. Cook the flour mixture for 2 minutes, stirring continuously. Slowly pour in the milk and cream and whisk to combine. Continue to cook,, stirring continuously with a wooden spoon, until the béchamel sauce coats the back of a wooden spoon (about 5 minutes). Remove from the heat. Add in the cheeses and whisk until smooth. Season with freshly grated nutmeg, salt and pepper. Stir in the reserved kale mixture.
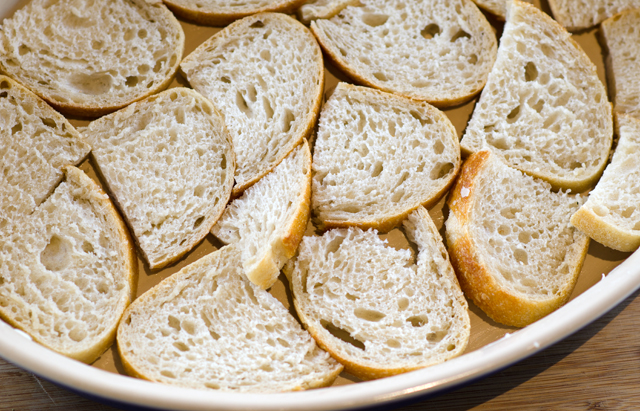
  4. Butter a large gratin baking dish. Lay an even layer of the read slices in the bottom of the gratin dish. Pour the creamy kale over the bread. Top the casserole with the remaining bread slices, placing them tightly together. Season the bread with salt and pepper and drizzle with olive oil. Place in the oven to bake for 30 minutes, until the topping is golden brown. Remove from the oven and allow to cool for 5 to 10 minutes before serving.
DSC_0035a
A rough chop is all you need for this dish.
DSC_0037a
A layer of bread slices are placed at the bottom of the dish.
DSC_0039_edited-1
Next, a layer of creamy, cheesy kale.
DSC_0062a
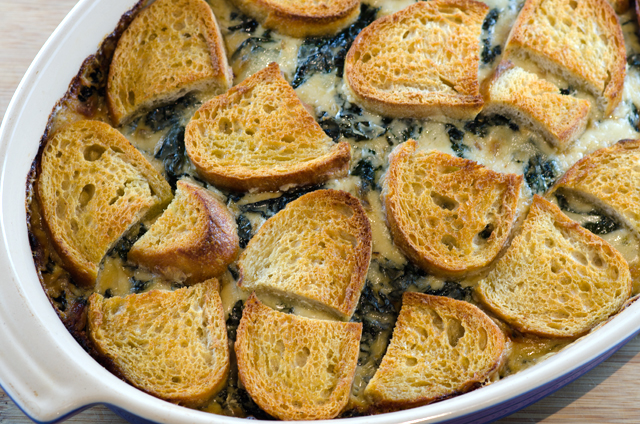
Then another layer of sourdough bread rounds.
DSC_0070a
Brush sourdough lightly with olive oil, sprinkle with salt and freshly ground pepper and bake. Delicious!


November 11, 2014 Puerto Rican Coleslaw

DSC_9489aA flavorful salad that’s a healthier alternative to mayonnaise based slaws. Crispy cabbage, celery and radishes are combined with sweet Sungold tomatoes in this very easy to make dish. Why is it considered Puerto Rican? Couldn’t find a definitive answer for that, but the addition of some sliced hearts of palm would give it a real Caribbean flair. Serve with a grilled steak or roast chicken, the leftovers keep for several days, that is, if you can keep it that long.

Puerto Rican Coleslaw

Makes about six servings

Ingredients

  • 6-8 c finely chopped green cabbage
  • 1 c diced small tomatoes
  • ½ c chopped celery, if the stalks are large, cut in half lengthwise first
  • 1/2c chopped celery leaves
  • 6-7 radishes, cut root and stem off first, then cut into half moon slices
  • ¼ c sliced green onion
  • 2 T apple cider vinegar
  • 1 t fresh lime juice
  • ½ t kosher salt, or more to taste
  • ¼  to 1/2t hot pepper sauce, I used sriracha sauce
  • 3T grapeseed or canola oil

Directions

  1. Chop up the cabbage, tomatoes and celery leaves, and slice celery, radishes and green onions, and toss into a large bowl. You can make this part ahead, place it in a container with a lid and pop it in the fridge until you’re ready to make the salad.
  2. In a small bowl, whisk together apple cider vinegar, lime juice, salt, hot sauce and oil. Taste to see if you want to add more hot sauce.
  3. Toss salad with the dressing. You can make this salad ahead and store it in the fridge for a few hours before you’re ready to serve.

October 25, 2014 Cauliflower Salad

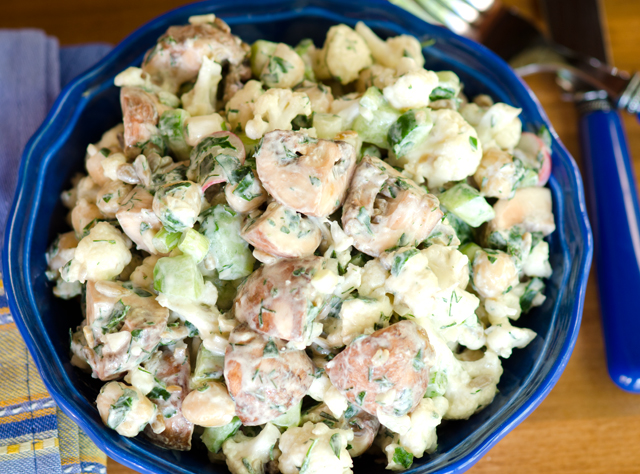
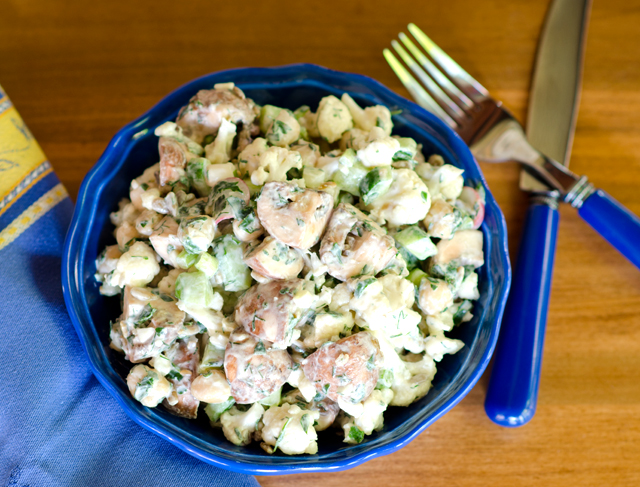
DSC_9433a“Gifted” with another box of Brassicas this week, I was looking for a way to use cauliflower in a fall salad. A new cookbook, Bar Tartine : Techniques and Recipes, gave me the salad I was looking for.

Opened in 2005, Bar Tartine, located in the Mission District of San Francisco is an offshoot of the highly praised San Francisco bakery, Tartine. In addition to doing their own curing, preserving and in-house fermenting, the food draws influences from countries as diverse as Norway, Japan and Hungary.

The cauliflower is broken down into tiny florets, save the rest to make cauliflower “mashed potatoes”. In a bowl with the yogurt dressing, combine the florets with cucumbers, chickpeas and mushrooms. Our garden provided me with the radishes and serrano peppers needed for this salad. I was hesitant to use the two serranos as suggested, ours get quite hot so I went with just one. The yogurt dressing tamed the chiles heat quite a bit.
Resist the urge to roast or blanch the cauliflower before adding it to the salad, if you normally dislike it raw.  Marinating small florets in the dressing softens them up considerably without making them mushy. The yogurt dressing is especially good and would work well with other salad combinations.

DSC_9387a
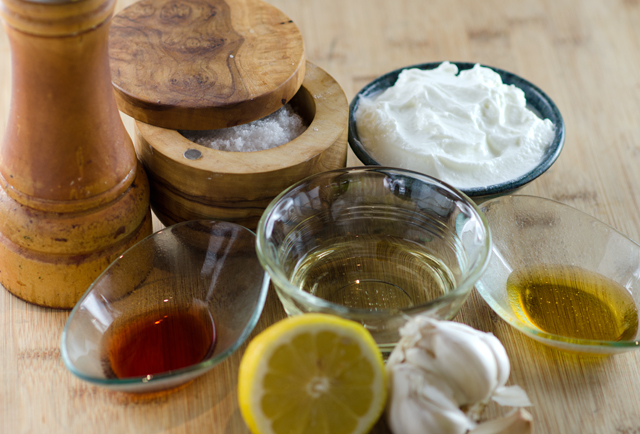
Assembled ingredients for the yogurt dressing.


Bar Tartine Cauliflower Salad

Serves 6

Ingredients

For the dressing

  • 1 c Greek style yogurt, regular or low fat
  • 5T sunflower oil
  • 2 cloves of garlic, minced
  • 2T freshly squeezed lemon juice
  • 1T red wine vinegar
  • 1T honey
  • 1 1/2t fine grain sea salt
  • Freshly ground black pepper

Directions for the dressing

  1. In a bowl large enough to hold all the salad components, whisk together the yogurt, sunflower oil, garlic, lemon juice, vinegar, honey, salt and pepper to taste. If not using immediately, store dressing in an airtight container. Dressing can be made several days ahead.

Ingredients for the salad

  • 6-8 c cauliflower, trimmed into tiny florets
  • 2 medium cucumbers, peeled, seeded if necessary, cut into small dice
  • 4-5 scallions, cut into 1/4″ rounds
  • 1c cooked chickpeas, fresh is best but rinsed well and drained thoroughy if canned.
  • 8oz mushrooms, button or shiitake, quartered
  • 6-8 radishes, ends trimmed and thinly sliced
  • 1 or 2 green serrano chiles, stemmed, seeded and thinly sliced
  • 1/4c sunflower seeds, lightly toasted
  • 1/4c each chopped fresh flat leafed parsley, dill and tarragon

Directions for the salad

  1. Add the cauliflower, cucumbers, scallions, chickpeas, mushrooms, radishes, chilies, sunflower seeds and herbs to the bowl toss lightly and let stand for 15 minutes.
  2. During this time the vegetables will begin to exude some liquid the cauliflower will soften. Toss again and transfer salad to a bowl. Leftovers should keep for several days, if you can keep them around that long!

DSC_9428a