Aug 1, 2017 Zucchini Lasagna with Meat Sauce

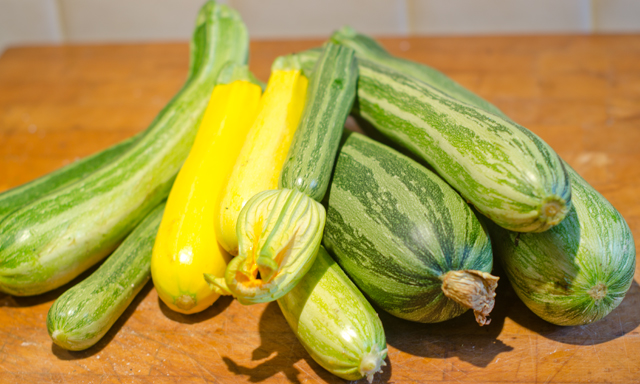
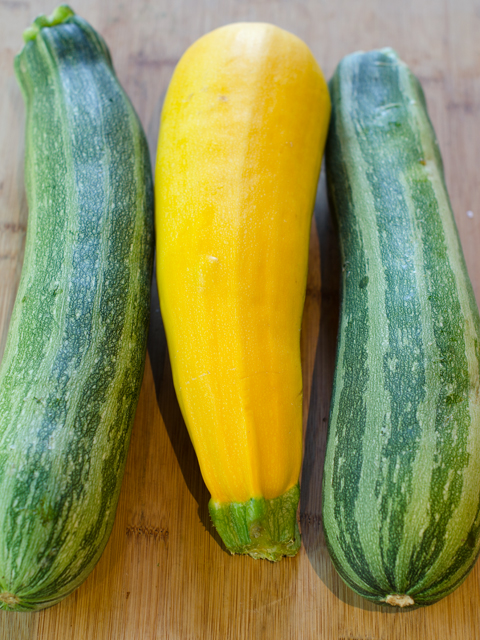
Gardeners, let’s face it, we’ve all done it. You watch that cute little zucchini you’ve been nurturing along for several days, waiting for the moment when it’s about eight to ten inches long, bright green with mottled white striping and the blossom still attached, ready for picking. But life isn’t perfect, it rains for several days and you didn’t make it out to the garden and now that cute little zucchini is the size of a miniature baseball bat. Don’t despair, there are ways to still use them, zucchini lasagna is one of my favorites.

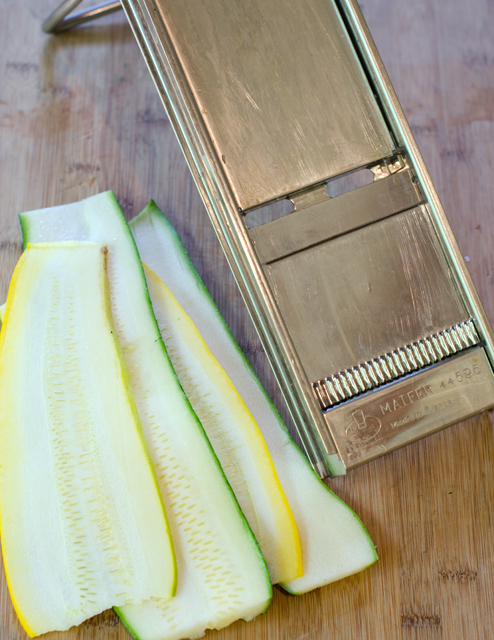
Zucchini lasagna “noodles” replace regular pasta for this delicious dish. I first cut the zucchini in half lengthwise so that I have a flat surface to cut my noodles. A mandolin is always my first choice for even uniform slices. If you weren’t aware, a mandolin, isn’t just a music instrument. It is a hand-operated kitchen tool with adjustable blades that in addition to making julienne and waffle cuts, makes uniform slices. Whatever model you choose, use the hand/finger guard, I speak from personal experience.  You can also go low tech and use a very sharp knife with a cutting board to stabilize your slices. I make my slices to fit the baking dish lengthwise, if you are using shorter zucchini, it’s fine to cut them the other way, making sure they fit your dish.

Zucchini is 95% water so before you assemble the lasagna it is important to precook it so less moisture ends up in your finished dish. Suggested methods I’ve seen include broiling, sauteing and parboiling. I like cooking them in the grill pan, it gives added flavor to the zucchini and the slices have a nice finished look. Cooking the slices on an outdoor grill would make the process even faster. Cook more slices than you think you may need to allow for breakage.

This dish can be made in stages, make the meat sauce one day, slice and cook the zucchini the next, then assemble. Just like regular lasagna, it tastes even better the next day, if it lasts that long!

Don’t forget the yellow squash , they work in this recipe too.

Zucchini Lasagna with Meat Sauce

Serves 6-8

Ingredients

Ingredients

  • 3-4 or more large zucchini, sliced 1/8″ thick
  • Extra virgin olive oil for brushing zucchini
  • 1 lb lean ground turkey or beef
  • 1 ½ t kosher salt
  • 1 T olive oil
  • 1 c finely chopped onion
  • 2 cloves minced garlic
  • 1 quart plain tomato sauce ( I used homemade)
  • 2 T tomato paste
  • 2 t dried oregano
  • ¾ t freshly ground black pepper
  • 1 ½ c part skim ricotta cheese
  • ½ c finely grated Parmesan
  • 1 large egg
  • 4 c shredded mozzarella cheese

Directions

  1. Preheat oven to 375°F and place baking rack in the lower position.
  2. Make zucchini lasagna “noodles”. Cut squash into 1/8″ thick slices using a sharp knife or mandolin.  If your squash is long they should fit the pan lengthwise, if you have shorter squash, orient the slices in the opposite direction. You should have enough slices to do four to five layers with a few extra pieces for good measure.
  3. Heat a grill pan or an outdoor grill to medium high heat. Brush both side of the slices lightly with olive oil.
  4. Grill the zucchini slices on both sides so they have grill marks, 3-5 minutes for the first side, a little less for the second side. Squash should be cooked but not falling apart. Line up the grilled zucchini slices on a paper towel lined baking sheet to absorb excess moisture.
  5. Heat a large saute pan over medium high heat and add 1 tablespoon olive oil. When the pan is hot add the onion and cook until onion is softened but not browned, 4-5 minutes. Lower the temperature if necessary. Add the garlic and cook another minute. Add the ground meat and season to taste with salt. Brown the meat, breaking it up as you cook it.
  6. Slowly pour in the tomato sauce and stir it into the meat. Bring to a boil and immediately reduce heat to medium. Add tomato paste, oregano, salt and pepper. Simmer on low, stirring occasionally for about 40 minutes. Cover and set aside.
  7. In a medium bowl combine ricotta, Parmesan and egg. Mix well.
  8. Assemble the lasagna. Lightly oil or spray a 9 x 12 glass or ceramic baking dish.
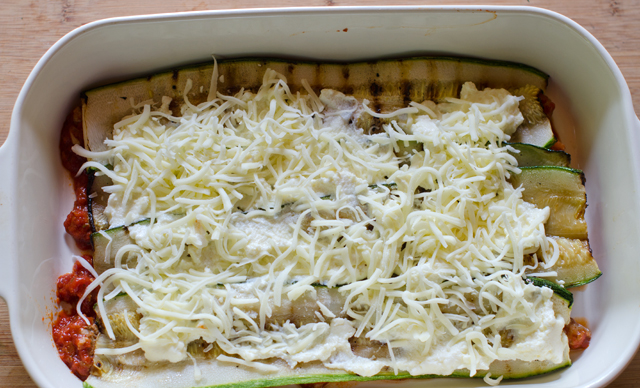
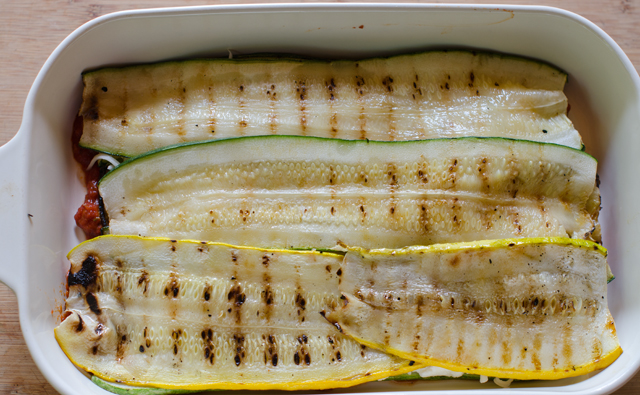
  9. Spread a light layer of the tomato sauce on the bottom of the pan. Layer zucchini slices over to cover. Spread one-third of the ricotta mixture over the zucchini and top with a cup of the mozzarella. Repeat the layers two more times, sauce, “noodles”, ricotta mixture topped with mozzarella. Top with noodles and the remainder of the sauce. Cover the baking dish tightly with foil and bake for 30 minutes. Uncover the foil and bake for an additional 20 minutes to dry up excess liquid. Sprinkle the last cup of mozzarella over the top and bake until melted, about 15 minutes. Let lasagna rest for a half hour to allow it to firm up and make for easier slicing.
Slices made with my stainless steel mandolin, a gift from many years ago, I have other inexpensive ones too.

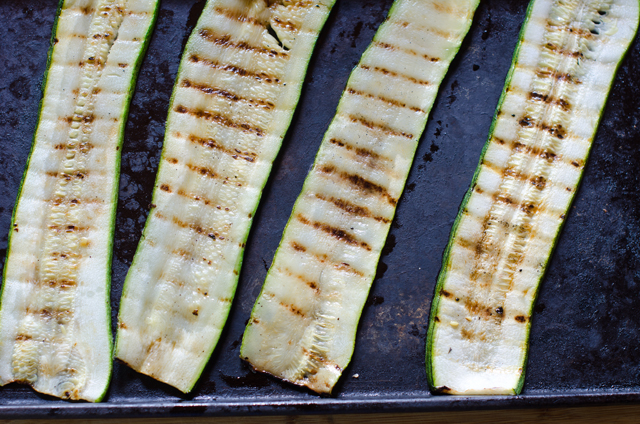
Zucchini slices cooked in the grill pan.

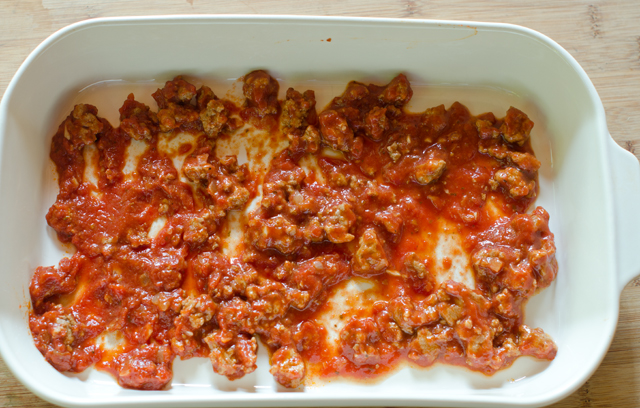
Meat sauce to cover the bottom of the baking dish.

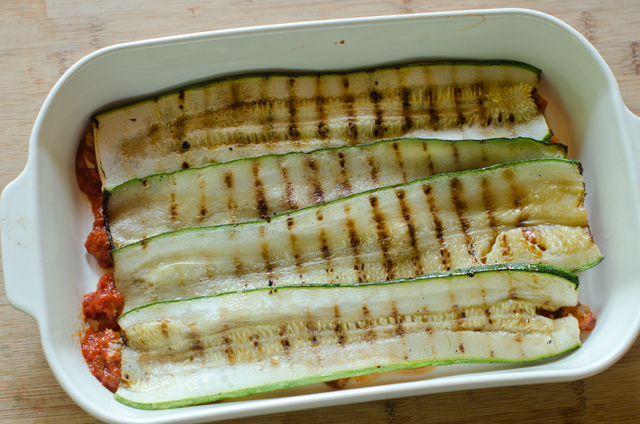
Grilled zucchini slices to cover.
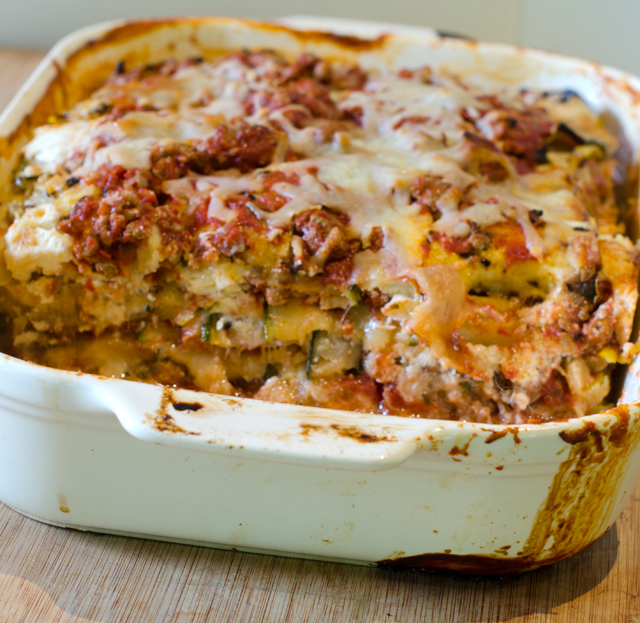
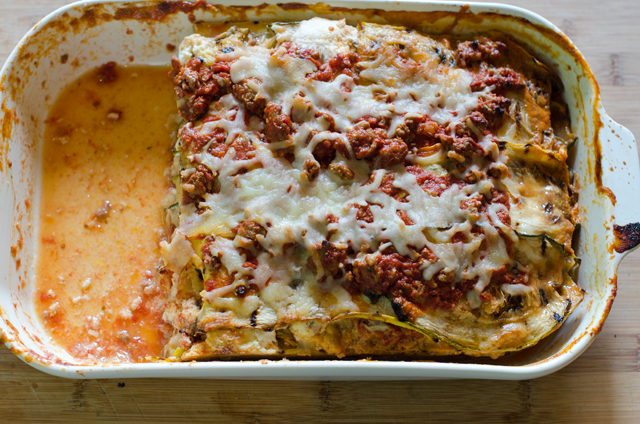
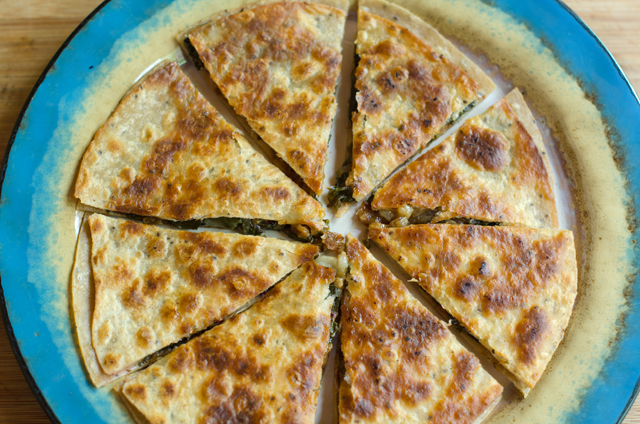
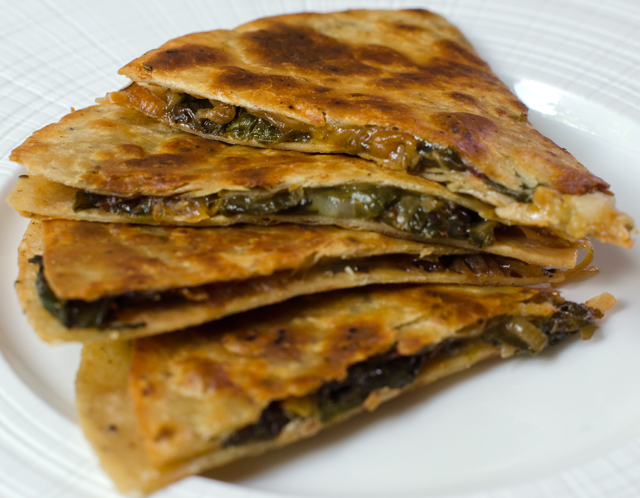
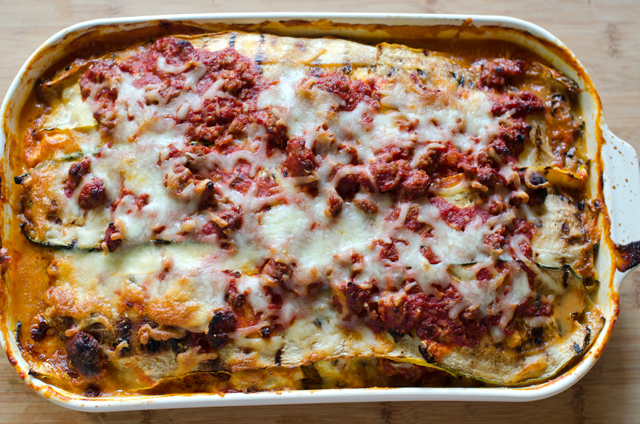
A layer of cheese.
Another layer of zucchini noodles. Repeat the process with the sauce.
The finished product.

Delicious!

July 21, 2017 Spicy Chipotle Shrimp with Zucchini and Chorizo


Spicy chipotle shrimp with chorizo and zucchini is an entrée that is flavorful, easy to prepare and uses only one pan. If that isn’t enough, it’s a great way to use that July abundance of zucchini and yellow squash from your garden or farmers market.

I always have some frozen shrimp on hand for a quick dinner. Though my local seafood market on occasion has fresh (never frozen) Florida shrimp, in my area of the country (mid-Atlantic) frozen shrimp is not a bad thing. The shrimp you see sitting on ice at the supermarket seafood counter have been thawed out. Convenient yes, but you can’t be certain how long they have been sitting there. I prefer to buy individually quick frozen (IQF) shrimp in 1 or 2 pound plastic bags, then I can just defrost what I need in 15-20 minutes. I prefer larger shrimp because there is less of a chance to overcook them. Look for the count of shrimp per pound, in this case 21-25 count, rather than a size designation like extra-large or jumbo.

Easy peel, meaning the shell is split down the back and deveined is the easiest way to make this or any recipe calling for shrimp. Always devein shrimp before cooking, many an eliminated Chopped contestant rues the day they didn’t. It’s not hard to do, either use a small pairing knife or the tool specifically made for that purpose. It’s not actually a vein but the shrimp’s digestive tract and when it is dark in color,  it is filled with grit. Removal is not essential, nor will it make you ill, deveining just makes for a more attractive presentation.

Pat the shrimp completely dry with paper towels before cooking. Any extra moisture on the surface of the shrimp prevents them from searing and browning. Preheat your skillet for a few minutes before adding the oil. Wait a minute until the oil is shimmering before adding the shrimp. Place the shrimp in a single layer, leaving a little space between each. Don’t be tempted to flip the shrimp too soon, give them time to brown on the first side, a little pink will start to show, now flip. You want the shrimp to be slightly underdone since they will be added back to the pan later.

Transfer the shrimp to a plate, add the second 2 tablespoons of oil to the pan along with the diced chorizo. Spanish chorizo is a dried and cured (fully cooked) pork sausage seasoned with smoked paprika, garlic and other herbs. There is also Mexican chorizo that comes in casings and must be cooked before eating. It is used in tacos, tortillas and often served at breakfast with eggs. I would definitely say that the Spanish chorizo is the best choice here.

Add the cubed zucchini, onion and yellow squash, cook until the zucchini starts to brown, 3-4 minutes. Now it’s time to add the broth mixture. A chipotle chili and adobo sauce give it a real kick and the tomato paste and brown sugar mellow out the heat. Chipotles are small jalapeños that are dried by a smoking process that gives them a dark color and a distinct smoky flavor. They are canned in a red sauce, adobo, that has a smoky flavor as well. Start with the quantity given in the recipe and if you really like it hot, add a little more. Just remember it’s easier to add heat than take it away. Since you will not be using the entire can, store the remaining chilis in adobo in a well labeled plastic container or zip-loc bag in the freezer. I wasted too many opened cans of chilis before I got in this habit.

Bring the sauce to a boil, then reduce it to medium low and add the shrimp back in along with the lime juice and parsley. Cook for an additional 2-3 minutes, the zucchini should be tender and the shrimp opaque throughout. You can check for doneness by cutting a shrimp in half at its thickest point. It should be creamy white, firm and springy but still moist. You can add some strips of red pepper to the recipe and swap out cilantro for the parsley. Give a final seasoning with salt, pepper and more lime juice. Serve immediately garnished with the rest of the parsley on a bed of rice.


Spicy Chipotle Shrimp with Zucchini and Chorizo

Serves 2-3

Ingredients

  • ½ c low-salt chicken broth
  • ½ small chipotle, seeded and minced, plus 2 T adobo sauce (from a can of chipotles in adobo
  • 1 T tomato paste
  • 1 t brown sugar
  • 1 lb shrimp (21-25 per lb), peeled, deveined, rinsed and patted dry
  • 1 t kosher salt; more as needed
  • Freshly ground black pepper
  • ¼ c olive oil, divided
  • ¼ lb chorizo, cut into ¼ inch dice, a little less than a cup
  • 3 c combination of zucchini and yellow squash, cut into ½ inch dice
  • 1 cup thinly sliced yellow onion
  • ¼ c chopped parsley or cilantro
  • 2 T fresh lime juice; more as needed

Directions

  1. In a one cup measure, whisk together chicken broth, chipotle, adobo sauce, tomato sauce and brown sugar.
  2. Sprinkle the shrimp with a ¼ t salt and a few generous grinds of black pepper. Put a skillet (not non-stick) over medium high heat, when the skillet is hot, add 2 tablespoons oil. When it starts to shimmer, add the shrimp in a single layer. Cook the shrimp undisturbed until it browns nicely, a little less than 2 minutes. Flip and brown the shrimp on the other side, about 1 ½ minutes. Transfer the shrimp to a plate, it should be slightly under cooked.
  3. Add the remaining 2 tablespoons oil and the chorizo to the pan and cook, tossing occasionally, until it starts to brown, about 1 minute. Add the zucchini, yellow squash and onion, sprinkle with a little salt. Cook, tossing frequently, until the zucchini starts to brown and is tender, about 4 minutes.
  4. Add the broth mixture to the skillet and bring to a boil. Reduce the heat to medium low. Stir in the shrimp, half of the parsley and the lime juice.
  5. Cook, stirring often, until the zucchini and squash are tender and the shrimp are opaque, 2-3 minutes. Cut one in half to check if necessary. Season to taste with salt, pepper and more lime juice. Serve immediately, sprinkled with the remaining parsley.
One day’s pick of zucchini and yellow squash.


July 15, 2017 Tomato Salads

This is a space to record Joe’s creative tomato salads throughout the summer. The pictures won’t always be the best since they are taken in the kitchen. Just a way to commemorate these wonderful salads.

July 10 salad – Sun Gold, Gold Nugget and Super Sweet tomatoes, raspberries, purple basil, mozzarella with peach vinegar and blood orange olive oil.

July 12 – Sun Gold tomatoes, ricotta and purple basil with peach vinegar and blood orange olive oil.

July 15 – Super Sweet 100’s, Sun Gold, Gold Nugget, Snow Cherry, Chocolate Cherry, Fourth of July, mozzarella, purple basil, raspberries, blueberries, Cascadian raspberry vinegar, Persian lime oil.

July 16 – Brandywine, Sun Gold, Super Sweet, Gold Nugget, Snow Cherry, Chocolate Cherry, purple basil, mozzarella, ricotta, Parmesan, purple basil, Cascadian raspberry vinegar, Persian lime oil.

July 17 – Fourth of July, Gold Nugget, Snow Cherry, Super Sweet, burrata, Persian cucumbers, purple basil, Cascadian raspberry vinegar, Persian lime oil.

August 14

August 16

August 17

July 12, 2017 Swiss Chard Quesadillas

Tuesday evening is Joe’s night to work late and although we don’t sit down for dinner when he comes home, I like to have a little snack ready. We sip a little wine, catch up on the days activities, maybe watch some television in the kitchen. This quesadilla was inspired by what I had in the fridge and the garden that summer evening. I have used spinach in a quesadilla in the past, why not some Swiss chard this time? A little sweet onion, sautéed until caramelized would be a good contrast to the earthy flavor of chard. All I needed now was a wrapper and some queso. I didn’t have tortillas on hand but I did have some sandwich wraps that could fill in. I always have several varieties of cheese in the fridge, the sharp flavor of cheddar worked well here.

We are still in the process of thinning the chard plants out. They are supposed to be 9-12 inches apart so it didn’t take long to pick what I needed. The chard is still relatively young so it wouldn’t need the long cooking that late summer chard does. I discuss basic chard preparation in this post. I also used some of the finely chopped stems for texture and their brilliant color.

I think a sweet onion works best with this flavor combination. I used a Vidalia, but whatever variety your market is featuring this week is fine. Sweet onions are low in pyruvic acid, the component that makes your eyes tear. I recently read that one of the best ways to store Vidalias is wrapped separately in a paper towel and stored in the refrigerator. I will be trying this method out.

If you are making a quesadilla you can’t forget the queso. If you prefer not to use cheddar, a Jack cheese would be a good choice too. I served the quesadillas plain, sour cream or a tomatillo salsa would be a good accompaniment. Next time I might add a few slivers of pickled jalapeno to the mix. Cooked black beans would be a good addition or some sautéed mushrooms. This recipe is just based on what I had on hand that evening. Golden crisp on the outside with healthy greens, a little sweetness from the onion with the creaminess of cheddar, this is a winning combination for a quick and delicious light meal or snack.


Swiss Chard Quesadillas

Makes two 8″ quesadillas

Ingredients

  • 16-18 medium to small chard leaves
  • 1 medium sweet onion
  • Extra virgin olive oil
  • Butter
  • Tortillas or wraps
  • ½-1 cup shredded cheese, I used cheddar, mozzarella or jack works too

Directions

  1. Wash chard leaves in several changes of water. Separate the chard leaves from the stems. Chop the leaves roughly. You should have 5 cups loosely packed leaves and ½-1 cup finely diced chard stems.
  2. Heat a tablespoon of olive oil in a 10 inch non stick skillet over medium high heat. Add stems and a sprinkle of salt and cook until softened, 3-4 minutes.
  3. Add the chard leaves and the water that still clings to the leaves and cook until wilted. Add a tablespoon more of water if necessary to wilt the leaves. Move stems and leaves to a plate and keep warm.
  4. Slice a medium onion very thinly, a mandolin or food processor is good for this. You should have 3 cups loosely packed thin slices.
  5. Wipe out the pan, add another tablespoon of oil and heat over medium high heat, cook onion until softened and brown. Reduce heat to medium if necessary. This should make about 1 cup of caramelized onion.
  6. Let the skillet cool off a bit and wipe out with a paper towel. Over medium high heat melt a teaspoon or so of butter and a little olive oil. When the butter is melted, add the first wrap or tortilla, spread out one half of the chard over this as evenly as possible.
  7. Evenly spread the cooked onions over the chard and then sprinkle the cheese over. Place the second wrap over the cheese and press down with your hand or a spatula to melt the cheese and make it adhere.
  8. Cook for 2-3 minutes on the first side, it’s okay to peek to make sure it isn’t browning too much. With the help of the spatula, flip and cook on the other side, about 2 minutes, adding a little more butter and oil if necessary.
  9. Move the quesadilla to a platter and keep warm, repeat cooking process with the second quesadilla. Cut quesadillas into wedges 4 to 8 pieces as desired.  Serve warm.
Chop the stems.
Sweet onion sautéed until golden brown.
Sautéed chard and stems are first to go on.
Then the sautéed onion.
Then a sprinkling of cheese.
A second tortilla or wrapper in my case, goes on top. Press down to help the cheese adhere. This was taken after this first quick flip.
Let it get golden brown.

July 4, 2017 Quick Pickled Baby Beets

The hot days of July are upon us so it’s time to harvest the root crops planted in early spring. that are still in the ground. We said good-bye to the radishes several weeks ago after the first heat wave of the summer. Warm temperatures cause radishes to bolt and become woody in texture. They will be planted at the end of summer for a fall harvest. The first planting of Japanese turnips have been harvested and now it’s time to harvest the rest of the beets.The”life cycle” of our beet consumption began with very small thinnings we add raw to our salads. The second thinning produces slightly larger leaves the size of spinach that are sautéed in olive oil with a little garlic and red pepper flakes for a wonderful side dish. Baby beets are sliced as thinly as possible or julienned and added to green salads.The Chiogga beets look pretty in salads, a slice looks like a candy cane bulls-eye and the Golden beets bring a pop of bright yellow.

I love beets, especially pickled ones. I have canned pickled beets in past summers for long storage, this year I thought I would make refrigerator pickles. Quick pickled baby beets couldn’t be simpler to make. These refrigerator pickles require very little prep and they are ready to eat after a few hours in the brine. Divide your beets by colors or they will bleed into each other. The brine is a touch sweet with a little spice. These pickles will last for several months in the refrigerator.

Just picked beets from the garden.
After a good clean up.


Quick Pickled Baby Beets

Makes 2 pint jars

Ingredients

  • 1 lb baby beets,  separated into colors
  • 1 c white wine vinegar
  • 2 t kosher salt
  • ½ c sugar
  • 2 T honey
  • Fresh ginger slices
  • 1 t coriander seed
  • 1 t black peppercorns
Trimmed and ready for pickling.

Directions

  1. Wash beets well, trim off the leaves and leave about an inch of stem on the beets. Separate beets into colors if you don’t want them to bleed into each other.
  2. Bring a medium pan of water to a boil. You can put all the beets of one variety in the pan, start checking the smaller beets at the two minute mark. Beets should be easily pricked with the tip of a knife, larger beets will take a few more minutes.
  3. Drain beets well in a colander. Place in a heat proof container like a canning jar, separating out the varieties.
  4. Combine vinegar, salt, sugar, honey and spices and bring to a boil. Pour the hot canning liquid over the beets and set aside to cool. Once cool, store in the refrigerator.


June 28, 2017 Sour Cream Ice Cream

When we first moved to our Windy Bush road property thirty years ago, we were always on the lookout for new plantings to add to our new homestead. Joe bought various fruit trees and started a vegetable and herb garden.

Back then we found interesting herbs at a yearly plant sale at the Churchville Nature Center. Gardeners are very generous people and a fellow plant and herb enthusiast offered us some raspberry bushes in exchange for some scented geraniums from Joe’s collection. We took her up on the offer and Joe planted the bushes in the vegetable garden. As the variety of the vegetables and herbs increased in the garden, we needed to find a new location for the raspberry bushes. Joe cleared a new area, not just for raspberries, now also including golden and black varieties, but for strawberries, blueberries, currants and blackberries as well.

Back in the original location where the raspberries were planted, a small piece of one of the bushes was left behind. Surprisingly, or maybe not, this small bush not only grew but thrived over the years. The transplanted bushes were fruitful for a time but eventually died off. Over the years we have put in more bushes but none has been as productive as that original planting that was never moved. For years Joe would cut it back, but it kept coming back stronger each year. We finally gave in and the bush is getting larger and is putting out beautiful plump red berries. I used to look for berries around the fourth of July, this crop started in mid June and will produce another harvest in August.

We enjoy them right off the vine, of course but I was looking for another way to enjoy this special treat. While picking one day my thoughts first went to crème fraîche but decided that a sour cream ice cream would be the perfect foil for these berries. The recipe I found for sour cream ice cream on Epicurious was originally from Gourmet magazine, July 2009 and was contributed by Ian Knauer. I met Ian several years ago at our local farmers market where he was signing copies of his cookbook, The Farm, subtitled, “rustic recipes for a year of incredible food.” The Farm is a cooking school in Stockton New Jersey, about twenty minutes from our home. Making a mental note to check it out sooner rather than later.

This is a very easy recipe, especially if, like me, you have made custard based ice creams in the past. Custard ice cream, although very delicious, requires a watchful eye to carefully temper the eggs with the cream and milk. One false move and you will have sweetened scrambled eggs.

This recipe is a Philadelphia style ice cream, which means it contains cream and/or other dairy products, a flavor base, but no eggs. All of the ingredients are whirled together in a blender, chilled well and churned in the ice cream maker. The sour cream makes it tangy and pairs well with any summer berry. I served it with toasted pound cake.

Raspberries in various stages of ripeness on the vine.
Beautiful raspberries from the garden.

Sour Cream Ice Cream

Makes about 5 cups

Ingredients

  • 1-16 ounce container sour cream
  • 1 c chilled half and half
  • ¾ c sugar
  • ½ c chilled heavy cream
  • 2 t fresh lemon juice
  • ½ t vanilla extract

Directions

  1. Puree all ingredients with 1/8 teaspoon salt in a blender until mixture is very smooth and sugar is dissolved. Chill until very cold.
  2. Freeze mixture in an ice cream maker. Transfer to an airtight container and put in freezer to firm up, about 6 hours.
Everything is whirred together in a blender.
After the mix is well chilled in the refrigerator, it is churned in an ice cream maker.
The Tovolo “Glide-A-Scoop ” ice cream storage container makes it easy to make a perfect scoop every time.

June 13, 2017 Green Harissa

Harissa is a spicy and aromatic chili sauce, commonly found in the cooking of the North African countries of Tunisia, Morocco and Algeria. The basic recipe calls for hot peppers, garlic, salt, olive oil and spices. This version from Vedge , a vegetarian restaurant in Philadelphia, uses green jalapenos, onions, garlic, a generous amount of fresh cilantro, along with dried coriander and cumin. Cilantro haters can substitute parsley or half parsley and half fresh spinach. Some mint might be interesting in the mix.

The original recipe called for 2 jalapenos, one was enough for my palate, remember you can always add more heat, it’s harder to take it away. It’s a good idea to wear gloves when handling chilies. Chili oil on sensitive parts of your body (hands, lips, eyes etc.) will burn for a long time. Chili oil is not water soluble, it’s fat soluble. So if you get some on your hands, rub some cooking oil into your hands before washing with soap and water.

Serve green harissa as a sauce for grilled vegetables and fish, lamb burgers, an unconventional taco topping, the possibilities are endless.

Green Harissa

Makes 1 cup

Ingredients

  • 2 c loosely packed cilantro leaves
  • 1 c finely chopped onion
  • 2 garlic cloves
  • 2 jalapeno peppers, stems and seeds removed
  • 2 T or more olive oil
  • 2 T rice wine vinegar
  • 1 t ground coriander
  • 1 t ground cumin
  • 1 t salt
  • 1 t freshly ground black pepper
  • 1 t sugar
Cilantro in the greenhouse.


Directions

  1. Combine all of the ingredients in a blender and blend until smooth

June 11, 2017 Carrot Top Pesto

Spring is an ideal time for planting root vegetables like turnips, beets and carrots. They especially love the cooler temperatures that we have been blessed with this spring. We try to be frugal with seeds, so the ones that aren’t planted are saved from season to season. I catalog them alphabetically like a card file in clamshell plastic containers that in a previous life held spinach or lettuce from a big box store. I use 3×5 cards to separate them into specific categories, beets, cucumbers, fennel etc. This year I even did a little clean up, getting rid of all packets before 2013.

Last year a friend gave Joe quite a few packets of carrot seeds he purchased on sale. Some were planted but most went into storage in the fridge over the winter. He wasn’t certain how many of them would germinate this season so he planted them very densely. As luck would have it, every carrot seed germinated.  Now it was time for some serious thinning.

Thinning is a necessary step in vegetable gardening if you want to have mature healthy plants. This can be done in stages. Armed with my Cutco scissors, I did the first thinning when the plants were about four inches tall. Pulling out the unwanted seedlings can often pull out the ones you wanted to leave growing. I snipped the plants at the soil line. With a colander full of the lacy feathery tops I thought about how I could use them. I remembered that parsley and carrots are related so I tasted a few of them. They have an herbaceous flavor, that to me was reminiscent of parsley.

I have made pesto with basil and arugula, why not carrot tops? I used a basic formula that I have used to make other types of pesto, herbs or a green, in this case carrot tops, garlic, nuts, a hard cheese and olive oil. Baby carrot greens are more delicate in flavor and are a special reward for the gardener. Organically grown full-sized carrot greens can be used too, eliminating any thick stems. I used my pesto as a topping for roasted salmon. It would work with chicken breasts and of course, roasted carrots.

Time to thin the carrots.
The first thinning of carrot greens.

Carrot Top Pesto

Makes about a cup

Ingredients

  • 3 cups lightly packed carrot tops
  • 1 clove of garlic
  • 3 T pine nuts
  • ¼ c extra virgin olive oil, more if needed to make a paste
  • ¼ c grated Parmesan cheese
  • Kosher salt and pepper to taste

Directions

  1. Place the carrot tops, garlic and pine nuts in the bowl of a food processor.
  2. Pulse until coarsely chopped. With the motor running, slowly add olive oil until a paste forms. Add cheese and pulse several times to combine.
  3. Season with salt and pepper to taste. Use immediately or cover tightly with plastic wrap and refrigerate for up to 2 days.

June 4, 2017 Arugula and Snow Pea Shoot Salad

I am pleased to say that the weather this spring  has cooperated with Joe’s spring plantings. Many years spring  has brought just a little cool weather followed by a blast of 90 degree plus temperatures that we never recover from. We have had our share of rain, but only one heat wave ( 3 consecutive days of 90° heat)  in May.

The cool, occasionally rainy weather makes for plump healthy radishes, too much heat and they become tough, pithy and hot. This week I picked the first harvest of beautiful crimson red, pink, purple and white Easter Egg radishes. Joe does consecutive plantings of quick-growing crops like radishes, arugula and salad greens so that they aren’t all ready to harvest at once.

Peas are one of the first seeds we plant in the garden, not just for the edible pods, we also reserve one section to harvest for the shoots alone. The round leaves and wispy tips are reminiscent of a green butterfly. To harvest I pinch off the tender tips, the top several leaves and the tendril that ends the vine, in turn they will send out new growth for the next harvest in several days.

This salad combines the best of spring, spicy arugula, snow pea shoots, crunchy sweet radishes from our garden and kohlrabi from the local farmers market. I accented the salad with some toasted hazelnuts and creamy French feta. For this vinaigrette I combined champagne vinegar, Dijon mustard, shallot, a touch of honey and extra virgin olive oil. When making a salad be sure to use a bowl that gives you plenty of room to toss your ingredients. I start by tossing the greens with dressing to coat them lightly, then I add some of the other ingredients and toss again. I leave the rest to top the salad with, this ensures that the last person who is served doesn’t get all the heavier ingredients that end up in the bottom of the bowl.

A cool spring makes for nice plump radishes.
Mature arugula
More arugula, but not as mature.
Snow pea shoots

Arugula and Snow Pea Shoot Salad

Serves two

Ingredients for the Salad

  • 4 c snow pea shoots
  • 4 c arugula
  • 4-5 medium radishes, thinly sliced
  • 1 c kohlrabi, peeled and cut into matchstick julienne
  • ¼ c toasted hazelnuts
  • 1/3 c crumbled French feta

Ingredients for the Vinaigrette

  • 2 t champagne vinegar
  • ½ t honey (more to taste)
  • ¼ t Dijon mustard
  • ½ t finely chopped shallot
  • ¼ c extra virgin olive oil
  • Kosher salt and freshly ground pepper to taste

Directions

  1. To make the dressing, combine all the ingredients in a small bowl and whisk together until evenly combined. Taste and adjust seasonings if necessary. Season to taste with kosher salt and pepper.
  2. Place the arugula and snow pea shoots in a large bowl and toss with some of the vinaigrette and taste. Add about half of the other ingredients, toss again, adding more of the dressing if necessary. Top the salad with the remaining ingredients. Season each portion to taste with freshly ground black pepper.


May 30, 2017 Baked Halibut with Bouillabaisse Sauce and Green Olive Tapenade

Fish is on the menu at our house three nights a week and though the method of cooking is usually the same, I am always looking for new ways to complement it. This recipe, Baked Cod Fillet with Bouillabaisse Sauce with Green Olive Tapenade from the April issue of Food and Wine seemed to fit that bill. It combines the classic flavors of bouillabaisse: fennel, garlic, saffron and tomatoes, to make a delicious sauce along with a quick briny olive tapenade.

The origins of bouillabaisse can be traced as far back as the ancient Greeks and was the humble fare of fishermen in Provence, specifically from the port city of Marseille. The best of the catch would be sold to restaurants while the less desirable bony rockfish and shellfish would become part of the fisherman’s dinner, a stew cooked with sea water and simmered over an open fire. Bouillabaisse has come a long way since then to become one of the most iconic French dishes.

The first step of the recipe is to chop the fennel, leek, onion and celery. This can be done by hand or a food processor makes quick work of this step. Just be certain that all pieces are relatively the same size to ensure even cooking. Sauté the vegetables over medium heat until softened then add the garlic and saffron. Saffron adds a subtle flavor and aroma and its beautiful golden color. At about forty dollars a bottle, Pernod is an ingredient I could not justify buying since I was only using a few tablespoons. It adds a subtle anise flavor so if you have some on hand, by all means use it. Add dry white wine and vermouth to the pot and reduce the liquid by half. Next into the pot are halved and smashed cherry tomatoes, grape tomatoes are an acceptable substitute here.

The next step is to make fish stock. I am fortunate to have an outstanding fish market that supplies me with fish bones and heads needed for stock making. If making fish stock would stop you from making this recipe, substitute clam broth or  fish bouillon.  Always taste products like this first, since they can be salty. After the sauce cooks, cool slightly and carefully discard the fish bones if using. Use an immersion blender to puree the sauce then pass it through a food mill into a sauce pan. Keep the sauce warm over low heat.

The green olive tapenade is very easy to do and adds a briny contrast to the rich sauce. Cook the fish according to your favorite method, we use the Canadian fisheries method with consistent results. The sauce and the tapenade can be made several days ahead making this an impressive recipe for entertaining.

Baked Halibut with Bouillabaisse Sauce and Green Olive Tapenade

Serves four

Ingredients for the sauce

  • 4 T extra virgin olive oil, divided
  • 1-1 lb fennel bulb, trimmed and finely chopped
  • 1 large leek, trimmed and finely chopped, white and light green parts only
  • 1 medium white onion, finely chopped
  • 2 celery ribs, finely chopped
  • 2 garlic cloves, finely chopped
  • ¼ t saffron threads
  • 2 T Pernod or pastis (optional)
  • ¾ c dry white wine
  • ¾ c dry vermouth
  • 1 pint cherry tomatoes, halved and smashed
  • ½ t smoked paprika
  • 2 lbs white fish bones, rinsed and dried
  • 2 t fresh lemon juice (plus more for drizzling)
  • Kosher salt
  • Four 6-oz. white fish fillets like cod, halibut, grouper

Directions for the sauce

  1. In a large enameled cast-iron casserole, heat 2 tablespoons of the olive oil. Add the fennel, leek, onion and celery and cook over moderate heat, stirring occasionally until the vegetables are softened, about 8 minutes.
  2. Stir in the garlic and the saffron and cook until fragrant, about 2 minutes
  3. Add the Pernod (if using) and cook until the liquid has evaporated, about 2 minutes. Add the wine and vermouth and cook until the liquid is reduced by about half, about 8 minutes. Add the tomatoes and paprika and simmer over medium heat until the liquid is reduced by half, about 5 minutes.
  4. In a large skillet, heat 2 tablespoons of the olive oil. Add the fish bones and cook over medium high heat, turning once, about 5 minutes.
  5. Transfer the bones to the casserole and add two cups of water. Cover partially and simmer over moderately low heat for 30 minutes. Let the sauce cool slightly then discard the fish bones.
  6. Using an immersion blender puree the sauce, then strain through the fine mesh of a food mill into a medium saucepan. Add 2 teaspoons lemon juice, season with salt and keep warm.

Ingredients for the Green Olive Tapenade

  • ¼ c green pitted olives
  • 2 T rinsed and drained capers
  • 2 T flat leaved parsley
  • 2 T extra virgin olive oil
  • 1 ½ T fresh lemon juice
  • kosher salt and freshly ground pepper

Directions for the Green Olive Tapenade

  1.  Place the first five ingredients in the bowl of a mini food processor and pulse until combined and roughly chopped. Season to taste with salt and pepper.

Cooking the Fish

  1. Preheat oven to 450°F.
  2. Coat a shallow baking dish with non stick spray. Season the fish fillets with salt.
  3. Measure your fish fillets at the thickest point. Bake the fish for 10 minutes for every inch of thickness.

Finishing the Dish

  1. Ladle the sauce into 4 shallow bowls and top each one with a cod fillet Spoon the tapenade over the fish. Drizzle with more olive oil and lemon juice. Serve immediately.