May 17, 2017 Spinach and Butternut Squash Salad

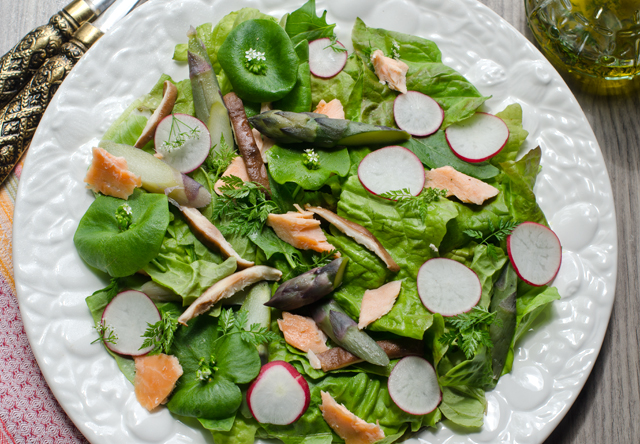
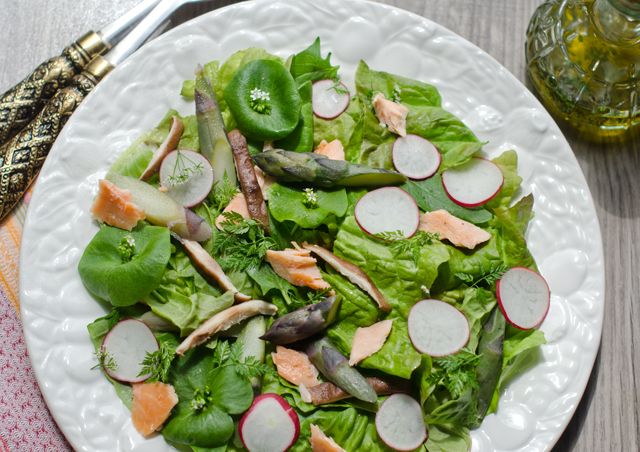
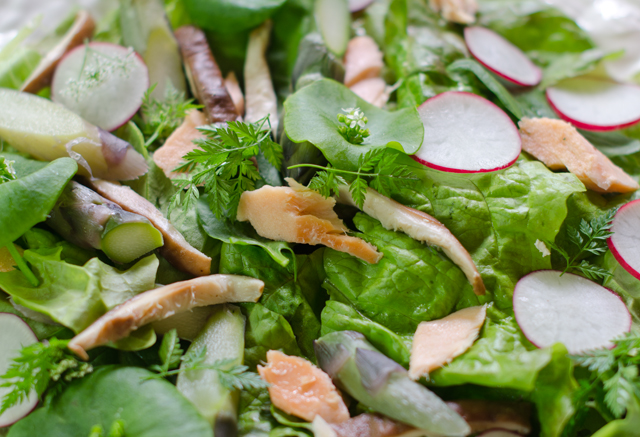
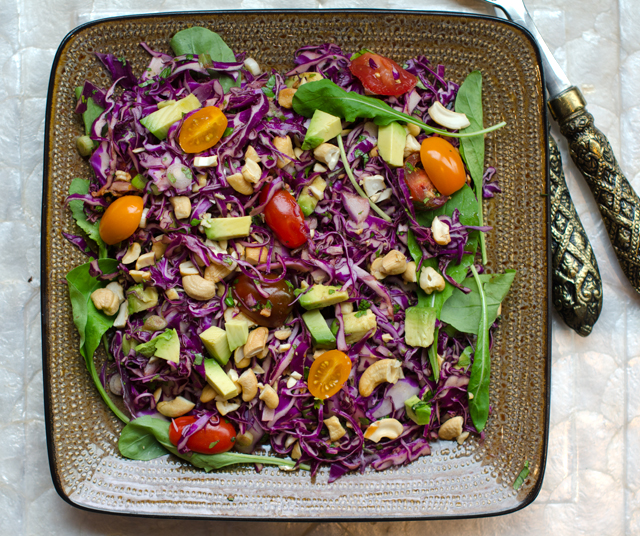
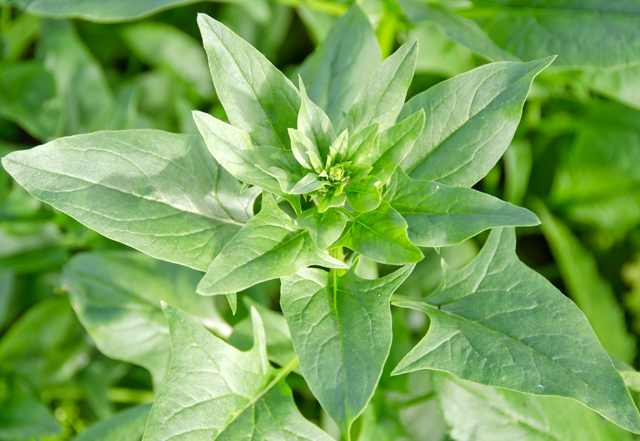
Spinach and butternut squash salad certainly isn’t the first thing that comes to mind when you think of a spring dish, but right now it makes perfect sense to me. I still have a few squash to use from last fall’s harvest and spinach plants that still have some nice leaves to offer before they go to seed.

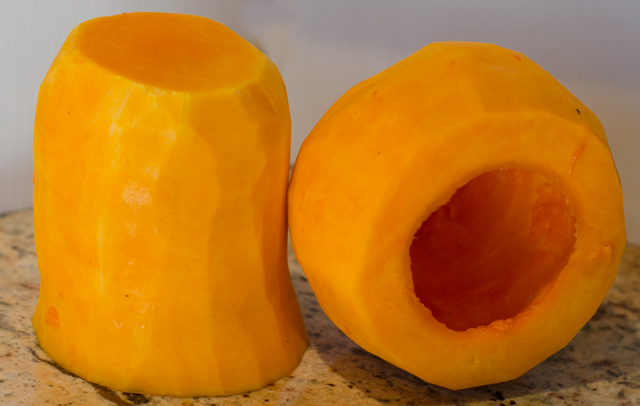
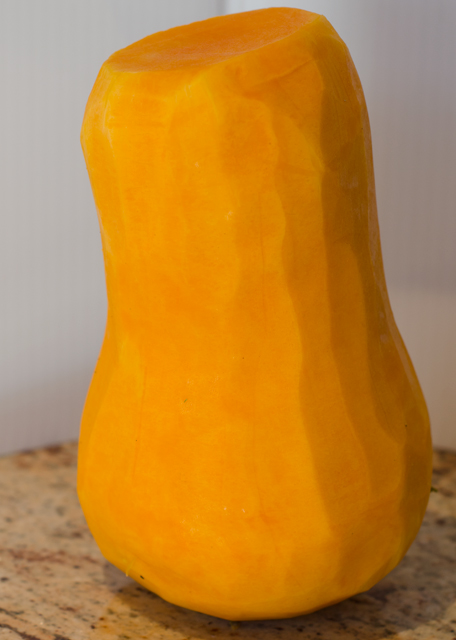
Begin the recipe with a medium-sized squash, 2 to 2 ½ lbs, using a sharp knife, cut off a half-inch piece at the stem and base ends. Cut the squash in half where the neck meets the bulb. I find it easiest to use my Kuhn Rikon peeler to remove not only the skin but also the white flesh and green fibers below the surface, the peeled squash should be completely orange. Scoop out the seeds, I like to toast mine for snacking and can also be used to garnish salads and soups. Cut the squash into 1 inch cubes, they will shrink during the roasting process. Toss the cubes with olive oil and spread them out evenly on a lined baking sheet and season with salt and freshly ground pepper.

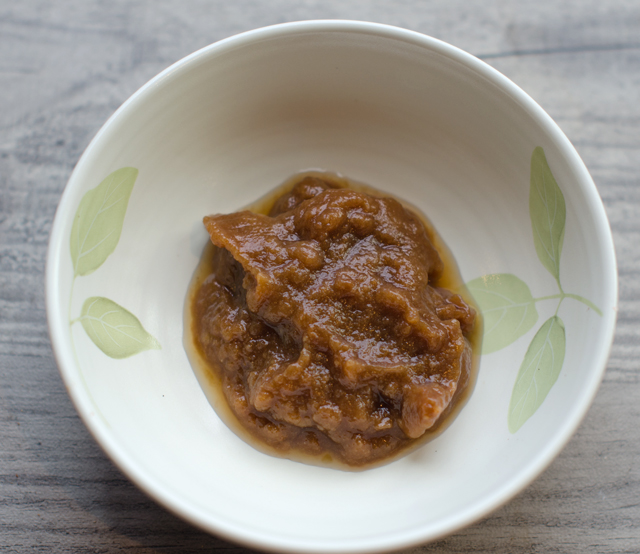
While the squash cubes are roasting, make the warm bacon dressing. Fry four slices of bacon in a large skillet until crispy. Place the cooked bacon on a paper towel lined plated to drain. Pour off the bacon fat into a metal bowl, the hot oil might melt a plastic bowl.  In the residual fat that is left in the skillet, saute a medium chopped shallot until soft. Stir in the other dressing ingredients along with some of the warm bacon fat, keep over very low heat.

Place the spinach leaves in a large bowl and toss with the warm dressing. I prefer to place the other ingredients on top of the individual salads rather than tossed with the spinach, since they are heavier and inevitably sink to the bottom. Rather than the traditional fall version of this salad that would include dried cranberries or pomegranate arils, I added some thin strips of roasted pepper. I used toasted pecan halves, some creamy feta, and some of the bacon crumbled on top to complete the salad. Make it your own with toasted walnuts or butternut squash seeds and crumbled Roquefort instead of the feta.


Spinach and Butternut Squash Salad

Serves two

Ingredients for the Salad

  • 5-6 cups of spinach
  • 1 medium butternut squash
  • 1 T or more of extra virgin olive oil
  • ½ c toasted pecan halves
  • ¼ c roasted red pepper slivers
  • 1/3 c crumbled feta
Spinach that is going to seed but perfectly good enough for a salad.
Peeled whole butternut squash.

Ingredients for the Dressing

  • 4 slices of bacon
  • 1 medium shallot
  • ¼ c apple cider vinegar
  • 1 t Dijon mustard
  • 1 T or more honey
  • Kosher salt and freshly ground pepper

Directions for the Salad and Dressing

  1. Preheat oven to 400°F convection or 425°F standard. Line a large baking sheet with parchment or aluminum foil.
  2. Peel and seed the squash, cut it into 1 inch cubes. In a large bowl toss sure even browning. Set cubes aside to cool. You will have enough for several days worth the squash with olive oil and place evenly on the prepared baking sheet. Season with salt and pepper. Roast until golden brown, about 20 minutes, at the halfway point carefully move the cubes around on the sheet to enof salads.
  3. In a large frying pan, cook bacon over medium high heat until crisp, about 5 minutes. Transfer to a paper towel lined plate and pour the bacon fat into a small metal bowl.
  4. Cook the shallot in the same pan until soft, 4 minutes. Stir in vinegar, mustard and honey and mix well. Whisk in two tablespoons of the bacon fat and stir to combine. Season with salt and pepper.
  5. Place the spinach leaves in a large bowl and toss with the warm dressing. Divide the salad onto two plates. Top each with about a half cup of butternut squash cubes, pecan halves, pepper strips, feta and some of the crumbled bacon. Season to taste with freshly ground pepper.

May 11, 2017 Spring Salad

Saturday morning was the first local outdoor farmers market of the season and I was ready to seek out some old favorites, and gain a little inspiration for a salad to accompany that night’s dinner. Local for me is the Wrightstown Farmers Market, about three miles from our house. It is held every Saturday, rain or shine from the first Saturday in May to the Saturday before Thanksgiving. The hours are from 9 to 1 but there was already a sizable crowd when I pulled in at 8:45.
The favorites I was looking for, some drip ground coffee from The Coffee Scoop for Sunday morning, the Guatemalan variety is exceptionally smooth. It wouldn’t be a visit without a stop to visit The Dog Bone Guy. I have to load up on cookies for our furry boys.

I love to create salads and spring is a great time to take advantage of the garden’s first offerings. I saw signs this week for local asparagus as I was driving around our area. I located several vendors offering asparagus and chose a bunch of fat purple asparagus and a leaner green bunch. The other two purchases I made for the salad were a bunch of plump red radishes and some shiitake mushrooms. Fortified with an orange cranberry scone I was ready to see what I could find in our own garden.

We have a wonderful crop of salad greens, a mesclun mix and Lollo Rosso, thanks to Joe’s hard work. Along with greens, we have spinach and miner’s lettuce, staples of early spring salads. So I picked a combination and went to work.

In winter months I usually roast asparagus but I thought that steaming would bring out the sweetness of the newly picked stalks. Next, what to do with the shiitake mushrooms? I use shiitake, both dried and fresh quite often but never raw in a salad. Was it okay to use raw shiitakes in a salad? Some quick research revealed a condition, shiitake dermatitis, that manifests in dark red blistering welts.  A component in shiitakes, lentinan, breaks down with heat so this reaction only occurs when the mushrooms are raw or partially cooked. Not certain if  I wanted to find out if we were one of the nine in five hundred people who react, I chose to add them to my steamer basket. The last addition, a little leftover smoked salmon. The sweetness of the asparagus combines perfectly with the smoky, saltiness of the salmon.

I made a very basic vinaigrette with some fines herbes, the perfect addition to a spring salad and garnished with some chervil flowers.

Spring Salad

Serves two

Ingredients for the Salad

  • Assorted  greens, 5-6 cups I used lettuces, miner’s lettuce and spinach
  • 2 or 3 medium radishes
  • 3 large spears of asparagus
  • Fresh shiitake mushrooms
  • Smoked salmon

Ingredients for Vinaigrette

  • 2 T grapefruit balsamic vinegar or white balsamic vinegar
  • ¼ c extra virgin olive oil
  • 1 T fines herbes (combination of parsley, tarragon, chervil and chives
  • Chervil flowers to garnish the salad
  • Kosher salt and freshly ground pepper

Directions

  1. Tear lettuces into bite sized pieces in a large bowl. Slice radishes thinly and add to the salad bowl.
  2. Cut asparagus into bite sized diagonal pieces. Discard the mushroom stems and cut the caps into thin slices. Steam the asparagus and mushrooms until tender. Mushroom caps will take about 3 minutes, thick asparagus pieces about 5-6 minutes. Pat dry  with paper towels and allow to cool. Add to the salad bowl
  3. Break the smoked salmon into bite sized chunks and add to the salad bowl.
  4. Combine the vinaigrette ingredients in small bowl. Pour over the salad and toss lightly. Divide salad on two plates. Season to taste with salt and pepper.


May 7, 2017 Fines Herbes

Fines herbes (feen ZERB) translates from the French to, as you may have guessed, fine herbs. Its origins are found in classic French cuisine and often attributed to “the king of chefs and the chef of kings” Escoffier.  Fine herbes is a blend of equal parts chervil, tarragon, chives and parsley. Thyme is the next most typical inclusion and occasionally marjoram, savory and watercress. Three of the four, chervil, tarragon and chives, are spring herbs that are flourishing in the garden now, parsley won’t be planted until June. By then the warm days of summer will send the chervil to seed, the chives will be past their blossom but will still be fine to use and the tarragon will start to flower. There are dried versions of fines herbes sold by every major herb supplier, but dried chervil and parsley lose much of their flavor in comparison to when they are fresh.

Chervil is a shade loving annual with feathery leaves and lacy white flowers, like a pale dainty parsley. It doesn’t last long once it is cut. I have never seen it a market, farmers or otherwise so growing it is your best option. The good news is even though it is an annual, it easily self seeds. Our crop of chervil migrated on its own from the garden to a shady spot in the back of the house and shows up every spring.

Chives love the sun and are one of the first herbs to pop up in the garden. The beautiful lavender blossoms are a welcome addition of color to the early spring garden. Chinese chives, also called garlic chives, bloom in the fall with white flowers. Garlic chives self seed very easily and if you don’t want them to take over your garden, don’t let them go to seed.  For fines herbes I would recommend regular chives, their delicate onion flavor harmonizes well with the other herbs.

Parsley has a warm gentle flavor, green and piny, with just a touch of camphor. Parsley mellows the assertiveness of its partners in flavor while adding its own intensity. Our parsley plants are still in flats, waiting another month or so for the warmer days of summer. We grow both curly and flat leaved or Italian parsley. I prefer flat leaved parsley for this mix.

Tarragon has a robust anisey camphor flavor, the counterpoint to the milder parsley licorice flavor of chervil. Tarragon is an herb that usually stands alone  with the exception of this blend. The chervil, parsley and chives are not assertive enough to challenge the tarragon.

Fines herbes are always used as a finishing element to a dish, sprinkled in an omelet or scrambled eggs, in a simple vinaigrette, over some freshly steamed mussels, topping a bagel with cream cheese and smoked salmon. Make fine herbes in small quantities since it is best fresh.

Fines Herbes

Makes about a quarter cup

Ingredients

  • 1 T finely chopped tarragon
  • 1 T finely chopped chervil
  • 1 T finely chopped chives
  • 1 T finely chopped flat leaved parsley

Directions

  1. With a sharp chef’s knife, chop each of the herbs separately.
  2. Measure out a tablespoon of each and combine in a small bowl.
  3. Add fines herbes at the end of the cooking process to preserve the flavor of the herbs.


April 22, 2017 Butternut Squash Bread and Rolls

You might expect a recipe like this to be posted around Thanksgiving, but delicious homemade butternut squash rolls were the accompaniment to asparagus soup for Easter dinner. Usually the squash of choice in both sweet and savory breads is pumpkin, since I am still chipping away at my stash of butternut squash, it was an easy substitution.

I cut the squash in half lengthwise and baked it on a parchment lined baking sheet, cut side down at 375°F until it was very soft, about 45 minutes. I scooped out the squash then cooked it down a bit to get rid of any additional moisture to make a nice thick puree.

I slightly adapted a recipe from the King Arthur Flour site, with encouragement from a rating of 4.8 out of 5 stars and 106 positive reviews. The only problem was that the ingredients were a bit too much for my Kitchen Aid mixer. Once the initial ingredients were mixed together I separated them into two smaller pieces so they could be kneaded in the mixer without taxing it too much. I cut back on the sugar called for in the original recipe, since I was not attempting to make a sweet bread recipe and unlike pumpkin, butternut squash puree has some natural sweetness.
The bread and rolls turned out great, I served the rolls with the soup, the bread is well wrapped, well labeled and frozen for future use. I’m thinking bread pudding sometime soon.

Butternut Squash Bread and Rolls

Makes two loaves or 1 loaf and a dozen rolls

Ingredients

  • 2 T active dry yeast
  • ½ c lukewarm milk
  • 2 large eggs
  • 1 ½ c butternut squash puree
  • 2 T vegetable oil
  • 6 ½ c unbleached all-purpose flour (I prefer King Arthur)
  • ¼ c brown sugar
  • 2 ½ t salt
  • ½ t ground ginger
  • ½ t ground cardamom

Directions

  1. Place all the ingredients into a large bowl of a stand mixer and combine ingredients using the flat beater. Alternately, this could be done by hand or in a bread machine.
  2. Once the ingredients are thoroughly combined, replace the flat beater with the dough hook and knead the dough until it is smooth and soft. I needed to do this in two batches.
  3. Put the dough into a lightly greased bowl. Cover and let dough rise until doubled, 60 to 75 minutes.
  4. Gently deflate the dough and turn it out onto a lightly oiled work surface. Divide it in half.
  5. Shape the dough into loaves or rolls. The loaves can be placed into lightly greased 9″ x 5″ loaf pans or rolls placed on parchment lined baking sheets.
  6. Cover the pans/baking sheets and let loaves/rolls rise until doubled, about 45 minutes. Toward the end of the rising time, preheat the oven to 350°F.
  7. Bake the bread for 30 to 35 minutes. The crust will be a deep golden brown and a digital thermometer inserted into the center will register 190°F. Bake rolls for about 20 minutes until golden brown.
  8. Remove bread and rolls from oven and turn out onto a wire rack to cool.  Cool completely and store, well wrapped at room temperature for several days. Freeze for longer storage.

April 19, 2017 Avocado and Cabbage Slaw

Suvir Saran’s first restaurant, Devi was awarded a coveted Michelin star for his critically acclaimed Indian cuisine. He closed Devi in 2012, and more recently opened Tapestry, in May of 2016. The cuisine at Tapestry had a more global focus interpreted with an Indian viewpoint. Unfortunately Tapestry closed in March of this year after being open for only ten months in spite of positive reviews. The problem according to Mr Saran was “high rents and low covers”. I never had the opportunity to visit the restaurant, but Food and Wine magazine provided a recipe from Tapestry for Avocado and Cabbage Slaw in their January issue.

What gives this slaw its unique flavor is the addition of chaat masala. It is a sand colored spice blend, predominately flavored with dried mango powder, also known as amchoor, black salt and asefetida. It is a traditional accompaniment to a fruit snack, often sold by street vendors, phal-ki-chaat, four or five fruit selections sprinkled with fresh lime juice and chaat masala.

The avocado and cabbage slaw is a reimagining of the traditional snack. This time, crunchy colorful cabbage, creamy avocados and juicy tomatoes take the place of the fruit. Chaat masala is part of the dressing that includes lime juice, honey, fresh ginger, fish sauce, spicy sriracha, cilantro and mint. You could make your own chaat masala, some of the ingredients, cumin and coriander seed are accessible in any supermarket, others, dried mango, asafoetida powder, would require an online trip to an Indian grocer. I purchased my chaat masala on Amazon. It has a very pleasant light spicy fragrance and includes thirteen spices.

We enjoyed the salad, the chaat masala made it unique but never having the original dish I think we were at a disadvantage. I will have to try the fruit salad to make a comparison.

Avocado and Cabbage Slaw

Serves six

Ingredients

  • 3 T fresh lime juice
  • 2 T honey
  • 1 T peeled and finely grated fresh ginger
  • 2 t sriracha
  • 2 t Asian fish sauce
  • 1 t white wine vinegar
  • ¾ t chaat masala
  • ¼ t ground cumin
  • kosher salt and freshly ground pepper
  • 1 lb green and/or red cabbage, cored and finely shredded
  • 6 scallion, light green and white parts only, thinly sliced
  • 1 pint cherry or grape tomatoes
  • ½ c cilantro leaves, finely chopped
  • ¼ c mint leaves finely chopped
  • 2 Hass avocadoes-peeled, pitted, and diced, plus more for serving
  • 1 c roasted, salted cashews, chopped, plus more for garnish
  • Microgreens for garnish

Directions

  1. In a large bowl whisk the first eight ingredients until well combined. Season with salt and pepper.
  2. Add the cabbage, scallions, tomatoes, chopped cilantro and mint, diced avocado and 1 cup of chopped cashews. Toss to coat. Garnish with avocado slices, chopped cashews and microgreens.

April 9, 2017 Butternut Squash, Bacon and Black Bean Chili

I am well aware that butternut squash is typically a sign that the cool crisp days of fall are approaching. But since I still have a large supply from last year’s garden, I will be looking for ways to use them into the summer. And why not, butternut squash has a sweet nutty  flavor and creamy texture that pairs well with many ingredients and is loaded with vitamin A, C, potassium and fiber. Joe’s opinion on the last variety I made, butternut squash soup with cannellini beans and sage pesto was,”I really like it, but bacon would make it even better”. Since there are many who would concur that bacon makes just about anything better, I was up for the challenge.

Butternut squash, bacon and black bean chili is a delicious, hearty and slightly spicy chili that’s great any time of the year. The sweetness of the butternut squash contrasts nicely against the salty bacon and the savory richness of the black beans.

It all begins with bacon, cooked over medium heat to render out the fat.  Restrain yourself from eating the bacon pieces, they will be added to the finished soup. Place the cooked bacon on a paper towel lined plate to absorb excess grease. Pour the fat through a fine strainer into a metal bowl. Don’t use plastic, if the fat is hot, it could melt the container, I know from experience. Add 2 tablespoons of the strained bacon fat back to the pan and saute the chopped onion. The garlic, butternut squash and red pepper are added and cooked until soft. Chili powders, herbs, a can of tomatoes with chilis, and cook for one minute. Stir in the chicken broth and drained black beans and simmer until the butternut squash is tender.

I made this recipe with fridge and pantry ingredients. I think the chipotle chili powder adds a complexity with its smoky flavor. Other additions to the soup could include a finely chopped chili en adobo, cooked corn, avocado slices and tortilla strips. If desired, top with a dollop of sour cream.The flavors get even more complex over the course a few days and makes great leftovers and lunches.


Butternut Squash, Bacon and Black Bean Chili

Serves 4-6

Ingredients

  • 3-4 slices of thick cut bacon, cut into 1-inch pieces
  • 1 medium onion, finely diced
  • 3 cloves of garlic, minced or pressed
  • 4 c cubed butternut squash
  • 1 c minced red pepper
  • 1 t chili powder
  • ½ t chipotle chili powder
  • 1 t ground cumin
  • 1 t oregano (preferably Mexican)
  • 1-15 oz can tomatoes with green chilis, I used Rotel
  • 1-15 oz can of black beans, drained and rinsed
  • 3-4 c chicken broth
  • kosher salt and freshly ground pepper
  • cilantro leaves
  • sour cream

Directions

  1. Cook the bacon in a Dutch oven over medium high heat. Remove bacon pieces to a towel lined plate to drain, strain the fat into a metal bowl. Add about 2 T bacon fat back to the pan and add onion and cook until soft, 5 to 8 minutes. Stir in the garlic, butternut squash and red pepper and cook until the vegetables are tender and the onion begins to brown, 12-15 minutes. Add more fat to the pan if needed.
  2. Add chili powders, herbs and tomatoes with green chilis and cook for 1 minute. Stir in chicken broth and drained black beans. Simmer until the butternut squash is tender, 20 minutes or more. Add more broth as needed.
  3. Stir in the bacon pieces, serve with sour cream and cilantro leaves.

April 1, 2017 Mayan Citrus Salsa (Xec) with Salmon

A vibrant combination of juicy grapefruit, orange, lemon and lime sections, accented with fragrant and spicy habanero pepper, the Yucatan peninsula is home to this colorful and healthy salsa. The Mayan name for this dish is Xec, pronounced, shek which roughly translates, “mixed”. It is an easy to prepare dish, all of the fruit is cut vertically and sectioned, the way you would cut into your morning grapefruit. If you prefer, the citrus could also be cut into supremes or segments.

The salsa gets its heat from habanero chiles. Lantern shaped and bright red, orange or yellow in color, the habanero is the hottest chile available in grocery stores. For perspective, a habanero registers in at 300,000 to 475,000 units on the Scoville scale, the standard for measuring the heat of a chili pepper, the jalapeno only 2,500 to 10,000 units. Treat all hot peppers with a certain amount of caution, wear gloves when working with them and keep your hands away from your face. It is best to add a little bit of chili pepper to see what your heat tolerance is before ruining a dish with too much at once.

I am fortunate to have a supply of NuMex Suave Orange peppers from the garden to add to the salsa. NuMex Suaves have the citrusy flavor that most people miss in the habanero, without the numbing heat. I like this salsa with fish, but it would pair with chicken or pork as well.

Mayan Citrus Salsa (Xec)

Makes four servings

Ingredients

  • 1 large orange
  • 1 medium grapefruit
  • 1 medium lemon
  • 1 lime
  • Finely chopped habanero pepper (according to your heat tolerance)
  • 1 NuMex suave pepper
  • ½ c finely chopped cilantro
  • Salt to taste
A combination of sweet, tart and sour citrus, habanero and cilantro are the ingredients for xec.
Section all the citrus the way you would a grapefruit.

Directions

  1. Cut orange in half horizontally and section it as you would a grapefruit. Do this over a bowl to capture all the juice. Remove the seeds and combine flesh and juice in a bowl. Repeat with the grapefruit, lemon and  lime. Stir in habanero, NuMex suave and cilantro. Season with salt.

March 26, 2017 Butternut Squash Soup with Sage Pesto

Is there really a need for another recipe for butternut squash soup when there are already three other butternut squash soup recipes on the blog? Well, when you have a metal locker in the basement still half full of last year’s harvest, (in excellent condition I will add) there’s always room for one more soup. This time the squash isn’t blended into a silky purée resulting in a soup that’s perfect as a starter for an elegant meal, here the squash pulls double duty. The fat bulbous end becomes part of a squash “stock” and the neck is cut into chunks that are simmered in the stock to make this hearty main dish soup.

Start with a medium-sized squash, 2 to 2 1/2 lb, use a sharp knife to cut off a half inch piece at both ends.  You can either cut the squash in half (approximately) where the neck meets the bulb or leave it whole for peeling. The next part I find easiest to do using a vegetable peeler, the inexpensive Kuhn Rikon ones are my favorite. A well sharpened chef’s knife works well too. Place the squash on its side and run the peeler down the length. This part goes quicker with the neck, the curved bottom takes a little more time, but with practice the whole process shouldn’t take more than ten minutes. Be sure to remove the white flesh and green fibers that are right below the skin’s surface. The squash should be completely orange after peeling. Scoop out the seeds and the fibrous pulp from the bulb end. I save the seeds for roasting as a garnish for soups and salads.

The bulb halves are cut into four chunks and combined in a saucepan with stock, water, butter and soy sauce or tamari. The soy brings a savory umami note to the natural sweetness of the squash and the butter adds richness. Cook until the squash is very soft and mash in the pan until broken down.

While the stock is cooking, cut the neck end into 1/3 inch cubes. Sauté leeks and tomato paste in a Dutch oven. The mild sweet onion flavor of the leeks complements the squash and the tomato paste adds a little umami to the mix. Add the garlic and squash pieces and cook, stirring occasionally. Pour in the squash stock, bring to a simmer, partially cover and cook for ten minutes. Canned cannellini beans are the last addition and add a hearty creaminess and some substance to the soup. Simmer until the squash is tender. You can serve it now or if you have the time, make the soup, cool, refrigerate and reheat and serve the next day. As with many soups and stews, the flavors have time to meld together and it even tastes better.

Don’t skip making the pesto, it is a wonderful addition to the soup. Sage and parsley replace the typical basil in this recipe. I’m glad that sage is one of the first herbs to perk up in the garden, in spite of the cold temperatures of late. I truly despise paying several dollars for a handful of less than perfect leaves when I can pick them fresh.

Butternut Squash Soup with Sage Pesto

Serves 6-8

Ingredients for soup

  • 1- 2½ lb butternut squash
  • 4 c broth, chicken or vegetable
  • 3 c water
  • 4  T unsalted butter
  • 1 T soy sauce or tamari
  • 1 T vegetable oil
  • 1 lb leeks, white and light green parts only, washed thoroughly, sliced thin
  • 1 T tomato paste
  • 2 garlic cloves, minced finely
  • Kosher salt and freshly ground pepper
  • 3-15 oz can cannellini beans
  • White wine vinegar to taste

Peeled whole butternut squash.

Cut the bottom into large chunks, they will become part of the squash stock.

Directions for soup

  1. Using a vegetable peeler, remove the skin and the fibrous threads just below the skin, the squash should look completely orange, no white spots remaining.
  2. Cut the squash in half where the neck and bulb meet. Cut the bulb section in half and remove the seeds and any strings. Save seeds for toasting if desired.
  3. Cut each half into four sections. Place the squash sections, broth, water, butter and soy or tamari in a medium saucepan and bring to a boil over medium high heat. Reduce heat to a simmer, partially cover and cook for about 25 minutes or until squash is very soft.
  4. Using a potato masher, mash the squash, still in the broth until it is broken down. Cover pan to keep warm and set aside.
  5.  While the broth is cooking, cut the neck of the squash into 1/3 inch pieces. Heat oil in a large Dutch oven over medium heat until shimmering. Add the chopped leeks and tomato paste and cook until the leeks are softened and the tomato paste darkens, about 5 minutes. Add garlic and cook until fragrant, 30 seconds. Add squash pieces, some salt and pepper and cook, stirring occasionally for 5 minutes.
  6. Add squash broth and bring to a simmer. Partially cover and cook for 10 minutes. Add beans and their liquid, partially cover and cook, stirring occasionally, until the squash is tender 15 to 20 minutes.
  7. Ladle soup into individual bowl, add a splash of white wine vinegar and dollop of pesto and an additional sprinkle of Parmesan cheese.


Sage Parsley Pesto

Ingredients for the Sage Parsley Pesto

  • ½ c toasted walnuts
  • 2 cloves of garlic, minced
  • 1 c fresh parsley leaves
  • ½ c fresh sage leaves
  • ¾ c extra virgin olive oil
  • ½ c grated Parmesan cheese
  • Salt and pepper to taste
Sage is one of the first perennial herbs to emerge in the herb garden.
By the end of April, the sage will look more like this.

Directions for the Sage Parsley Pesto

  1. Pulse walnuts and garlic in food processor until coarsely chopped, about 5-6 pulses.
  2. Add parsley and sage to the bowl, with the processor running, slowly add oil and process until smooth, about 1 minute.
  3. Transfer to a bowl, stir in Parmesan and add salt and pepper to taste.
Parsley mellows out the sage in this pesto, a combination I will definitely try again.


March 21, 2017 Creamy Poblano Chicken

I didn’t think the day would come, but I finally exhausted my supply of freezer pesto. I’ve been using it this winter to top boneless chicken breasts before baking as an easy weeknight supper. A little looking around the freezer and I found the ingredients for this new impromptu sauce. Chicken with poblano cheese sauce is loosely based on a Mexican classic. Poblano peppers have a dark green skin and if left to ripen further on the vine will turn red. They are somewhat heart-shaped, 3-6 inches long and 2-3 inches wide. Poblano peppers are rich and flavorful with a mild to medium heat.

This recipe can be made as mild or as spicy as you like, depending on the number of poblanos added to the sauce. Since most recipes begin with roasted and peeled poblanos, there are several methods for roasting. If you have a gas stove as I do, they can be roasted on an open grated grill known as an asador. If you don’t have a gas stove they can be broiled on a foil lined baking sheet. With either method, turn them often so they char evenly. Put the chilis in a bowl while they are still hot and cover tightly with plastic wrap. Let them rest until they are cool enough to handle, 15-20 minutes. Pull on the stem to remove the seed core and cut the chile open to remove any additional seeds and ribs. Remove the skin by running your hands down the chile, use a damp paper towel to remove any skin that won’t easily come off. Resist rinsing the chiles, you will dilute the flavor.

The base is cauliflower Alfredo sauce, a recipe from the blog two summers ago. I wasn’t certain if this would be good to freeze, but I’m pleased to say it reheated well. Since my first step was to see if the sauce held up to freezing, I started with a cup of the cooled down sauce in the food processor. To this I added several roasted poblanos, from the end of last years garden, also from the freezer.

I puréed the sauce, along with a cup of raw spinach leaves, a teaspoon of ground cumin, salt and pepper. Start with one stemmed and seeded poblano, cut into strips and add more as desired just to give a little kick of heat. I topped chicken breasts with this sauce, covered with foil and baked for 23 minutes. After 23 minutes, I took out the chicken, removed the foil and topped with grated cheese and placed under the broiler. Delicious and the chicken is cooked perfectly! Next time I might add some roasted garlic too. This sauce would also be good to top chicken enchiladas or even as a dip for veggies.

Creamy Poblano Chicken

Serves 4

Ingredients

  • 1-1 ½ c cauliflower Alfredo sauce
  • 2-3 roasted poblano peppers
  • 1 c raw spinach leaves
  • 1 t ground cumin
  • kosher salt and freshly ground pepper
  • 2 lbs boneless skinless chicken breasts, remove tenderloin if attached, breasts cut in equal halves
  • ½c or more shredded cheese, a Mexican blend is good here, mozzarella is fine as well
  • Non stick spray or oil to coat baking dish.
Cut large breast pieces in half.
It’s best to cut on an angle to get even pieces.
Poblano peppers add just the right amount of heat.
I like to cook them on the stovetop on an asador.


The sauce can be made easily in a food processor or blender.

Coat the breast pieces evenly with the sauce.
Cover the chicken tightly with foil before cooking. Be careful of the steam that will escape after cooking.
After cooking they will shrink a bit.
Turn the broiler on and sprinkle chicken with cheese.
The finished product!

Directions

Preheat oven to 375°F

  1. Put the first four ingredients in the bowl of a food processor or blender and pulse until all ingredients are incorporated. Taste for seasoning and add another poblano if desired. Season with salt and pepper to taste. Scrape sauce from processor into a bowl and set aside.
  2. Spray a 9″ X 11″  baking dish with non stick spray or coat lightly with olive oil.
  3. Remove tenderloins from chicken breasts if still attached. Cut each breast in half to make even (as possible) pieces. Place the chicken breast pieces in the baking dish.
  4. Cover each piece generously with the sauce. Cover the baking dish with foil and bake for 23 minutes. Remove baking dish from oven, take off the foil and set oven to broil. Sprinkle cheese over chicken breasts and return baking dish without the foil to the oven. Broil until the cheese is melted and starts to brown in spots, 3-4 minutes. Watch closely. Serve with cauliflower rice to sop up the juices.

March 7, 2017 Pad Thai, a light version

Since Joe has already lost ten pounds on a South Beach phase 1 diet, I am looking for ways to adapt recipes we already like to fit the plan. My latest “rework” is Pad Thai. Pad Thai is a stir fried noodle dish, typical food cart fare in Thailand that over the last thirty years has gained popularity worldwide.

Most of the Thai cookbooks I own are over thirty years old and I was surprised to see that I rarely found a listing for Pad Thai in the index. What I did find were recipes for “Noodles, stir fried Thai style”. I learned that Pad Thai was made popular in the 1930’s and ’40s as part of an attempt to modernize and revitalize the economy of the country. The full name of the dish is  Kway teow phat Thai. Kway teow means rice noodles in a Chinese dialect and phat Thai means Thai-style, hinting at the possible Chinese origins of the dish.

The dish is a harmonic combination of flavors, umami (fish sauce), sour (lime or tamarind paste), salty (soy sauce or tamari) and sweet (palm sugar). Fish sauce used to require a special trip to the Asian grocer, now it can be found in most large supermarkets. I prefer tamari in recipes over soy. A by product of miso production, it is thicker and less salty than soy sauce. Palm sugar is a sweetener made from the sap of the flowers of the coconut palm tree. The taste is similar to brown sugar with caramel and butterscotch notes. Tamarind comes from the pods of a large tropical tree and adds a pleasant sweet tart note to dishes. . If you look at the list of ingredients on a Worcestershire sauce bottle, tamarind extract is one of the ingredients. Lime juice is usually substituted when tamarind isn’t available. Another recipe I found in my research called for apricot or prune puree if a substitute for tamarind was needed. One well known cookbook author recommended ketchup as a substitute for tamarind, texture yes, taste, not like any ketchup I’ve tried.

Several months ago I bought a container of tamarind pods with no specific reason other than to possibly use them some day. This recipe presented my opportunity, but I really had no idea how to extract the pulp from the pods. My first step was to remove the dried outer pods. Don’t expect them to come off neatly, they will break off in pieces. When the dried brown pods are removed, the sticky pulp is exposed along with strings that run the length of the pods, remove as many of the strings as possible. In the middle of the pulp are the smooth shiny seeds that almost look like they have been polished. After reading several articles I came up with the approach that worked for me. I put the pulp that still contained the seeds in a bowl. I covered the pulp with warm water for about twenty minutes. Then I put the softened pulp in a sieve and pressed on the solids with a pestle to extract as much pulp as possible. I got a decent amount of pulp and some tamarind water too. Next time I think I will take the easy route and order tamarind paste on line.

My version substitutes shredded cabbage for the traditional rice noodles since they aren’t part of phase one of the diet. Cabbage provides a good base for the dish and adds sweetness too. Noodles made from zucchini or daikon radish would work here too. I used shrimp as the protein in this dish, but chicken and either of those combined with tofu works as well. The secret to making any stir fry dish is to have all your components ready before you start cooking. It comes together in less than a half hour and I must say we enjoyed it very much.

Tamarind pods
Tamarind puree

Pad Thai

Serves 3-4

Ingredients

  • 6-8 cups finely shredded green cabbage
  • 5 T peanut or neutral oil like grapeseed (divided)
  • 2 eggs, lightly beaten
  • 4 garlic cloves, finely minced
  • 12 oz to 1 lb shrimp, peeled and deveined
  • 1 green pepper, stemmed, seeded and finely sliced
  • 1 large shallot, finely sliced
  • 1 cup of mung bean sprouts, rinsed and trimmed
  • 2 t or more of nam pla (Thai fish sauce)
  • 2 t tamarind paste or lime juice
  • 1 T tamari or  soy sauce
  • ¼ c chopped peanuts
  • ¼ c cilantro leaves
  • 1-2 Thai chiles (optional)
  • 1 lime cut into wedges

Directions

  1.  Heat 2 teaspoons cooking oil in a large wok over medium high heat. Swirl the oil around to coat the entire pan, then add the cabbage. Season with some fresh ground pepper and stir fry until barely crisp tender, 3-4 minutes. Remove to a  bowl.
  2. Add a little more oil to the wok and add the eggs, and scramble quickly with a fork. Cook until set and remove to a cutting board and cut into thin strips.
  3. Add oil as necessary and add the garlic and the shrimp and cook, stirring occasionally, until the shrimp lose their grey color, 2-3 minutes. Remove from the pan with a slotted spoon to a plate.
  4. Add the shallot and green pepper to the wok. Season with salt and pepper and stir fry and stir fry until crisp tender, 4-5 minutes.
  5. Raise the heat to high and add a tablespoon or more of oil as needed Add the cabbage, eggs, shrimp and sprouts to the wok. Season to taste with the nam pla, tamari and tamarind or lime juice. Cook until all the ingredients are heated through.
  6. Add the chopped peanuts, cilantro leaves and optional pepper. Toss once or twice and transfer the contents of the pan to a serving platter. Serve with lime wedges.