January 10, 2015 Turkey Zucchini Meatballs

DSC_0549a

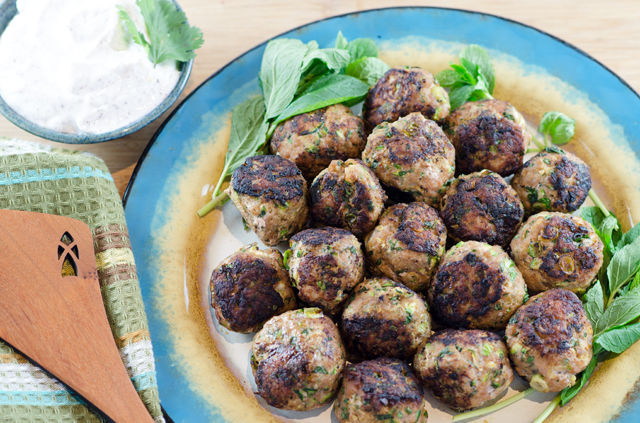
It’s a new year and it’s time to put the emphasis back on healthy meals. But healthy doesn’t have to equal boring. Meatballs are lightened up with ground turkey and fresh herbs in this recipe from Yotam Ottolenghi’s cookbook, Jerusalem.  Originally from Jerusalem, Ottolenghi is a London based chef restaurant owner, food writer and cookbook author known for his vibrant, fresh, multi cultural cuisine. His recipe takes ground turkey and zucchini, two ingredients with not much flavor going for them on their own and combines them with fresh herbs, cilantro and mint, along with garlic, cumin and spicy cayenne pepper to make a delicious meatball.

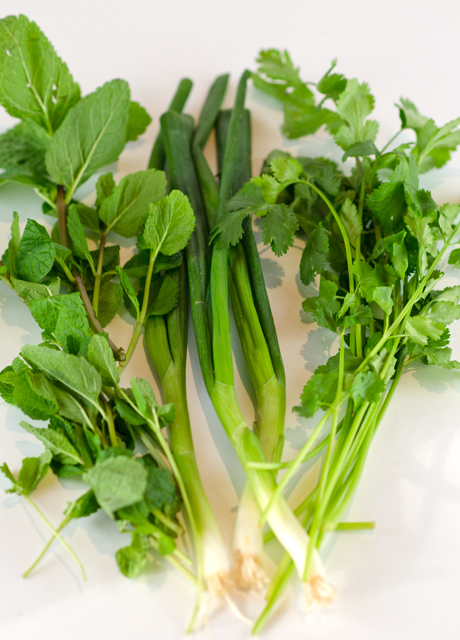
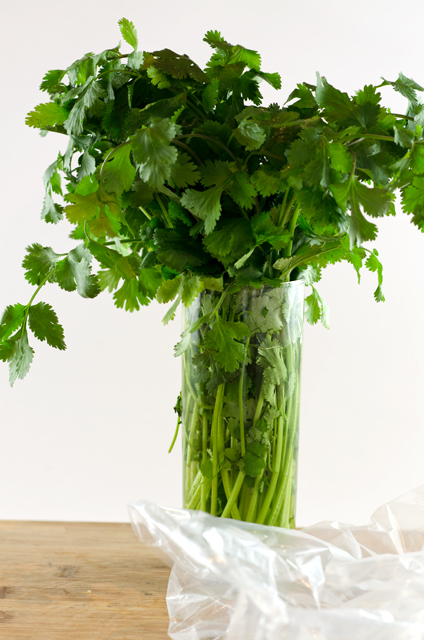
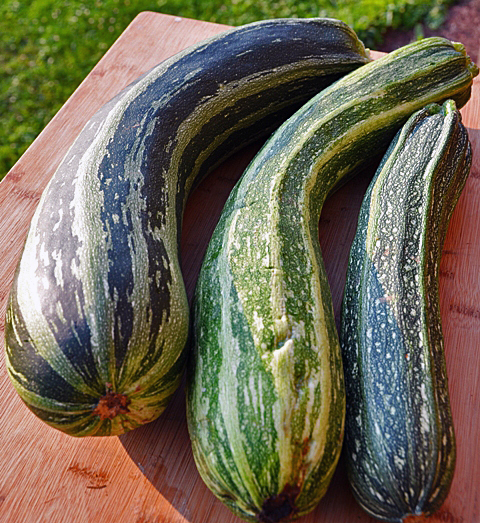
In July, I would be making this recipe with herbs and zucchini fresh from the garden. But it’s a bitter cold day in January, so like everyone else I have to bite the bullet and plunk down several dollars for a small bunch of herbs I would have buckets of in the summer. Don’t get me started with the zucchini…  When I purchase herbs at the supermarket I try to treat them as a precious commodity. How many times have you (or I) brought home a bunch of herbs, used the tablespoon or teaspoon we needed and the rest was sentenced to the crisper drawer. The next time you notice it, you’re not even sure what it is. My favorite method of preserving fresh herbs as long as possible in the fridge, is to trim the stem ends and place the bunch in a glass with several inches of water. I place a loose plastic storage bag over the herbs and not only can I successfully store them for a week or more, I am more likely to use them since they are not tucked away in a drawer.

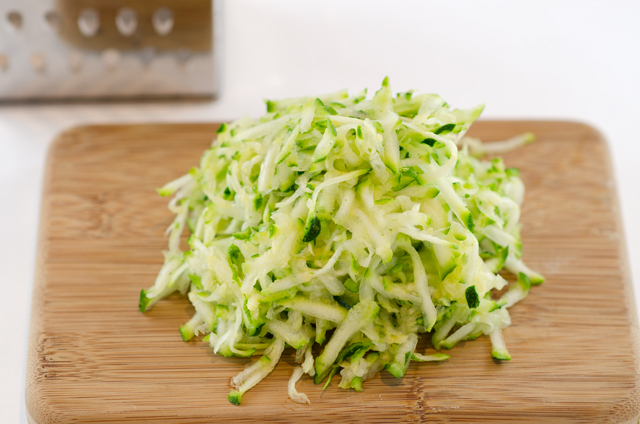
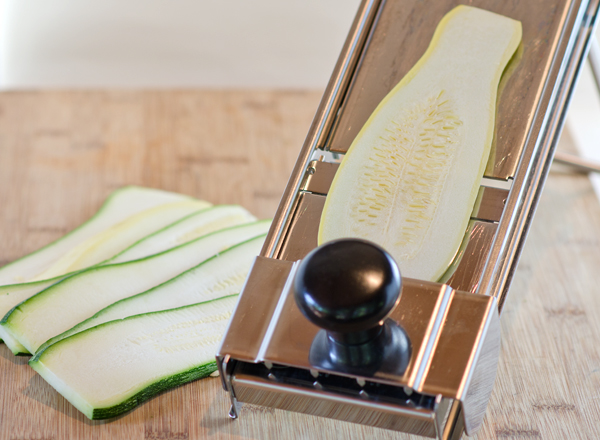
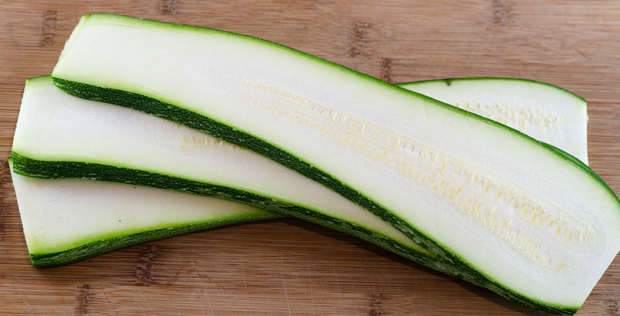
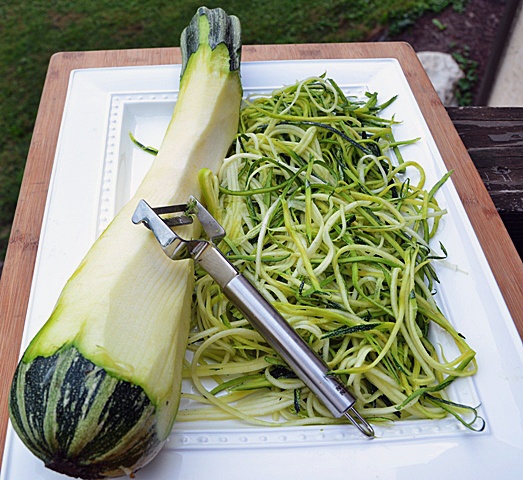
This is a wet meat mixture to work with so use a minimally processed product, the extra water added in some brands of ground turkey is not your friend.  Check the label, the turkey I purchased was 93/7, lean to fat with no water added. I used a hand grater for the zucchini and lightly wrung it out in  a cloth towel to eliminate extra liquid. I like to taste the leaf of the herbs I am using to see how pungent (or not) they are to see what adjustments I might need to make for the recipe.

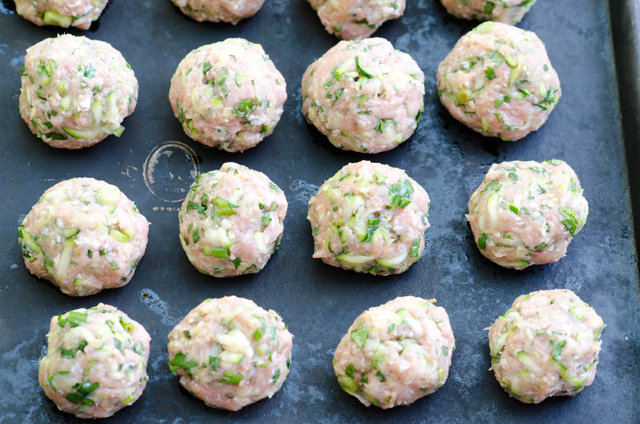
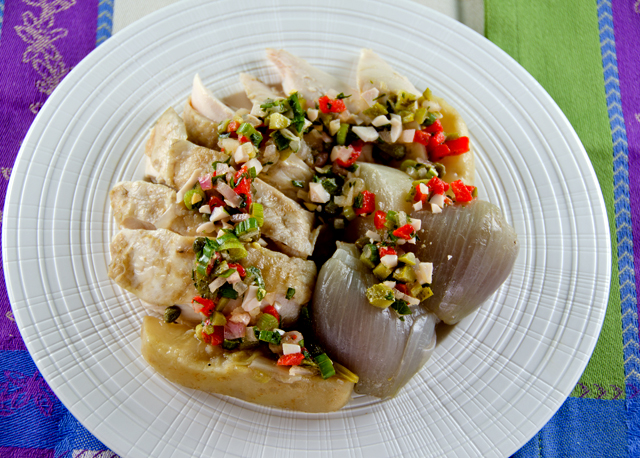
Put all the ingredients in a large enough bowl so that you can combine your ingredients thoroughly. Take off your rings and roll up your sleeves to do some serious mixing.  Put some non stick spray on the sheet that you will place the meatballs when formed and also on your hands to minimize the herbs from sticking to your fingers (some will). Ottolenghi’s original recipe called for these to be made as small burgers, but I thought meatballs were better suited for this January night.

Cook the meatballs in a large (12inch) heavy skillet. I used a Le Creuset cast iron type skillet. Just a thin film of a neutral oil, canola, safflower, is all you need to coat the bottom of the pan. Be sure not to overcrowd the pan, I cooked 18 meatballs in two batches. I shake the pan halfway through to make sure they don’t stick.  Finish your browned meatballs in the oven for 5 to 7 minutes to finish cooking them.

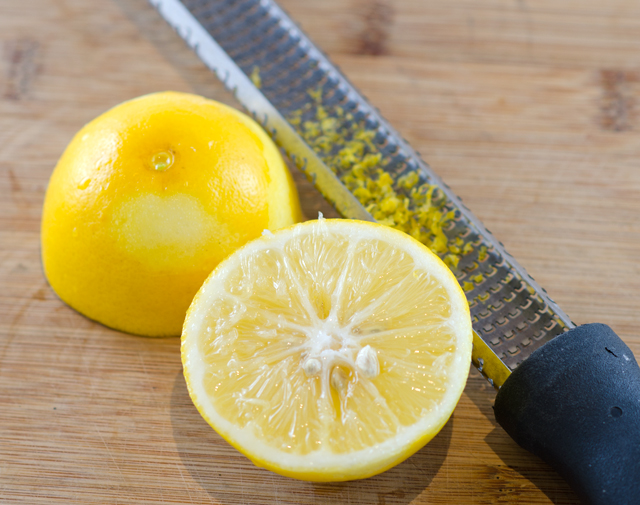
The accompanying sauce is very simple, Greek yogurt, sour cream, lemon peel and juice and an interesting middle eastern ingredient, sumac.  I discuss sumac at greater lengths here. Sumac is extracted from the berries of the sumac bush and it adds an astringent, fruity taste to dishes. I purchased mine from Penzeys. I am over my Meyer Lemon envy of 2013 now that Joe is growing several trees that are producing fruit. They are inside now for the winter. This is the season for harvest and I was able to pick a fresh lemon from one of our trees.  More information about Meyer lemons is in this post.  Meyer lemons are not as acidic as regular lemons but the sumac added another layer of flavor complexity to the sauce.

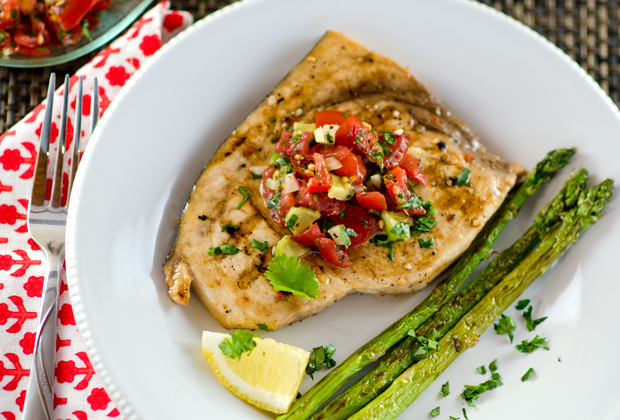
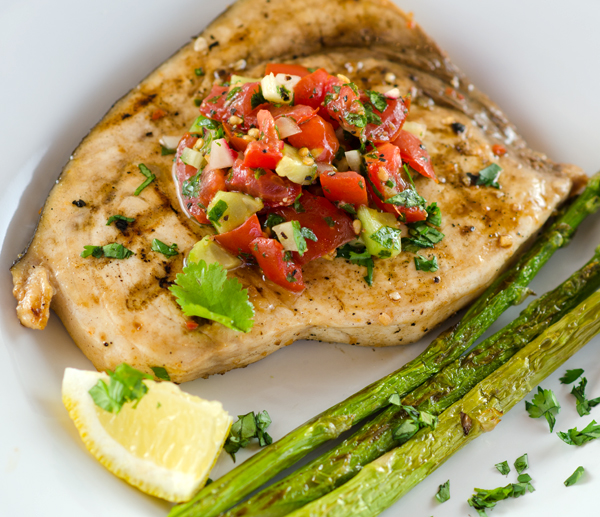
Herb substitutions could be made, parsley for the cilantro, finely snipped chives for the green onions. A tzatziki sauce would also be a good accompaniment. Serve with a tomato sauce and zucchini “noodles” for a family-friendly spaghetti and meatballs substitution.  This one definitely goes in the “I would make this one again” column.

Turkey and Zucchini Meatballs

Makes about 18

Ingredients for Meatballs

  • 1lb ground turkey
  • 2c grated zucchini
  • 3 scallions, white and green, thinly sliced
  • 1 large egg
  • 2T chopped mint
  • 2T chopped cilantro
  • 2 cloves garlic, crushed or finely chopped
  • 1t ground cumin
  • 1t table salt
  • 1/2t freshly ground pepper
  • 1/2t cayenne pepper
  • about 1/8c of a neutral cooking oil, canola, safflower

Ingredients for the Sour Cream and Sumac Sauce

  • 1/2c sour cream (regular or low fat)
  • 2/3c plain Greek yogurt (regular or low fat)
  • 1t grated lemon zest
  • 1T freshly squeezed lemon juice
  • 1 small clove garlic, crushed
  • 1T sumac
  • 1/2t salt
  • 1/4t freshly ground pepper

Directions

  1. Make the sour cream sauce by placing all the ingredients in a small bowl. Stir well and set aside or chill until needed.
  2. Preheat the oven to 425°F. In a large bowl combine all the ingredients for the meatballs, except the cooking oil. Mix well with your hands. Shape into 2″ balls. Place meatballs on a well greased baking sheet to ready for cooking.
  3. Pour enough oil into a large heavy frying pan to form a layer about 1/16 inch thick on the bottom of the pan. Heat over medium heat until oil is shimmering, sear the meatballs in batches on all sides. Cook each batch for about 4 minutes adding oil as needed, until browned.
  4. Transfer the seared meatballs to a baking sheet and place in the oven for 5-7 minutes, or until just cooked through. Serve warm or at room temperature with the sauce on the side.
DSC_0526a
Mint, scallions and cilantro bring a lot of flavor to the meatballs.


I grated zucchini on a box grater and wrung out the extra moisture with a tea towel.
Why yes, I pick my lemons fresh from the tree.
DSC_0559a
Meyer lemons have thinner skin and are sweeter than the usual lemon.
Ready to go into the frying pan.
DSC_0565a
Cilantro in a half filled glass of water, ready to put the bag on top and store in the fridge.

DSC_0556a


January 4, 2014 Swordfish with Tomato, Cucumber and Radish Relish

DSC_4354a

A new year and a time for new beginnings. No more lobster bisque with heavy cream, filet wrapped in bacon with blue cheese. Time to put those tempting chocolate caramels topped with sea salt and every imaginable variation of chocolate truffles away for awhile. It’s time to eat healthy again and lose those few extra holiday pounds. As of January 2nd we have embarked on a healthy eating plan. What it doesn’t mean is deprivation.

We both love fish and swordfish steaks are one of my favorites. Swordfish can weigh as much as 1000 pounds but usually average between 50 and 100 pounds. The “sword” accounts for one third of their length. Due to mismanagement and overfishing the swordfish population was dwindling at the end of the twentieth century. After more than a decade of responsible management, the United States swordfish population is thriving. Now the Monterey Bay Aquarium Sea Watch rates North Atlantic swordfish (harpoon and hand line caught) a “best choice”. They are fished all along the North Atlantic coast, from Newfoundland to coastal Florida, wherever and whenever the water is warm.

There is a consumption advisory for swordfish, due to elevated levels of mercury. From what I have read in the most recent literature the health benefits of swordfish outweigh the detriments for most people. Large ocean fish, like swordfish have higher concentrations of selenium, a trace mineral necessary to all functions of the body. Selenium bonds to the mercury in swordfish and prevents the body from absorbing mercury.

Fish markets buy sections of swordfish called wheels, the thickness of which are measured in knuckles. Each knuckle corresponds to one of the fish’s vertabrae. A wheel is either sliced into steaks or quartered into loins. Swordfish flesh is firm, lean and sweet.

As the title of the book says this recipe is fast, easy and fresh. I call this a relish and not a salsa, I know that salsa means sauce but the secondary connotation is that a salsa will have some heat. This recipe is not hot, though that is an option open to the cook. You could add some avocado, red onion, a little celery, a small fresh chili, the options and combinations are many. When I need raw tomatoes out of season I prefer Campari tomatoes. They are small but have the best flavor of any tomato I have tried. Remember never refrigerate any tomato. They lose flavor and quickly become mealy.

Our swordfish piece was on the thin side so all the cooking it needed was a few minutes on each side in a hot grill pan, you want the center of the steak to remain moist. If you can make it through the snow, grilling would be another cooking option. Refer to my previous swordfish post for cooking a thicker piece of swordfish using the Canadian Fisheries method.

DSC_4363a


Swordfish with Tomato, Fennel, Cucumber, and Radish Relish

Adapted from The Bon Appetit Cookbook: Fast Easy Fresh

Serves 2

  • 2 6-to-7 ounce swordfish steaks
  • 3T olive oil
  • 2 t fresh lemon juice
  • 2 tomatoes or 5 Campari tomatoes, diced
  • 1/2c diced pickling cucumber or English hothouse cucumber
  • 1/2c finely diced fennel
  • 4 medium radishes, diced
  • 3 T chopped fresh cilantro

Directions

  1. Spray grill pan with Pam and preheat grill pan to medium-high heat.
  2. Combine the tomatoes, cucumbers, fennel, radishes and cilantro, 3 tablespoons olive oil, and 2 teaspoons fresh lemon juice in a small bowl. Stir to combine and season with salt and pepper.
  3. Timing is always a function of the thickness of your fish. One inch thickness of fish equals 10 minutes cooking time. Measure first!
  4. Sprinkle fish with salt and pepper and grill over a medium-high heat, our fish took  about 4 minutes per side, rotate fish half way through each cooking time to create a crosshatch pattern.
  5. Serve fish with relish.

DSC_4367a

September 3, 2013 Eggplant Caponata revisited

DSC_2138a


Summer is berry season and each month brings a new arrival. June is time for plump juicy strawberries. July brings succulent raspberries and blueberries. August brings one of my favorite berries, eggplant. A berry? you say. First, the members of the nightshade family, tomatoes, pepper and eggplants to name just a few, are actually fruit, not vegetables. Botanically speaking, fruit are seed bearing structures that develop from the ripened ovaries of flowers. But eggplant are not just any old fruit, they are considered berries because they are indehiscent which means they do not sprout open when ripe. With these technicalities aside, there are two burning questions that most people have when it comes to eggplant; should I salt or not? and are there male and female eggplants?

DSC_2012a
A round up of the varieties of eggplant we grow.


Young eggplants, picked fresh from the garden or purchased at the farmers market will not need salting. They will have thinner skin and fewer seeds. The bitterness originates in the seeds which contains nicotinic alkaloids. Did I mention tobacco is another member of the nightshade family? So the larger the eggplant, the greater the likelihood of it having more seeds. Salting, also known as degorging, is good for drawing out excess liquid from the eggplant so that it doesn’t absorb as much oil in the cooking process, but it is only successful in masking bitterness.

The male vs. female eggplant was a tale that even I fell victim to. I was surprised at the number of websites that propose the theory of male and female eggplants as fact. The story goes that a dash-shaped slit on the bottom of the fruit indicates a female eggplant and a deep round indent indicates a male. The male eggplant reportedly has fewer seeds and is more desirable. It’s debunking time again. Fruit, like eggplants develop from the female flower on the plant but have no sex of their own.

So, how do you choose the best eggplant?  Look for eggplant that have smooth, bright, shiny skin. When you press on the skin it should spring right back. Select eggplant that are heavy for their size, indicating younger fruit. The calyx, the green leaves at the stem end should be fresh and green, not dried out and brown.

Our garden in the month of August yields an abundance of the nightshade family, tomatoes, peppers and eggplants. While our tomato harvest is better than last year, this has proven to be not the best year for eggplants and peppers. I wanted to take advantage of the eggplants we did grow and make one of our favorites, caponata.

I posted a different recipe for caponata last year, this is one from my catering days.  A great room temperature dish, caponata always tastes better the second day, after the flavors had the chance to meld. It is an agro dolce, a sweet and sour dish from Sicily that shows the influence of North African flavors on the region. Serve on grilled baguette slices and garnish with toasted pine nuts and chopped flat leafed parsley.

DSC_2117a


Eggplant Caponata

Serves 6-8 as a side dish

Ingredients

  • 1/3c olive oil
  • 3c diced eggplant
  • 1 1/2c chopped onion
  • 1c thinly sliced celery
  • 2c chopped tomatoes
  • 3T minced garlic
  • 2T tomato paste
  • 1/4c red wine vinegar
  • 1c sliced green or black olives
  • 1/3c capers, well drained
  • 1 or 2 anchovies, drained and chopped
  • 1T sugar
  • 1/2t crushed red pepper flakes
  • 1/2c minced flat leafed parsley
  • Kosher salt and freshly ground black pepper
DSC_2065a
A lot of chopping but the dish comes together quickly after that.

DSC_2069a


Directions

  1. Heat the olive oil in a large skillet. Add the eggplant and sauté until somewhat soft, 3-4 minutes. Add the onions, celery, tomatoes and garlic and cook for another 10-12 minutes, stirring occasionally.
  2. Remove from the heat, add the remaining ingredients and toss lightly. Refrigerate until ready to serve, preferably the next day. Bring to room temperature before serving.

DSC_2131a

DSC_2122aDSC_2145a-copy

August 22, 2013 Zucchini Lasagna

DSC_1857a

When you grow big zucchini, make zucchini lasagna. In this recipe, zucchini or yellow squash “noodles” replace the usual pasta. I cut the zucchini in half lengthwise first so that I would have a flat surface to work with. A mandoline works best here. In case you didn’t know, a mandoline, also spelled mandolin is a hand operated kitchen tool with adjustable blades that produces uniform slices. They can cost anywhere from about  two hundred dollars for a professional stainless steel style model all the way down to less than twenty dollars for a plastic model. The more expensive models will slice, julienne and waffle cut, the less expensive ones just slice. Whatever model you choose, use the hand/finger guard when you run the food against the blade, believe me, I speak from personal experience.  If you have steady hands and no slicer, use a sharp knife and be sure to use a cutting board to stabilize the squash to ensure even slices. Since zucchini is 95% water it is best to precook it to reduce excess moisture that will end up in your finished dish. Some of the recipes I saw suggested parboiling, sautéing, but I found that grilling worked well for me. My version is totally vegetarian. If you want something more substantial, add ground beef, turkey or sausage to your sauce. Just like regular lasagna, it tastes even better the next day, if it lasts that long!

DSC_1993a


Zucchini Lasagna

Serves four to six

Ingredients

  • 3-4 long zucchini/yellow squash
  • 4 c thick tomato sauce
  • 1 15 oz container of regular or low-fat ricotta cheese
  • 3 lightly beaten eggs
  • 2 T fresh chopped basil
  • 2 T fresh chopped flat leaf parsley
  • 1 t dried oregano
  • Kosher salt and fresh ground pepper to taste
  • 1 ½ c grated Parmesan cheese or other similar grated cheese
  • 1 lb grated mozzarella cheese

Directions

  1. Preheat oven to 350° F. Place baking rack in the lower position.
  2. Cut squash into ¼ inch thick slices, to fit the pan lengthwise, if your squash is shorter, just orient the slices in the opposite direction, just be sure they cover the pan.  You should have enough slices to make three layers.
  3. Heat a grill pan or an outdoor grill to medium high heat. Brush both sides of the slices lightly with olive oil.
  4. Grill squash slices on both sides so that they have grill marks, 3-5 minutes each side. Squash should be cooked but not falling apart.
  5. In a medium bowl, combine the ricotta, eggs, parsley, basil, oregano and a cup of the Parmesan cheese. Reserve the rest for the top layer.
  6. In a 9×13 glass or ceramic dish, spoon a thin layer of sauce on the bottom of the pan.
  7. Place the first layer of squash over the sauce. Spoon a third of the ricotta mixture over the squash. Sprinkle with a third of the mozzarella cheese. Repeat the layers two more times, sauce, “noodles” ricotta, ending with the mozzarella cheese and reserved Parmesan from step four.
  8. Bake for one hour, rotating pan half way through cooking time. Let lasagna rest for at least a half hour before serving.
DSC_1844a
I used my Matfer mandolin slicer, a gift many years ago to get neat uniform slices.
DSC_1976a
Slices should be 1/4″ thick
DSC_1850a
Use the grill or a grill pan to slightly cook the zucchini.
DSC_1998a
Fresh zucchini with tomato sauce, delicious!

DSC_1982a

March 24, 2013 Poached Chicken with Salsa Rustica

DSC_9310a

Chicken is a regular part of our weekly dinner rotation, whether it’s boneless breasts in a pesto sauce, chicken thighs and legs in a fragrant blend of Moroccan spices or crispy skinned roast chicken redolent of garlic and lemon.  I turn to poached chicken when I am making a broth that is going to be made into chicken stock or a chicken soup.  Recently, one too many dinners out, vacation and parties called for a few weeks of eating light. So I was interested to see an article in the latest issue of Fine Cooking, “Beyond Roast Chicken. Three new ways to cook a whole bird from three creative chefs.”

That’s what attracted me to the recipe that Lidia Bastianich offered in this article, poached chicken with salsa rustica. Lidia is a master of Italian cooking, a restaurateur, and author of many cookbooks. Her television programs on PBS are not only informative but entertaining as well. So I decided to follow Lidia’s lead and made a poached chicken for dinner.

Poaching is a technique that cooks chicken gently and slowly, submerged in a liquid that is heated to just under the boiling point, about 180F, when small bubbles begin to break the surface. The cooking process begins with a broth of herbs and spices, enhanced with dried porcini mushrooms and Parmesan rinds, providing the rich umami.  Fragrant root vegetables, fennel and celery root, along with shallots, leeks and turnips are added next to the broth. Taking a step from what we normally do with our roast chicken, she stuffs it with peppercorns, bay, crushed garlic and lemon. The chicken is double wrapped in cheesecloth which both keeps the aromatics in the bird and not in the broth and provides a way to retrieve the chicken from the pot at the end of cooking. Poaching chicken provides both a moist flavorful chicken with no additional fat and a flavorful broth to serve with the meal and later as a soup.

Don’t skip the salsa rustica that accompanies this dish. Made mostly with pantry ingredients, it’s the first salsa I’ve ever seen that includes a hard-boiled egg. It adds a pop of color to the very flavorful but pale chicken and a unique piquant flavor. I could see serving this salsa with fish and pork as well.

Be sure to use Turkish or true bay leaves, laurus nobilis. California bay leaves are not from the same family but are similar in shape. They have a strong menthol flavor that will overpower the dish. I am fortunate that we have several Turkish bay trees to pick my leaves from. The salsa rustica recipe called for dill gherkins but I picked up a jar of cornichons. So is there really that big of a difference? Gherkins can refer to both a variety of cucumber, harvested very small for the pickling process and the pickle itself. Gherkins can be either tart or sweet. French cornichons are the tart, crisp pickles made from gherkins or other cucumbers picked small. My choice was fine since the original recipe called for dill (tart) gherkins.

The broth, delicious on it’s own, can be made into a quick soup.  Bring the broth to a simmer and add a small pasta such as ditalini or orzo. Cook until al dente and serve topped with grated cheese and finely chopped parsley. We used the broth several days later to poach halibut fillets seasoned with a ginger citrus herb blend and topped with fresh lime peel.

Poached Chicken with Salsa Rustica from Fine Cooking #122

Serves 4-6, yields 3 quarts broth

Salsa Rustica

Ingredients

  • 1/3c extra virgin olive oil
  • 1/4c red wine vinegar
  • 1/3c thinly sliced scallions
  • 1/4c finely chopped red onion
  • 1/4c finely chopped jarred roasted red pepper
  • 1/4c finely chopped cornichons
  • 1 hard boiled egg, finely chopped
  • 1T balsamic capers, drained
  • 1/8t dried mustard
  • Pinch of cayenne pepper
  • 2T finely chopped flat leaved parsley
  • Kosher salt and fresh ground pepper to taste
DSC_9263a_edited-1
Components for the salsa rustica.

Directions

  1. In a medium bowl, whisk the olive oil and vinegar.  Add the scallions, onion, roasted red pepper, cornichons, egg, capers, mustard and a pinch of cayenne. Whisk to combine.
  2. The salsa can be made up to 5 days ahead, but you will probably consume it before the chicken is cooked so either make a double batch or make it the day of! Cover and refrigerate, let sit at room temperature for a half hour before serving. Before serving, stir in the parsley and  season to taste with salt and pepper.

DSC_9270

Poached Whole Chicken

Ingredients

  • 8 sprigs flat leaved parsley
  • 1T plus 2t whole black peppercorns
  • Kosher salt
  • 1/4c dried mushrooms (1/4oz), preferably porcini
  • 4 fresh Turkish bay leaves
  • 1 piece of Parmigiano-Reggiano rind (optional but nice)
  • 8 large shallots, peeled
  • 2 large turnips cut into 1 inch wedges (carrots were the original choice…)
  • 2 large leeks, white and light green parts, cut crosswise into 4-inch pieces, halved lengthwise and rinsed
  • 1 large fennel bulb, trimmed and cut through the root into 6 wedges
  • 1 medium celery root, trimmed, peeled and cut into large wedges
  • 1 whole chicken (about 3 1/2 lb) my brand of choice is Bell and Evans
  • 3 large cloves garlic, smashed
  • 1 lemon, halved
Root vegetables are added to the Parmesan porcini enhanced broth.

Directions

  1. Place the parsley sprigs and 1 tablespoon of the peppercorns on a six inch square of cheesecloth. Tie up with string to make a sachet.
  2. Pour 6 quarts of water to a 10-12 quart stockpot. Add the sachet, 2T salt, the dried mushrooms, 2 bay leaves and cheese rind if using.  Cover and bring to a boil over high heat.  Add the shallots, turnips, leeks, fennel and celery root. Return the liquid to a boil. Reduce heat to a simmer, partially cover and let vegetables simmer while you prepare the chicken, 10 to 15 minutes.
  3. Remove the giblets from the chicken (mine didn’t have them!!), rinse them and reserve. Into the chicken cavity place 1t salt, the garlic, the remaining 2t peppercorns, 2 bay leaves, the juice of the lemon and the squeezed lemon halves. Tie the bird’s legs together and tuck the wings behind the neck.
  4. Cut a 30 inch double-layer cheesecloth square and lay it on a work surface. Put the chicken in the center, breast side up. Tie two diagonally opposite corners snugly over the bird with a simple over hand knot. Tie the other corners the same way.
  5. Cut a yard long length of string and thread one end through the cheesecloth topknots. Pull the ends even and tie in a double knot close to the cheesecloth.
  6. Lower the chicken into the broth, being careful to keep the string out of the pot. Loop the free end of the string around a handle of the stockpot so it doesn’t fall into the pot. Add giblets if using. Bring to a boil over high heat, then lower the heat to maintain a gentle simmer.
  7. Cook, uncovered until the chicken is cooked through, an instant read thermometer inserted into the breast will register 158-160F. The chicken will continue to cook after you remove it from the pot, the final temperature will be 165F. Start checking at 45 minutes. If you prefer firmer vegetables, check on them sooner and remove them with a slotted spoon.
  8. Set a deep rimmed baking sheet large enough to hold the chicken near the pot. Transfer the chicken to the baking sheet, letting the excess liquid drain back into the pot. Using a slotted spoon, transfer the vegetables to a bowl and ladle a bit of the broth over them. Cover to keep warm.
  9. Unwrap the bird, remove the string and discard the ingredients from the cavity.  Pour some hot broth over the bird and cover loosely with foil to keep it warm.
  10. Set a fine strainer over a deep pot and strain the broth.
  11. Carve the chicken and serve with the vegetables, moistened with some broth and topped with salsa. Leftover broth can be refrigerated for 5 days or frozen up to 3 months.

DSC_9303a


September 25, 2012 Chard Chips and Pickled Chard Stems


When the new issue of Fine Cooking came last week I was ready to put it aside for a few weeks. The holiday desserts and side dishes looked very tempting, but the beginning of fall was just last Saturday and I am still enjoying cooking as much as I can with the harvest from our garden. As I quickly thumbed through the issue I happened to notice an article that interested me, “What We Are Cooking Now.” Specifically, what really caught my eye were Swiss chard chips. I had heard of kale chips, both the pricey little bags sold in health food stores and the homemade varieties that a friend introduced me to. So why not chard chips? We have three sections of chard of the Bright Lights and Rhubarb variety still producing, so I thought it would be fun to try my hand at this. Since I am a proponent of using both the chard leaves and the stems, I wanted to use the colorful stems in another healthy nibble so a refrigerator pickle seemed to be the best choice here.
My on-line research revealed many different approaches to making chard chips and after reading them all, came up with my own method. There are certain important things to remember if you are going to make chard chips. Wash the leaves thoroughly, chard leaves are usually very crinkly, and those crevices can be dirty. After washing the leaves, remove the stems, reserve if using. Spin the leaves dry in a salad spinner and use paper towels to remove any excess moisture. Any moisture left on the leaves will cause them to steam, not bake and crisp up. A  “bunch” is a non-specific term, to be exact as possible, I used 25 chard leaves that were about 12-14 inches long after stemming. When in doubt, keep the leaf pieces larger, 2 inch squares approximately. The leaves will break easily when they are dry and too many small pieces will give you chard crumbles or dust.  Place the dry leaf pieces in a large bowl and toss lightly with olive oil and your seasonings of choice. Start with a modest amount, about a tablespoon of oil, you can always add more, it’s not as easy to take it away. I used a little Espelette pepper olive oil, kosher salt, fresh ground pepper, a little garlic powder and a little plain olive oil to taste. I did not grease my baking sheet or use cooling racks to elevate the leaves. I did not crowd or overlap the leaves. I used four large baking sheets in two ovens, racks in the top and the bottom set to 275F on the convection bake setting. The caveat here is, know your own oven, my chips seemed to be ready quicker than most of the recipes I looked at, keep a watchful eye to ensure a crispy, not a burnt chip!
Chard Chips

  • 1 large bunch of chard, 25 leaves, 12-14 inches long
  • Olive oil
  • Seasoning of your choice, I used kosher salt, garlic powder and freshly ground pepper

Directions

  1. Preheat oven to 275F (convection bake). Put racks in the top and bottom of oven.
  2. Wash chard leaves thoroughly in several changes of water. Remove the stems from the leaves, reserve for chard stem pickles.
  3. Dry chard leaves, first in a salad spinner, then remove excess moisture with paper towels. Cut leaves into 2″x2″ pieces, or a size as close as possible, when in doubt, larger is better.
  4. Spread leaves on a large ungreased baking sheet, do not overlap or crowd. My leaves took up four sheets that I baked in two ovens.
  5. Bake chard for six to seven minutes, check to see how the leaves are drying, at this point I loosened the leaves with a spatula and my fingers and rotated the baking sheets, top to bottom and front to back.
  6. Bake for another six to seven minutes, chard should be crisp, not burnt.
Trimmed chard leaves ready to be tossed with olive oil and seasonings


Give the chard leaves enough room to ensure even baking.
Not the prettiest snack, but certainly tastes good!


Pickled Chard Stems

Colorful Bright Lights and Rhubarb chard stems are too pretty to waste.

Pickling shows off the brightly colored stems in another healthy nibble. Refresh the stems in some ice water to crisp them up and cut to even lengths to fit your canning jar. I chose pint jars but one cup sized jars would work as well. I used a basic refrigerator pickle recipe and added my own spice blend combination. Allow them to cure in the refrigerator for a few days, after three days they were ready. If your stems are wide, cut them in half lengthwise, there will be less chance for the stems to be stringy.

Quick Chard Pickle

Makes  2 pints

  • 2 pint canning jars and lids
  • Enough chard stems to pack tightly into the jars
  • 2c water
  • 1c rice wine vinegar
  • 1/4c granulated sugar
  • 1/2t cumin seed
  • 1/2t coriander seed
  • 1/2t fennel seed
  • 1 small piece of cinnamon stick about 2″
  • 1/2t pink peppercorns
  • 1/2t white peppercorns

Directions

  1. Sterlize two pint canning jars by washing them in hot soapy water, rinsing and drying them thoroughly. Crush spices in a mortar and pestle or small food processor. Distribute spices evenly between the two jars.
  2. In a medium saucepan bring two cups of water to a boil. Add vinegar, sugar and salt and bring the mixture back to a boil.
  3. Pack the chard stems in the jars as tightly as possible. Using a wide mouth canning funnel, pour the brine over the stems to cover completely. Place lids and bands on the jars and let cool. Refrigerate, chard pickles will be ready in a few hours but at their best in about two days.

    My spice blend ready to crush in the mortar and pestle.
Pickled chard stems ready for the refrigerator. Notice the classic Bicentennial Liberty Bell jar on the right.


September 19, 2012 Roasted Eggplant Caponata

The days are getting shorter, there is a chill in the morning air, only three days until the official beginning of autumn. Our summer vegetables are on the wane and this morning I harvested some of the last eggplants, peppers, fennel and tomatoes of the season. The sweet and sour flavors of eggplant caponata would be the right contrast to the richness of the king salmon we were having for dinner.
Caponata is a dish native to Sicily by way of the Arabs (then called the Saracens)  who ruled the island from the ninth to the eleventh century. Along with citrus fruits, pasta and eggplants, just to name a few, the Saracens brought the sweet and sour flavor combination to Sicily, the sour coming from vinegar and sweet from sugar or honey.  Among several theories, the word caponata came from the Sicilian dialect, capunata, the name for a sailor’s dish of a biscuit steeped in oil and vinegar, served with chopped vegetables.
The vegetables in my caponata were the “last gasp” of certain varieties we were growing. I used lavender-white Asian Bride  and magenta colored Beatrice eggplant, both ideal because of their thin skin (no peeling required), some small yellow Admiral peppers, and  a red Anaheim pepper that had just a little heat. Fennel isn’t typically an ingredient in caponata, but I thought the slight licorice flavor would add to the sweetness. The most time consuming part of the recipe is the hand chopping of the vegetables, a food processor is definitely not the right choice here. Unlike most of the recipes I make with eggplant, I salted the eggplant to eliminate any bitter flavors from these plants that had been on the vine for a while. Salting also prevents the eggplant from absorbing too much oil and becoming greasy. I decided to roast the vegetables in this recipe is to keep the olive oil to a minimum. I cut the vegetables a bit smaller than I would usually since I was using it as a topping for fish. Caponata is also wonderful scooped up with a pita, in a sandwich and as a topping for pasta. It is best made a day ahead so the flavors have time to blend. Caponata keeps about a week in the refrigerator, if it lasts that long.

Eggplant Caponata

Makes about 4 cups

  • 1 medium eggplant or a combination of smaller eggplants to equal about 1 1/2lbs, unpeeled, and trimmed
  • 3 ribs of celery cut into 1/2 inch dice
  • 1 small red onion cut into 1/2 inch dice
  • 1 small yellow pepper cut into 1/2 inch dice
  • 1 small red pepper cut into 1/2 inch dice
  • 1 small fennel bulb cut into 1/2 inch dice (optional)
  • Olive oil
  • 1 1/2 cups peeled plum tomatoes with juices or 1 14 oz can of diced tomatoes
  • 1T tomato paste
  • 2-3T Pomegranate red wine vinegar
  • 1-2t granulated sugar or honey
  • 2 anchovy filets, minced
  • 1/3 c green olives, pitted and slivered
  • 3T drained and rinsed balsamic capers
  • 2T chopped Italian parsley
  • Kosher salt and freshly ground pepper

Directions

  1. Preheat oven to 450F. Place racks in the top and bottom shelves of the oven.
  2. Cut the eggplant into 1-inch cubes. Place the cubes in a bowl, sprinkle with a tablespoon of  kosher salt. Spread the cubes on a baking sheet that has been lined with a paper towel. Allow cubes to sit for one hour. Pat cubes dry with paper towel and remove any excess salt. Do not rinse.
  3. Place the cubes in a bowl and toss with 1-2T of olive oil. Place cubes on a baking sheet, spread them out evenly, crowded vegetables will steam, not roast. Set aside. In another bowl, toss the celery, onion, fennel and peppers with another tablespoon or more of olive oil. Spread on another baking sheet, making sure that the vegetables are spread out evenly and not crowded.
  4. Place vegetables in preheated oven and cook for about 5 minutes. With a spatula, loosen them from the baking sheet to promote even browning and rotate the baking sheets, top and bottom as well as front and back. Continue to roast in the oven until vegetables are softened and browned around the edges. Start checking the pan after 5 minutes.
  5. Allow vegetables to cool on baking sheet. In a medium saute pan cook tomatoes and their liquid. Add tomato paste, red wine vinegar, sugar or honey and anchovies (if using) and stir to combine. Taste and adjust the sweet and sour flavor as desired.  Add the cooled vegetables, toss gently but thoroughly to combine. Add chopped olives, capers and chopped parsley. Taste and adjust seasoning as desired. Set aside to allow flavors to blend. Serve at room temperature as accompaniment to fish or chicken or with crusty bread or crostini.


August 3, 2012 Zucchini “Pasta”

Gardeners, we’ve all done it. You are diligent at first picking zucchini from your garden. For days you happily pluck small to medium zucchini off the vines, sometimes with the blossoms still attached. Then it happens, you get busy doing other things, it rains for several days or you just simply forget. Those compact little fruits are now the size of a major league baseball bat. Well, before you make one more loaf of zucchini bread or sneak it down to the compost pile, I have another idea.

I make something I refer to as “zucchini pasta”. Kuhn-Rikon, a Swiss cookware company has a tool that makes short work of over-sized zucchini. The stainless steel julienne peeler moves effortlessly down the length of the squash. Steady the zucchini with one hand, start at the top, press the teeth of the peeler into the flesh and pull down. You will have the finest Julienne imaginable in no time. Just stop soon enough to avoid the seedy interior. Although all varieties of zucchini work well with this preparation, I especially like the Italian variety Striato d’Italia which translates Italian stripe. When this variety gets bigger, it doesn’t get as fat as other zucchini, it gets longer, making for longer capellini pasta-like shreds. Put your strands into a bowl and separate any that stick together with your fingers. I like to slightly wilt the strands in a saute pan with some olive oil but  they could  be used raw. I like to toss the “pasta” with some pesto and sometimes I will add halved cherry tomatoes, either raw or cooked slightly. You could also pair it with a cooked tomato sauce or just about anything you like on regular pasta.  Don’t just use the julienne peeler for zucchini. Shred carrots and jicama for a slaw or beets for a salad. The possibilities are limitless.

The longest zucchini in this picture is 22 inches!

The julienne peeler makes short work of this zucchini.

Use your fingers to separate any strands that stick together.


July 12, 2012 Swiss Chard


Let’s begin with two misconceptions regarding chard. Swiss chard is not from Switzerland, but the botanist who named it in the nineteenth century was, and named it for his homeland.  Second, it is pronounced chard, not shard. I can understand why the mistake can occur. Chardonnay, a wine grape varietal, is referred to in a shorthand kind of way  by many people (moi included) as “shard”. The “ch” is pronounced “sh” in French, like chalet. Also a shard is a sharp piece of glass, not something one would consume.

Chard is from the Latin and the French for the word “thistle”. However, chard is not a member of the thistle family but belongs to the beet family.  Chard is cultivated for the leaves and stems of the plants, not the roots.  It is the cooked green of choice in the summer months in our house. We grow many varieties that are as pretty to look at as they are nutritious for you. Varieties like Rhubarb with its bright red stems and Bright Lights with its neon pink, orange and yellow stems give beautiful accents of color in the garden. Chard is a nutritional powerhouse with vitamins K, A and C, and is  a good source of potassium, iron and fiber.

European cooks are partial to chard stems discarding the leafy part and in America most cooks use the leaf and discard the stem. I take advantage of both the stems and the leaves .  The tiniest leaves are an interesting addition to salad mixes. When using larger leaves, the stems need to be separated from the leaves to cook both parts correctly. This is a recipe with the gardener in mind. If you don’t grow your own, your local farmer’s market is a good source for chard. Supermarket chard looks sad for the most part and wouldn’t make a chard lover out of anyone.

Swiss Chard with Garlic

Serves 4-6

Ingredients

  • 1 large bunch of chard
  • Kosher salt and fresh ground pepper
  • Low sodium chicken broth
  • Extra virgin olive oil
  • Several cloves of garlic, peeled and chopped

Directions

  1. Trim the bottoms of the stems and wash chard in several changes of water
  2. Cut the stems from the leaves. Chop stems into 1/2 to 1 inch pieces. Cut leaves into 1 to 2 inch ribbons. Stacking leaves on top of leaves and stems in an even row  makes the task go quicker.
  3. Bring a large pot of well-salted water to a boil. Add chard stems and blanch for 4-5 minutes. The timing will depend on how thick you cut the stems and how soft you want them to be. Remove stems from water with a slotted spoon or spider. Add a little more water to the pot if necessary and keep at a boil.
  4. Add chard leaves in batches and blanch until wilted, 2-3 minutes. Drain in a large colander. Squeeze out excess liquid when cool enough to handle.
  5. Heat a tablespoon or so of extra virgin olive oil in a large skillet over medium high heat for about a minute. Add stems and toss gently to coat. Add wilted chard leaves and stir often, until tender, adding a little chicken broth if the mixture seems too dry. Push chard to one side of pan, add a little more olive oil, add garlic to pan and saute garlic until golden, another minute or two.
  6. Serve warm. Cooked chard could be added to a frittata or omelet as well.


Crinkly rhubarb chard leaf with bright red stem.

Soak chard leaves in several changes of water. Dirt will sink to the bottom when you lift the leaves out. Drain chard in a colander.


Trim the bottom of the chard leaves. Cut the leaf away from the stalks, I prefer using scissors or a small serrated knife. Chop leaves in 1-2 inch ribbons. Stacking the leaves speeds the process along.

Chop stalks into 1/4 to 1/2 inch pieces.


Always cook more chard than you think you will need. This large bowl cooked down to this.


As you can see from the measuring cup, some of the color leaches out during the blanching process but they remain predominately red.


Saute the stems and leaves together and finish with a little chopped garlic.  A flavorful extra virgin olive oil will really enhance the flavors in this dish.