August 21, 2017 Stir Fried Shrimp with Eggplant and Cashews

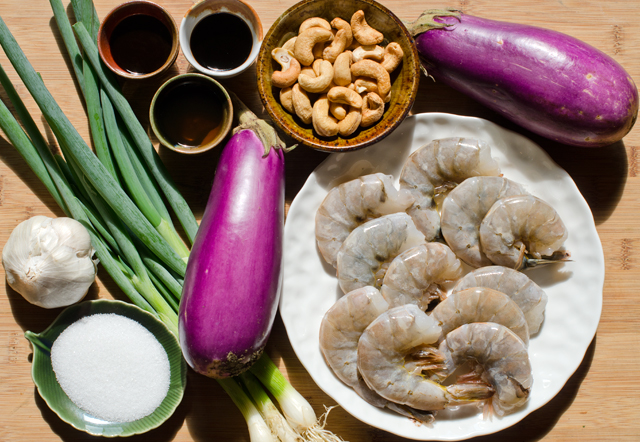
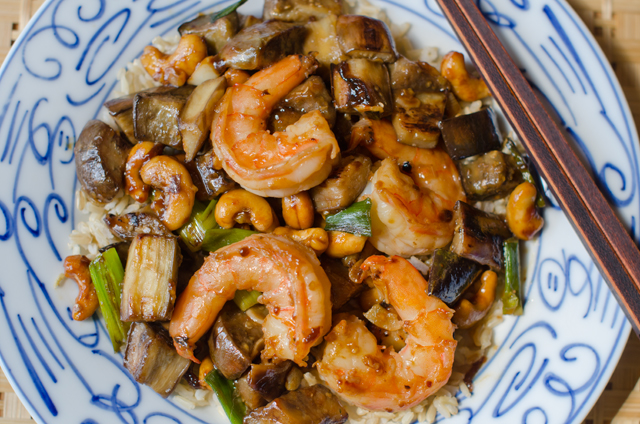
It’s a great time of year to try out some new eggplant recipes. Whether from the farmers market, your local CSA or your own garden, freshly harvested eggplants are at their best. Our garden has produced an amazing array of colorful eggplants this summer. Bright fuchsia Asian Bride, slender dark violet Farmer’s Long, pure white Charming, beautifully variegated Listada de Gandia, all the varieties we have harvested this year have thin skin and minimal seeds.

During the eggplant season I have time to revisit the classics, eggplant Parmesan, caponata, moussaka and to look for new ways to serve this versatile vegetable that’s actually a fruit, but I digress. Stir fry recipes are quick and relatively easy, so why not shrimp and eggplant? Cook’s Illustrated magazine tests recipes countless times to understand how they work and in turn, offer the best version. So I knew I could try their recipe for stir fried shrimp with garlic, eggplant and cashews with confidence.

In perfecting this recipe they discovered several things that make this recipe stand out.

Soaking the shrimp for 30 minutes in salt, oil and aromatics yields a deeply flavored and tender finished product. The salt enters the flesh, allowing the shrimp to stay juicy. The oil picks up the flavor of the aromatics, in this case garlic, and distributes it over the shrimp. They also address the issue of the typical home stove that lacks the high heat of restaurant burners. This problem is solved by cooking the components of the dish in batches and trading in the wok for a skillet to ensure maximum surface area for even cooking.

As with all stir fry dishes, everything should be ready and portioned out when you start the recipe. Soak the shrimp in the seasoned brine. Whisk the sauce together next. My personal trick here is when you are making a sauce with both wet and dry ingredients I measure out the dry ingredients first since they will not stick to the measuring spoon, like soy sauce does.

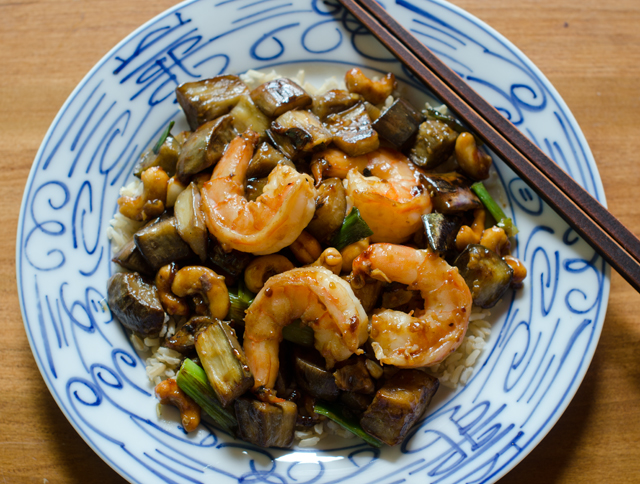
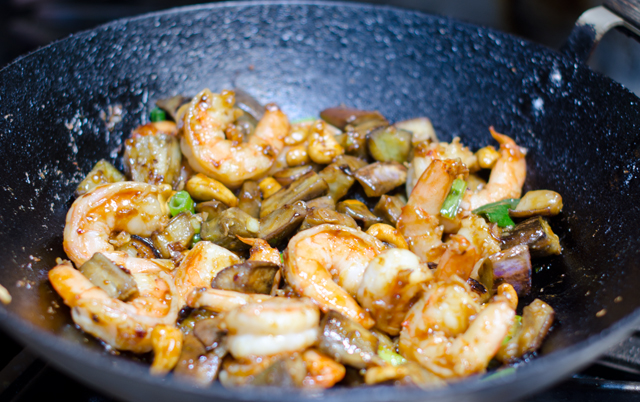
The components of the dish are cooked in batches. First, the eggplant and scallion greens are cooked until lightly browned and transferred to a bowl. Next in are the aromatics, thinly sliced garlic and scallions. Cook until browned, don’t burn that garlic! To the aromatics, add in the shrimp. The shrimp are cooked to a light pink on both sides, then the sauce is added to the pan. Raise the heat to high to thicken the sauce and finish cooking the shrimp. The eggplant is returned to the skillet and tossed, ready to absorb the flavors of the sauce.

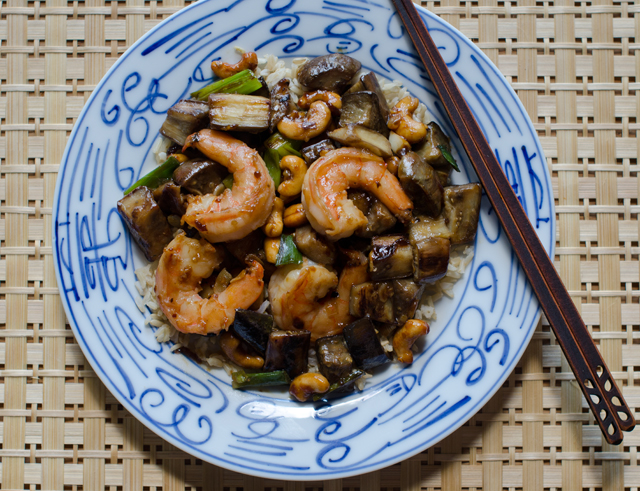
I made some changes to the original recipe. I used one tablespoon of sugar instead of two in the sauce, the oyster sauce adds its own sweetness. I also used more eggplant than called for since it cooks down considerably.  Serve with white or brown rice, this is a dish that is quick to execute and quite delicious.
A recent harvest of all the varieties of eggplant we are growing.

Stir Fried Shrimp with Eggplant and Cashews

adapted from Cooks Illustrated

Serves 4

  • 6 medium garlic cloves, 1 minced or pressed through garlic press, 5 thinly sliced 
  • 1 pound extra-large (21-25) shrimp, peeled, deveined, and tails removed 
  • 3 T vegetable oil 
  • ½ t table salt 
  • 2 T soy sauce (I use low-sodium Tamari)
  • 2 T oyster sauce 
  • 2 T dry sherry or Shaoxing wine
  • 1 T sugar 
  • 1  T toasted sesame oil
  • 1 T white vinegar (I use rice vinegar)
  • 1/8 t red pepper flakes 
  • 2 t cornstarch 
  • 6 large scallions, greens cut into 1-inch pieces and whites sliced thin 
  • ½ c cashews, unsalted 
  • 1 medium eggplant (about 3/4 pound), cut into 3/4-inch dice 

Directions

  1. Combine minced garlic with shrimp, 1 tablespoon vegetable oil, and salt in a medium bowl. Let shrimp marinate at room temperature 30 minutes.  Depending on your particular brown rice (regular, instant, etc.) start your rice as appropriate.
  2. Meanwhile, whisk soy sauce, oyster sauce, sherry, sugar, sesame oil, vinegar, red pepper flakes, and cornstarch in small bowl. Combine sliced garlic with scallion whites and cashews in another small bowl.  Heat 1 tablespoon oil in 12-inch nonstick skillet or a wok over high heat until just smoking. Add eggplant and cook, stirring frequently, until lightly browned, 3 to 6 minutes. Add scallion greens and continue to cook until scallion greens begin to brown and eggplant is fully tender, 1 to 2 minutes longer. Transfer vegetables to medium bowl.
  3. Heat remaining tablespoon oil to now-empty skillet/wok. Add cashew mixture and cook, stirring frequently, until just beginning to brown, about 30 seconds. Add shrimp, reduce heat to medium-low, and cook, stirring frequently, until shrimp are light pink on both sides, 1 to 1½ minutes. Whisk soy sauce mixture to recombine and add to skillet/wok.  Return to high heat and cook, stirring constantly, until sauce is thickened and shrimp are cooked through, 1 to 2 minutes. Return vegetables to skillet, toss to combine, and serve.
Aug 1, 2017 Zucchini Lasagna with Meat Sauce

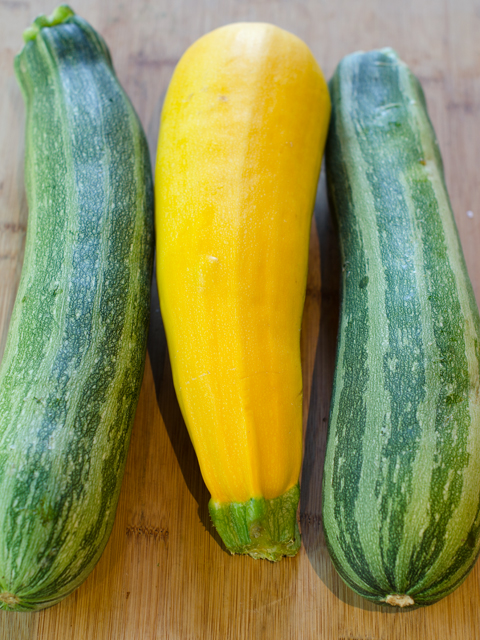
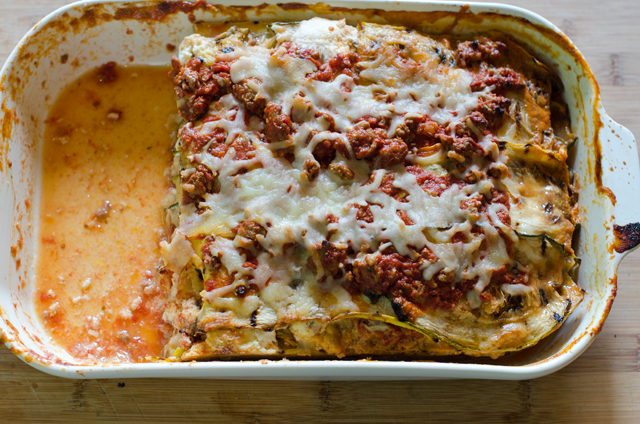
Gardeners, let’s face it, we’ve all done it. You watch that cute little zucchini you’ve been nurturing along for several days, waiting for the moment when it’s about eight to ten inches long, bright green with mottled white striping and the blossom still attached, ready for picking. But life isn’t perfect, it rains for several days and you didn’t make it out to the garden and now that cute little zucchini is the size of a miniature baseball bat. Don’t despair, there are ways to still use them, zucchini lasagna is one of my favorites.

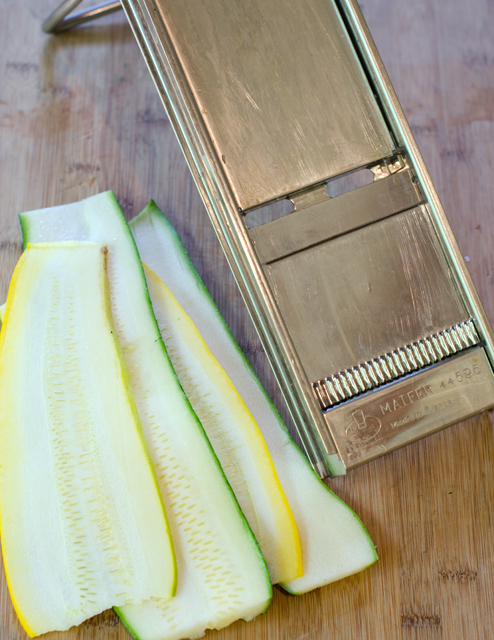
Zucchini lasagna “noodles” replace regular pasta for this delicious dish. I first cut the zucchini in half lengthwise so that I have a flat surface to cut my noodles. A mandolin is always my first choice for even uniform slices. If you weren’t aware, a mandolin, isn’t just a music instrument. It is a hand-operated kitchen tool with adjustable blades that in addition to making julienne and waffle cuts, makes uniform slices. Whatever model you choose, use the hand/finger guard, I speak from personal experience.  You can also go low tech and use a very sharp knife with a cutting board to stabilize your slices. I make my slices to fit the baking dish lengthwise, if you are using shorter zucchini, it’s fine to cut them the other way, making sure they fit your dish.
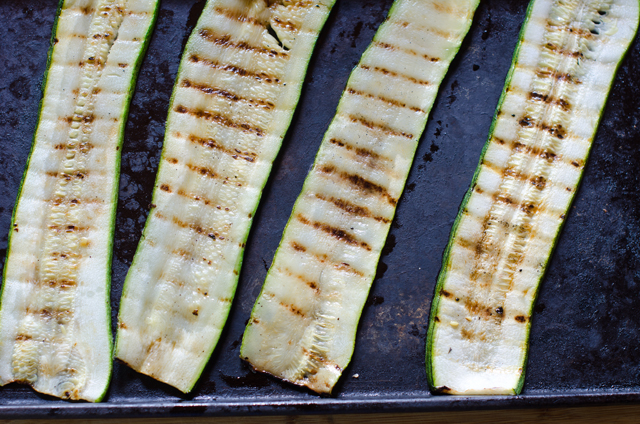
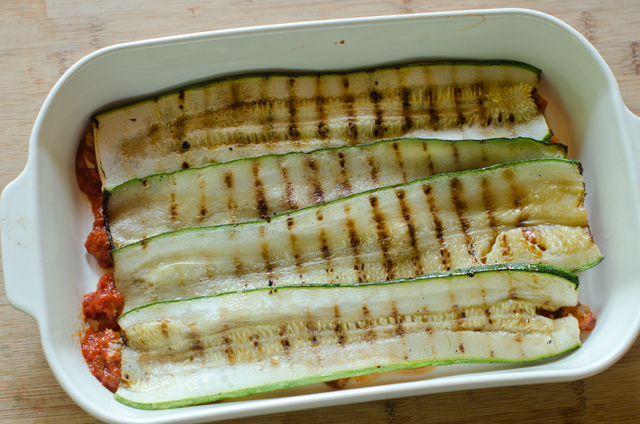
Zucchini is 95% water so before you assemble the lasagna it is important to precook it so less moisture ends up in your finished dish. Suggested methods I’ve seen include broiling, sauteing and parboiling. I like cooking them in the grill pan, it gives added flavor to the zucchini and the slices have a nice finished look. Cooking the slices on an outdoor grill would make the process even faster. Cook more slices than you think you may need to allow for breakage.

This dish can be made in stages, make the meat sauce one day, slice and cook the zucchini the next, then assemble. Just like regular lasagna, it tastes even better the next day, if it lasts that long!

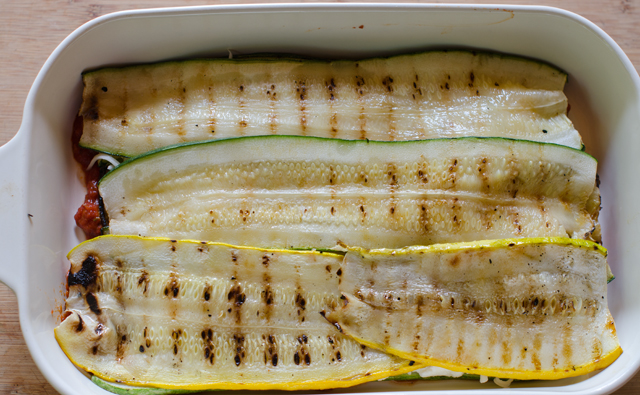
Don’t forget the yellow squash , they work in this recipe too.

Zucchini Lasagna with Meat Sauce

Serves 6-8

Ingredients

Ingredients

  • 3-4 or more large zucchini, sliced 1/8″ thick
  • Extra virgin olive oil for brushing zucchini
  • 1 lb lean ground turkey or beef
  • 1 ½ t kosher salt
  • 1 T olive oil
  • 1 c finely chopped onion
  • 2 cloves minced garlic
  • 1 quart plain tomato sauce ( I used homemade)
  • 2 T tomato paste
  • 2 t dried oregano
  • ¾ t freshly ground black pepper
  • 1 ½ c part skim ricotta cheese
  • ½ c finely grated Parmesan
  • 1 large egg
  • 4 c shredded mozzarella cheese

Directions

  1. Preheat oven to 375°F and place baking rack in the lower position.
  2. Make zucchini lasagna “noodles”. Cut squash into 1/8″ thick slices using a sharp knife or mandolin.  If your squash is long they should fit the pan lengthwise, if you have shorter squash, orient the slices in the opposite direction. You should have enough slices to do four to five layers with a few extra pieces for good measure.
  3. Heat a grill pan or an outdoor grill to medium high heat. Brush both side of the slices lightly with olive oil.
  4. Grill the zucchini slices on both sides so they have grill marks, 3-5 minutes for the first side, a little less for the second side. Squash should be cooked but not falling apart. Line up the grilled zucchini slices on a paper towel lined baking sheet to absorb excess moisture.
  5. Heat a large saute pan over medium high heat and add 1 tablespoon olive oil. When the pan is hot add the onion and cook until onion is softened but not browned, 4-5 minutes. Lower the temperature if necessary. Add the garlic and cook another minute. Add the ground meat and season to taste with salt. Brown the meat, breaking it up as you cook it.
  6. Slowly pour in the tomato sauce and stir it into the meat. Bring to a boil and immediately reduce heat to medium. Add tomato paste, oregano, salt and pepper. Simmer on low, stirring occasionally for about 40 minutes. Cover and set aside.
  7. In a medium bowl combine ricotta, Parmesan and egg. Mix well.
  8. Assemble the lasagna. Lightly oil or spray a 9 x 12 glass or ceramic baking dish.
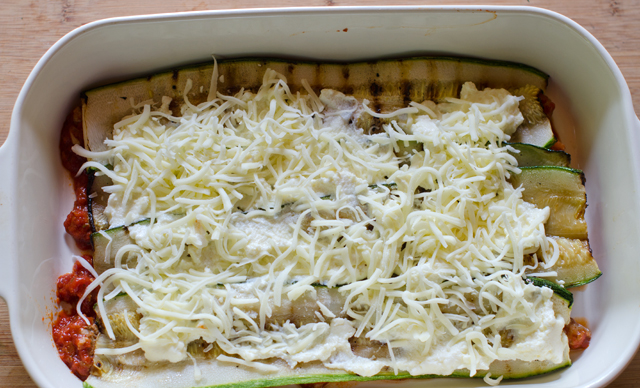
  9. Spread a light layer of the tomato sauce on the bottom of the pan. Layer zucchini slices over to cover. Spread one-third of the ricotta mixture over the zucchini and top with a cup of the mozzarella. Repeat the layers two more times, sauce, “noodles”, ricotta mixture topped with mozzarella. Top with noodles and the remainder of the sauce. Cover the baking dish tightly with foil and bake for 30 minutes. Uncover the foil and bake for an additional 20 minutes to dry up excess liquid. Sprinkle the last cup of mozzarella over the top and bake until melted, about 15 minutes. Let lasagna rest for a half hour to allow it to firm up and make for easier slicing.
Slices made with my stainless steel mandolin, a gift from many years ago, I have other inexpensive ones too.

Zucchini slices cooked in the grill pan.

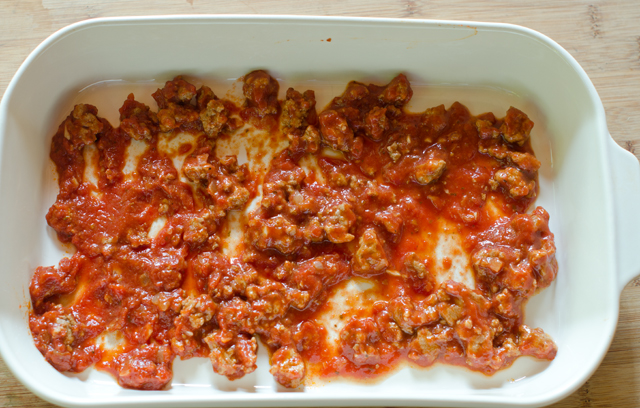
Meat sauce to cover the bottom of the baking dish.

Grilled zucchini slices to cover.

A layer of cheese.
Another layer of zucchini noodles. Repeat the process with the sauce.
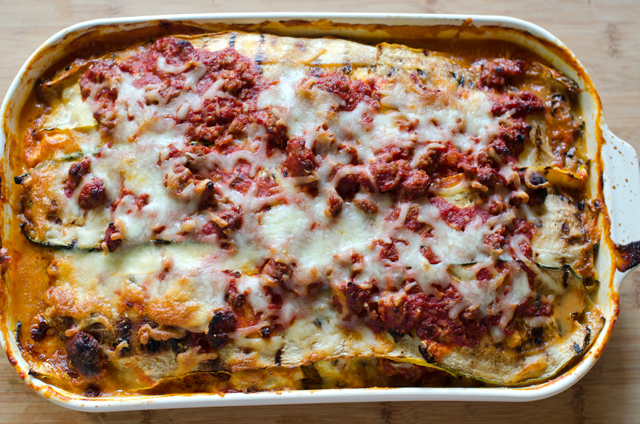
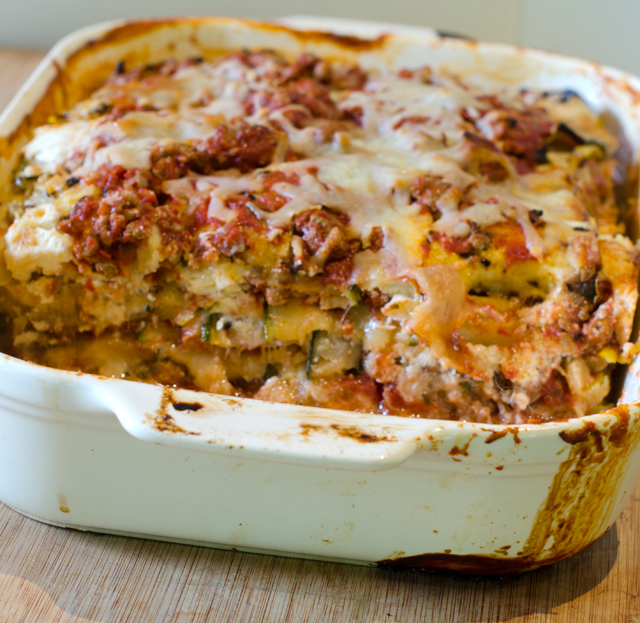
The finished product.

Delicious!

July 21, 2017 Spicy Chipotle Shrimp with Zucchini and Chorizo


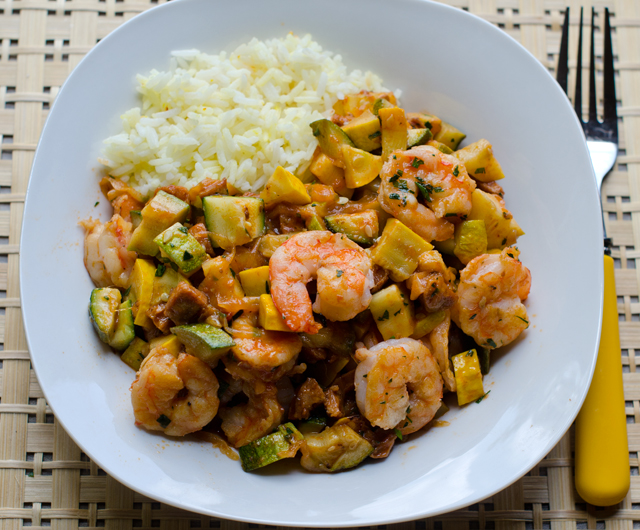
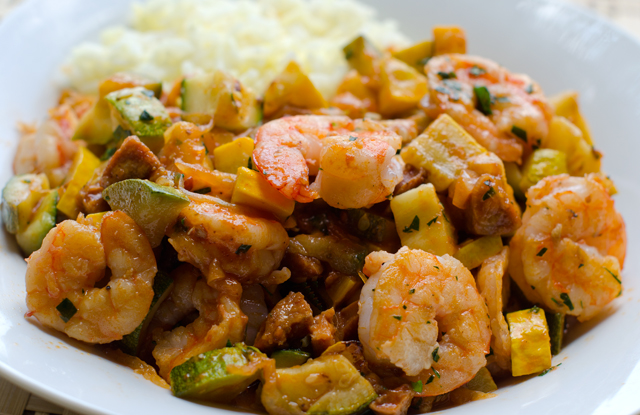
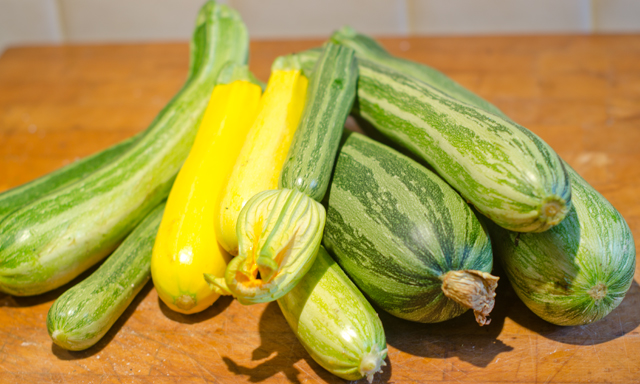
Spicy chipotle shrimp with chorizo and zucchini is an entrée that is flavorful, easy to prepare and uses only one pan. If that isn’t enough, it’s a great way to use that July abundance of zucchini and yellow squash from your garden or farmers market.

I always have some frozen shrimp on hand for a quick dinner. Though my local seafood market on occasion has fresh (never frozen) Florida shrimp, in my area of the country (mid-Atlantic) frozen shrimp is not a bad thing. The shrimp you see sitting on ice at the supermarket seafood counter have been thawed out. Convenient yes, but you can’t be certain how long they have been sitting there. I prefer to buy individually quick frozen (IQF) shrimp in 1 or 2 pound plastic bags, then I can just defrost what I need in 15-20 minutes. I prefer larger shrimp because there is less of a chance to overcook them. Look for the count of shrimp per pound, in this case 21-25 count, rather than a size designation like extra-large or jumbo.

Easy peel, meaning the shell is split down the back and deveined is the easiest way to make this or any recipe calling for shrimp. Always devein shrimp before cooking, many an eliminated Chopped contestant rues the day they didn’t. It’s not hard to do, either use a small pairing knife or the tool specifically made for that purpose. It’s not actually a vein but the shrimp’s digestive tract and when it is dark in color,  it is filled with grit. Removal is not essential, nor will it make you ill, deveining just makes for a more attractive presentation.

Pat the shrimp completely dry with paper towels before cooking. Any extra moisture on the surface of the shrimp prevents them from searing and browning. Preheat your skillet for a few minutes before adding the oil. Wait a minute until the oil is shimmering before adding the shrimp. Place the shrimp in a single layer, leaving a little space between each. Don’t be tempted to flip the shrimp too soon, give them time to brown on the first side, a little pink will start to show, now flip. You want the shrimp to be slightly underdone since they will be added back to the pan later.

Transfer the shrimp to a plate, add the second 2 tablespoons of oil to the pan along with the diced chorizo. Spanish chorizo is a dried and cured (fully cooked) pork sausage seasoned with smoked paprika, garlic and other herbs. There is also Mexican chorizo that comes in casings and must be cooked before eating. It is used in tacos, tortillas and often served at breakfast with eggs. I would definitely say that the Spanish chorizo is the best choice here.

Add the cubed zucchini, onion and yellow squash, cook until the zucchini starts to brown, 3-4 minutes. Now it’s time to add the broth mixture. A chipotle chili and adobo sauce give it a real kick and the tomato paste and brown sugar mellow out the heat. Chipotles are small jalapeños that are dried by a smoking process that gives them a dark color and a distinct smoky flavor. They are canned in a red sauce, adobo, that has a smoky flavor as well. Start with the quantity given in the recipe and if you really like it hot, add a little more. Just remember it’s easier to add heat than take it away. Since you will not be using the entire can, store the remaining chilis in adobo in a well labeled plastic container or zip-loc bag in the freezer. I wasted too many opened cans of chilis before I got in this habit.

Bring the sauce to a boil, then reduce it to medium low and add the shrimp back in along with the lime juice and parsley. Cook for an additional 2-3 minutes, the zucchini should be tender and the shrimp opaque throughout. You can check for doneness by cutting a shrimp in half at its thickest point. It should be creamy white, firm and springy but still moist. You can add some strips of red pepper to the recipe and swap out cilantro for the parsley. Give a final seasoning with salt, pepper and more lime juice. Serve immediately garnished with the rest of the parsley on a bed of rice.


Spicy Chipotle Shrimp with Zucchini and Chorizo

Serves 2-3

Ingredients

  • ½ c low-salt chicken broth
  • ½ small chipotle, seeded and minced, plus 2 T adobo sauce (from a can of chipotles in adobo
  • 1 T tomato paste
  • 1 t brown sugar
  • 1 lb shrimp (21-25 per lb), peeled, deveined, rinsed and patted dry
  • 1 t kosher salt; more as needed
  • Freshly ground black pepper
  • ¼ c olive oil, divided
  • ¼ lb chorizo, cut into ¼ inch dice, a little less than a cup
  • 3 c combination of zucchini and yellow squash, cut into ½ inch dice
  • 1 cup thinly sliced yellow onion
  • ¼ c chopped parsley or cilantro
  • 2 T fresh lime juice; more as needed

Directions

  1. In a one cup measure, whisk together chicken broth, chipotle, adobo sauce, tomato sauce and brown sugar.
  2. Sprinkle the shrimp with a ¼ t salt and a few generous grinds of black pepper. Put a skillet (not non-stick) over medium high heat, when the skillet is hot, add 2 tablespoons oil. When it starts to shimmer, add the shrimp in a single layer. Cook the shrimp undisturbed until it browns nicely, a little less than 2 minutes. Flip and brown the shrimp on the other side, about 1 ½ minutes. Transfer the shrimp to a plate, it should be slightly under cooked.
  3. Add the remaining 2 tablespoons oil and the chorizo to the pan and cook, tossing occasionally, until it starts to brown, about 1 minute. Add the zucchini, yellow squash and onion, sprinkle with a little salt. Cook, tossing frequently, until the zucchini starts to brown and is tender, about 4 minutes.
  4. Add the broth mixture to the skillet and bring to a boil. Reduce the heat to medium low. Stir in the shrimp, half of the parsley and the lime juice.
  5. Cook, stirring often, until the zucchini and squash are tender and the shrimp are opaque, 2-3 minutes. Cut one in half to check if necessary. Season to taste with salt, pepper and more lime juice. Serve immediately, sprinkled with the remaining parsley.
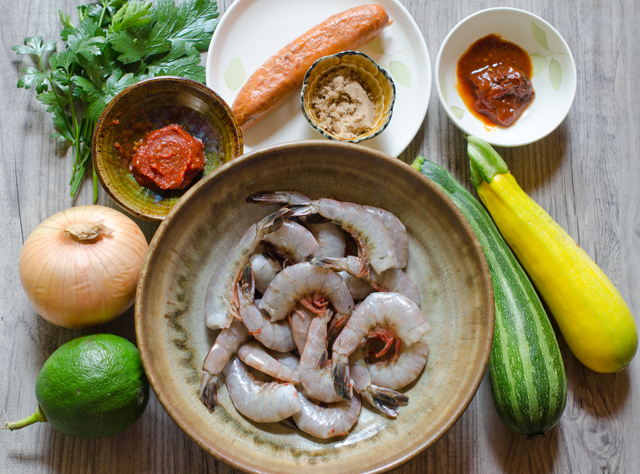
One day’s pick of zucchini and yellow squash.


May 30, 2017 Baked Halibut with Bouillabaisse Sauce and Green Olive Tapenade

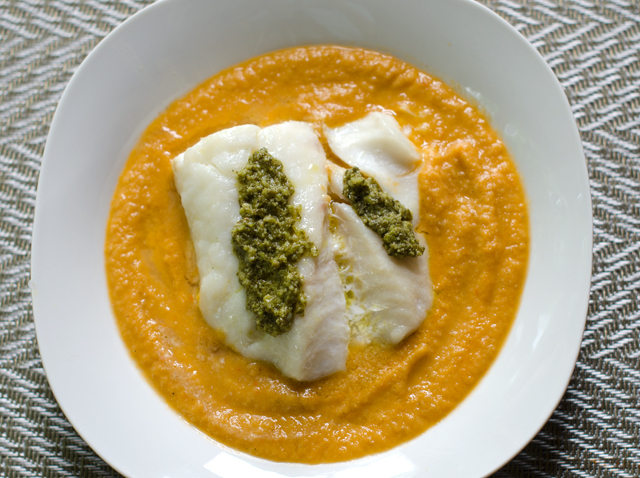
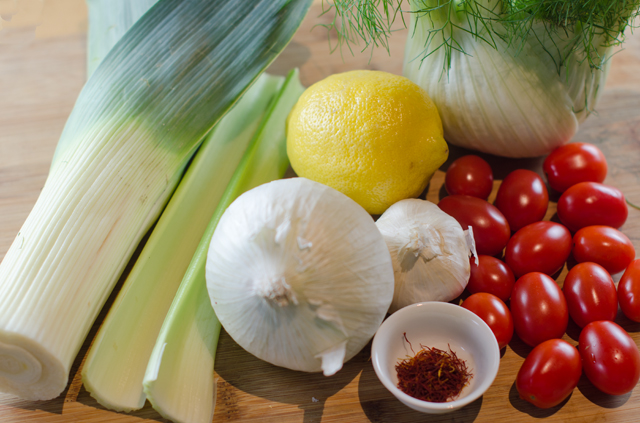
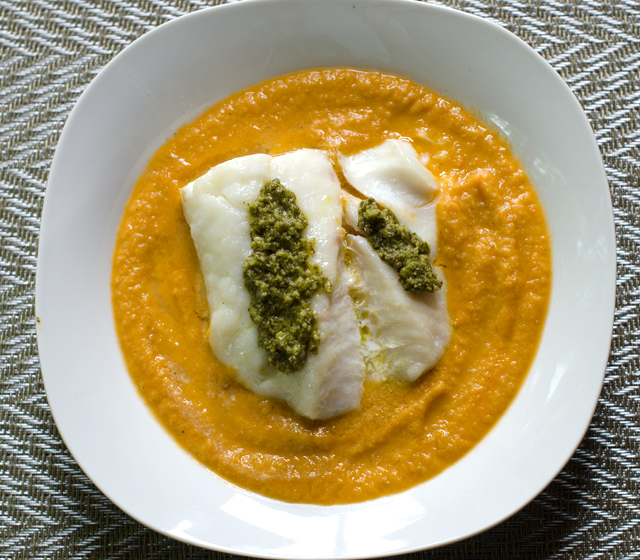
Fish is on the menu at our house three nights a week and though the method of cooking is usually the same, I am always looking for new ways to complement it. This recipe, Baked Cod Fillet with Bouillabaisse Sauce with Green Olive Tapenade from the April issue of Food and Wine seemed to fit that bill. It combines the classic flavors of bouillabaisse: fennel, garlic, saffron and tomatoes, to make a delicious sauce along with a quick briny olive tapenade.

The origins of bouillabaisse can be traced as far back as the ancient Greeks and was the humble fare of fishermen in Provence, specifically from the port city of Marseille. The best of the catch would be sold to restaurants while the less desirable bony rockfish and shellfish would become part of the fisherman’s dinner, a stew cooked with sea water and simmered over an open fire. Bouillabaisse has come a long way since then to become one of the most iconic French dishes.

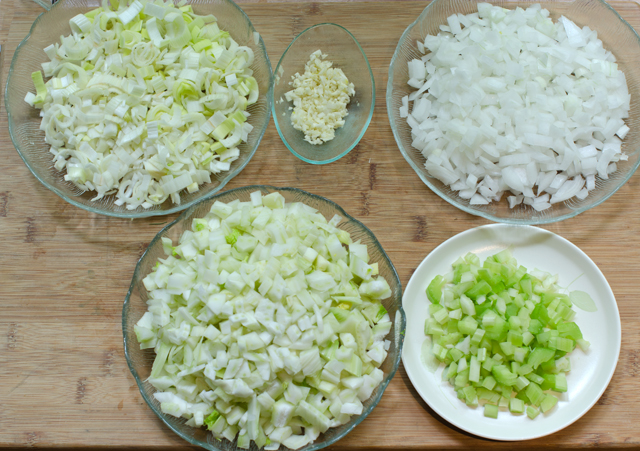
The first step of the recipe is to chop the fennel, leek, onion and celery. This can be done by hand or a food processor makes quick work of this step. Just be certain that all pieces are relatively the same size to ensure even cooking. Sauté the vegetables over medium heat until softened then add the garlic and saffron. Saffron adds a subtle flavor and aroma and its beautiful golden color. At about forty dollars a bottle, Pernod is an ingredient I could not justify buying since I was only using a few tablespoons. It adds a subtle anise flavor so if you have some on hand, by all means use it. Add dry white wine and vermouth to the pot and reduce the liquid by half. Next into the pot are halved and smashed cherry tomatoes, grape tomatoes are an acceptable substitute here.

The next step is to make fish stock. I am fortunate to have an outstanding fish market that supplies me with fish bones and heads needed for stock making. If making fish stock would stop you from making this recipe, substitute clam broth or  fish bouillon.  Always taste products like this first, since they can be salty. After the sauce cooks, cool slightly and carefully discard the fish bones if using. Use an immersion blender to puree the sauce then pass it through a food mill into a sauce pan. Keep the sauce warm over low heat.

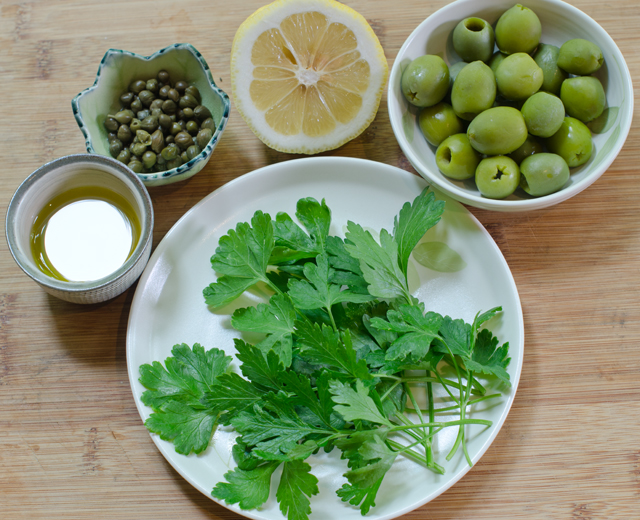
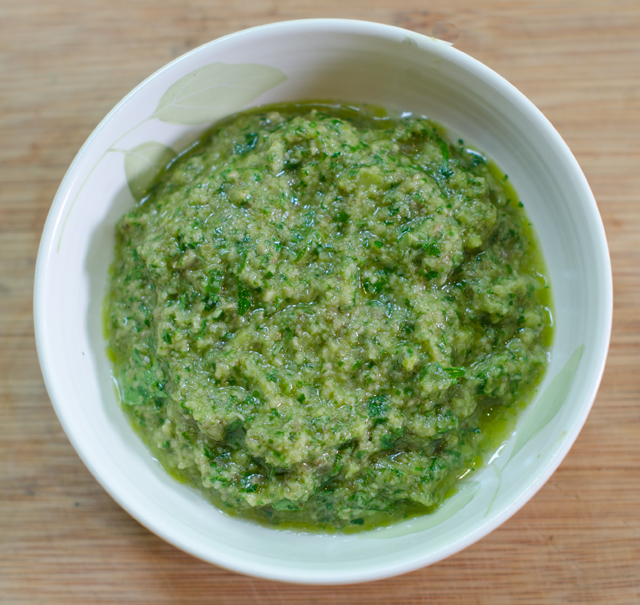
The green olive tapenade is very easy to do and adds a briny contrast to the rich sauce. Cook the fish according to your favorite method, we use the Canadian fisheries method with consistent results. The sauce and the tapenade can be made several days ahead making this an impressive recipe for entertaining.

Baked Halibut with Bouillabaisse Sauce and Green Olive Tapenade

Serves four

Ingredients for the sauce

  • 4 T extra virgin olive oil, divided
  • 1-1 lb fennel bulb, trimmed and finely chopped
  • 1 large leek, trimmed and finely chopped, white and light green parts only
  • 1 medium white onion, finely chopped
  • 2 celery ribs, finely chopped
  • 2 garlic cloves, finely chopped
  • ¼ t saffron threads
  • 2 T Pernod or pastis (optional)
  • ¾ c dry white wine
  • ¾ c dry vermouth
  • 1 pint cherry tomatoes, halved and smashed
  • ½ t smoked paprika
  • 2 lbs white fish bones, rinsed and dried
  • 2 t fresh lemon juice (plus more for drizzling)
  • Kosher salt
  • Four 6-oz. white fish fillets like cod, halibut, grouper

Directions for the sauce

  1. In a large enameled cast-iron casserole, heat 2 tablespoons of the olive oil. Add the fennel, leek, onion and celery and cook over moderate heat, stirring occasionally until the vegetables are softened, about 8 minutes.
  2. Stir in the garlic and the saffron and cook until fragrant, about 2 minutes
  3. Add the Pernod (if using) and cook until the liquid has evaporated, about 2 minutes. Add the wine and vermouth and cook until the liquid is reduced by about half, about 8 minutes. Add the tomatoes and paprika and simmer over medium heat until the liquid is reduced by half, about 5 minutes.
  4. In a large skillet, heat 2 tablespoons of the olive oil. Add the fish bones and cook over medium high heat, turning once, about 5 minutes.
  5. Transfer the bones to the casserole and add two cups of water. Cover partially and simmer over moderately low heat for 30 minutes. Let the sauce cool slightly then discard the fish bones.
  6. Using an immersion blender puree the sauce, then strain through the fine mesh of a food mill into a medium saucepan. Add 2 teaspoons lemon juice, season with salt and keep warm.

Ingredients for the Green Olive Tapenade

  • ¼ c green pitted olives
  • 2 T rinsed and drained capers
  • 2 T flat leaved parsley
  • 2 T extra virgin olive oil
  • 1 ½ T fresh lemon juice
  • kosher salt and freshly ground pepper

Directions for the Green Olive Tapenade

  1.  Place the first five ingredients in the bowl of a mini food processor and pulse until combined and roughly chopped. Season to taste with salt and pepper.

Cooking the Fish

  1. Preheat oven to 450°F.
  2. Coat a shallow baking dish with non stick spray. Season the fish fillets with salt.
  3. Measure your fish fillets at the thickest point. Bake the fish for 10 minutes for every inch of thickness.

Finishing the Dish

  1. Ladle the sauce into 4 shallow bowls and top each one with a cod fillet Spoon the tapenade over the fish. Drizzle with more olive oil and lemon juice. Serve immediately.

April 1, 2017 Mayan Citrus Salsa (Xec) with Salmon

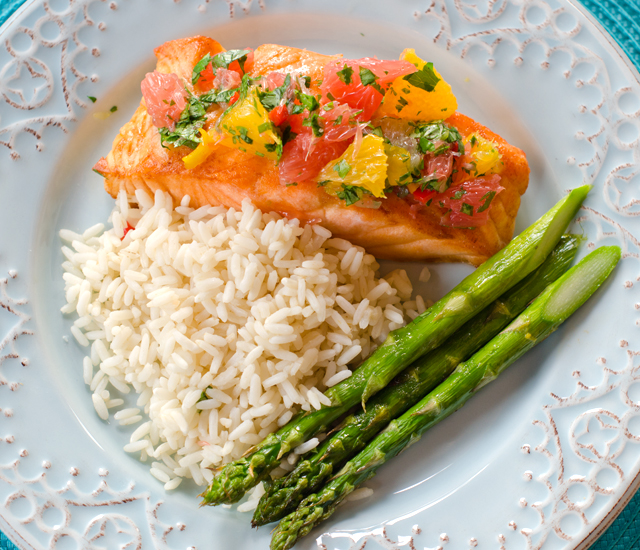
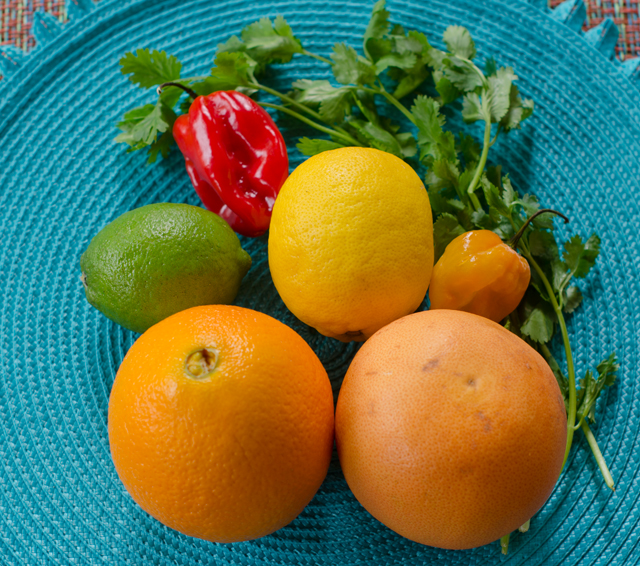
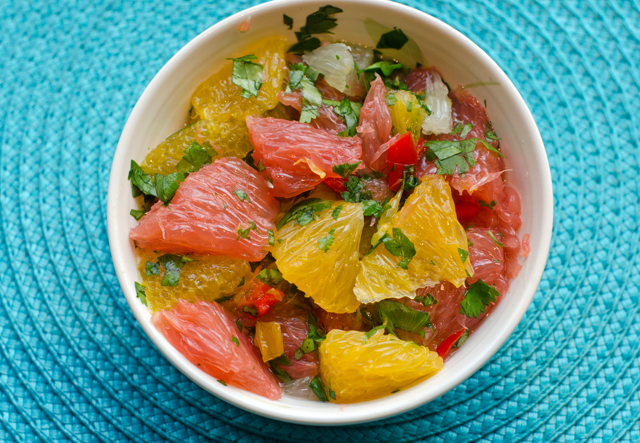
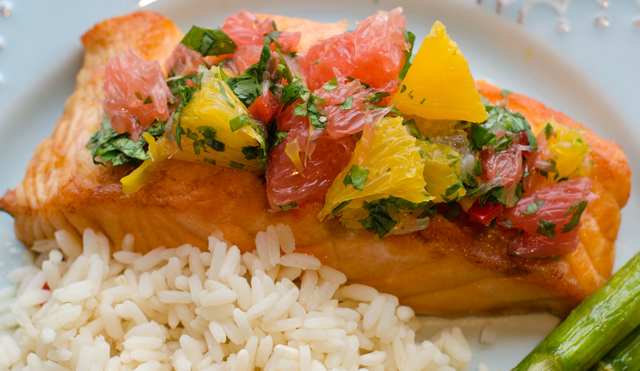
A vibrant combination of juicy grapefruit, orange, lemon and lime sections, accented with fragrant and spicy habanero pepper, the Yucatan peninsula is home to this colorful and healthy salsa. The Mayan name for this dish is Xec, pronounced, shek which roughly translates, “mixed”. It is an easy to prepare dish, all of the fruit is cut vertically and sectioned, the way you would cut into your morning grapefruit. If you prefer, the citrus could also be cut into supremes or segments.

The salsa gets its heat from habanero chiles. Lantern shaped and bright red, orange or yellow in color, the habanero is the hottest chile available in grocery stores. For perspective, a habanero registers in at 300,000 to 475,000 units on the Scoville scale, the standard for measuring the heat of a chili pepper, the jalapeno only 2,500 to 10,000 units. Treat all hot peppers with a certain amount of caution, wear gloves when working with them and keep your hands away from your face. It is best to add a little bit of chili pepper to see what your heat tolerance is before ruining a dish with too much at once.

I am fortunate to have a supply of NuMex Suave Orange peppers from the garden to add to the salsa. NuMex Suaves have the citrusy flavor that most people miss in the habanero, without the numbing heat. I like this salsa with fish, but it would pair with chicken or pork as well.

Mayan Citrus Salsa (Xec)

Makes four servings

Ingredients

  • 1 large orange
  • 1 medium grapefruit
  • 1 medium lemon
  • 1 lime
  • Finely chopped habanero pepper (according to your heat tolerance)
  • 1 NuMex suave pepper
  • ½ c finely chopped cilantro
  • Salt to taste
A combination of sweet, tart and sour citrus, habanero and cilantro are the ingredients for xec.
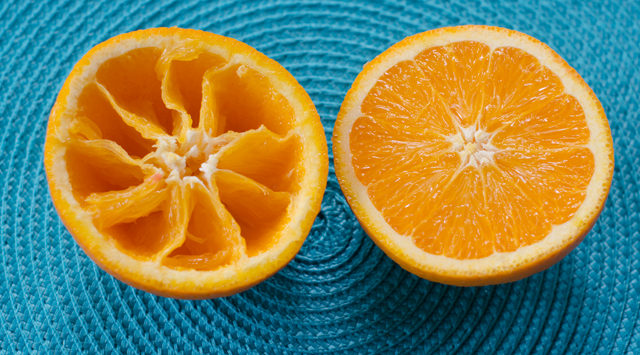
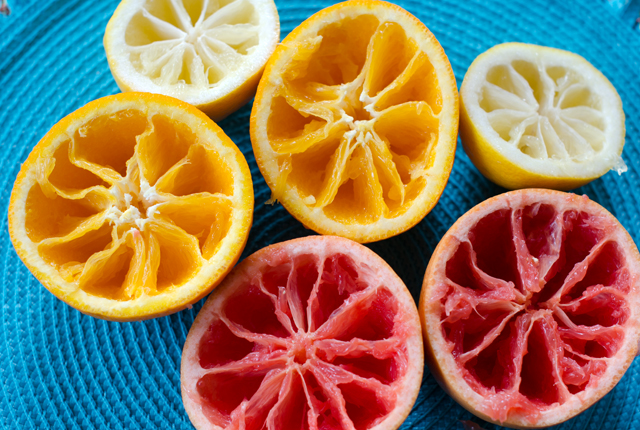
Section all the citrus the way you would a grapefruit.

Directions

  1. Cut orange in half horizontally and section it as you would a grapefruit. Do this over a bowl to capture all the juice. Remove the seeds and combine flesh and juice in a bowl. Repeat with the grapefruit, lemon and  lime. Stir in habanero, NuMex suave and cilantro. Season with salt.

March 26, 2017 Butternut Squash Soup with Sage Pesto

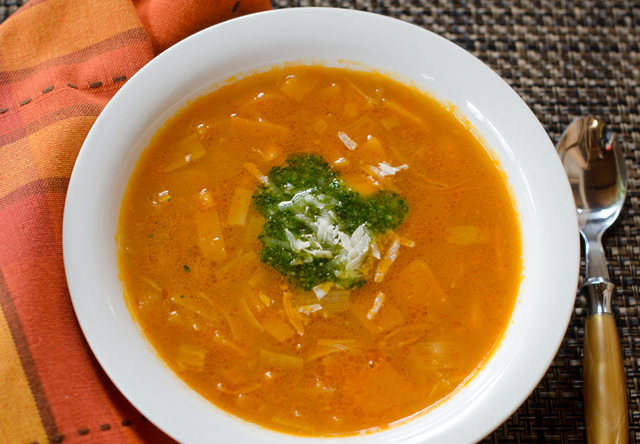
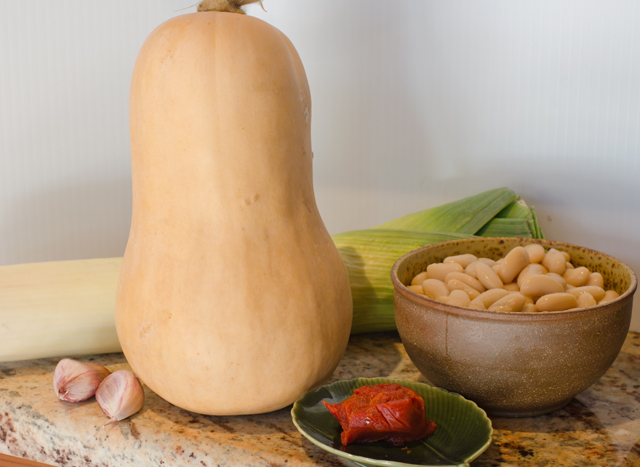
Is there really a need for another recipe for butternut squash soup when there are already three other butternut squash soup recipes on the blog? Well, when you have a metal locker in the basement still half full of last year’s harvest, (in excellent condition I will add) there’s always room for one more soup. This time the squash isn’t blended into a silky purée resulting in a soup that’s perfect as a starter for an elegant meal, here the squash pulls double duty. The fat bulbous end becomes part of a squash “stock” and the neck is cut into chunks that are simmered in the stock to make this hearty main dish soup.

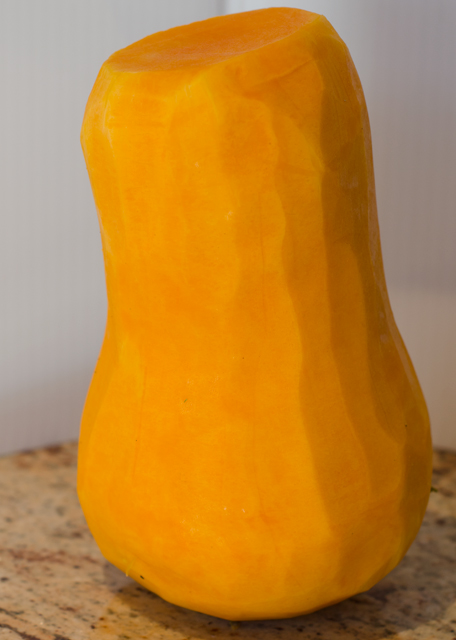
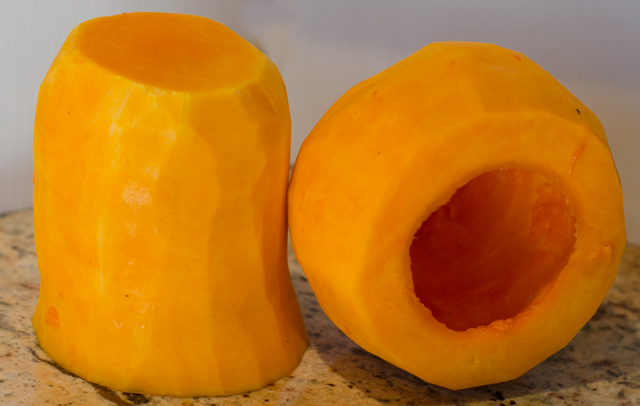
Start with a medium-sized squash, 2 to 2 1/2 lb, use a sharp knife to cut off a half inch piece at both ends.  You can either cut the squash in half (approximately) where the neck meets the bulb or leave it whole for peeling. The next part I find easiest to do using a vegetable peeler, the inexpensive Kuhn Rikon ones are my favorite. A well sharpened chef’s knife works well too. Place the squash on its side and run the peeler down the length. This part goes quicker with the neck, the curved bottom takes a little more time, but with practice the whole process shouldn’t take more than ten minutes. Be sure to remove the white flesh and green fibers that are right below the skin’s surface. The squash should be completely orange after peeling. Scoop out the seeds and the fibrous pulp from the bulb end. I save the seeds for roasting as a garnish for soups and salads.

The bulb halves are cut into four chunks and combined in a saucepan with stock, water, butter and soy sauce or tamari. The soy brings a savory umami note to the natural sweetness of the squash and the butter adds richness. Cook until the squash is very soft and mash in the pan until broken down.

While the stock is cooking, cut the neck end into 1/3 inch cubes. Sauté leeks and tomato paste in a Dutch oven. The mild sweet onion flavor of the leeks complements the squash and the tomato paste adds a little umami to the mix. Add the garlic and squash pieces and cook, stirring occasionally. Pour in the squash stock, bring to a simmer, partially cover and cook for ten minutes. Canned cannellini beans are the last addition and add a hearty creaminess and some substance to the soup. Simmer until the squash is tender. You can serve it now or if you have the time, make the soup, cool, refrigerate and reheat and serve the next day. As with many soups and stews, the flavors have time to meld together and it even tastes better.

Don’t skip making the pesto, it is a wonderful addition to the soup. Sage and parsley replace the typical basil in this recipe. I’m glad that sage is one of the first herbs to perk up in the garden, in spite of the cold temperatures of late. I truly despise paying several dollars for a handful of less than perfect leaves when I can pick them fresh.

Butternut Squash Soup with Sage Pesto

Serves 6-8

Ingredients for soup

  • 1- 2½ lb butternut squash
  • 4 c broth, chicken or vegetable
  • 3 c water
  • 4  T unsalted butter
  • 1 T soy sauce or tamari
  • 1 T vegetable oil
  • 1 lb leeks, white and light green parts only, washed thoroughly, sliced thin
  • 1 T tomato paste
  • 2 garlic cloves, minced finely
  • Kosher salt and freshly ground pepper
  • 3-15 oz can cannellini beans
  • White wine vinegar to taste

Peeled whole butternut squash.

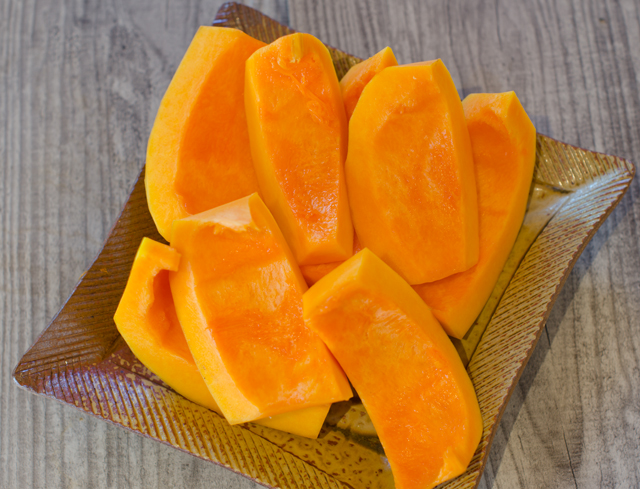
Cut the bottom into large chunks, they will become part of the squash stock.

Directions for soup

  1. Using a vegetable peeler, remove the skin and the fibrous threads just below the skin, the squash should look completely orange, no white spots remaining.
  2. Cut the squash in half where the neck and bulb meet. Cut the bulb section in half and remove the seeds and any strings. Save seeds for toasting if desired.
  3. Cut each half into four sections. Place the squash sections, broth, water, butter and soy or tamari in a medium saucepan and bring to a boil over medium high heat. Reduce heat to a simmer, partially cover and cook for about 25 minutes or until squash is very soft.
  4. Using a potato masher, mash the squash, still in the broth until it is broken down. Cover pan to keep warm and set aside.
  5.  While the broth is cooking, cut the neck of the squash into 1/3 inch pieces. Heat oil in a large Dutch oven over medium heat until shimmering. Add the chopped leeks and tomato paste and cook until the leeks are softened and the tomato paste darkens, about 5 minutes. Add garlic and cook until fragrant, 30 seconds. Add squash pieces, some salt and pepper and cook, stirring occasionally for 5 minutes.
  6. Add squash broth and bring to a simmer. Partially cover and cook for 10 minutes. Add beans and their liquid, partially cover and cook, stirring occasionally, until the squash is tender 15 to 20 minutes.
  7. Ladle soup into individual bowl, add a splash of white wine vinegar and dollop of pesto and an additional sprinkle of Parmesan cheese.


Sage Parsley Pesto

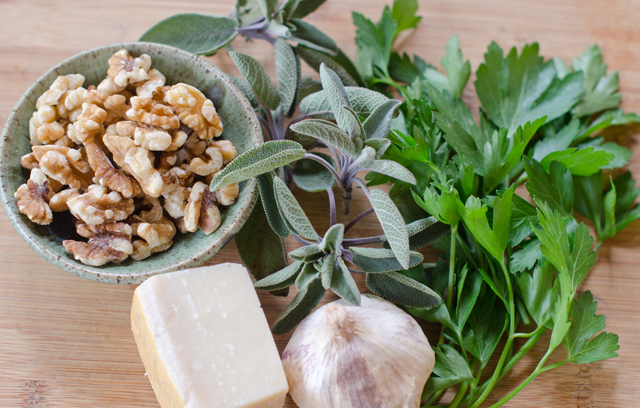
Ingredients for the Sage Parsley Pesto

  • ½ c toasted walnuts
  • 2 cloves of garlic, minced
  • 1 c fresh parsley leaves
  • ½ c fresh sage leaves
  • ¾ c extra virgin olive oil
  • ½ c grated Parmesan cheese
  • Salt and pepper to taste
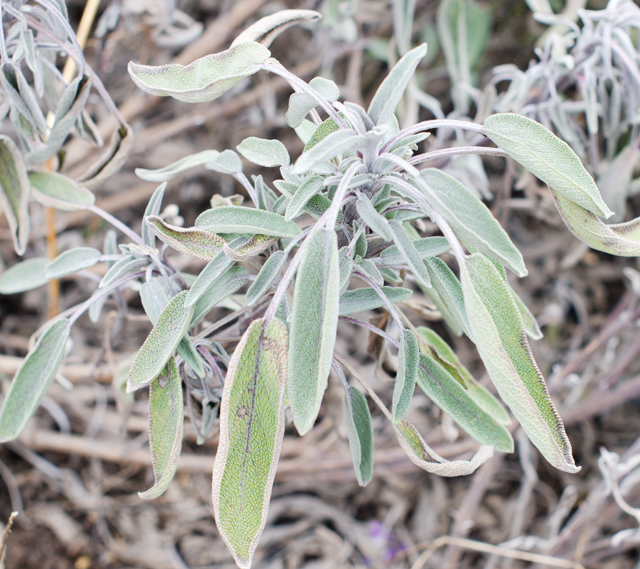
Sage is one of the first perennial herbs to emerge in the herb garden.
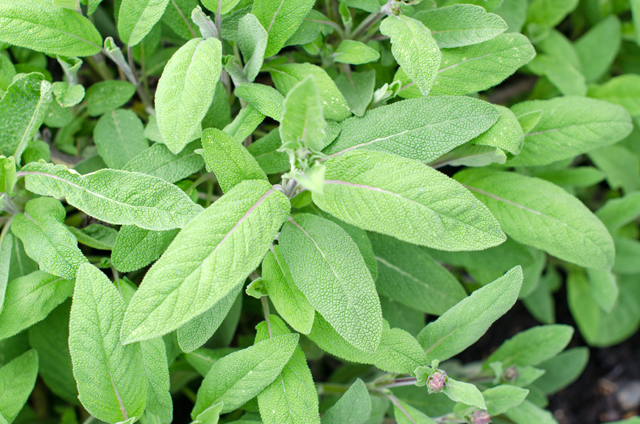
By the end of April, the sage will look more like this.

Directions for the Sage Parsley Pesto

  1. Pulse walnuts and garlic in food processor until coarsely chopped, about 5-6 pulses.
  2. Add parsley and sage to the bowl, with the processor running, slowly add oil and process until smooth, about 1 minute.
  3. Transfer to a bowl, stir in Parmesan and add salt and pepper to taste.
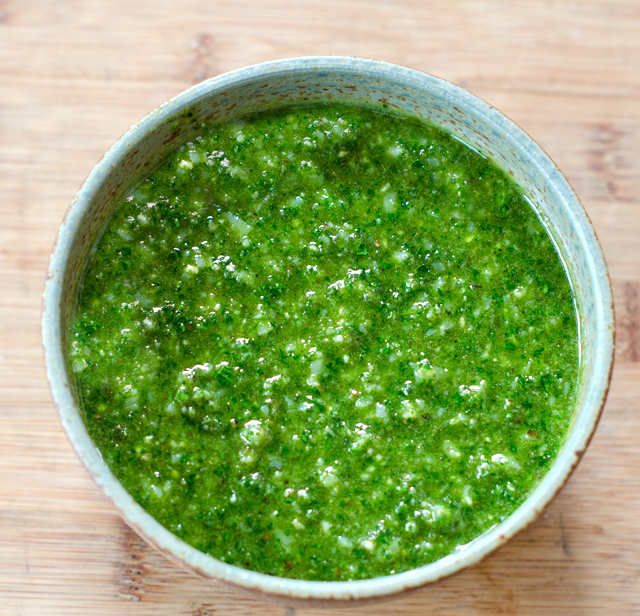
Parsley mellows out the sage in this pesto, a combination I will definitely try again.


March 21, 2017 Creamy Poblano Chicken

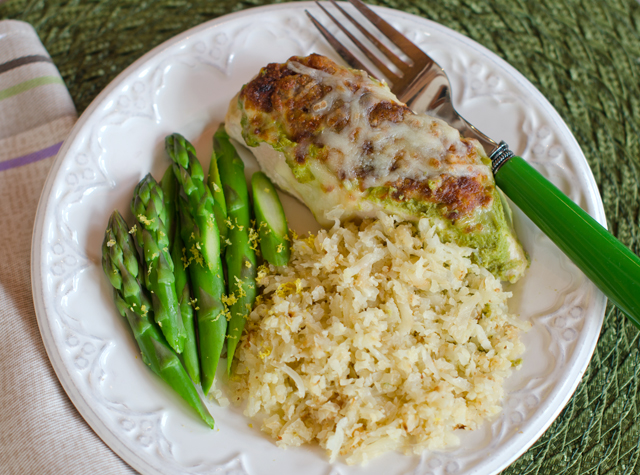
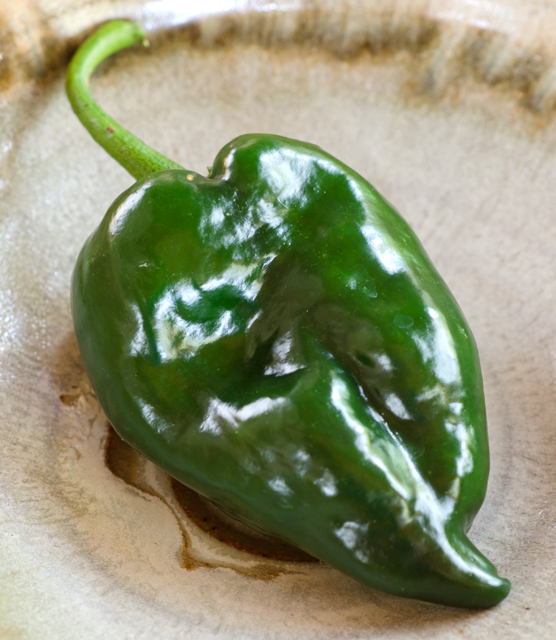
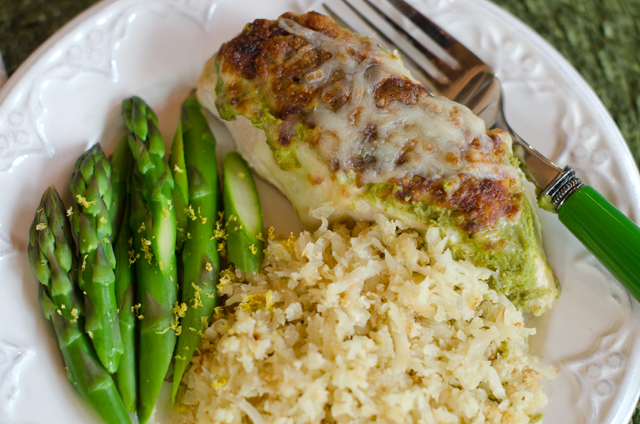
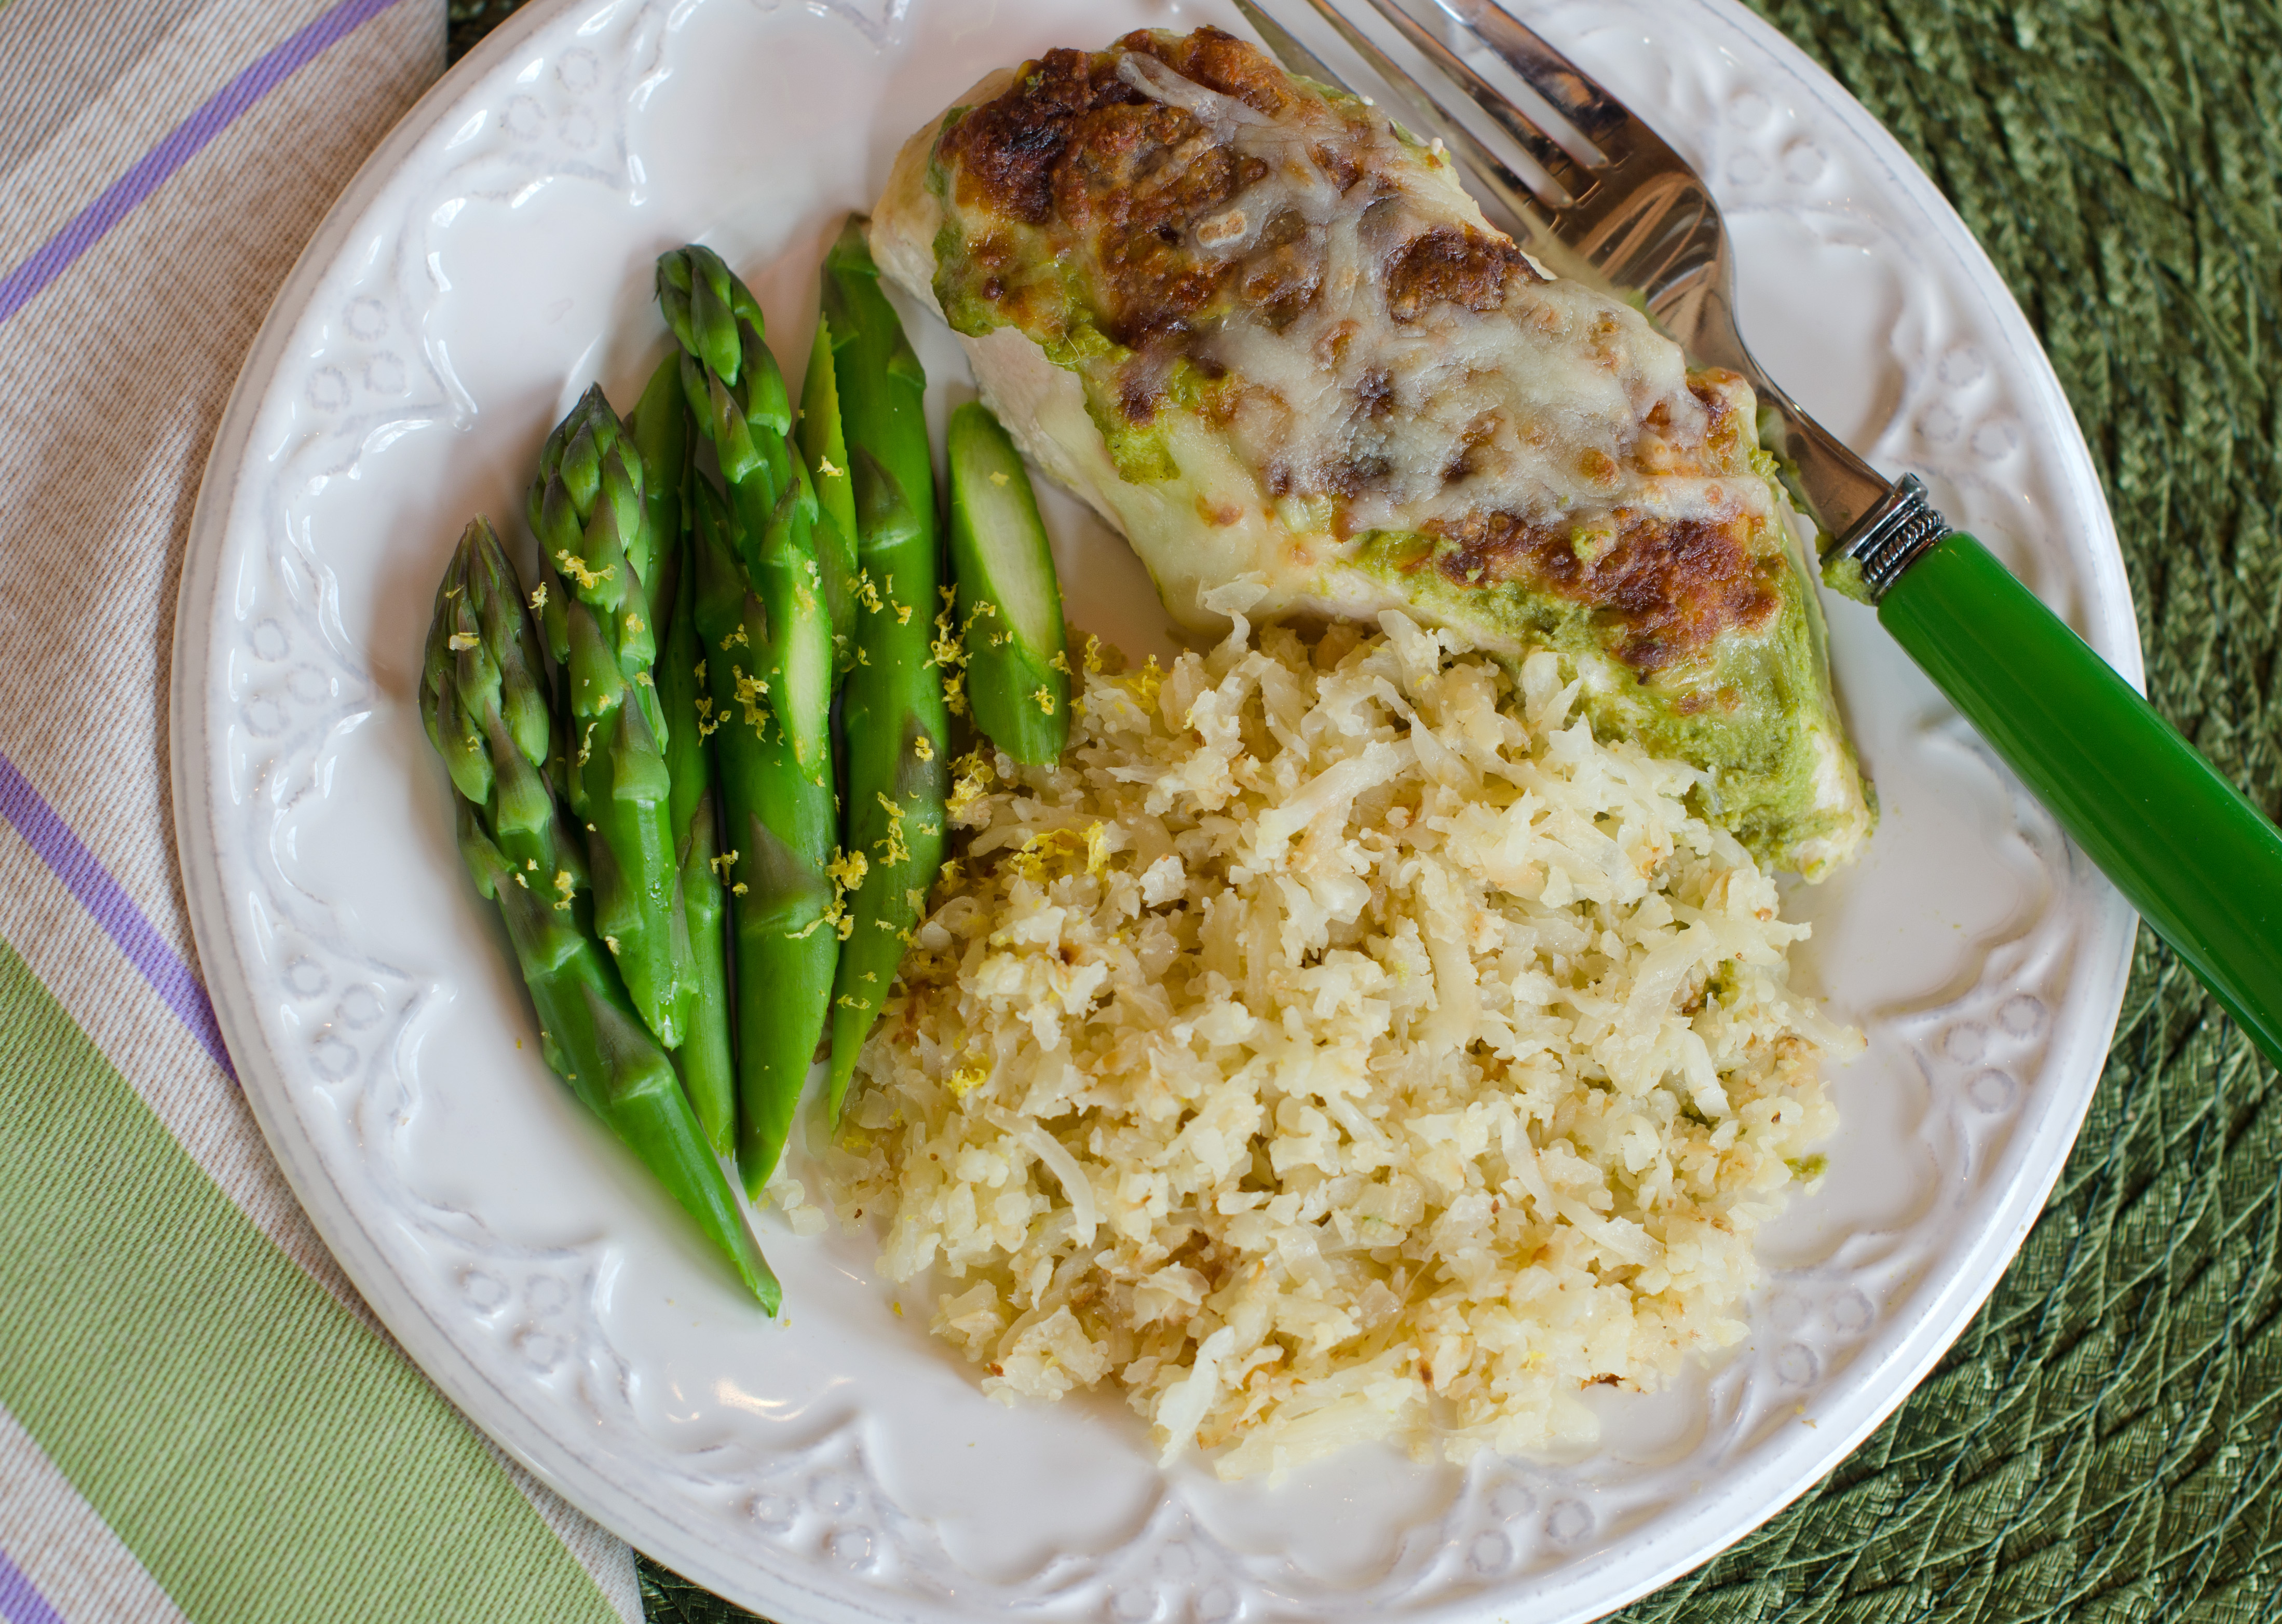
I didn’t think the day would come, but I finally exhausted my supply of freezer pesto. I’ve been using it this winter to top boneless chicken breasts before baking as an easy weeknight supper. A little looking around the freezer and I found the ingredients for this new impromptu sauce. Chicken with poblano cheese sauce is loosely based on a Mexican classic. Poblano peppers have a dark green skin and if left to ripen further on the vine will turn red. They are somewhat heart-shaped, 3-6 inches long and 2-3 inches wide. Poblano peppers are rich and flavorful with a mild to medium heat.

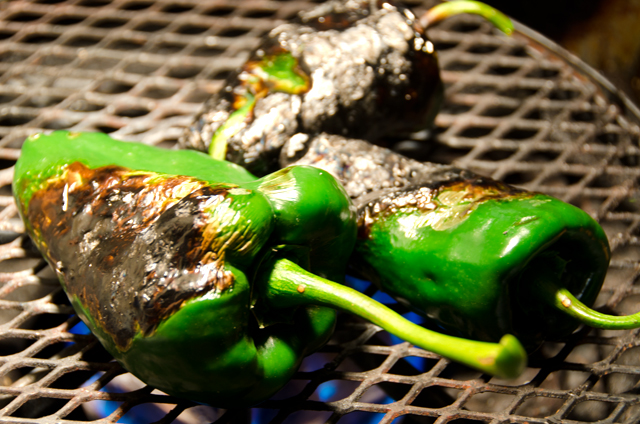
This recipe can be made as mild or as spicy as you like, depending on the number of poblanos added to the sauce. Since most recipes begin with roasted and peeled poblanos, there are several methods for roasting. If you have a gas stove as I do, they can be roasted on an open grated grill known as an asador. If you don’t have a gas stove they can be broiled on a foil lined baking sheet. With either method, turn them often so they char evenly. Put the chilis in a bowl while they are still hot and cover tightly with plastic wrap. Let them rest until they are cool enough to handle, 15-20 minutes. Pull on the stem to remove the seed core and cut the chile open to remove any additional seeds and ribs. Remove the skin by running your hands down the chile, use a damp paper towel to remove any skin that won’t easily come off. Resist rinsing the chiles, you will dilute the flavor.

The base is cauliflower Alfredo sauce, a recipe from the blog two summers ago. I wasn’t certain if this would be good to freeze, but I’m pleased to say it reheated well. Since my first step was to see if the sauce held up to freezing, I started with a cup of the cooled down sauce in the food processor. To this I added several roasted poblanos, from the end of last years garden, also from the freezer.

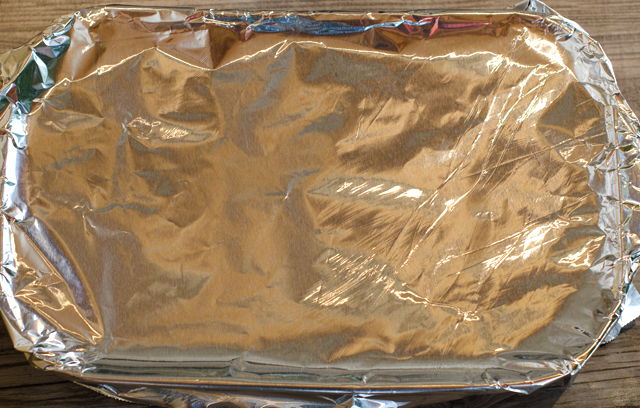
I puréed the sauce, along with a cup of raw spinach leaves, a teaspoon of ground cumin, salt and pepper. Start with one stemmed and seeded poblano, cut into strips and add more as desired just to give a little kick of heat. I topped chicken breasts with this sauce, covered with foil and baked for 23 minutes. After 23 minutes, I took out the chicken, removed the foil and topped with grated cheese and placed under the broiler. Delicious and the chicken is cooked perfectly! Next time I might add some roasted garlic too. This sauce would also be good to top chicken enchiladas or even as a dip for veggies.

Creamy Poblano Chicken

Serves 4

Ingredients

  • 1-1 ½ c cauliflower Alfredo sauce
  • 2-3 roasted poblano peppers
  • 1 c raw spinach leaves
  • 1 t ground cumin
  • kosher salt and freshly ground pepper
  • 2 lbs boneless skinless chicken breasts, remove tenderloin if attached, breasts cut in equal halves
  • ½c or more shredded cheese, a Mexican blend is good here, mozzarella is fine as well
  • Non stick spray or oil to coat baking dish.
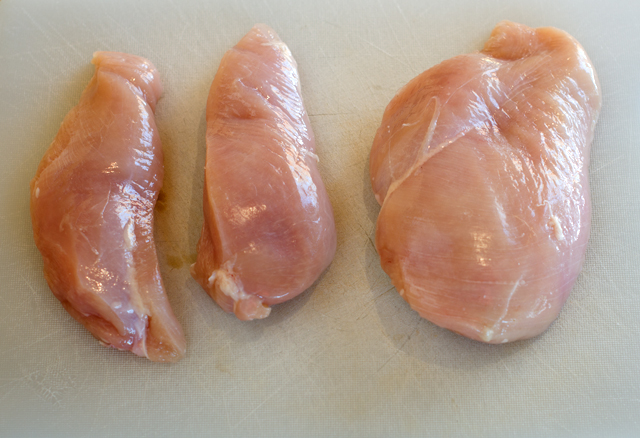
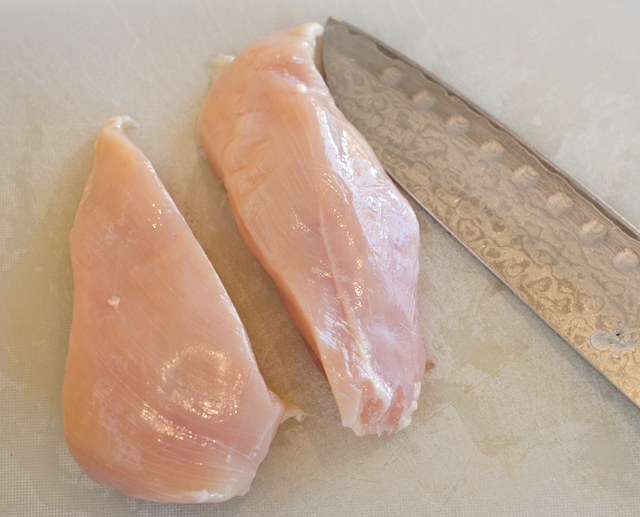
Cut large breast pieces in half.
It’s best to cut on an angle to get even pieces.
Poblano peppers add just the right amount of heat.
I like to cook them on the stovetop on an asador.


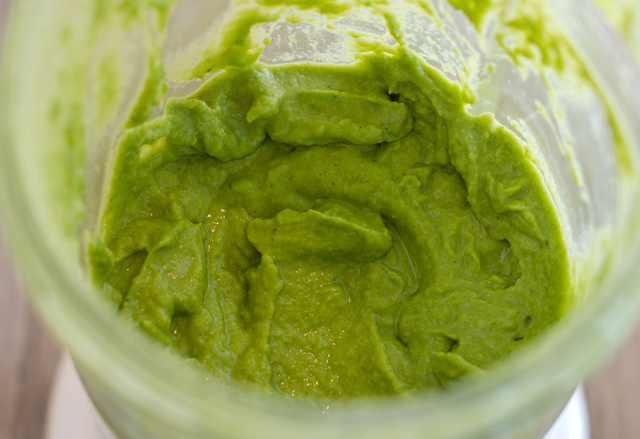
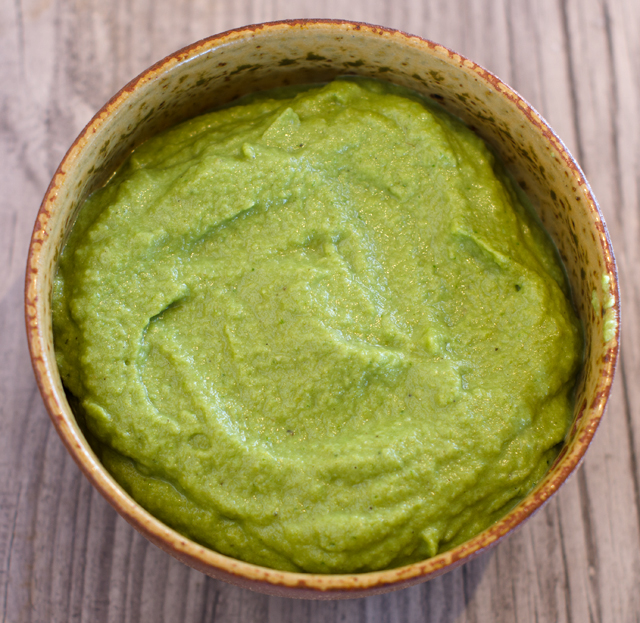
The sauce can be made easily in a food processor or blender.

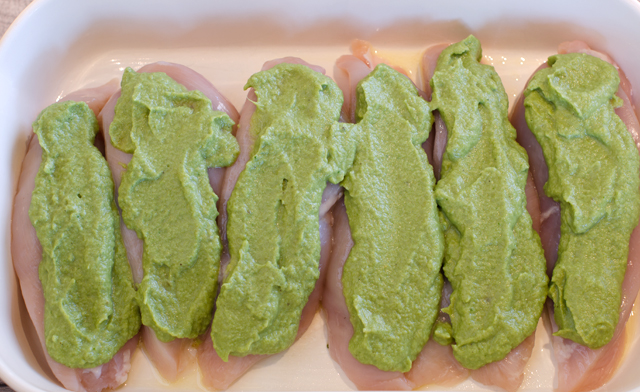
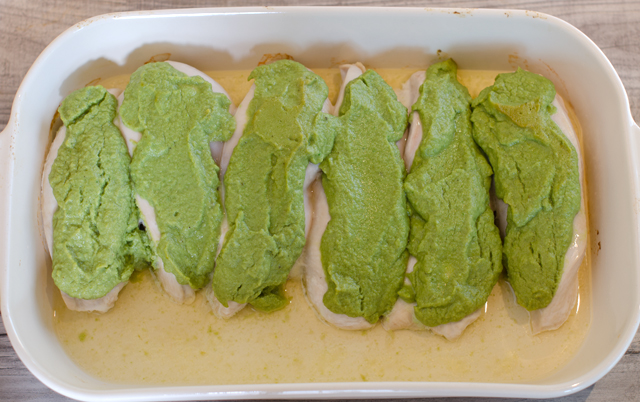
Coat the breast pieces evenly with the sauce.
Cover the chicken tightly with foil before cooking. Be careful of the steam that will escape after cooking.
After cooking they will shrink a bit.
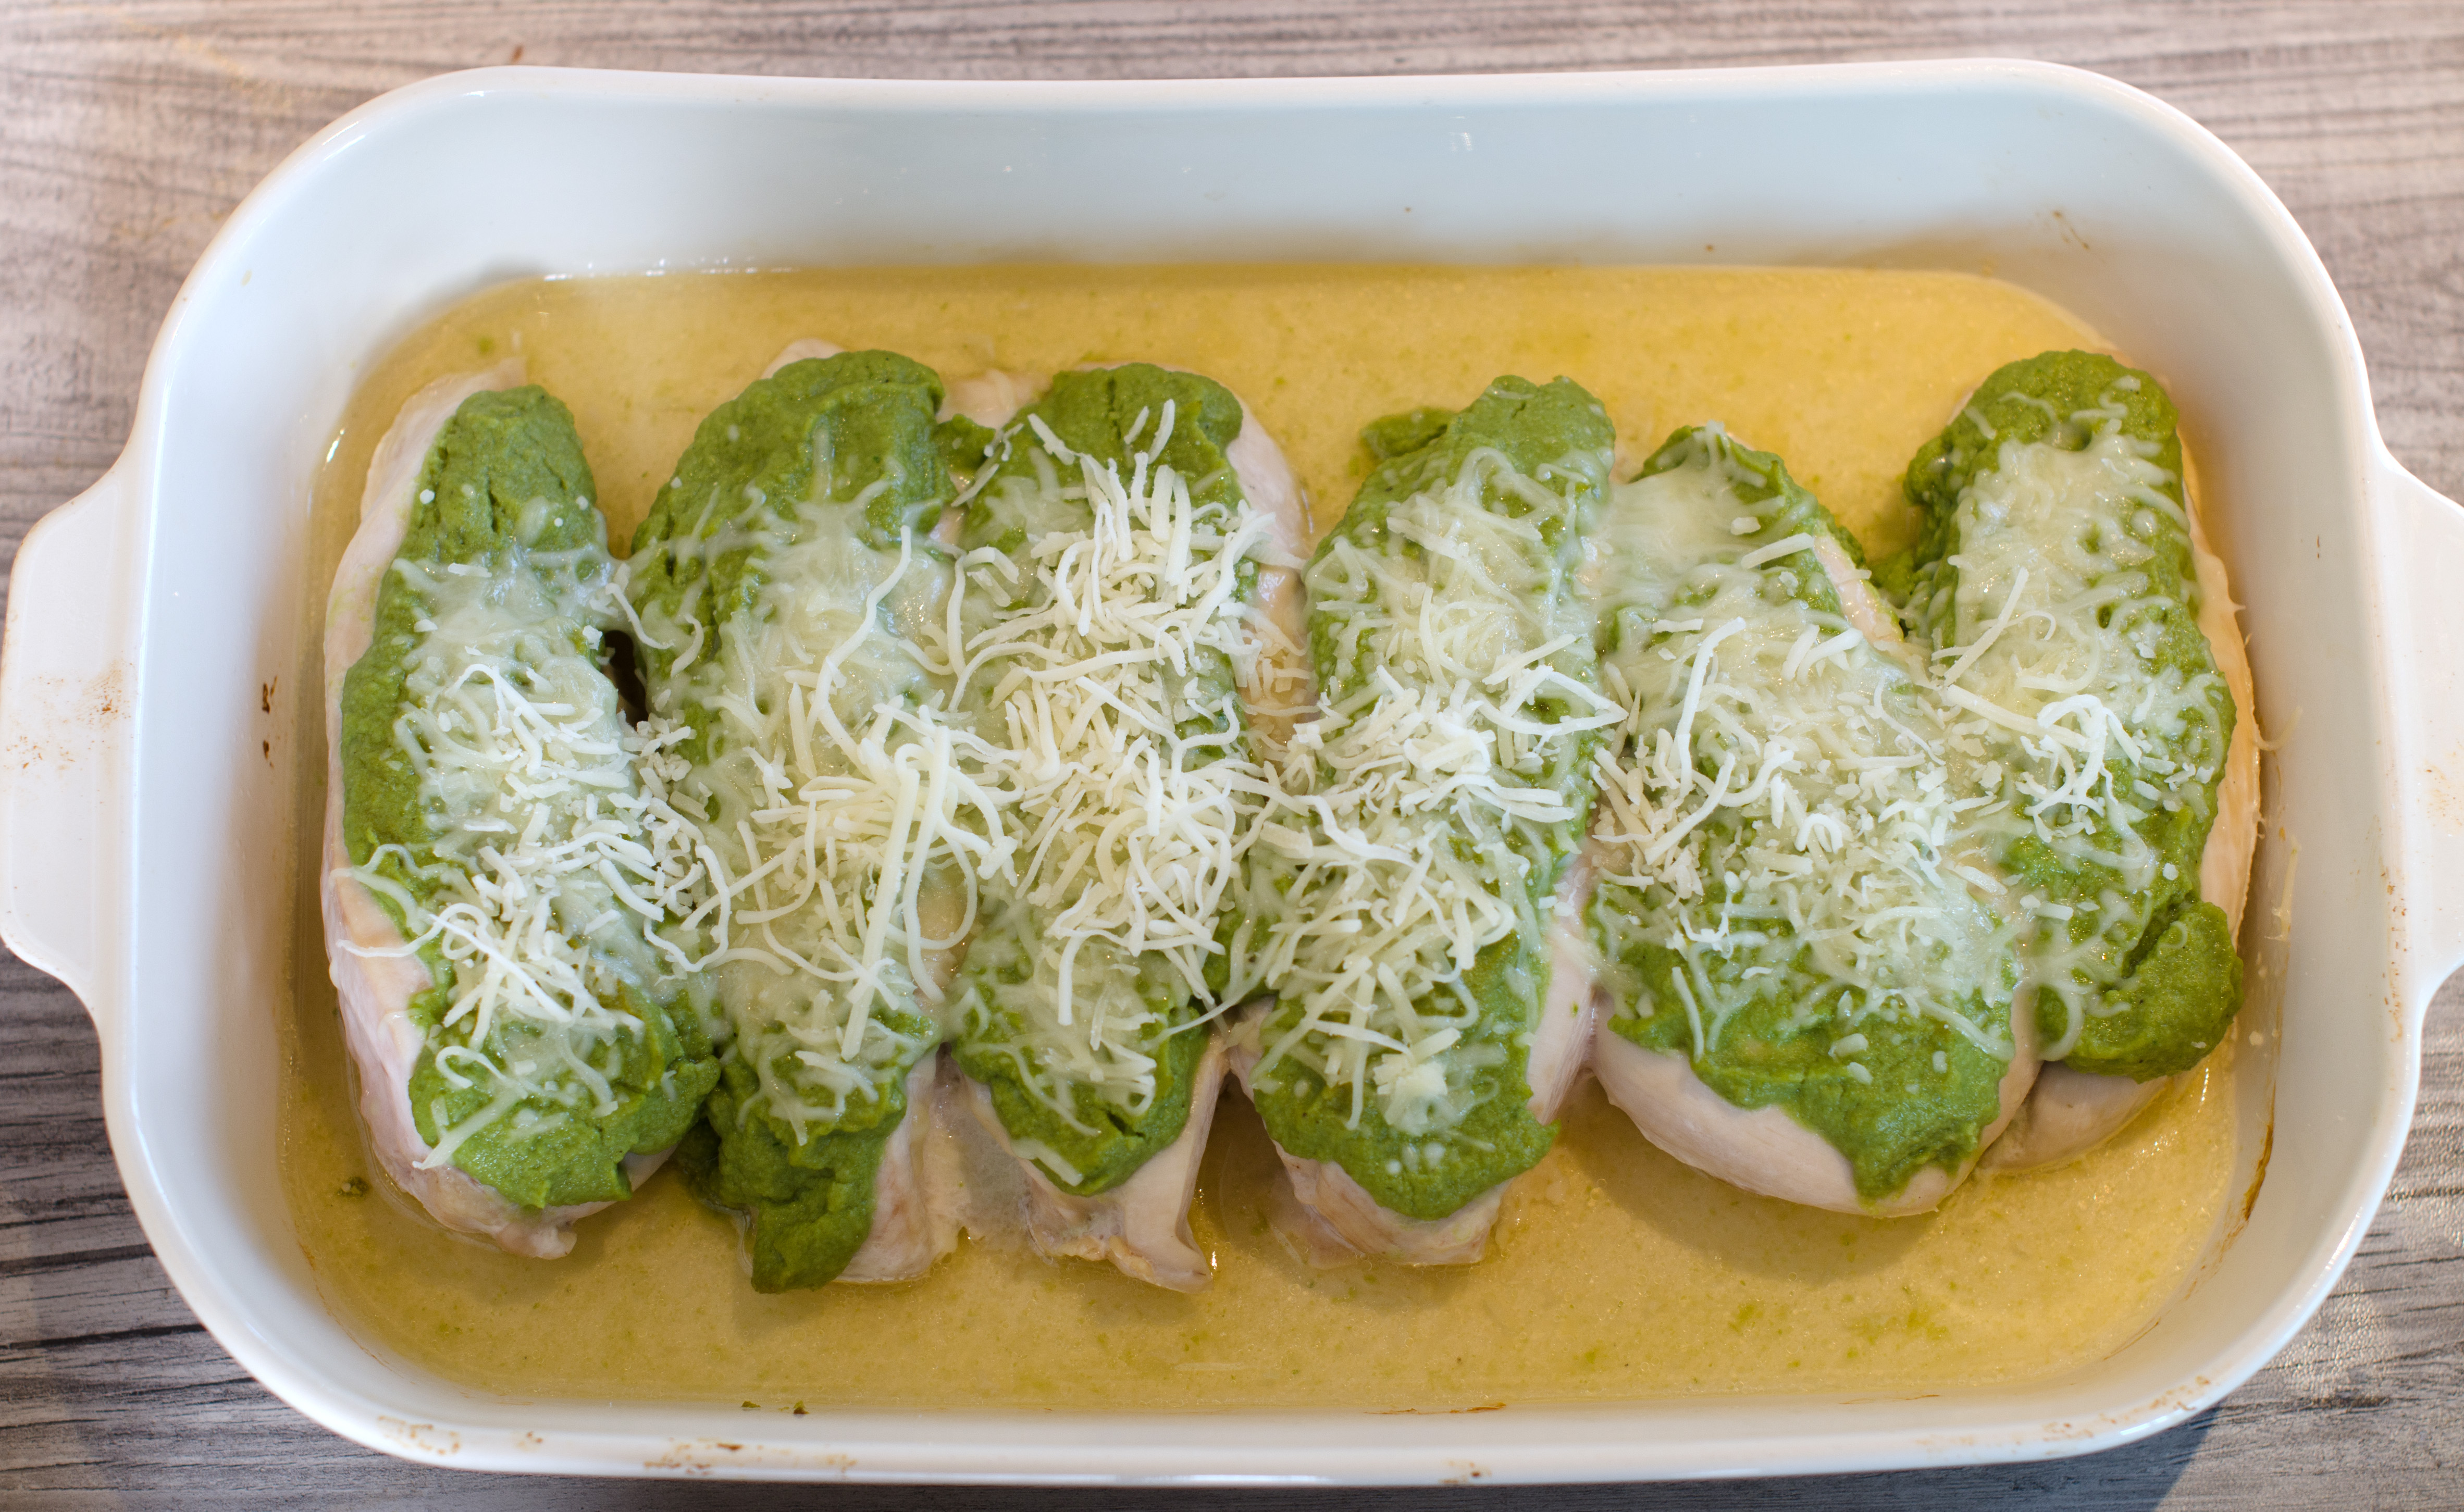
Turn the broiler on and sprinkle chicken with cheese.
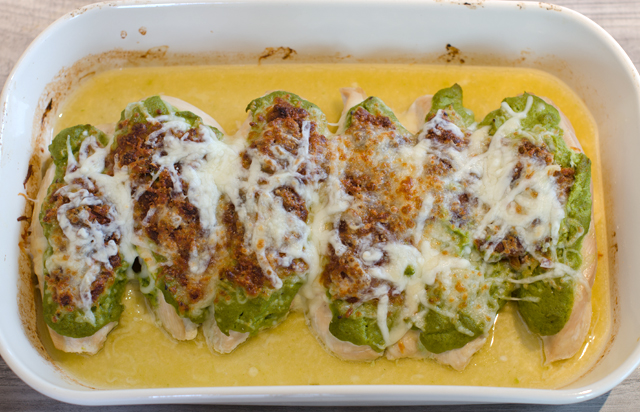
The finished product!

Directions

Preheat oven to 375°F

  1. Put the first four ingredients in the bowl of a food processor or blender and pulse until all ingredients are incorporated. Taste for seasoning and add another poblano if desired. Season with salt and pepper to taste. Scrape sauce from processor into a bowl and set aside.
  2. Spray a 9″ X 11″  baking dish with non stick spray or coat lightly with olive oil.
  3. Remove tenderloins from chicken breasts if still attached. Cut each breast in half to make even (as possible) pieces. Place the chicken breast pieces in the baking dish.
  4. Cover each piece generously with the sauce. Cover the baking dish with foil and bake for 23 minutes. Remove baking dish from oven, take off the foil and set oven to broil. Sprinkle cheese over chicken breasts and return baking dish without the foil to the oven. Broil until the cheese is melted and starts to brown in spots, 3-4 minutes. Watch closely. Serve with cauliflower rice to sop up the juices.

March 7, 2017 Pad Thai, a light version

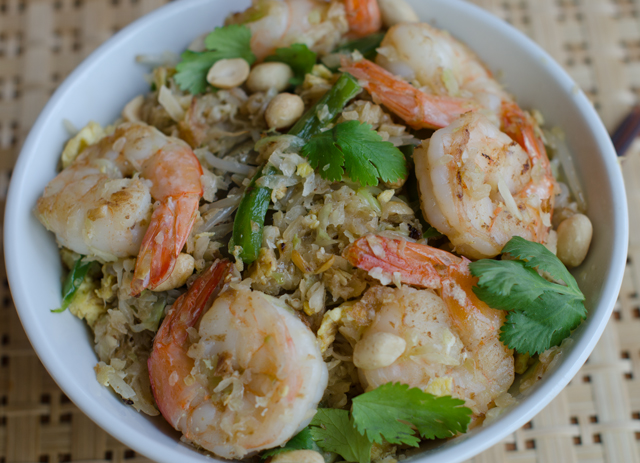
Since Joe has already lost ten pounds on a South Beach phase 1 diet, I am looking for ways to adapt recipes we already like to fit the plan. My latest “rework” is Pad Thai. Pad Thai is a stir fried noodle dish, typical food cart fare in Thailand that over the last thirty years has gained popularity worldwide.

Most of the Thai cookbooks I own are over thirty years old and I was surprised to see that I rarely found a listing for Pad Thai in the index. What I did find were recipes for “Noodles, stir fried Thai style”. I learned that Pad Thai was made popular in the 1930’s and ’40s as part of an attempt to modernize and revitalize the economy of the country. The full name of the dish is  Kway teow phat Thai. Kway teow means rice noodles in a Chinese dialect and phat Thai means Thai-style, hinting at the possible Chinese origins of the dish.

The dish is a harmonic combination of flavors, umami (fish sauce), sour (lime or tamarind paste), salty (soy sauce or tamari) and sweet (palm sugar). Fish sauce used to require a special trip to the Asian grocer, now it can be found in most large supermarkets. I prefer tamari in recipes over soy. A by product of miso production, it is thicker and less salty than soy sauce. Palm sugar is a sweetener made from the sap of the flowers of the coconut palm tree. The taste is similar to brown sugar with caramel and butterscotch notes. Tamarind comes from the pods of a large tropical tree and adds a pleasant sweet tart note to dishes. . If you look at the list of ingredients on a Worcestershire sauce bottle, tamarind extract is one of the ingredients. Lime juice is usually substituted when tamarind isn’t available. Another recipe I found in my research called for apricot or prune puree if a substitute for tamarind was needed. One well known cookbook author recommended ketchup as a substitute for tamarind, texture yes, taste, not like any ketchup I’ve tried.

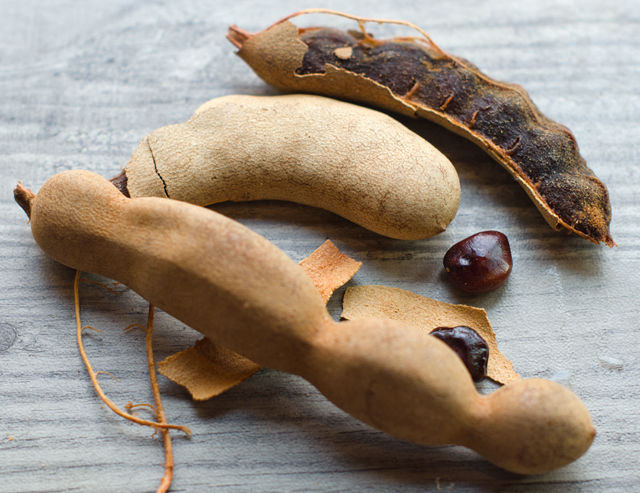
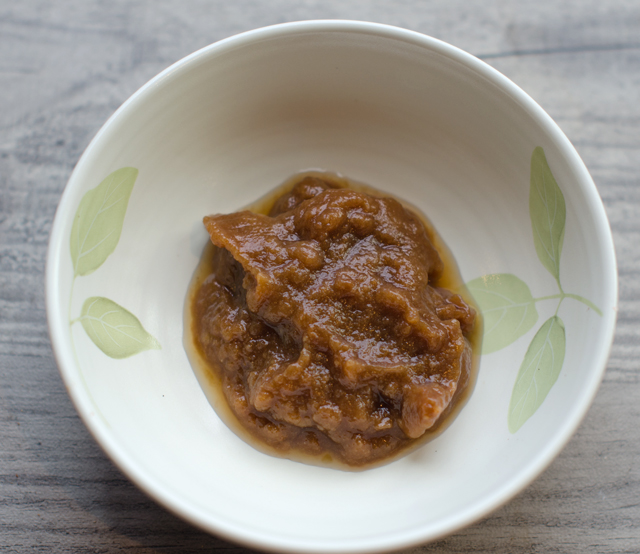
Several months ago I bought a container of tamarind pods with no specific reason other than to possibly use them some day. This recipe presented my opportunity, but I really had no idea how to extract the pulp from the pods. My first step was to remove the dried outer pods. Don’t expect them to come off neatly, they will break off in pieces. When the dried brown pods are removed, the sticky pulp is exposed along with strings that run the length of the pods, remove as many of the strings as possible. In the middle of the pulp are the smooth shiny seeds that almost look like they have been polished. After reading several articles I came up with the approach that worked for me. I put the pulp that still contained the seeds in a bowl. I covered the pulp with warm water for about twenty minutes. Then I put the softened pulp in a sieve and pressed on the solids with a pestle to extract as much pulp as possible. I got a decent amount of pulp and some tamarind water too. Next time I think I will take the easy route and order tamarind paste on line.

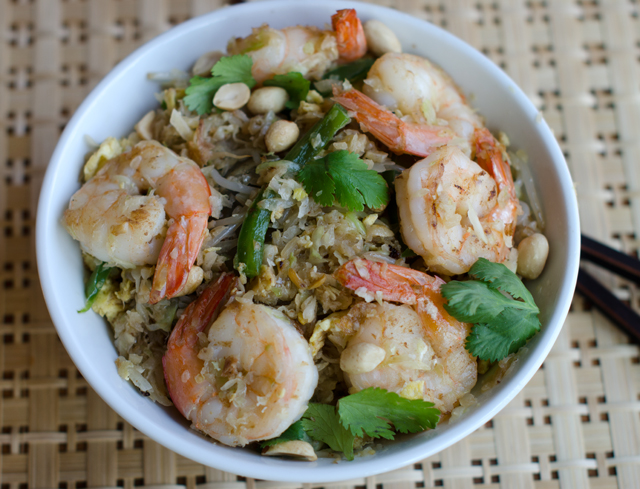
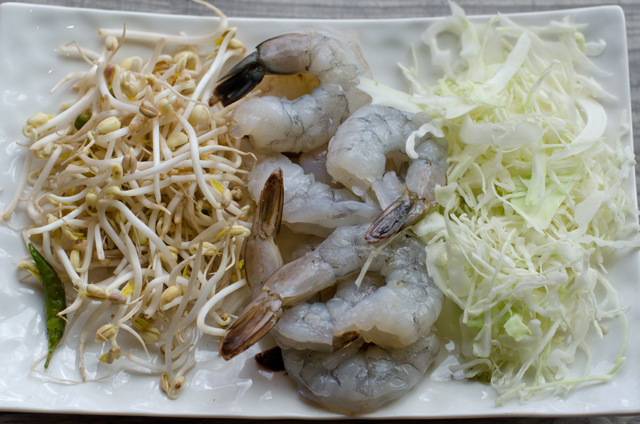
My version substitutes shredded cabbage for the traditional rice noodles since they aren’t part of phase one of the diet. Cabbage provides a good base for the dish and adds sweetness too. Noodles made from zucchini or daikon radish would work here too. I used shrimp as the protein in this dish, but chicken and either of those combined with tofu works as well. The secret to making any stir fry dish is to have all your components ready before you start cooking. It comes together in less than a half hour and I must say we enjoyed it very much.

Tamarind pods
Tamarind puree

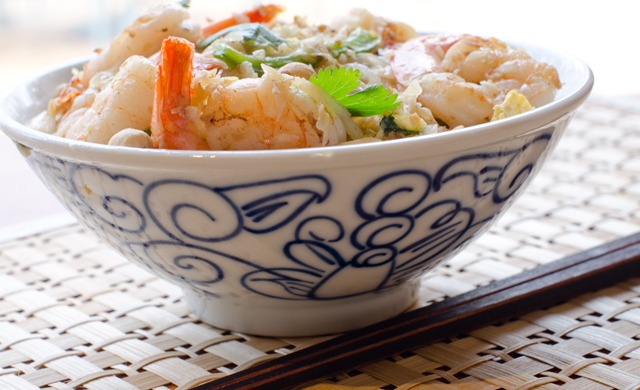
Pad Thai

Serves 3-4

Ingredients

  • 6-8 cups finely shredded green cabbage
  • 5 T peanut or neutral oil like grapeseed (divided)
  • 2 eggs, lightly beaten
  • 4 garlic cloves, finely minced
  • 12 oz to 1 lb shrimp, peeled and deveined
  • 1 green pepper, stemmed, seeded and finely sliced
  • 1 large shallot, finely sliced
  • 1 cup of mung bean sprouts, rinsed and trimmed
  • 2 t or more of nam pla (Thai fish sauce)
  • 2 t tamarind paste or lime juice
  • 1 T tamari or  soy sauce
  • ¼ c chopped peanuts
  • ¼ c cilantro leaves
  • 1-2 Thai chiles (optional)
  • 1 lime cut into wedges

Directions

  1.  Heat 2 teaspoons cooking oil in a large wok over medium high heat. Swirl the oil around to coat the entire pan, then add the cabbage. Season with some fresh ground pepper and stir fry until barely crisp tender, 3-4 minutes. Remove to a  bowl.
  2. Add a little more oil to the wok and add the eggs, and scramble quickly with a fork. Cook until set and remove to a cutting board and cut into thin strips.
  3. Add oil as necessary and add the garlic and the shrimp and cook, stirring occasionally, until the shrimp lose their grey color, 2-3 minutes. Remove from the pan with a slotted spoon to a plate.
  4. Add the shallot and green pepper to the wok. Season with salt and pepper and stir fry and stir fry until crisp tender, 4-5 minutes.
  5. Raise the heat to high and add a tablespoon or more of oil as needed Add the cabbage, eggs, shrimp and sprouts to the wok. Season to taste with the nam pla, tamari and tamarind or lime juice. Cook until all the ingredients are heated through.
  6. Add the chopped peanuts, cilantro leaves and optional pepper. Toss once or twice and transfer the contents of the pan to a serving platter. Serve with lime wedges.

December 27, 2016 Butternut Squash and Spinach Lasagna


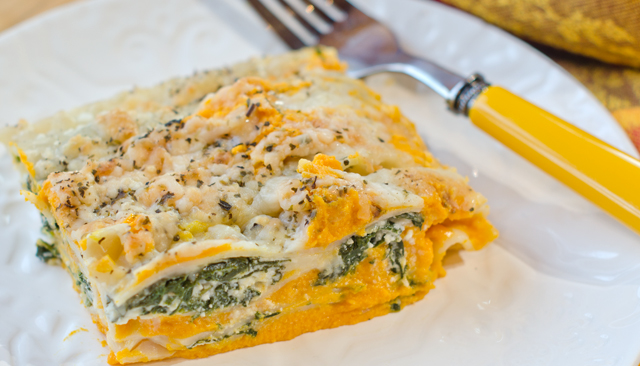
In this unique lasagna, perfect for the fall and winter months, a ricotta enriched butternut squash purée takes the place of a marinara sauce. A cheesy spinach filling complements the creamy squash for this satisfying and healthy vegetarian main dish.

You will need a medium size butternut squash, weighing two and a half to three pounds. Cut the stem end off the butternut squash then cut the squash in half where the bulb end meets the neck. Cut both pieces in half lengthwise. scoop the seeds and fiber out of the bulb end, save seeds for later use. I  rinse the seeds off and dry them between layers of paper towels. Toss with a little bit of olive oil and sprinkle with salt. Bake in a 375°F oven until they pop and become toasty brown. They are great for topping salads and for snacking.

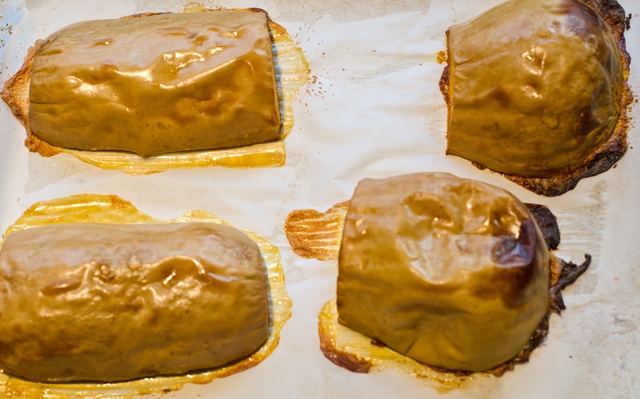
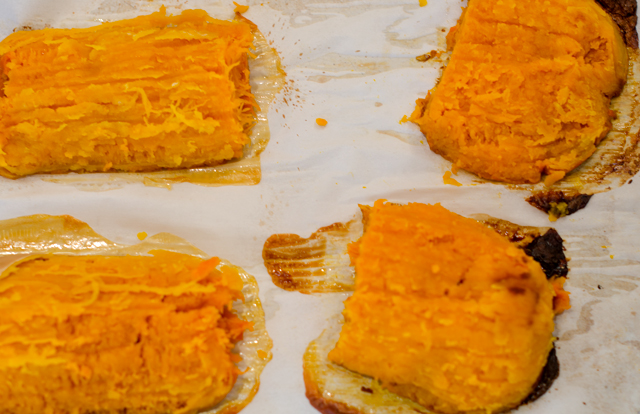
Cover a large baking tray with parchment paper. Brush the squash pieces lightly with olive oil and place the four sections of squash cut side down on the baking sheet. Bake in a 375° oven for about 50 to 55 minutes, until the squash pierces easily with the tip of the knife. Let cool for 10 minutes, the skin should come off easily. Place the squash pieces in the bowl of a food processor fitted with the metal blade. If necessary, add a little additional liquid, purée until smooth, you will have about 2½ cups. Add 1 cup of ricotta cheese and purée again, season to taste with salt and pepper and a little freshly grated nutmeg.

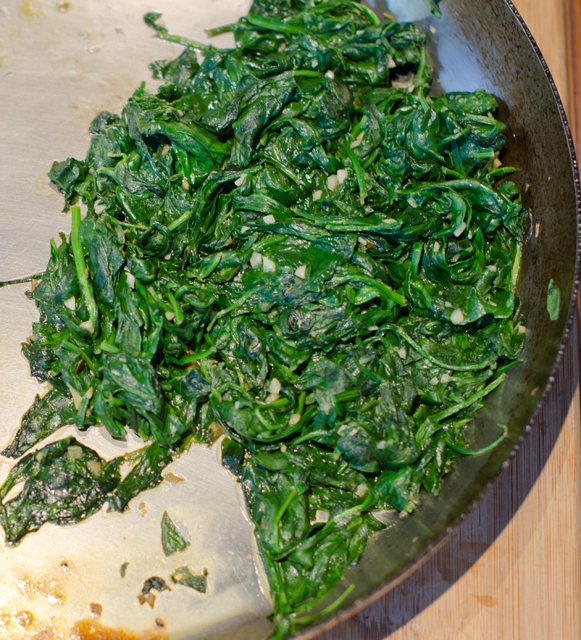
Place the spinach in a large bowl. Lightly rinse the spinach and toss in the bowl. The moisture will help wilt the spinach quickly. I used a 1 pound container of organic triple washed spinach.  Finely chop two garlic cloves.  Heat a large sauté pan over high heat and add the olive oil and swirl it around. Saute the garlic for a few minutes then add the spinach by the handfuls, adding more each time as it wilts down.  After squeezing out any additional liquid, the end result will be one generous cup of spinach.

You can make this version with regular lasagna noodles or if you are following a gluten-free diet, I would recommend  brown rice pasta noodles from Tinkyada, easily found in large grocery stores. They are actually good and have a nutty brown rice flavor. Follow package instructions with regular noodles, I would suggest cooking brown rice noodles for about 10 minutes, no longer. Drain them in a colander, rinse with cold water and dry on parchment lined baking sheets. I haven’t tried this recipe with no bake noodles, my suggestion would be just be certain that the ingredients in your lasagna are moist enough to cook the noodles properly. There are 14 noodles in the package of brown rice noodles, I cook them all in case of breakage. You can always make a lasagna roll up with any leftover purée and cheese.

In a medium bowl mix the well-drained garlic spinach with one and a quarter cups of ricotta cheese and a cup of mozzarella cheese or a cheese blend that you prefer. Season to taste with salt and freshly ground pepper.

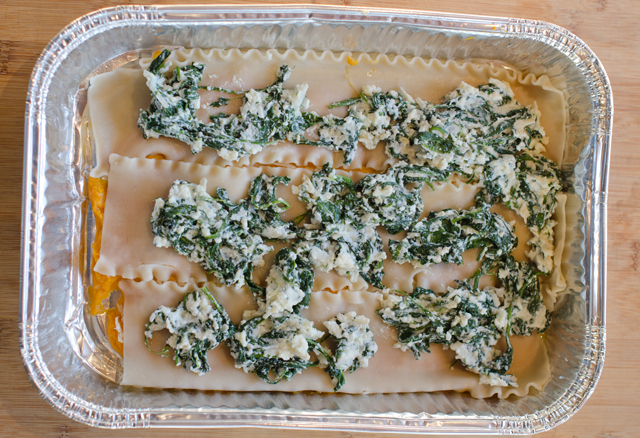
To assemble the lasagna, spray the bottom of your baking tray with nonstick spray.I used a disposable pan with dimensions of 11 x 8 x 2 . Spread one-third of the butternut squash mixture over the bottom of the tray. Top with three lasagna noodles. Dollop one half of the spinach cheese mixture over the noodles. Continue to layer and finish with the remaining butternut squash, sprinkle with a generous amount of cheese, and a sprinkle of dried basil and oregano. Cover with aluminum foil and bake for a half hour. After the half hour take off the foil reattach any cheese that has attached to the foil and bake uncovered for another 10 to 15 minutes.

Since lasagna is a time-consuming dish you could do this in stages, make the butternut squash puree one day, the spinach filling the next and assemble and cook on the third day. You could substitute frozen spinach rather than cooking down your own. Possible additions to the dish include sautéed onions, sage leaves, even toasted walnuts. Serve with a crisp salad of arugula, fennel and apples. As it is with all lasagna, it’s even better the next day.

One of our very own butternut squash.
After baking, the skin pops off easily.
Skin off, ready to puree.
A large container of spinach cooks down to about a cup.
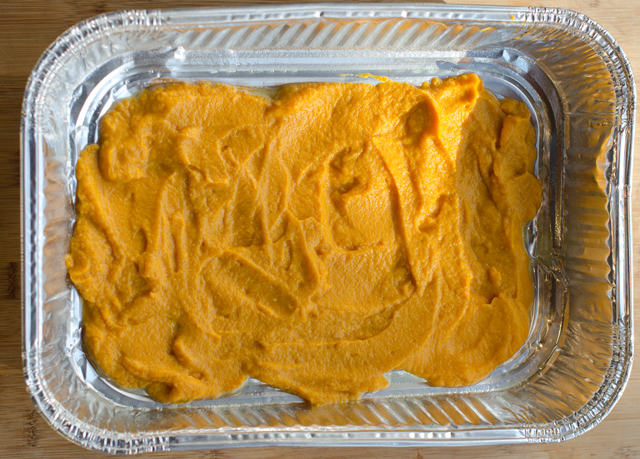
First layer of butternut squash ricotta puree .
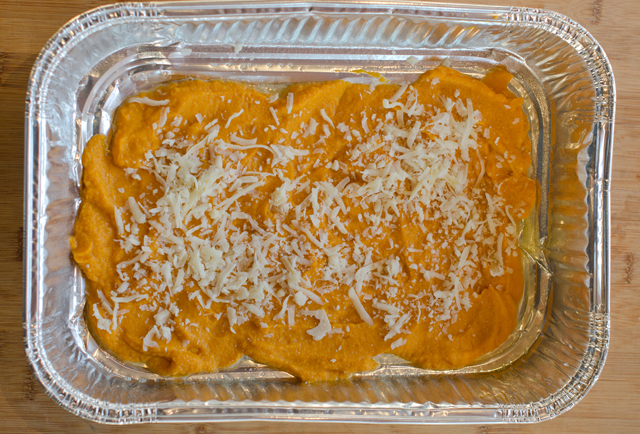
Just a sprinkling of mozzarella cheese on top.
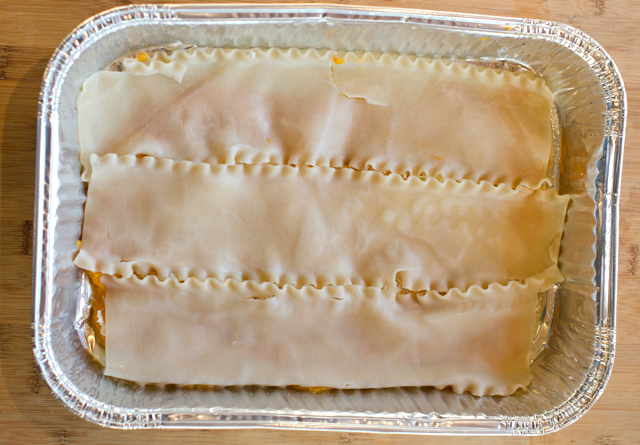
Lasagna noodles next, these are the brown rice noodles.
Next is the spinach and ricotta filling.
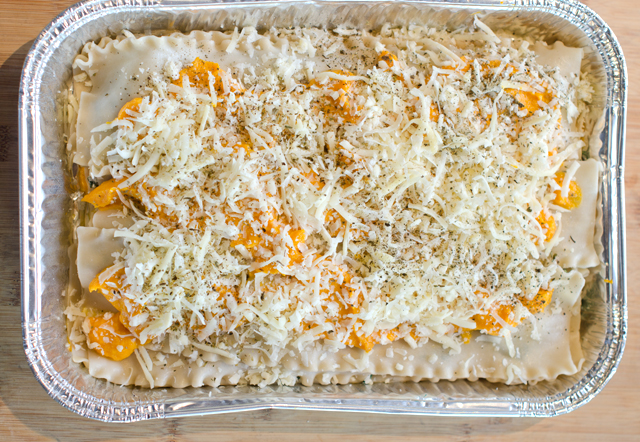
Repeat layers and finish with squash puree, a generous sprinkling of cheese, dried basil and oregano.
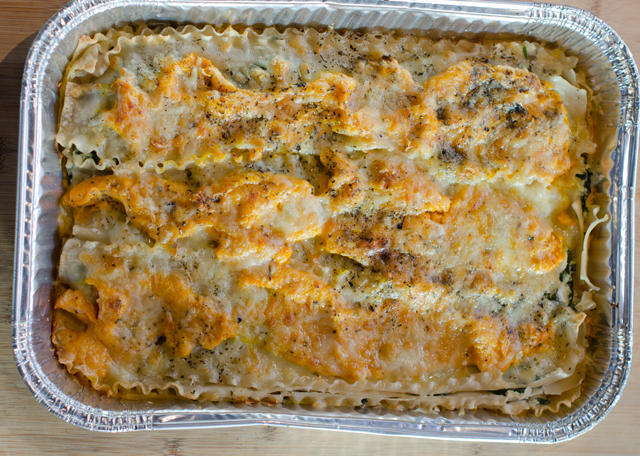
Out of the oven..


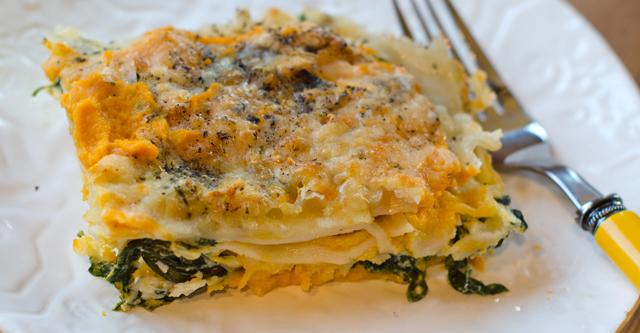
Delicious!!

Butternut Squash and Spinach Lasagna

Serves 6-8

Ingredients for butternut squash filling

  • 1-3 lb butternut squash
  • Olive oil
  • 1¼ c regular or low-fat ricotta cheese
  • ½ t salt
  • ¼ t freshly ground nutmeg

Ingredients for spinach layer

  • 1 lb fresh spinach
  • 1 t olive oil
  • 2 t minced garlic
  • 1 c regular or low-fat ricotta cheese
  • 1¼ c mozzarella cheese
  • Kosher salt and freshly ground pepper to taste

To assemble the lasagna

  • 1 lb lasagna noodles (regular or gluten-free)
  • Shredded mozzarella cheese
  • Shredded Parmesan cheese
  • Dried basil and oregano

Directions for making the squash puree

  1. Preheat oven to 375°F.
  2. Line a large baking sheet with parchment paper and spray lightly with nonstick spray.
  3. With a sharp knife cut the squash in half where the neck meets the bulbous end. Cut both of these pieces in half lengthwise. Scoop out the seeds and reserve for toasting if desired.
  4. Brush the cut sides lightly with olive oil and place the four squash pieces on a baking sheet cut side down. Bake in preheated oven 25 minutes, rotate and bake another 25 minutes. The squash should be easily pierced with the tip of a knife.
  5. Cool the squash for about ten minutes, until it can be handled. Scoop out the flesh and place in the bowl of a food processor fitted with the metal blade. Puree squash until smooth.  Add the ricotta cheese, nutmeg and salt and puree again. Taste and adjust seasonings. Add a little more ricotta if necessary, the puree should have the consistency of a thick marinara sauce. Set puree aside for the assembly. Leave oven on at 375° if you will be finishing the lasagna.

Directions for the spinach filling

  1. Place the fresh spinach in a large colander that is set inside a large bowl. Sprinkle the spinach lightly with water and toss spinach lightly.
  2. Heat olive oil in a 12″ saute pan. Add garlic and saute until light golden brown. Add the spinach by the handful, adding more as it wilts down. After draining the spinach of excess liquid, you will have a generous cup.
  3. In a medium bowl combine spinach and garlic along with ricotta, mozzarella, salt and freshly ground pepper. Taste and adjust seasonings.

Directions for assembling the lasagna

  1. Bring a large pot of lightly salted water to a boil over high heat. Add  lasagna noodles and cook according to package directions. Stir noodles occasionally to prevent them from sticking. Drain well and rinse with cool water.
  2. To assemble the lasagna, spray the bottom of the baking dish with nonstick spray. I used a disposable tray with dimensions of 8″ x 11″ x 2″.
  3. Spread one-third of the butternut squash puree over the bottom of the pan. Sprinkle lightly with mozzarella cheese. Top with three lasagna noodles. Dollop one half of the spinach cheese mixture over the noodles, sprinkle lightly with mozzarella cheese. Top this layer with the second layer of noodles.
  4. Spread your second layer of butternut squash over the noodles. Sprinkle with mozzarella cheese, then top with the third layer of lasagna noodles.
  5. Top this with the remaining spinach cheese mixture and sprinkle with mozzarella cheese.
  6. Top with the remaining butternut squash puree and spread evenly over the noodles. Sprinkle this layer generously with shredded mozzarella and Parmesan cheese. Sprinkle lightly with dried basil and oregano.
  7. Cover the baking dish tightly with foil and bake for 30 minutes. After 30 minutes remove the foil, reattach any cheese clinging to the foil and continue to bake uncover for another 10 to 15 minutes. You can turn the broiler on for a few minutes if you want to brown the cheese.

December 10, 2016 Pinchos Morunos

When Christopher Kimball left Cooks Illustrated to start a new multimedia venture, Milk Street, that includes a website, cooking school, TV and radio show and print magazine I was curious how the new magazine would differ from Cooks Illustrated, the publication he founded over twenty years ago. I have always been a big fan of Cooks Illustrated and have saved every issue since the first one came out in 1993. Could I justify subscribing to one more cooking publication?

The magazines are about the same size, Cooks Illustrated is a tad longer and both are 32 pages long. Both accept no advertising, unless you count the subscription inserts. Cooks Illustrated uses mostly black and white photography and illustration with color photographs of all the finished dishes on the inside back cover. Color photographs abound in Milk Street, though they aren’t the life-sized glamour shots we see on many popular blogs, they are accurate representations of the finished dishes. One thing Milk Street does not have are the wonderful back cover illustrations of John Burgoyne that are a welcome part of each issue. Whether it is a page of eggplant varieties, classic American cookies, crustaceans or heirloom tomatoes I always look forward to seeing his detailed and realistic work. On the other hand, Milk Street has Christopher Kimball’s folksy and entertaining  letters from Vermont.

Commenting on the new publication, Mr Kimball said that Milk Street would bring techniques from the world’s kitchens, focusing on simple dishes with easy to find ingredients. The term, “easy to find” has certainly changed since I started cooking over thirty years ago. The coconut milk and fish sauce I can find on any supermarket shelf now would have taken a special trip to an ethnic market back then. Although that was enjoyable and educational at the time, I appreciate the convenience now.

Looking at a recent issue of Cooks Illustrated I found recipes for shredded tacos, walkaway ratatouille, grilled pizza and paella on the grill, the typical representation of the Americas and western Europe. There is usually one recipe with an Asian influence, in this issue one for Korean fried chicken wings. Milk Street’s inaugural issue reflected the global emphasis they promised with recipes for harissa from north Africa,  pie crust that uses a Japanese baking technique, Chinese white cooked chicken, Thai coleslaw, French carrot salad and the one I chose to make first, Pinchos Morunos.

Pinchos morunos are grilled skewered meat kabobs. A pincho, or pintxo as it is called in Basque country, is a thorn or a spike. This can either refer to the skewer the meat is cooked on or the cocktail pick that is attached to a piece of bread when pinchos are served as part of a tapas menu. Morunos refers to the Moors who influenced Spanish food and culture for centuries. The meat in the original recipe was most likely lamb, the Moors were Muslim and did not eat pork. When the Spanish adopted this recipe, the meat of choice became pork. The meat was tossed with a Moroccan spice blend, ras el hanout. The term ras el hanout translates to “head of the shop” and refers to the best spices the shop has to offer. Ras el hanout can have as many as ten spices, this recipe streamlines that number to three, salt and pepper not included.

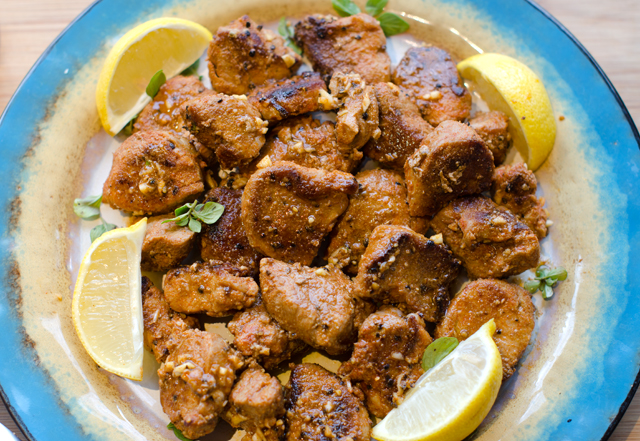
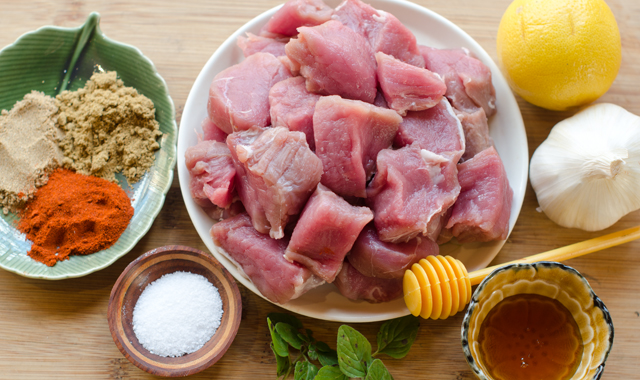
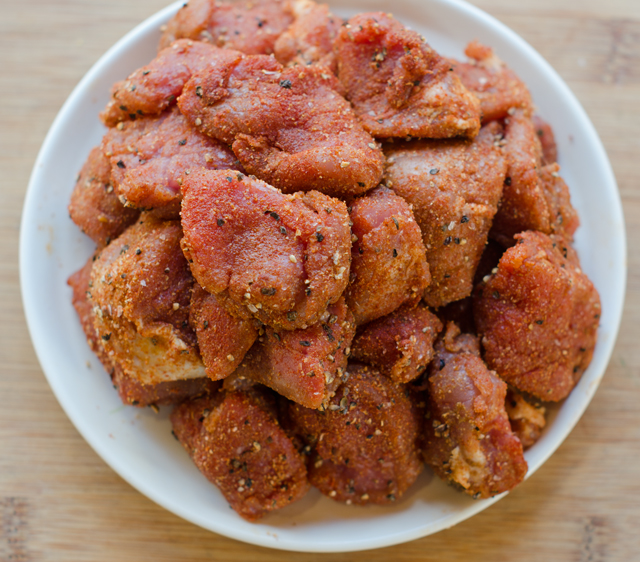
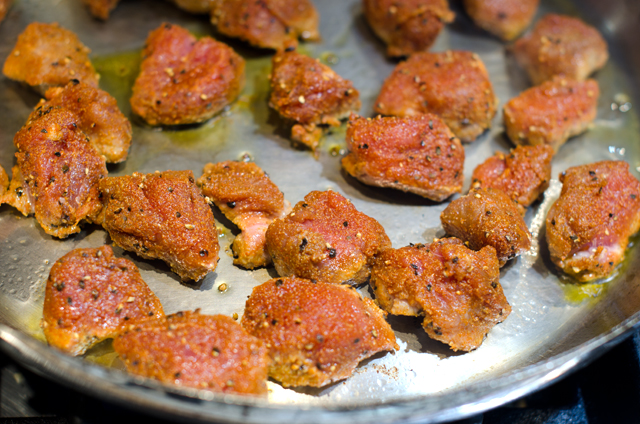
This version of pinchos morunos eliminates the skewers and brings the meat right to the saute pan. The pork is cut into 1 to 1 ½ inch cubes and tossed with a flavorful spice rub of cumin, coriander and smoked paprika. The cubes of pork are just the right size to absorb the rub and flavor the meat. The meat only needs to sit for about an hour before proceeding with the recipe. While the pork is absorbing the flavor of the spices, mix the garlic, lemon juice and honey in a small bowl.

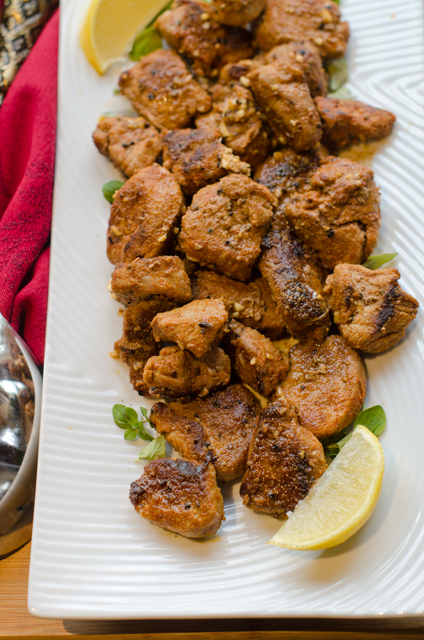
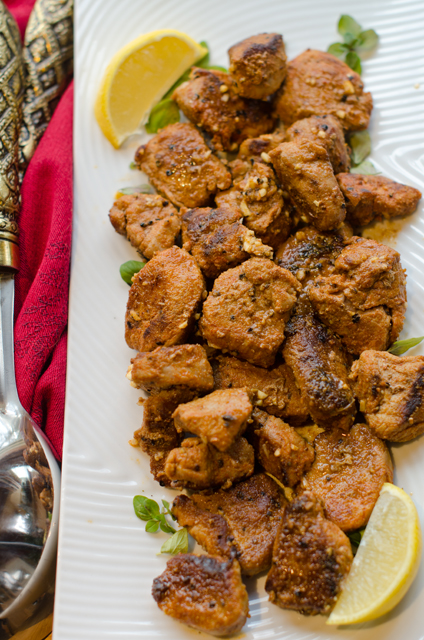
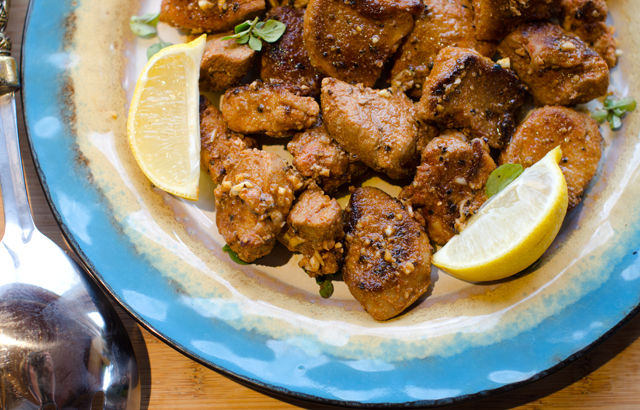
Place a large skillet over high heat, coat lightly with olive oil and heat until smoking. Add the seasoned pork cubes in one layer and cook without moving for about 3 minutes. You want all of the meat to develop a deep brown crust. Flip the pork with tongs and cook, turning the pieces occasionally as they continue to brown. The additional cooking time is 2-3 minutes, the pork will continue to cook even after you take it off the heat and you don’t want the pork to dry out. While the pork is still hot, pour the garlic, lemon, honey mixture over the meat and garnish with oregano. Serve immediately to optimally appreciate the flavors. You can prep the components of the dish earlier in the day. Cut the meat into cubes, cover with plastic wrap and make the spice blend and lemon honey mixture . An hour before serving, bring the meat out of the fridge and proceed with the recipe.

We have enjoyed this recipe several times for dinner. Serve with rice or couscous and a salad. It would also make a great hors d’oeuvre accompanied with a saffron aioli for dipping.

Pinchos Morunos

Serves 2-3

Ingredients

  • 1½ t ground coriander
  • 1½ t ground cumin
  • 1½ t smoked paprika
  • ¾t each kosher salt and fresh ground pepper
  • 1 lb pork tenderloin, trimmed and cut into 1 to 1½ inch pieces
  • 1 T lemon juice plus lemon wedges for serving
  • 1 T honey
  • 1 large clove of garlic, finely grated
  • 2 T extra virgin olive oil
  • 1 T chopped fresh oregano

Directions

  1. Combine coriander, cumin, smoked paprika, salt and pepper in a medium bowl.
  2. Add the cubed pork to the bowl and toss to coat thoroughly until no dry rub remains.
  3. Let the pork sit at room temperature for 30 minutes and up to 1 hour.
  4. While the pork is sitting at room temperature, combine the lemon juice, honey and garlic in another  bowl.
  5. In a large skillet over high heat, heat 1 tablespoon of the oil until smoking. Add the meat in a single layer and cook without moving until deeply browned on one side, about 3 minutes. Using tongs flip the meat over and continue to cook until browned on all sides, another 2-3 minutes.
  6. Take meat off the heat and pour the lemon juice and garlic mixture over the meat and toss until evenly coated.  Transfer the meat to a serving platter.
  7. Drizzle  the meat with the remaining olive oil, sprinkle with oregano and serve with lemon wedges.

Toss the pork cubes with the spice blend.
Be sure the pork develops a nice crust on the first side.