June 27, 2014 Grilled Chicken with Chermoula Sauce

DSC_7879a

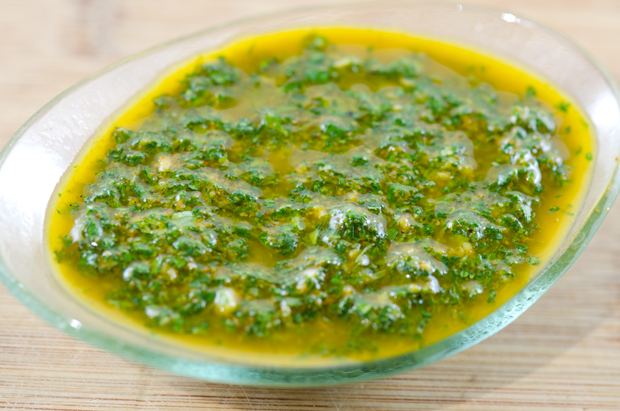
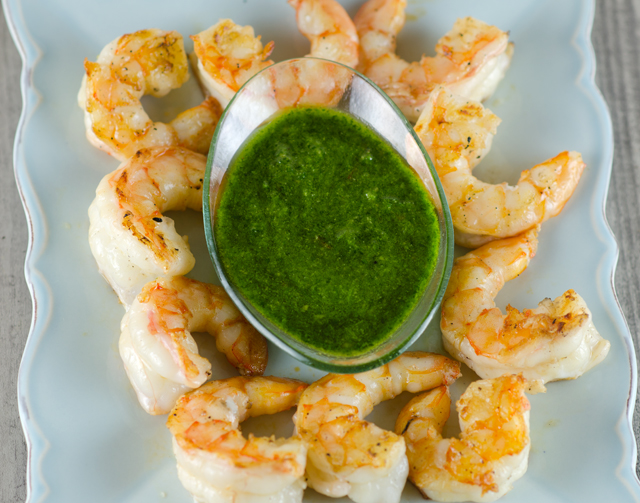
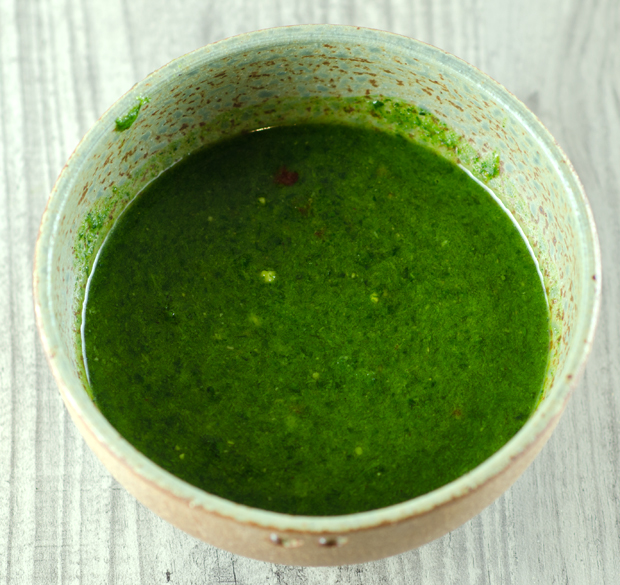
As a lover of all things related to food and cooking, I am especially pleased when I discover something new, at least new to me. In the tradition of herb and olive oil based sauces like pesto and chimichurri, chermoula is a sauce that originates from Morocco and other North African countries. It is a tangy blend of fresh herbs and spices, lemon and olive oil.

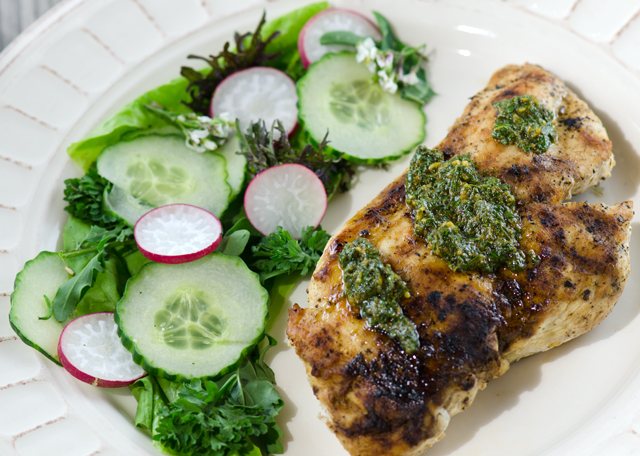
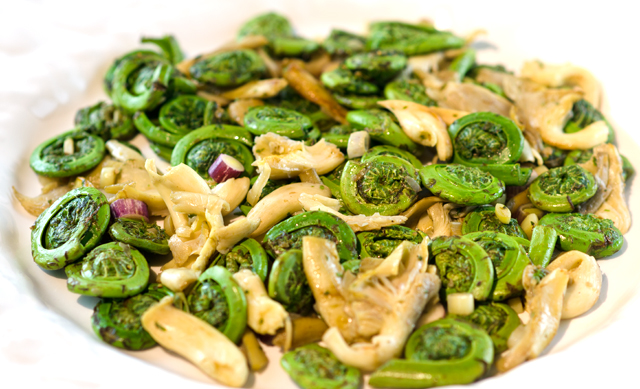
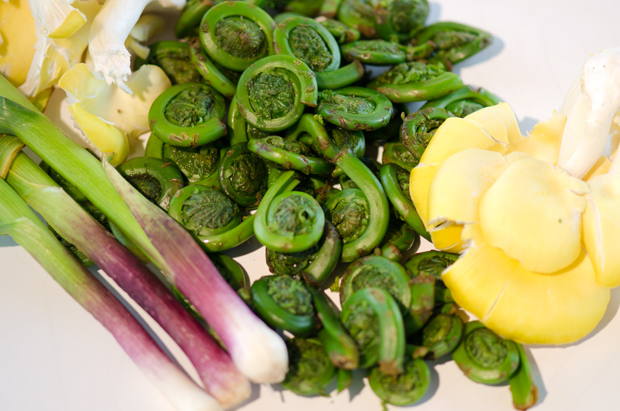
It is traditionally used to season fish but pairs equally as well with chicken or grilled vegetables. It can be both a dry spice mixture or more commonly, an herb sauce. I used it both ways in this recipe. First, as the rub for the chicken and then as the sauce to serve with the chicken. If you like, preserved lemon peel or a pinch of saffron would be a welcome addition to the mix. If you don’t like cilantro, either change the proportions of cilantro and parsley or eliminate it altogther. Traditionally, like pesto, this was made in a mortar and pestle but a mini food processor makes quick work of the recipe. I cooked these indoors on a grill pan, if I were cooking on an outdoor grill I would prefer whole chicken pieces.  Friendly to many diets, chermoula is a sauce worth discovering.

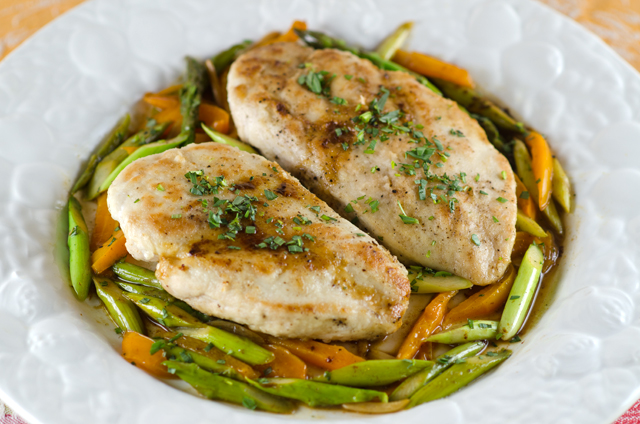
Grilled Chicken Breasts with Chermoula Sauce

Serves four

Ingredients for marinated chicken
  • 4 pieces boneless, skinless chicken breast
  • 4 T fresh-squeezed lemon juice
  • 4T olive oil
  • 1t ground cumin
  • 1t ground coriander
  • 1t garlic powder
  • 1t sweet paprika

DSC_7856a

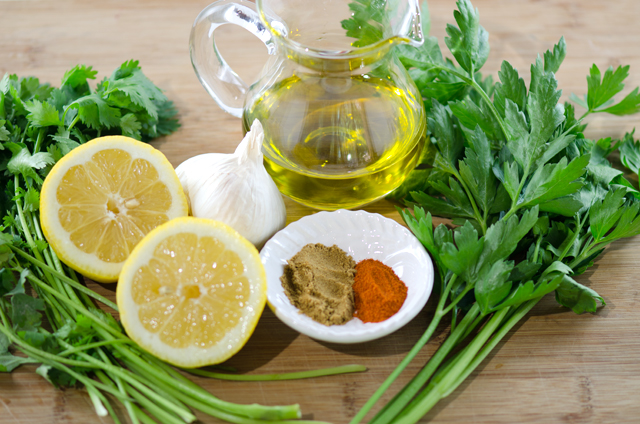
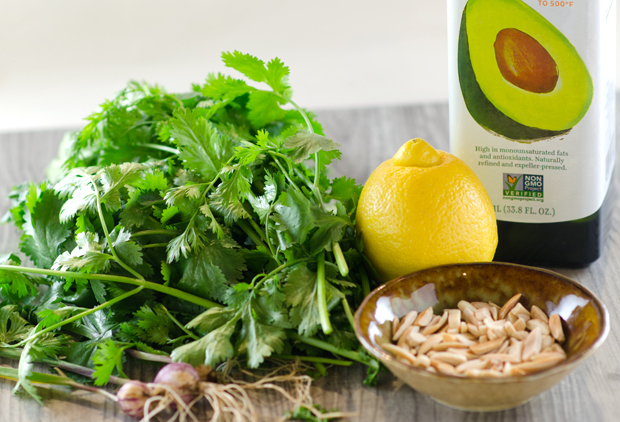
Ingredients for the Chermoula Sauce

  • 2 large garlic cloves, coarsely chopped
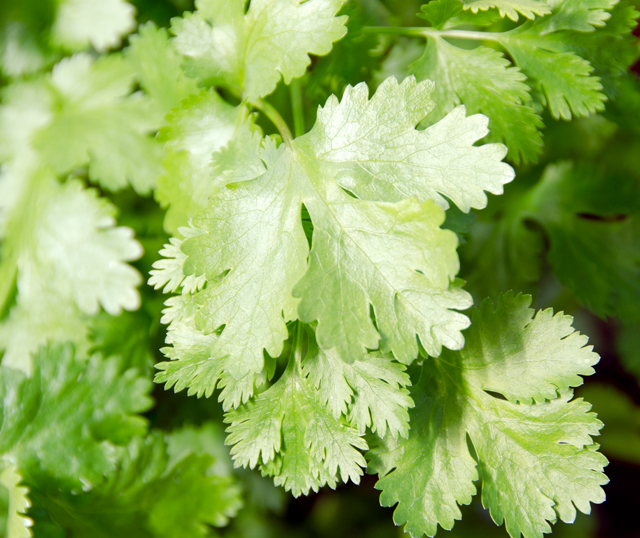
  •  1/2 c coarsely chopped cilantro
  • 1/4 c coarsely chopped parsley (flat is my preference, but curly works too)
  • 1 T + 2 t freshly squeezed lemon juice
  • 1/2 t sweet paprika
  • 1/2 t ground cumin
  • 1/4t cayenne pepper (optional)
  • 1/8t saffron threads (optional)
  • 4 -5 T olive oil
  • Kosher salt and pepper to taste

Directions

  1.  Trim all fat and sinew from chicken breasts. Place chicken breast between two pieces of plastic wrap and with the flat edge of a mallet, pound to an even thickness, season generously with kosher salt. Whisk together lemon juice, olive oil and spices to make the marinade. Put chicken pieces inside a Ziploc bag or plastic container with a snap-tight lid, pour marinade over and let chicken marinate in the refrigerator 4-6 hours, turning bag occasionally.
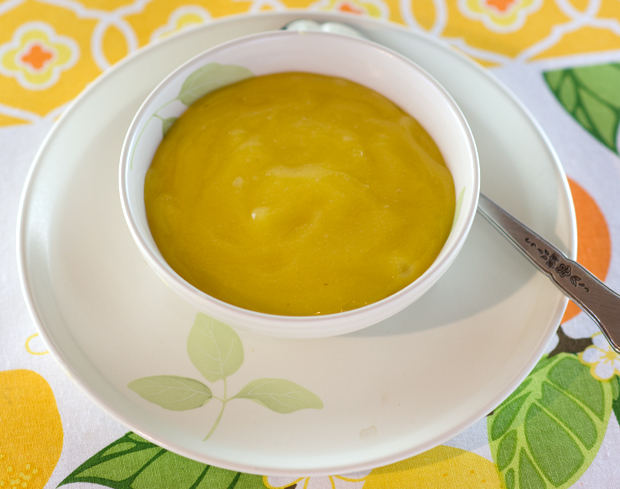
  2. To make the chermoula sauce, put chopped garlic, chopped cilantro, chopped parsley, lemon juice, sweet paprika, and ground cumin, cayenne and saffron (if using) in food processor and pulse to combine. Add the 4 T olive oil and pulse just enough to get it mixed in, then taste to see if you want the other tablespoon of oil and add it if you want a milder sauce. (Don’t over-process; the mixture is not supposed to be smooth.) Add salt and pepper to taste.
  3. To cook the chicken in a grill pan, spray grill pan with nonstick grill spray or brush with oil and preheat grill pan to high (you can only hold your hand there for a few seconds at that heat.) Let chicken come to room temperature while the pan heats.
  4. To get criss-cross grill marks, lay the chicken top-side down at a diagonal across the grill pan and let it cook until well-defined grill marks are showing, about 3-4 minutes. It’s okay to lift a corner to check.  Turn the chicken so it’s going the opposite way at an angle to the grill grates and cook about 3-4 more minutes. Then turn chicken over and cook 4-5 minutes on the second side, or until chicken is firm but not hard to the touch.Serve chicken hot, with Charmoula Sauce spooned over.

DSC_7862aDSC_7886a

June 18, 2014 Spinach and Mushroom Crustless Quiche

DSC_7849aAs the old song goes “see you in September”. It was time to say good bye to the spinach in our garden. Spinach does not like warm weather and temperatures have soared into the 90+ vicinity the last several days. So before it all bolted or went to seed I picked the remaining spinach.Then the plants could be pulled out of the ground and the space could be used to plant something else.
Most of the time we enjoy fresh garden spinach with dinner just sautéed with a little olive oil and garlic. It cooks down so quickly that a large bowl full of uncooked spinach soon becomes a very small plate of cooked spinach.  I decided for the last hurrah to make a crustless spinach and mushroom quiche. It would make a nice light lunch and breakfast for the next day.

A quiche essentially is a savory custard that is baked in a piecrust. A custard mixture is a liquid, usually milk or cream and combined with eggs and baked until it sets. I used fresh spinach but frozen spinach or bagged spinach would work as well. Just remember to squeeze out all the water or the custard will be too wet. Eliminating the crust saves time and calories too. Spinach and feta are a natural combination, but any cheese with good melting qualities will work, mozzerella, cheddar and parmesan to name a few.

A minor disaster occurred about fifteen minutes into baking my quiche, the power went out. We weren’t having a storm or bad weather at all, it just went out long enough (five minutes) that I had to reset all the clocks in the house and the oven, though still warm, had to be brought back to temperature. I didn’t take the quiche out of the oven, I just adjusted my baking time to make certain the custard was cooked. The top was a little too brown but still tasted good.
A delicious way to say good bye for the summer!

DSC_7839a

Spinach and Mushroom Crustless Quiche

Serves six

Ingredients

  • I cup of fresh sliced mushrooms (white, cremini etc.)
  • 8 cups of fresh spinach or 1 box frozen chopped spinach
  • 1T olive oil
  • 1t chopped garlic
  • 4 large eggs
  • 1 cup of milk, cream or half and half
  • 1/2c feta cheese, crumbled
  • 1/3c grated parmesan cheese
  • 1/2c shredded mozzarella cheese
  • Kosher salt and freshly ground pepper

Directions

  1. Preheat oven to 350F degrees. If using fresh spinach, cook it down in a large sauté pan and drain in a colander. Squeeze out the rest of the moisture in a clean dish towel. I cooked whole leaves so at this point I chopped it. If using frozen chopped spinach, thaw in microwave and drain well.
  2. In the same pan, heat the olive oil and add the chopped garlic. Sauté garlic until it starts to brown slightly then add the mushrooms.  Sprinkle a little salt and a grind of pepper over the mushrooms and sauté until they have released all of their moisture and no more water remains on the bottom of the skillet. This should take about five minutes.
  3. Lightly grease or spray with nonstick spray a 9 inch pie pan or quiche dish. Evenly spread the spinach over the dish, scatter the mushrooms over the top, then sprinkle the feta over.
  4. In a medium bowl whisk the eggs. Add the milk, parmesan and a grind of fresh pepper. Pour the liquid over the ingredients in the dish.
  5. Sprinkle the mozzarella cheese over top. Place the dish on a baking sheet, this will make it easier to transfer the dish in and out of the oven.  Place dish in the oven and bake until the quiche is golden brown and a tester comes out clean. This will take between 45 minutes to an hour, starting checking at 45 minutes.
  6. Allow quiche to cool a bit, cut into slices and serve. It’s also good cold!

DSC_7795aDSC_7829aDSC_7833aDSC_7842aDSC_7851a

June 17, 2014 Strawberry Avocado Salad

DSC_7813aIn this salad of my own design, strawberries and avocado are combined not once, but twice, in the salad as well as the dressing that tops it. Juicy sweet strawberries are in season locally and are the perfect contrast to smooth creamy avocados. I combined chopped strawberries with avocado oil to make a dressing that compliments the salad perfectly.

Avocado oil has a mild nutty flavor and is high in monounsaturated “good” fats, vitamin E and omega-3 fatty acids. It has a high smoke point (500 F) making it well suited for frying but I haven’t tried that yet.

The  greens, fresh from our garden are in their third planting now. I used Lolla Rosa and Oak leaf lettuces along with some arugula and mâche. French feta is one of my favorites, it’s creamier and milder than other varieties, a mild blue cheese would be interesting as well. I topped my salad with walnuts, almonds or pistachios would be good choices as well.

This salad is a combination of vibrant flavors, colors and textures. Add some roasted chicken and you have a great lunch or light supper.

DSC_7805a

Strawberry Avocado Salad

Serves two

Ingredients

  • Salad greens-I used a combination of oak leaf and Lolla Rosa with a little arugula, mâche and cress, enough to fill the plate or bowl of your choice
  • 2c strawberries, hulled and quartered
  • 1 avocado, cut into chunks
  • 1/2c creamy goat cheese, I love French feta
  • 1/2 c coarsely chopped walnuts
  • Strawberry-avocado dressing (recipe follows)
  • Freshly ground pepper

Strawberry Avocado Dressing

Ingredients

  • 1c roughly chopped strawberries
  • 3T lime juice
  • 2T balsamic vinegar
  • 1T(more or less) of agave sweetener or honey
  • 1/2c avocado oil

Directions for Dressing

  1. Combine all ingredients in a blender until smooth.

Directions for Salad

  1. Place salad ingredients on a plate or toss in a bowl. Add dressing to taste. Season with freshly ground black pepper.

DSC_7810a


June 14, 2014 Quinoa, Cucumber, Radish and Turnip Salad

DSC_7755a

You know that quinoa has become part of the mainstream vocabulary when it shows up in a beer commercial during a football broadcast on television. Sure, the guy eating the quinoa burger refers to it as “kwee-noh” and his friend who is looking on asks,”what is that, a loofah?” Enough people “get it” to make this a funny commercial.

Quinoa, pronounced “KEEN wah” is showing up these days in everything from whiskey, to chips, chocolate bars and yes, burgers. Quinoa is an edible seed or a pseudo-grain, because it is cooked and used in recipes like a grain.  It is closely related to beets, chard, spinach and even tumbleweeds. Quinoa is unique because it is a complete protein, containing all nine essential amino acids and provides “good” fat along with fiber, potassium and iron. Since it is not a grain, quinoa is well suited for gluten free diets.
Even though most quinoa is sold prerinsed, it is a good idea to rinse it before proceeding with your recipe to remove any remaining saponin, a bitter coating that protects the plant from insects. Submerge the quinoa in a bowl of cold water, swish it around and drain it in your finest strainer. Like rice, the cooking ratio is 2:1 liquid to grain.

In this recipe from Fine Cooking magazine, nutty quinoa is combined with crisp summer vegetables, spicy arugula and a  slightly sweet miso vinaigrette. I used red quinoa in this recipe but white or black would be fine too. I used the radishes from our garden. They have peaked now with the onset of the warmer weather.  I also included Japanese turnips in the salad that we are harvesting now. Unlike the standard turnip, the Hakurei variety is pure white, very mild and sweet, even when raw. Don’t hesitate to add the pickled ginger, it brings just a little spiciness and acidity to the salad. This salad will be a welcome addition to picnics and potlucks all summer long.

DSC_7745a
Because of it’s nutritional profile, quinoa has been called a “superfood”.

Quinoa, Cucumber, Radish and Turnip Salad with Miso Vinaigrette

Serves six

Ingredients

  • 2-3/4 cups plus 1/3 cup lower-salt vegetable or chicken broth
  • 3 Tbs. white miso
  • 3 T seasoned rice vinegar
  • 2 T soy sauce, preferably reduced sodium
  • 1 T Asian sesame oil
  • 1/2 cup canola or other neutral vegetable oil
  • 2 T chopped sweet pickled sushi ginger
  • 1 1/2c red quinoa, any color will do
  • 1c Japanese baby turnips
  • 2c cucumbers, cut into bite sized pieces
  • 2c radishes, cut into bite sized pieces
  • 2  packed cups of arugula

Directions

  1. Put 1/3 cup of the broth and the miso, vinegar, soy sauce, and sesame oil in a blender; blend to combine. With the motor running, slowly add the canola oil to make a creamy dressing. Add the ginger and pulse a couple of times to very finely chop.
  2. In a 2- to 3-quart saucepan, bring the remaining 2-3/4 cups broth to a simmer over medium heat. Add the quinoa, cover, turn the heat down to medium low, and cook until the quinoa is tender and the liquid is absorbed, 10 to 15 minutes. Remove from the heat and let stand for 3 to 5 minutes. Uncover and fluff with a fork. Let cool to room temperature, about 30 minutes.
  3. Toss the quinoa, turnips, cucumber, radishes, and greens together. Add 3/4 cup of the vinaigrette, toss, and serve, passing the remaining dressing at the table. (Save the remaining vinaigrette for other salads; it will keep for at least 3 days in the refrigerator.)
DSC_7677a
The French breakfast radishes are literally popping out of the ground!
DSC_7749a
The radish harvest along with a little Hakurei turnip.

DSC_7776a

June 9, 2014 Chicken Paillards with Asparagus, Garlic and Tarragon

DSC_7650aFor an easy weekend supper, nothing comes together quicker than a chicken paillard. A paillard, (pi-YAR) is a  boneless piece of meat, in this case, chicken that has been pounded flat and sauteed or grilled quickly. Actually the term paillard has fallen out of favor in the cooking world and has been replaced with the word escalope (es-kuh-LOHP). In English we would refer to it as a “scallop”, not of the seafood varety of course.

I couldn’t find the word paillard in The Food Lover’s Companion or in James Peterson’s exhaustive work, Glorious French Food. But everyone, from Rachael Ray to Daphne Oz of “The Chew” to Martha Stewart has recipes online for chicken paillards, so it’s worth keeping that definition under your hat.

Remove any tenderloins or extra fat before wrapping the breast in plastic wrap. Then pound out the meat with the flat side of a mallet to an even thickness. Pound from the fattest part of the breast outward to avoid tearing the meat.
Another French term is very important to this recipe, mise en place (MEEZ ahn plahs). Translated, this means “to put in place”. Start by reading the recipe all the way through, then check to see that you have all the ingredients necessary, or at least a reasonable substitute. I chose to use tarragon in this recipe, the original used dill. The tarragon in our garden is starting to fill in nicely and it’s anisey flavor is a natural with chicken dishes. All of the other ingredients should be measured out, prepped and ready to go, garlic sliced, lemon zested and juiced and vegetables cleaned and cut to size. In less than fifteen minutes of cooking time you can have a meal on your table that is easy and elegant.

Tarragon in the garden.

Chicken Paillards with Asparagus, Lemon, Garlic and Tarragon

Serves 4

Ingredients

  • 4 boneless, skinless chicken breast halves, tenders removed
  • 1/3c all purpose flour
  • Kosher salt and freshly ground pepper
  • 1/4c extra virgin olive oil
  • 1/2c lower salt chicken broth or chicken stock
  • 6 medium cloves garlic, thinly sliced
  • 1 large lemon, finely grated to yield 1t zest and squeezed to yield 3T juice
  • 1 lb. asparagus, trimmed and cut into 2-inch pieces
  • 1 medium orange or yellow pepper cut into 2-inch strips
  • 2T chopped fresh tarragon
  • 2T unsalted butter, cut into 3-4 pieces

Directions

  1. Using the flat side of a meat mallet, pound each chicken breast between 2 sheets of plastic wrap to an even 1/4-1/2 inch thickness
  2. In a shallow bowl, combine the flour, 2t salt and 1t pepper.
  3. Heat 2T oil in a 12-inch skillet over medium-high heat. Dredge 2 paillards in the flour, shaking off any excess, and place in the skillet. Cook, flipping once, until lightly browned, about 4 minutes total. Transfer chicken to a plate and keep warm. Repeat with the remaining oil and paillards
  4. Add the garlic to the skillet and cook over medium high heat, stirring occasionally, for about a minute. Add the chicken broth and lemon zest, scraping up any browned bits from the skillet. Add the asparagus, pepper, chicken and any accumulated juices. Nestle the chicken pieces into the liquid. Bring to a boil, turn down the heat to maintain a simmer. Cover and cook until the chicken is cooked through and the vegetables are tender, 5 to 7 minutes. Transfer the chicken to a serving platter or plates.
  5. Remove the skillet from the heat and stir in the lemon juice, tarragon and the butter. Season to taste with salt and pepper. Spoon the vegetable mixture over the chicken and serve.

DSC_7646a

May 29, 2014 Cilantro Pesto with Shrimp

DSC_7543a

After spending some time weeding and watering in the greenhouse, Joe made an inspiring suggestion to me, “why don’t you make cilantro pesto sometime?” Now that the warmer temperatures have arrived, everything in the greenhouse is growing like mad. The lettuces are picture perfect and ready to harvest and a row of cilantro is at it’s best.

Cilantro, coriander, Chinese parsley, whatever you choose to call it, it’s one herb that people are rarely on the fence about. You either like it, or as I’ve heard often, feel it tastes like soap. Now maybe I haven’t consumed enough soap in my day, so I’m not sure what that’s all about.
Cilantro is one of our herb garden staples. It’s versatility takes it from Mexican to Thai, from salsas to curries. I decided to make a pesto that would accompany fresh Florida shrimp I purchased at our favorite seafood market, Hellers. Fresh, meaning never frozen, a rarity in this area. I decided to keep the pesto simple, no cheese, so that the bright flavor of the cilantro would shine through. Cilantro is the only herb I know of where the tender, and I must emphasize tender, stems have the same flavor and can be used along with the leaves. Limes would usually be my citrus of choice with cilantro, but since, I didn’t have any, they are quite expensive now and the ones I have purchased recently haven’t been that good, a juicy lemon would fill in quite nicely.

Toasted almond slivers added a subtle nutty quality to the pesto, walnuts or pine nuts are also good choices. I like to toast small quantities of  nuts in a dry nonstick skillet on the stove top. I find that when I toast nuts in the oven I am opening the door so frequently to shake the pan to avoid spotty burning, it’s easier to do them on the stove.

I chose an oil relatively new to me, avocado oil. It is cold pressed, high in monounsaturated fats and vitamin E. It’s flavor is mild and buttery. It can be used for skin and scalp care as well, but mine will stay in the kitchen.
The cilantro pesto was an excellent accompaniment to the shrimp that I cooked in the grill pan.  The addition of a little serrano pepper gave the pesto just enough heat.
As for some people’s dislike of cilantro, I read there is an essential oil found in the fresh leaves and unripe seeds that can be recognized immediately and not to everyone’s liking. It has to do with a genetic predisposition on how individuals perceive flavors. If you are a “hater” you are in good company. Julia Child is quoted as saying when asked what foods she hated most. “Cilantro and arugula, I don’t like at all. They’re both green herbs they have kind of a dead taste to me.” Harsh Julia, that’s just harsh. For the rest of us who enjoy the crisp, bright flavor of cilantro this is a simple recipe worth trying.

DSC_7519a

DSC_7532aDSC_7537a


Cilantro Pesto

Makes about 1 cup

Ingredients

  • 1 1/2c  packed coarsely chopped cilantro leaves and tender stems
  • 1/2c avocado oil
  • 1/4c lightly toasted slivered almonds
  • 1 medium clove garlic
  • 1t cumin
  • 1t chipotle chili powder
  • 1/2t kosher salt
  • 1/2t or more to taste finely chopped Serrano pepper

Directions

  1. Combine all the ingredients in a blender and puree until smooth. Use immediately or up to three days.

DSC_7524a

May 21, 2014 Fiddlehead Ferns and Yellow Oyster Mushrooms with Spring Garlic

DSC_6942a

Standing in line at the mushroom vendor at the farmers market on Saturday I spotted them. Among the portabellos, creminis and the morels, there was a basket of fiddlehead ferns The two customers ahead of me purchased some, so was it the power of suggestion, I’ll never know. They were being sold by the third of a pound, so I put down my five dollars and walked off with a small brown paper bag filled with fiddlehead ferns.
Fiddlehead does not refer to a specific species of fern but the coiled form of any fern that has not yet unfurled. In the United States they are ostrich ferns, mostly found across the northeastern states and the Great Lakes region, particularly along shady river banks. Wherever they grow their availability is only for about a three week period in early spring when ferns grow their new shoots.

The name comes from it’s appearance; fiddleheads look like the tuning end of a violin. They are also known as croziers because of their resemblance to the top of a shepherd’s staff. Their fifteen dollar a pound and higher price is for a good reason, they are wild harvested and not cultivated. I resisted nibbling on a raw fiddlehead when I read that eating them raw can cause stomach distress. It is advisable not to hunt for fiddleheads without an experienced forager.  One variety, the royal fern, cultivated in the Far East has been linked to stomach and esophageal cancer.  Boil fiddleheads for three to four minutes in lightly salted water with a pinch of baking soda. This helps them retain texture and color and removes bitterness and the possibility of gastric distress.
Fiddleheads are a good source of vitamins A, C and fiber. Their flavor has been likened to asparagus, green beans with a chewy texture all it’s own. To prepare fiddleheads, rinse, remove any residual brown paper-like coating and trim the brown ends. They do not keep well so use them as soon as possible after your purchase.

In this recipe I combined fiddleheads along with mild garlic shoots and another farmers market find, yellow oyster mushrooms, grown locally in Kennett Square, Pa, the mushroom capital of the United States.

DSC_6922a

Fiddlehead Ferns and Yellow Oyster Mushrooms with Spring Garlic Shoots

Serves 2

Ingredients

  • Water
  • 1T kosher salt
  • 1/2t baking soda
  • 1/3lb fiddlehead ferns
  • 1 stalk of spring garlic
  • 1/4lb yellow oyster mushrooms (white are fine)
  • unsalted butter

Directions

To prepare fiddlehead ferns

  1. Bring a large pot of water to a boil.
  2. Trim the browned ends off the ferns. If any brown covering remains on the ferns, rub it off. Rinse briskly under running water.
  3. Drop ferns into a large pot of boiling water to which you have added 1 tablespoon kosher salt and 1/2t baking soda.
  4. Boil until tender, about 3-4 minutes. Drain well.

To finish the dish

  1. Chop the tender end of the spring garlic finely. Tear mushrooms into bite sized pieces.
  2. Heat a skillet over medium high heat. Melt a tablespoon or two of unsalted butter in the pan. Add mushrooms and cook until mushrooms release some of their liquid and begin to brown. Add fiddleheads to the pan and sauté lightly. Season to taste with salt and pepper.
DSC_6924a
How do I love thee, fiddleheads? Let me count the ways….
DSC_6927a
Unfortunately, the yellow color disappears when the mushrooms are sautéed.
DSC_6930a
Spring garlic gives a mellow, mild garlic flavor.
DSC_6946a
Ferns from our yard. I wonder if they could be harvested? Not going to try.

May 8, 2014 Turkey Spinach Meatballs

DSC_6855aNine times out of ten I would be more than likely to skip over a recipe that’s labeled “kid friendly”, especially if that recipe isn’t even in the magazine! But I was in search of a quick, mostly make ahead recipe that would include ground turkey and spinach.

The spinach in question was the last of the pick from seed Joe planted last October. It wintered over quite nicely in the greenhouse, considering the extremely cold and snowy winter we had. These were not the smaller leaves that we would use in salads but larger ones that would be fine incorporated into a stir fry or cooked down for a dish. I wasn’t in the mood for soup or a stir fry. Larb, the Thai dish that uses ground meat wrapped in lettuce leaves (I could substitute spinach..) was a possibility, but I still wasn’t satisfied yet.
Finally I found it, sort of, in the March edition of Bon Appetit, a column called “The Providers” written by bloggers and husband and wife, Jenny Rosenstrach and Andy Ward. It was an article about strategies for feeding a busy family with preplanned homemade meals. No recipe here but a small postscript to find a recipe for turkey and spinach meatballs on Bon Appetit.com.

Okay, I’m “biting” now, meatballs would be a change of pace for us and we haven’t had a meal with pasta in quite a while. Not that you would have to have them with pasta. Rice would work,so would polenta, on a roll or just by themselves. I pulled a few bags of my oven roasted tomatoes out of the freezer for the marinara sauce and I was ready to go.
The spinach in this recipe was the frozen variety, I have no problems with that, I always have some on hand. It’s just that I had fresh that wasn’t going to be fresh for long and wanted to use it up. The next question for me was, how many cups of fresh spinach does it take to make the equivalent of a ten ounce package? Since my frozen chopped spinach of choice these days is Birdseye, I checked the package, nutrition information yes, but nothing regarding the fresh equivalent. I checked the web, the best I could find was that 1.5 lbs of fresh spinach would cook down to the 10 ounces needed. I just trimmed the large stems and cooked all the spinach I had, a crisper bin full. It looked fairly close to 10 ounces, final weight after squeezing out excess liquid, 9.2 ounces, not too bad I would say.
The marinara sauce is very basic, quite similar to what I already make. I substituted 2 quart bags of our roasted tomatoes, drained of excess liquid. That excess liquid is certainly not the prettiest, but a very flavorful tomato juice, a special treat for the chef. Since I cooked whole leaf spinach, I roughly chopped it after it was cooked down and drained it well before adding it to the meat mixture.
After a somewhat messy beginning, I coated my hands with non stick spray before forming the meatballs so the mixture wouldn’t stick to my fingers. Another selling point of this recipe is that the meatballs are broiled in the oven, eliminating the splatter that comes along with stovetop cooking. This is a recipe that can be doubled, work once, eat twice. The writers of the article recommend freezing in single serving batches so they can be thawed as needed. It’s protein and vegetable all in one juicy meatball served with a simple but flavorful tomato sauce, a great weeknight meal.

DSC_6866a

Turkey Spinach Meatballs

from the Bon Appetit website

Makes 20 meatballs, serves 4

Ingredients for Marinara Sauce

  • 1/4 c olive oil
  • 1/2 small onion, chopped
  • 1 clove garlic, finely chopped
  • 1t dried oregano
  • 1/4t crushed red pepper flakes
  • Kosher salt and freshly ground pepper
  • 2T tomato paste
  • 1-28oz can whole peeled tomatoes (I used my own roasted tomatoes)

Directions for Marinara Sauce

  1. Heat oil in medium saucepan over medium heat. Cook onion, stirring often, until soft but not brown, about 5 minutes. Add garlic, oregano and red pepper flakes; season with salt and pepper and cook, stirring, until fragrant, about 1 minute. Add tomato paste and 1 tablespoon water and cook, until tomato paste coats onion and begins to darken, about 3 minutes.
  2. Add tomatoes to saucepan, crushing with a fork or wooden spoon when you add them. Bring to a boil, reduce heat, and gently simmer until slightly thickened, 20-25 minutes; season with salt and pepper. Be sure to stir frequently so the tomatoes don’t stick to the bottom of the pan.

Ingredients for the Meatballs

  • Non stick vegetable oil spray
  • 1 large egg, beaten to blend
  • 1/4 small onion, finely chopped
  • 1 clove garlic, finely chopped
  • 1 1/2 lb. ground turkey
  • 1 10-oz. package frozen chopped spinach, thawed, squeezed to remove excess moisture (I used fresh spinach that I cooked down and chopped)
  • 1/2c finely shredded Parmesan cheese
  • 1/2c plain dried breadcrumbs
  • 2T chopped fresh flat leafed parsley
  • 1t fennel seeds
  • 1t finely grated lemon peel
  • 1t kosher salt
  • 2T olive oil,

Directions for the Meatballs

  1. Preheat broiler. Cover a rimmed baking sheet with foil and coat with nonstick spray
  2. Using your hands or a fork, gently mix egg, onion, garlic, turkey, spinach, Parmesan, breadcrumbs, parsley, fennel seeds, lemon zest and salt in a large bowl until just combined.
  3. Scoop out turkey mixture by the 1/4 cupful and form into balls, you should have about 20. Place on the prepared baking sheet, spacing 2″ apart; brush with oil.
  4. Broil meatball, turning often, until browned all over and cooked through, 15-18 minutes. Add to marinara sauce.
  5. To do ahead: Meatballs with marinara sauce can be made 2 weeks ahead. Let cool completely and freeze individual portions in resealable plastic bags. To cook, reheat gently until meatballs are warmed through and sauce is bubbling, 15-20 minutes.
DSC_6820a
Fresh spinach, cooked down and ready to be chopped.


DSC_6825a
After the broiler, ready to be sauced.

DSC_6871a

May 4, 2014 Lemony Chicken and Orzo Soup

DSC_6841aWhat could be better on a chilly and rainy spring evening than a bowl of warming soup? Our latest rainstorm brought us cooler than normal temperatures and rain that was coming down at a half an inch per hour. Lemony chicken and orzo soup was the perfect choice. It’s a blend of the comfort of chicken noodle soup with a tip of the hat to avgolemono, the classic Greek egg and lemon soup.

Easy enough for a weeknight dinner, the initial prep time is only about five minutes and soup is on the table in less than an hour. It starts with chopped leek and celery sautéed in olive oil until softened. Next boneless chicken thighs and broth are added to the pot, brought to the boil and simmered. Chicken thighs are the best choice in making soup, they hold up well and stay tender in cooking. Orzo means “barley” in Italian and is the rice shaped pasta in this soup. Though not essential, you could toast the orzo first, it adds a depth and nuttiness to the soup. If you choose to toast, do this first in the pot you will cook the soup in, eliminating the need to dirty an extra pot. The orzo is cooked in the broth and the chicken is shredded and added back to the soup.


What really takes this soup from average to outstanding is the addition of fresh chopped dill and a squeeze of lemon at the end that brightens the flavors. Let each diner add  lemon to their own taste. More vegetables could be added if desired, sliced carrots or baby spinach would be good choices. A new approach on an old classic that is quick, simple and delicious.

DSC_6828a

Lemony Chicken and Orzo Soup

Serves four

Ingredients

  • 1 T butter (if toasting the orzo)
  • 1 T olive oil
  • 1 medium leek, white and pale-green parts only, halved lengthwise, sliced crosswise 1/2″ thick
  • 1 celery stalk, sliced crosswise 1/2″ thick
  • 12 oz. skinless, boneless chicken thighs
  • 6 c low-sodium chicken broth
  • Kosher salt, freshly ground pepper
  • 3/4c orzo
  • 1/3 to 1/2 c chopped fresh dill
  • Lemon halves (for serving)


DSC_6837a

Directions

  1. If toasting the orzo. Heat a dutch oven over medium heat. Add butter to melt. Add orzo and cook until toasted, 3-5 minutes. Transfer to a plate
  2. Heat oil in a large heavy pot over medium heat. Add leek and celery and cook, stirring often, until vegetables are soft, 5-8 minutes.
  3. Add chicken and broth; season with salt and pepper. Bring to a boil, cover, reduce heat, and simmer until chicken is cooked through, 15-20 minutes. Transfer chicken to a plate. Let cool, then shred chicken into bite-size pieces.
  4. Meanwhile, return broth to a boil. Add orzo and cook until al dente, 8-10 minutes.
  5. Remove pot from heat. Stir in chicken and dill. Serve with lemon halves for squeezing over.

DSC_6843a


April 29, 2014 Lemon Cheesecake with Lemon Curd

DSC_6770a

A light lemony cheesecake was the finishing touch for our Easter dinner. This easy to make cheesecake has been a favorite of mine for several years. It is a very simple recipe and always turns out great. It can even be made ahead and frozen, just wrap it very well in several layers of plastic and foil.

Lemon curd has long been a tea time favorite for topping for scones and shortbread. Here it adds another intense lemony layer to the cheesecake. The ingredients are very basic, eggs, butter, sugar and the zest and juice of lemon.

This lemon curd recipe was a real revelation for me. As a caterer I made countless, probably thousands of miniature lemon and lime curd tarts for dessert tables. The recipe I used for years combined the lemon juice and rind, beaten eggs and sugar in the top of a double boiler. The mixture was cooked slowly over simmering water until thick and shiny, making sure the curd never came to the boiling point. It was a long and tedious process. As careful as you might try to be, there was always the possibility of getting unattractive little white specks of egg in the curd. That meant the additional step of straining the curd and losing some of the product.

This recipe for lemon curd combines ingredients much in the way when you bake a cake. Room temperature butter and sugar are beaten together until smooth. Next the eggs and the egg yolks are beaten in one at a time. Now the lemon juice is added. Don’t panic, the mixture will appear to be curdled. The butter will start to melt when it’s cooked over low heat and the texture will become silky smooth.  The heat is now raised to medium and the curd is cooked until thickened, about 15 minutes.

Never let the mixture come to a boil. Be sure to get your whisk into every corner of the pan. This is when the curd can overcook if it is not stirred and scraped often.
Why does this method work? The egg proteins are coated in fat from the butter. This prevents them from coagulating into hard bits when the lemon juice is introduced.

All I know is that it works. The finished product may not seem to be as thick as you want it but it will continue to thicken after it is refrigerated. This easy recipe makes a lemon curd that is silky smooth, rich and creamy with just the right amount of tartness. Another bonus is that it can be frozen, so make a double batch and enjoy it now and later.

DSC_6767a

Lemon Cheesecake

Ingredients

For the crust:
  • 8 oz. vanilla wafers, finely crushed (2 cups of crumbs)
  • 3 T. granulated sugar
  • 7 T unsalted butter, melted
For the filling:
  • 3 8-oz. packages cream cheese, at room temperature
  • 1 c ricotta (regular or low fat)
  • 2 T. all-purpose flour
  • Table salt
  • 1-1/4 c granulated sugar
  • 2 Tbs. finely grated lemon zest
  • 1 Tbs. pure vanilla extract
  • 4 large eggs, at room temperature
For the garnish:
  • 3/4 cup lemon curd

Directions for the crust

  1. Position a rack in the center of the oven and heat the oven to 375°F.
  2. In a medium bowl, stir together the vanilla wafer crumbs and 3 Tbs. granulated sugar. Mix in the melted butter until the crumbs are evenly moist and clump together slightly. Transfer the mixture to a 9-inch spring form pan and press evenly onto the bottom and about 2 inches up the sides of the pan (to press, use plastic wrap or a flat-bottom measuring cup). Bake until the crust is fragrant and slightly darkened, 9 to 12 minutes. Let the pan cool on a rack. Lower the oven temperature to 300°F.

Directions for filling and baking the cheesecake

  1. In a stand mixer fitted with the paddle attachment, beat the cream cheese, ricotta, flour, and a pinch of table salt on medium speed, scraping down the sides of the bowl and the paddle frequently, until very smooth and fluffy, about 5 minutes. Make sure the cheese has no lumps. Add the 1-1/4 cups granulated sugar and continue beating until well blended and smooth.
  2.  Add the lemon zest and vanilla, and beat until blended, about 30 seconds. Add the eggs one at a time, beating just until blended. (Don’t overbeat once the eggs have been added or the cheesecake will puff too much and crack as it cools.) Pour the filling into the cooled crust and smooth the top.
  3. Bake at 300°F until the center jiggles like Jell-O when nudged, 55 to 65 minutes. The cake will be slightly puffed around the edges, and the center will still look moist. Set on a rack and cool completely. Cover and refrigerate until well chilled, at least 8 hours and up to 3 days. The cake can also be frozen at this point for up to 1 month.
  4. To freeze, put the unmolded, cooled cake on a rimmed baking sheet in the freezer, uncovered, until the top is cold and firm; then wrap it in two layers of plastic and one layer of foil. Thaw overnight in the refrigerator.

DSC_6772a

Classic Lemon Curd

From Fine Cooking magazine

Makes about 2 cups

Ingredients

  • 3 oz. (6 Tbs.) unsalted butter, softened at room temperature
  • 1 c sugar
  • 2 large eggs
  • 2 large egg yolks
  • 2/3 c fresh lemon juice
  • 1 t. grated lemon zest

Directions

  1. In a large bowl, beat the butter and sugar with an electric mixer, about 2 min. Slowly add the eggs and yolks. Beat for 1 min. Mix in the lemon juice. The mixture will look curdled, but it will smooth out as it cooks.
  2. In a medium, heavy-based saucepan, cook the mixture over low heat until it looks smooth. (The curdled appearance disappears as the butter in the mixture melts.) Increase the heat to medium and cook, stirring constantly, until the mixture thickens, about 15 minutes. It should leave a path on the back of a spoon and will read 170°F on a thermometer. Don’t let the mixture boil.
  3. Remove the curd from the heat; stir in the lemon zest. Transfer the curd to a bowl. Press plastic wrap on the surface of the lemon curd to keep a skin from forming and chill the curd in the refrigerator. The curd will thicken further as it cools. Covered tightly, it will keep in the refrigerator for a week and in the freezer for 2 months.
DSC_6602a
Sugar, butter, eggs and lemon, the basic ingredients of lemon curd.
DSC_6603a
It looks curdled after mixing but when it’s heated will smooth out to a silky lemon curd.


DSC_6760a
Delicious lemon curd.