April 24, 2014 Strawberry Rhubarb Crumb Bars

DSC_6692a

Some of Kathy’s friends were asked to bring a dessert for the lunch reception after her memorial service. Wanting to do something special in remembrance of her, I recalled she mentioned liking rhubarb so I knew it had to be part of my dessert contribution. The list of ingredients I have cooked with could rival a Chopped competition  but I had never used rhubarb before. I thought I would be best paired with another springtime favorite, strawberries. Since this lunch was informal, the dessert would need to be eaten out of hand so a bar cookie seemed to be the best choice.
For inspiration I turned to the doyenne of desserts, Martha Stewart. The rhubarb crumb bar on her website looked good and in the end notes she said that strawberries could be substituted for half of the rhubarb. Knowing her dessert recipes were dependable, that was good enough for me.
The first hurdle I encountered was finding a market that carried rhubarb. You would think that one of the harbingers of spring in the north would be in abundance but finding rhubarb was quite a challenge.  I will chalk that up to an exceptionally cold and snowy winter. After several phone calls I located the one farm market that carried it.  Manuevering through the crowds of Good Friday food shoppers, there it was, next to the corn on the cob (still haven’t figured out the logic of that).
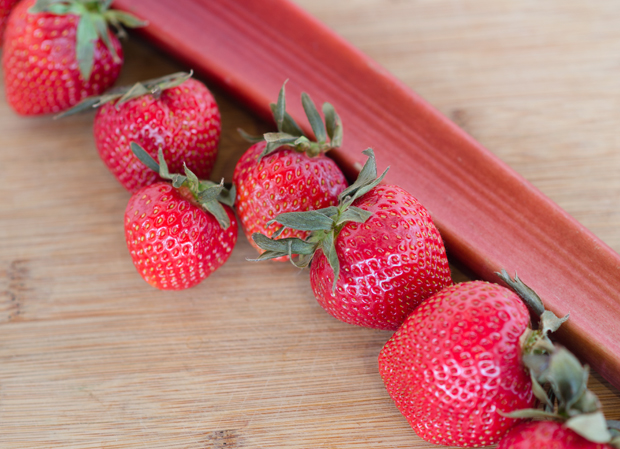
I have passed by rhubarb before in markets with casual disinterest, so this was the first time I gave notice to it. To me it just looked like an overgrown stalk of celery or a ruby chard without the leaves. Not that impressive looking I’d say.  I learned that rhubarb leaves contain oxalic acid which is poisonous in large amounts. That’s why you will never see the leaves attached in the store.  Whoever figured out that the stalk wasn’t poisonous must have been very brave or very hungry!

Rhubarb, is also known as “pie plant”  and is a perennial vegetable. Rhubarb shows up most often in sweet dishes like cake, cobblers and crisps but also can show a more savory side in chutneys, salads and even curry. Look for firm, bright red or red-green stalks that can be as long as two feet. It can be wrapped in plastic and stored in the refrigerator for 3-5 days.

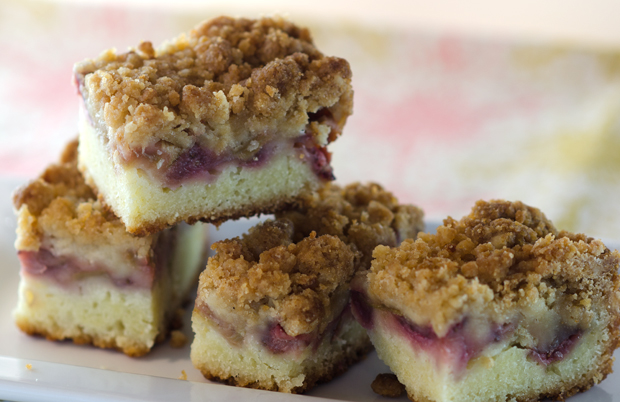
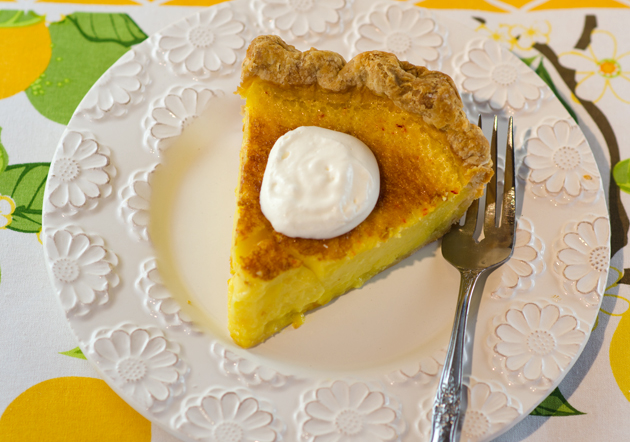
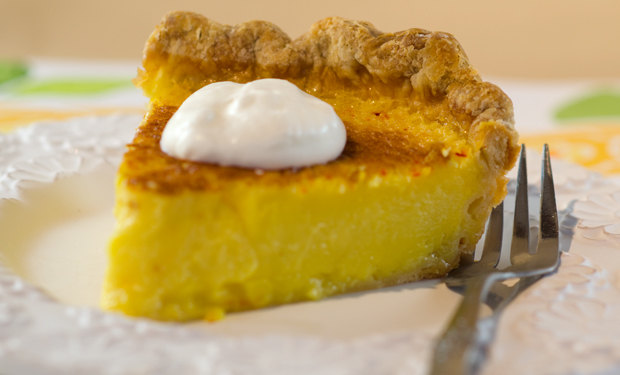
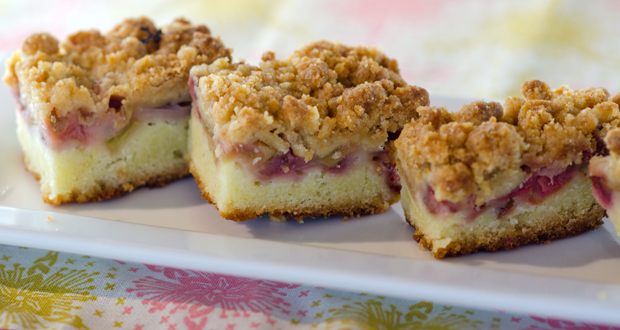
The flavor of rhubarb is quite tart and needs to be balanced with a great deal of sweetness.These easy to make bars combine a cake base with a tangy sweet filling of berries and rhubarb and are topped with streusel. Cool the bars completely, an overnight stay in the refrigerator is best, before cutting. Serve as is or dusted with confectioners sugar or “fancied up” with a dollop of sweetened whipped cream.

DSC_6609aDSC_6611aDSC_6612aDSC_6616aDSC_6619aDSC_6625aDSC_6628a

Strawberry Rhubarb Crumb Bars

Adapted from Martha Stewart Website

Makes 16 or more if you cut them smaller

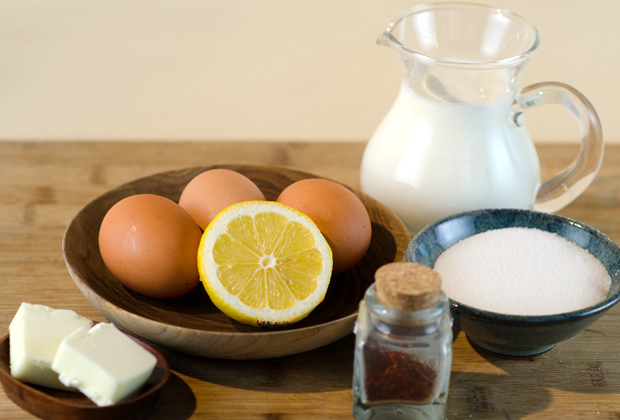
Ingredients for the Streusel

  • 1/2c melted unsalted butter, you will need additional room temperature butter for the pan
  • 3/4c packed light brown sugar
  • 1/4t kosher salt
  • 1 1/4c all purpose flour plus more for the pan

Ingredients for the Bars

  • 1/2lb rhubarb, cut into 1/2″ dice
  • 1/2lb strawberries, hulled and sliced 1/4″ thick
  • 1 1/2T light brown sugar
  • 1 1/3c all purpose flour
  • 1t baking powder
  • 1/2t kosher salt
  • 3/4c unsalted butter at room temperature
  • 1 1/4c confectioners sugar
  • 2 large eggs, beaten lightly
  • 1t vanilla extract

Directions for the bars

  1. Preheat oven to 350ºF. Line a 9″ square baking pan with parchment paper, leaving a 2″ overhang on two sides. A little butter on the edge of the pan will help keep the parchment flush with the pan. Butter and flour the parchment and pan, tapping out excess flour.
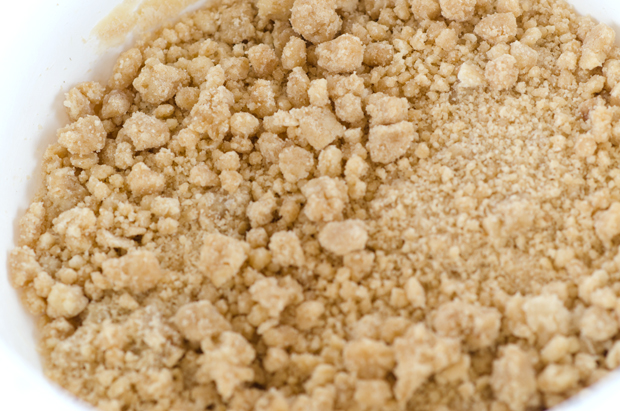
  2. Make the streusel. Whisk together butter, brown sugar and salt. Add flour and mix together with a fork or your fingers. Refrigerate until ready to use.
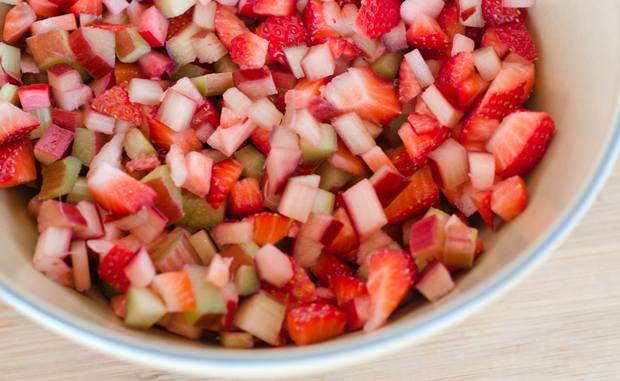
  3. Make the cake. In a medium bowl, combine rhubarb, strawberries, brown sugar and 1/3c flour. Sift or whisk together remaining flour, baking powder and salt, set aside.
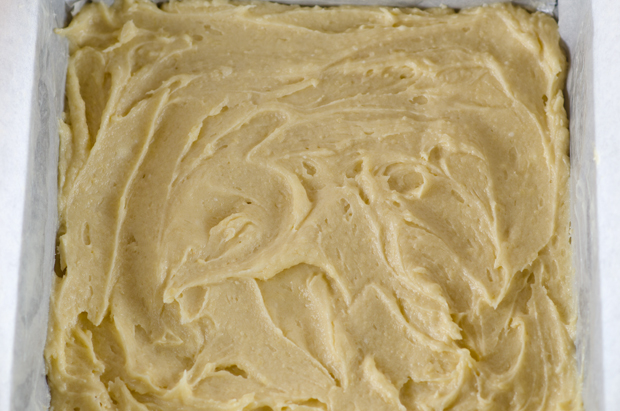
  4. Beat the butter and confectioners sugar with a mixer until light and fluffy. Slowly add eggs and vanilla extract.  Stir in flour mix until just incorporated.
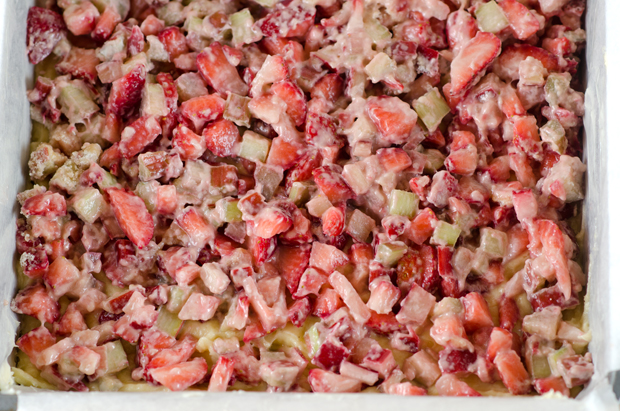
  5. Spread batter in prepared pan, top with the strawberry rhubarb mix, then top with streusel.
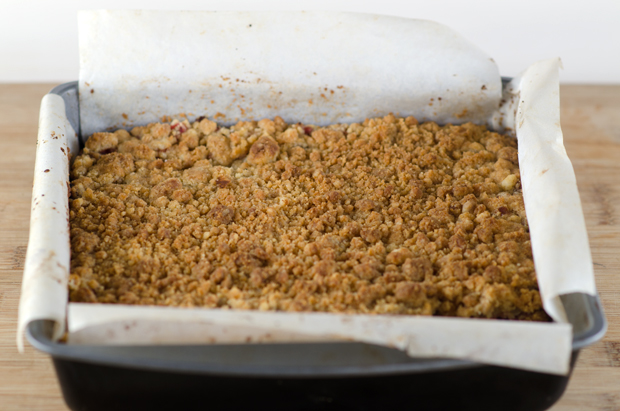
  6. Bake 50-55 minutes or until golden and a toothpick comes out clean. Let the bars cool in the pan, then remove from the pan using the parchment tabs.
  7. Slice bars to preferred size and serve.

DSC_6693a


April 21, 2014 Creamy Asparagus Soup

DSC_6574a

Spring is finally in the air and asparagus is one of the first spring vegetables to emerge.  When I was examining the asparagus in the supermarket, a fellow shopper asked me if it was local asparagus or not. The sign indicated that the asparagus was from Mexico. My fellow shopper told me she would wait a little longer for the local asparagus. Because of our exceptionally cold and snowy winter I am sure that local asparagus won’t be appearing in our farmers markets until late May and early June. I wanted to make asparagus soup for Easter so I decided to buy it anyway.

When purchasing asparagus, choose spears that are bright green, even purplish with firm, tight tips. Markets usually sell asparagus in one pound bundles. Pick the bunch up and examine for split or broken ends. The cut ends are fibrous, the plant’s reaction to when it is cut in the field. If the stem end is excessively woody or wrinkly,  the asparagus is past its prime.

Fat, thin or in between, when it comes to asparagus you could say they were “born this way”. When we had an asparagus patch the spears varied from skinny ones to very plump ones. Fatter spears of asparagus weren’t left out in the field too long unlike that zucchini you grew that became as thick as a baseball bat. Thickness is a sign of the age of the crown which produces the asparagus stalks. Thinner asparagus originates from younger plants or from crowns  that are planted closer together. Mature crowns and certain varieties produce thicker spears.

Thin asparagus is predominant in the off-season in this area and many view it as more desirable. I personally prefer a medium to slightly thicker stalk when the local farms are producing.The taste testers at Cooks Illustrated liked both thick and thin asparagus. They found the thicker spears to be more tender because the fibers are more concentrated in the thin spears. The trade-off? Thicker spears may need to be peeled.

The best way to store asparagus is to trim the cut ends slightly and stand them in a shallow container of water. Cover the container with a plastic bag and refrigerate for several days. The alternative (my personal favorite) is to wrap the stem ends with a damp paper towel and store in the produce bin of your refrigerator. To snap or to cut? I prefer to cut the ends of asparagus for a more uniform appearance.

Waste not, want not could be the subtitle of this recipe. Every part of the asparagus stalk is used from the ends to the tips. The “waste not” is the woody stems of the asparagus and the dark green tops of the leeks that are usually relegated to the compost bin in most recipes. For the “want not”, these usual discards are combined with celery and onions, herbs and water to make a flavorful vegetable stock. Then the rest of the celery, leeks and garlic are sautéed in butter. The tender stalks of the asparagus along with some potato are added next  to give the soup more body before the vegetable stock is added.  It was not called for in the original recipe, but I put the soup through a food mill to give it a smoother texture. The asparagus tips are blanched separately for a minute or two and added to the soup before serving as a final garnish. Cream is added to the soup as a final touch, you could use half and half or skip the dairy altogether.  Served hot or cold, this soup is a delicious springtime treat.

DSC_6524a
Asparagus stems and leek trimmings combine to make a flavorful stock.
DSC_6530a
Blend it up!
DSC_6595a
Putting the soup through the mill.


Creamy Asparagus Soup

From Fine Cooking magazine

Serves eight

Ingredients

  • 2 lb asparagus
  • 3 ½ T unsalted butter
  • 1 c coarsely chopped celery ribs
  • 2 c coarsely chopped yellow onion
  • 1 large leek (white and green parts), halved lengthwise, thoroughly rinsed, and thinly sliced crosswise (keep dark green parts separate from light green and white parts
  • 8 whole peppercorns
  • 5 sprigs flat leaf parsley
  • 2 sprigs thyme
  • Kosher salt
  • 2 medium cloves garlic, chopped
  • ½ lb small red potatoes, peeled and cut into 1/2 inch dice (1 heaping cup)
  • ¼ c heavy cream or half and half (optional)
  • Freshly ground white pepper

Directions

  1. Snap off the tough ends of the asparagus, but don’t discard them. Cut about 1½ inches of the tips off the asparagus spears and cut the spears crosswise in thirds; set the spears and tips aside separately.
  2. Melt 1½ T of the butter in a 3 quart saucepan over medium low heat. Add the tough asparagus ends, half of the celery, the onion, and the dark green parts of the leek. Cook uncovered, stirring occasionally, until the vegetables look very soft, about thirty minutes. If the vegetable show any sign of browning, reduce the heat to low. Add 6 cups cold water and the peppercorns, parsley, thyme and a ½ t salt. Bring to a boil over high heat, reduce the heat to medium low, cover, and simmer for 30 minutes to make a flavorful vegetable stock.
  3. Meanwhile, bring a 2 quart pot of salted water to a boil over high heat. Add the asparagus tips and cook until just tender, 2 to 3 minutes. Drain in a colander, rinse with cold water to stop the cooking, and drain again. Set aside.
  4. In another 3 quart (or larger) saucepan, melt the remaining 2T butter over medium low heat. Add the white and light green sliced leek and the remaining celery and season with a with a generous pinch of salt. Cook, stirring occasionally, until the leeks look soft but not browned, 3 to 4 minutes. Add the garlic and cook for one minute more. Add the asparagus spears and the potato. Set a wire mesh strainer over the pot and pour the stock from the other pot; discarding the solids. Stir well and bring to a boil over high heat. Reduce the heat to medium low, cover and simmer until the potatoes and asparagus are very tender, about 20 minutes. Turn off the heat and let cool slightly.
  5. Purée the soup in a blender in two or three batches. If you want, put the soup through a food mill for the smoothest texture. Return the puréed soup to the soup pot.
  6. Add cream or half and half if desired, and stir well. Reheat the soup gently over medium low heat. Season to taste with more salt and a large pinch of white pepper. Ladle soup into bowls and scatter in the asparagus tips, distributed them evenly among the bowls.

DSC_6592a

DSC_6585a

April 9, 2014 Seared Scallops with Roasted Cauliflower and Caper-Raisin Sauce

DSC_6510a

I left the house with a busy agenda and a pile of cooking magazines with sticky notes. The plan was to shop for the ingredients needed for a scallop recipe, a curry that looked interesting, unique and not too time consuming. When I pulled out my magazines to make a shopping list I realized I didn’t have the issue of Food and Wine that I needed. So I turned to my phone, googling “Food and Wine magazine scallop recipe”. I didn’t find the recipe I had in mind but found one that sounded just as good, and I had all the ingredients I needed at home.

I didn’t know it when I first chose it but it was the featured recipe in the back page column  “Most Wanted”. The article was titled, “Jean-Georges Vongerichten’s Iconic Seared Scallops”. It is iconic because it is one of the signature dishes from the tasting menu that has been offered at Jean-Georges since 1998.

What makes the recipe unique is the sauce and the way it was discovered.To gain inspiration, Vongerichten will walk around the stations of his restaurant, tasting ingredients. As the story goes, one day he popped a caper in his mouth at one station, a few seconds later, a raisin at another. These two ingredients created a sweet and sour combination, a “taste explosion” in his mouth and caper raisin sauce was born.

I thought the pairing was intriguing and quite plausible, I often make a chard recipe that includes raisins and capers, along with olives, pine nuts, lemon and garlic and capers and raisins are often included in the ingredients for caponata, an Italian eggplant relish.

The vegetable in Vongerichten’s dish was cauliflower, another personal favorite. I love to toss cauliflower florets with olive oil, salt and pepper and roast in a very hot oven. The finished dish I refer to as “cauliflower popcorn” and more often than not, is finished before we sit down to the table.

The one thing I didn’t like, or at least didn’t want to splurge the extra calories on, was the ten tablespoons of butter required in the original recipe! I was certain I could work around that. I seared my scallops in a hot pan as I always do with a neutral cooking oil, not butter. I place my scallops in the pan like the numbers on a clock, starting at 12 and working my way around, extra ones go in the middle. That way I know which scallop to flip first.  I tossed the cauliflower florets with some olive oil and roasted them in the oven, until they started to turn brown in spots. The sauce contained the most butter, a whopping six tablespoons. Golden raisins are a must in this recipe, dark raisins would make a most unattractive color with the green capers. I plumped the raisins and capers in water as directed, drained them, reduced the cooking liquid by one half and added that to the blender to make the sauce along with sherry vinegar. The sauce is sweet and tart from the raisins and sherry vinegar, and briny from the capers Not the exact recipe but definitely a lighter and just as flavorful one.

DSC_6513a

Seared Scallops with Roasted Cauliflower and Caper Raisin Sauce

Serves four as an appetizer

Ingredients

  • 1/3 c capers, drained, not rinsed
  • 1/4c golden raisins
  • 1T sherry vinegar
  • Kosher salt and freshly ground pepper
  • Olive oil
  • Canola oil
  • 4c small cauliflower florets (you will have some leftover, allow for breakage)
  • 2T finely minced parsley
  • 12 large dry packed sea scallops, outer muscle removed

Directions

  1. Preheat oven to 450°F.
  2. In a small saucepan, combine the capers, raisins and 3/4 cup of water. Simmer over moderately low heat until the raisins are plump, about 10-15 minutes. Do not let it come to a boil. Drain the capers and raisins and transfer them to a blender, reserving the liquid. Return the liquid to the pan and boil until it is reduced by one half. With the blender on add the reduced liquid and sherry vinegar until incorporated. Season the sauce to taste with salt and pepper.
  3. In a large bowl toss cauliflower florets with a little olive oil, salt and freshly ground  black pepper. Transfer cauliflower to a baking sheet, and roast, shaking pan occasionally to caramelized all sides, about 10 minutes.
  4. Brush a large non stick skillet lightly with canola oil. Season the scallops with salt and pepper and add one half to the pan. Cook over moderately high heat without turning, until the scallops are golden brown on the bottom, about 3 minutes. Turn the scallops over and cook until browned on the other side. Repeat the process with the remaining scallops.
  5. Rewarm the caper raisin sauce, press through a sieve if a finer texture is desired.
  6. Arrange scallops on plates, spoon some sauce on the plate. Arrange cauliflower on the scallop and garnish with chopped parsley.DSC_6522a

DSC_6517a

April 5, 2014 Lemon Buttermilk Pie with Saffron

DSC_6433a

I am not known for my pie baking skills, I make the ice cream and left that part of the meal to my friend, Kathy. Known for her blue ribbon prize winning pie skills, naming only one of her many talents, she could whip up a pie to compliment any occasion or cuisine. Sadly, Kathy lost her battle of many years to cancer just two weeks ago. She fought a long and ardous ordeal with amazing courage and dignity. So naturally the first dinner we were going to have with our closest friends and family after her passing, I decided to make a pie. What’s the big deal? It’s just a pie, don’t overthink it, just make it. I found a recipe in Bon Appetit, a lemon buttermilk pie with saffron. A bit different, Kathy’s pies were fruit filled, not custard types, so technically I was doing my own thing.

Buttermilk was the star of the dessert recipes in this article and it was in both the crust and the filling. I made my pie dough Friday evening and everything seemed okay, I didn’t overwork it and formed it into a disc to roll out the next day. The directions called for the crust to be rolled out on a well floured surface. I decided to roll mine between layers of waxed paper, I read somewhere that made it easier to transfer it to the pie pan. It got a bit “wrinkly” and fearing it would  stick, I transferred the rolled out dough back to the freezer before peeling it off the waxed paper. The transfer was successful and I trimmed it and made my not so pretty crimped edges. Then I pricked it with a fork and placed it back in the freezer to relax before the blind baking. Blind baking is pre baking the pie crust so that it doesn’t get soggy, important when you are going to add a custard filling. Blind baking accomplished, my only concern was that the bottom of the crust was just a tad too brown.

The custard filling was easy to whip up in the blender  but it looked like there would be more filling than the pie shell would handle. But I trudged ahead, believing something magical would happen when I poured it into the pie shell. It did, custard all over the counter, a ruined soggy crust and I moved my hand the wrong way, sending a new plate I just bought into the air and into several pieces on the ground. Score that one, pie one, me zero.

Determined, I was not going to give up on this, no pie would defeat me, so I made the crust recipe again and found a deeper pie plate to accomodate the filling. Rolling out, baking and filling would wait until Sunday, the day I would serve the pie. In the mean time I watched videos on the proper way to roll out pie crust and how to properly crimp the edge to make a beautiful pie.

I had all the ingredients I needed to make pie number two, I just needed the heavy cream to make whipped cream to accompany it. Joe asked if I should get a “back-up” dessert, just in case. I said no, no safety net here, well I guess if things turned out real bad I would just get some ice cream at the CVS. The rolling went extremely well, this time directly on the counter as the recipe suggested, out from the center, then continual 90 degree turns. I kept rolling until the dough was 4 inches larger in diameter than my pan. No problem transferring the dough to the pan, I trimmed and made reasonably pretty edges for the crust.

Now the blind baking. I pricked the crust all over, chilled it, placed a layer of foil and filled it with pie weights. What happened next I’m not exactly sure. I removed the weights and foil from the crust to finish baking. Much to my horror and dismay the edges of the crust started to shrink back in the pan. I put the foil and weights back in, hoping to salvage the crust and save a trip to the CVS.

It didn’t turn out that bad but wouldn’t be featured in Pie Weekly, if there was such a publication. I added the custard, carefully transferring the pie plate on the baking sheet back into the oven. The perfect pie in Bon Appetit was pale, nicely crimped with flecks of saffron showing up here and there. My pie filling was considerably darker, Joe pointed out that I baked in convection mode, that was why. The pie was not perfect, but still tasted good. And my pursuit of pie making will not end with this attempt, Kathy would have approved.

DSC_6393a
Ingredients for the pie filling.


Lemon Buttermilk Pie with  Saffron

From Bon Appetit

Serves eight

Ingredients for Buttermilk Pie Dough

  • 1 1/4c all purpose flour
  • 1T sugar
  • 1/2t kosher salt
  • 1/2c (1 stick) chilled unsalted butter cut into pieces
  • 1/4c buttermilk

Ingredients for Filling and Assembly

  • 2T all purpose flour, plus more
  • 6 large egg yolks
  • 3 large eggs
  • 1 1/4c buttermilk
  • 1 1/4c sugar
  • 1T finely grated lemon zest
  • 1/3c fresh lemon juice
  • 1/4t kosher salt
  • Pinch of saffron threads
  • 2T unsalted butter, melted and cooled slightly
  • Whipped cream, for serving

DSC_6426a


Directions for Buttermilk Pie Dough

  1. Pulse flour, sugar and salt in a food processor to combine. Add butter and pulse until mixture resembles coarse meal with a few pea-sized pieces of butter remaining.
  2. Transfer to a large bowl and add buttermilk. Mix with a fork, adding more buttermilk by the tablespoon if needed, just until a shaggy dough comes together. Knead lightly until no dry spots remain. Pat into a disc and wrap in plastic. Chill at least 4 hours. Dough can be made 2 days ahead, keep chilled.

Directions for filling and assembly

  1. Preheat oven to 325F. Roll out pie dough on lightly floured surface to a 14″ round. Transfer to a 9″ pie dish, allowing dough to slump down into dish. Trim dough, leaving about 1″ overhang. Fold overhang under and crimp edge. Prick bottom all over with a fork. Freeze 15 minutes.
  2. Line crust with parchment paper or foil, leaving an overhang, and fill with pie weights or dried beans. Place pie dish on a rimmed baking sheet and bake until crust is dry around the edge, 20-25 minutes. Remove foil and weights; bake until surface looks dry, 10-12 minutes longer.
  3. For the filling, blend egg yolks, eggs, buttermilk, sugar, lemon zest, lemon juice, and saffron in a blender until smooth. With motor running, add 2T flour, then the melted butter. Tap blender jar against countertop to burst any air bubbles in filling and pour into warm crust.
  4. Bake pie, rotating halfway through and covering edges with foil if they brown too much before filling is done, filling should be set around the edges but the center will jiggle slightly, 55-65 minutes.
  5. Transfer pie dish to a wire rack and let pie cool. Serve pie with whipped cream.
  6. Pie can be baked 2 days ahead. Keep at room temperature up to 6 hours, cover and chill to hold longer.

DSC_6404a

March 29, 2014 Roast Pork Tenderloin with Carrot Romesco

DSC_6375aLet’s see, it’s salmon on Monday, leftovers on Tuesday, chicken on Wednesday and pork tenderloin shows up on our dinner menu most Thursdays. Boring you say, well it could be, but I am always on the look out for new ways to season and sauce that low fat and easy to cook cut of  “the other white meat.” Pork tenderloin’s mild flavor lends itself nicely as a canvas for many different cuisines.

The most basic pork tenderloin recipe we enjoy is seasoned with salt and pepper and topped with a honey mustard rosemary glaze that is brushed on right before the end of cooking. We often enjoy it “Thai style” borrowing from a dish that I have enjoyed at a local Thai restaurant for many years, pork tenderloin in a spicy peanut sauce over a bed of watercress. Looking through some of the recent recipes from Bon Appetit, pork tenderloin with a carrot Romesco seemed to be quick and intriguing enough to give a try.

I am quite familiar with Romesco, a Spanish sauce of roasted peppers, tomatoes, garlic and almonds and even wrote about it here. Bon Appetit’s new version combined roasted carrots with garlic and pine nuts, definitely stretching the definition of Romesco. It does mimic the rough texture of the classic sauce, reminiscent of pesto. The roasted carrots bring a body and sweetness to the sauce that nicely compliments the pork.

Resist overcooking the pork tenderloin, nothing is worse than dried out pork.  It should still be somewhat pink in color and will be quite juicy. Remember that because of carry over cooking you should take the tenderloin out of the oven when it is 5 to 10 degrees below your desired temperature. The temperature of the meat will continue to rise after it’s taken out of the oven  I don’t know where Bon Appetit finds their pork tenderloins, I have never encountered one that is a pound and a half. Mine were about 3/4lb each, with two to a package.

My local market had beautiful hydroponically grown upland cress, also known as creasy greens in the south. It is a cousin of watercress with dark green heart shaped leaves with a slightly more peppery pungent flavor. I used mine right away but for longer storage could have submerged the root ball in a small container of water and kept it at room temperature for a week. I think that toasted almonds would be a good substitute for the pine nuts. Aleppo pepper adds another dimension to the sauce with it’s rich fruity heat with just a hint of tartness. Would I make this again? A definite yes. The sauce was easy to assemble and soon the carrots and the spicy greens I will be using will be harvested from our garden.

DSC_6364aDSC_6368a


Roast Pork Tenderloin with Carrot Romesco

Serves four

From Bon Appetit Magazine April 2014

Ingredients

  • 1/4c pine nuts
  • 1 1/2 lbs. small carrots, peeled and halved if larger
  • 5T olive oil, divided
  • Kosher salt and freshly ground pepper
  • 2 medium pork tenderloins, about 3/4lb each
  • 1 small clove garlic, finely chopped
  • 1 tsp. Aleppo pepper
  • 2T red wine vinegar, divided
  • 2 or more cups spicy greens like cresses or baby mustard greens

DSC_6367a

Directions

  1. Preheat oven to 350°F. Toast pine nuts on a rimmed baking sheet, shaking occasionally until nuts are golden brown, 5-6 minutes. Remove from baking sheet and allow nuts to cool.
  2. Increase oven temperature to 450°F. Toss carrots with 1T oil on another baking sheet, season with salt and pepper. Roast, tossing occasionally, until softened and browned, about 15 minutes; let cool slightly.
  3. Pulse pine nuts, garlic and 3T oil in a food processor to a coarse paste. Add Aleppo pepper, one fourth of the carrots, 1T vinegar and 1T water. Process, adding more water as needed to a coarse paste; season romesco with salt, black pepper and more vinegar if desired.
  4. Brush 1T oil in a large ovenproof grill pan over medium high heat. Season pork with salt and pepper and cook until golden brown grill marks appear on all sides, about 8 to 10 minutes. Transfer the skillet to oven and roast pork until a thermometer inserted into the thickest portion registers 135°F.Remove pork from oven and let rest for 5 minutes before slicing.
  5. Toss greens with remaining carrots and 1T vinegar in a large bowl; season with salt and pepper. Serve pork with romesco and salad.

DSC_6387a

March 26, 2014 Looking for Spring

DSC_0100a


Spring is here, that’s what the calendar says but it certainly doesn’t feel like it. I am looking out at bare trees on a rather gray landscape watching snowflakes dance by the confused robins.

It’s not supposed to accumulate they say and we will see. The beginning of March to me means putting away my heaviest winter sweaters, for Joe, it’s time to plant the peas. I still need the sweaters and the weather has not cooperated for pea planting. With temperatures just yesterday feeling like it was in the teens, the ground has not been ready to work yet. We have seen an occasional crocus and the green of future daffodils but there is a small patch of snow still left over down by the Christmas tree line. We did enjoy spinach just last week from a greenhouse planting of last October.  It was large, crinkly and probably the sweetest spinach I have ever tasted. That is why we garden.

DSC_0005a
Metal cages became a necessity for the pea seeds, makes it harder for the voles to get to them.
DSC_0087a
Not just peas but early spring greens are planted.

DSC_0064aDSC_0117aDSC_2096a

DSC_3424a
Spinach planted in October tastes even better in March after frigid winter temperatures!


March 22, 2014 Winter Market Salad

DSC_6347 copy

A full day of snapping pictures, shooting video and taking in the exhibits at the Philadelphia Flower Show didn’t allow us time to stop for lunch so a “prevening” meal was in order. We headed across the street from the Pennsylvania Convention Center to refuel at the Reading Terminal Market. A descendant of the open air markets that have been in operation in the same general locale since the 1600’s, it is the nation’s oldest continuously operating farmers’ market. A vast array of food choices ranging from Pennsylvania Dutch to Thai to Mexican await hungry visitors. But there’s not just food, the market offers quilts, homemade crafts, fresh flowers and cookbooks.
We did a quick browse of the many vendors and found a place to rest our weary bones, Molly Malloy’s, a restaurant and bar. They offer 24 beers on tap and when possible, locally sourced produce, courtesy of Molly Malloy’s sons, Jimmie and Vinny, the Iovine brothers. They also operate Iovine Brothers Urban Produce Market  in the Reading Terminal Market. We settled in and perused the menu. Starters of butternut squash soup, crispy calamari and carmelized onion and goat cheese flatbread hit the spot. Joe chose the green apple salad and I chose the market salad.
Appropriate for winter with it’s heartier greens, the salad featured kale, radicchio, romaine and shaved brussels sprouts. A tangy mustard seed vinaigrette and some parmesan bacon crisps tied the salad together nicely. Not wanting to get into a salad “rut” I decided to recreate this at home.
I began by tearing the romaine and the radicchio into bite sized pieces. I used a sharp knife to cut the kale into thin strips. If you have a choice, the Lacinato kale works better because the straighter crinkled leaves are much easier to cut into strips. Shave the brussels sprouts as thinly as possible. You could use a mandoline, but that might be a bit risky if you forget to use the guard. Not that I know anyone who would do that. I trimmed the root ends of the sprouts and sliced them with the 2mm blade on the food processor. You could also cut them in half with a knife, turn them cut side down and thinly slice from root to top. Gently tease apart the layers of the sprouts into distinct shreds  The serrano honey vinegar I used in my tangy mustard seed dressing came from another terminal market vendor, The Tubby Olive. I love visiting their store in Newtown, since then they have opened locations in Doylestown and most recently at the Reading Terminal Market.
A crispy salty component comes from the addition of the parmesan crisps. Known as frico in Italy, it is a wafer of shredded cheese, baked until golden. I sprinkled a little crispy bacon over the frico in the last few minutes of cooking.
The most important rule for all tossed salads is the bowl you are tossing in needs to be large enough to hold the ingredients comfortably. Add the dressing a little at a time to coat, not drown your salad. Tongs or very clean hands do the best job of coating the greens. A half of a lonely avocado was a last minute addition to my salad. Though not part of the original recipe I think it worked in quite nicely.

DSC_6339a

Winter Market Salad

Serves four

Mustard Seed Vinaigrette

Ingredients

  • 3T Serrano honey vinegar or 3T apple cider vinegar plus 1t honey and a pinch of chili powder
  • 2t Dijon mustard
  • 8T extra virgin olive oil
  • 2t yellow mustard seeds
  • Kosher salt and freshly ground black pepper

Directions

  1. Mix vinegar and mustard in a small bowl; slowly whisk in oil. Add mustard seeds. Season dressing with salt and pepper.

Parmesan Bacon Crisps

Ingredients

  • 4 ounces Parmesan cheese
  • 2 slices of bacon, cooked until crisp and crumbled

Directions

  1. Preheat the oven to 350 degrees. Line 2 sheet pans with parchment paper.
  2. Grate 2 ounces of the Parmesan using the side of the box grater that finely grinds the cheese and then grate 2 ounces of the Parmesan using the side of the box grater that makes long shreds of cheese, and then mix them together.
  3. Drop rounded tablespoons of the grated Parmesan on the parchment paper to make neat mounds. Bake in the oven for 4 minutes then sprinkle bacon over the crisps, bake an additional 2-3 minutes or until golden.
  4. Cool slightly and loosen with a metal spatula.

DSC_6352a

Salad Assembly

Ingredients

  • 1 small head of romaine lettuce
  • 1 small head radicchio
  • 4 leaves of Lacinato kale
  • 12 Brussels sprouts
  • Mustard seed vinaigrette
  • Parmesan bacon crisps
DSC_6335a
Brussels sprouts shredded in the food processor.

Directions

  1. Wash romaine and radicchio leaves and tear into 1 inch pieces. Spin dry in a salad spinner
  2. Wash the kale leaves and cut the leaves away from the stems. Cut the leaves into 1/2″ ribbons
  3. Trim the bottoms of the Brussels sprouts, slice in half lengthwise and either slice in a food processor with a 2mm blade or slice thinly with a sharp knife from root to top.  Gently tease apart the layers into distinct shreds.
  4. Add romaine and radicchio to a large bowl. Top with kale strips and shredded Brussels sprouts.
  5. Toss salad with the mustard seed vinaigrette. Serve parmesan bacon crisps on the side. Season salad with additional fresh ground pepper.

DSC_6342a


March 12, 2014 Red Snapper with Red Curry Sauce

DSC_6318a


Times certainly have changed. Ten years ago, shopping for the ingredients for red curry carrot sauce would have required a trip to the local Asian market. Now, most large well stocked supermarkets have curry pastes, coconut milk and fish sauce needed to make this recipe. Here’s a little background information on the special ingredients.

The base of a red chili paste is dried red chilies. The chilies are combined with dry (cumin seeds, coriander seeds) and wet (lemon grass, ginger, garlic) ingredients to make a paste. Taste a little of the curry paste to get a feel for it’s heat before using. Curry pastes that you would purchase in an Asian market are considerably hotter than their counterparts aimed at American palates. There are many varieties of curry paste, in this case you are first looking for a Thai curry paste, the most popular are red and green, with green being the hotter of the two.

The coconut milk used in this recipe is not the kind that you might have on hand for a Pina Colada. That type has sugar and stabilizers added.  Also coconut milk is not the liquid inside the coconut, that is coconut water. Coconut milk is a liquid made by pureeing coconut meat and water.  Shake the can well before using to mix the cream that rises to the top with the milk. There are also many recipes on line for making your own coconut milk.

Fish sauce is known as nam pla in Thailand and nuoc mam in Vietnam. Amber in color, it is the liquid extracted from fish, usually anchovies, and  fermented with sea salt. This pungent condiment becomes subtle when combined with other ingredients.

The sweetness of the carrots and the creaminess of the coconut milk are balanced with the heat of the curry and the unami of fish sauce. We served red curry sauce with vermillion snapper, a variety that is slightly smaller than red, caught in the south Atlantic and Gulf of Mexico. It is listed as a “good alternative” by the Monterey Bay Aquarium Sea Watch.  The sauce would compliment any moderately firm delicate flavored fish. Remember to look for any pinbones and remove with tweezers before cooking your fish. As always, we use the Canadian fisheries method to determine the cooking time of the fillets.  Serve with jasmine rice to soak up the delicious sauce.

DSC_6281a
Ingredients to make the sauce.

Red Snapper with Red Curry Sauce

Adapted from a recipe in Food and Wine Magazine

Ingredients

  • 3/4lb carrots, peeled and trimmed, cut into 1/4″ pieces
  • 1 clove garlic smashed
  • 1 11/2c low sodium chicken broth or chicken stock
  • 1 can coconut milk (about 13.5 oz)
  • 2T fish sauce nam pla or nuoc mam
  • 2t brown sugar
  • 1 1/2t red curry paste (more or less to taste)
  • 1T canola oil
  • 1lb vermilion or red snapper fillets
  • Cilantro leaves and lime wedges for serving
  • Cooked jasmine or other long grain rice

Directions

  1. In a medium saucepan, bring the carrots, garlic and broth to a boil. Cook, covered, over moderately low heat until the carrots are tender, about 15 minute. Check for doneness with the tip of a knife.
  2. Puree the carrots, garlic, and broth in a blender and pour back into the pan. Add coconut milk, fish sauce, curry paste,, brown sugar and 1/2t salt and bring to a simmer, stirring occasionally.
  3. Preheat your oven to 450°F.
  4. Measure the fillets at their thickest point. Season fish with salt and pepper and place on a baking sheet.
  5. Bake fish for 10 minutes for every inch of thickness. The original instructions say to turn the fish over at the halfway point, you can, we don’t. If you check internal temperatures, it should be about 145°F.
  6. Mound the rice on plates and top with fish and sauce. Sprinkle with cilantro and serve with lime wedges.

DSC_6306a

March 8, 2014 Chicken and Andouille Sausage Gumbo

DSC_6186a

A whole new world opened up to me when I discovered my love of cooking and good food over thirty years ago. To learn as much as I could, I immersed myself in cooking magazines, cookbooks and food programs on television. In the pre Food Network days the only option was the local PBS affliliate. Sure there was Julia, but there was also Nathalie, Madeline and a program called The Great Chefs. The Great Chefs programs were the first to take the television cameras behind the scenes and into the kitchens of the finest restaurants in the world. Two of the those programs, Great Chefs of New Orleans and the Great Chefs Louisiana New Garde became my first encounter with the Cajun and Creole cooking of New Orleans. Probably the first celebrity chef to come out of  that town, even before Emeril, was Paul Prudhomme. I bought his first cookbook, Chef Paul Prudhomme’s Louisiana Kitchen and began cooking away.

We had parties revolving around the food of NOLA, Jambalaya Jams, we called them, featuring the spicy cuisine of that city. We also had the pleasure of visiting New Orleans several times and even dined at K-Paul’s, Prudhomme’s eponymous restaurant. While Joe was busy with medical seminars, I enjoyed some demonstration cooking classes to further my exploration in the cooking techniques of the region. I learned about a very different “holy trinity” than I was familiar with, how simple it is to make “prah-leens”,and that a roux (pronounced roo) was the basis of many of the region’s best dishes.

A New Orleans style roux is a fifty-fifty mixture of flour and oil. The oil, always something neutral like a vegetable oil, is heated to a high temperature, then the flour is added gradually. The flour will first bubble as it releases it’s moisture, then toasts as you continue to stir, and stir you must, constantly. The tool of choice here is a long-handled wooden spoon or heat proof spatula. The well-earned nickname “Cajun napalm” comes from the fact that splattering roux will stick to your skin and result in a nasty burn.  The roux will toast and begin to turn a caramel color and develop a wonderful nutty fragrance. A roux can range anywhere from light brown to almost black. Chef Prudhomme says that Cajun tradition is the darker the meat in the dish, the lighter the roux. A dark roux will provide less thickening since the starch is thoroughly cooked but will impart a richer flavor to the dish. If the roux has black specks in it, or smells burnt, discard it and start all over again. A burnt roux cannot be saved!

Gumbo is a classic New Orleans dish claimed by both Cajun and Creole cooks.  Along with a toasty roux, the flavor base of gumbo is enhanced by the “holy trinity” that I mentioned before, a Creole mirepoix of celery, onion and green pepper.  I chose to make this gumbo with chicken thighs since they stand up well to reheating and some andouille sausage to add a little spiciness and authenticity to the dish. Okra and file powder are traditional thickeners added at the end of the cooking process.  Okra is a green pod that is sliced into rounds and breaks down to thicken the gumbo. Okra, both the plant and it’s fruit contain mucilage. That is why some think okra brings a “slimey” quality to the dish. The other option, filé powder is made with the ground leaves of the sassafras tree. It smells like eucalyptus and adds a certain earthiness to gumbo. Filé powder needs to be added to individual bowls right before serving, cooking it makes it become stringy.

Intrestingly enough either one of these two thickeners could be the origin of the word gumbo. The African Bantu word for okra is “kingombo” and the Choctaw Indians were the first to make and sell filé powder which they called “kombo”.

Gumbo is a great make ahead dish. As with many stews, it tastes even better the next day. Gumbo can be stored in the refrigerator for several days or frozen. Serve over white rice, garnish with chopped scallions and pass around the Louisiana style hot sauce for a satisfying one dish meal.

DSC_6194a


Chicken and Andouille Sausage Gumbo

Serves 6-8

Ingredients

  • 2lbs boneless skinless chicken thighs, cut into 1″ pieces
  • 1t kosher salt
  • 1t garlic powder
  • 1/2-1t cayenne pepper
  • 6c chicken stock or low sodium chicken broth
  • Vegetable oil (1/2 cup plus a little more)
  • 1/2lb Andouille sausage or other spicy sausage, sliced in half lengthwise, then cut into 1/3 inch half moon slices
  • 1/4c Canadian bacon, cubed
  • 1 1/2c finely chopped onion
  • 1c finely chopped green pepper
  • 1c finely chopped celery
  • 3 cloves garlic, finely chopped
  • 2 bay leaves
  • 2t dried thyme
  • Finely chopped scallions
  • Louisiana style hot sauce
  • Hot cooked white rice
  • Filé powder

Directions

  1. Place the chicken in a bowl large enough to hold it comfortably. Mix salt, garlic powder and cayenne in a small bowl. Toss the chicken with the spices and let stand at room temperature for 30 minutes.
  2. Warm the chicken stock over medium heat.
  3. Heat 1 tablespoon vegetable oil in a 7-8 quart Dutch oven over medium high heat until hot, 1-2 minutes. Add the sausage and the Canadian bacon and cook, stirring occasionally with a wooden spoon, until well browned, 4-6 minutes. Transfer to a bowl with a slotted spoon.
  4. Add 2 tablespoons to the Dutch oven and sauté the chicken in several batches until golden brown, about 6-7 minutes. Transfer the chicken to the bowl with the sausage.
  5. Add enough vegetable oil to the Dutch oven to make 1/2 cup. Using a wooden spoon to scrape and loosen browned bits from the bottom of the pot.
  6. Using a long handled whisk, gradually stir in the 1/2 cup flour. Cook whisking constantly. I switched back and forth between a whisk and flat edged wooden spoon to make sure nothing stuck to the bottom of the pan. It will take anywhere from 4 to 8 minutes for the roux to reach a dark caramel color.
  7. Remove the pan from the heat and immediately add the onion, celery, pepper and garlic. Stir constantly to stop the roux from getting darker.
  8. Return pan to low heat and cook until vegetables are soft, about 5 minutes, stirring constantly and scraping the bottom of the pan well.
  9. Stir in the chicken broth, sausage, Canadian bacon, chicken, thyme and bay leaves.
  10. Bring to a boil and then reduce heat and simmer for 30 minutes.
  11. Gumbo can be served immediately or stored in the refrigerator for several days. Reheat gently before serving.
  12. Serve in large soup bowls over cooked rice. Add scallions, filé powder and hot sauce to taste.

DSC_6206a

March 4, 2014 “Masterpizzas”

DSC_4678a

Picasso, Renoir, Monet, artists with different styles but all started their paintings with the same thing, a blank canvas.  A pizza dough can serve the same role.  It becomes the canvas for the toppings you “paint” on your dough. An article in the March issue of Martha Stewart Living, “Modern Masterpizzas” featured pies that were inspired by artists from Picasso to Pollack. These unique brightly colored canvases were the inspiration for the pizza course that became part of the Valentine’s Day menu.  Martha’s pizzas were abstract looking rectangular creations topped with everything from brussels sprouts and delicata squash to a slightly more conventional prosciutto and mozzarella pie.

Joe has always been quite the pizza master. His first job as a teenager was at the most popular pizza shop in the area where he worked his way up from dishwasher to pizza maker. One of his more surprising talents is spinning and throwing pizza dough. So I was certain he would be up to a pizza challenge. He has liked the dough that I have made for several years but decided to use the dough in Martha’s recipe. My dough uses unbleached all purpose flour, Martha’s dough uses bread flour and three times the amount of yeast in the recipe I use. I prefer instant dry yeast in all my pizza and bread recipes. Instant dry yeast does not need to be dissolved in warm water like active dry yeast and can be added with the other dry ingredients. Joe found the dough made with the bread flour tore easily. It definitely rose much more than the pizza dough I make. As Joe put it, dough made with bread flour is not a “spinning dough”. So he worked the dough into the pan, baked it a short time until he could remove the pan and allow the bottom of the crust to brown.

He made two different types of pizza for this occasion. One was topped with an assortment of mushrooms, cremini aka “baby bellas”, shiitake and oyster that were sauteed in butter, olive oil and garlic. After the pizza was removed from the oven, he scattered baby arugula leaves on top. The best of both worlds, pizza and salad.

The other pizza was topped with four Italian cheeses and pancetta.  Like bacon, pancetta originates from pork belly. Bacon is cured by both brining and smoking. Pancetta is cured with salt and pepper but not smoked. Pancetta is readily available these days, even in the “big box” stores. I rewrap it from the original packaging and store it in the freezer for moments like this. Bacon or prosciutto could be substituted for a slightly different flavor profile.

When that pie came out of the oven, he drizzled a little honey over the warm pizza. The saltiness of the pancetta was the perfect contrast with the honey. Honestly, I think I could have eaten  the whole pizza  but used a little restraint, knowing I needed to save my appetite for the many courses yet to come.

DSC_4674a
Mushroom and four cheese pizza on the peel ready to slide back into the oven after a short prebake.
DSC_4677a
The warm mushroom and cheese pizza is topped with baby arugula. Can’t wait for spring and our own greens!


Martha’s Pizza Dough

Makes enough for three 12″ round pies

Ingredients

  • 4c unbleached bread flour, plus more for dusting
  • 1 1/2 t instant dry yeast, I use Fermipan 2 in 1
  • 1 3/4c water at room temperature
  • 2 1/4t coarse salt
  • 1T extra virgin olive oil, plus more for brushing and bowl

Directions

  1. In a large bowl, whisk together the flour and yeast. Slowly add water, mixing with a wooden spoon until incorporated. Stir in salt and oil. The dough will be lumpy and raggedy. Brush with oil. Cover bowl with a dry kitchen towel and let rest 1 hour.
  2. Turn out dough onto a floured surface and pat with flour. Continue to flour your hands as you work. Holding two opposite sides, pull dough until about a foot long, then fold back onto itself and pinch ends together. Repeat 4 more times, rotating dough each time to stretch alternate sides, until it feels smooth.
  3. Place dough in a well-oiled large bowl; brush with oil. Cover with plastic wrap and let rise in refrigerator until doubled in bulk, at least 24 hours and up to 48 hours.
  4. Turn out dough onto floured surface. Cut into 3 equal parts; form into balls. Brush with oil; cover. Let rest 1 hour.
  5. Place dough on fists and use knuckles to begin stretching dough from middle, rotating it slightly as you work. Set on surface and continue to stretch from all sides to form a rough 10-by-14-inch rectangle. Dough may tear at this point, just pinch it back together if that occurs.
  6. Transfer dough to a lightly oiled 12 round or 9-by-13 inch rimmed baking sheet. Pull edges to fill pan.

Wild Mushroom and Four Cheese Pizza  topped with Arugula

Ingredients

  • 2 cloves garlic, finely chopped
  • 1T olive oil
  • 2T unsalted butter
  • 8oz assorted mushrooms, about 3 cupes (Joe used porcini, oyster and shiitake)
  • 1 1/2c shredded four cheese Italian blend.
  • Baby arugula or other micro green
  • One pizza crust from the preceding recipe

Directions

  1. Place pizza stone on the bottom rack of the oven if using. Preheat oven to 500°F.
  2. Over medium high heat melt butter and olive oil in a sauté pan. Add mushrooms and cook until softened, 7-9 minutes.
  3. Brush pizza crust with a thin coating of olive oil. Evenly sprinkle cheese over the crust. Top with the sautéed mushrooms.
  4. Bake until cooked through, the crust should be golden on the edges and the cheese should be golden brown in spots, about 15 minutes. Joe bakes his pizza on the sheet for about 5 minutes, uses a pizza peel to remove the pan and bakes the pie directly on the pizza stone until it is done. This allows the bottom of the crust to brown nicely.
  5. Sprinkle arugula or micro greens over the warm pizza. Slice into 6 pieces and serve.

Honey Drizzled Pancetta and Cheese Pizza

Ingredients

  • 1 1/2c shredded four cheese blend or mozzarella
  • Thinly sliced pancetta to cover the pizza
  • Honey

Directions

  1. Place pizza stone on bottom rack of oven if using. Preheat oven to 500°F.
  2. Sprinkle cheese evenly over the crust. Bake for about five minutes or until it is easy to remove crust from the pan with a pizza peel. Return pizza to oven and continue to bake for another five minutes.
  3. Layer pancetta over the cheese and bake for another 5-7 minutes, until crust is golden around the edges.
  4. Remove pizza from oven with a pizza peel and slide pizza onto a cutting board. Lightly drizzle honey over the pancetta. Slice into 6 pieces and serve.