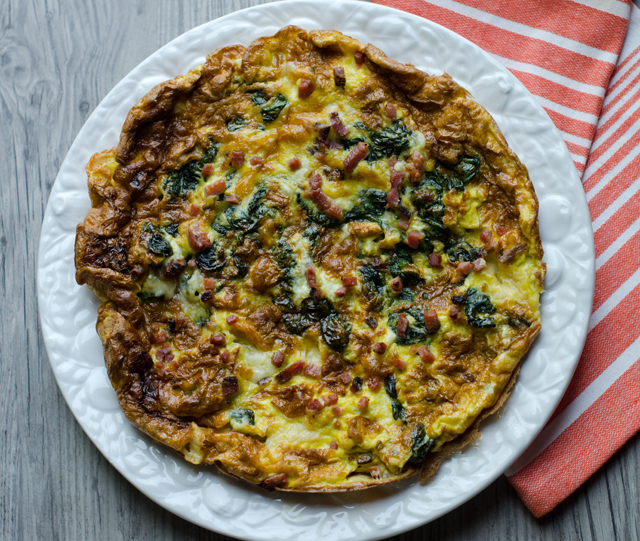
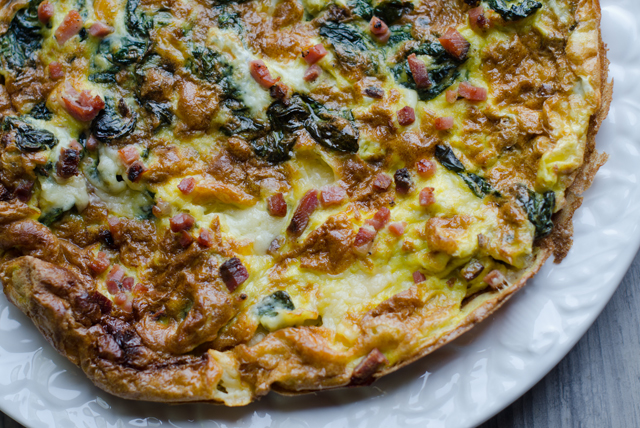
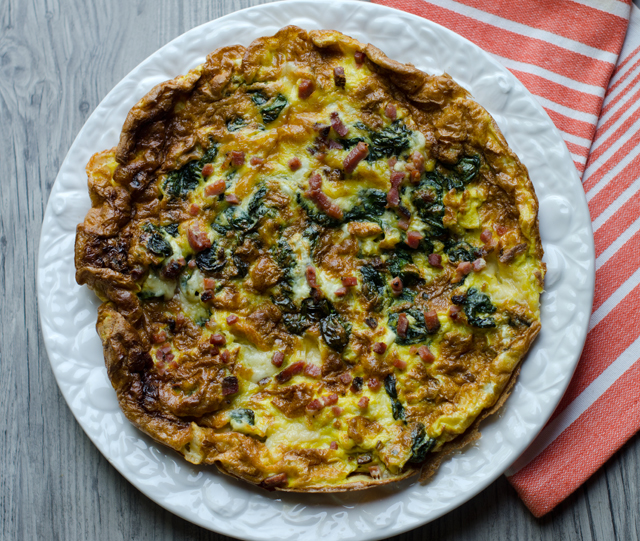
July 7, 2018 Swiss Chard, Gruyere and Ham Frittata

After a cold, very rainy spring, summer has arrived with a vengeance. We are experiencing temperatures in the upper 90’s with humidity that makes it feel like 100 degrees plus. With no real rain in the foreseeable future, drip irrigation and sprinklers are keeping the veggies and berries happy. We’ve had a few Sungold tomatoes, bright yellow blossoms are now producing the first zucchini of the season, tart juicy raspberries are beginning to ripen and we have the earliest eggplants ever.

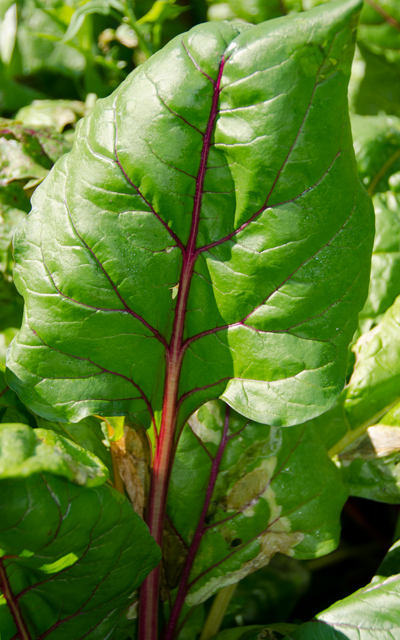
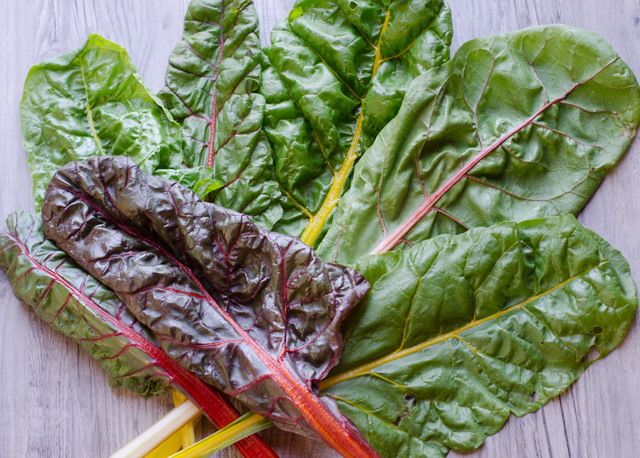
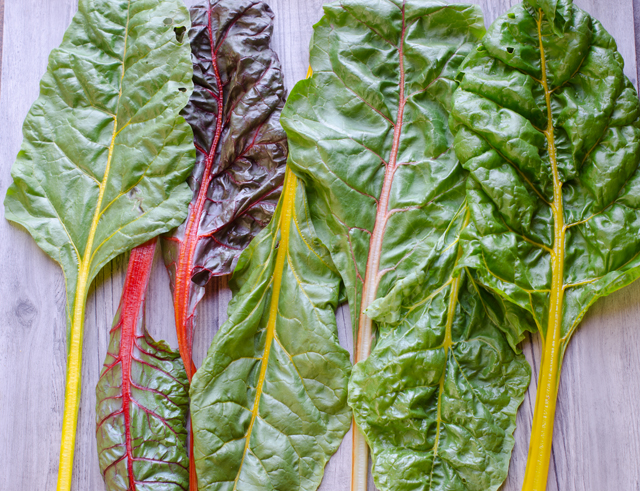
As you enter the garden, there is a large planting of Swiss chard. Not only delicious and nutritious, the stems and veins bring a pop of brilliant color to the garden. Earlier in the spring, Joe planted the faster growing spinach in between each row of chard. The spinach was harvested first before it had a chance to bolt. Now we are enjoying a daily harvest of chard. The leaves are always a dark green but the stems can be white, red, yellow and even an orangey color. Very small leaves can be used in salads, larger leaves need to be separated from the stems but both parts are edible. You can read about more of the basics of chard in this post.

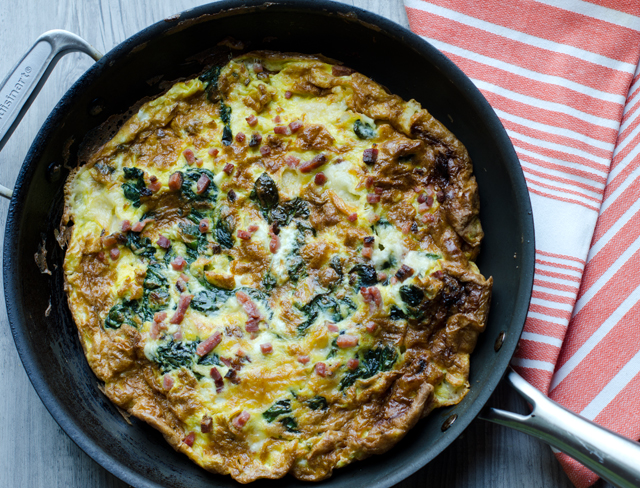
In season, I love making frittatas with ingredients straight from the garden. They are versatile as an on-the-go breakfast, lunch or a no-fuss light supper. In this recipe I take a basic frittata recipe I use as a guideline and use Swiss chard, both stems and leaves, a little Canadian bacon and, why not, a Swiss cheese. When I say Swiss most people are thinking of Emmenthaler, the mild holey cheese that is paired with ham in a sandwich. But there are other Swiss cheeses and Gruyère is one worth trying. Firm and dense, as in, no holes, Gruyere has a rich, creamy, slightly nutty taste.

Some important tips to remember when you are making this or any frittata. Cook any raw vegetable you will be adding to the frittata first. Even quick cooking vegetables like spinach and mushrooms exude water when you cook them. So cook them completely, no one wants a watery frittata! You also should adjust the amount of salt you use based on the saltiness of the ingredients you use like cheese and cured meats.

A  heavy bottomed oven safe non stick skillet or a well-seasoned cast iron pan is absolutely necessary to make the frittata. Before you proceed with the recipe be sure the skillet fits comfortably under the broiler without a great deal of maneuvering. The handle on my skillet was a bit high and made getting it in and out of the oven quite challenging. Have thick potholders at the ready so you don’t burn your fingers pulling the pan out of the oven. Once out, leave the potholder over the handle to remind yourself the pan is still hot. Use a spatula to loosen the frittata from the pan and transfer to a platter or cutting board. Of course, there are countless variations of the frittata and as the season moves on my add-ins will change.  Whatever you put in yours, it’s a great quick weeknight supper to serve alongside a simple green salad.
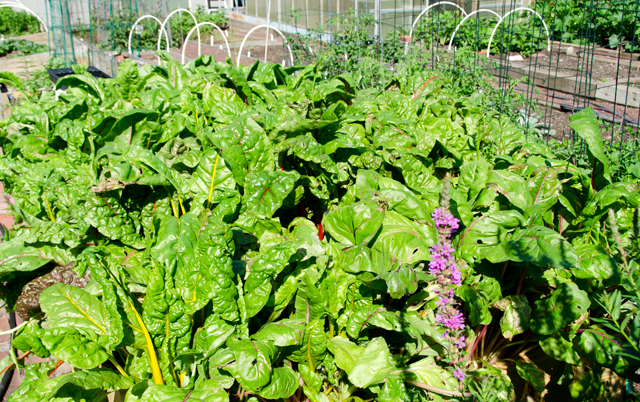
Our section of chard.

The colorful stems are good to eat as well.

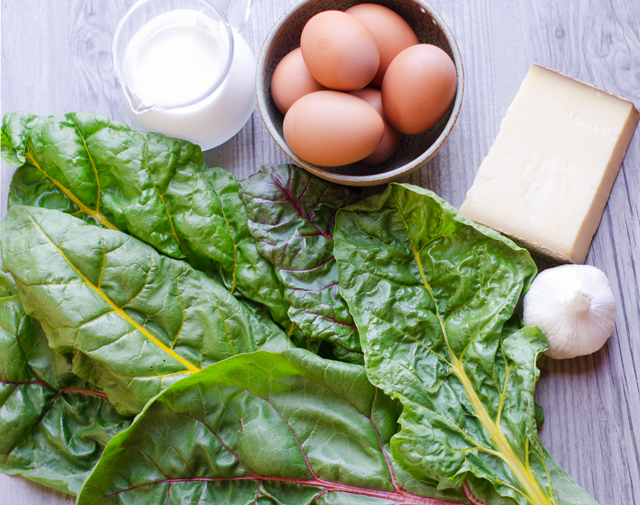
Everything but the bacon.

Swiss Chard, Gruyère and Ham Frittata

Makes one 12″ frittata

Ingredients

  • 12 large eggs
  • 3 T half and half
  • Kosher salt and freshly ground pepper
  • 2 t olive oil
  • 8 c chard leaves roughly torn into 1″ pieces
  • ½ to 1 cup thinly sliced chard stems (optional)
  • 1 clove garlic, finely minced
  • ¾ c shredded Gruyère cheese
  • ¼ to ½ c finely diced Canadian bacon or ham

Directions

  1.  Adjust oven rack to upper middle position, about 5 inches away from the heating element. Heat broiler.
  2. Whisk eggs, half and half, ½ t salt and a grind of pepper in a medium bowl until well combined, about 30 seconds. Set eggs aside.
  3. Heat oil in a 12-inch non stick skillet over medium heat until shimmering; add stems first if using and saute until softened a bit, 3-4 minutes. Add chard and continue to cook until leaves are wilted and soft, another 4-5 minutes. Add chopped garlic and cook until fragrant.
  4. Stir shredded Gruyère into the egg mixture. Add egg mixture to the skillet and cook, using spatula to stir and scrape bottom of skillet, until large curds form and spatula begins to leave wake but eggs are still very wet, about 2 minutes. Shake skillet to  distribute eggs evenly, cook without stirring for 30 seconds. Sprinkle Canadian bacon over the frittata surface.
  5. Slide skillet under broiler and broil until the frittata has risen and the surface puffs and turn spotty brown, three to four minutes. Remove skillet from the oven and let stand 5 minutes to finish cooking.
  6. Using a spatula, loosen frittata from the skillet and slide onto a platter or a cutting board. Cut into wedges and serve.
 

June 24, 2018 Carrot Top Chimichurri Sauce

When I exercise on our elliptical machine I catch up on my version of “must-see t.v.”. Right now I am watching the current season of Iron Chef America. For those not familiar with the show, two chefs,  a world-class “Iron Chef”  competes against an up and coming chef. The chefs create a menu in one hour from appetizer to dessert that prominently features that week’s secret ingredient. Two weeks ago it was ” Battle Kobe Beef”. This weekend I tuned into “Battle Carrot”. The show is fun to watch and also stimulates my own creativity in the kitchen. I’m pretty sure when I went to the farmers market after my workout I had carrots on the brain. So along with all the other goodies I found, a lovely bunch of recently harvested carrots went into my bag.

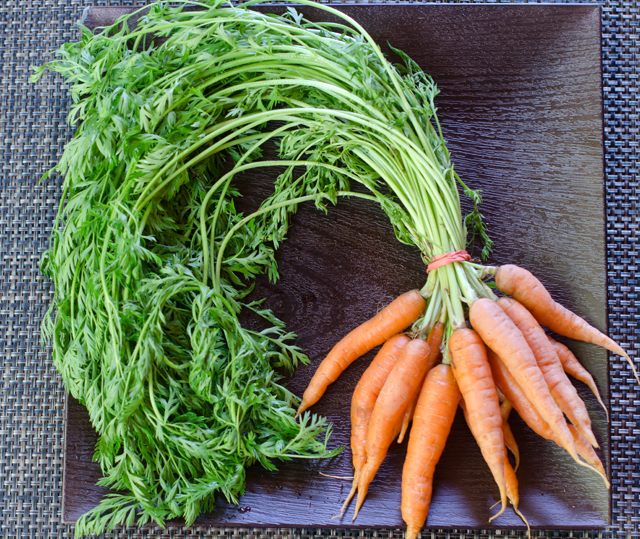
My plan was to roast the carrots and in the spirit of “root to stem” cooking, use the greens as well. Carrot tops are edible and rich in vitamins A,C, calcium, iron and dietary fiber. They have an earthy, herbal, slightly bitter taste. Carrot top pesto was a success last year, this time I was looking for something a little bit different. Chimichurri sauce was a natural for this dish. This rich herby sauce from Argentina was already a favorite of ours. I have served as an appetizer at parties, spooned over rare beef tenderloin on crostini. It was easy enough to swap out the parsley in the original recipe for carrot tops. After all they are both members of the same plant family, along with fennel, dill  and coriander.

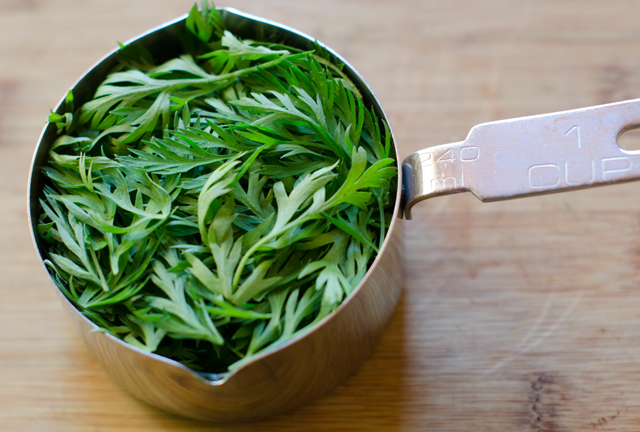
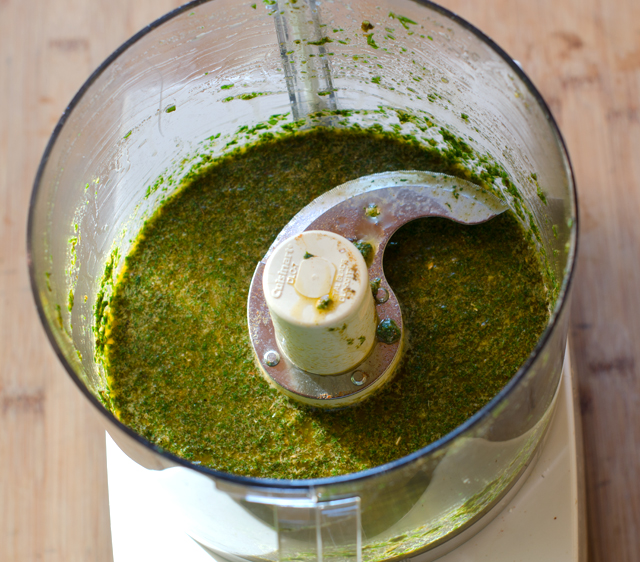
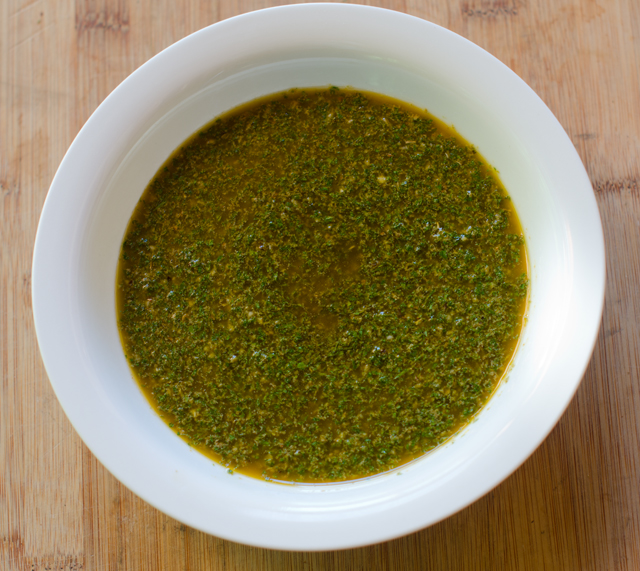
Wash the greens well and pat dry with paper towels. The most time-consuming part of this recipe is separating the leaves from the slightly harder stems. Aim for a lightly packed cup, if you want this thicker to use as a dip, either cut back on the olive oil or add a quarter cup more of leaves. Blend all of the ingredients until smooth in a food processor. Taste and adjust the seasonings. Give the chimichurri at least an hour to fully combine the flavors, over night is even better. If you don’t have carrot tops, substitute the traditional parsley or a combination of parsley and cilantro.

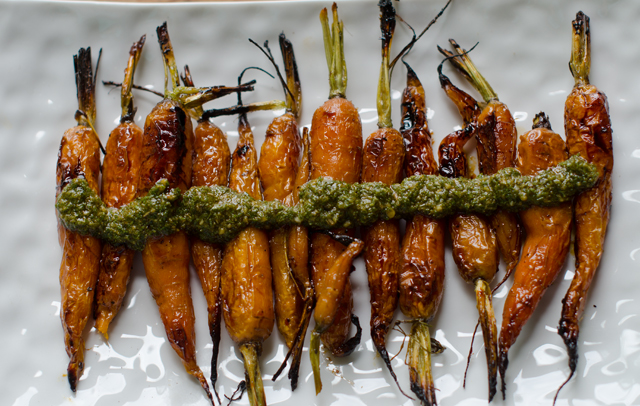
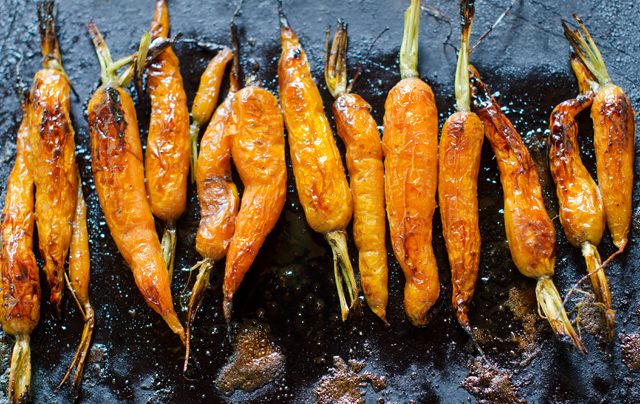
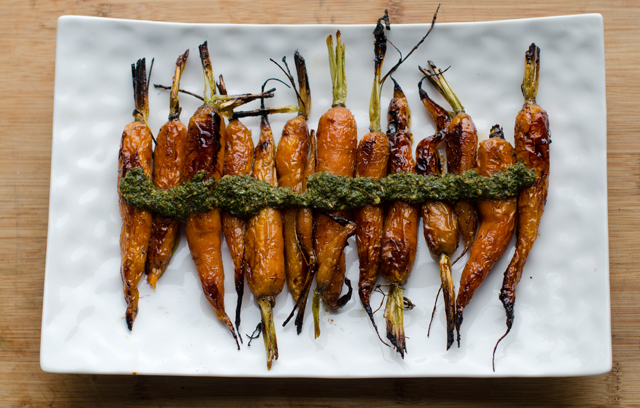
I served my chimichurri over roasted carrots. Traditionally this is served with steak but I think it would be just as good as a sauce with grilled chicken or lamb chops. Store in the refrigerator in an airtight container for up to a week.

A cup of lightly packed carrot leaves.
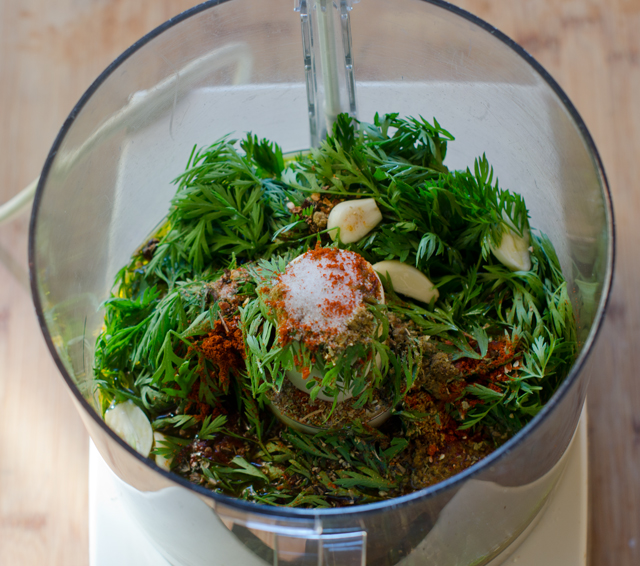
Everything goes in the food processor.


Carrot Top Chimichurri Sauce with Roasted Carrots

Makes about a cup

Ingredients for Chimichurri Sauce

  • 1 c lightly packed fresh carrot top leaves
  • ¾ c extra virgin olive oil
  • 3 T red wine vinegar
  • 1 T dried oregano
  • 2 t ground cumin
  • 1 t salt
  • 3 cloves garlic, peeled and roughly chopped
  • ½ t smoked paprika
  • ½ t dried crushed red pepper

Directions

  1. Combine all of the ingredients in a food processor and blend until smooth.
  2. Refrigerate for at least one hour but tastes even better the next day. Store in an airtight container. Use within a week.

Roasted Carrots

Ingredients

  • 1 lb fresh carrots, scrubbed well, tops reserved for chimichurri sauce
  • 1 T extra virgin olive oil
  • 1 T honey
  • Kosher salt and freshly ground black pepper

Directions

  1. Preheat oven to 425°F. Coat a large baking sheet with non stick spray.
  2. In a bowl large enough to accommodate the carrots, mix together the olive oil and honey.
  3. Add the carrots to the bowl and toss them with the oil and honey. Salt and pepper to taste.
  4. Spread carrots evenly on the baking sheet and use a spatula to scrape the rest of the honey-oil mixture over the carrots.
  5. Roast carrots for about 15 minutes, shaking pan halfway through the cooking process for even browning.
  6. Remove carrots from oven, allow to cool slightly.  Serve carrots topped with chimichurri sauce.


June 12, 2018 Kohlrabi Slaw with Honey Lemon Mustard Dressing

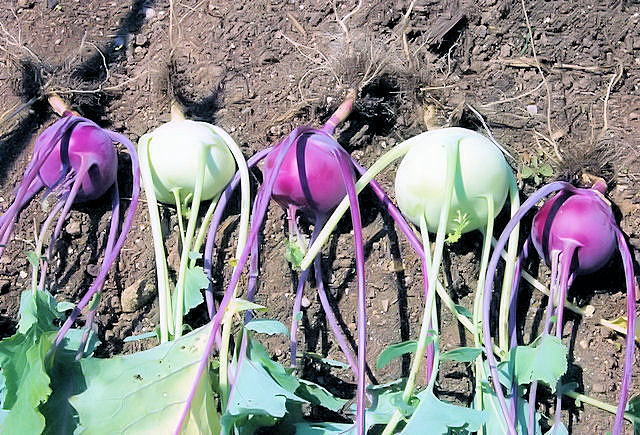
With temperatures consistently in the eighties and more than our share of rain, it was time to do a final harvest of the spring vegetables. The heat, rain and deer damage sadly ruined our edible pod pea crop. On the positive side we have enjoyed a variety of lettuces, spinach, radishes and small white Japanese turnips. Also in the harvest, those funny looking space alien looking vegetables, kohlrabi.

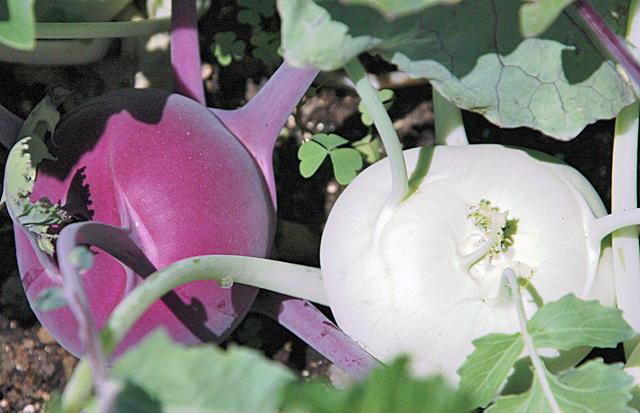
Translated from the German, cabbage turnip, it is the bulbous above ground stem that gives the “turnip” name to the crispy green and sometimes purple vegetable. Oddly enough, it doesn’t taste like cabbage or turnips. When young, about the size of a tennis ball, it is thin-skinned, sweet and juicy with a mild flavor reminiscent of broccoli stems. Older, larger kohlrabi should be peeled, and the flavor is still sweet but a bit peppery.

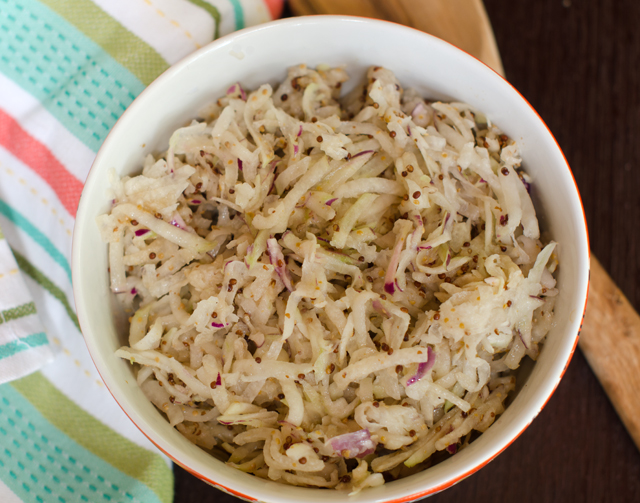
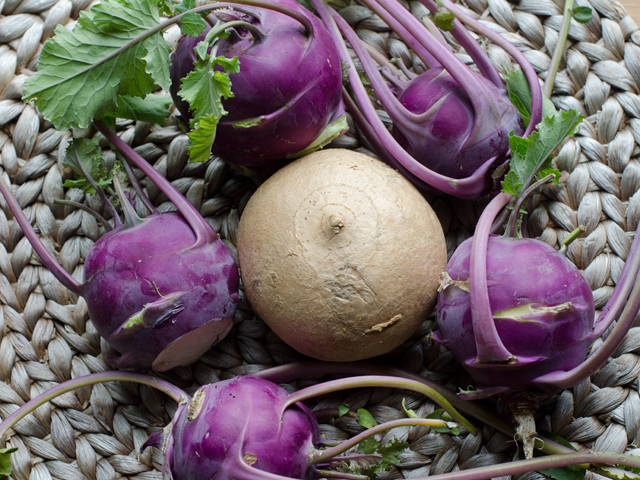
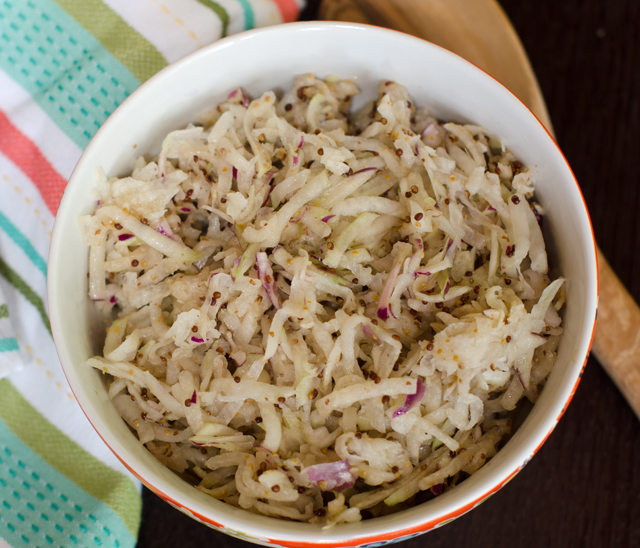
Kohlrabi is a natural shredded or julienned in a slaw. This time I combined it with another ugly ducking vegetable, jicama. “HEE-kah-mah” is the edible tuberous root of a vine native to Mexico. Resembling a round potato, the papery brown skin needs to be peeled away before eating. The texture of the flesh is similar to an apple or a pear with a flavor that is mild and slightly sweet.

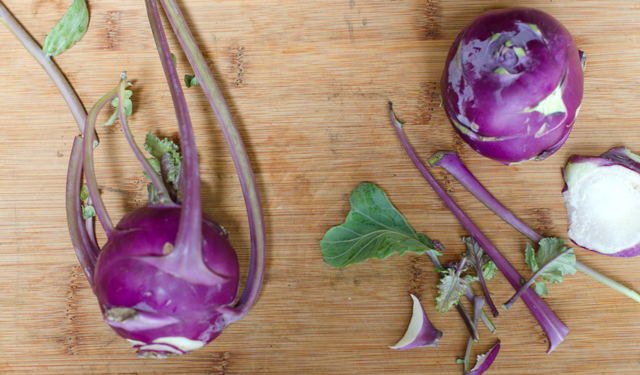
You can either shred or julienne the vegetables. Since the kohlrabi I used was on the small side, I shredded it in the food processor. The kohlrabi were still young and tender, so there was no need to peel, preserving the purple color. Larger kohlrabi with thicker skin should be peeled.

I was looking for a new twist on dressing the slaw so I turned to The Flavor Bible for some inspiration. I saw that both mustard and lemon were compatible flavors so I thought a honey whole grain mustard dressing would add the right texture and tang to the recipe. A little juice from one of our Ponderosa lemons gave the dressing brightness.

This simple slaw is a great addition to any buffet or picnic because it stays crisp long after it is dressed.

Kohlrabi ready to pick from the garden.
Just picked kohlrabi, love that purple color!
Jicama surrounded with purple kohlrabi
The kohlrabi need to be trimmed before they are shredded.
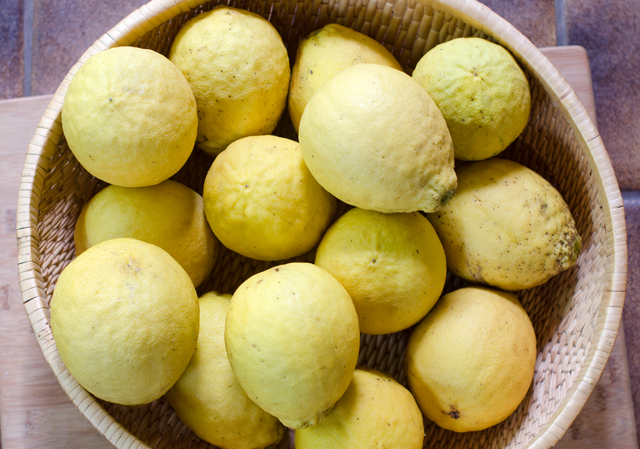
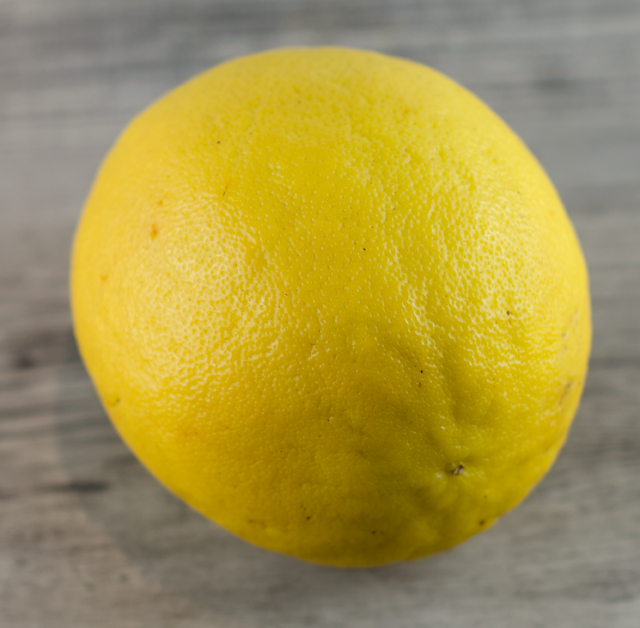
A recent harvest of Ponderosa lemons.
Nicknamed the “five pound lemon” they usually weigh two to four pounds. Ponderosa lemon is a citrus hybrid of a pomelo and a citron.


Kohlrabi Slaw

Serves 4-6

Ingredients for slaw

  • 3-4 small or 1 large kohlrabi
  • 1 small jicama
  • Kosher salt and freshly ground pepper

Honey Lemon Mustard Dressing

Ingredients for dressing

  • 2 T honey
  • 2 T whole grain mustard (can add another T if desired)
  • 3 T olive oil
  • ¼ c freshly squeezed lemon juice
  • pinch of salt

Directions for dressing

  1. Place all the ingredients in a small bowl and whisk to combine. Taste and adjust seasonings to your liking.

Directions for slaw

  1. To prepare the kohlrabi, trim the root stem to the base. Cut the leaf stems from the globes. Wash leaves if using in another preparation. If the kohlrabi is mature, peel, if smaller leave skin on.
  2. To prepare the jicama, peel.
  3. Grate kohlrabi and jicama in a food processor or on a box grater. Squeeze out any excess water with your hands. You should have about 6 cups total.
  4. Place shredded vegetables in a large bowl. Pour the dressing over the slaw and toss to combine. Season to taste with kosher salt and fresh ground pepper.
  5. Refrigerate until serving.

June 2, 2018 Chicken Marsala Meatballs

A friend recently texted me some pictures from the meal he had at a new local restaurant. One photo piqued my curiosity, chicken Marsala meatballs. When I had my catering business, chicken Marsala was a client favorite. Tender pieces of chicken in a luxurious, creamy sauce loaded with umami rich mushrooms, what’s not to love? This was a recipe I wanted to try.

I buy ground turkey quite frequently, ground chicken I have shied away from. I thought that a lean meat like ground chicken would too easily result in a dry dish. But there are ways to ensure that won’t happen. Adding ricotta to meatballs is a tip I learned from chef Michael Symon on The Chew. The mild and creamy consistency of ricotta gives the meatballs a light texture. I prefer a natural ricotta, made with just milk, vinegar and salt. Place ricotta into a sieve and allow it to drain for at least a half hour to ensure a moist, but not watery meatball. I added finely chopped shiitake to the meat mixture to amp up the mushroom flavor and some panko breadcrumbs to lighten the texture of the meatballs.

Take off your rings and roll up your sleeves because it is best to use your hands for the next step. Combine the ingredients until they just come together, don’t over work. It’s easier to feel when everything is well mixed. Use oiled hands or a small cookie scoop to portion out the meat.Be gentle when forming meatballs. If they are packed too tightly and compactly, they will turn out tough, rubbery and chewy.

Place the meatballs on a parchment lined baking sheet and lightly coat it with non stick spray. I chose to roast the meatballs in the oven but they could also be fried in oil on the stove top. While the meatballs are cooking, you will have time to make the sauce. The star of the sauce, of course is Marsala wine. Marsala is a fortified wine produced in the region surrounding the Italian city of Marsala in Sicily. Dry Marsala is used in savory preparations like this dish while sweet Marsala is used in desserts. Tiramisu anyone?

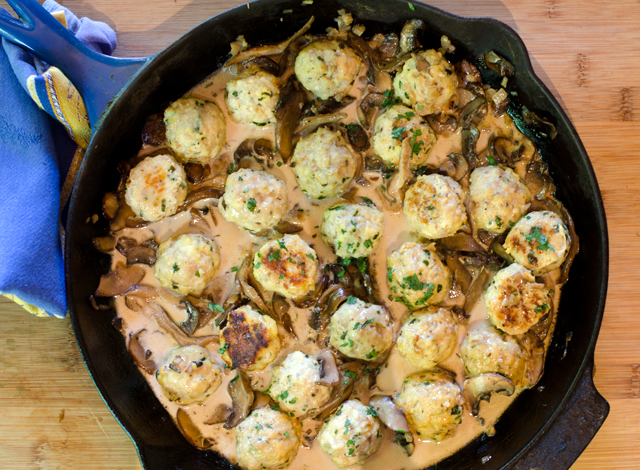
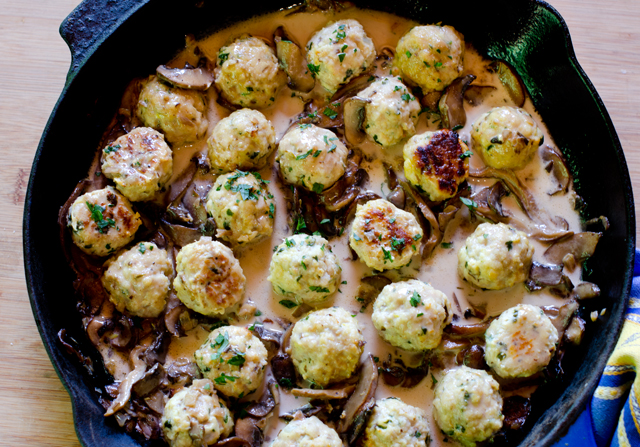
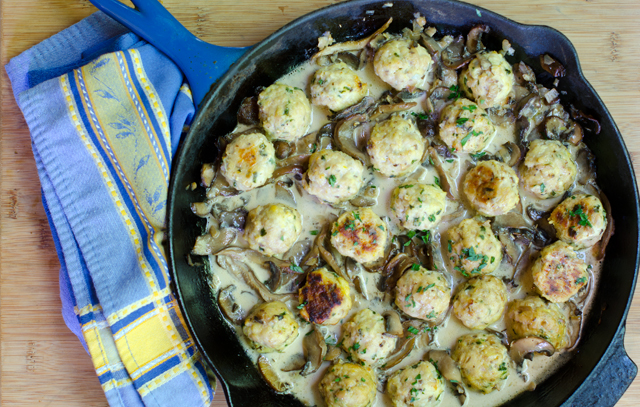
Melt butter in a saute pan large enough to hold the meatballs. Saute shallot, then add mushrooms and garlic to the pan, I used a combination of shiitake and cremini, white button mushrooms are fine as well. Cook, stirring frequently until the mushrooms begin to brown, 3 to 4 minutes. Add Marsala wine to the pan and cook until slightly reduced. Add cream and wine and reduce heat to a simmer. Add meatballs back to the pan tossing gently. Sprinkle with fresh parsley and serve.
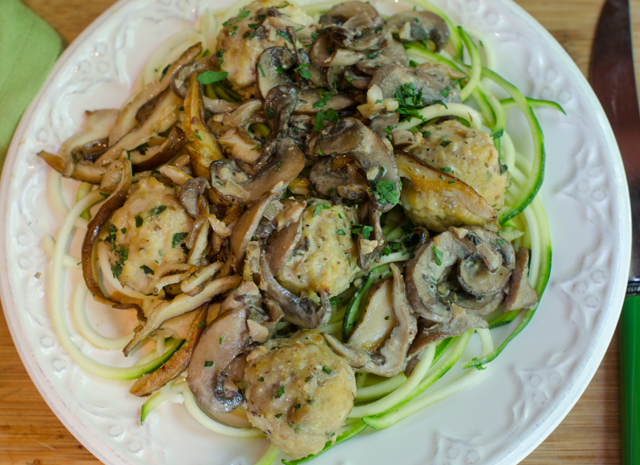
This dish could be prepped ahead of time, make the meatballs and sauce and hold separately in the refrigerator until you are ready to cook dinner. Chicken Marsala meatballs make a great hors d’oeuvre, sandwich filling on a crusty roll or served over wide pasta noodles or like we did, over zucchini “noodles”.

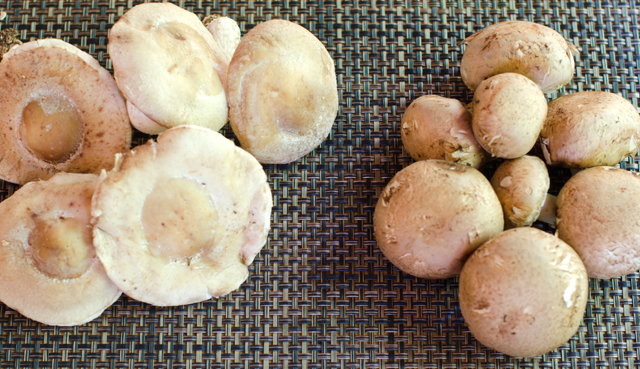
I used cremini and shiitake mushrooms in my preparation, button mushrooms are fine to use as well.
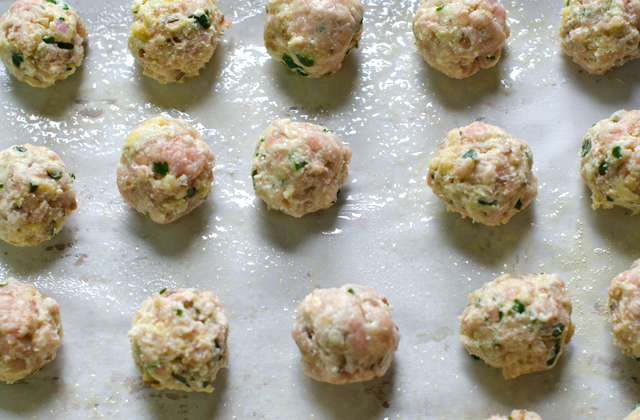
Place meatballs evenly spaced on a prepared baking sheet.

Chicken Marsala Meatballs

Makes 24-27 meatballs

Ingredients for the meatballs

  • 1 lb ground chicken
  • ¾ well-drained ricotta cheese
  • 3 T finely chopped shallot
  • 2 t finely chopped garlic
  • 1 egg, lightly beaten
  • 1 c finely chopped mushrooms
  • ½ c freshly grated pecorino romano cheese
  • ½ c panko breadcrumbs
  • Kosher salt and freshly ground black pepper

Directions for the meatballs

  1. Preheat oven to 375°F. Line a large baking sheet with parchment or foil. Spray the baking sheet with non stick spray, set aside.
  2. In a large bowl combine chicken, ricotta, shallot, garlic, egg, mushroom, cheese, panko, salt and pepper to taste. Be careful not to over mix.
  3. Using your hands or a small cookie scoop, scoop out the meat mixture and roll into balls. Evenly place the meatballs on the prepared baking sheet.
  4. Bake for about 15 minutes, until light golden, rotating the tray halfway through the baking time.  Keep the meatballs warm while you make the sauce.

Ingredients for sauce

  • 1 T unsalted butter
  • 1 T extra virgin olive oil
  • 1 small shallot, finely diced
  • 8 oz thinly sliced mushrooms-more if you like.
  • 1 clove garlic, finely diced
  • 1 c dry Marsala wine
  • ¼ t dried thyme
  • 2 T chopped parsley
  • Kosher salt and fresh ground pepper

Directions for sauce

  1. Melt butter in a large saute pan over medium high heat, add olive oil.
  2. Add shallot to the pan, season with a pinch of salt and pepper. Cook until softened, 1-2 minutes.
  3. Add mushrooms and garlic to the pan. Saute until mushrooms are cooked through, 3-4 minutes, add Marsala wine to the pan, cook until slightly reduced, 4-5 minutes.
  4. Add cream and thyme and bring to a simmer. Add meatballs to the pan, toss gently until well coated.  Reduce the heat to medium-low and cover; let them simmer in the sauce for 10 minutes. Add chopped parsley, taste and adjust for seasoning with salt and pepper.

I served Chicken Marsala meatballs over zucchini noodles.

May 13, 2018 Baked Parmesan Panko Asparagus Fries

Our spring vegetable garden includes several varieties of lettuce, spinach, radishes, Japanese turnips, beets, kohlrabi, sugar snap peas and cooking greens. However there is one spring vegetable that we don’t grow that makes my trip to the farmers market worthwhile, fresh local asparagus. Asparagus is a real sign that spring is here. and the season is fleeting. I will serve it roasted, grilled, raw in salads, in stir fries and a new way (at least for me) I heard about from a new “friend”, Alexa.

Alexa is a digital assistant that performs tasks, like turning on Sirius radio when I’m in the kitchen. “Alexa, play Seventies on Seven”. You can ask her the score of the game, will it be sunny today and even turn the lights on if you have the right smart home device. Our Amazon Echo has a screen that always shows the time, weather and rotating news headlines, fun facts and even recipes. One afternoon I noticed that a recipe for oven baked asparagus fries popped up. I was too busy at the time but thought that this was one I needed to try. On line I found many recipes, this is my interpretation of this popular dish.

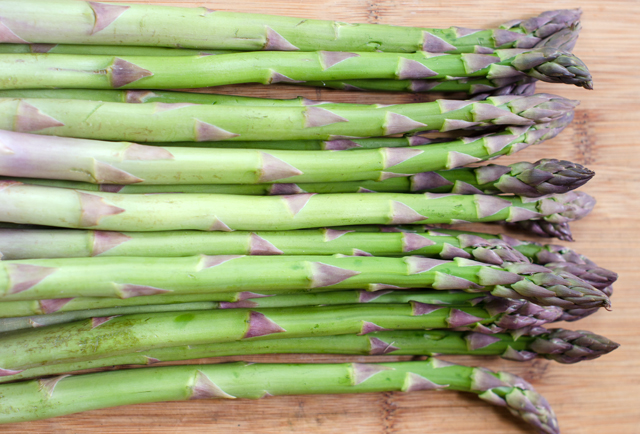
Look for medium-sized asparagus for this recipe, twenty spears weighed about a pound. If you are storing the asparagus for any length of time, leave the rubber band on, trim about an inch off the bottom. Stand the spears up in a jar with about two inches of cool water and cover loosely with a plastic bag.

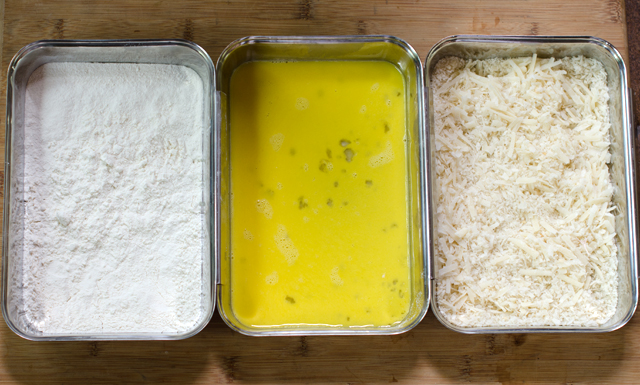
When you are ready to proceed with the recipe, preheat the oven to 425° F. Line a large baking sheet with parchment paper or foil for easy clean up and brush with a tablespoon of oil or coat lightly with cooking spray. Set up your breading station by lining up three containers that are long enough to accommodate the asparagus spears. Place the flour in the first container. Add the beaten eggs to the second container. Combine panko and Parmesan and season with salt and pepper for the third container. Trim off the tough ends and lightly rinse the asparagus. Coat the spears with flour, dip in the egg then turn to coat in the Parmesan panko mixture. Place on baking sheet, lining up in a row but not touching. Lightly coat the spears with olive oil cooking spray. Bake in preheated oven, turning spears over halfway during the cooking process to ensure even baking.

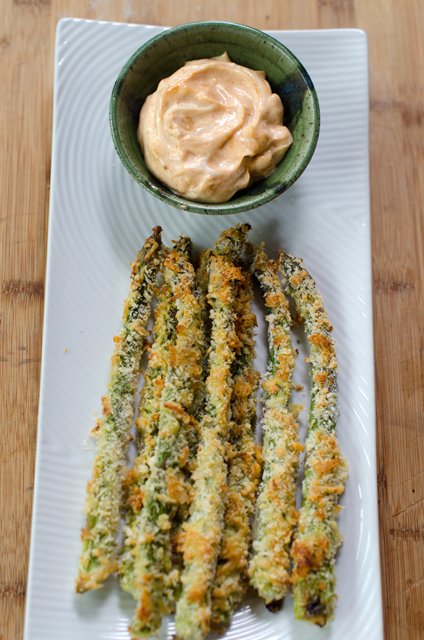
In the category of “in case you didn’t know” panko is a Japanese style white breadcrumb that is light and airy with a texture like crushed corn flakes. You can easily find them in the Asian section of your supermarket. I prefer to only put a third of the breadcrumb mixture in the dredging pan at a time. After you have rolled several eggy spears in the crumbs, they tend to make the crumbs wet, so adding more dry crumbs as needed makes the process easier and neater. Remember the rule of wet hand dry hand. Designate one hand to do the dry steps, flour and breadcrumbs and the other to do the wet step-the egg mixture.These are best served right from the oven.  Serve plain or with smoked paprika aioli.

I love my Williams-Sonoma interlocking stainless steel pans for my breading station.
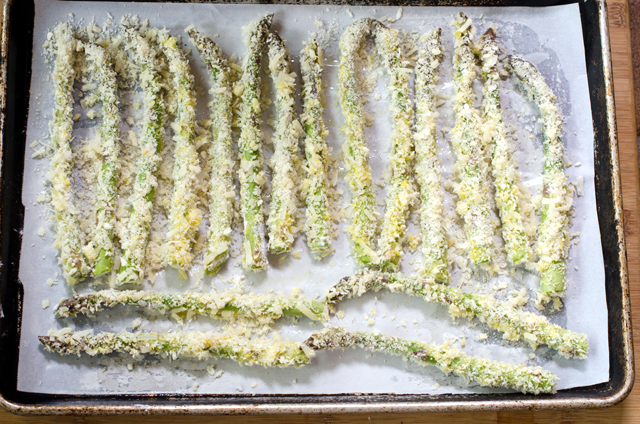
Ready to go into the oven.
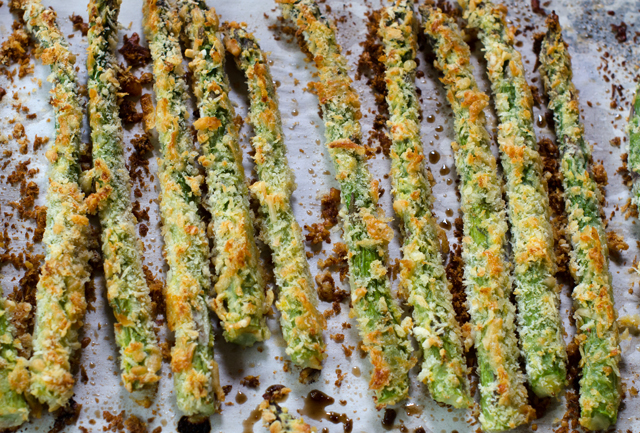
Crispy, brown and delicious!

Baked Parmesan Panko Asparagus Fries

Serves four

Ingredients

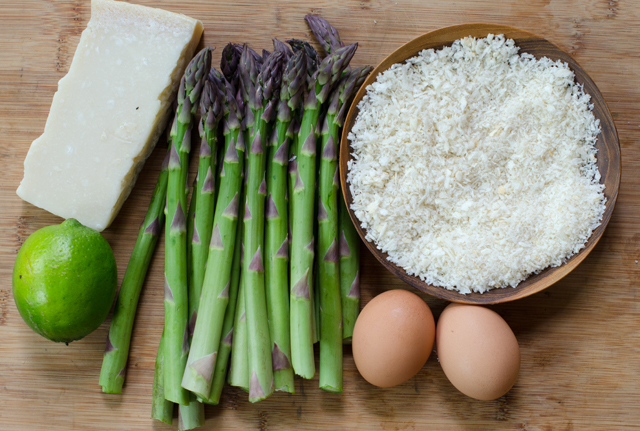
  • 1 lb asparagus-medium thickness
  • ½ c or more unbleached all-purpose flour
  • 2 eggs, beaten
  • 1 T fresh lime juice
  • 1 c panko breadcrumbs
  • 1 c freshly grated Parmesan cheese
  • Kosher salt and fresh ground pepper
  • Non stick spray or olive oil

Directions

  1. Preheat oven to 425°F. Line a large baking sheet with parchment and lightly coat with a tablespoon of olive oil or olive oil cooking spray.
  2. Rinse the asparagus and  snap or cut tough ends off.
  3. In a large bowl stir with a fork to combine the Parmesan and panko
  4. Set up your breading station: line up three shallow bowls or dishes that are long enough to accommodate the spears. Put the flour in the first dish. Place the beaten eggs in the second and lightly beat in the lime juice. Place the Parmesan panko crumbs in the third, season crumbs with salt and pepper to taste.
  5. Dredge the spears first in the flour, dip in the egg mixture and roll in the crumbs to coat on all sides, pressing crumbs in.
  6. Place asparagus on the prepared baking sheet, spears close together but not touching. Coat lightly with olive oil cooking spray.
  7. Bake the asparagus until browned, crisp and crunchy, about 10-12 minutes. Flip spears over halfway through the cooking time for even baking.
  8. Serve immediately with smoked paprika aioli or your favorite dipping sauce.

Smoked Paprika Aioli

Makes about a cup

Ingredients

  • 4-5 cloves roasted garlic
  • ¾ c mayonnaise (homemade or prepared)
  • 1 t smoked paprika
  • 1 t fresh lemon juice
  • Kosher salt and freshly ground pepper

Directions

  1. To make roasted garlic, cut off top third of a head of garlic, drizzle with olive oil, wrap in foil and bake in a 375°F oven for about 40 minutes or until garlic is soft and brown.
  2. With a fork, mash 4-5 roasted cloves in a medium bowl. Add mayonnaise, smoked paprika, lemon juice and whisk to combine. Adjust seasonings and salt and pepper to taste.
  3. Refrigerate for at least an hour to meld the flavors.

April 30, 2018 Whole Roasted Cauliflower


Is there any other vegetable as versatile as cauliflower? Puréed as a substitute for mashed potatoes, broken down into fine grains like rice, couscous and polenta, filling in as both pizza crust and tortilla, sometimes I think we forget how good it is without the disguises. I love to toss cauliflower florets with olive oil, salt and pepper and roast them until crispy brown on the outside and tender and creamy to the bite. A tray of roasted cauliflower sometimes doesn’t make it to the dinner table, we finish it off like popcorn. I shouldn’t leave out cauliflower “steaks”, thick slabs roasted in the same fashion as the florets and just as good. But the version that is visually impressive and surprisingly not that hard to do is whole roasted cauliflower. The internet has countless recipes for whole roasted cauliflower, most of the ones I read just baked the cauliflower.  This one, from Israeli celebrity chef Eyal Shani in the latest issue of Milk Street Kitchen uses two techniques, poaching in well salted boiling water and then roasting at a high heat.

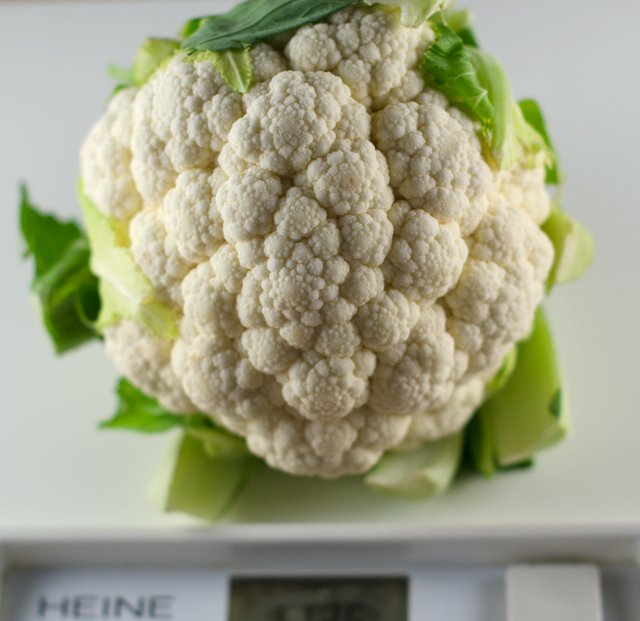
Prime season for cauliflower is in the fall and the ones available at farmers markets can be as large as 4-5 pounds. Out of season we depend on the wrapped varieties in our local supermarkets. Look for a cauliflower that weighs about two to two and half pounds.  A larger head will be overcooked on the outside before it is tender on the inside. To begin the two step cooking process, get a large pot of water on to boil and preheat your oven to 475°F with the rack in the middle position.

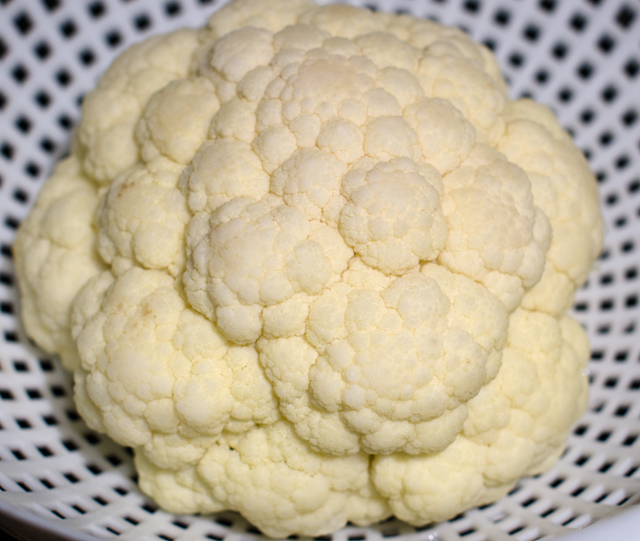
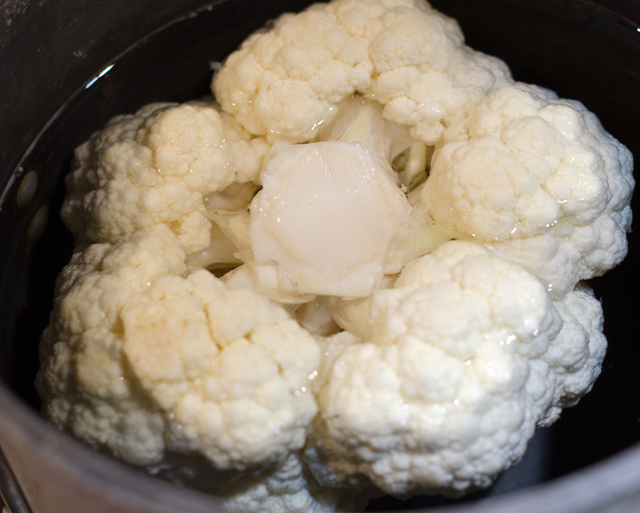
While you are waiting for things to heat up, carefully trim off the leaves and the hard core near the bottom of the cauliflower. Leave the main stem intact and make sure not to cut through any of the florets. When the water has come to a rolling boil, add a half cup of kosher salt to the water.  Carefully lower the cauliflower into the boiling water and immediately set a timer for five minutes. Since the cauliflower floats to the top, you will need to flip it halfway through the cooking process so it will cook evenly. When the timer goes off, transfer the cauliflower, stem side down to a colander. I found that a large Chinese strainer made this process easy. Allow the cauliflower to drain for at least ten minutes, you want the cauliflower to roast, not steam.

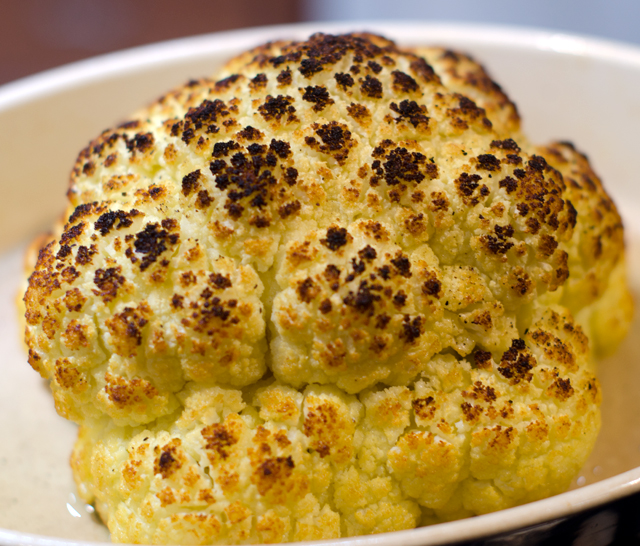
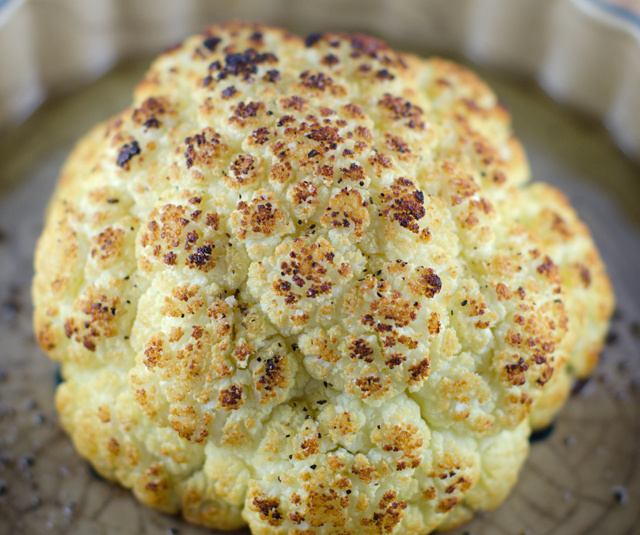
Transfer the cauliflower to a shallow sided baking dish, stem side down of course. Sprinkle with pepper or a pepper seasoning blend and rub with olive oil. Don’t neglect the bottom florets. Place the dish in the oven and bake, rotating the dish several times during the cooking process. This will allow for even browning. Tilting the pan with a potholder, use a small spoon to redistribute any olive oil that accumulates in the pan. The cauliflower is done when it is golden brown on the outside and the center is easily pierced with a skewer. Let cool for five minutes and serve right in the baking dish. Use a knife to cut into wedges. Delicious as is, or serve with your favorite dipping sauce.

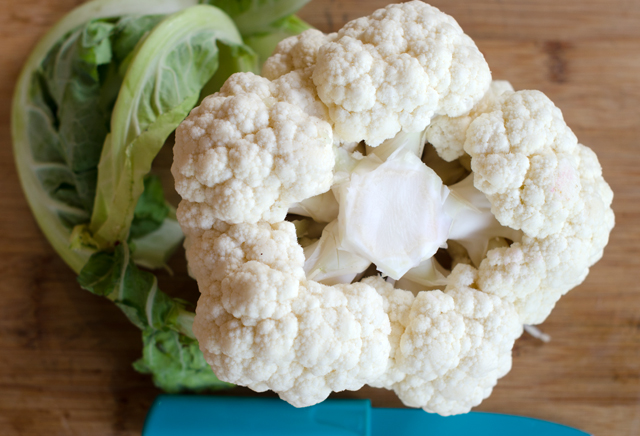
Start with a cauliflower that weighs about 2 lbs.
Trim away the leaves and the hard stem.
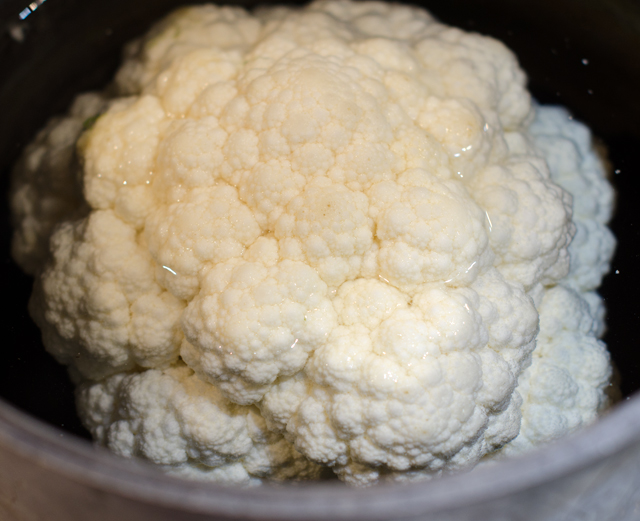
Blanch cauliflower in a large pot of well salted water. Salting the water ensures the cauliflower is seasoned to the core.
At the halfway point flip the cauliflower to the other side.
Immediately transfer cauliflower to a colander to drain, stem side down.
The finished product.

Whole Roasted Cauliflower

Serves two to four

Ingredients

  • 2-pound cauliflower
  • Kosher salt and fresh ground pepper
  • 3-4 T extra virgin olive oil

Directions

  1. Preheat oven to 475°F with the rack in the middle position. In a 6 to 8 quart pot, bring 4 quarts of water to a rolling boil. While you are waiting for the water to boil, trim the green leaves and hard stem from the cauliflower. leaving the core and florets intact. Add a ½ cup of salt to the water and when it comes to a boil carefully lower the cauliflower into the water. Immediately set a timer for five minutes. Flip the cauliflower half way through the cooking process. Remove from heat.
  2.  Transfer the cauliflower to a colander stem side down and drain for at least 10 minutes.
  3. Transfer the cauliflower to a shallow sided baking dish, stem side down.
  4. Drizzle with olive oil and use your hands to rub it in. Season with fresh ground pepper.
  5. Roast in the preheated oven, rotating the baking dish  several times during the cooking process. Spoon oil that accumulates in the pan back over the cauliflower.
  6. Cauliflower is done when golden brown on the outside and a skewer can easily pierce the center, 20-25 minutes.
  7. Let rest for five minutes and serve in the baking dish.

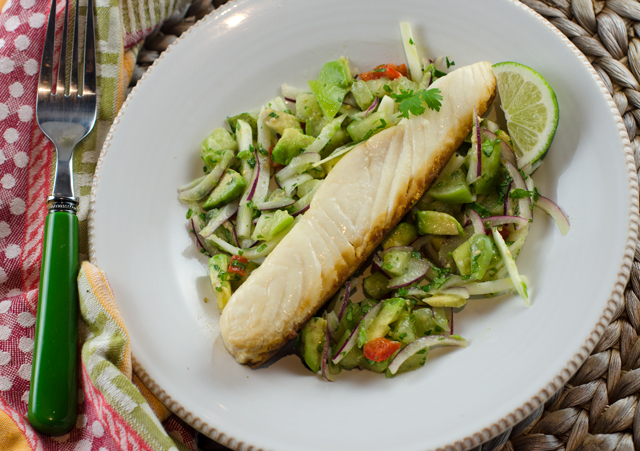
April 19, 2018 Halibut with Avocado, Tomatillo and Fennel Relish

Weekends at our house, fish is always on the menu and most likely it was purchased at Heller’s Seafood in Warrington Pa. Not the closest location to us, but worth the trip because I can always be assured of the quality and freshness of the seafood I purchase. How we cook the fish depends on the weather. In the warmer seasons we often cook whole fish on the grill stuffed with lemon and herbs or a fillet cooked on a fragrant cedar plank.

This time of year with temperatures still in the forties most days, the fish is baked according to Canadian fisheries method. Just measure your fillet, steak or whole fish at the thickest part and follow the rule of 10 minutes per inch or 5 minutes per side per inch. So often the real question is, how am I going to season and accent the flavors of the fish I am cooking.  Meaty swordfish pairs nicely with a rich olive tapenade, sometimes I make my own but occasionally I will just pick up a container at the local supermarket for a quick meal. We top red snapper with a south of the border style Veracruzana sauce, especially good in summer with garden fresh tomatoes.

Recently while searching for a recipe for crispy skinned fish I came across a relish that is an excellent accompaniment to many fish preparations. Avocado, tomatillo and fennel relish originates from a television program on Food Network, “Worst Cooks in America,” not necessarily a place where I would look to find a recipe. Worst Cooks is a program on Food Network that takes contestants, as known as “recruits” with poor cooking skills and puts them through a culinary boot camp to earn cash prizes. This recipe was contributed by chef, restaurateur, cookbook author and Emmy award-winning reality television host, Bobby Flay. Bobby was one of the two mentors for seasons 3 to 5 and this episode is titled straight edge skills. In the clip I saw from the episode Bobby told the recruits he was looking for uniformity and good technique. I didn’t hold out much hope for the recruits I saw, one declared his fear of knives and mistook fennel for an onion and another was cutting the avocado without using the cutting board and only succeeded in cutting himself.

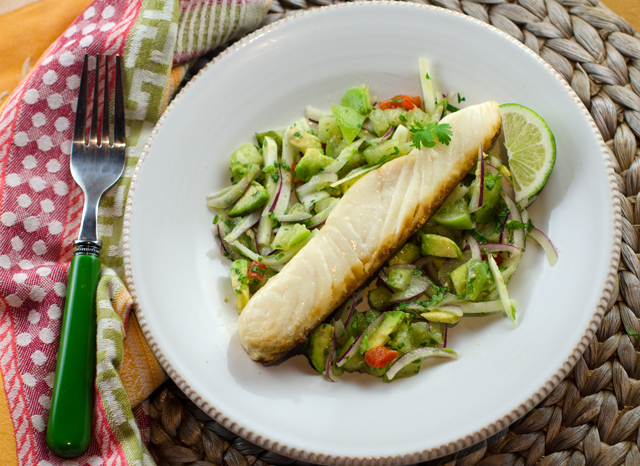
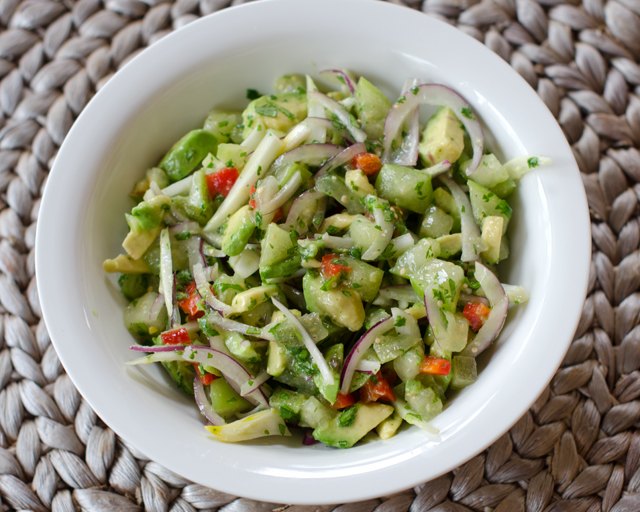
The relish relies on precise knife technique, small dice, fine dice, julienne and a little slicing.With a sharp knife it should go fairly quickly. What I really love about this dish is the contrast in textures and flavor. Tomatillos give a little citrus bite, avocado brings a creamy nuttiness and the fennel is crisp and licoricey sweet. Add pepper to your taste, the original recipe called for a serrano, I opted for a jalapeno, that’s not quite as hot. The original recipe called for red wine vinegar with a touch of honey I substituted grapefruit balsamic from The Tubby Olive.
Halibut with Avocado, Tomatillo and Fennel Relish

Serves two

Ingredients

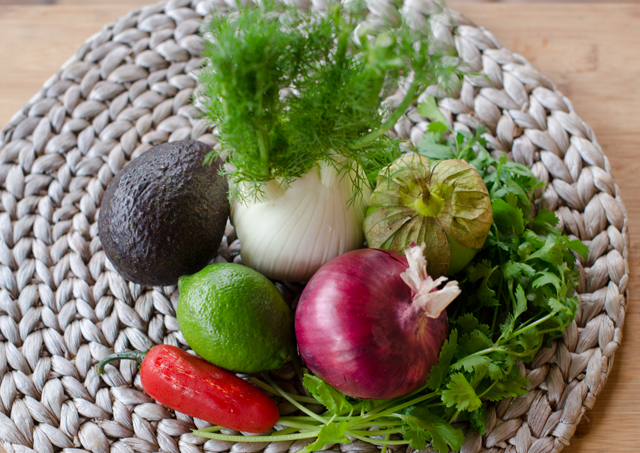
  • 1 medium fresh tomatillo, husk removed, rinsed well and cut into small dice
  • ½ medium avocado, peeled, pitted and cut into small dice
  • ½ jalapeno, seeded and cut into small dice
  • ¼ small head fennel, cut into julienne
  • ¼ small red onion, thinly sliced against the grain
  • 1 T neutral oil (canola, grape seed)
  • Juice of ½ fresh lime
  • Touch of red wine vinegar and honey or 1 T fruit vinegar
  • Kosher salt and freshly ground black pepper
  • 2 T chopped fresh cilantro.
  • Two 6-oz. firm white fish fillets like halibut, grouper or cod

Directions for the relish

  1. Combine the tomatillo, avocado, jalapeno, fennel and onion in a medium bowl.
  2. Drizzle with the oil, lime juice, vinegar and honey. Season with salt and pepper and fold in the cilantro.

Cooking the Fish

  1. Preheat oven to 450°F.
  2. Coat a shallow baking dish with non stick spray. Season the fish fillets with salt.
  3. Measure your fish fillets at the thickest point. Bake the fish for 10 minutes for every inch of thickness.
  4. Serve halibut with the relish and a wedge of lime.
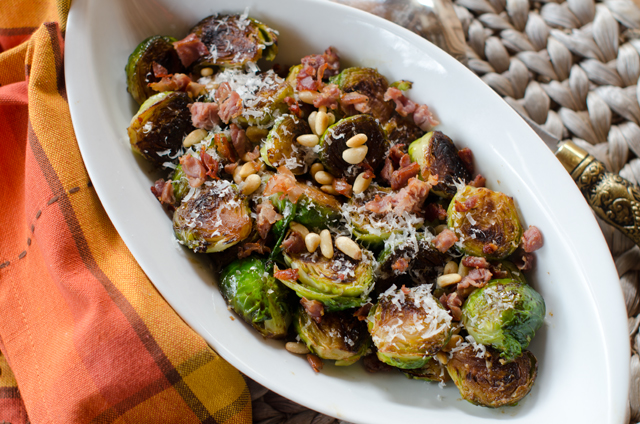
April 6, 2018 Balsamic Glazed Brussels Sprouts with Prosciutto and Pine Nuts

I tried Brussels sprouts for the first time as an adult. It’s not that I disliked them, my mom never served them. In our 1960’s kitchen, most nights canned beans; green, wax, baked and the dreaded lima reigned supreme at the dinner table. That turned out to be a good thing, at least I didn’t have childhood memories of overcooked mushy (and often stinky) sprouts. If you only have memories of bad Brussels sprouts, now is the time to give them a second chance.
Brussels sprouts are members of the same family as cabbage (brassica) and they look like mini heads of cabbage growing on a tall stalk. They are every bit as nutritious as cabbage, low in calories and rich in fiber, vitamin C, vitamin K, beta carotene, folic acid and potassium.

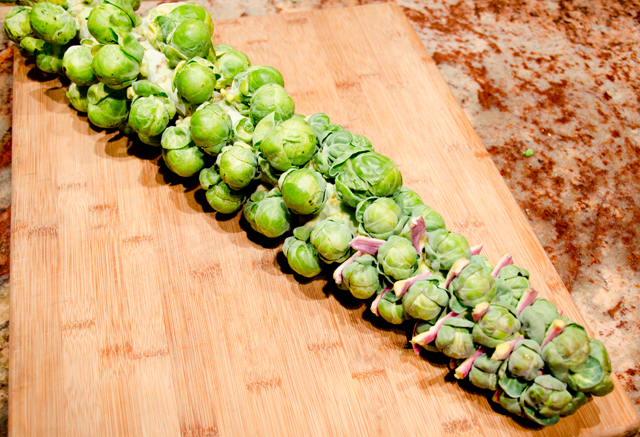
In this one pan recipe sprouts are cooked in two steps. Start with fresh firm sprouts that are 1 to 1 ½ inches in diameter.The smaller the sprout the more tender and sweet it is. If you can find them sold on the stock, usually in the fall, they will be even fresher. Trim the base of the sprout where it was attached to the stalk. Remove any discolored or blemished leaves and cut each head in half through the stem end. Set the sprouts aside.

In a large non stick skillet cook the prosciutto until crisp, remove with a slotted spoon and drain on paper towels. Chopped bacon or pancetta would work here too. Add all the sprouts, cut side down to the skillet and cook undisturbed until nicely browned. Check the first sprout at about the 2 minute mark to see how they are progressing. I add my sprouts clockwise starting from the top of the pan so I will remember which one to check first. When all the sprouts are browned add a half cup of water to the pan and cover with a lid to simmer until they are tender, easily pierced with the tip of a knife. Transfer sprouts to a plate and keep warm. Add balsamic vinegar to the pan and boil it until reduced and lightly syrupy. Return the sprouts to the pan, tossing them with the balsamic reduction. Add the crisped prosciutto and pine nuts to the pan. If you find pine nuts to be too expensive (they are) substitute chopped walnuts. Top the warm sprouts with some freshly grated Parmesan cheese.

The sprouts are deliciously tender inside and perfectly browned and crusted on the outside. to create a delicious side dish that will be a worthy compliment to any entrée.

Brussels sprouts on the stalk. Stalks can be anywhere from 24-48 inches long.

Brussels Sprouts with Prosciutto and Pine Nuts

Serves 2-3

Ingredients

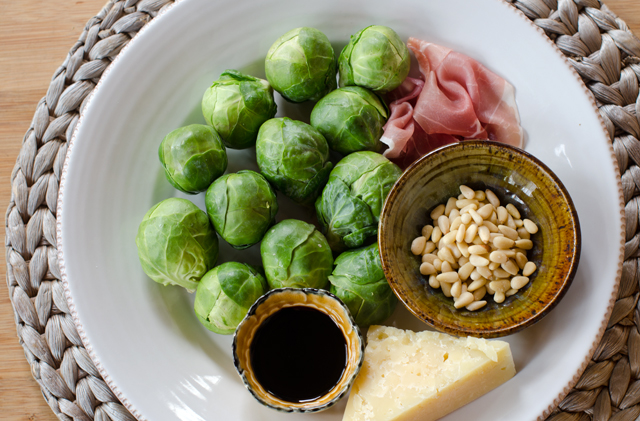
  • ¼ c finely diced prosciutto
  • 2 T extra virgin olive oil
  • 10-12 oz Brussels sprouts, trimmed and halved through the core
  • ¼ c  balsamic vinegar
  • 2 T unsalted butter
  • 3 T toasted pine nuts
  • Kosher salt
  • Parmesan cheese

Directions

  1. In a large non stick skillet set over medium heat, cook the prosciutto in 1 tablespoon of the oil until crisp, 7-8 minutes.
  2. Transfer the prosciutto to a paper towel lined plate, leaving any oil and fat behind.
  3. Add the second tablespoon of oil to the pan and return the heat to medium high. Add the Brussels sprouts cut side down in a single layer. Cook undisturbed for 2-3 minutes until nicely browned.
  4. When the sprouts are browned, add ½ c water to the pan, cover immediately and simmer until the sprouts are tender, they will be easy to pierce with the tip of a knife. If the water evaporates before the sprouts are tender, ¼ cup at a time. Transfer the sprouts to a plate with a slotted spoon.
  5. Add the balsamic vinegar and a few grinds of pepper. Boil the vinegar until it is reduced to about 2 tablespoons. Reduce the heat to low, add the butter and stir until melted.
  6. Return the sprouts to the pan, tossing them in the balsamic reduction. Add the prosciutto and pine nuts and swirl and shake the pan to coat with the sauce.  Top with a grating of fresh Parmesan cheese. Serve immediately.

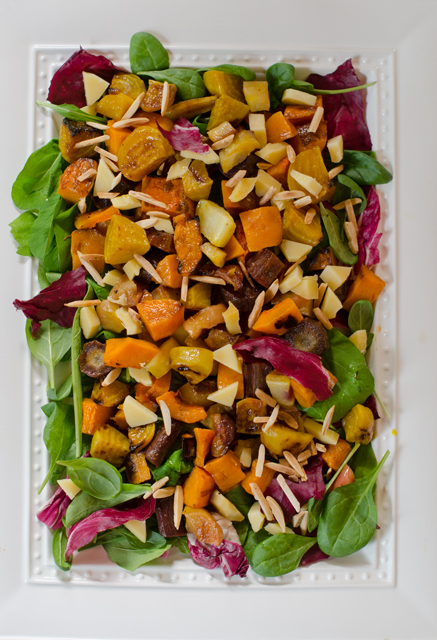
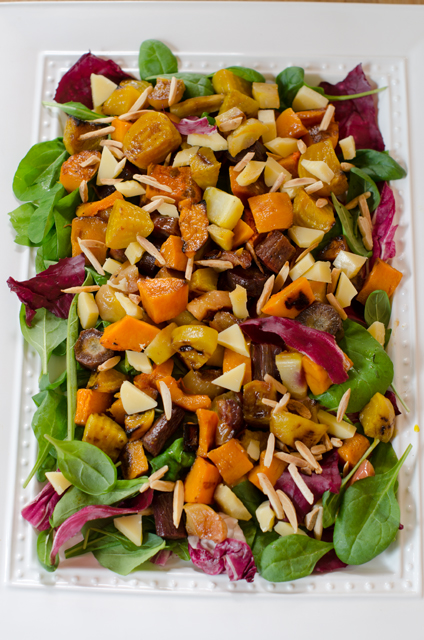
March 19, 2018 Butternut Squash, Golden Beet. Carrot and Apple Salad

With three nor’easters bringing snow, rain and high winds over the last week or so and two more anticipated this week, it’s hard to believe that the first day of spring is tomorrow. We are months away from the heart of the summer produce season but that doesn’t mean you can’t enjoy a delicious fresh salad. Using this formula for a roasted vegetable salad from Fine Cooking magazine is just what you need to stimulate your cooking creativity and beat the winter blahs.

Hearty greens like spinach, arugula and radicchio form the base of this salad. Other choices could include baby greens like kale, collards and chard. I must emphasize baby (immature), because the mature greens are quite toothsome and should be used in recipes where they are cooked. This is a good time to experiment with bitter greens like escarole, endive and radicchio. They contrast nicely with sweetness of the roasted vegetables.

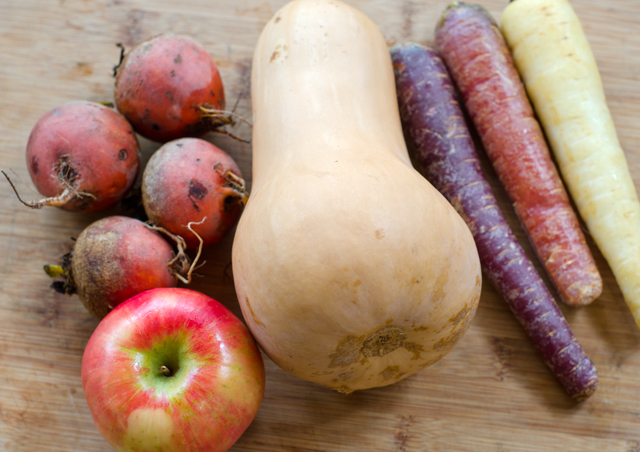
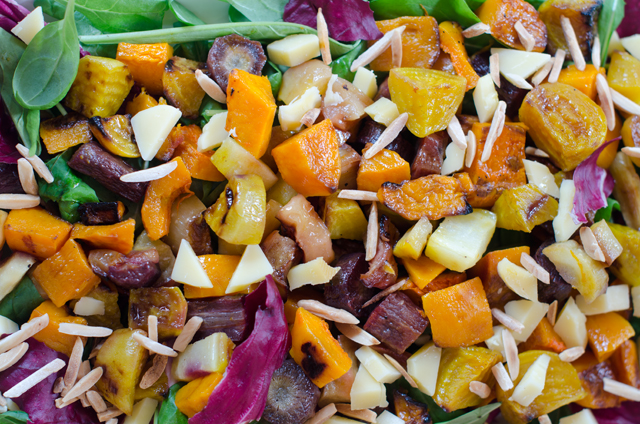
Roasted vegetables give the salad substance and a lot of deep rich flavor. Root vegetables, potatoes and winter squash are great for roasting, you can even add apple and pear wedges. Cut the vegetables into fairly even sized pieces so they cook evenly. Toss the vegetables with olive oil and some kosher salt. If you are using red beets, toss and roast on a separate pan. Otherwise the beets will discolor the other vegetables on the baking sheet. Roast about 20 minutes, tossing veggies halfway and rotating the baking sheet. The amount of vegetables may seem like a lot but roasting condenses them in size and concentrates their sweet flavor. I used golden beets, rainbow carrots, butternut squash and apple, all items I had in my pantry. So for me it was a “clean out your fridge” recipe.

The salad is accented with cheese and nuts that add contrasting flavors and textures. Aged Gouda brings a sharp, sweet flavor reminiscent of butterscotch and toasted slivered almonds add a wonderful aroma and crunch. An optional sprinkling of dried fruit, raisins, dried cranberries, figs give a nice touch as well.

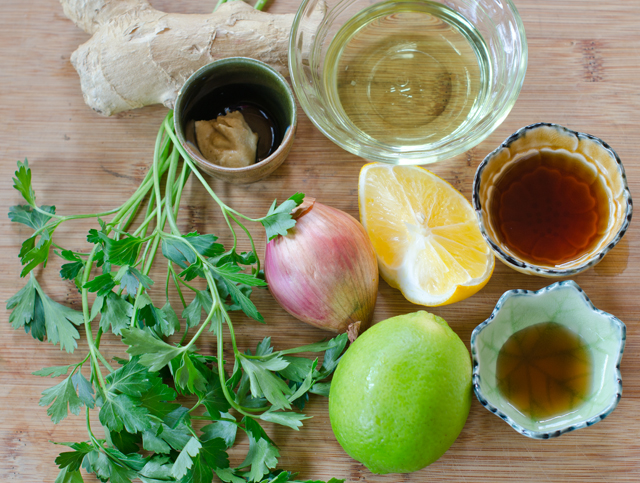
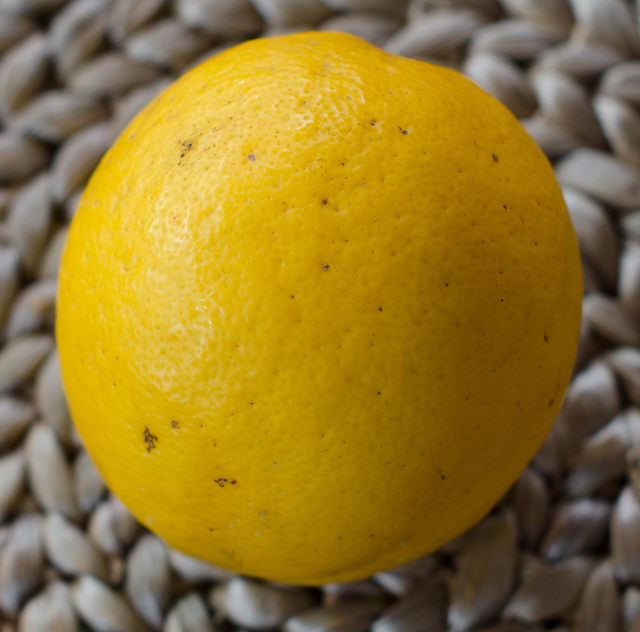
A slightly tart white balsamic lime vinaigrette is a pleasing contrast to the sweetness of the roasted vegetables. I chose this recipe because Joe picked a large yellow, very fragrant lime from our Persian lime tree. This vinaigrette calls for an oil you may not be familiar with. High in polyunsaturated fats and vitamin E, grape seed oil is extracted from the seeds of grapes. Its flavor is neutral allowing the infused flavors of shallots and ginger to shine through.

White balsamic vinegar is made from the same variety of white grapes as dark balsamic . While the dark balsamic is simmered for hours and aged in barrels for years, white balsamic is slow cooked to avoid caramelization and is not aged. White balsamic vinegar is a good choice when you don’t want to darken the appearance of your final dish.

Toss the greens in a large bowl with a drizzle of the warm vinaigrette. Distribute the greens on two plates. Next, gently toss the roasted vegetables with some of the remaining vinaigrette. Distribute the vegetables over the plates, along with the nuts, cheese and optional fruit.

This would be a nice vegetarian lunch or dinner. Add chicken or thinly sliced flank steak if you need to include meat. The formula gives you the chance to be creative and make your own unique and delicious salad.

Butternut Squash, Golden Beet, Carrot and Apple Salad

Serves 2

Ingredients for the roasted vegetables

  • 6-7  c mixed vegetables and fruit, I used butternut squash, rainbow carrots, golden beets and apple, trimmed and peeled.
  • 2 T extra virgin olive oil
  • Kosher salt

Directions for the roasted vegetables

  1. Position oven rack in the center and preheat oven to 450°F.
  2. Trim vegetables into 1-inch dice or wedges.
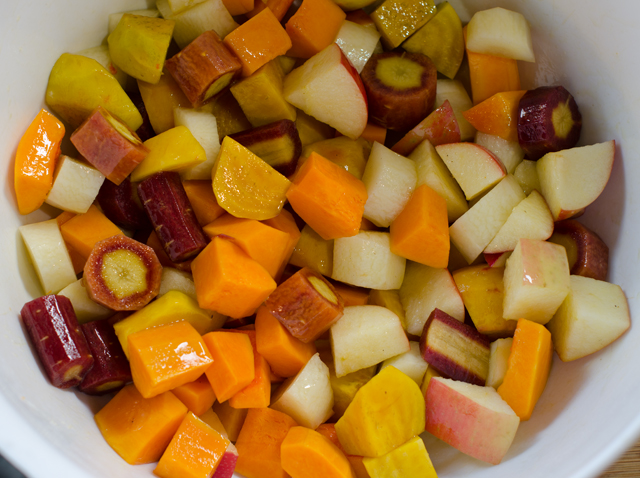
  3. In a large bowl, combine the vegetables and fruits with the oil and 1 t salt.
  4. Toss well and transfer to a large rimmed heavy-duty baking sheet.
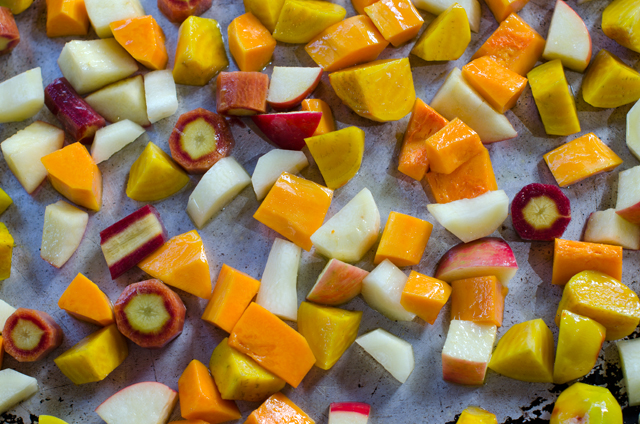
  5. Spread the vegetables evenly on the baking sheet.
  6. Roast. flipping the vegetables halfway through the baking time and rotating the baking sheet.
  7. Cook until the vegetables are browned and tender, 20-25 minutes.
  8. Let cool and transfer to a large bowl.
Toss the vegetables with olive oil and salt.
Spread out evenly on a baking sheet.

Ingredients for the white balsamic lime vinaigrette

  • ¼ c grape seed oil
  • 1/3 c thinly sliced shallots
  • kosher salt
  • 1 t chopped fresh ginger
  • 2 T white balsamic vinegar
  • 1 T maple syrup or honey
  • 1 T fresh lime juice (more to taste)
  • 1 t grated lime zest
  • 1 t fine minced parsley
  • 1 t Dijon mustard
  • Freshly ground black pepper

Despite the color, this is a lime, very fragrant and juicy from Joe’s citrus trees.
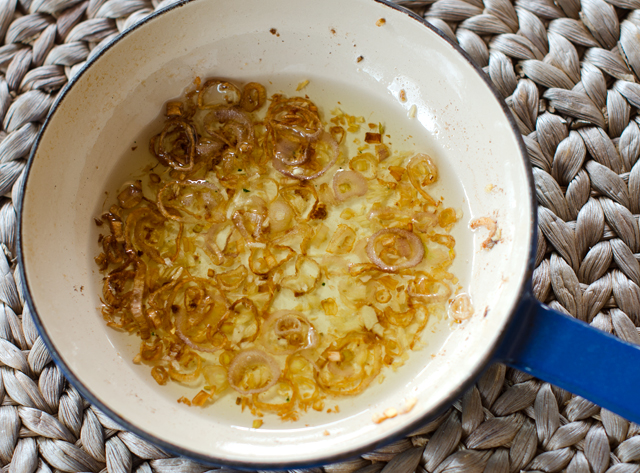
Infusing grape seed oil with shallots and ginger.

Directions for the white balsamic lime vinaigrette

  1. Heat the oil in an 8-inch skillet, over medium heat. Add the shallots and a pinch of salt and cook for 2-4 minutes, shallots should be softened and slightly browned.
  2. Add chopped ginger and cook until fragrant until softened and fragrant, 15 seconds. Take infused oil off the heat and let cool for about 5 minutes.
  3. While the oil is cooling, to a heat proof metal bowl add the vinegar, maple syrup, juice, zest, mustard, ¼ t salt and a few grinds of pepper.
  4. Whisk the warm oil into the vinegar mixture until emulsified. Taste vinaigrette and season to taste with additional salt, pepper or citrus juice.

Ingredients for assembling the salad

  • 5-6 cups of sturdy greens, torn into bite sized pieces if needed
  • Kosher salt
  • Roasted vegetables from step one
  • ¼ c toasted slivered almonds
  • ½ c cubed aged Gouda


Directions for assembling the salad

  1. In a large bowl, lightly salt greens and toss with a drizzle of the warm vinaigrette. Taste a green and add a little more dressing if necessary. Arrange the greens on a platter or two plates.
  2. Season the vegetables with a pinch of salt and dress them lightly with 1-2 T of the remaining vinaigrette.
  3. Spread the vegetables evenly over the greens, then top with the almonds and Gouda. Serve immediately, passing the remaining dressing at the table.

March 10, 2018 Market 17 Green Salad

A few weeks ago we took a much needed vacation to visit close friends in south Florida. When traveling we enjoy seeking out the most interesting (at least to us) restaurants a city has to offer. I have learned that you won’t necessarily find what you are looking for by Googling for the results, any restaurant can tout itself as “the best”. Checking Trip Advisor or Open Table may not produce the results you are looking for either.The Trip Advisor number one restaurant in Fort Lauderdale is a hoagie place! I have found the most reliable results come from our destination’s city or regional magazine. They supply the most critical (good and bad) reviews, plus information about restaurants that have just opened and are not under the culinary radar yet.

Over the years, one of our favorite finds in Fort Lauderdale is, or should I say was, Market 17. Located at the Portside Yachting Center, Market 17 served delicious and creative food and was one of the first true farm to table restaurants we experienced. We have enjoyed dining there many times during our visits to Florida. Sadly, we learned that the building that houses the restaurant is going to be demolished due to the expansion of the convention center. So for one last time we “ate the menu”, appetizers, tasting portions of the entrées and dessert split between six of us, with wine to accompany the meal.

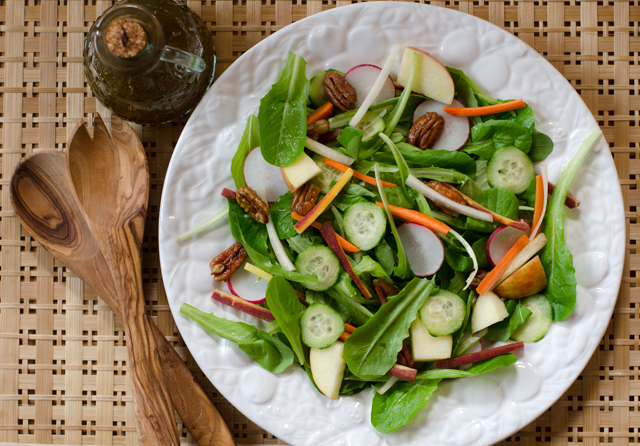
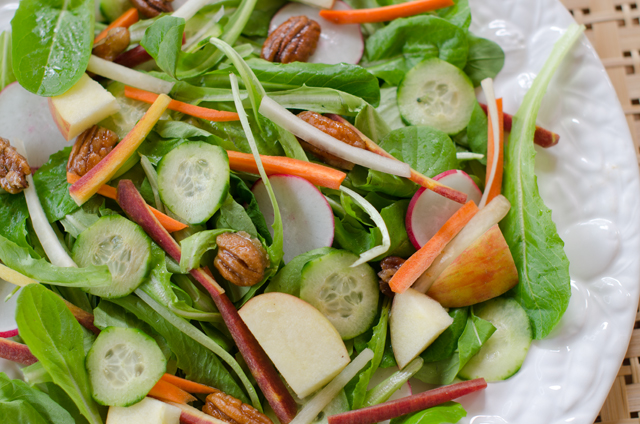
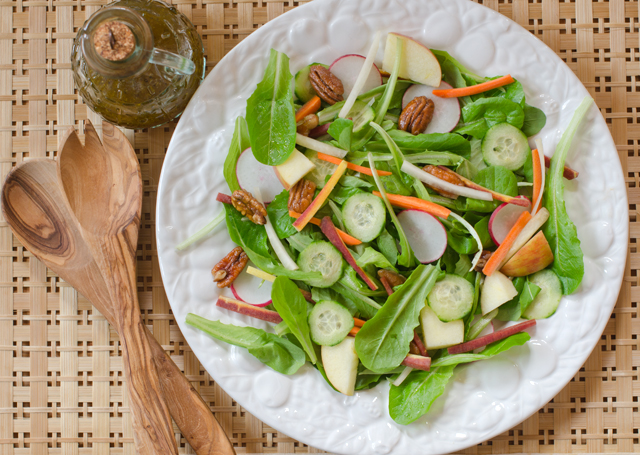
According to their website Market 17 will have a new concept in early 2019, so in tribute to this fine restaurant I have reinterpreted their local farm green salad. The menu describes it as a salad of greens, rainbow carrots, apples, cucumber, radish, candied pecans topped with a white balsamic vinaigrette.

Start with the freshest greens you can find. We are not in season for our own garden produce so our salad greens come from our local supermarkets. The greens I buy for the most part are in a plastic clamshell container. Even though they are labeled “triple washed” there are always some spoiled leaves that are never missed by the disdainful eye of Joe. So I still soak them in a sink filled with cold water with an eye to remove any bad or discolored leaves. It is important to spin the greens dry, excess water will dilute your dressing. For this salad I chose baby spinach and bibb leaves, the leaves are bite sized so there is no need to tear them. I store washed greens in gallon twist tie bags with a paper towel inside to absorb any excess moisture.

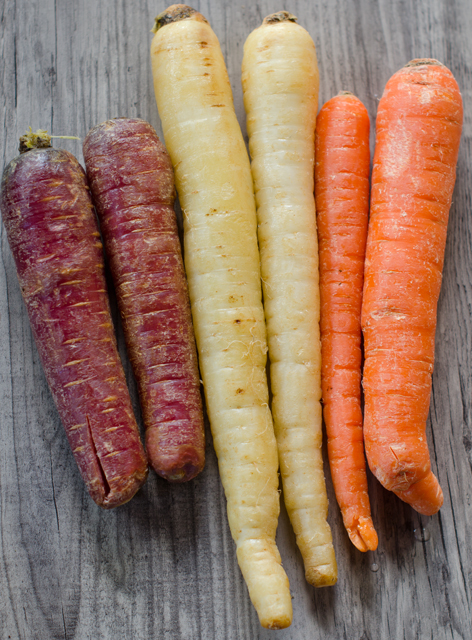
Rainbow carrots add color and crunch to everyday salads. They can range in color from deep purple, crimson red, white and bright yellow. Originally carrots were mostly purple and white. Orange carrots are a strain developed by 17th century Dutch farmers and contain more beta Carotene than other varieties. I cut my carrots into matchstick julienne, if this is too fussy for you, cut into thin slices.

Radishes bring color, crunch and a little spiciness. Cucumbers and apples give a crisp and juicy element. I like to peel the cucumbers, just leaving strips of green peel for color. I used a mandolin to slice the radishes and cucumber very thinly. Choose a sweet tart apple variety like Granny Smith or Sweet Tango.

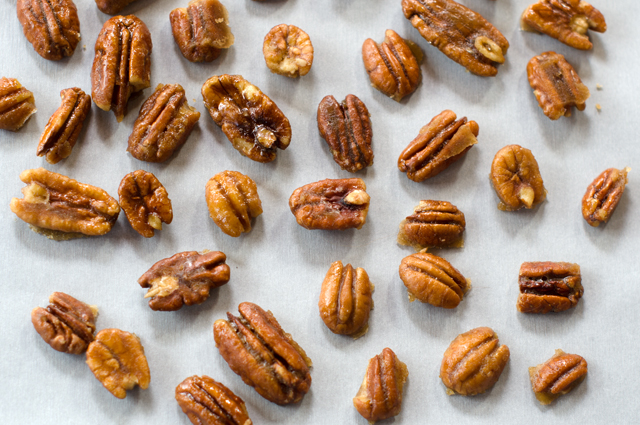
Place your greens in a large bowl, this gives you space to dress the salad without compressing the ingredients. A white balsamic dressing adds flavor but not the dark color that can muddy an otherwise bright, colorful salad plate. The finishing touch, candied pecans that are quick and easy to make. A delicious salad that brings back great memories.

Market 17 Green Salad

Serves two

Ingredients

  • 4-5 generous handfuls of baby romaine, spring mix etc
  • 1 Persian cucumber
  • 2 radishes
  • 3 rainbow carrots-yellow, purple and orange
  • 1 small apple (I used Sweet Tango)
  • candied pecans (recipe follows)
  • white balsamic vinaigrette (recipe follows)
  • kosher salt and freshly ground pepper
Rainbow carrots are readily available in most supermarkets.

Directions

  1. Rinse lettuce and spin dry, removing any spoiled leaves. Place in a large bowl.
  2. Peel cucumber, leaving only thin strips of skin. Slice thinly with a mandoline or a knife
  3. Trim root ends off radishes, slice thinly.
  4. Peel carrots and cut into matchstick pieces, you will need about two cups.
  5. Cut the apple into thin slices, peel if desired (I didn’t)
  6. Shake vinaigrette to combine ingredients, taste and adjust for balance and drizzle some over the salad greens. Toss lightly.
  7. Add the cucumber, radishes, carrots and apple to the bowl. Toss with additional dressing and add salt and pepper to taste.
  8. Use tongs to plate individual salads and top with candied pecans.

White Balsamic Vinaigrette

Ingredients

  • ¾ c extra virgin olive oil
  • ¼ c white balsamic vinegar
  • 2-3 T honey
  • ½ t kosher salt
  • ¼ t fresh ground black pepper
  • ¼ t dried oregano

Directions

  1. In a medium bowl, whisk all ingredients together until well blended.

Candied Pecans

Ingredients

  • ½ c brown sugar
  • ½ t sea salt
  • ¼ t ground cumin
  • 2 T water
  • 1 c pecans

Directions

  1. In a medium non stick skillet, combine all the ingredients except the pecans. Cook over medium heat for a few minutes, until the sugar dissolves and mixture is bubbling.
  2. Add in the pecans, stirring to coat all surfaces in the glaze, 3-5 minutes.
  3. Remove pan from the heat and spread the pecan out on a parchment lined baking sheet. Let cool completely. Break apart into individual pieces. Store in an airtight container.